

Page 1
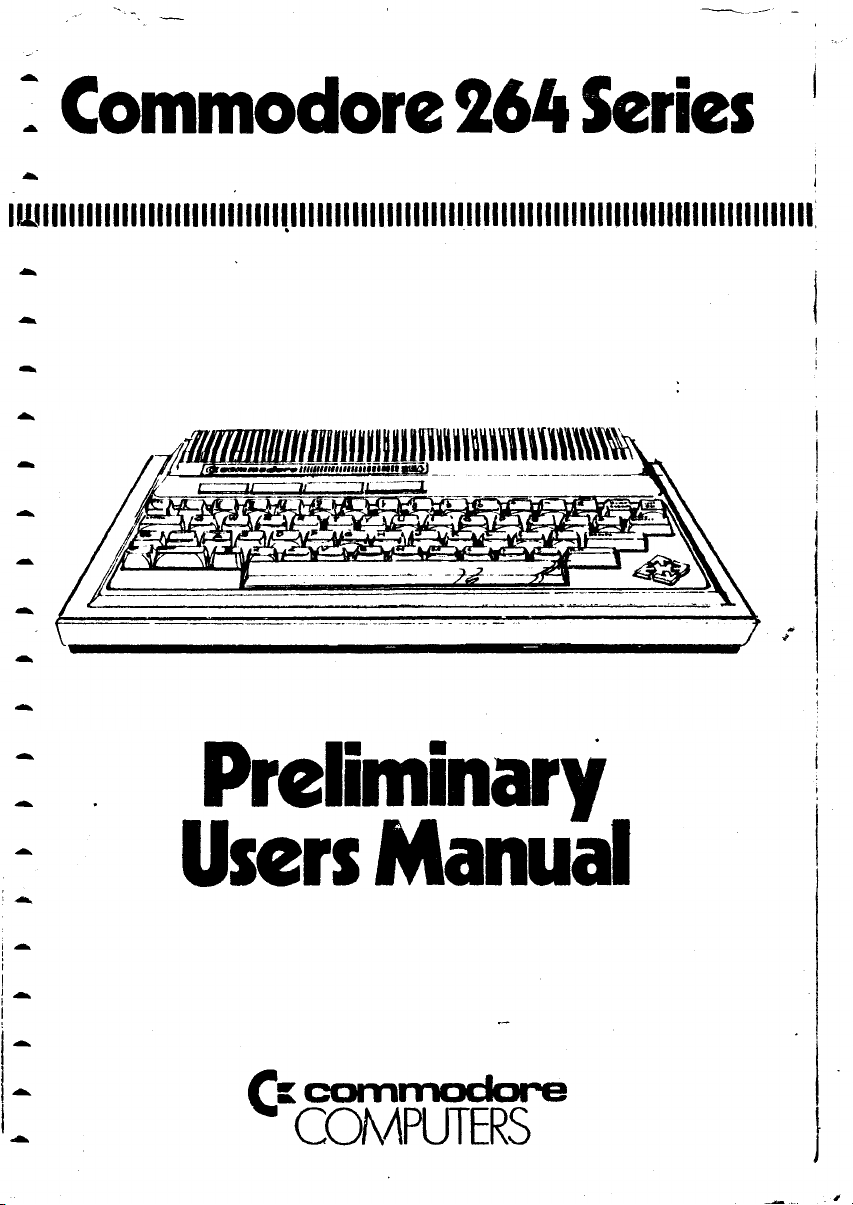
I C om m o dore 2 6 4 Series
i
i
iiiiiiiiiiiiiiiiiiiiiiiiiiiiiiiillliiillilliillliliiiliillilliiliiliilliiiltiliiiiliiilinil
%
Prelim inary
UsersManual
fscommodore
^COMPUTERS
Page 2
USER’SGUIDE STATEMENT
"This equipment generates and uses radio frequency energy. If it is not ^
properly installed and used in strict accordance with the manufacturer’s
instructions, this equipment may interfere with radio and television ^
reception. This machine has been tested and found to comply with the limits
for a Class B computing device in accordance with the specifications in
Subpart J of Part 15 of FCC Rules, which are designed to provide reasonable ^
protection against such interference in a residential installation. If you
suspect interference, you can test this equipment by turning it off and on. If ^
you determine that there is interference with radio or television reception, try
one or more of the following measures to correct it: « ,
• reorient the receiving antenna
• move the computer away from the receiver ^
• change the relative positions of the computer equipment and the receiver ^
• plug the computer into a different outlet so that the computer and the
receiver are on different branch circuits. ^
If necessary, consult your Commodore dealer or an experienced radio/
television technician for additional suggestions. You may also wish to ^
consult the following booklet, which was prepared by the Federal
Communications Commission: **
"How to Identify and Resolve Radio-TV Interference Problems". This booklet
is available from the U.S. Government Printing Office, Washington, D.C. ^
20402, Stock No. 004-000-00345-4.
I
I
Page 3
INTRODUCTION
YOU’LL ADORE YOUR C OMMODO R E 264!
Welcome to the Commodore family! Whether you’re a beginner or an expert,
you'll be surprised how easy it is to use your Commodore 264 computer. The
Commodore 264 is easy to program . .. but you don’t have to be a
programmer to use it. You don't even have to know how to type!
Commodore’s full selection of COMM ODORE 264 software makes it easy to
use your computer for business, home and educational applications. (And
don’t forget the games!)
You Bought The Best Computer
These special built-in features make your COMMODORE 264 the best home
computer you can buy:
• 64K RAM (60K available for BASIC programming)
• Full Typewriter Style Keyboard
• Optional Built in Software
• Screen Window Capability
• HELP Key
• 8 Programmed, Reprogrammable Function Keys
• Four Separate Cursor Keys
• Uses Most C OMMODORE 64 and VIC-20 Peripherals
• 128 Colors (16 primary colors, 8 luminance levels)
• Over 75 BASIC Commands
• High Resolution Graphics Plotting
• Split-Screen Text With High-Res Graphics
• Graphic Character Set On Keyboard
• Keyboard Color Controls
• 320 x 200 Pixel Screen Resolution
• Reverse and Flashing Characters
• 2 Tone Generators
• Built-In Machine Language Monitor (13 commands)
What You Can Do With Your Commodore 264
The key to any computer is SOFTWARE, and Commodore has a full “menu”
of software available from your Commodore dealer. Specific applications
Include wordprocessing, financial calculations, learning activities, mail lists,
project planning, recordkeeping, home budget, investment analysis and
much more. Some software products combine several different functions,
such as “Triology,” which provides wordprocessing, an electronic
spreadsheet, database AND graphics!
Many models of the Commodore 264 have software built into the machine.
You can also buy Commodore software on plug-in cartridges, floppy
diskettes and cassette tapes. And of course, you can learn to program your
computer in BASIC, which comes built into your computer, or in other
popular computer languages such as LOGO.
Page 4
Built-in Software
You may have purchased your Commodore 264 with one of several built-in
software packages that are ready to use as soon as you turn on your
computer. If your computer has built-in software, a separate manual
describing how to use the software is included. Built-in software on the
Commodore 264 is a Commodore first!
Commodore Software on Cartridge
For a long time, video games were the only software programs available on
cartridge. Now Commodore brings you large application programs such as
wordprocessing and business programs on cartridge...at prices you can
afford. Cartridges are convenient because all you have to do is plug them in
and start computing; you don’t need any additional equipment. There are
other advantages as well...for exampie, an electronic spreadsheet on
cartridge gives you more working space than an electronic spreadsheet on
disk.
Software on Disk and Tape
Commodore software also cornes on floppy diskettes and on cassette tape.
The Commodore Disk Drive lets you run Commodore disk-based software
and the Commodore Model 1531 Datassette lets you run tape-based
software.
Programming in BASIC — Over 50 New Commands
It’s easy to program your COM M ODORE 264. Start by working through the
exercises included in this manual, and if you want to get more involved in
programming, Commodore offers several self-teaching courses such as
INTRODUCTION TO BASIC and our BOOKWARE™ series of books and
tutoriais.
The BASIC on your Commodore 264 is the most powerful BASIC ever built
into any Commodore home com puter...it includes MORE THAN FIFTY NEW
BASIC C OMMANDS including full G RAPHICS PLOTTING and PROGRAM
EDITING.
Programming in LOGO — Turtle Graphics and More
Many new computerists prefer to learn programming with LOGO, an easy
computer language created for beginners, which features the use of a
“turtle” to draw pictures and create graphs and charts. LOGO is rising
rapidly in popularity, especially in schools, and Commodore has a strong
commitment to this "friendly” programming language.
Page 5
The MAGIC DESK
If you’re a new computerist and you want to use your computer for
wordprocessing, calculations and other functions, but you really don’t want
to learn any special commands or instructions...try M AGIC DESK. This
unique Commodore software system uses PICTURES of familiar objects
instead of written commands, and uses the computer Keyboard like a
typewriter. The software is automatically linked to your disk drive and printer
so, for example, all you have to do is “point” at the picture of the printer to
print out a paper copy of something you’ve typed. Ask your dealer for a
demonstration.
Creating A Complete Computer System
As you develop your complete computer SYSTEM, you’ll find that
Commodore peripherals are priced so you can afford them, and designed
with superior features. Here are the major peripherals included in most
typical Commodore home computer systems:
Computer: Commodore 264
Display: Commodore Color Monitor (or your television set)
Storage: Commodore Datassette (tape recorder) or Commodore Disk
Drive
Printer Commodore Printer (several models) or 1520 Printer/Plotter
Modem: Commodore VICMODEM or Commodore AUTOMODEM
Controller: Commodore Joysticks
Where To Go From Here?
By now you’ve done enough reading and you want to get started. Here’s
what we recommend you do first: Send in your warranty card. Subscribe to
the Commodore magazine so you get the latest information on your
computer, and join the Commodore National User Club. Read this manual
and try the exercises. Try some software. Keep checking in with the
Commodore dealers in your area for new developments In software,
bookware™ and peripherals. Enjoy!
•
Page 6
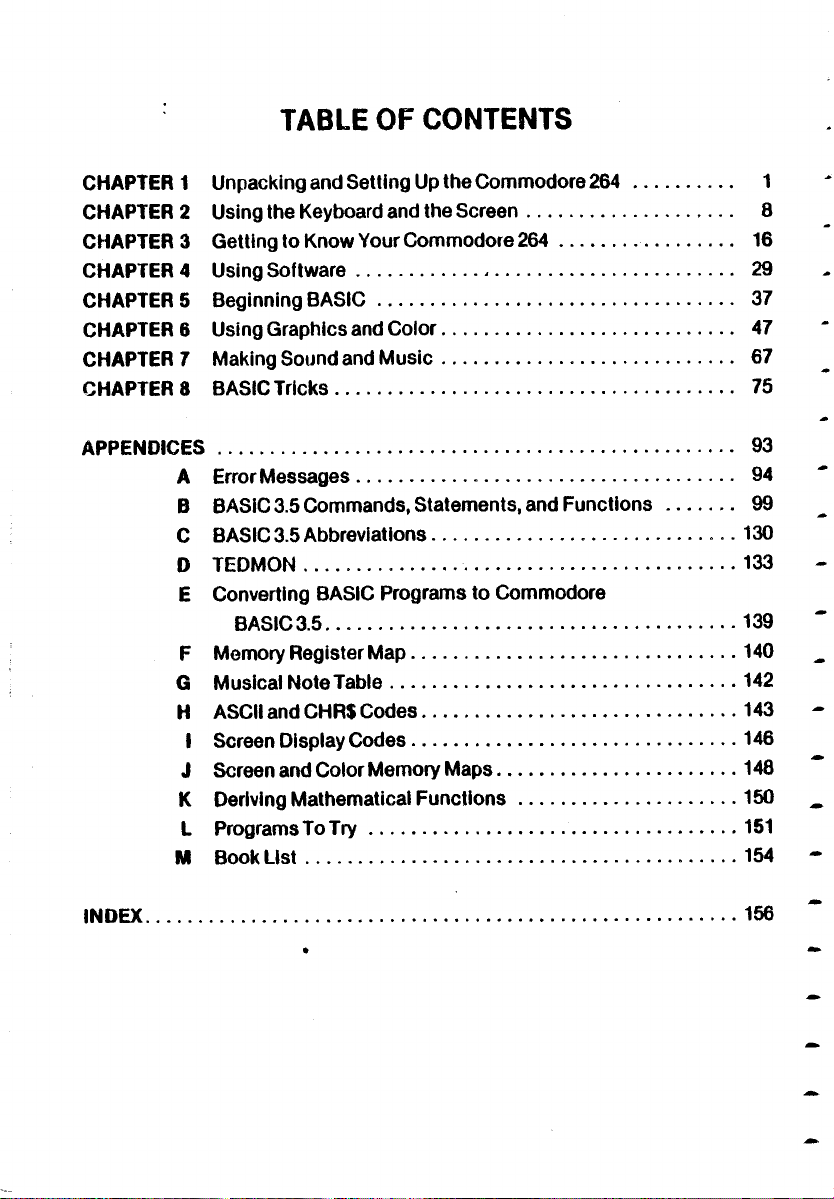
TABLE OF CONTENTS
CHAPTER 1
CHAPTER 2
CHAPTER 3
CHAPTER 4
CHAPTER 5
CHAPTER 6
CHAPTER 7
CHAPTER 8
APPENDICES .....................................................................................
Unpacking and Setting Up the Commodore 264
Using the Keyboard and the Scree n
Getting to Know Your Commodore 264
Using Softw a re........................-
Begin nin gB A SIC
Using Graphics and Co lor
M a k ingSo u n d andM u s ic
BASIC Trick s ........................................................
A E rrorM essage s..........................................................
B BASiC 3.5 Commands, Statements, and Functions
C BASIC 3.5 Abbreviations...........................................
D TED MO N
E Converting BASIC Programs to Commodore
BASIC 3.5................................................................
F Memory Register M a p
G M us ica lNo teT a b le
H ASCII and CHR$ Codes
I Screen Display Codes
J Sc reen andColo rM em o ryMaps
K Deriving Mathematical F u nction s..........................
L Program sTo T ry........................................................
M Book Lis t
..............................
....................................................................
...............................................
..................................
..................................
......................................
...............................................
...................................................
.............................................
...............................................
.................
...........
.........................
..............................
1
8
16
29
37
47
67
75
93
94
99
130
133
139
140
142
143
146
148
150
151
154
INDEX
156
Page 7
CHAPTER
UNPACKING AND
SETTING UP THE
COMMODORE 264
Unpacking your Commodore 264.
Getting to know the switches and
sockets.
Setting up your Commodore 264.
Troubleshooting chart.
Page 8
UNPACKING YOUR COMMODORE 264
Now that you’ve opened the box containing your new C-264 box and found
this manual, the first thing that you should do is check to make sure that
you have ail the items on this list. You should have:
1. Y ourCommodore264
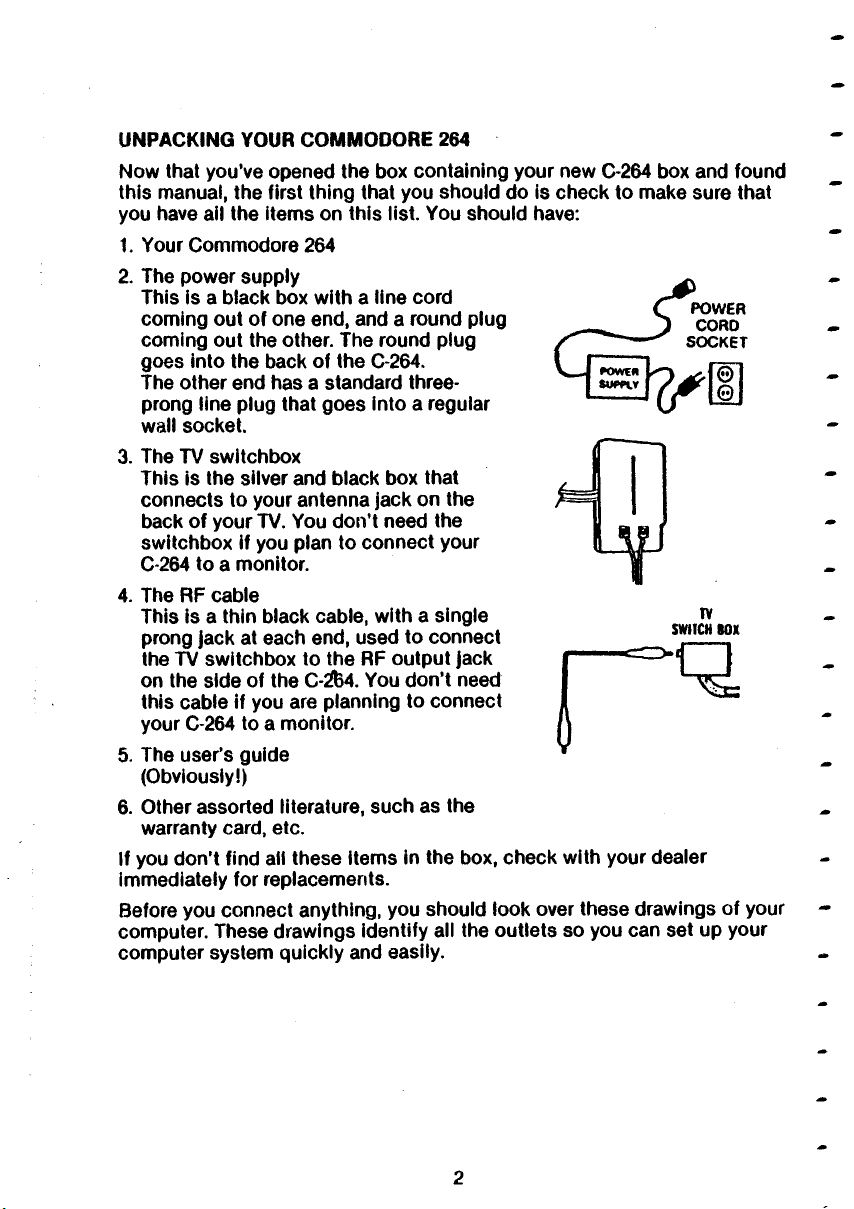
2. The power supply
This is a biack box with a line cord
coming out of one end, and a round plug
coming out the other. The round plug
goes into the back of the C-264.
The other end has a standard three-
prong line plug that goes into a regular
PO W ER
SU PP LY
POWER
CORO
SOC KET
©
©
wall socket.
3. The TV switchbox
This is the silver and black box that
connects to your antenna jack on the
back of your TV. You don’t need the
switchbox if you plan to connect your
C-264 to a monitor.
4. The RF cable
This is a thin black cable, with a single
prong jack at each end, used to connect
the TV switchbox to the RF output jack
on the side of the C-264. You don’t need
this cable if you are planning to connect
your C-264 to a monitor.
5. The user’s guide
(Obviousiy!)
6. Other assorted literature, such as the
warranty card, etc.
If you don't find all these items in the box, check with your dealer
immediately for replacements.
Before you connect anything, you should look over these drawings of your
computer. These drawings identify all the outiets so you can set up your
computer system quickly and easily.
Page 9
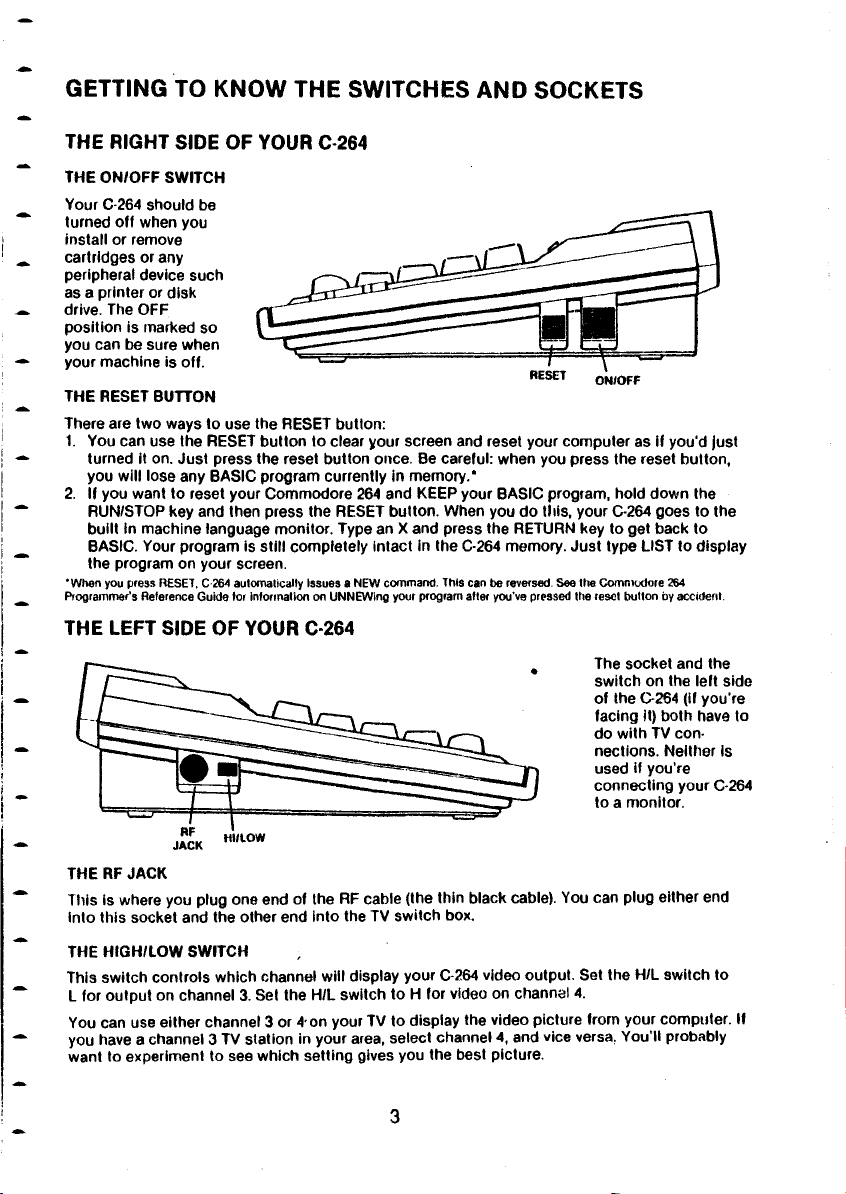
GETTING TO KNOW THE SWITCHES AND SOCKETS
THE RIGHT SIDE OF YOUR C-264
THE O N /O F F SW IT CH
Your C-264 should be
turned off when you
Install or remove
cartridges or any
peripheral device such
as a printer or disk
drive. The O FF
position is marked so
you can be sure when
your mach ine is off.
THE RESET BUTTON
There are two ways to use the RESET button:
1. You can use the RESET butto n to clear your screen and reset your computer as If you'd just
turned it on. Just press the reset button once. Be careful: when you press the reset button,
you will lose any BASIC program currently in memory.*
2. If you want to reset your Comm odore 264 and KEEP your BAS IC program, hold down the
RUN/STOP key and then press the RESET button. When you do this, your C-264 goes to the
built in machine language monitor. Type an X and press the RETURN key to get back to
BASIC. Your program is still com pletely intac t in the C-264 memory. Just type LIST to display
the program on your screen.
*W hen yo u press RESE T, C-26 4 aut omatic ally I ssues a N EW c omman d. T his can be reversed. See the C om modo re 264
Pro gram mer's Refer ence Gui de for inform ation on UN NEW ing your p rog ram after you've pressed the reset butto n by a ccident .
THE LEFT SIDE OF YOUR C-264
The socket and the
switc h on the left side
of the C-264 (if you’re
facing it) both have to
do with TV con
nections. Neither is
used if you’re
connecting your C-264
to a monitor.
THE RF JACK
This is where you plug one end of the RF cable (the thin black cable). You can plug either end
Into this socket and the other end into the TV switch box.
THE H IG H /L O W SW IT CH
This sw itch controls which channel will display your C-264 video output. Set the H/L switch to
L for output on channel 3. Set the H/L switch to H for video on channel 4.
You can use either c hannel 3 or 4 on your TV to display the video picture frorn your computer. If
you have a channel 3 TV station in your area, select channel 4, and vice versa. Yo u’ll probably
want to experiment to see which setting gives you the best picture.
3
Page 10
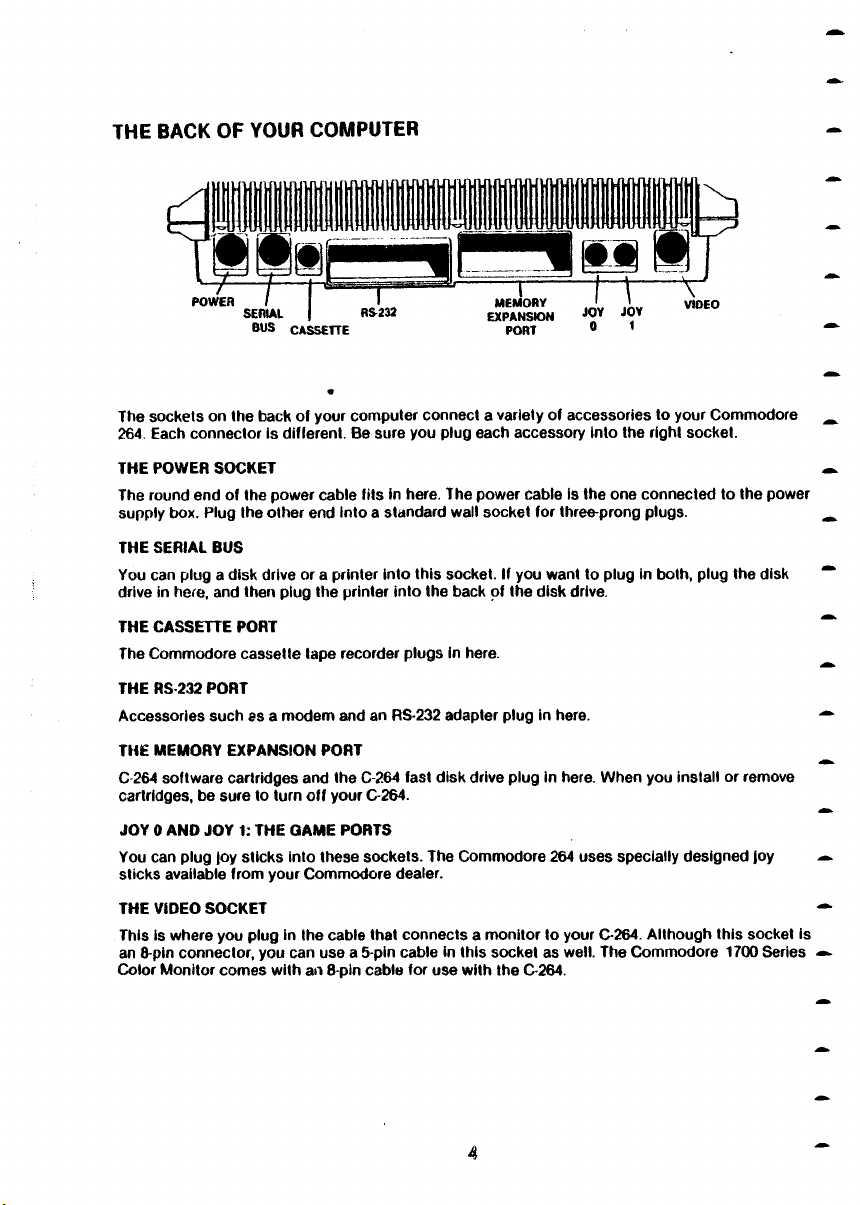
THE BACK OF YOUR COMPUTER
The soc kets on the back of your computer connect a variety of accessories to your Com modore
264. Each connector is different. Be sure you plug each accessory into the right socket.
TH E POWER SOCK ET
The round end of the power cable fits in here. The power cable Is the one con nected to the power
supply box. Plug the other end into a standard wall socket for three-prong plugs.
THE SERIAL BUS
You can plug a disk drive or a printer into this socket. If you want to plug in both, plug the disk
drive in here, and then plug the printer into the back pf the disk drive.
THE CA SSETTE PORT
The Commodore cas sette tape recorder plugs in here.
THE R S 23 2 PORT
Accessories such as a m od em and an RS-232 adapte r plug in here.
TH E M EM ORY EX PA NS IO N PORT
0 2 6 4 software cartridges and the 0 2 64 fast disk drive plug in here. When you install or remove
cartridges, be sure to turn off your 0 2 6 4.
JOY 0 AN D JOY 1: THE GA ME PORTS
You can plug )oy sticks into these sockets. Th e Commodore 264 uses specially designed joy
sticks available from your Co mm odore dealer.
THE VIDEO SOC KET
This is where you plug in the cable that connects a m onitor to your 0 2 64 . Although this socket is
an 8-pin connector, you can use a 5-pin cable in this socket as well. T he Commodore 1700 Series
Color Monitor co mes with an 8-pin cable for use with the C-264.
Page 11
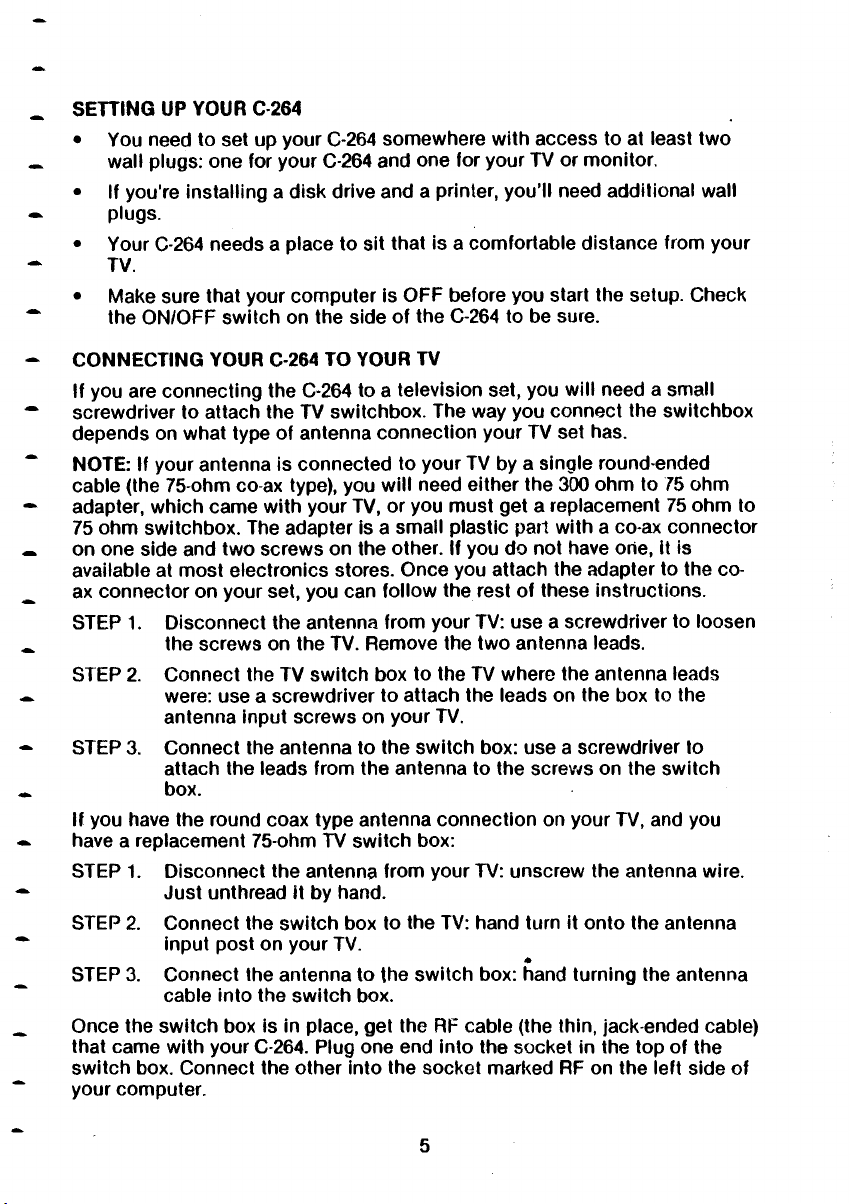
SETTING UP YOUR C-264
• You need to set up your C-264 somewhere with access to at least two
wall plugs: one for your C-264 and one for your TV or monitor.
• If you're installing a disk drive and a printer, you'll need additional wall
plugs.
• Your C-264 needs a place to sit that is a comfortable distance from your
TV.
• Make sure that your computer is OFF before you start the setup. Check
the ON/OFF switch on the side of the C-264 to be sure.
CONNECTING YOUR C-264 TO YOUR TV
If you are connecting the C-264 to a television set, you will need a small
screwdriver to attach the TV switchbox. The way you connect the switchbox
depends on what type of antenna connection your TV set has.
NOTE: If your antenna is connected to your TV by a single round-ended
cable (the 75-ohm co-ax type), you will need either the 3CX) ohm to 75 ohm
adapter, which came with your TV, or you must get a replacement 75 ohm to
75 ohm switchbox. The adapter is a small plastic part with a co-ax connector
on one side and two screws on the other. If you do not have orie, it is
available at most electronics stores. Once you attach the adapter to the co
ax connector on your set, you can follow the rest of these instructions.
STEP 1. Disconnect the antenna from your TV: use a screwdriver to loosen
the screws on the TV. Remove the two antenna leads.
STEP 2. Connect the TV switch box to the TV where the antenna leads
were: use a screwdriver to attach the leads on the box to the
antenna Input screws on your TV.
STEP 3. Connect the antenna to the switch box: use a screwdriver to
attach the leads from the antenna to the screws on the switch
box.
If you have the round coax type antenna connection on your TV, and you
have a replacement 75-ohm TV switch box:
STEP 1. Disconnect the antenna from your TV: unscrew the antenna wire.
Just unthread it by hand.
STEP 2.
STEP 3.
Once the switch box is in place, get the RF cable (the thin, jack-ended cable)
that came with your C-264. Plug one end into the socket in the top of the
switch box. Connect the other into the socket marked RF on the left side of
your computer.
Connect the switch box to the TV: hand turn it onto the antenna
input post on your TV.
Connect the antenna to the switch box: hand turning the antenna
cable into the switch box.
*
5
Page 12
Once you’ve attached the switch box to the TV, you never have to do it
again. When you want to use the computer, just move the switch to
COMPUTER. When you want to watch TV, just move the switch to the TV
position. The switch box will not interfere with vour TV reception.
SELECTING A CHANNEL ON YOUR TV
As we explained earlier, your TV should be set on either channel 3 or 4 when
you are using your computer. Don't choose a channel that broadcasts in
your area. If you use channel 3, set the H/L switch on the side of the
computer to L. If you use channel 4, set this switch to H.
CONNECTING YOUR COM MODO RE 264 TO A MONITOR
If you’re connecting your computer to a monitor instead of a TV, follow the
instructions in the manual that comes with the monitor. Hooking up a
monitor like the Commodore 1703 Color Monitor is simple. It requires only
one cable that goes directly from your monitor to the VIDEO socket on the
back of your computer.
FINAL STEPS
1. Attach the power supply cable with the power box to your C-264. Plug
the round end of the cable into the POWER socket on the back of the
computer; plug the power supply into the wall socket.
2. If you are using a TV, make sure that the setting on the modulator (H/L),
and the channel on your TV (3 or 4) are in agreement. Make sure that the
switchbox is set to the COMPUTER setting.
If you are using a 1702 or 1703 monitor, use the rear jacks, and check
that the back/front switch is set to BACK.
3. Turn on your computer. fThe switch is on the right side as you face the
C-264.)
4. If all went well, this message will appear on your screen:
COMMODORE BASIC 3.5 60671 BYTES FREE
READY.
The flashing cursor under the READY message tells you that the C-264 is
waiting for you to start typing. The background color will be white, while the
letters will be printed in black.
5. Check the troubleshooting chart if you have problems. You may need to
adjust your TV set to get a sharper picture.
6
Page 13
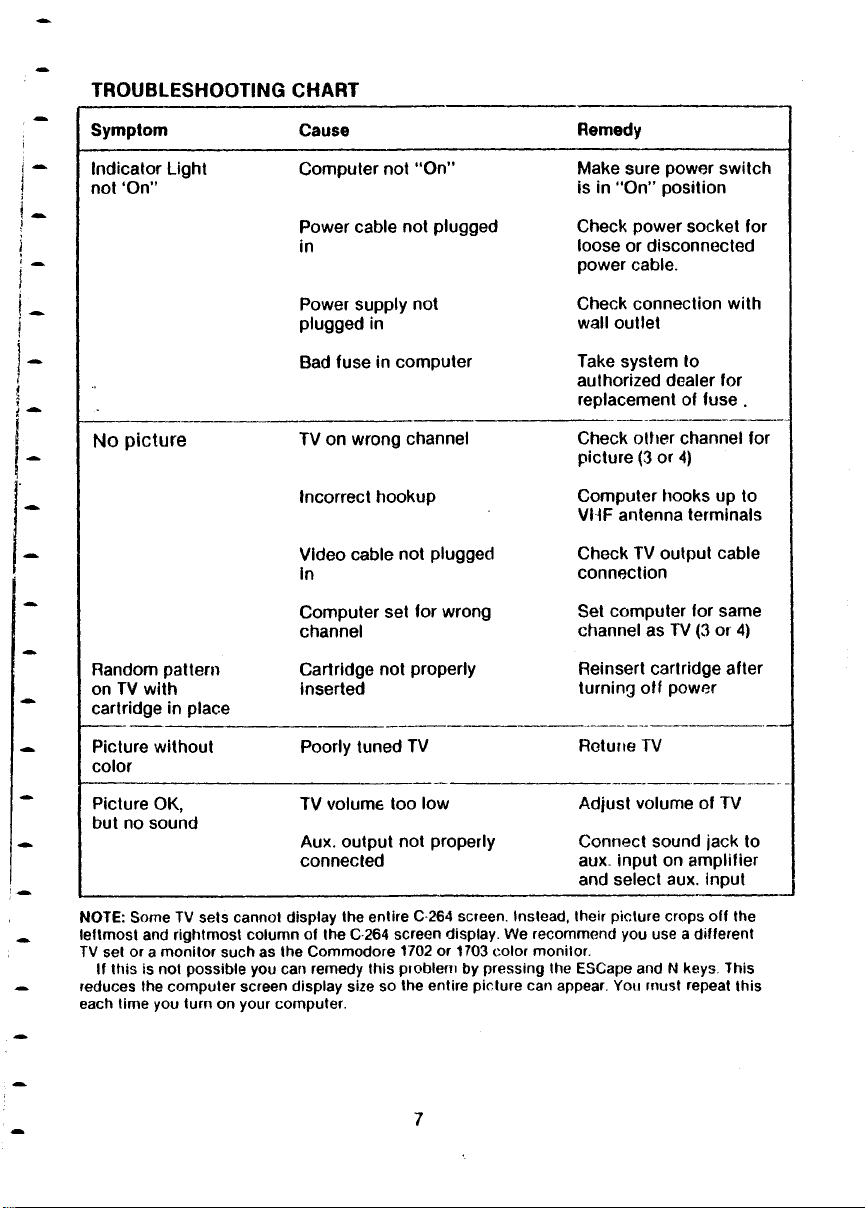
TROUBLESHOOTING CHART
Sy m pto m
In d ica t o r L ig h t
no t ‘On ”
No picture
R a n d o m p a tte r n
on TV with
ca r tridge in p lace
Ca use
C o m pu ter not “O n”
Po w e r c a b le n ot plugged
in
Pow e r su p p ly not
plu g g e d in
Ba d fu s e in co m pu ter
T V o n wrong c h a n n e l
In c o rre ct ho o k u p
V ide o cable not plugged
in
C o m pu ter set fo r w ro n g
ch an n e l
C a rtr id ge not prope r ly
in s e rte d
Remedy
M a k e sure po w er sw itc h
is in “O n ” p o s ition
C h e c k po w er socket for
lo o se o r dis c o n ne c ted
pow e r cable .
Ch e c k co n n e c tion wi th
wal l ou tle t
Tak e s y s t e m t o
au tho r iz e d d e a ler for
re pla c e m en t o f fus e .
C h e c k ot h e r ch ann el fo r
pic ture (3 o r 4)
C o m pu ter hoo ks up t o
V H F a n t e n n a term inals
C h e c k T V outp ut ca b le
co nn e c t io n
Set co mp uter for sam e
ch an n e l as T V (3 or 4)
Re in s e r t c a r tridge a f ter
tu rnin g ol f po w e r
Pic tu re w ith o u t
co lor
Pic tu re O K ,
but no s o u n d
NOTE: Some TV sets cannot display the entire C 264 screen. Instead, their picture crops off the
leftmost and rightmost column of the C 264 screen display. We re com mend you use a different
TV set or a mo nitor such as the Commod ore 1702 or 1703 color monitor.
If this is not possible you can remedy this problem by pressing the ESCape and N keys. This
reduces the com puter screen display size so the entire picture can appear. You rnust repeat this
each time you turn on your computer.
Po o r ly tuned T V
T V vol u m e to o low
Au x . outp u t no t pro p erly
co nn e c t e d
R e tun e T V
Ad ju s t vo lu m e o f T V
C o n ne c t soun d jac k to
au x . in p u t on am pli fie r
an d se lect au x. inpu t
7
Page 14
CHAPTER
USING THE KEYBOARD
AND THE SCREEN
A tour of the keyboard.
The special keys.
The graphics keys.
The programmable function keys.
The HELP key.
Page 15
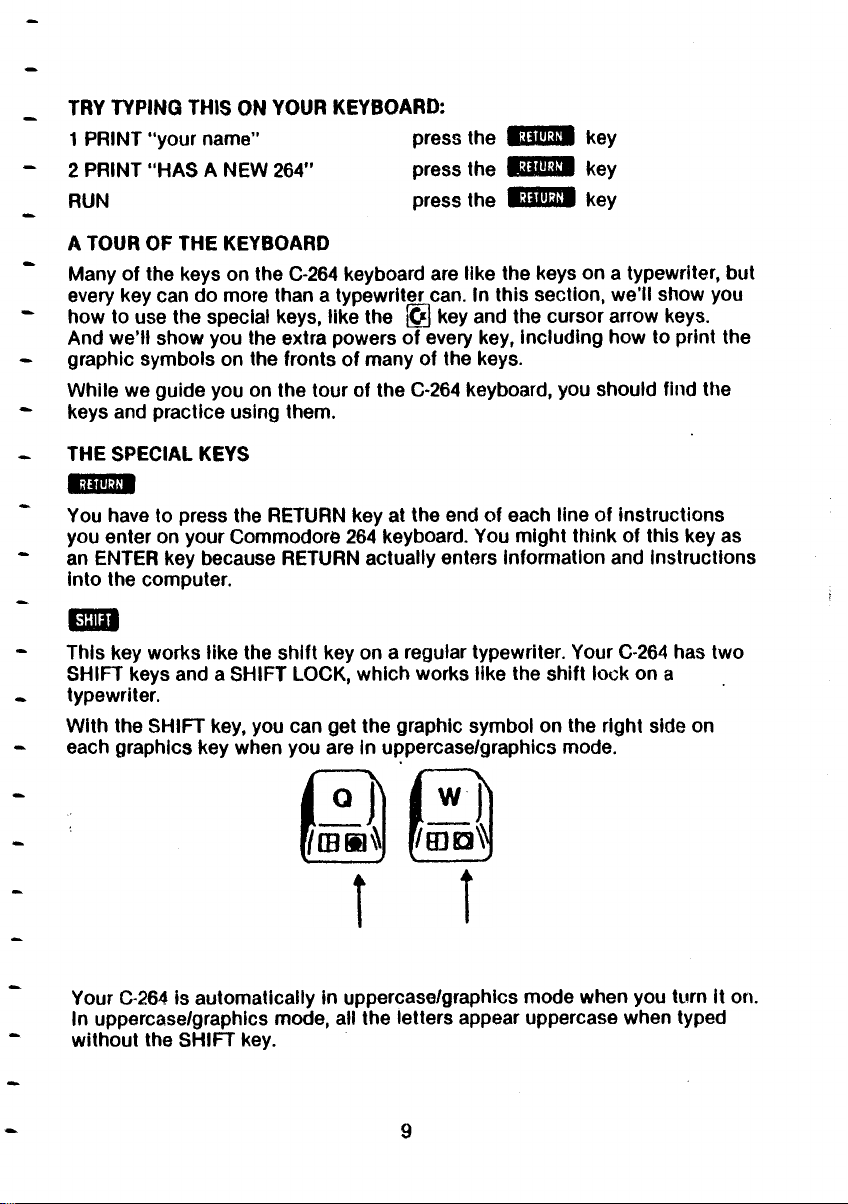
TRY TYPING THIS ON YOUR KEYBOARD:
1 PRINT “your name”
2 PRINT “HAS A NEW 264"
RUN
press the M>|l|;™ key
pressthe iiH M 'B key
pressthe BaiM f li key
A TOUR OF THE KEYBOARD
Many of the keys on the C-264 keyboard are like the keys on a typewriter, but
every key can do more than a typewriter can. In this section, w e ’ll show you
how to use the special keys, like the ^ ] key and the cursor arrow keys.
And we’ll show you the extra powers of every key, including how to print the
graphic symbols on the fronts of many of the keys.
While we guide you on the tour of the C-264 keyboard, you should find the
keys and practice using them.
THE SPECIAL KEYS
RETURN
You have to press the RETURN key at the end of each line of instructions
you enter on your Commodore 264 keyboard. You might think of this key as
an ENTER key because RETURN actually enters information and instructions
into the computer.
SH IfT
This key works like the shift key on a regular typewriter. Your C-264 has two
SHIFT keys and a SHIFT LOCK, which works like the shift lock on a
typewriter.
With the SHIFT key, you can get the graphic symbol on the right side on
each graphics key when you are in uppercase/graphics mode.
Your C-264 is automatically in uppercase/graphics mode when you turn it on.
In uppercase/graphics mode, all the letters appear uppercase when typed
without the SHIFT key.
9
Page 16
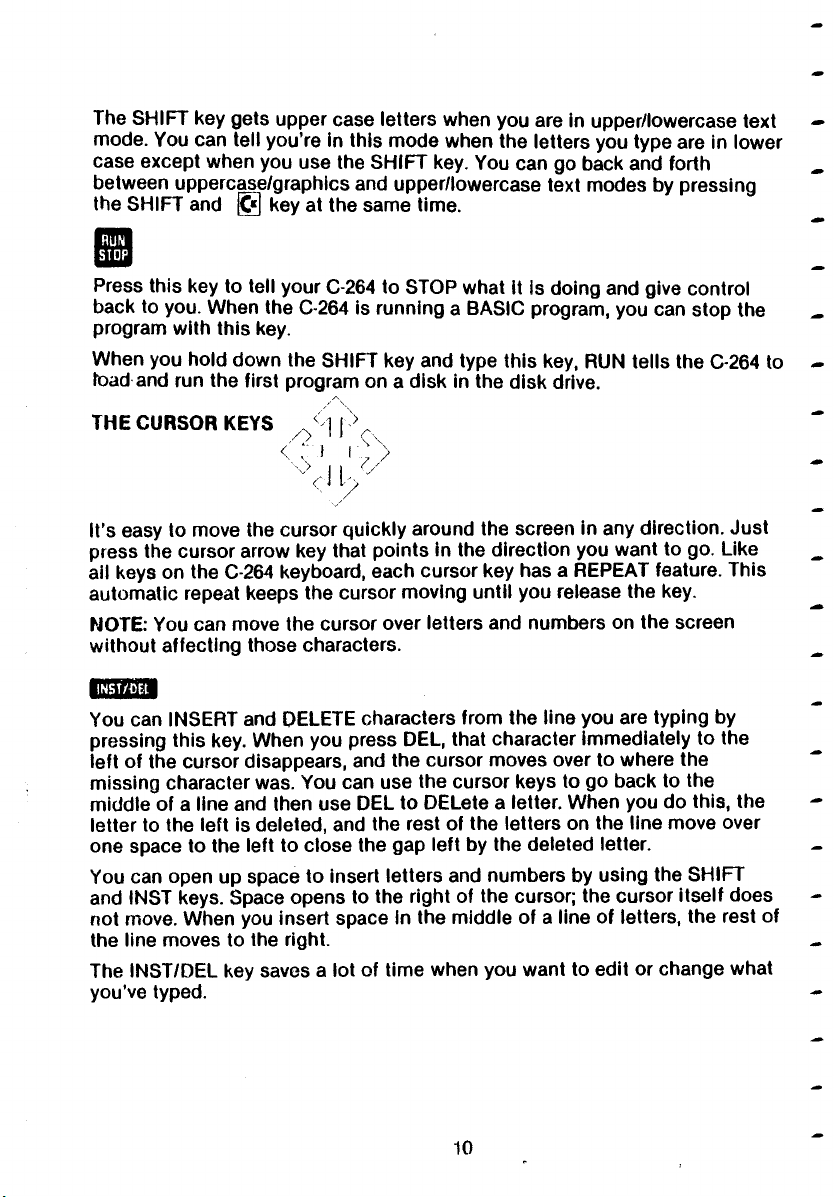
The SHIFT key gets upper case letters when you are in upper/lowercase text
mode. You can tell you’re in this mode when the letters you type are in lower
case except when you use the SHIFT key. You can go back and forth
between uppercase/graphics and upper/lowercase text modes by pressing
the SHIFT and @5] key at the same time.
RU N
STOP
Press this key to tell your C-264 to STOP what it is doing and give control
back to you. When the C-264 is running a BASIC program, you can stop the
program with this key.
When you hold down the SHIFT key and type this key, RUN tells the C-264 to
fc>ad and run the first program on a disk in the disk drive.
✓ ^\
THE CURSOR KEYS ^ ] | \
It’s easy to move the cursor quickly around the screen in any direction. Just
press the cursor arrow key that points in the direction you want to go. Like
ail keys on the C-264 keyboard, each cursor key has a REPEAT feature. This
automatic repeat keeps the cursor moving until you release the key.
NOTE: You can move the cursor over letters and numbers on the screen
without affecting those characters.
'iN5T / W
You can INSERT and DELETE characters from the line you are typing by
pressing this key. When you press DEL, that character immediately to the
left of the cursor disappears, and the cursor moves over to where the
missing character was. You can use the cursor keys to go back to the
middle of a line and then use DEL to DELete a letter. When you do this, the
letter to the left is deleted, and the rest of the letters on the line move over
one space to the left to close the gap left by the deleted letter.
You can open up space to insert letters and numbers by using the SHIFT
and INST keys. Space opens to the right of the cursor; the cursor itself does
not move. When you insert space in the middle of a line of letters, the rest of
the line moves to the right.
The INST/DEL key saves a lot of time when you want to edit or change what
you've typed.
10
Page 17
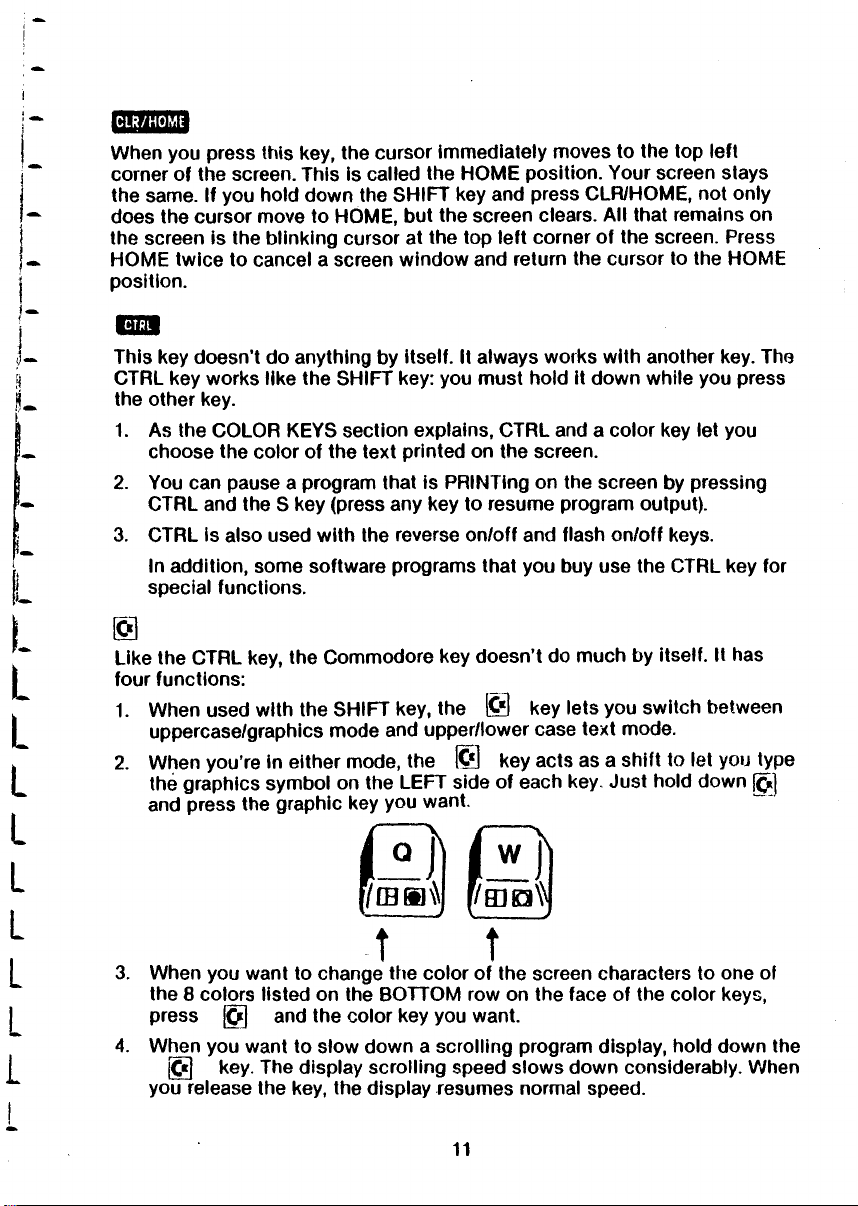
CLR/HOM E
When you press this key, the cursor immediately moves to the top left
corner of the screen. This is called the HOME position. Your screen stays
the same. If you hold down the SHIFT key and press CLR/HOME, not only
does the cursor move to HOME, but the screen clears. All that remains on
the screen is the blinking cursor at the top left corner of the screen. Press
HOME twice to cancel a screen window and return the cursor to the HOME
position.
KTW
This key doesn’t do anything by itself. It always works with another key. The
CTRL key works like the SHIFT key: you must hold it down while you press
the other key.
1. As the COLOR KEYS section explains, CTRL and a color key let you
choose the color of the text printed on the screen.
2. You can pause a program that is PRINTing on the screen by pressing
CTRL and the S key (press any key to resume program output).
3. CTRL is also used with the reverse on/off and flash on/off keys.
In addition, some software programs that you buy use the CTRL key for
special functions.
m
Like the CTRL key, the Commodore key doesn’t do much by itself. It has
four functions:
1. W he nu se dw lthth e SH IF T ke y,the © ke yle tsyousw itchbetw een
uppercase/graphics mode and upper/lower case text mode.
2. When you’re in either mode, the © key acts as a shift to let you type
the graphics symbol on the LEFT side of each key. Just hold down ft^|
and press the graphic key you want.
3. When you want to change the color of the screen characters to one of
the 8 colors listed on the BOTTOM row on the face of the color keys,
press § ij and the color key you want.
4. When you want to slow down a scrolling program display, hold down the
jQt| key. The display scrolling speed slows down considerably. When
you release the key, the display resumes normal speed.
11
Page 18
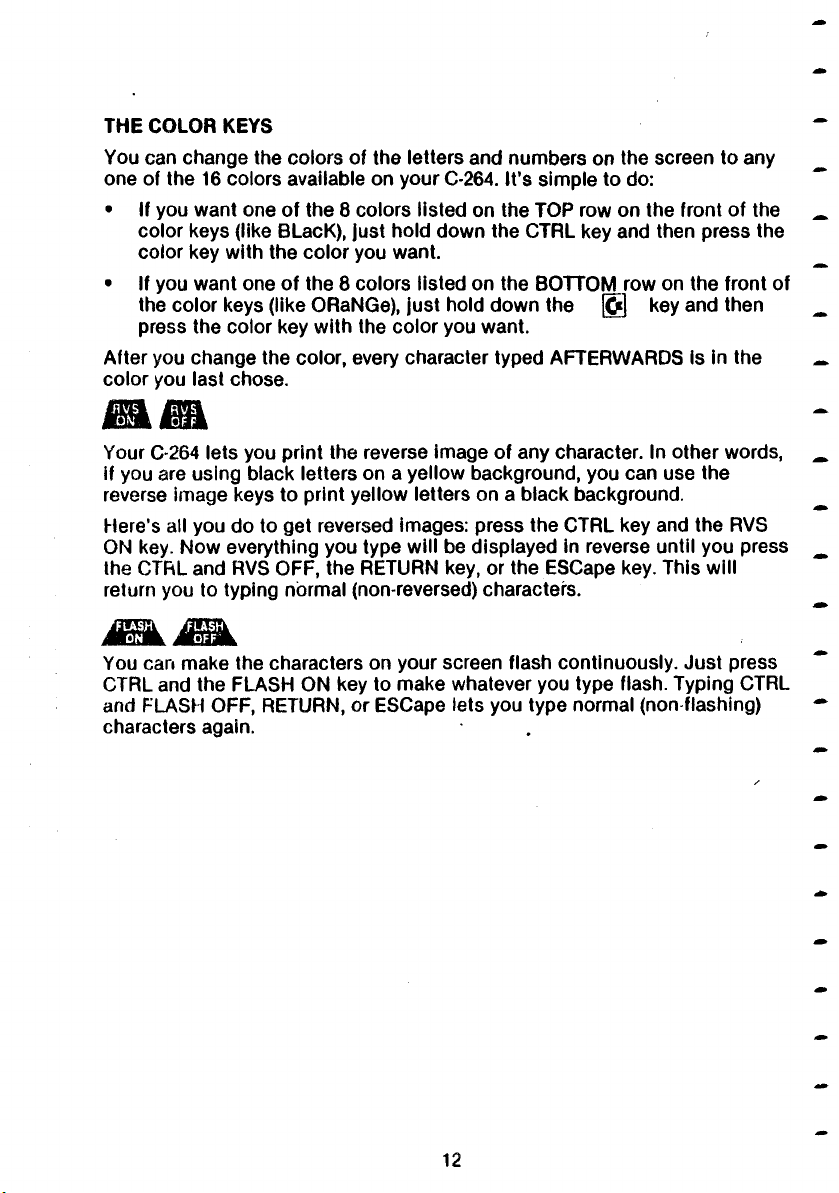
THE COLOR KEYS
You can change the colors of the letters and numbers on the screen to any
one ot the 16 colors available on your C-264. It’s simple to do:
• If you want one of the 8 colors listed on the TOP row on the front of the
color keys (like BLacK), just hold down the CTRL key and then press the
color key with the color you want.
• If you want one of the 8 colors listed on the BOTTOM row on the front of
the color keys (like ORaNGe), just hold down the @ key and then
press the color key with the color you want.
After you change the color, every character typed AFTERWARDS is in the
color you last chose.
Your C-264 lets you print the reverse image of any character. In other words,
if you are using black letters on a yellow background, you can use the
reverse image keys to print yellow letters on a black background.
Here’s all you do to get reversed images: press the CTRL key and the RVS
ON key. Now everything you type will be displayed in reverse until you press
the CTRL and RVS OFF, the RETURN key, or theESCape key. This will
return you to typing normal (non-reversed) characters.
u r a ft iTTOTk
iNEEHk ^EXuwk
You can make the characters on your screen flash continuously. Just press
CTRL and the FLASH ON key to make whatever you type flash. Typing CTRL
and FLASH OFF, RETURN, or ESCape lets you type normal (non-flashing)
characters again.
12
Page 19
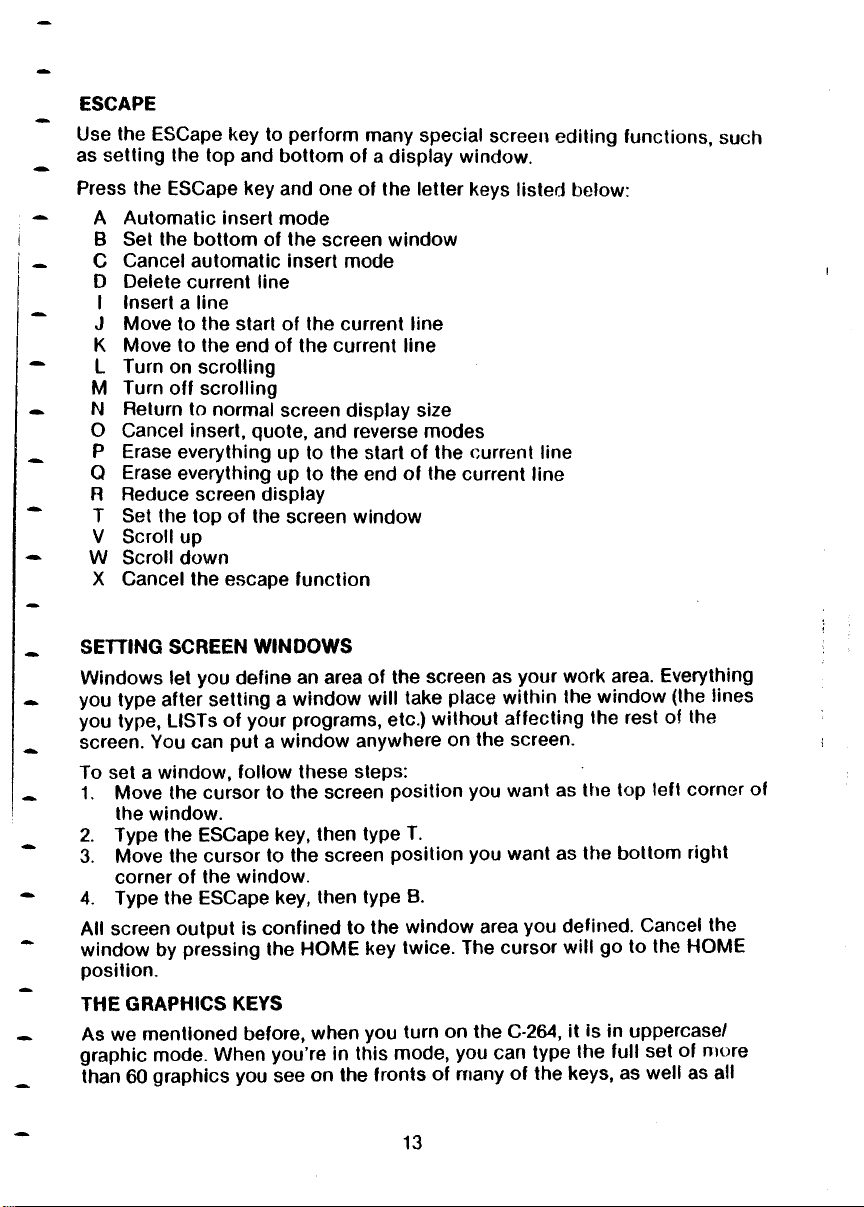
ESCAPE
Use the ESCape key to perform many special screen editing functions, such
as setting the top and bottom of a display window.
Press the ESCape key and one of the letter keys listed below:
A Automatic insert mode
B Set the bottom of the screen window
C Cancel automatic insert mode
D Delete current line
I Insert a line
J Move to the start of the current line
K Move to the end of the current line
L Turn on scrolling
M Turn off scrolling
N Return to normal screen display size
0 Cancel insert, quote, and reverse modes
P Erase everything up to the start of the current line
Q Erase everything up to the end of the current line
R Reduce screen display
T Set the top of the screen window
V Scroll up
W Scroll down
X Cancel the escape function
SETTING SCREEN WINDOWS
Windows let you define an area of the screen as your work area. Everything
you type after setting a window will take place within the window (the lines
you type, LISTs of your programs, etc.) without affecting the rest of the
screen. You can put a window anywhere on the screen.
To set a window, follow these steps:
1. Move the cursor to the screen position you want as the top left corner of
the window.
2. Type the ESCape key, then type T.
3. Move the cursor to the screen position you want as the bottom right
corner of the window.
4. Type the ESCape key, then type B.
All screen output is confined to the window area you defined. Cancel the
window by pressing the HOME key twice. The cursor will go to the HOME
position.
THE GRAPHICS KEYS
As we mentioned before, when you turn on the C-264, it is in uppercase/
graphic mode. When you’re in this mode, you can type the full set of more
than 60 graphics you see on the fronts of many of the keys, as well as a!l
13
Page 20
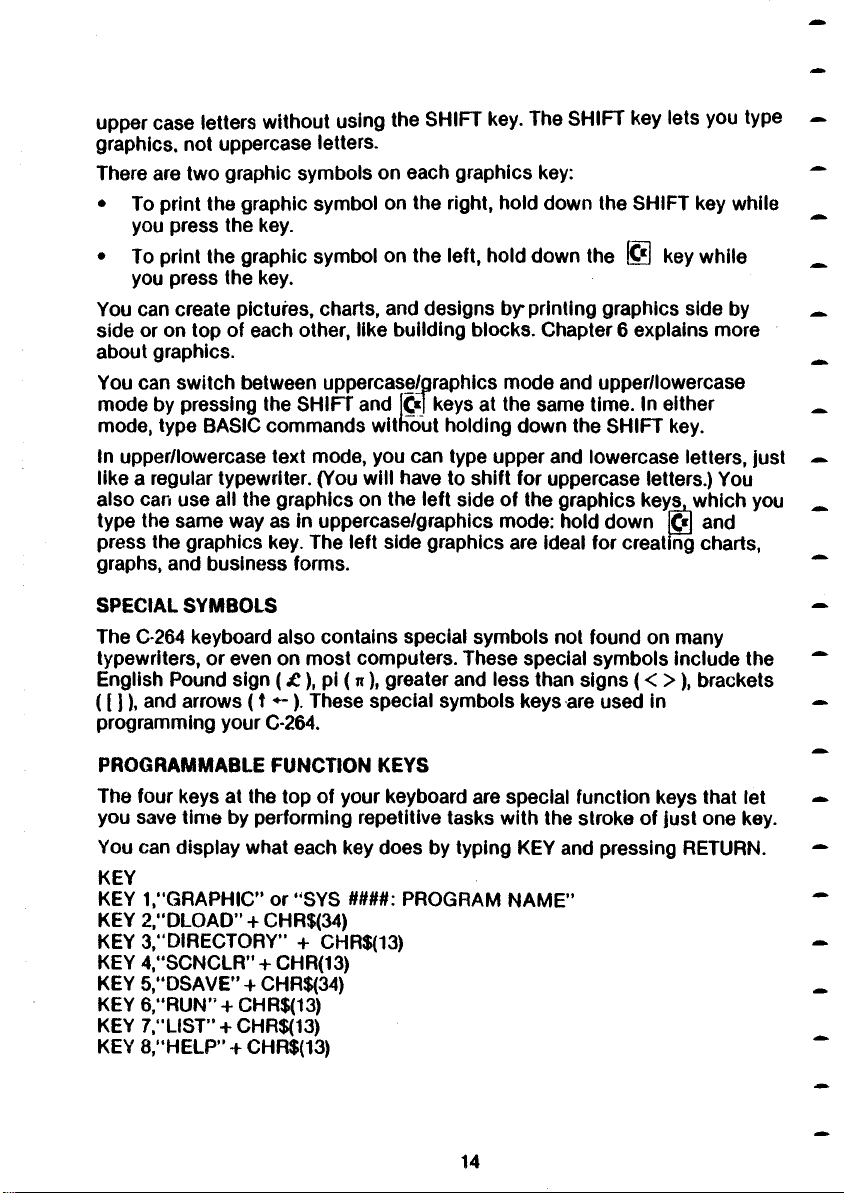
upper case letters without using the SHIFT key. The SHIFT key lets you type
graphics, not uppercase letters.
There are two graphic symbols on each graphics key:
• To print the graphic symbol on the right, hold down the SH IFT key while
you press the key.
• To print the graphic symbol on the left, hold down the fC*j key while
you press the key.
You can create pictures, charts, and designs b y printing graphics side by
side or on top of each other, like building blocks. Chapter 6 explains more
about graphics.
You can switch between uppercase/graphics mode and upper/lowercase
mode by pressing the SHIFT and jC*f keys at the same time. In either
mode, type BASIC commands witn6ut holding down the SHIFT key.
In upper/lowercase text mode, you can type upper and lowercase letters, just
like a regular typewriter. Otou will have to shift for uppercase letters.) You
also can use all the graphics on the left side of the graphics keys, which you
type the same way as in uppercase/graphics mode: hold down §£] and
press the graphics key. The left side graphics are ideal for creating charts,
graphs, and business forms.
SPECIAL SYMBOLS
The C-264 keyboard also contains special symbols not found on many
typewriters, or even on most computers. These special symbols include the
English Pound sign (£), pi ( n ), greater and less than signs ( < > ), brackets
( f J), and arrows ( t — ). These special symbols keys are used in
programming your C-264.
PROGRAMMABLE FUNCTION KEYS
The four keys at the top of your keyboard are special function keys that let
you save time by performing repetitive tasks with the stroke of just one key.
You can display what each key does by typing KEY and pressing RETURN.
KEY
KEY 1,“6RAP H IC” or “SYS ####: PROGRAM NAME”
KEY 2,"DLOAD" + CHR$(34)
KEY 3,‘ DIRECTORY” + CHR$(13)
KEY 4,"SCNCLR" + CHR(13)
KEY 5,“DSAVE” + CHR$(34)
KEY 6,“RUN” + CHR$(13)
KEY 7,”LiST” + CHR$(13)
KEY 8,‘‘HELP” + CHR$(13)
14
Page 21
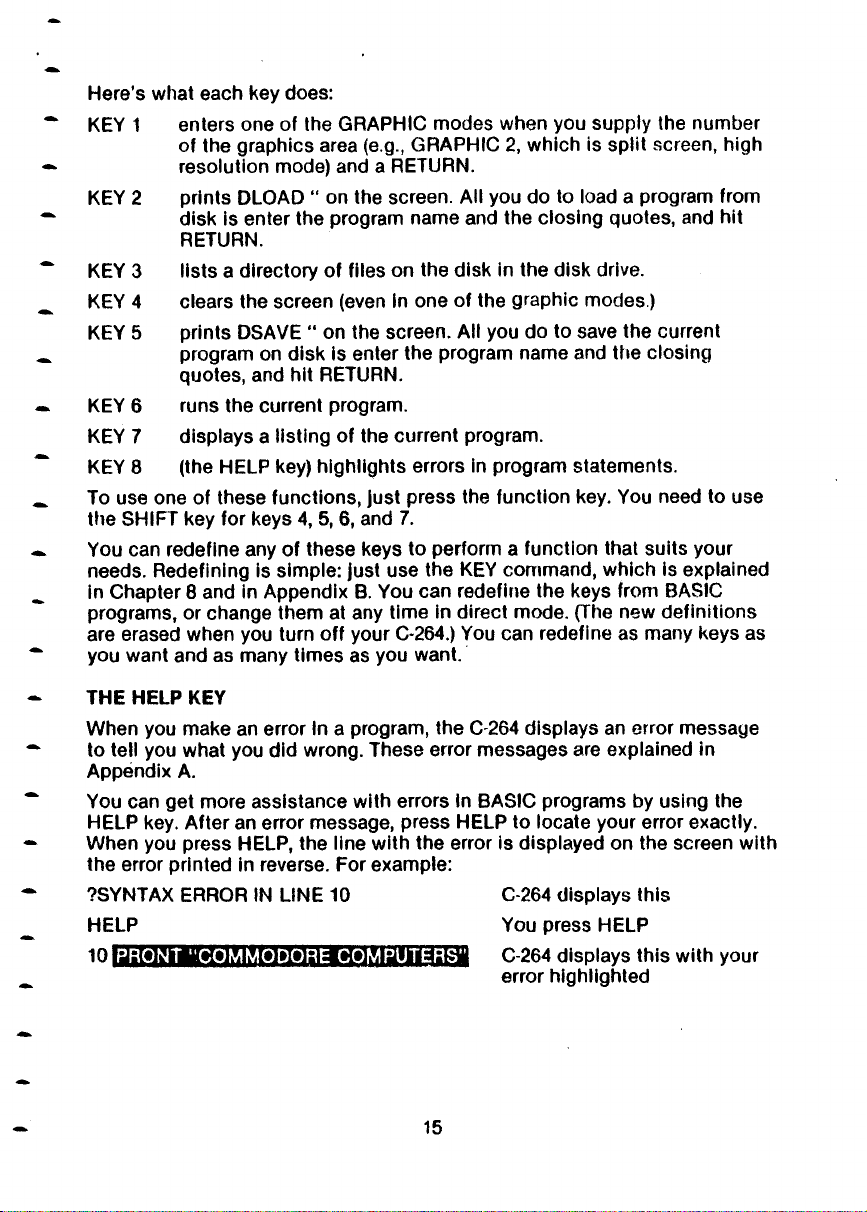
Here’s what each Key does:
KEY 1 enters one of the GRAPHIC modes when you supply the number
of the graphics area (e.g., GRAPHIC 2, which is sp lit screen, high
resolution mode) and a RETURN.
KEY 2 prints DLOAD “ on the screen. All you do to load a program from
disk is enter the program name and the closing quotes, and hit
RETURN.
KEY 3 lists a directory of files on the disk in the disk drive.
KEY 4 clears the screen (even In one of the graphic modes.)
KEY 5 prints DSAVE “ on the screen. All you do to save the current
program on disk is enter the program name and the closing
quotes, and hit RETURN.
KEY 6 runs the current program.
KEY 7 displays a listing of the current program.
KEY 8 (the HELP key) highlights errors in program statements.
To use one of these functions, just press the function key. You need to use
the SHIFT key for keys 4, 5, 6, and 7.
You can redefine any of these keys to perform a function that suits your
needs. Redefining is simple: just use the KEY command, which is explained
in Chapter 8 and in Appendix B. You can redefine the keys from BASIC
programs, or change them at any time in direct mode. CThe new definitions
are erased when you turn off your C-264.) You can redefine as many keys as
you want and as many times as you want.
THE HELP KEY
When you make an error In a program, the C-264 displays an error message
to tell you what you did wrong. These error messages are explained in
Appendix A.
You can get more assistance with errors In BASIC programs by using the
HELP key. After an error message, press HELP to locate your error exactly.
When you press HELP, the line with the error is displayed on the screen with
the error printed in reverse. For example:
7SYNTAX ERROR IN LINE 10 C-264 displays this
HELP You press HELP
HflPRONT "COMMODORE COMPUTERS”
C-264 displays this with your
error highlighted
15
Page 22
CHAPTER
GETTING TO KNOW -
YOUR COMMODORE
264
• Some simple C-264 programs.
• How to correct typing mistakes.
• Introduction to the C-264 text screen.
• More about PRINTing on the screen.
• Introduction to color and reverse
printing.
16
Page 23
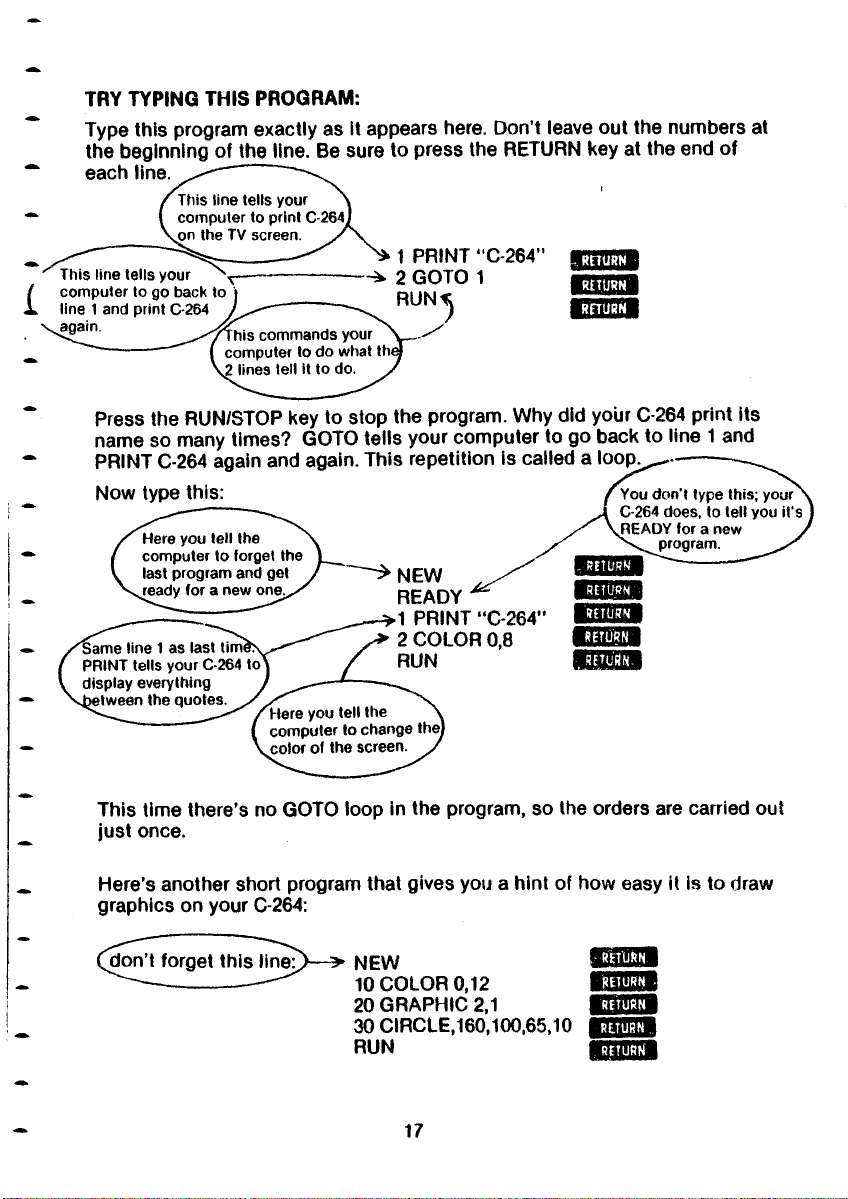
TRY TYPING THIS PROGRAM:
Type this program exactly as it appears here. Don’t leave out the numbers at
the beginning of the line. Be sure to press the RETURN key at the end of
each line.
This line tells your
com puter to print C-2 6^
on the T V screen.
This line tells your ^
com pu ter to go back to
line t and print C-264
^again.
1 PRINT “C-264”
2 GOTO 1
RU N ^
his commands your
com puter to do what th<
2 lines tell it to do.
RETURN
RETURN
RETURN
Press the RUN/STOP key to stop the program. Why did your C-264 print its
name so many times? GOTO tells your computer to go back to line 1 and
PRINT C-264 again and again. This repetition is called a loop^,
Now type this:
This time there’s no GOTO loop in the program, so the orders are carried out
just once.
Here’s another short program that gives you a hint of how easy it is to draw
graphics on your C-264:
don’t forget this line*
NEW
10 COLOR 0,12
20 GRAPHIC 2,1
30 CIRCLE,160,100,65,10
RUN
fl!i5W3M
M flfE M
1 RETURN
I RETURN.
| RETURN
17
Page 24
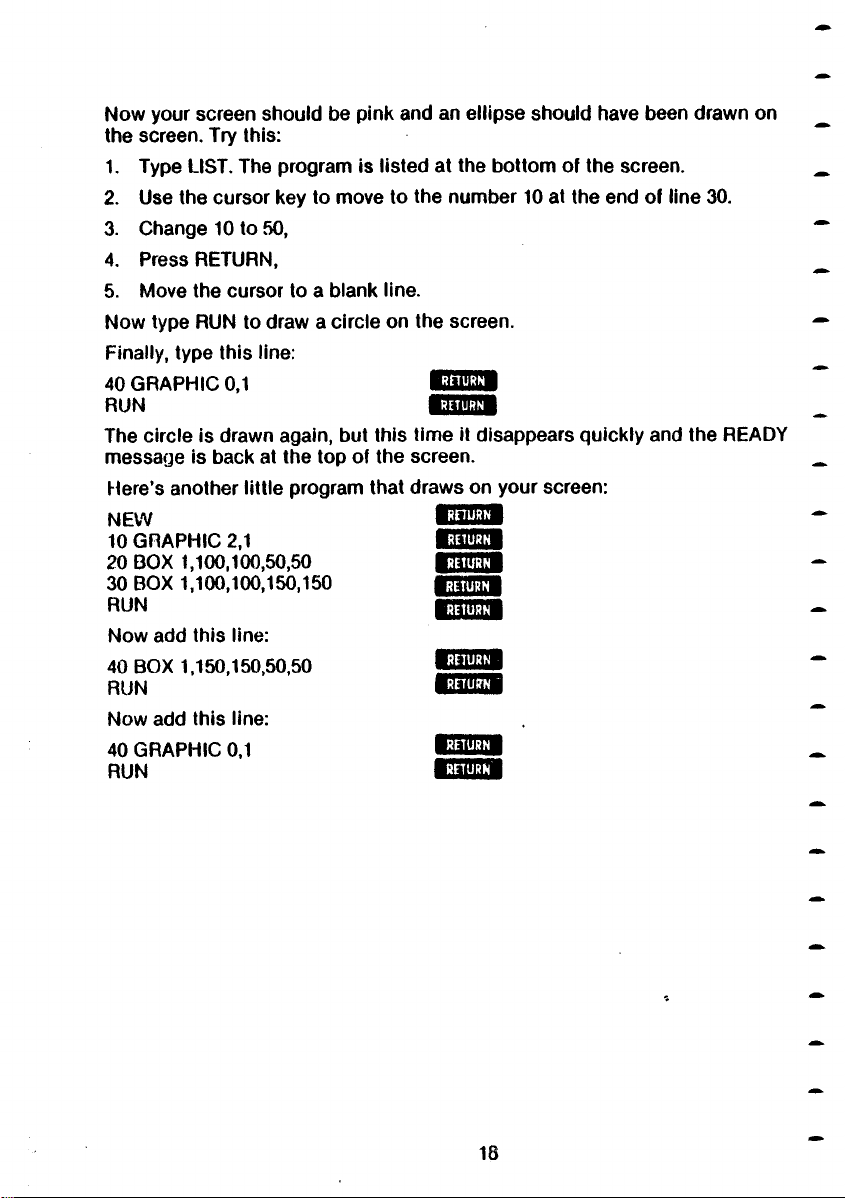
Now your screen should be pink and an ellipse should have been drawn on
the screen. Try this:
1. Type LIST. The program is listed at the bottom of the screen.
2. Use the cursor key to move to the number 10 at the end of line 30.
3. Change 10 to 50,
4. Press RETURN,
5. Move the cursor to a blank line.
Now type RUN to draw a circle on the screen.
Finally, type this line:
40 GRAPHIC 0,1
RUN
RETURN
RETURN
The circle is drawn again, but this time it disappears quickly and the READY
message is back at the top of the screen.
Here’s another little program that draws on your screen:
NEW
10 GRAPHIC 2,1
20 BOX 1,100,100,50,50
30 BOX 1,100,100,150,150
RUN
RETURN
RETURN
RETURN
RETURN
RETURN
\
Now add this line:
40 BOX 1,150,150,50,50
RUN
RETURN
RETURN ~
Now add this line:
40 GRAPHIC 0,1
RUN
RETURN
RETURN
18
Page 25
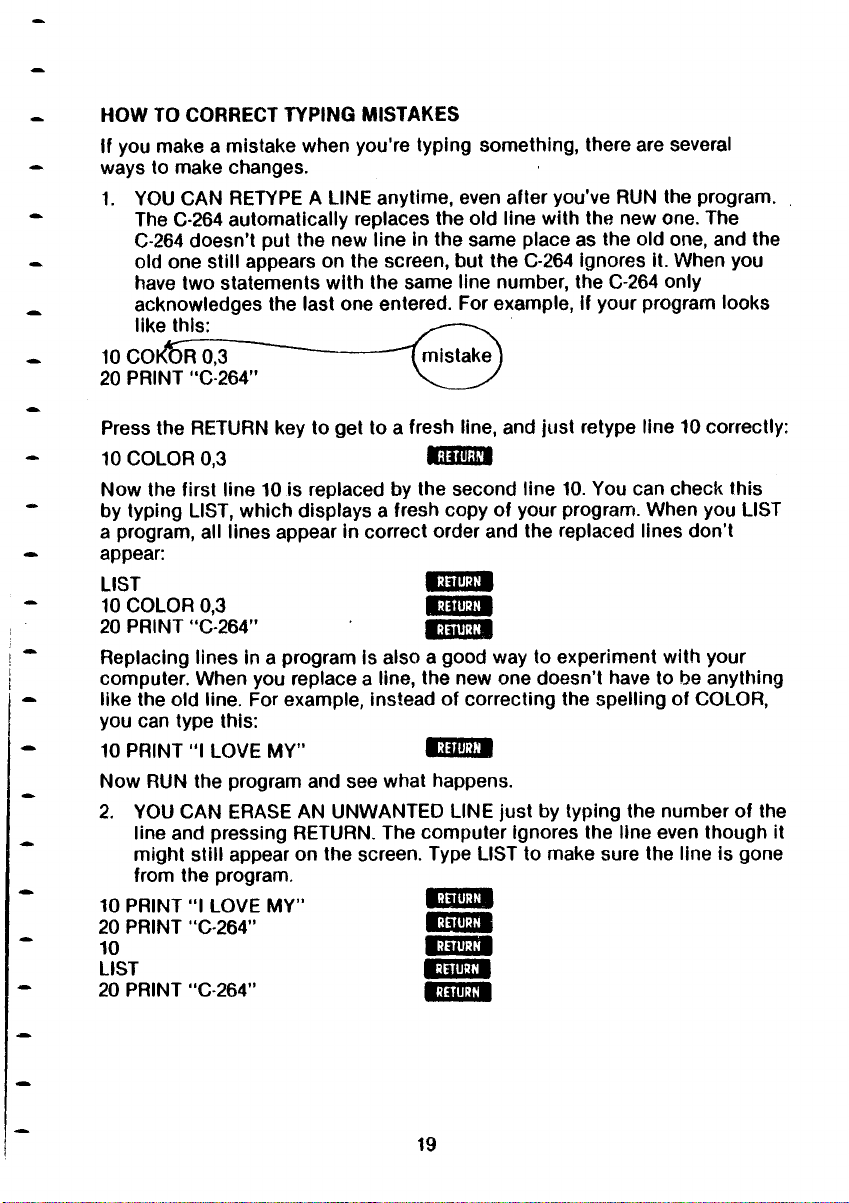
HOW TO CORRECT TYPING MISTAKES
If you make a mistake when you’re typing something, there are several
ways to make changes.
1. YOU CAN RETYPE A LINE anytime, even after you've RUN the program.
The C-264 automatically replaces the old line with the new one. The
C-264 doesn’t put the new line in the same place as the old one, and the
old one still appears on the screen, but the C-264 ignores it. When you
have two statements with the same line number, the C-264 only
acknowledges the last one entered. For example, if your program looks
like this: ^ — ^
10 C O k ftR 03 ~ ~~
20 PRINT “C-264” V
-------------
^m is t a ke )
_____
/
Press the RETURN key to get to a fresh line, and just retype line 10 correctly:
10 COLOR 0,3
RETURN
Now the first line 10 is replaced by the second line 10. You can check this
by typing LIST, which displays a fresh copy of your program. When you LIST
a program, all lines appear in correct order and the replaced lines don’t
appear:
LIST
10 COLOR 0,3
20 PRINT “C-264”
RETURN
RETURN
RETURN
Replacing lines in a program is also a good way to experiment with your
computer. When you replace a line, the new one doesn’t have to be anything
like the old line. For example, instead of correcting the spelling of COLOR,
you can type this:
10 PRINT "I LOVE M Y”
RETURN
Now RUN the program and see what happens.
2. YOU CAN ERASE AN UNWANTED LINE just by typing the number of the
line and pressing RETURN. The computer ignores the line even though it
might still appear on the screen. Type LIST to make sure the line is gone
from the program.
10 PRINT “I LOVE MY”
20 PRINT “C-264”
10
LIST
20 PRINT “C-264”
RETURN
RETURN
RETURN
RETURN
RETURN
19
Page 26
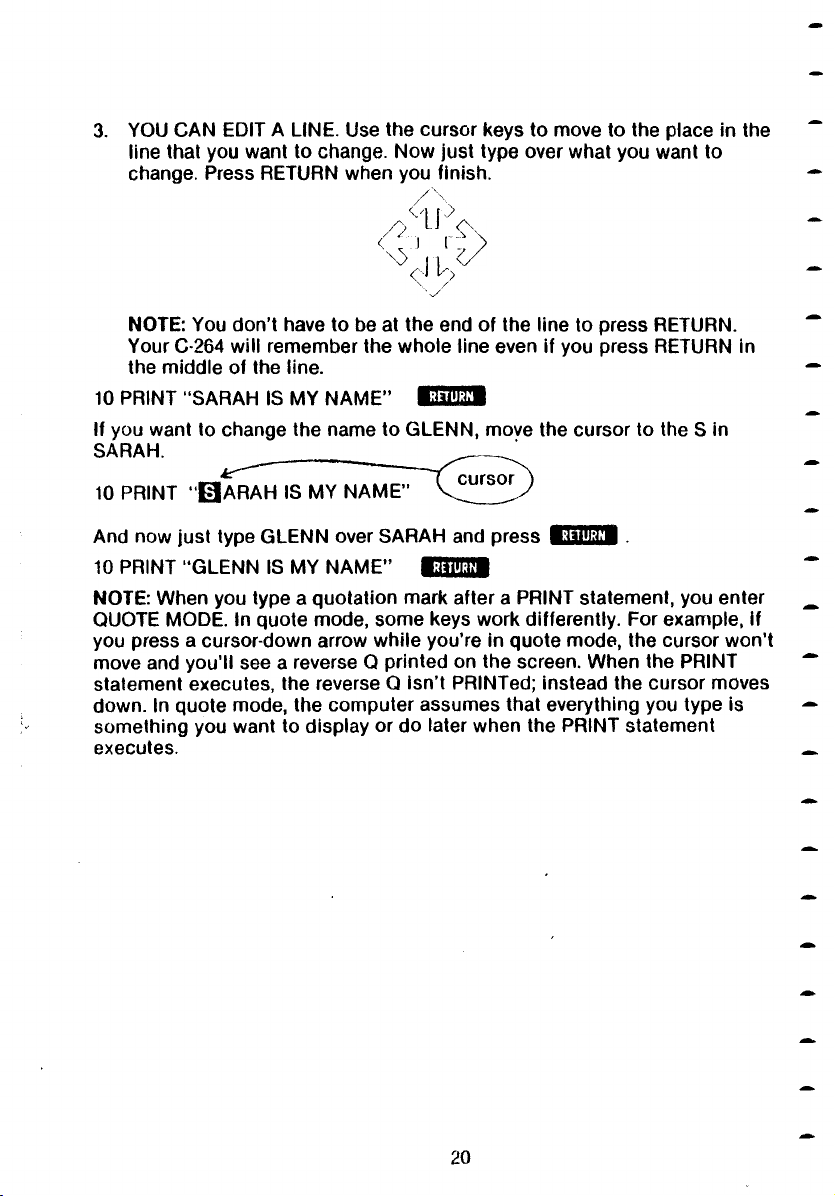
YOU CAN EDIT A LINE. Use the cursor keys to move to the place in the
3.
line that you want to change. Now just type over what you want to
change. Press RETURN when you finish.
/ \
M P
4 ' r
^ ;'V
NOTE: You don’t have to be at the end of the line to press RETURN.
Your C-264 will remember the whole iine even if you press RETURN in
the middle of the line.
10 PRINT "SARAH IS MY NAM E”
If you want to change the name to GLENN, move the cursor to the S in
SARAH. _
10 PRINT “0 A R A H IS MY NAME”
RETURN
___
'
And now just type GLENN over SARAH and press
10 PRINT “GLENN IS MY NAM E ”
NOTE: When you type a quotation mark after a PRINT statement, you enter
QUOTE MODE. In quote mode, some keys work differently. For example, if
you press a cursor-down arrow while you’re in quote mode, the cursor won’t
move and you’ll see a reverse Q printed on the screen. When the PRINT
statement executes, the reverse Q isn’t PRINTed; instead the cursor moves
down. In quote mode, the computer assumes that everything you type is
something you want to display or do later when the PRINT statement
executes.
RETURN
RETURN
20
Page 27
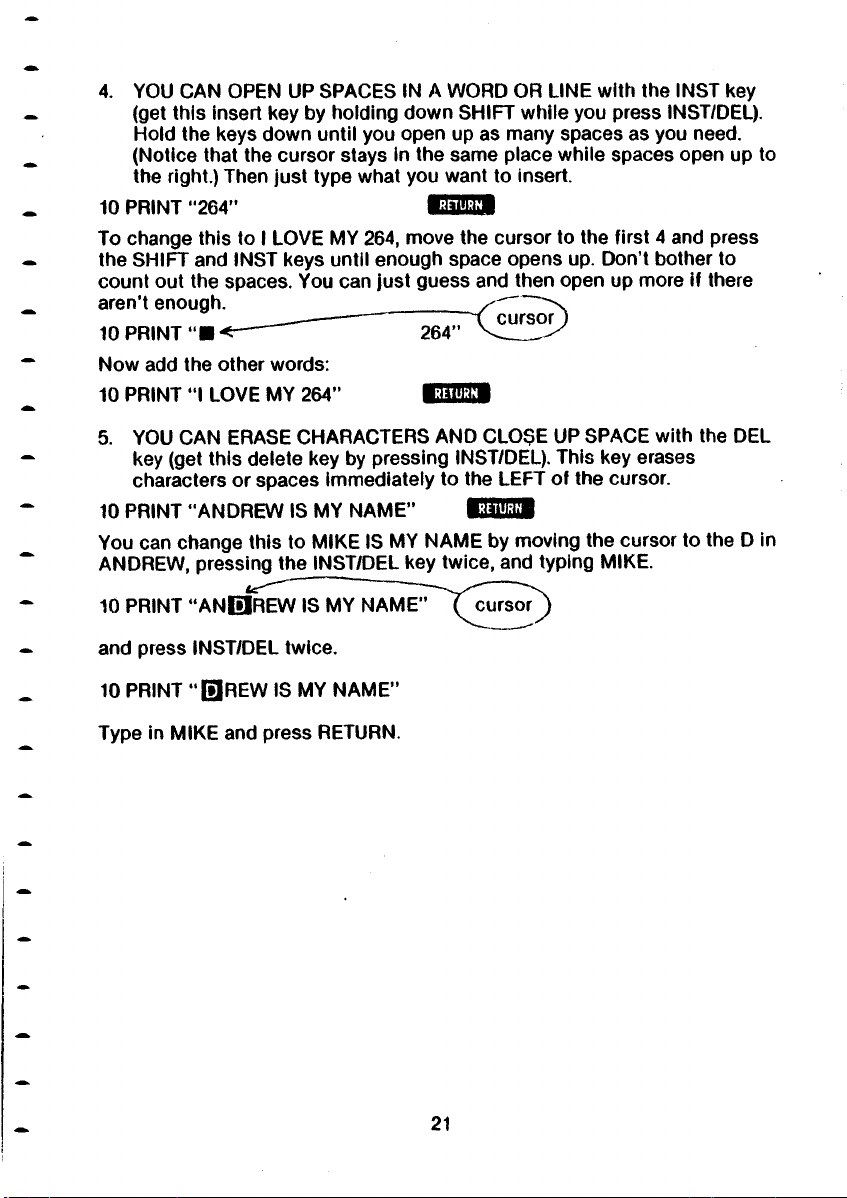
4. YOU CAN OPEN UP SPACES IN A WORD OR LINE with the INST Key
(get this insert key by holding down SHIFT while you press INST/DEL).
Hold the Keys down until you open up as many spaces as you need.
(Notice that the cursor stays in the same place while spaces open up to
the right.) Then just type what you want to insert.
10 PRINT "264”
RETURN
To change this to I LOVE MY 264, move the cursor to the first 4 and press
the SHIFT and INST keys until enough space opens up. Don’t bother to
count out the spaces. You can just guess and then open up more if there
aren’t enough.
10 PRINT " ■ <
------
" 264^
________
Now add the other words:
10 PRINT “I LOVE MY 264”
RETURN
5. YOU CAN ERASE CHARACTERS AND CLOSE UP SPACE with the DEL
key (get this delete key by pressing INST/DEL). This key erases
characters or spaces immediately to the LEFT of the cursor.
10 PRINT ’’ANDREW IS MY NAME”
RETURN
You can change this to MIKE IS MY NAME by moving the cursor to the D in
ANDREW, pressing the INST/DEL key twice, and typing MIKE.
10 PRINT “A N 0R E W IS MY N A M P ^ Y c u rs o i ^ )
and press INST/DEL twice.
10 PRINT “ 0R E W IS MY NAME”
Type in MIKE and press RETURN.
21
Page 28
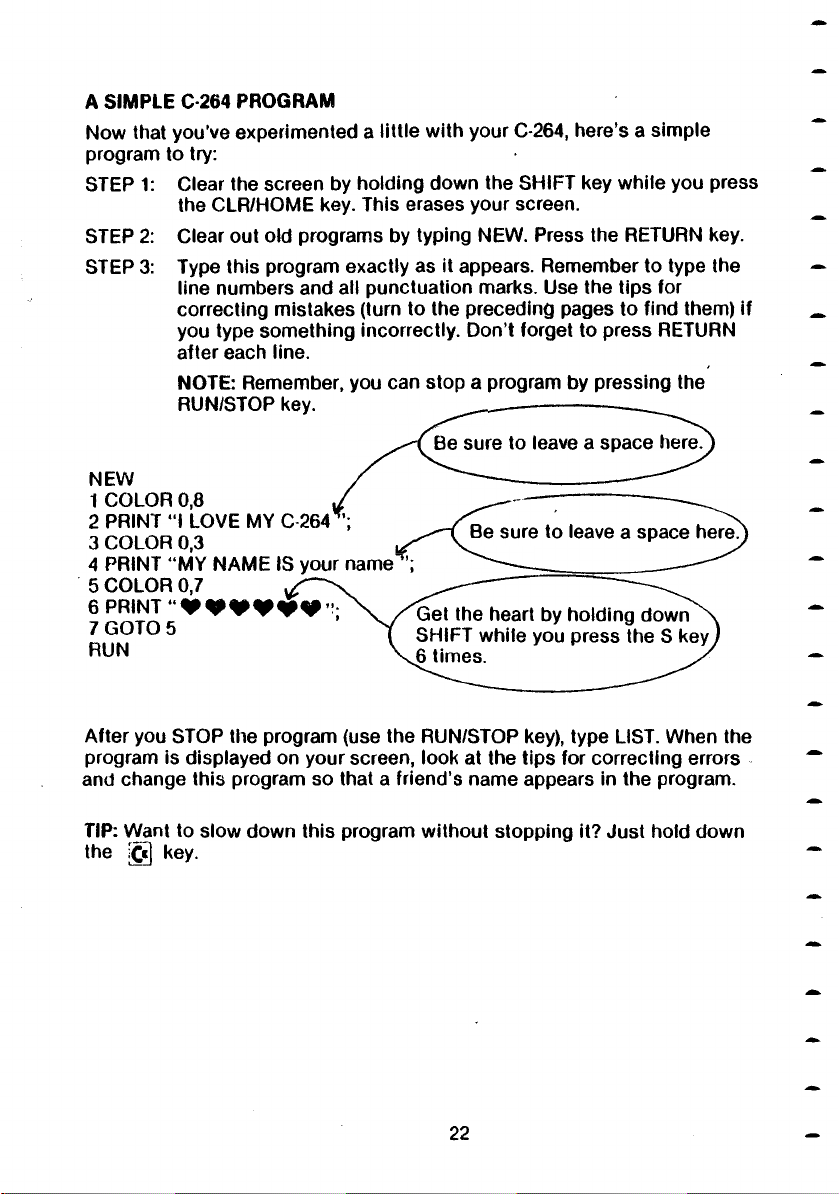
A SIMPLE C-264 PROGRAM
Now that you’ve experimented a little with your C-264, here’s a simple
program to try:
STEP 1: Clear the screen by holding down the S HIFT key while you press
the CLR/HOME key. This erases your screen.
STEP 2: Clear out old programs by typing NEW. Press the RETURN key.
STEP 3: Type this program exactly as it appears. Remember to type the
line numbers and all punctuation marks. Use the tips for
correcting mistakes (turn to the preceding pages to find them) if
you type something incorrectly. Don’t forget to press RETURN
after each line.
NOTE: Remember, you can stop a program by pressing the
RUN/STOP key.
Be sure to leave a space here.
NEW
1 COLOR 0,8
2 PRINT “I LOVE MY C-2641’;
3 COLOR 0 3
4 PRINT “MY NAME IS your name1’;
5 COLOR 0,7
6 PRINT “ <
7 GOTO 5
RUN
j6 times.
Be sure to leave a space here.j
Get the heart by holding down
SHIFT while you press the S keyj
After you STOP the program (use the RUN/STOP key), type LIST. When the
program is displayed on your screen, look at the tips for correcting errors
and change this program so that a friend’s name appears in the program.
TIP: Want to slow down this program without stopping it? Just hold down
the £ 3 key.
22
Page 29
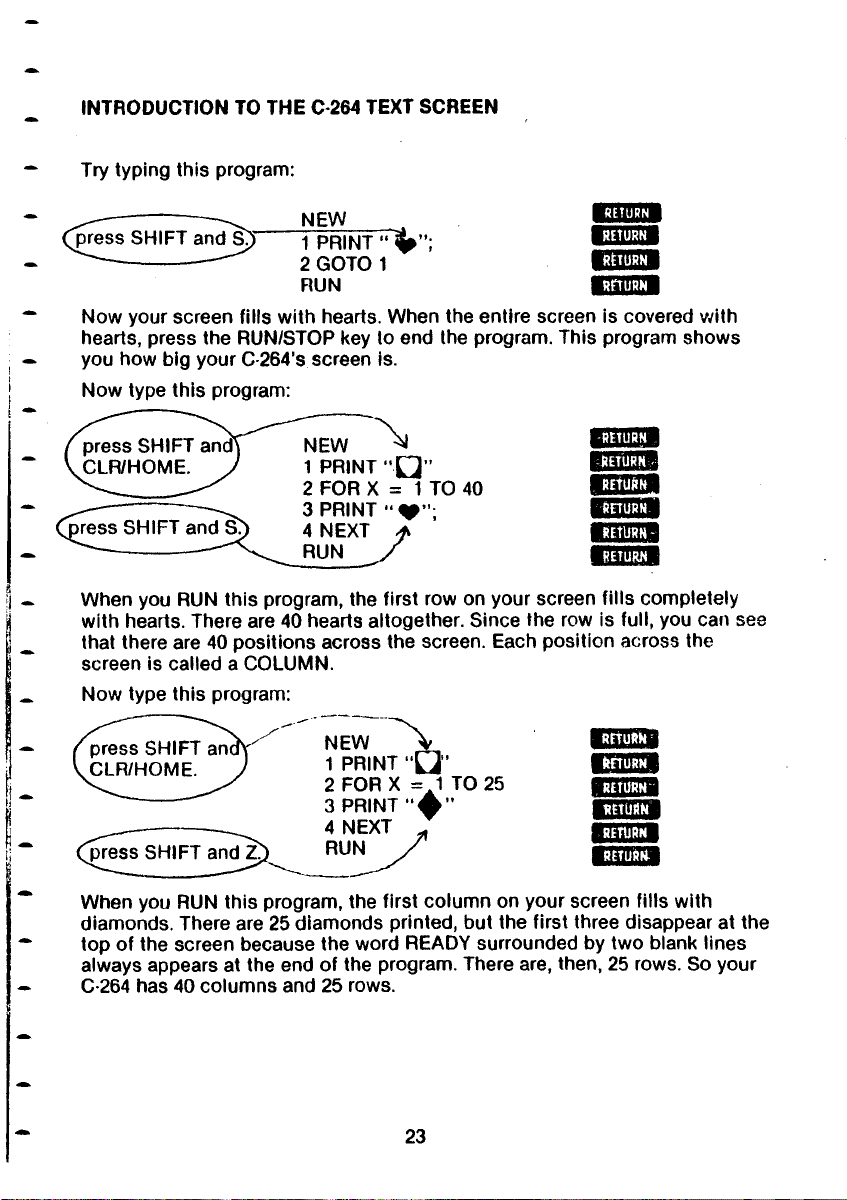
INTRODUCTION TO THE C-264 TEXT SCREEN
Try typing this program:
RETURN
RETURN
RETURN
RETURN
^pmssSHIFTand^S?f
NEW
1 PRINT “ | > ”;
2 GOTO 1
RUN
Now your screen fills with hearts. When the entire screen is covered with
hearts, press the RUN/STOP key to end the program. This program shows
you how big yourC-264'sscreen is.
Now type this program:
NEW ^
1 PRINT MQ ”
2 FOR X = 1 TO 40
3 PRINT “ V ;
4 NEXT
RUN
When you RUN this program, the first row on your screen fills completely
with hearts. There are 40 hearts altogether. Since the row is full, you can see
that there are 40 positions across the screen. Each position across the
screen is called a COLUMN.
Now type this program:
press SHIFT anc
kCLR/HOME.
^prespress SH IFT and Z.
NEW
l T ^ Q '
1 PRINT
2 FOR X = 1 TO 25
3 PRINT " m '
4 NEXT
RUN
RETURN
RETURN
RETURN
RETURN
RETURN
RETURN
When you RUN this program, the first column on your screen fills with
diamonds. There are 25 diamonds printed, but the first three disappear at the
top of the screen because the word READY surrounded by two blank lines
always appears at the end of the program. There are, then, 25 rows. So your
C-264 has 40 columns and 25 rows.
23
Page 30
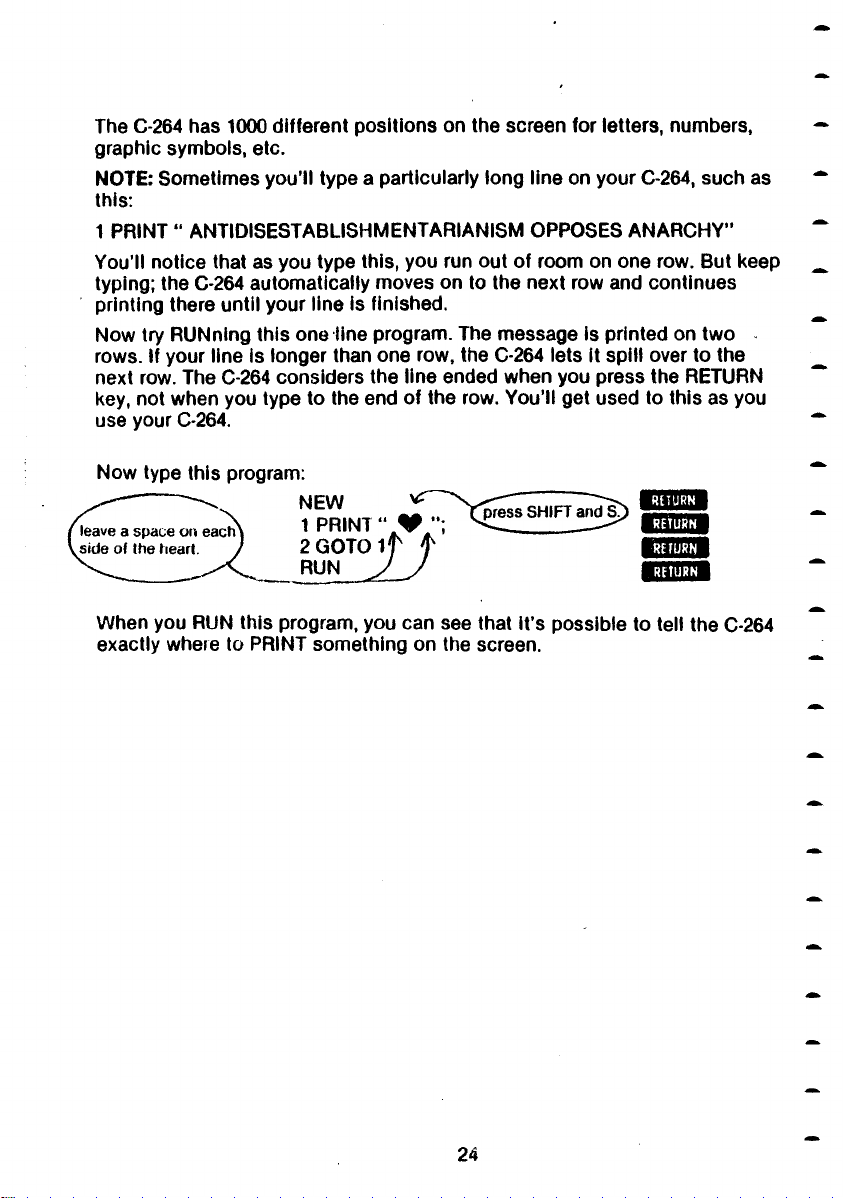
The C-264 has 1000 different positions on the screen for letters, numbers,
graphic symbols, etc.
NOTE: Sometimes you'll type a particularly long line on your C-264, such as
this:
1 PRINT “ ANTIDISESTABLISHMENTARIANISM OPPOSES ANA RCHY”
You’ll notice that as you type this, you run out of room on one row. But keep
typing; the C-264 automatically moves on to the next row and continues
printing there until your line is finished.
Now try RUNning this one line program. The message is printed on two ■
rows. If your line is longer than one row, the C-264 lets it spill over to the
next row. The C-264 considers the line ended when you press the RETURN
key, not when you type to the end of the row. You’ll get used to this as you
use your C-264.
Now type this program:
NEW
1 PRINT
2 GOTO
RUN
RETURN
RETURN
RETURN
RETURN
When you RUN this program, you can see that it’s possible to tell the C-264
exactly where to PRINT something on the screen.
24
Page 31
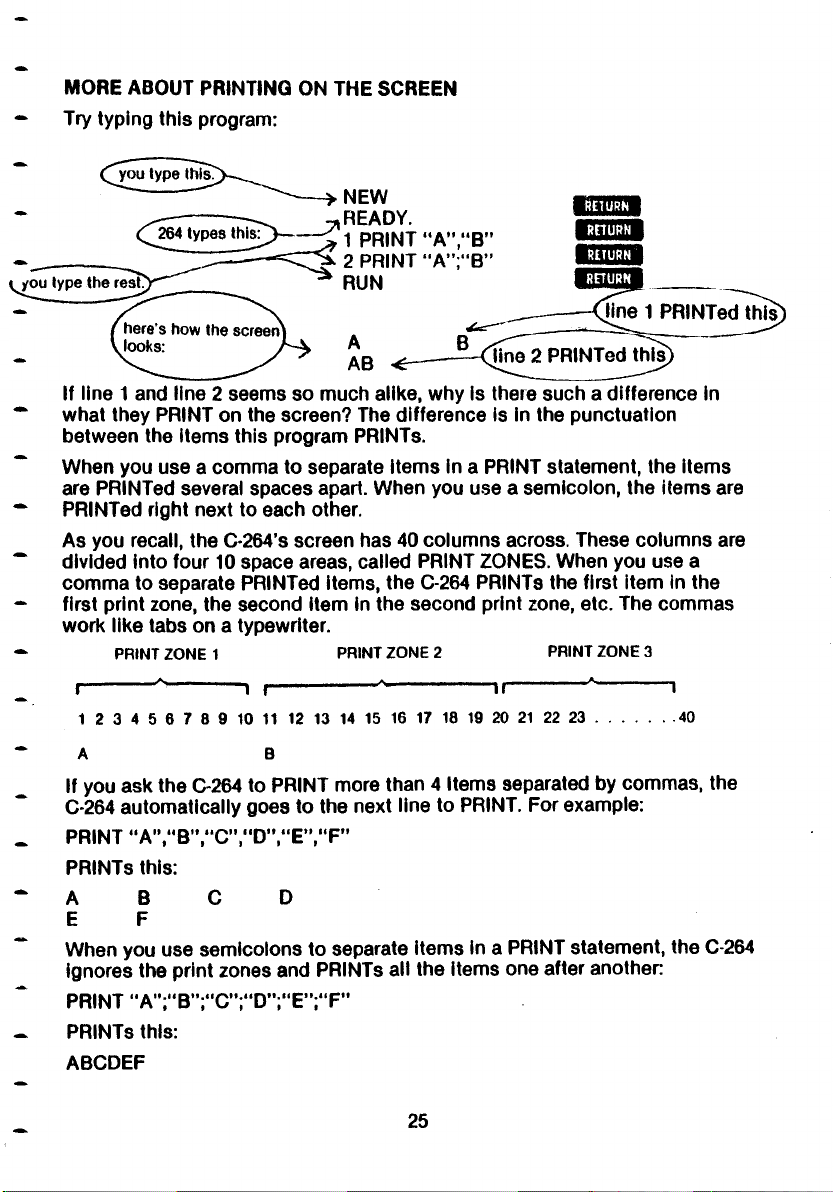
MORE ABOUT PRINTING ON THE SCREEN
Try typing this program:
NEW
READY.
1 PRINT “A’V'B "
2 PRINT “A”;“B”
RUN
RETURN
RETURN
RETURN
RETURN
A
AB <r
If line 1 and line 2 seems so much alike, why is there such a difference in
what they PRINT on the screen? The difference is in the punctuation
between the items this program PRINTs.
When you use a comma to separate items in a PRINT statement, the items
are PRINTed several spaces apart. When you use a semicolon, the items are
PRINTed right next to each other.
As you recall, the C-264's screen has 40 columns across. These columns are
divided into four 10 space areas, called PRINT ZONES. When you use a
com ma to separate PRINTed items, the C-264 PRINTs the first item in the
first print zone, the second item in the second print zone, etc. The commas
work like tabs on a typewriter.
PRINT ZON E 1 PRINT ZON E 2 PRINT ZO N E 3
I
--------------
1 2 3 4 5 6 7 8 9 10 11 12 13 14 15 16 17 18 19 20 21 22 23 ....................40
* A B
1 I
---------------------
1|
---------------*--------------
1
_ If you ask the C-264 to PRINT more than 4 Items separated by commas, the
“ C-264 automatically goes to the next line to PRINT. For example:
PRINT “A”,“B”,“C”,‘‘D”,“E”,“F”
PRINTs this:
A B C D
E F
~ When you use semicolons to separate items in a PRINT statement, the C-264
ignores the print zones and PRINTs all the items one after another
PRINT ,'A”;“B”;‘,C";“D,,;“E’,;“F”
PRINTs this:
ABCDEF
25
Page 32
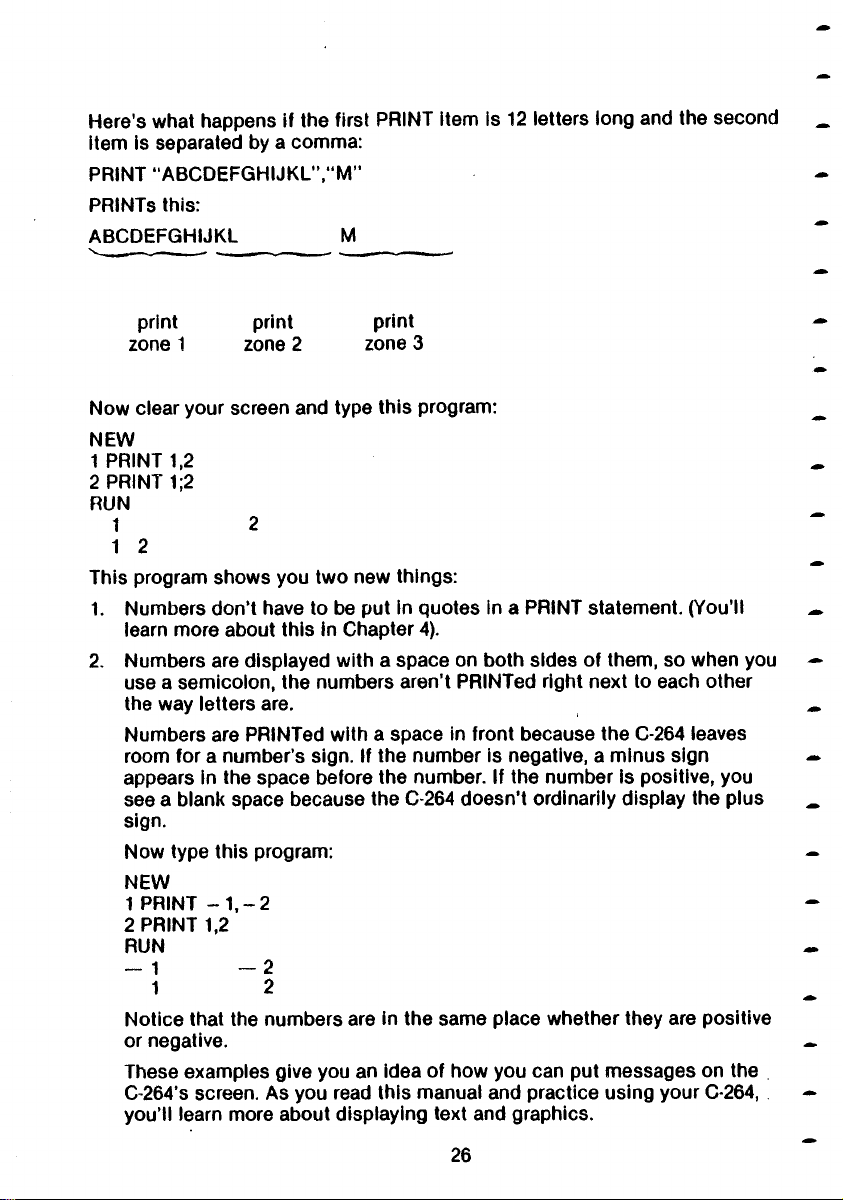
Here’s what happens if the first PRINT item is 12 letters long and the second
item is separated by a comma:
PRINT “ABCDEFGHIJKL” ,“M ”
PRINTs this:
ABCDEFGHIJKL M
print print print
zone 1 zone 2 zone 3
Now clear your screen and type this program:
NEW
1 PRINT 1,2
2 PRINT 1;2
RUN
1 2
1 2
This program shows you two new things:
1. Numbers don’t have to be put in quotes in a PRINT statement. (You’ll
learn more about this in Chapter 4).
2. Numbers are displayed with a space on both sides of them, so when you
use a semicolon, the numbers aren't PRINTed right next to each other
the way letters are.
Numbers are PRINTed with a space in front because the C-264 leaves
room for a number’s sign. If the number is negative, a minus sign
appears in the space before the number. If the number is positive, you
see a blank space because the C-264 doesn’t ordinarily display the plus
sign.
Now type this program:
NEW
1 PRINT - 1 ,-2
2 PRINT 1,2
RUN
— 1 — 2
1 2
Notice that the numbers are in the same place whether they are positive
or negative.
These examples give you an idea of how you can put messages on the
C-264's screen. As you read this manual and practice using your C-264,
you’ll learn more about displaying text and graphics.
26
Page 33
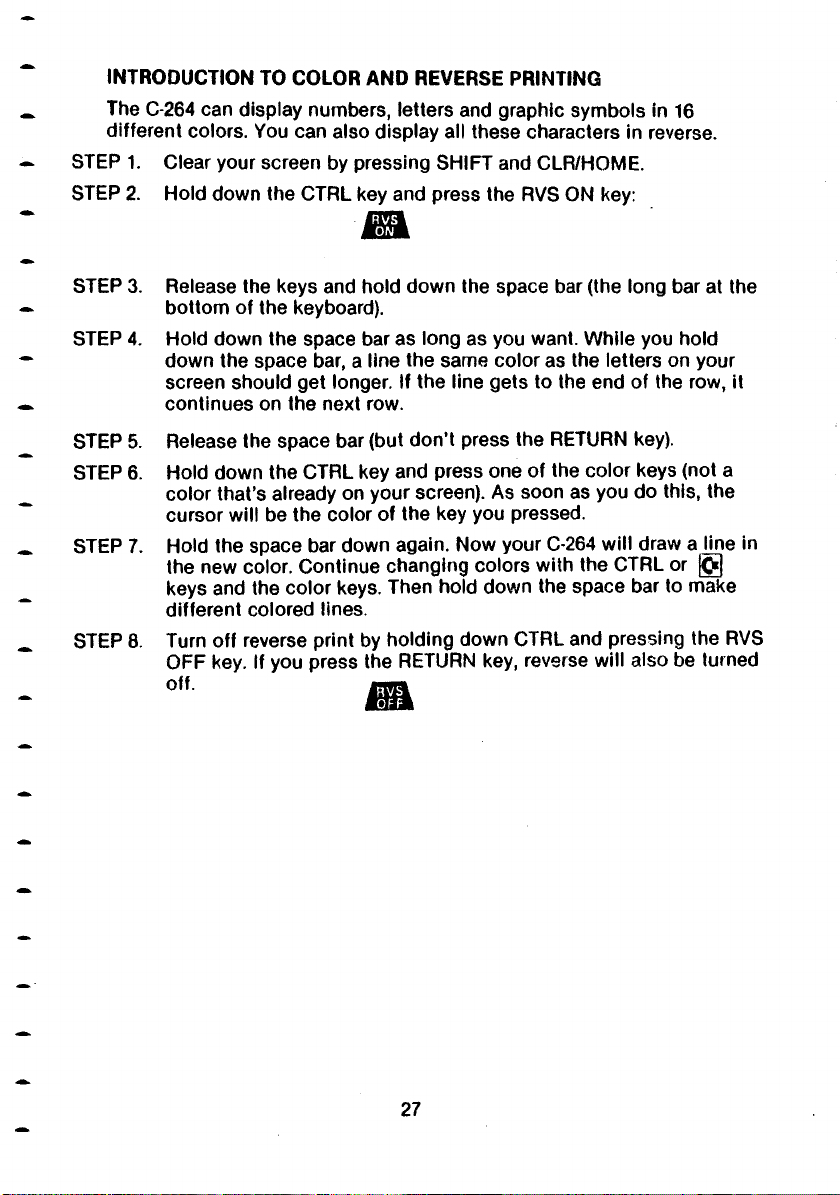
INTRODUCTION TO COLOR AND REVERSE PRINTING
The C-264 can display numbers, letters and graphic symbols in 16
different colors. You can also display all these characters in reverse.
STEP 1. Clear your screen by pressing SHIFT and CLR/HOME.
STEP 2. Hold down the CTRL key and press the RVS ON key:
EFFk
I < M
STEP 3. Release the keys and hold down the space bar (the long bar at the
bottom of the keyboard).
STEP 4. Hold down the space bar as long as you want. While you hold
down the space bar, a line the same color as the letters on your
screen should get longer. If the line gets to the end of the row, it
continues on the next row.
STEP 5. Release the space bar (but don’t press the RETURN key).
STEP 6. Hold down the CTRL key and press one of the color keys (not a
color that’s already on your screen). As soon as you do this, the
cursor will be the color of the key you pressed.
STEP 7. Hold the space bar down again. Now your C-264 will draw a line in
the new color. Continue changing colors with the CTRL or ^ ]
keys and the color keys. Then hold down the space bar to make
different colored lines.
STEP 8. Turn off reverse print by holding down CTRL and pressing the RVS
OFF key. If you press the RETURN key, reverse will also be turned
off.
27
Page 34
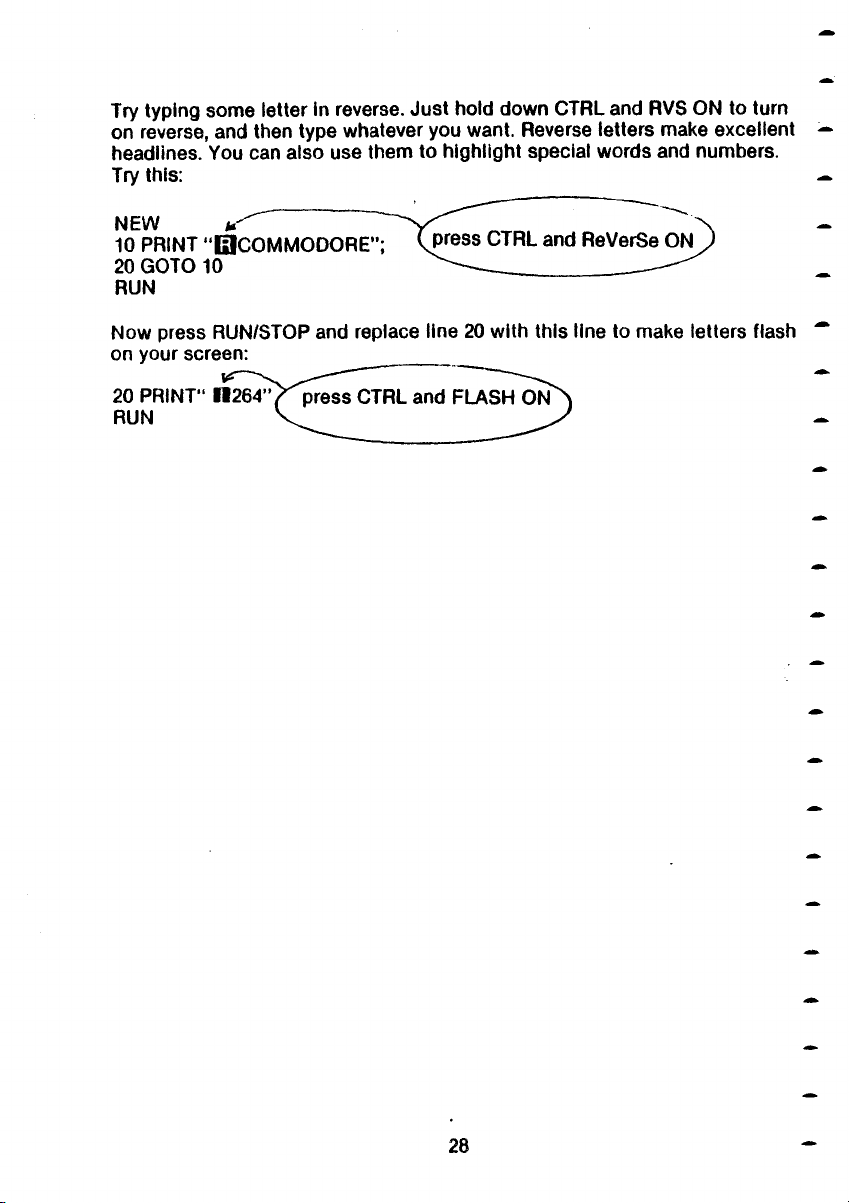
Try typing some letter in reverse. Just hold down CTRL and RVS ON to turn
on reverse, and then type whatever you want. Reverse letters make excellent
headlines. You can also use them to highlight special words and numbers.
Try this:
NEW *
10 PRINT “0
20 GOTO 10
RUN
Now press RUN/STOP and replace line 20 with this line to make letters flash
on your screen:
20 PRINT" H26 4 " f press CTRL and FLASH O N
RUN V
Page 35
CHAPTER
USING SOFTWARE
• Introduction.
• How to use built-in software.
• How to load cartridges.
• How to load cassette tapes.
• How to save programs on cassette
tapes.
• How to load programs from diskette.
• How to header a diskette.
• How to save programs on diskette.
• How to find out what programs are on a
diskette.
• Getting software through
telecommunications.
29
Page 36
INTRODUCTION
The family of software available for your C-264 is growing quickly. Your
dealer can keep you up-to-date on new products and inform you about the
features of software that's currently available.
Your Commodore 264 can use software that is built-in or that is recorded on
CARTRIDGES, CASSETTE TAPES, and DISKETTES that are available from
your Commodore dealer. All you do is load them into your C-264. And you •
can create and store your own programs on cassette tapes or floppy disks.
HOW TO USE BUILT-IN SOFTWARE
Your C-264 can be equipped with a wide variety of function key software
packages. These are programs built into the C-264, which you call by
pressing the appropriate FUNCTION key. The programs range from Logo to
The Magic Desk. The built-in package is always available for use. When you
turned on your C-264, both BASIC and the function key software packages
announce themselves through their power-on messages. Also, you can use
the KEY command to see the function key definitions. If there is function
key software built Into your C-264, the definition for KEY 1 will be:
SYSXXXX:package name. Just press function key f1 and hit RETURN to
enter the built-in program.
Function key software packages are also available on cartridge. If you have
plugged in a function key cartridge into your C-264, start the program by
pressing function key f2.
HOW TO LOAD CARTRIDGES
You can use a variety of business and personal programs, as well as
exciting, arcade-style games available on cartridge for your C-264.
Follow these steps to load cartridges:
30
Page 37
STEP 1 TURN O FF your C-264.
IMPORTANT: YOU MUST TURN OFF YOUR COMPUTER BEFORE YOU
INSERT OR REMOVE CARTRIDGES. IF YOU DON’T, YOU MAY DAMAGE
THE CARTRIDGE AND THE COMPUTER.
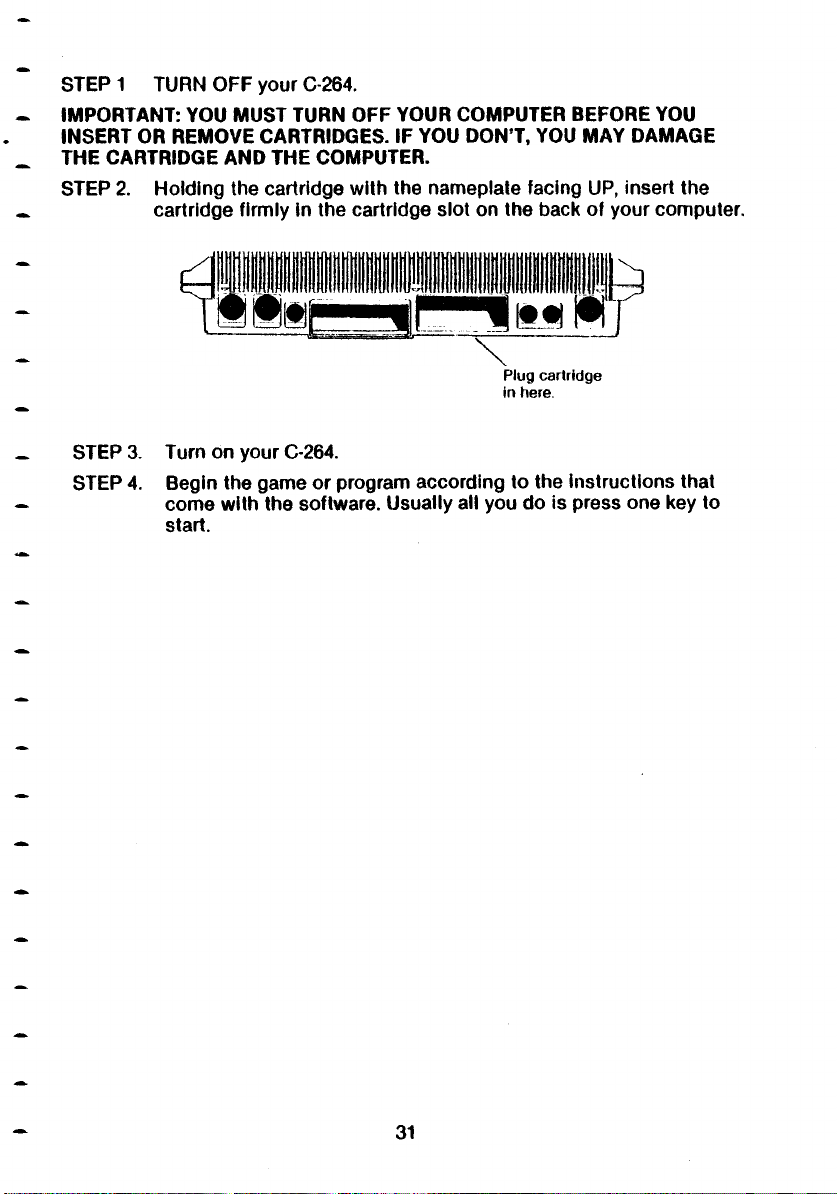
STEP 2. Holding the cartridge with the nameplate facing UP, insert the
cartridge firmly in the cartridge slot on the back of your computer.
Plug cartridge
in here.
STEP 3. Turn on your C-264.
STEP 4. Begin the game or program according to the instructions that
come with the software. Usually all you do is press one key to
start.
31
Page 38
HOW TO LOAD CASSETTE TAPES
A variety of software products for the C-264 is available on cassette tapes.
These cassette tapes look just like the ones with recorded music that you
can play on a stereo. Cassette tapes run in the Datassette tape recorder,
available from your Commodore dealer.
You can also use cassette tapes and the Datassette to store programs you
write yourself. The next section explains how to save programs on tape.
The steps for loading tape are the same whether you are using purchased
software or programs you saved yourself.
STEP 1. Insert the cassette into your cassette recorder and close the door.
STEP 2. Type LOAD and press the RETURN key. The computer displays
this message:
PRESS PLAY ON TAPE.
STEP 3. Rewind the tape to the beginning. The screen will go blank. Just i
press the REWIND button on the cassette recorder.
STEP 4. When the tape is rewound to the beginning, press the PLAY
button on the datassette.
When the program is found, the screen displays this message:
FOUND program name
STEP 5. Press the Commodore key to load this program. If there Is more
than one program on the tape, and the program the C-264 found
isn’t the one you want, press the space bar to keep searching.
When the program is loaded, the word READY appears. If you want to stop
the loading before it’s complete, press the RUN/STOP key. After the
software is loaded, type RUN to start the program. You can also LIST it or
change it, assuming it is a BASIC program.
To LOAD a specific program on the tape, use the LOAD “program name"
form of the LOAD command.
32
Page 39
HOW TO SAVE PROGRAMS ON CASSETTE TAPES
When you write a program and want to save it on cassette tape, follow these
steps:
STEP 1. Type:
SAVE “program name”
The program name you use can be anything you want, but can be no more
than 16 letters and/or numbers long.
STEP 2. Press the RETURN key. The computer displays this message:
PRESS RECORD AND PLAY ON TAPE
STEP 3. Press the RECORD and PLAY buttons on your cassette recorder.
The screen goes blank. When your program is saved, the word
READY appears on the screen.
Examples of SAVE Commands for Cassette Tape:
SAVE “MYJOB”
SAVE “3TEST”
Page 40
HOW TO LOAD PROGRAMS FROM DISKETTE
Disks are fast and easy to use. Be sure to handle your disks and your disk
drive carefully.
The steps are the same for loading all disks:
STEP 1. Make sure that your disk drive is ON.
STEP 2. Insert the disk into the disk drive. The label side of the disk must
face up. Put the disk in so that the labelled end goes in last while
the end with the exposed oval goes in first. Look for a little notch
on the disk (it might be covered with a little sticker). This notch Is
on the left side as you put in the disk, assuming that you’re facing
your disk drive. Be sure the disk is In all the way.
STEP 3. Close the protective door on the disk drive after you insert the
disk.
STEP 4. Type:
DLOAD "program name”
STEP 5. Press the RETURN key. The disk spins and your screen says:
SEARCHING FOR PROGRAM NAM E
LOADING
READY.
■
STEP 6. Your software is ready to use.
Type RUN and RETURN to start the program.
If the red light on the disk drive blinks after the DLOAD is finished,
something went wrong. You can find out what happened by typing:
RETURN
Examples of DLOAD commands:
DLOAD " * " LOADs the 1st program on the disk.
DLOAD “MYFILE” LOADs a disk program called MYFILE.
DLOAD "S E T*” LOADs the first program on the disk that begins
with the letters SET.
Page 41
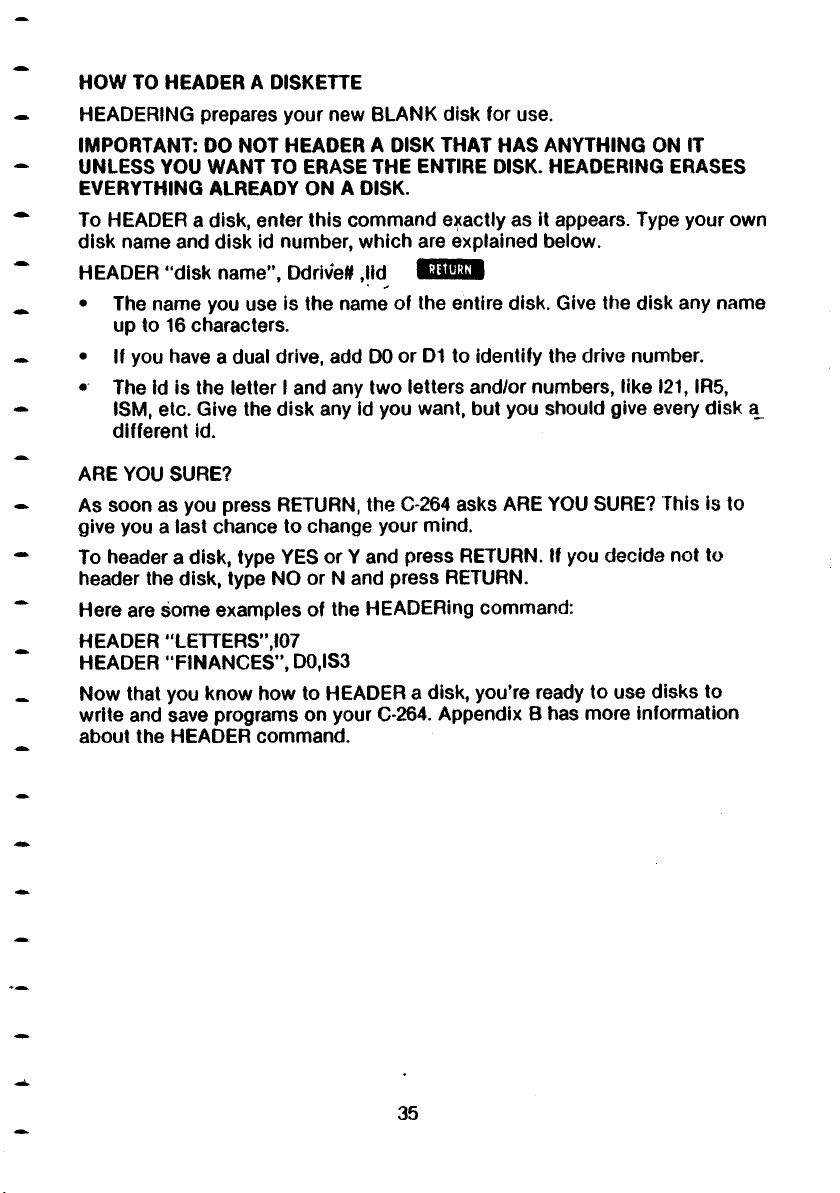
HOW TO HEADER A DISKETTE
HEADERING prepares your new BLANK disk for use.
IMPORTANT: DO NOT HEADER A DISK THAT HAS ANYTHING ON IT
UNLESS YOU WANT TO ERASE THE ENTIRE DISK. HEADERING ERASES
EVERYTHING ALREADY ON A DISK.
To HEADER a disk, enter this command exactly as it appears. Type your own
disk name and disk id number, which are explained below.
HEADER “disk name”, Ddrive# ,lid
• The name you use is the name of the entire disk. Give the disk any name
up to 16 characters.
• If you have a dual drive, add DO or D1 to identify the drive number.
• The id is the letter I and any two letters and/or numbers, like 121, IR5,
ISM, etc. Give the disk any id you want, but you should give every disk a^
different id.
ARE YOU SURE?
As soon as you press RETURN, the C-264 asks ARE YOU SURE? This is to
give you a last chance to change your mind.
To header a disk, type YES or Y and press RETURN. If you decide not to
header the disk, type NO or N and press RETURN.
Here are some examples of the HEADERing command:
HEADER "LETTERS",f07
HEADER “FINANCES”, D0,IS3
Now that you know how to HEADER a disk, you’re ready to use disks to
write and save programs on your C-264. Appendix B has more information
about the HEADER command.
RETURN
35
Page 42
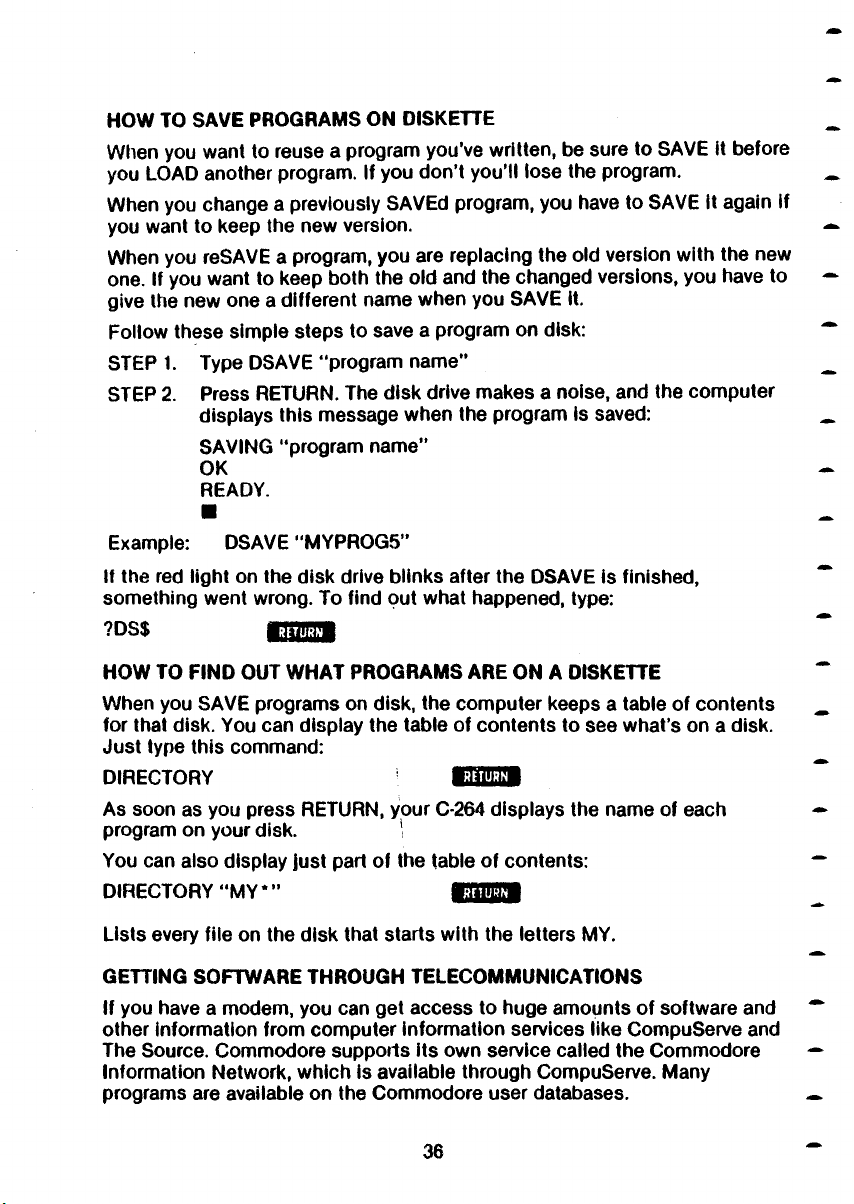
HOW TO SAVE PROGRAMS ON DISKETTE
When you want to reuse a program you’ve written, be sure to SAVE It before
you LOAD another program. If you don’t you’ll lose the program.
When you change a previously SAVEd program, you have to SAVE it again if
you want to keep the new version.
When you reSAVE a program, you are replacing the old version with the new
one. If you want to keep both the old and the changed versions, you have to
give the new one a different name when you SAVE it.
Follow these simple steps to save a program on disk:
STEP 1. T y peD S AV E‘‘program name”
STEP 2. Press RETURN. The disk drive makes a noise, and the computer
displays this message when the program is saved:
SAVING “program name”
OK
READY.
Example: DSAVE “MYPROG5”
If the red light on the disk drive blinks after the DSAVE is finished,
something went wrong. To find out what happened, type:
?DS$ l l f l l M
HOW TO FIND OUT WHA T PROGRAMS ARE ON A DISKETTE
When you SAVE programs on disk, the computer keeps a table of contents
for that disk. You can display the table of contents to see what’s on a disk.
Just type this command:
DIRECTORY
HtIURN
As soon as you press RETURN, your C-264 displays the name of each
program on your disk. 1
You can also display just part of the table of contents:
DIRECTORY "M Y*”
J*HURN
Lists every file on the disk that starts with the letters MY.
GETTING SOFTWARE THROUGH TELECOMM UNICATIONS
If you have a modem, you can get access to huge amounts of software and
other information from computer information services like CompuServe and
The Source. Commodore supports its own service called the Commodore
Information Network, which is available through CompuServe. Many
programs are available on the Commodore user databases.
36
Page 43
CHAPTER
BEGINNING BASIC
• Doing calculations on your C-264.
• Immediate mode.
• Using var|ables.
• Inputting information.
• Using loops: FOR . .. NEXT
37
Page 44
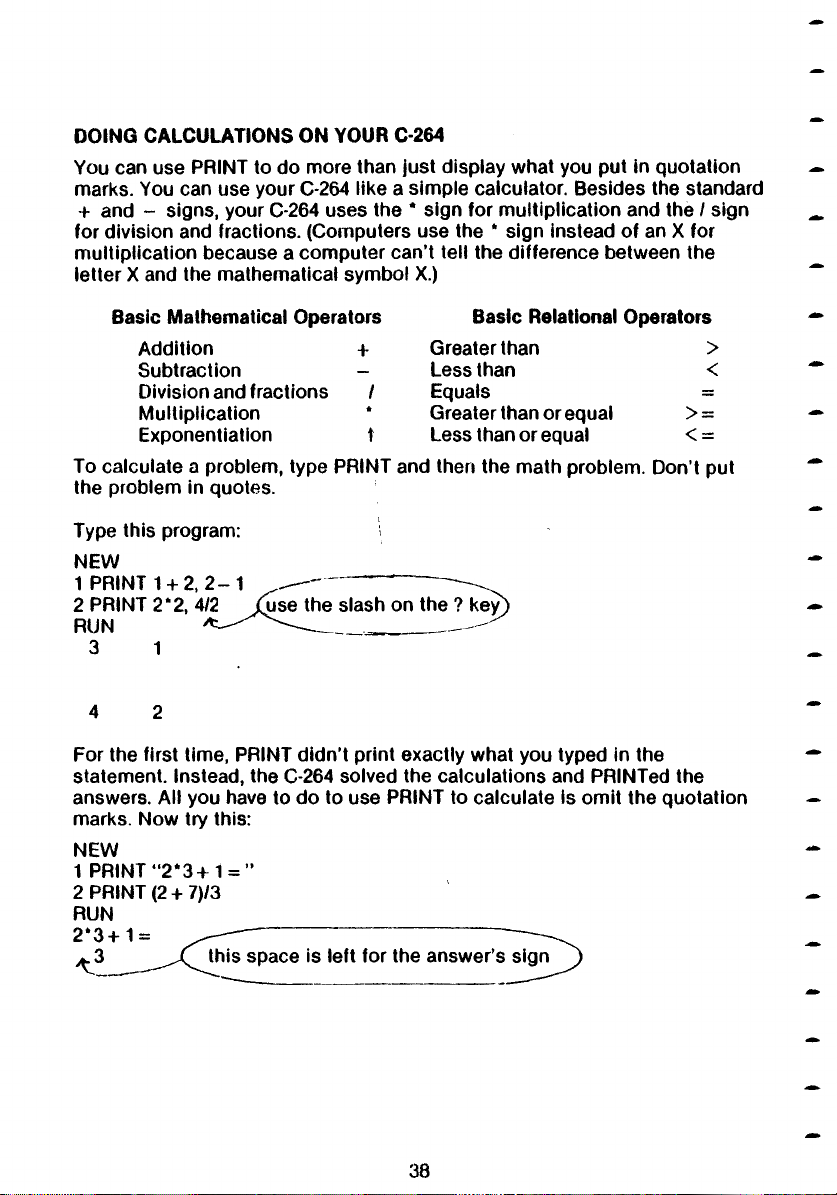
DOING CALCULATIONS ON YOUR C-264
You can use PRINT to do more than just display what you put in quotation
marks. You can use your C-264 like a simple calculator. Besides the standard
+ and - signs, your C-264 uses the * sign for multiplication and the / sign
for division and fractions. (Computers use the * sign instead of an X for
multiplication because a computer can’t tell the difference between the
letter X and the mathematical symbol X.)
Basic Mathematical Operators Basic Relational Operators
Addition
Subtraction
Division and fractions
Multiplication
Exponentiation
+
—
/
*
t
To calculate a problem, type PRINT
Greaterthan
Less than
Equals
Greater than orequal
Less than or equal
and then the math problem.
>
<
=
> =
< =
Don’t put
the problem in quotes.
Type this program:
NEW
1 PRINT 1 + 2, 2
2 PRINT 2*2, 4/2
use the slash on the
RUN *
3 1
4 2
For the first time, PRINT didn’t print exactly what you typed in the
statement. Instead, the C-264 solved the calculations and PRINTed the
answers. All you have to do to use PRINT to calculate is omit the quotation
marks. Now try this:
NEW
1 PRINT “2 *3 + 1 = ”
2 PRINT (2 + 7)/3
RUN
2 *3 + 1 = ^ ^ — ^
^ 3 ^ ^ ^ ^ j ^ t h is space is left for the answer’s signJ^)
Page 45
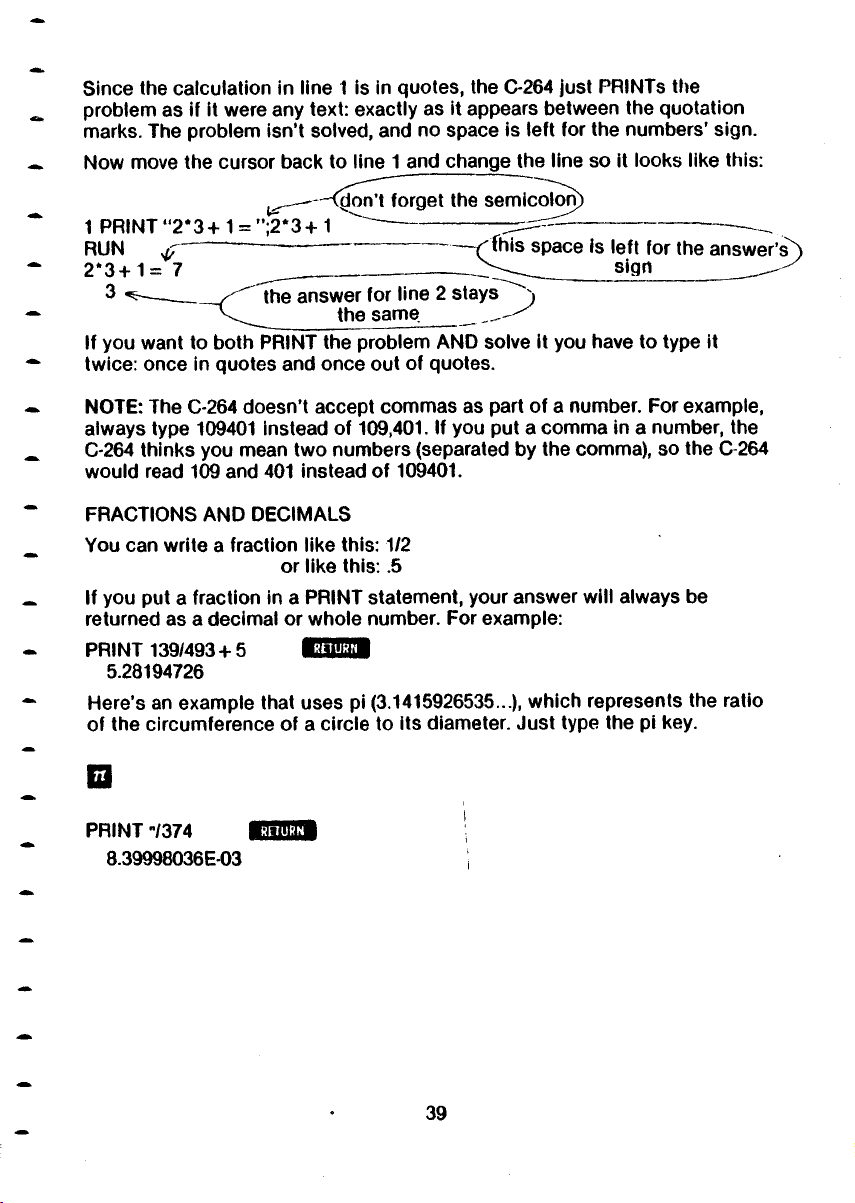
Since lhe calculation in line 1 is in quotes, the C-264 just PRINTs the
problem as if it were any text: exactly as it appears between the quotation
marks. The problem isn’t solved, and no space is left for the numbers’ sign.
Now move the cursor back to line 1 and change the line so it looks like this:
, ^ ^ ^ io nT f o rg et the semicolon)
1 PRINT “2*3+ 1 = ";2*3 + 1 ^ "
RUN #
----------
-----------------------------
2*3+1= 7 _ _ ___________-—
3 ----------------^ ^ the answer for line 2 stays
If you want to both PRINT the problem AND solve it you have to type it
twice: once in quotes and once out of quotes.
NOTE: The C-264 doesn’t accept commas as part of a number. For example,
always type 109401 instead of 109,401. If you put a comma in a number, the
C-264 thinks you mean two numbers (separated by the comma), so the C-264
would read 109 and 401 instead of 109401.
FRACTIONS AND DECIMALS
You can write a fraction like this: 1/2
or like this: .5
If you put a fraction in a PRINT statement, your answer will always be
returned as a decimal or whole number. For example:
PRINT 139/493 + 5
5.28194726
Here’s an example that uses pi (3.1415926535...), which represents the ratio
of the circumference of a circle to its diameter. Just type the pi key.
RH U R N
---------
fhis space is left for the answer’s^)
^ sign ^
thesame _..-
PRINT "/374
8.39998036E-03
RHURN
39
Page 46
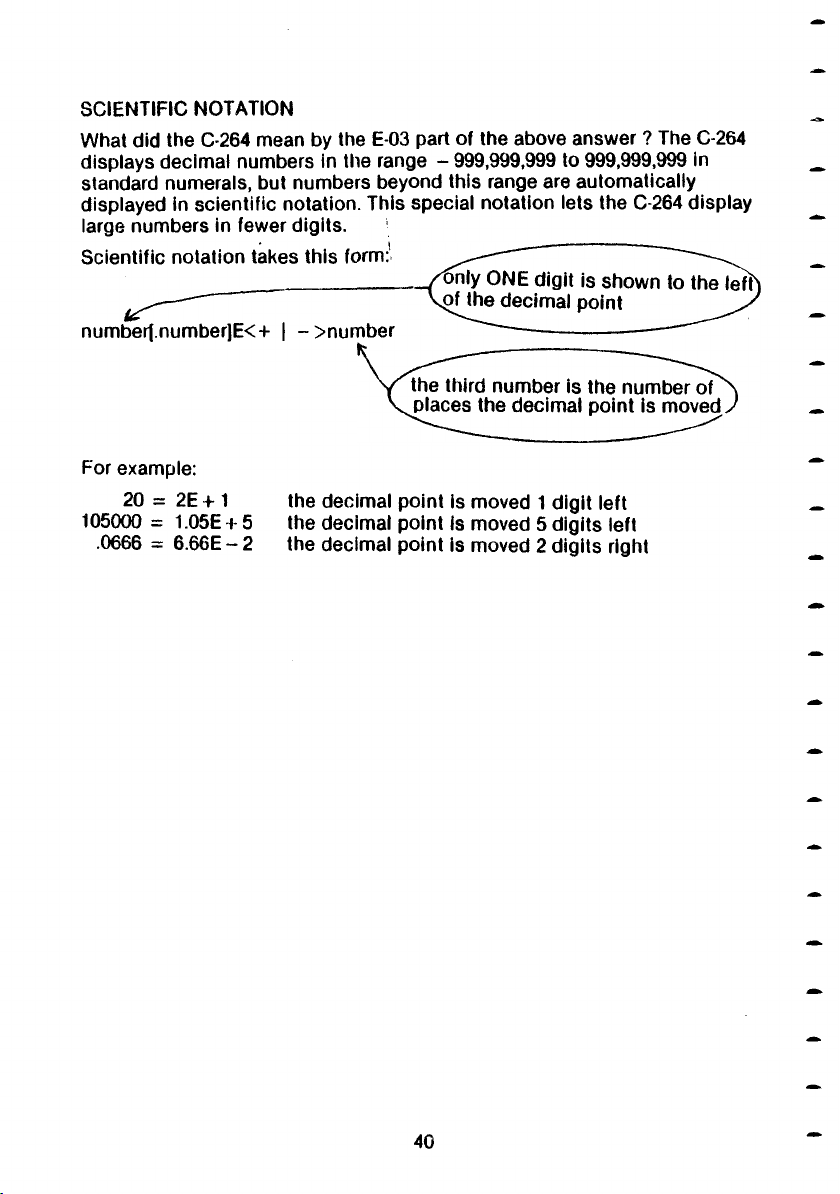
SCIENTIFIC NOTATION
What did the C-264 mean by the E-03 part of the above answer ? The C-264
displays decimal numbers in the range - 999,999,999 to 999,999,999 in
standard numerals, but numbers beyond this range are automatically
displayed in scientific notation. This special notation lets the C-264 display
large numbers in fewer digits.
Scientific notation takes this fc
numbef|.numberJE<+ | - >nun
For example:
20 = 2 E +1
105000 = 1.05E + 5
.0666 = 6 .6 6 E-2
the decimal point is moved 1 digit left
the decimal point is moved 5 digits left
the decimal point is moved 2 digits right
Page 47
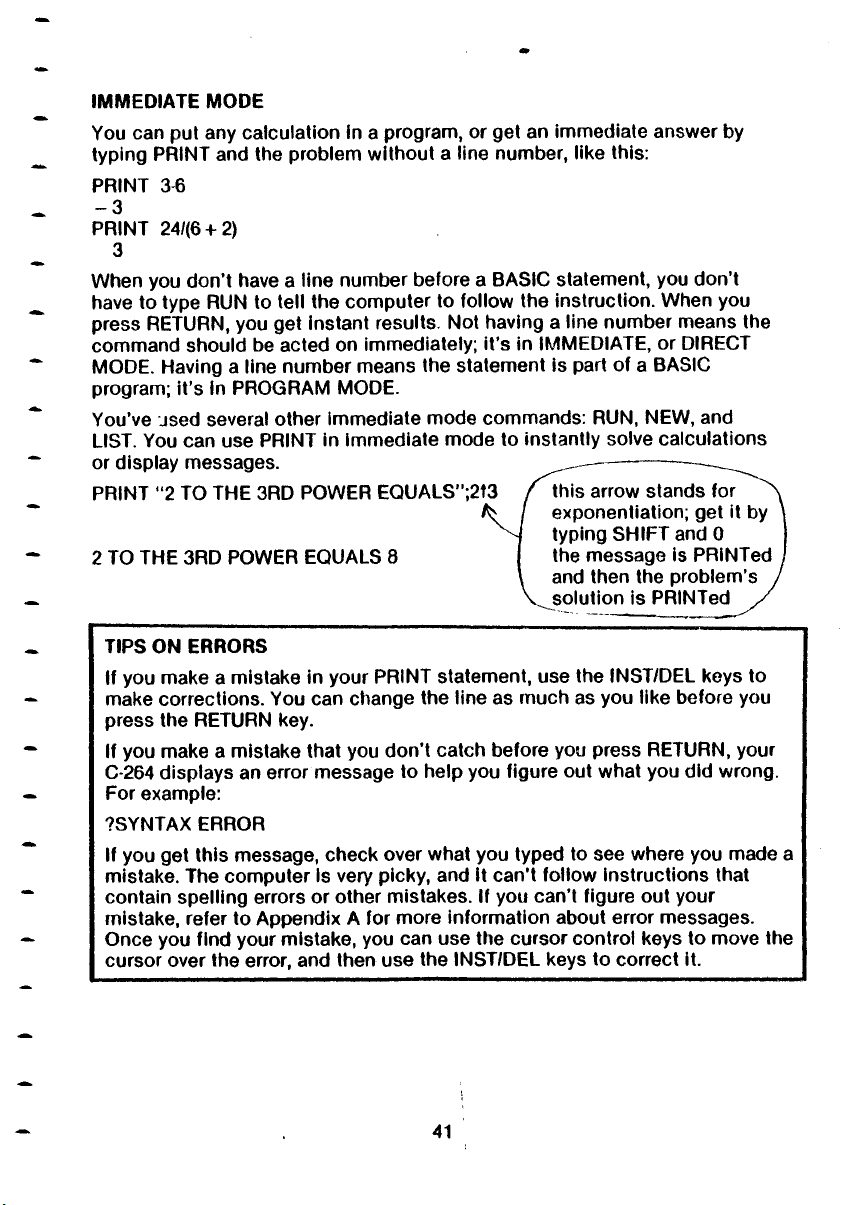
IMMEDIATE MODE
You can put any calculation in a program, or get an immediate answer by
typing PRINT and the problem without a line number, like this:
PRINT 343
- 3
PRINT 24/(6 + 2)
3
When you don’t have a line number before a BASIC statement, you don’t
have to type RUN to teli the computer to follow the instruction. When you
press RETURN, you get instant results. Not having a line number means the
command should be acted on immediately; it’s in IMMEDIATE, or DIRECT
MODE. Having a line number means the statement is part of a BASIC
program; it’s in PROGRAM MODE.
You’ve used several other immediate mode commands: RUN, NEW, and
LIST. You can use PRINT in immediate mode to instantly solve calculations
or display messages.
PRINT “2 TO THE 3RD POWER EQUALS";2t3
2 TO THE 3RD POWER EQUALS 8
TIPS ON ERRORS
if you make a mistake in your PRINT statement, use the INST/DEL keys to
make corrections. You can change the line as much as you like before you
press the RETURN key.
If you make a mistake that you don’t catch before you press RETURN, your
C-264 displays an error message to help you figure out what you did wrong.
For example:
7SYNTAX ERROR
If you get this message, check over what you typed to see where you made a
mistake. The computer Is very picky, and It can't foliow instructions that
contain spelling errors or other mistakes. If you can’t figure out your
mistake, refer to Appendix A for more information about error messages.
Once you find your mistake, you can use the cursor control keys to move the
cursor over the error, and then use the INST/DEL keys to correct it.
this arrow stands for
exponentiation; get it by
typing SH IFT and 0
the message is PRiNTed
and then the problem’s
solution is PRiNTed
4t
Page 48
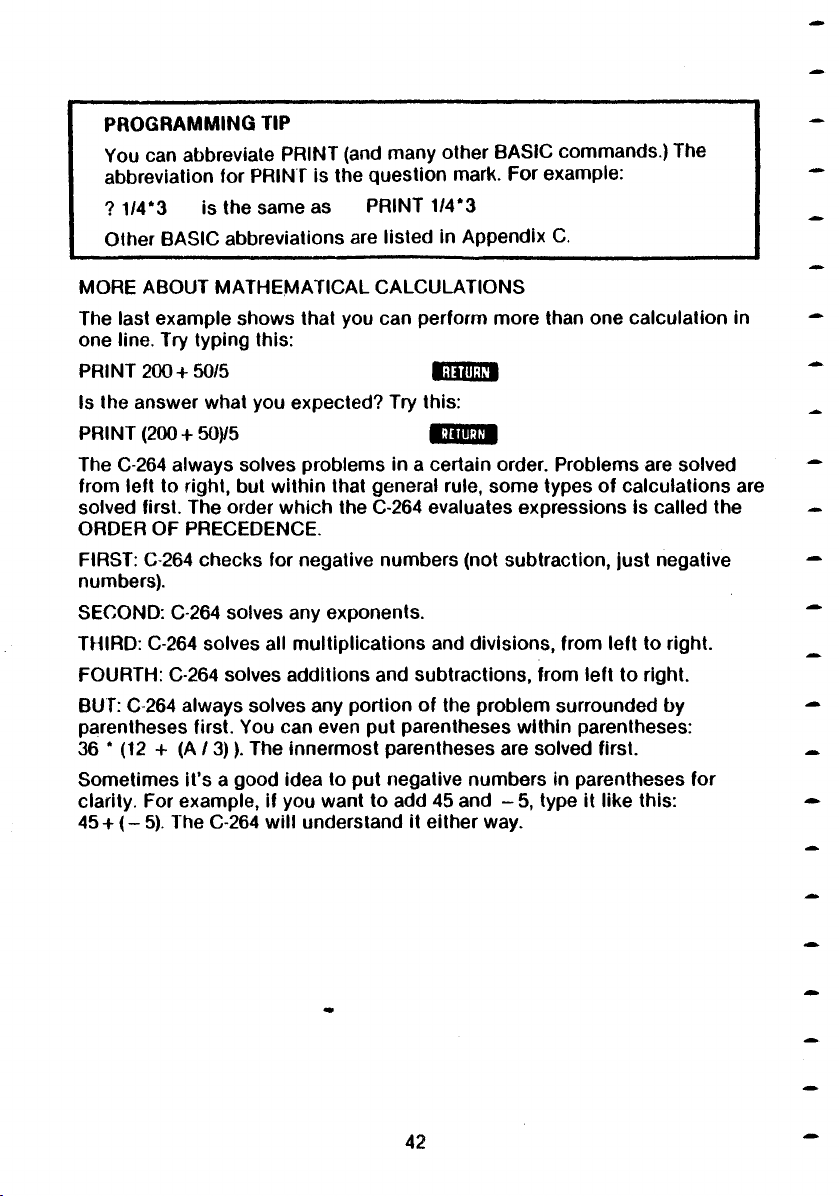
PROGRAM MINQ TIP
You can abbreviate PRINT (and many other BASIC commands.) The
abbreviation for PRINT is the question marK. For example:
? 1/4*3 is the same as PRINT 1/4*3
Other BASIC abbreviations are listed in Appendix C.
MORE ABOUT MATHEMATICAL CALCULATIONS
The last example shows that you can perform more than one calculation in
one line. Try typing this:
PRINT 200 + 50/5
RETURN
Is the answer what you expected? Try this:
PRINT (200 + 50y5
RETURN
The C-264 always solves problems in a certain order. Problems are solved
from left to right, but within that general rule, some types of calculations are
solved first. The order which the C-264 evaluates expressions is called the
ORDER OF PRECEDENCE.
FIRST: C-264 checks for negative numbers (not subtraction, just negative
numbers).
SECOND: C-264 solves any exponents.
THIRD: C-264 solves all multiplications and divisions, from left to right.
FOURTH: C-264 solves additions and subtractions, from left to right.
BUT: C-264 always solves any portion of the problem surrounded by
parentheses first. You can even put parentheses within parentheses:
36 * (12 + (A / 3)). The innermost parentheses are solved first.
Sometimes it's a good idea to put negative numbers in parentheses for
clarity. For example, if you want to add 45 and - 5, type it like this:
45 + ( - 5). The C-264 will understand it either way.
42
Page 49
USING VARIABLES
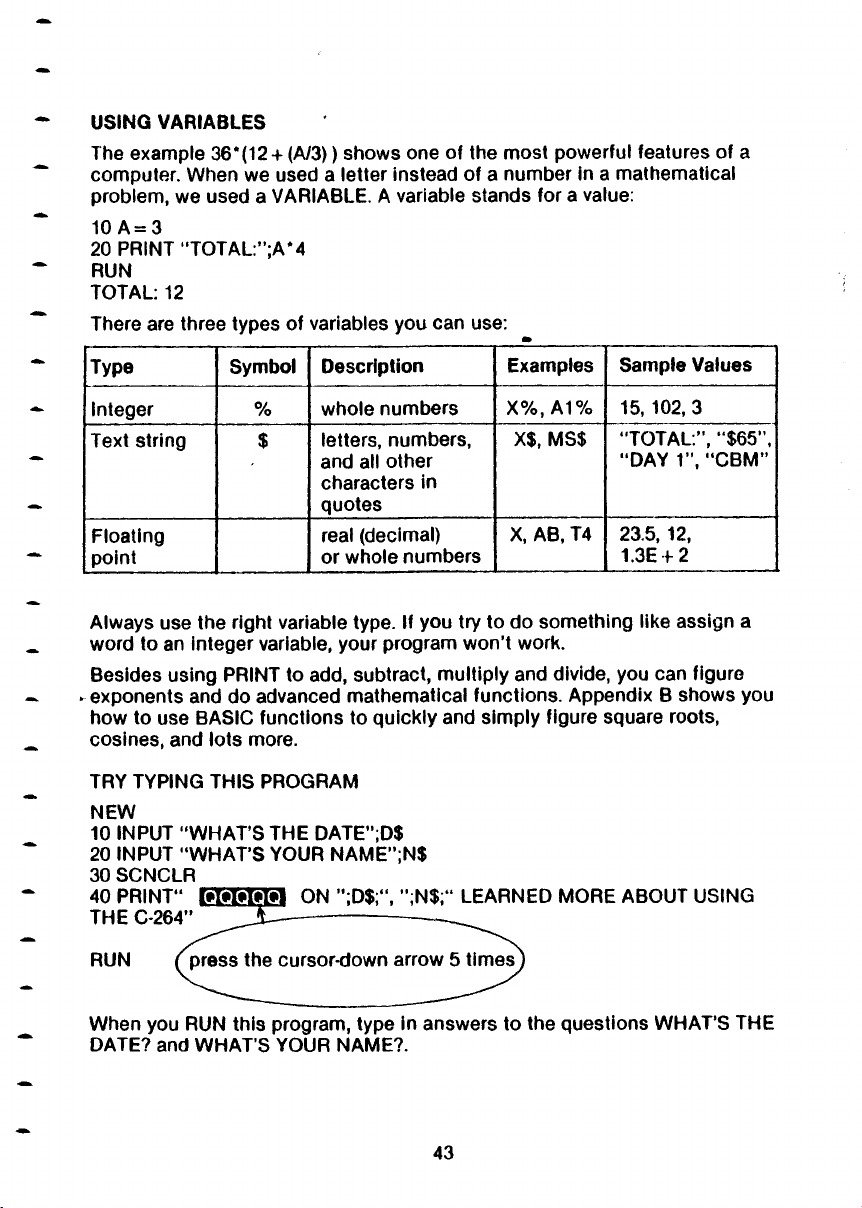
The example 36*(12 + (A/3)) shows one of the most powerful features of a
computer. When we used a letter instead of a number in a mathematical
problem, we used a VARIABLE. A variable stands for a value:
10A = 3
20 PRINT "TOTAL:";A*4
RUN
TOTAL: 12
There are three types of variables you can use:
Type
________
Integer
Text string
Floating
point
Always use the right variable type. If you try to do something like assign a
word to an integer variable, your program won’t work.
Besides using PRINT to add, subtract, multiply and divide, you can figure
* exponents and do advanced mathematical functions. Appendix B shows you
how to use BASIC functions to quickly and simply figure square roots,
cosines, and lots more.
TRY TYPING THIS PROGRAM
NEW
10 INPUT “W HAT’S THE DATE";D$
20 INPUT “WHAT’S YOUR NAME";N$
30 SCNCLR
40 PRINT” M e M e M ON ”;D$;“, ";N$;“ LEARNED
THE C-264”
Symbol
%
$
Description Examples
whole numbers
letters, numbers,
and all other
characters in
quotes___________
real (decimal)
or whole numbers
X%, A1% 15, 102, 3
X$, MS$
X, AB, T4
MORE ABOUT USING
Sample Values
“TOTAL:”, ''$6577,
"DAY 1”, “CBM”
23.5, 12,
1.3E + 2
________
RUN
When you RUN this program, type in answers to the
DATE? and W H AT’S YOUR NAME?.
press the cursor-down arrow 5 times
43
questions WHAT’S THE
Page 50
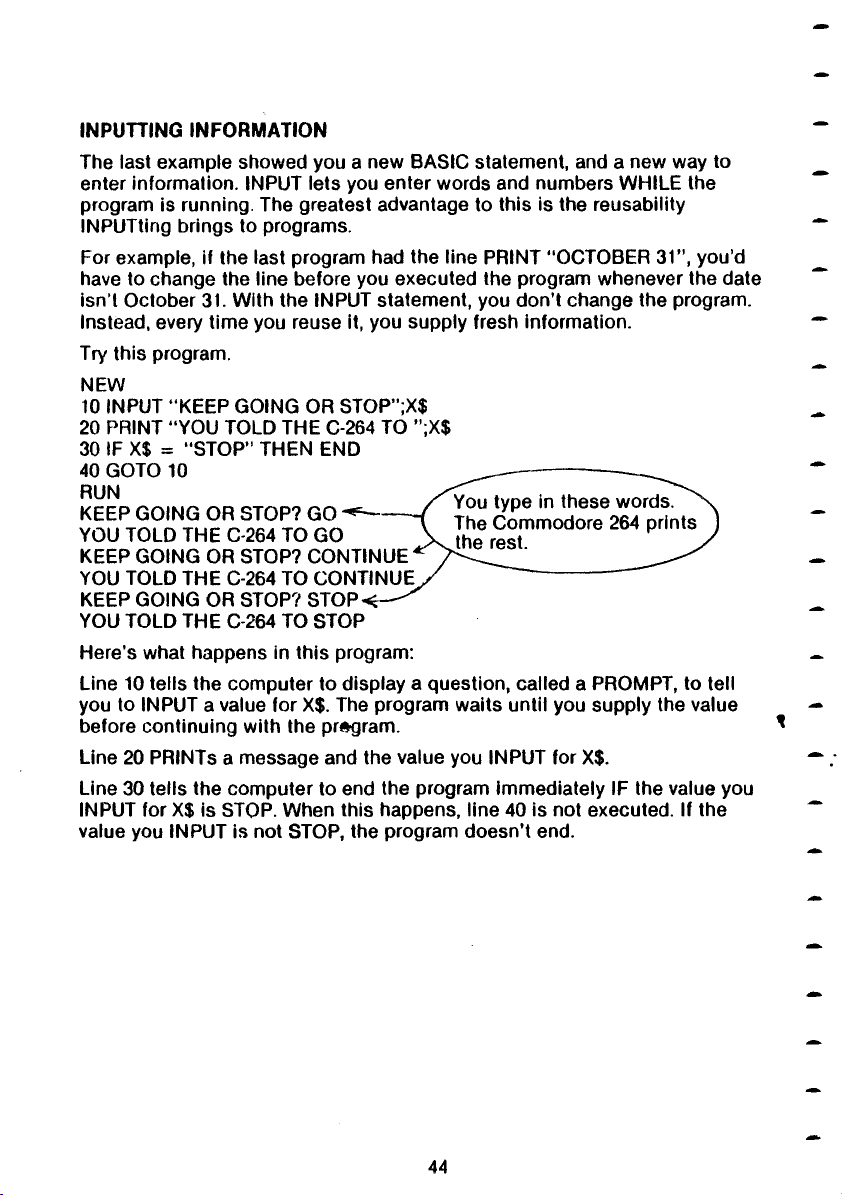
INPUTTING INFOR MATION
The last example showed you a new BASIC statement, and a new way to
enter information. INPUT lets you enter words and numbers WHILE the
program is running. The greatest advantage to this is the reusability
INPUTting brings to programs.
For example, if the last program had the line PRINT "OCTOBER 31” , you’d
have to change the line before you executed the program whenever the date
isn’t October 31. With the INPUT statement, you don’t change the program.
Instead, every time you reuse it, you supply fresh information.
Try this program.
NEW
10 INPUT "KEEP GOING OR STOP";X$
20 PRINT “YOU TOLD THE C-264 TO ”;X$
30 IF X$ = "STOP” THEN END
40 GOTO 10
RUN
KEEP GOING OR STOP? GO *
YOU TOLD THE C-264 TO GO
KEEP GOING OR STOP? CONTINUE
YOU TOLD THE C-264 TO CONTINUE
KEEP GOING OR STOP? STOP
YOU TOLD THE C-264 TO STOP
Here's what happens in this program:
Line 10 tells the computer to display a question, called a PROMPT, to tell
you to INPUT a value for X$. The program waits until you supply the value
before continuing with the pr#gram.
Line 20 PRINTs a message and the value you INPUT for X$.
Line 30 tells the computer to end the program immediately IF the value you
INPUT for X$ is STOP. When this happens, line 40 is not executed. If the
value you INPUT is not STOP, the program doesn’t end.
You type in these words.
The Commodore 264 prints
the rest.
44
Page 51
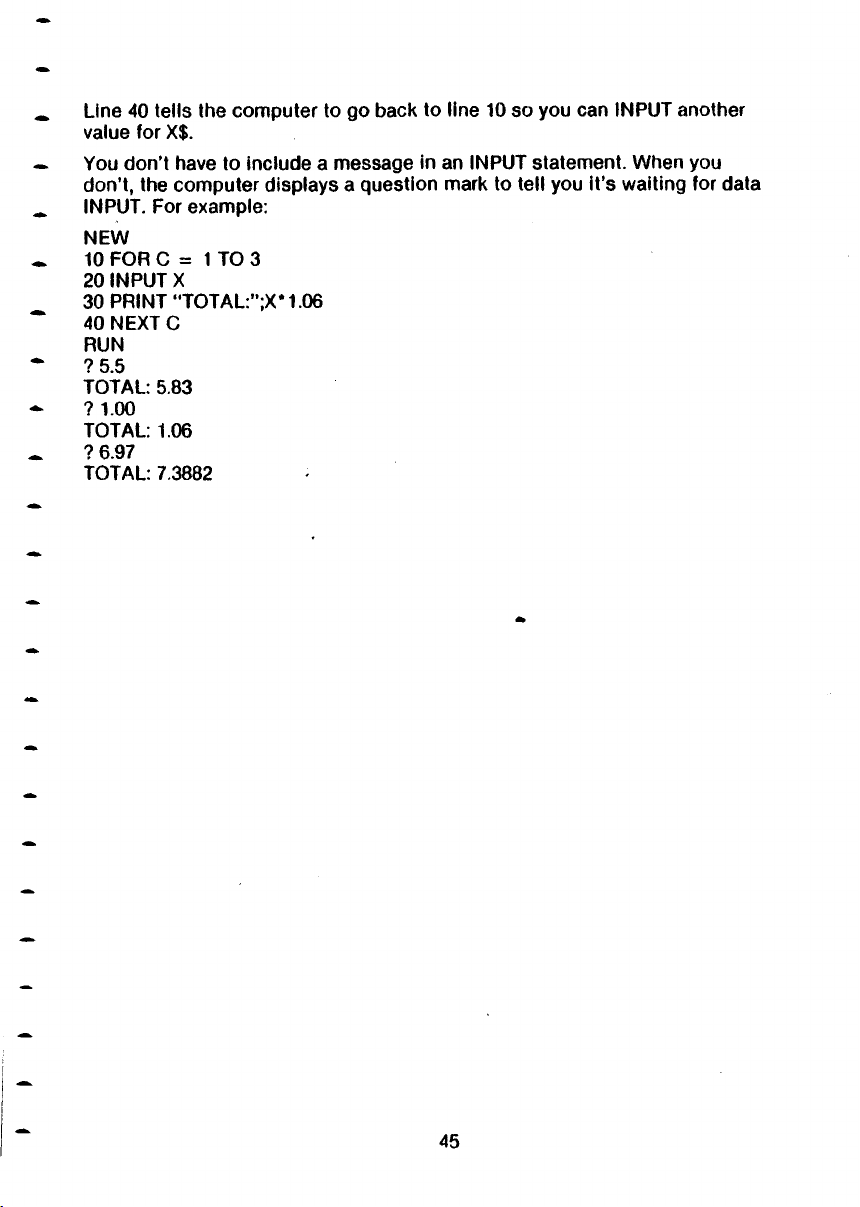
Line 40 tells the computer to go bacK to line 10 so you can INPUT another
value for X$.
You don’t have to include a message in an INPUT statement. When you
don’t, the computer displays a question mark to tell you it’s waiting for data
INPUT. For example:
NEW
10 FOR C = 1 TO 3
20 INPUT X
30 PRINT "TOTAL:";X*1.06
40 NEXT C
RUN
? 5.5
TOTAL: 5.83
? 1.00
TOTAL: 1.06
7 6.97
TOTAL: 7.3882
Page 52
USING LOOPS: FOR . . . NEXT
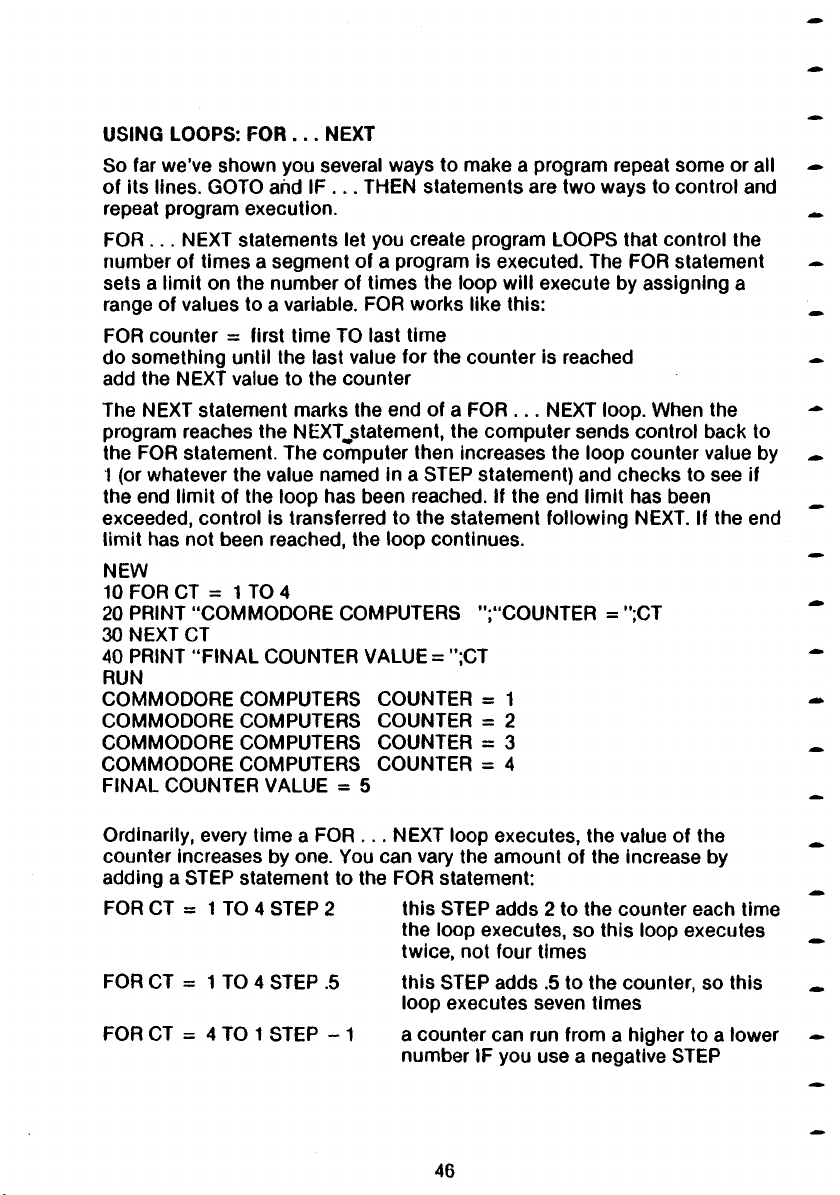
So far w e’ve shown you several ways to make a program repeat some or all
of its lines. GOTO ahd IF . . . THEN statements are two ways to control and
repeat program execution.
F O R. . . NEXT statements let you create program LOOPS that control the
number of times a segment of a program is executed. The FOR statement
sets a limit on the number of times the loop will execute by assigning a
range of values to a variable. FOR works like this:
FOR counter = first time TO last time
do something until the last value for the counter is reached
add the NEXT value to the counter
The NEXT statement marks the end of a FOR .. . NEXT loop. When the
program reaches the NEXT^statement, the computer sends control back to
the FOR statement. The computer then increases the loop counter value by
1 (or whatever the value named in a STEP statement) and checks to see if
the end limit of the loop has been reached. If the end limit has been
exceeded, control is transferred to the statement following NEXT. If the end
limit has not been reached, the loop continues.
NEW
10 FOR CT = 1 TO 4
20 PRINT “CO MMODORE COMPUTERS ”;“COUNTER
30 NEXT CT
40 PRINT “FINAL COUNTER VALUE = ";CT
RUN
COMM ODORE COMPUTERS COUNTER = 1
COMMODORE COMPUTERS COUNTER = 2
COMMODORE COMPUTERS COUNTER = 3
COMMODORE COMPUTERS COUNTER = 4
FINAL COUNTER VALUE = 5
Ordinarily, every time a FOR .. . NEXT loop executes, the value of the
counter increases by one. You can vary the amount of the increase by
adding a STEP statement to the FOR statement:
FOR CT = 1 TO 4 STEP 2
FOR CT = 1 TO 4 STEP .5
FOR CT = 4 TO 1 STEP - 1
this STEP adds 2 to the counter each time
the loop executes, so this loop executes
twice, not four times
this STEP adds .5 to the counter, so this
loop executes seven times
a counter can run from a higher to a lower
number IF you use a negative STEP
46
Page 53
CHAPTER
USING GRAPHICS AND
COLOR
• Keyboard colors
• Graphics characters
• Character animation
• Controlling colors
• High resolution graphics
• Points, lines, and labels
• Squares, circles, polygons, and painting
• Multi-colorgraphics
47
Page 54
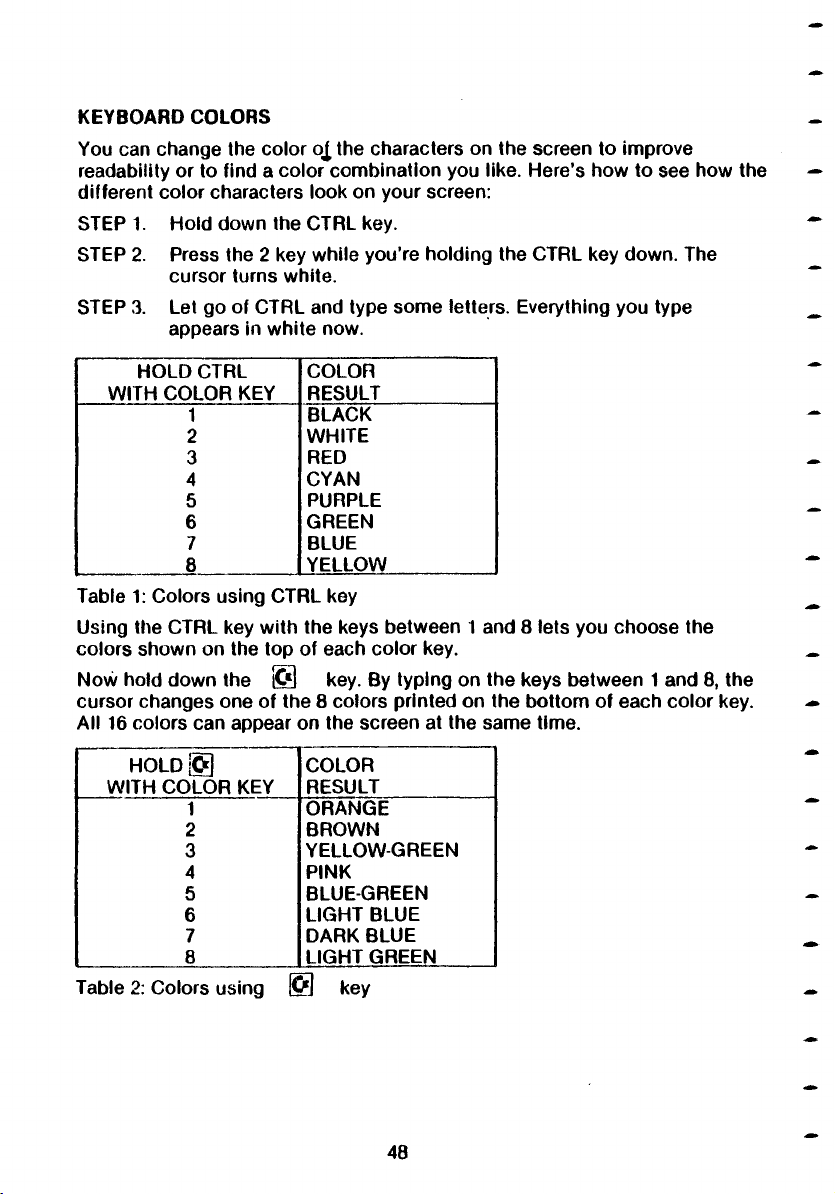
KEYBOARD COLORS
You can change the color qJ the characters on the screen to improve
readability or to find a color combination you like. Here’s how to see how the
different color characters look on your screen:
STEP 1. Hold down the CTRL key.
STEP 2. Press the 2 key while you’re holding the CTRL key down. The
cursor turns white.
STEP 3. Let go of CTRL and type some letters. Everything you type
appears in white now.
HOLD CTRL
WITH COLOR KEY
1
2
3
4
5 PURPLE
6
7 BLUE
__________8_________
Table 1: Colors using CTRL key
Using the CTRL key with the keys between 1 and 8 lets you choose the
colors shown on the top of each color key.
Now hold down the © key. By typing on the keys between 1 and 8, the
cursor changes one of the 8 colors printed on the bottom of each color key.
All 16 colors can appear on the screen at the same time.
H O L D ®
WITH COLOR KEY
1 ORANGE
2
3
4 PINK
5
6
7 DARK BLUE
__________8__________
Table 2: Colors using S'] key
COLOR
RESULT
BLACK
WHITE
RED
CYAN
GREEN
YELLOW
COLOR
RESULT
BROWN
YELLOW-GREEN
BLUE-GREEN
LIGHT BLUE
LIGHT GREEN
___________
__________
___________
48
Page 55
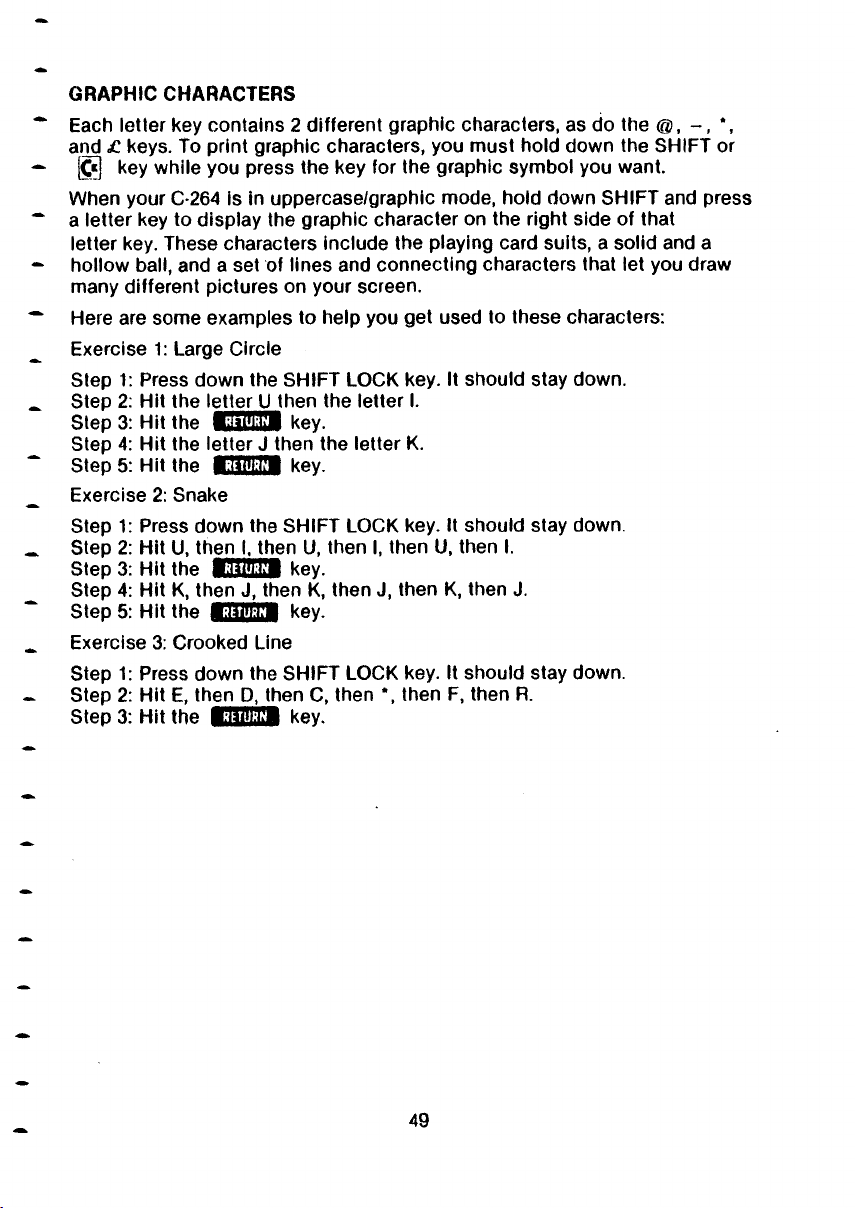
GRAPHIC CHARACTERS
Each letter key contains 2 different graphic characters, as do the @, - , *,
and £ keys. To print graphic characters, you must hold down the SHIFT or
[C«| key while you press the key for the graphic symbol you want.
When your C-264 is in uppercase/graphic mode, hold down SHIFT and press
a letter key to display the graphic character on the right side of that
letter key. These characters include the playing card suits, a solid and a
hollow ball, and a set of lines and connecting characters that let you draw
many different pictures on your screen.
Here are some examples to help you get used to these characters:
Exercise 1: Large Circle
Step 1: Press down the S HIFT LOCK key. It should stay down.
Step 2: Hit the *etterUth e n the letter I.
Step 3: Hit the fcMH:l!l key.
Step 4: Hit the letter J then the letter K.
Step 5: Hit the ^;UnkM key.
Exercise 2: Snake
Step 1: Press down the SHIFT LOCK key. It should stay down.
Step 2: Hit U, then I, then U, then I, then U, then I.
Step 3: Hit the U W M 1 key.
Step 4: Hit K, then J, then K, then J, then K, then J.
Step 5: Hit the K B iffW key.
Exercise 3: Crooked Line
Step 1: Press down the S HIFT LOCK key. It should stay down.
Step 2: Hit E, then D, then C, then *, then F, then R.
Step 3: Hit the B S M 9 key.
49
Page 56
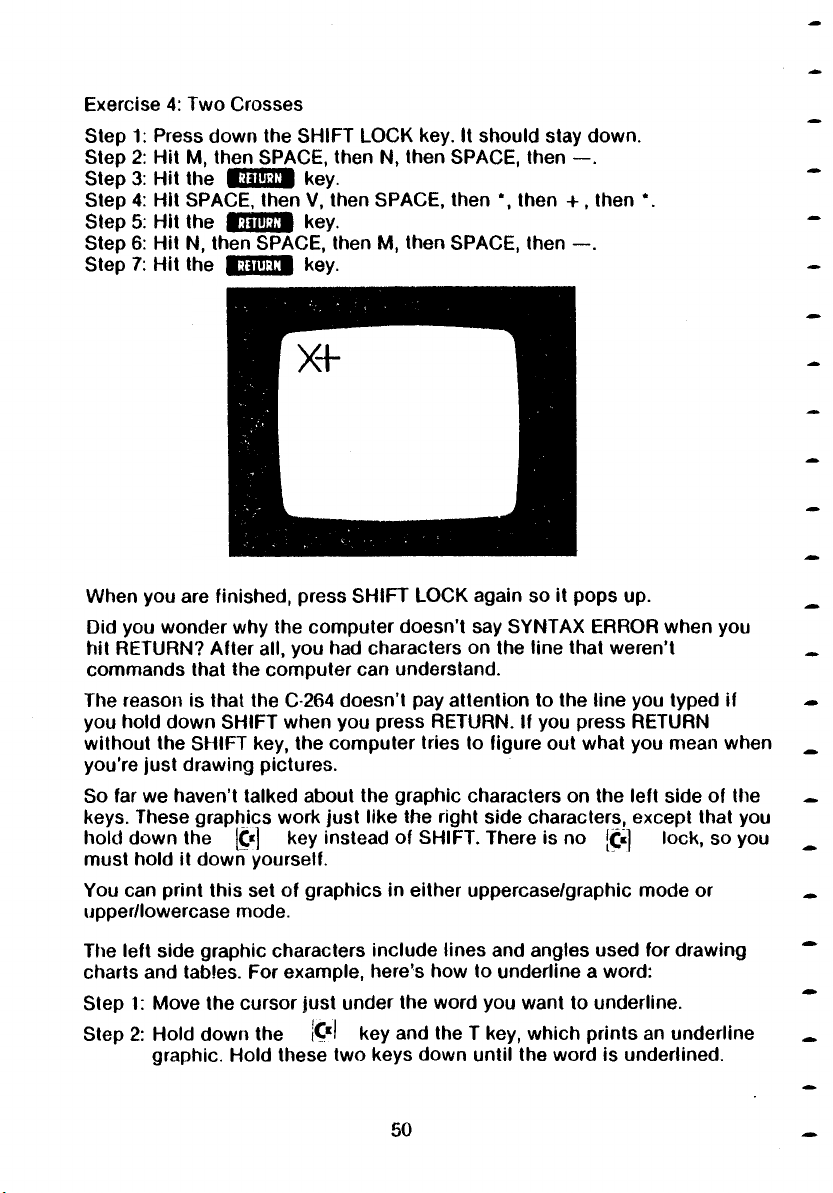
Exercise 4: Two Crosses
Step 1:
Step 2:
Step 3:
Step 4:
Step 5:
Step 6:
Step 7:
When you are finished, press SHIFT LOCK again so it pops up.
Did you wonder why the computer doesn’t say SYNTAX ERROR when you
hit RETURN? After all, you had characters on the line that weren’t
commands that the computer can understand.
The reason is that the C-264 doesn’t pay attention to the line you typed if
you hold down SHIFT when you press RETURN. If you press RETURN
without the SHIFT key, the computer tries to figure out what you mean when
you're just drawing pictures.
So far we haven’t talked about the graphic characters on the left side of the
keys. These graphics work just like the right side characters, except that you
hold down the £*] key instead of SHIFT. There is no [C«] lock, so you
must hold it down yourself.
You can print this set of graphics in either uppercase/graphic mode or
upper/lowercase mode.
Press down the SHIFT LOCK key. It should stay down.
Hit M, then SPACE, then N, then SPACE, then — .
Hit the BMB:M key.
Hit SPACE, then V, then SPACE, then *, then + , then
Hit the BTfHI'M key.
Hit N, then SPACE, then M, then SPACE, then — .
Hit the i - M I: l f l key.
The left side graphic characters include lines and angles used for drawing
charts and tables. For example, here’s how to underline a word:
Step 1: Move the cursor just under the word you want to underline.
Step 2: Hold down the iC*l key and the T key, which prints an underline
graphic. Hold these two keys down until the word is underlined.
50
Page 57
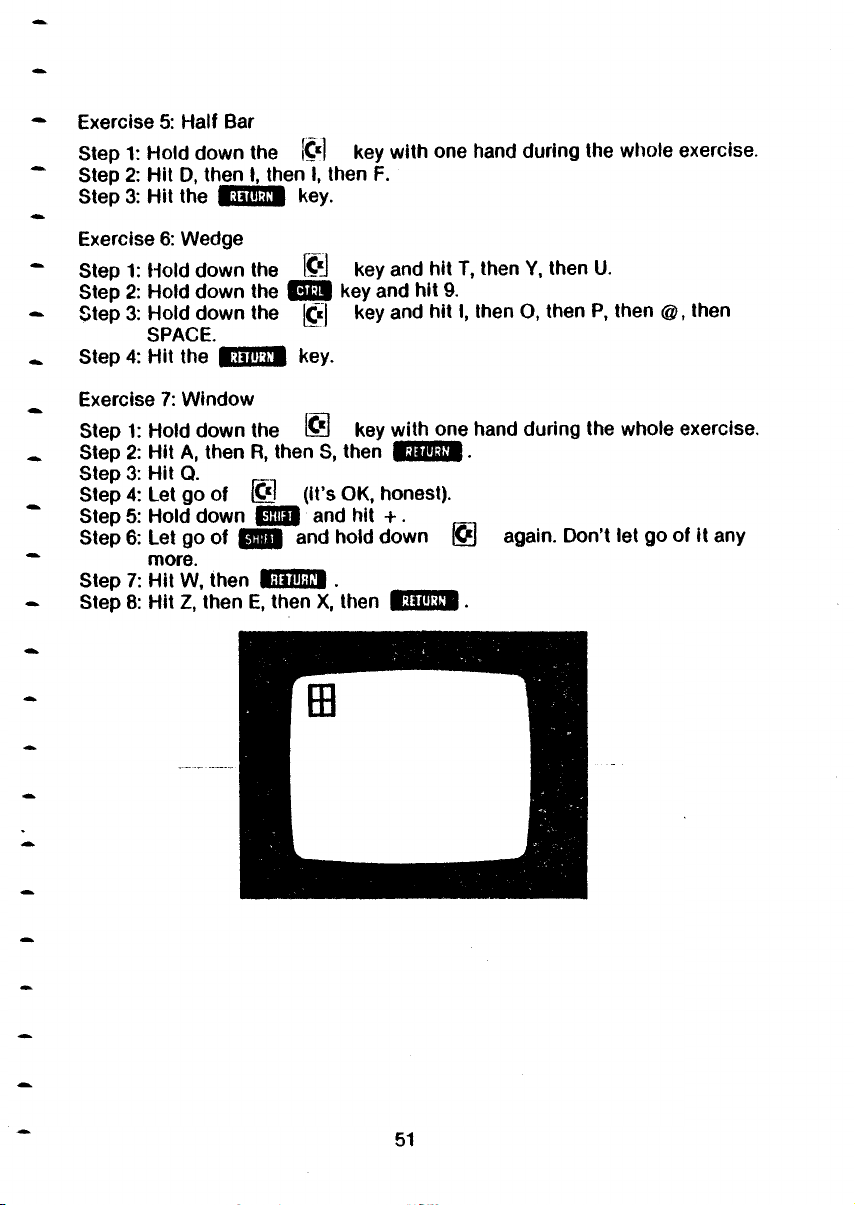
• Exercise 5: Half Bar
Step 1: Hold down the [O] key with one hand during the whole exercise.
~ Step 2: Hit D, then t, then I, then F.
Step 3: Hit the CSS S 9 key.
Exercise 6: Wedge
Step 1: Hold down the
Step 2: Hold down the
Step 3: Hold down the
fe l key and hit T, then Y, then U.
key and hit 9.
[C*| key and hit I, then 0 , then P, then
SPACE.
Step 4: Hit the
Exercise 7: Window
Ste p 1:H oldd ow nth e © key with one hand during the whole exercise.
Step 2: Hit A, then R, then S, then ^:wnl.-l: h .
Step 3: Hit Q.
Step 4: Let go of lOl (It’s OK, honest).
Step 5: Hold down jLMj | and hit + .
Step 6: Let go of Q Q | and ho,d down e3 again. Don’t let go of it any
more. _ __ __
Step 7: Hit W, then iH MB Ll. _ _
Step 8: Hit Z, then E, then X, then flM Mfc .
), then
51
Page 58
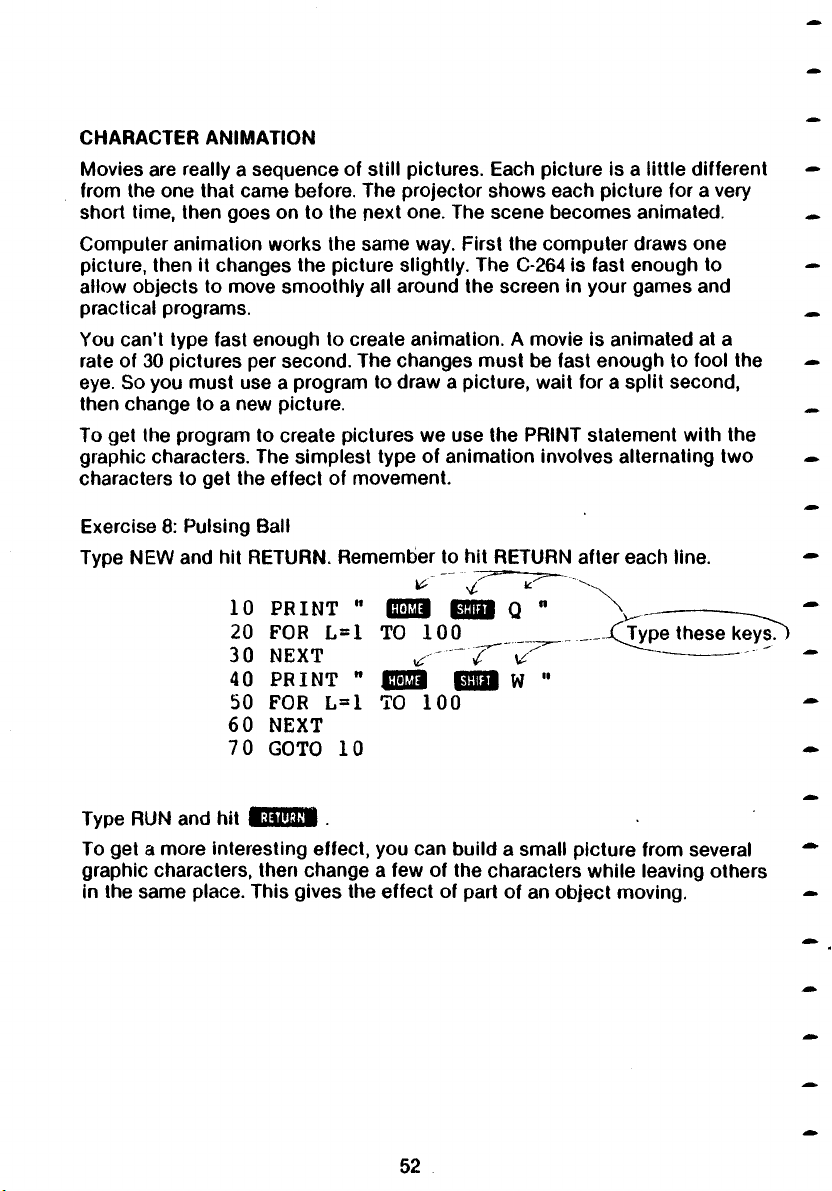
CHARACTER ANIMATION
Movies are really a sequence of still pictures. Each picture is a little different
from the one that came before. The projector shows each picture for a very
short time, then goes on to the next one. The scene becomes animated.
Computer animation works the same way. First the computer draws one
picture, then it changes the picture slightly. The C-264 is fast enough to
allow objects to move smoothly all around the screen in your games and
practical programs.
You can’t type fast enough to create animation. A movie is animated at a
rate of 30 pictures per second. The changes must be fast enough to fool the
eye. So you must use a program to draw a picture, wait for a split second,
then change to a new picture.
To get the program to create pictures we use the PRINT statement with the
graphic characters. The simplest type of animation involves alternating two
characters to get the effect of movement.
Exercise 8: Pulsing Ball
Type NEW and hit RETURN. Remember to hit RETURN after each line.
V-' ^ ~ ^ ' \
10
PRINT "
20
FOR L=1
30 NEXT
40 PRINT "
50
FOR L=1 TO 100
60
NEXT
70
GOTO 10
iff<r.fi
TO 100
£021
8fflBl Q "
uT
BQ| w "
jC jyp e these keysT)
V w''
Type RUN and hit
To get a more interesting effect, you can build a small picture from several
graphic characters, then change a few of the characters while leaving others
in the same place. This gives the effect of part of an object moving.
RETURN
52
Page 59
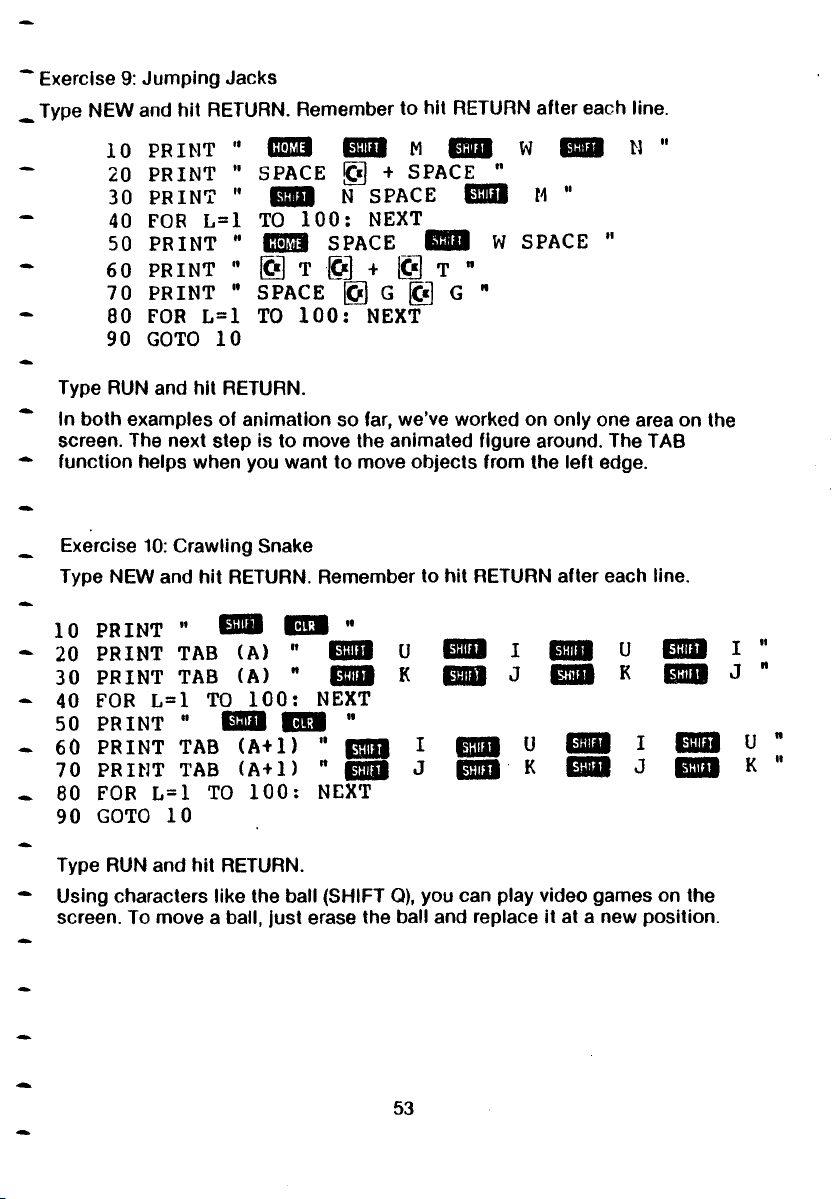
* Exercise 9: Jumping Jacks
^ Type NEW and hit RETURN. Remember to hit RETURN after each line.
10 PRIMT " CM1 R9S| M E3BI W QSS| 1] "
- 20 PRINT " SPACE g] + SPACE "
30 PRINT " iBBI N SPACE E3S| M "
- 40 FOR L=1 TO 100: NEXT
50 PRINT " flBTCfl SPACE GSB W SPACE "
60 PRINT " te*j T @ + S>j T "
70 PRINT " SPACE g| G g| G "
80 FOR L=1 TO 100: NEXT
90 GOTO 10
Type RUN and hit RETURN.
In both examples of animation so far, w e’ve worked on only one area on the
screen. The next step is to move the animated figure around. The TAB
function helps when you want to move objects from the left edge.
Exercise 10: Crawling Snake
Type NEW and hit RETURN. Remember to hit RETURN after each line.
10 PRINT "
20 PRINT TAB (A)
30 PRINT TAB (A) " Q39
U
K
i
j
u m *
K »aBM j "
40 FOR L=1 TO 100: NEXT
50 PRINT "
60 PRINT TAB (A+1)
70 PRINT TAB (A+1)
G S 3
i
j
EflHl U
ttflffl K
SHtFT
E f f l f l J
Bffil U "
E 3 D K "
80 FOR L=1 TO 100: NEXT
90 GOTO 10
Type RUN and hit RETURN.
Using characters like the ball (SHIFT Q), you can play video games on the
screen. To move a ball, just erase the ball and replace it at a new position.
53
i "
Page 60
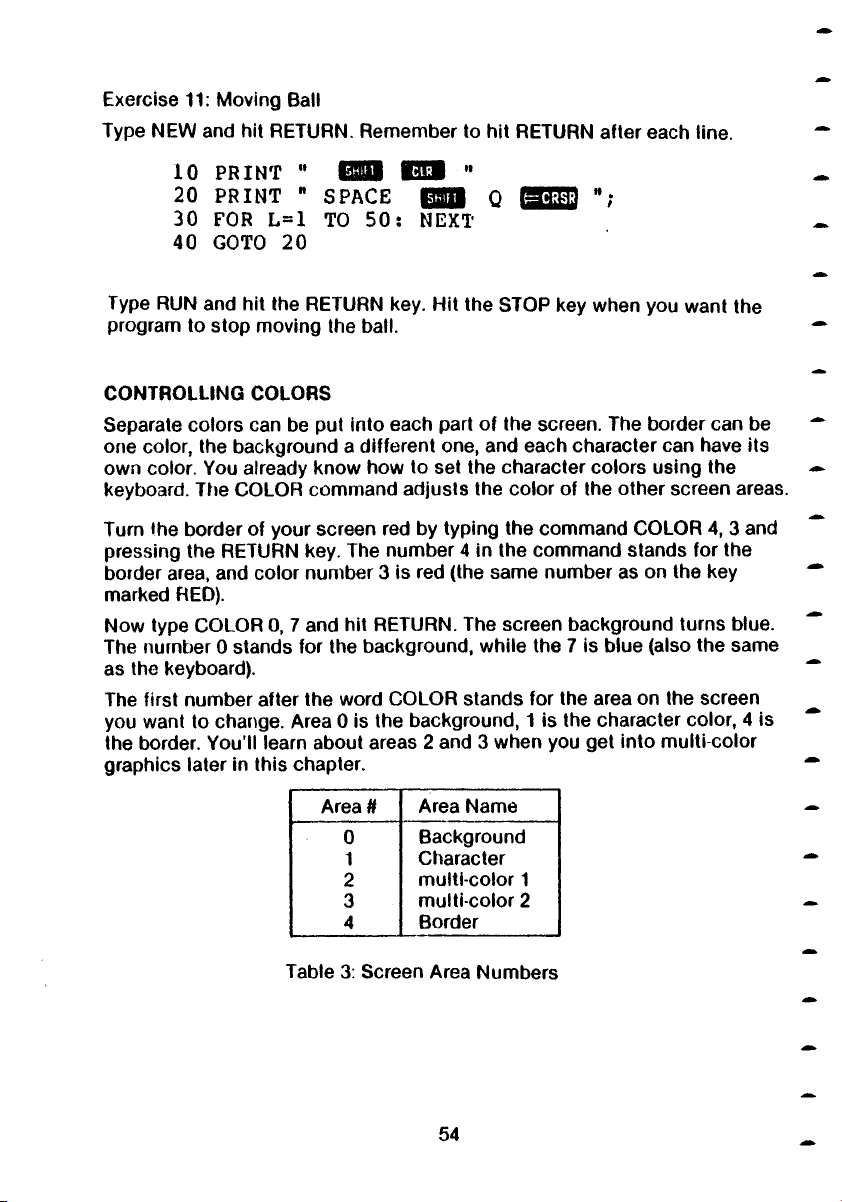
Exercise 11: Moving Ball
Type NEW and hit RETURN. Remember to hit RETURN after each line.
10 PRINT "
20
PRINT ■
30
FOR L=1
40
GOTO 20
Type RUN and hit the RETURN key. Hit the STOP key when you want the
program to stop moving the ball.
CONTROLLING COLORS
Separate colors can be put into each part of the screen. The border can be
one color, the background a different one, and each character can have its
own color. You already know how to set the character colors using the
keyboard. The COLOR command adjusts the color of the other screen areas.
Turn lhe border of your screen red by typing the command COLOR 4, 3 and
pressing the RETURN key. The number 4 in the command stands for the
border area, and color number 3 is red (the same number as on the key
marked RED).
Now type COLOR 0, 7 and hit RETURN. The screen background turns blue.
The nurnber 0 stands for the background, while the 7 is blue (also the same
as the keyboard).
The first number after the word COLOR stands for the area on the screen
you want to change. Area 0 is the background, 1 is the character color, 4 is
the border. You'll learn about areas 2 and 3 when you get into multi-color
graphics later in this chapter.
QQ|
SPACE
TO 50
SHIM
NEXT
£=C R SR
Area #
~~ -
1
2
3
4
Table 3: Screen Area Numbers
Area Name
Background
Character
multi-color 1
multi-color 2
Border
_______
54
Page 61
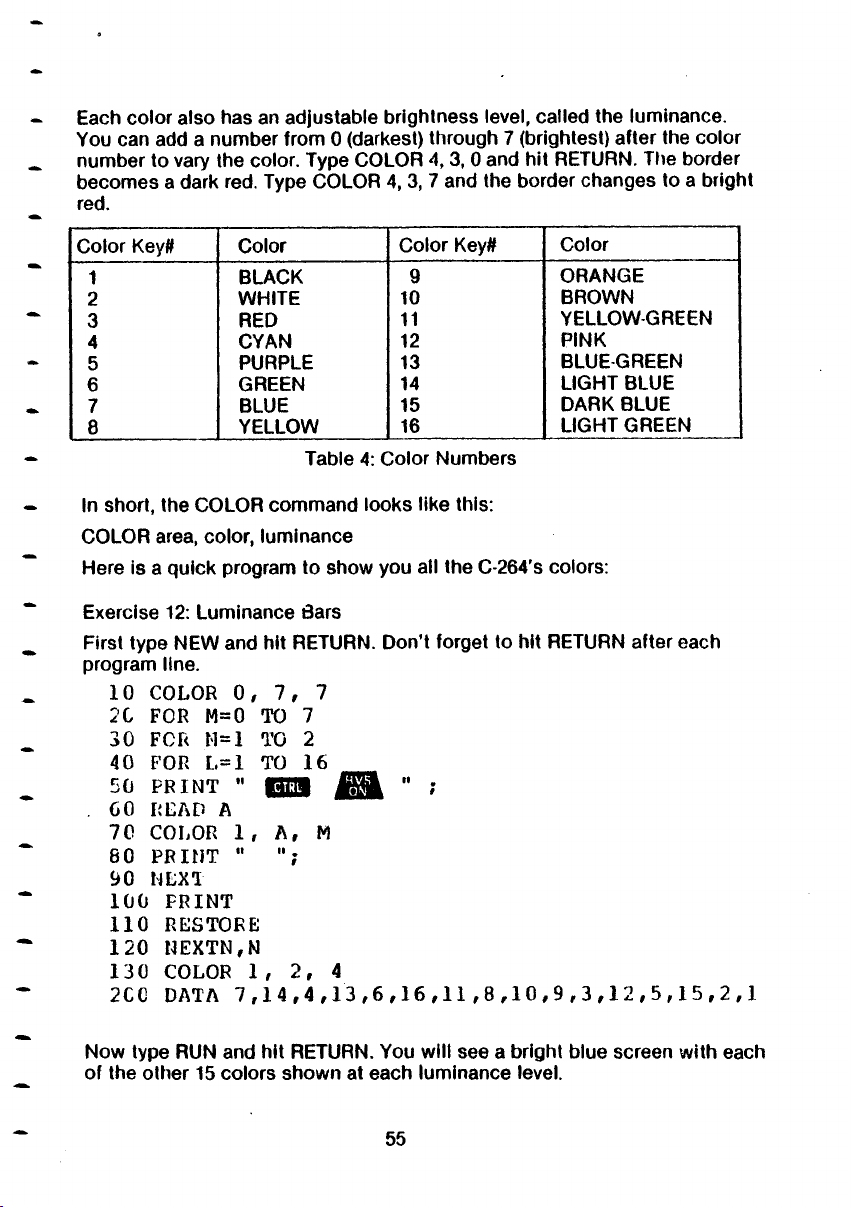
Each color also has an adjustable brighlness level, called the luminance.
You can add a number from 0 (darkest) through 7 (brightest) after the color
number to vary the color. Type COLOR 4, 3, 0 and hit RETURN. The border
becomes a dark red. Type COLOR 4, 3, 7 and the border changes to a bright
red.
Color Keyff Color
_ _
BLACK
2
3
4
5
6
7
8
___________
In short, the COLOR command looks like this:
COLOR area, color, luminance
Here is a quick program to show you all the C-264's colors:
Exercise 12: Luminance Bars
First type NEW and hit RETURN. Don’t forget to hit RETURN after each
program line.
10 COLOR
2G
FOR M=
30 FCR M== 1
40
FOR L== 1
50 PRINT
60
RLAD t ^
70
COLOR
PRINT
80
WHITE
RED
CYAN
PURPLE 13
GREEN
BLUE
YELLOW
Table 4: Color Numbers
= 0
0,
II
1,
It
, 7,
r A,
7
TO
2
TO
TO 16
GEEB
» .
,
7
M
Color Key#
9
10
11
12
14
15
16
____________
Color
ORANGE
BROWN
YELLOW-GREEN
PINK
BLUE-GREEN
LIGHT BLUE
DARK BLUE
LIGHT GREEN
90 NEXT
100 PRINT
110 RESTORE
120 NEXTN,N
130 COLOR 1, 2, 4
2CC DATA 7,14,4,13,6,16,11,8,10,9,3,12,5,15,2,1
Now type RUN and hit RETURN. You will see a bright blue screen with each
of the other 15 colors shown at each luminance level.
55
Page 62
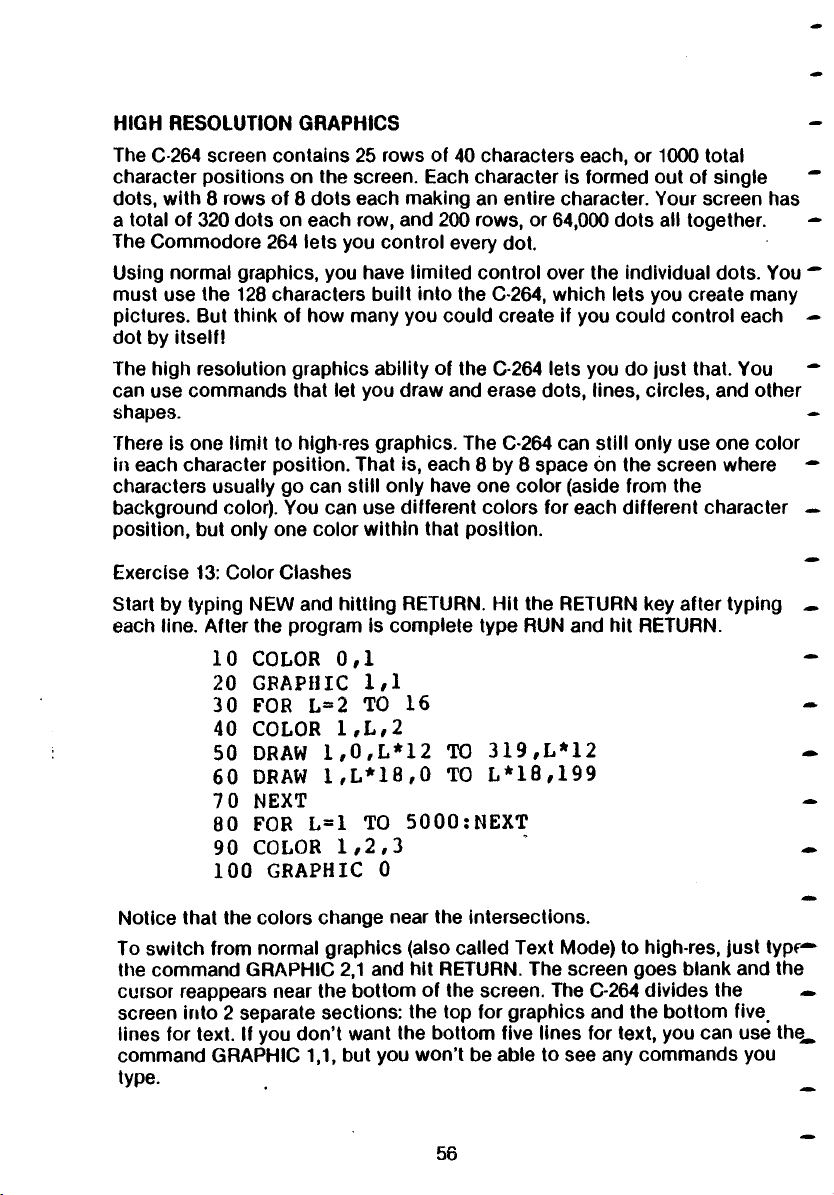
HIGH RESOLUTION GRAPHICS
The C-264 screen contains 25 rows of 40 characters each, or 1000 total
character positions on the screen. Each character is formed out of single ~
dots, with 8 rows of 8 dots each making an entire character. Vour screen has
a total of 320 dots on each row, and 200 rows, or 64,000 dots all together. —
The Commodore 264 lets you control every dot.
Using normal graphics, you have limited control over the individual dots. You ~
must use the 128 characters built into the C-264, which lets you create many
pictures. But think of how many you could create if you could control each —
dot by itseif!
The high resolution graphics ability of the C-264 lets you do just that. You ~
can use commands that let you draw and erase dots, tines, circles, and other
shapes. -
There is one limit to high-res graphics. The C-264 can still only use one color
in each character position. That is, each 8 by 8 space 6n the screen where —
characters usually go can still only have one color (aside from the
background color). You can use different colors for each different character —
position, but only one color within that position.
Exercise 13: Color Clashes
Start by typing NEW and hitting RETURN. Hit the RETURN key after typing •
each line. After the program is complete type RUN and hit RETURN.
10 COLOR 0,1
20 GRAPHIC 1,1
30 FOR L=2 TO 16
~
~ *
40 COLOR l,L,2
50 DRAW l,0,L*12 TO 319,L*12
~
60 DRAW l,L*18,0 TO L*18,199
70 NEXT
^
80 FOR L=1 TO 5000:NEXT
90 COLOR 1,2,3
~
100 GRAPHIC 0
Notice that the colors change near the intersections.
To switch from normal graphics (also called Text Mode) to high-res, just typ< *
the command GRAPHIC 2,1 and hit RETURN. The screen goes blank and the
cursor reappears near the bottom of the screen. The C-264 divides the —
screen into 2 separate sections: the top for graphics and the bottom five_
lines for text. If you don’t want the bottom five lines for text, you can use thq_
command GRAPHIC 1,1, but you won’t be able to see any commands you
type. . _
56
Page 63
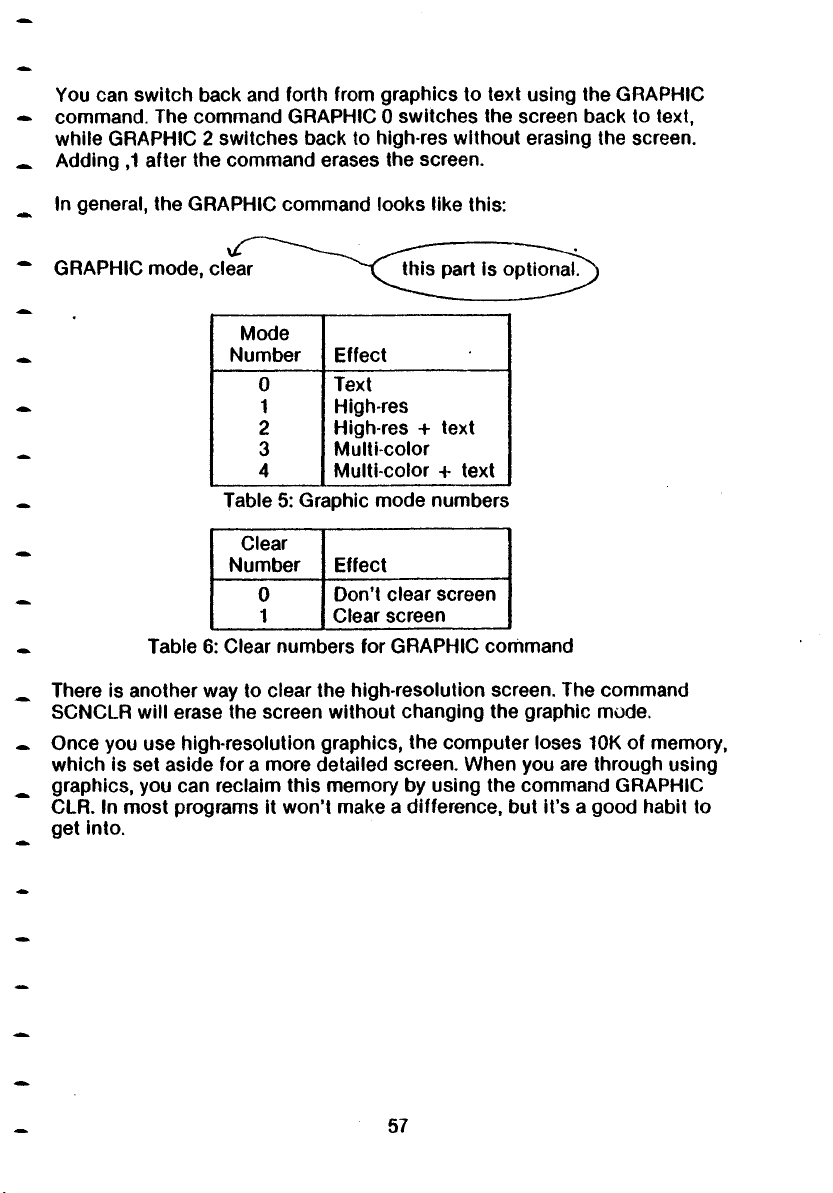
You can switch back and forth from graphics to text using the GRAPHIC
~ command. The command GRAPHIC 0 switches the screen back to text,
while GRAPHIC 2 switches back to high-res without erasing the screen.
_, Adding ,1 after the command erases the screen.
In general, the GRAPHIC command looks like this:
GRAPHIC mode, clear
Mode
Number
Effect
________
•
0 Text
—
-
1 High-res
2
3
4
_____
High-res + text
Multi-color
Multi-color + text
Table 5: Graphic mode numbers
Clear
Number
0
1
Effect____________
Don’t clear screen
Clear screen
______
Table 6: Clear numbers for GRAPHIC command
There is another way to clear the high-resolution screen. The command
SCNCLR will erase the screen without changing the graphic mode.
Once you use high-resolution graphics, the computer loses 10K of memory,
which is set aside for a more detailed screen. When you are through using
graphics, you can reclaim this memory by using the command GRAPHIC
CLR. In most programs it won’t make a difference, but it’s a good habit to
get into.
57
Page 64
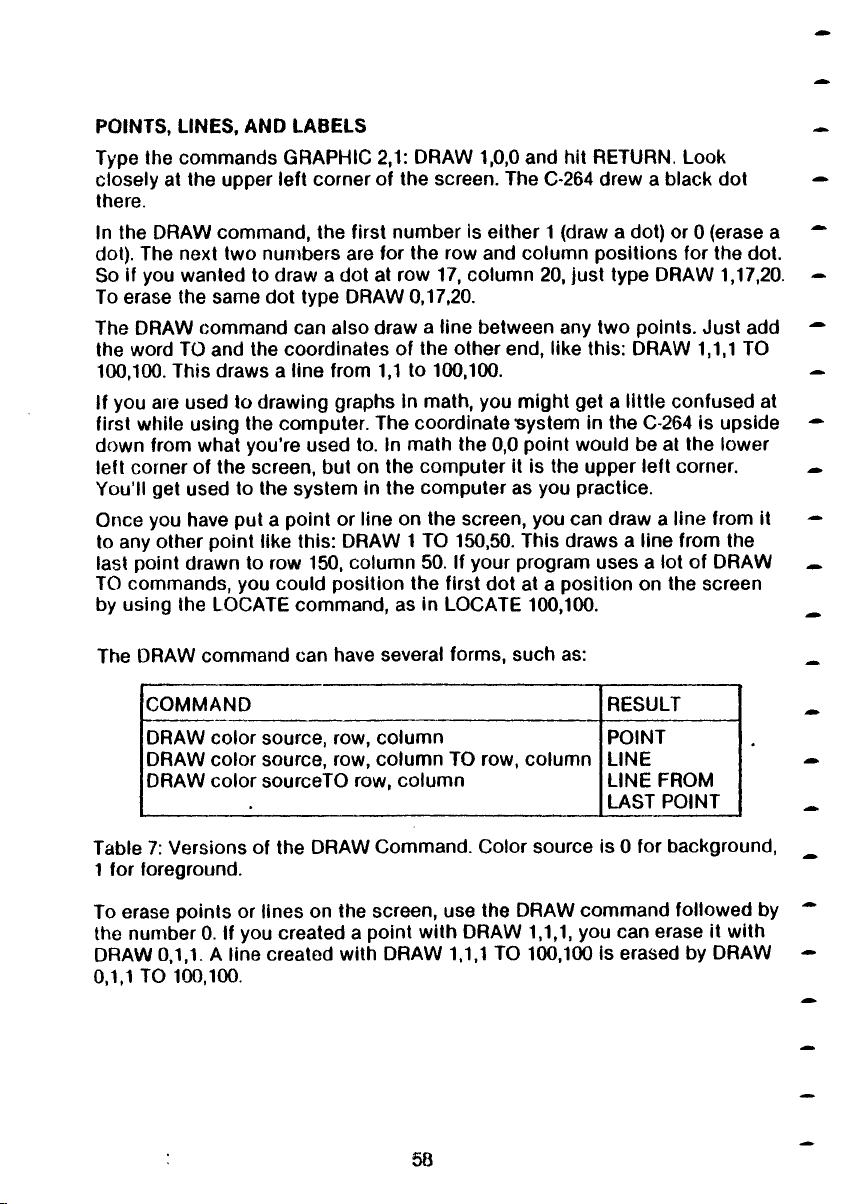
POINTS, LINES, AND LABELS
Type the commands GRAPHIC 2,1: DRAW 1,0,0 and hit RETURN. Look
closely at the upper left corner of the screen. The C-264 drew a black dot
there.
In the DRAW command, the first number ls either 1 (draw a dot) or 0 (erase a
dot). The next two numbers are for the row and column positions for the dot.
So if you wanted to draw a dot at row 17, column 20, just type DRAW 1,17,20.
To erase the same dot type DRAW 0,17,20.
The DRAW command can also draw a line between any two points. Just add
the word TO and the coordinates of the other end, like this: DRAW 1,1,1 TO
100,100. This draws a line from 1,1 to 100,100.
If you are used to drawing graphs in math, you might get a little confused at
first while using the computer. The coordinatesystem in the C-264 is upside
down from what you're used to. In math the 0,0 point would be at the lower
left corner of the screen, but on the computer it is the upper left corner.
You’ll get used to the system in the computer as you practice.
Once you have put a point or line on the screen, you can draw a iine from it
to any other point like this: DRAW 1 TO 150,50. This draws a line from the
last point drawn to row 150, column 50. If your program uses a lot of DRAW
TO commands, you could position the first dot at a position on the screen
by using the LOCATE command, as in LOCATE 100,100.
The DRAW command can have several forms, such as:
CO M M A ND
DRAW color source, row, column
DRAW color source, row, column TO row, column
DRAW color sourceTO row, column
Table 7: Versions of the DRAW Command. Color source is 0 for background,
1 for foreground.
To erase points or lines on the screen, use the DRAW command followed by
the number 0. If you created a point with DRAW 1,1,1, you can erase it with
DRAW 0,1,1. A line created with DRAW 1,1,1 TO 100,100 is erased by DRAW
0,1,1 TO 100,100.
__________________
RESULT
POINT
LINE
LINE FROM
LAST POINT
58
Page 65
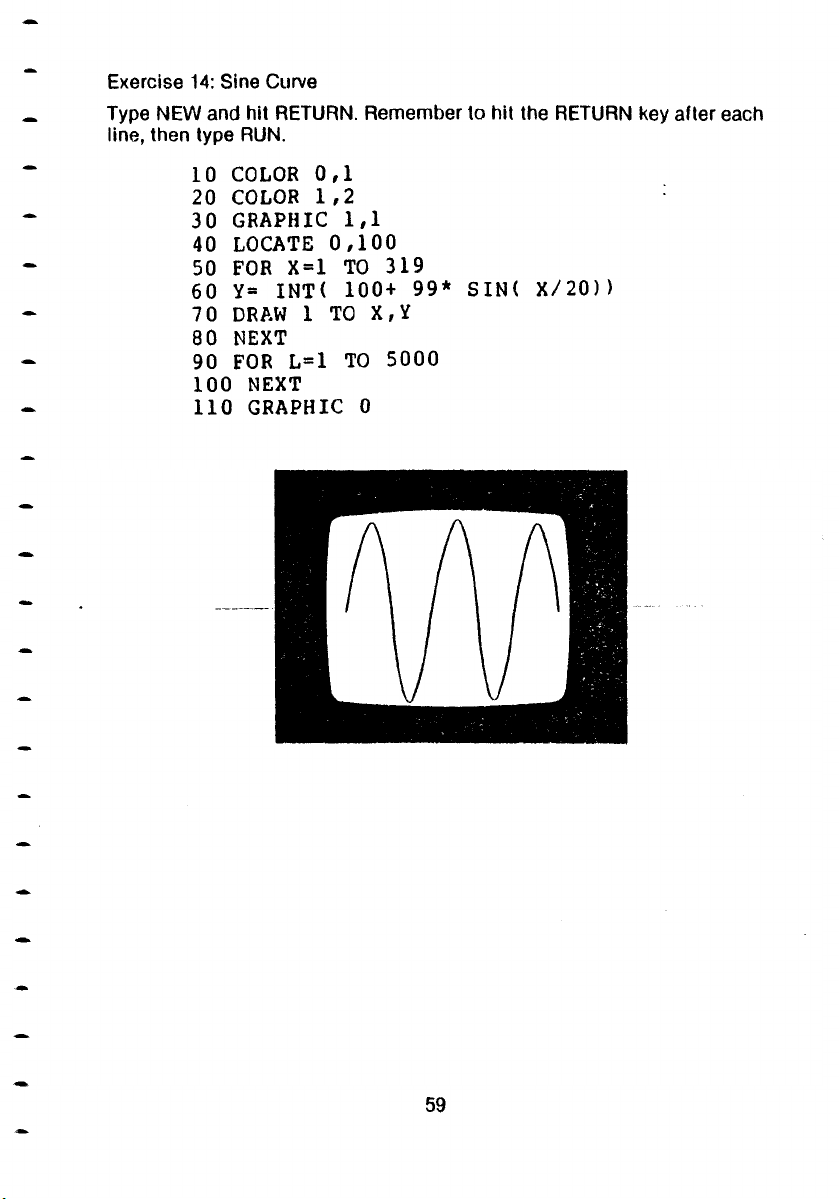
Exercise 14: Sine Curve
Type NEW and hit RETURN. Remember to hit the RETURN key after each
line, then type RUN.
10 COLOR 0,1
20 COLOR 1,2
30 GRAPHIC 1,1
40 LOCATE 0,100
50 FOR X = 1 TO 319
60 Y= INT( 100+ 99* SIN( X/20))
70 DRAW 1 TO X,Y
80 NEXT
90 FOR L=1 TO 5000
100 NEXT
110 GRAPHIC 0
59
Page 66
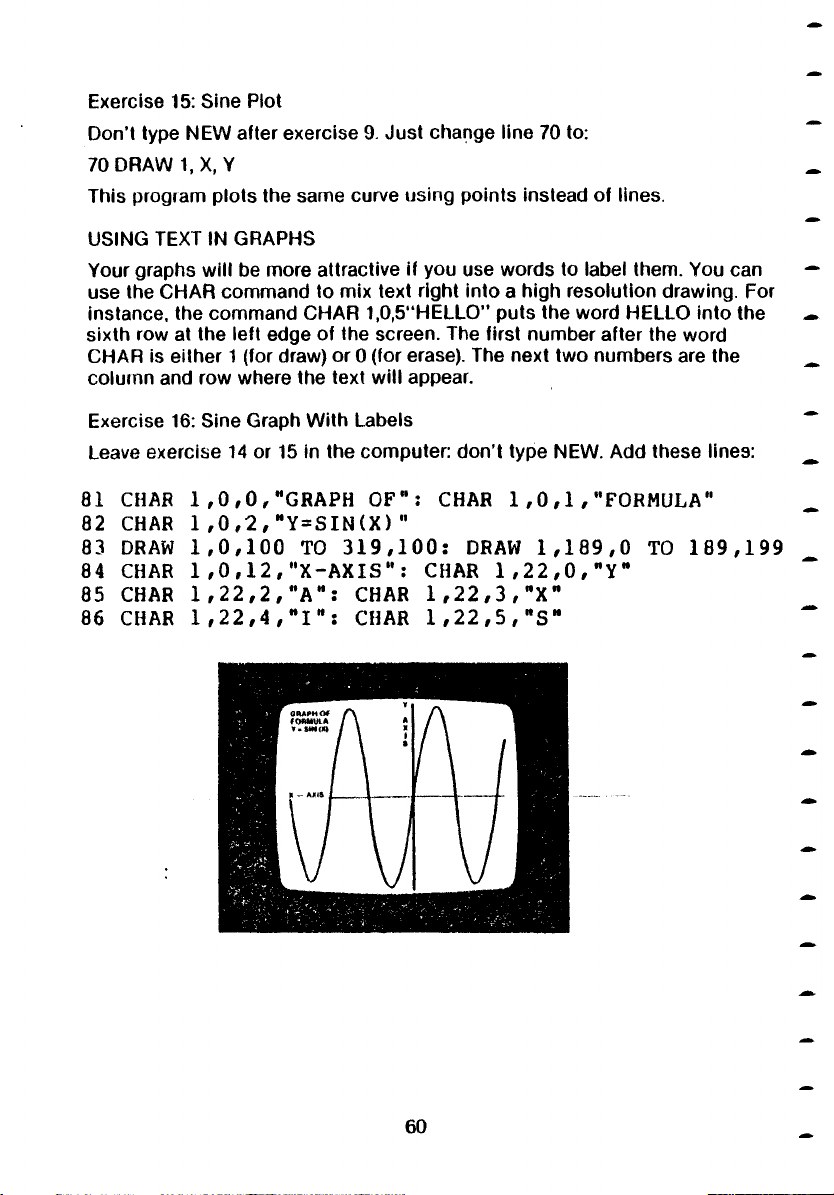
Exercise 15: Sine Plot
Don’t type NEW after exercise 9. Just change line 70 to:
70 DRAW 1, X, Y
This program plots the same curve using points instead of lines.
USING TEXT IN GRAPHS
Your graphs will be more attractive if you use words to label them. You can
use the CHAR command to mix text right into a high resolution drawing. For
instance, the command CHAR 1,0,5“HELLO” puts the word HELLO into the
sixth row at the left edge of the screen. The first number after the word
CHAR is either 1 (for draw) or 0 (for erase). The next two numbers are the
column and row where the text will appear.
Exercise 16: Sine Graph With Labels
Leave exercise 14 or 15 in the computer: don’t type NEW. Add these lines:
81 CHAR 1,0,0,"GRAPH OF": CHAR l,0,l,"FORMULA"
82 CHAR 1 ,0 ,2,"Y=SIN(X)"
83 DRAW 1,0,100 TO 319,100: DRAW 1,189,0 TO 189,199
84 CHAR 1 ,0,12,"X-AXIS": CHAR l,22,0,"Y"
85 CHAR l,22,2,"A": CHAR l,22,3,"X"
86 CHAR l,22,4,"I": CHAR l,22,5,"S"
60
Page 67
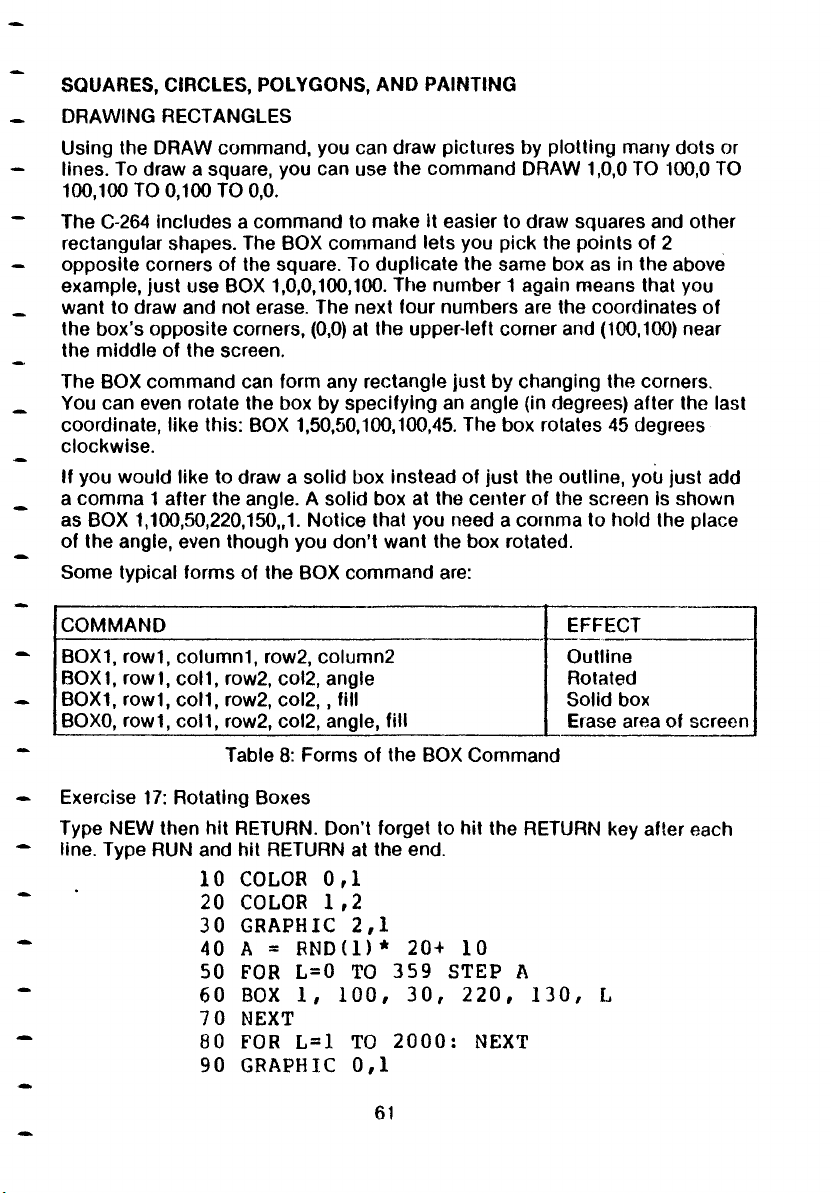
SQUARES, CIRCLES, POLYGONS, AND PAINTING
DRAWING RECTANGLES
Using the DRAW command, you can draw pictures by plotting many dots or
lines. To draw a square, you can use the command DRAW 1,0,0 TO 100,0 TO
100,100 TO 0,100 TO 0,0.
The C-264 includes a command to make It easier to draw squares and other
rectangular shapes. The BOX command lets you pick the points of 2
opposite corners of the square. To duplicate the same box as in the above
example, just use BOX 1,0,0,100,100. The number 1 again means that you
want to draw and not erase. The next four numbers are the coordinates of
the box’s opposite corners, (0,0) at the upper-left corner and (100,100) near
the middle of the screen.
The BOX command can form any rectangle just by changing the corners.
You can even rotate the box by specifying an angle (in degrees) after the last
coordinate, like this: BOX 1,50,50,100,100,45. The box rotates 45 degrees
clockwise.
If you would like to draw a solid box instead of just the outline, you just add
a comma 1 after the angle. A solid box at the center of the screen is shown
as BOX 1,100,50,220,150,,1. Notice that you need a comma to hold the place
of the angle, even though you don’t want the box rotated.
Some typical forms of the BOX command are:
CO M MAND
BOX1, row1, column1, row2, column2
BOX1, row1, coll, row2, col2, angle
BOX1, row1, coll, row2, c o l2,, fill
BOX0, row1, c o ll, row2, col2, angle, fill
Exercise 17: Rotating Boxes
Type NEW then hit RETURN. Don’t forget to hit the RETURN key after each
line. Type RUN and hit RETURN at the end.
_____________________________________
_____________
Table 8: Forms of the BOX Command
EFFECT
Outline
Rotated
Solid box
Erase area of screen
___________
10 COLOR 0,1
COLOR 1,2
20
30 GRAPHIC 2,1
A = RND(1)* 20+
40
FOR L=0 TO 359
50
60 BOX 1, 100, 30,
70
NEXT
80
FOR L=1 TO 2000
10
STEP A
220,
: NEXT
90 GRAPHIC 0,1
61
Page 68
Exercise 18: Colored Boxes
Type NEW then hit RETURN. Don’t forget to hit the RETURN key after each
line. Type RUN and hit RETURN at the end.
5 TRAP 60
10 GRAPHIC 2,1
20 DEF FNA(X)= INT( RND(1)* X)
30 COLOR 1, FNA(15)+1
40 BOX 1, FNA(320), FNA(160), FNA(320), FNA(160),, 1
50 GOTO 30
60 COLOR 1,2,3: GRAPHIC 0
Hit RETURN and type RUN. Hold down the STOP key to end the program.
This program draws different colored squares all over the screen. You’ll
notice some parts of the screen changing when other parts near them
change. The reason for this was discussed In section 5 earlier in this
chapter.
DRAWING CIRCLES
The C-264 also has commands for drawing circles. Like the BOX command, _
we can vary the shape of the circle to form an oval (also catied an ellipse), “
and we can rotate the oval. We can also just draw a section of the shape
(called an arc). *
This command draws a circle in the center of the screen: CIRCLE
1,160,100,50. This tells the C-264 to draw a circle with its center at row 160 *
and column 100, with a radius of 50. This actually produces an oval, since
the dots on the screen are taller than they are wide. To change this to a real ~
circle you must add a separate number to tell that the height is different
from the width, like this: CIRCLE 1,160,100,50,42. -
The C-264 can also draw a square, triangle or other polygon using the
CIRCLE command. Just tell the computer how many degrees to go between ~
points on the circle, like this: CIRCLE 1,160,100,50,42,,, ,120. This command
draws a triangle, since each side is 120 degrees. A simple formula to get the —
angle for a polygon with N sides is 360/N.
62
Page 69
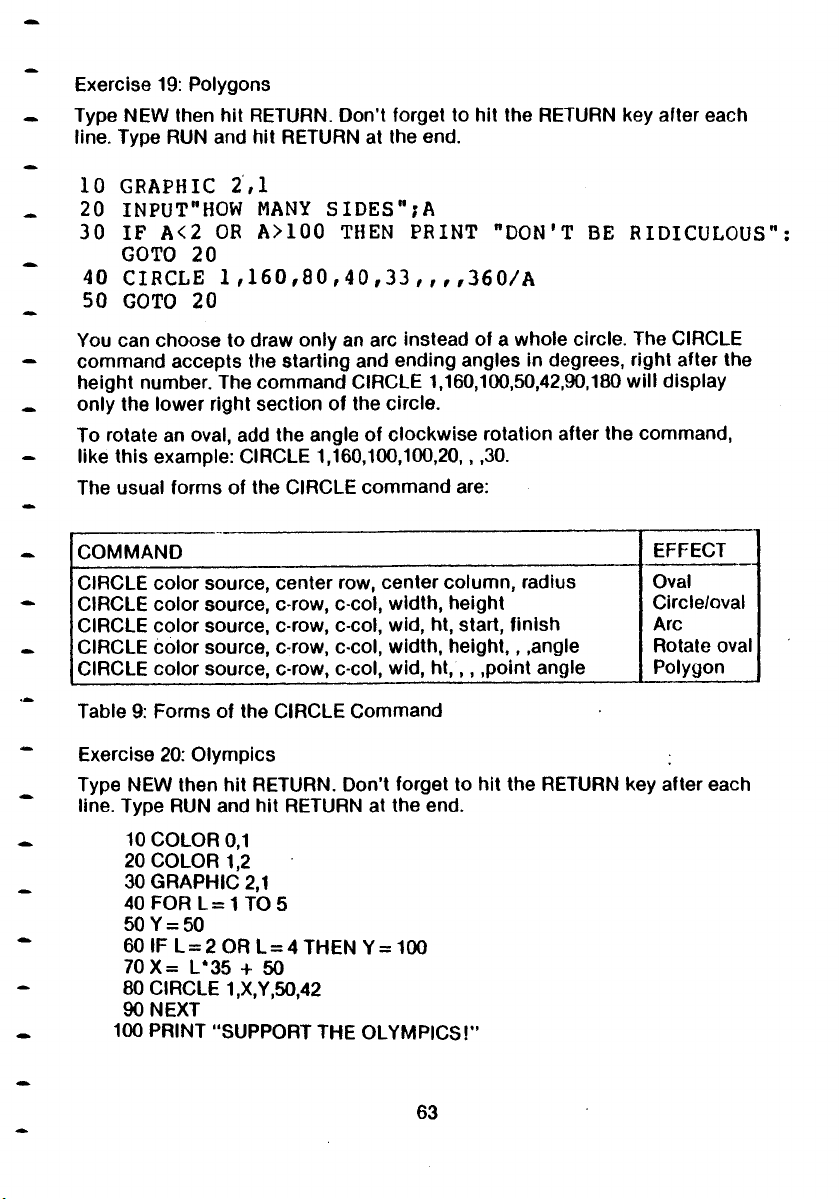
Exercise 19: Polygons
Type NEW then hit RETURN. Don’t forget to hit the RETURN key after each
line. Type RUN and hit RETURN at the end.
10 GRAPHIC 271
20 INPUT"HOW MANY SIDES";A
30 IF A<2 OR A>100 THEN PRINT "DON’T BE RIDICULOUS"
GOTO 20
40 CIRCLE 1,160,80,40,33,,,,360/A
50 GOTO 20
You can choose to draw only an arc instead of a whole circle. The CIRCLE
command accepts the starting and ending angles in degrees, right after the
height number. The command CIRCLE 1,160,100,50,42,90,180 will display
only the lower right section of the circle.
To rotate an oval, add the angle of clockwise rotation after the command,
like this example: CIRCLE 1,160,100,100,20,, ,30.
The usual forms of the CIRCLE command are:
C O M M A N D
CIRCLE color source, center row, center column, radius
CIRCLE color source, c-row, c-col, width, height
CIRCLE color source, c-row, c-col, wid, ht, start, finish
CIRCLE color source, c-row, c-col, width, he ight,, ,angle
CIRCLE color source, c-row, c-col, wid, ht, , , ,point angle
Table 9: Forms of the CIRCLE Command
Exercise 20: Olympics
Type NEW then hit RETURN. Don’t forget to hit the RETURN key after each
line. Type RUN and hit RETURN at the end.
10 COLOR 0,1
20 COLOR 1,2
30 GRAPHIC 2,1
40 FOR L = 1 T 0 5
50Y = 50
60 IF L = 2 OR L = 4 THEN Y = 100
7 0 X= L*35 + 50
80 CIRCLE 1 ,X,Y,50,42
90 NEXT
100 PRINT "SUPPORT THE OLY M PICS!’’
______________________________________
EFFECT
Oval
Circle/oval
Arc
Rotate oval
Polygon
63
Page 70
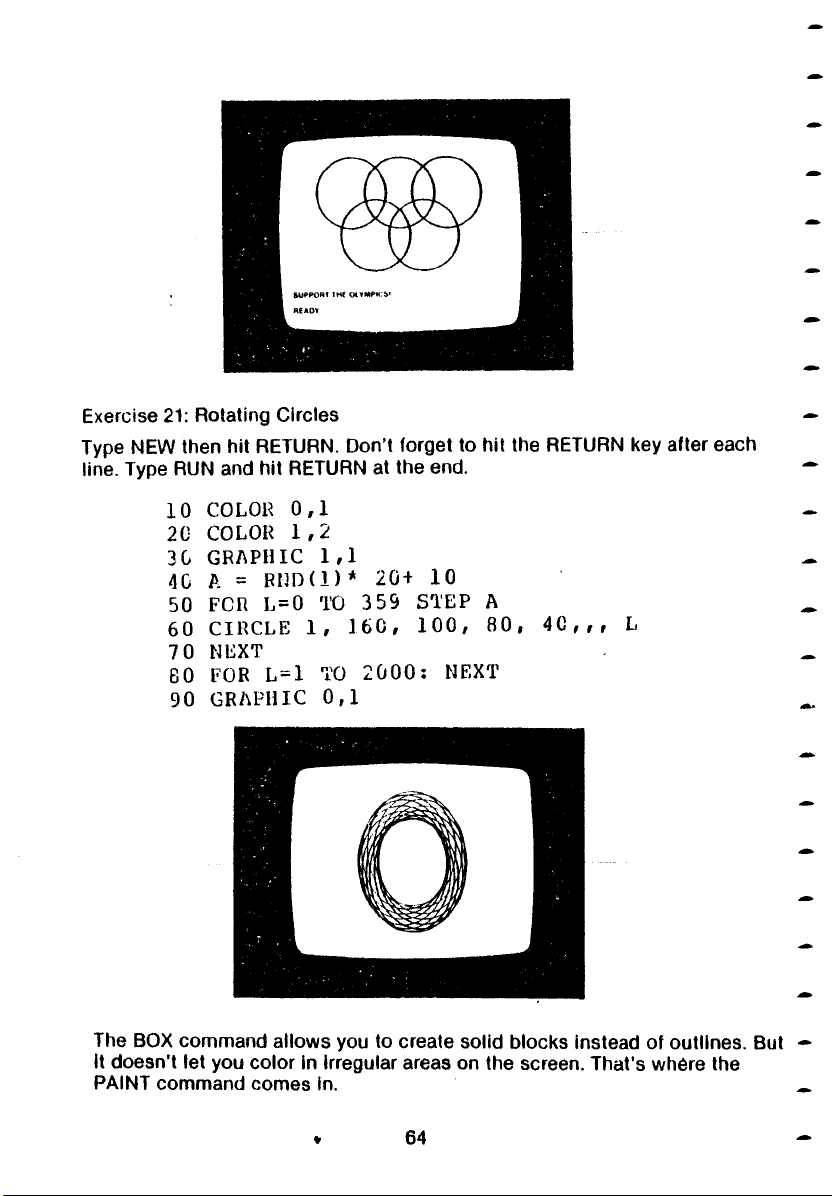
Exercise 21: Rotating Circles
Type NEW then hit RETURN. Don’t forget to hit the RETURN key after each
line. Type RUN and hit RETURN at the end.
10 COLOR 0,1
20 COLOR 1,2
30 GRAPHIC 1,1
40 A = RND(1)* 20+ 10
50 FCR L=0 TO 359 STEP A
60 CIRCLE 1, 160, 100, 80, 40,,, L
70 NEXT
80 FOR L=1 TO 2000: NEXT
90 GRAPHIC 0,1
The BOX command allows you to create solid blocks instead of outlines. But
it doesn’t let you color in irregular areas on the screen. That’s wh6re the
PAINT command comes In.
64
Page 71
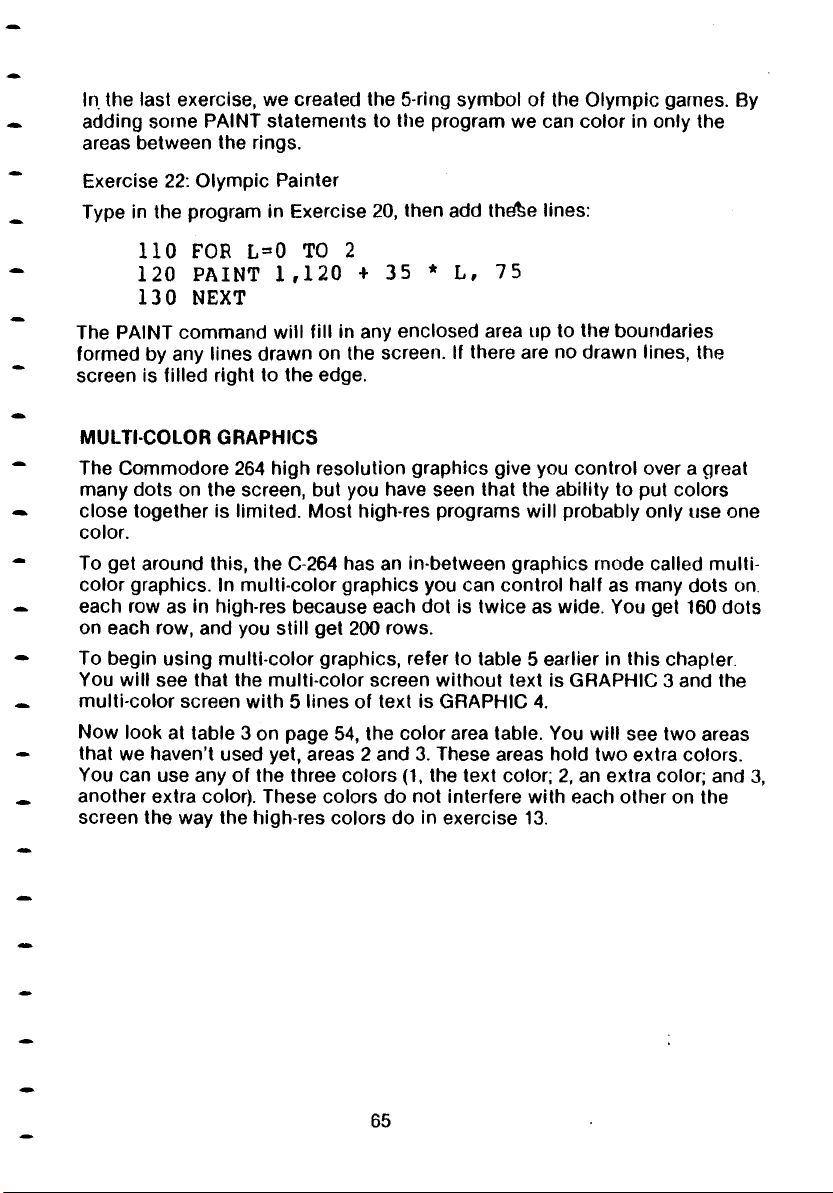
In the last exercise, we created the 5-ring symbol of the Olympic games. By
adding some PAINT statements to the program we can color in only the
areas between the rings.
Exercise 22: Olympic Painter
Type in the program in Exercise 20, then add the&e lines:
110 FOR L=0 TO 2
120 PAINT 1 ,120 + 35 * L, 75
130 NEXT
The PAINT command will fill in any enclosed area up to the boundaries
formed by any lines drawn on the screen. If there are no drawn lines, the
screen is filled right to the edge.
MULTI-COLOR GRAPHICS
The Commodore 264 high resolution graphics give you control over a great
many dots on the screen, but you have seen that the ability to put colors
close together is limited. Most high-res programs will probably only use one
color.
To get around this, the C-264 has an in-between graphics rnode called multi
color graphics. In multi-color graphics you can control half as many dots on.
each row as in high-res because each dot is twice as wide. You get 160 dots
on each row, and you still get 200 rows.
To begin using multi-color graphics, refer to table 5 earlier in this chapter.
You will see that the multi-color screen without text is GRAPHIC 3 and the
multi-color screen with 5 lines of text is GRAPHIC 4.
Now look at table 3 on page 54, the color area table. You will see two areas
that we haven’t used yet, areas 2 and 3. These areas hold two extra colors.
You can use any of the three colors (1, the text color; 2, an extra color; and 3,
another extra color). These colors do not interfere with each other on the
screen the way the high-res colors do in exercise 13.
65
Page 72
Exercise 23: M ulti-color Olympics ^
Type NEW then hit RETURN. Don’t forget to hit the RETURN key after each
line. Type RUN and hit RETURN at the end.
10 COLOR 0,1
20 GRAPHIC 4,1
30 FOR L=1 TO 5
40 Q=L: IF Q>3 THEN Q=Q-3
50 COLOR Q,L + 1
60 Y=50
70 IF L=2 OR L=4 THEN Y=100
80 X= L*18 + 25
90 CIRCLE Q, X, Y, 25, 42
100 NEXT
110 PRINT "SUPPORT THE OLYMPICSl" -
Color area 3, the second of the multicolor areas, has a special ability that ^
none of the others has. Once you have drawn on the screen using area 3,
you can change that color everywhere it appears on the screen by using the_
COLOR command. If you set the color with COLOR 3,5 and draw using that
color, your graphics will appear in purple. If you then change the color with
COLOR 3,6, all the purple areas would change tQ green. This doesn’t work ~
with any other area.
The Commodore 264 Programmer’s Reference Guide contains more “
information about graphics.
Exercise 24: Neon Sign
Type NEW then hit RETURN. Don’t forget to hit the RETURN key after e a cl~
line. Type RUN and hit RETURN at the end.
10 COLOR 0,1
20 GRAPHIC 3,1 _
30 COLOR 3,1
40 TRAP 200 *
50 DRAW 3,10,10 TO 10,100: DRAW 3,10,55 TO 30,55“
60 DRAW 3,30,10 TO 30,100: DRAW 3,50,10 T080,10
70 DRAW 3,65,1C TO 65,100: DRAW 3,50,100 TO 80,1~)
80 FOR L=0 TO 7
90 COLOR 3,2,L ~
1C0 FOR M=1 TC 100: NEXT
110 NEXT -
120 COLOR 3,1
13C FOR M=1 TO 100: NEXT , -
140 GOTO 80
200 GRAPHIC 0: COLOR 1,2,7 _
Page 73
CHAPTER
MAKING SOUND AND
MUSIC ON THE C-264
• Introduction
• Making some music
• The C-264 music machine
67
Page 74
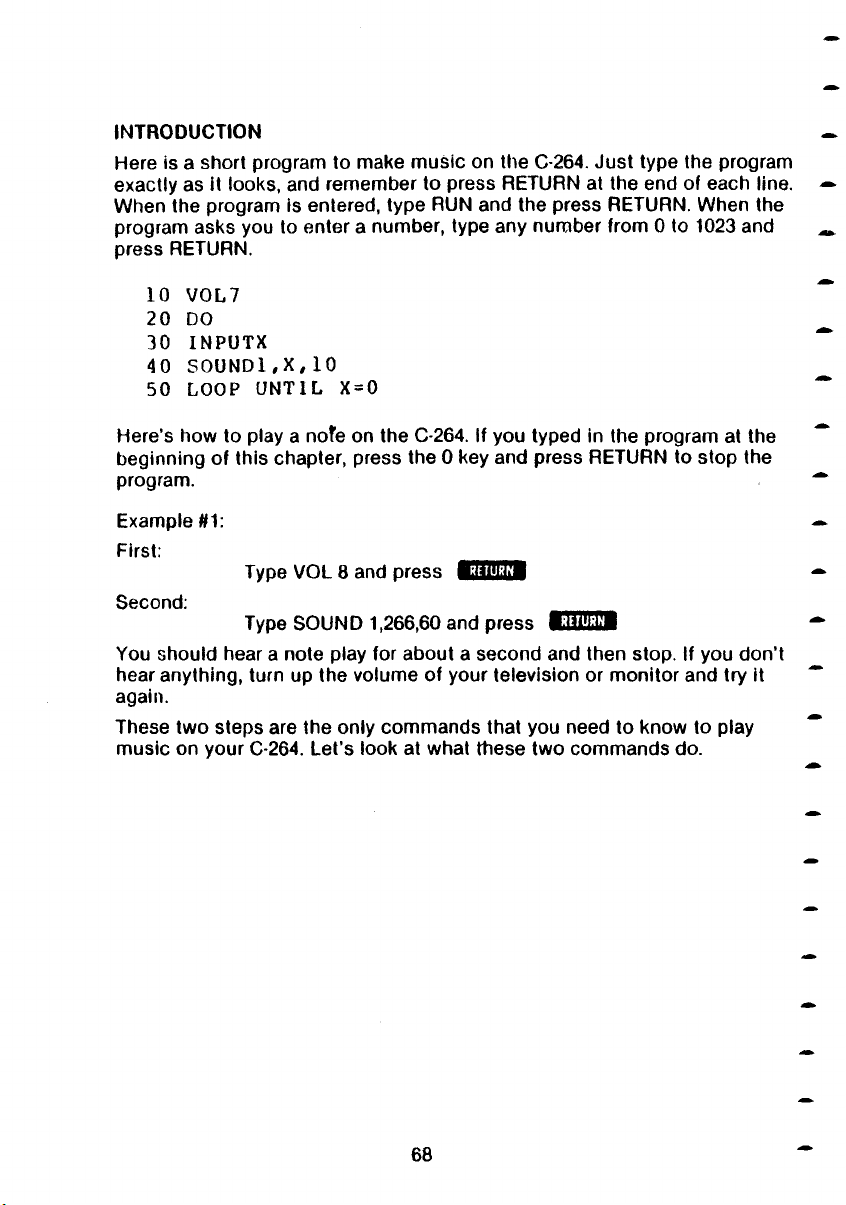
INTRODUCTION
Here is a short program lo make music on the C-264. Just type the program
exactly as it looks, and remember to press RETURN at the end of each line.
When the program is entered, type RUN and the press RETURN. When the
program asks you to enter a number, type any number from 0 to 1023 and
press RETURN.
10 VOL7
20 DO
30 INPUTX
40 SOUNDl,X ,10
50 LOOP UNTIL X=0
Here’s how to play a nofe on the C-264. If you typed in the program at the
beginning of this chapter, press the 0 key and press RETURN to stop the
program.
Example #1:
First:
Type VOL 8 and press
Second:
Type SO UND 1,266,60 and press
You should hear a note play for about a second and then stop. If you don’t
hear anything, turn up the volume of your television or monitor and try it
again.
These two steps are the only commands that you need to know to play
music on your C-264. Let’s look at what these two commands do.
RETURN
RETURN
68
Page 75
VOL
The VOL command controls the volume of the notes that the C-264 will play.
Think of the first three letters of the word ‘volume’ to remember the VOL
“ command. The number that comes after VOL is the setting for the volume.
Think o< the VOL command as a volume knob on the C-264. When the knob
*“ points to zero, the volume is off and you won't hear anything. When the knob
points to 8, the volume is turned up all the way, and the C-264 will play as
— loud as it can.
__ Try the first example again and use a different number after the command
VOL. As the number you choose gets smaller, the note that is played will get
quieter.
SOUND
The SOUND command tells the C-264 everything about the note you want to
~ play. The SOUND command has three numbers after it that describe the
note you want to play.
VOICE
The first number after the word SOUND can be a 1,2 or 3. This number
— selects which of the two voices you want to use. Just like a choir has
different voices, so does the C-264. Each of the voices is a little different,
_ and you have to choose the one that best fits what you are trying to play.
Voice 1 — This voice plays tones. You select this with a 1 following the
— SOUND command. It can go very high, and pretty low too.
Voice 2 — This voice can be used for tones or for noise. Use a 2 after the
“ SOUND command to select tones, and a 3 to select noise.
You can use noise to make sound effects like thunder and rain.
NOTE
The second number after the word SOUND is the note value. This can be any
«. number from 0 to 1023, and it tells the C-264 how low or high a note to play.
As the numbers get bigger, the notes get higher.
— Noise is “white” noise only in the range 600-940. You can use register values
outside this range to create other interesting sound effects.
69
Page 76
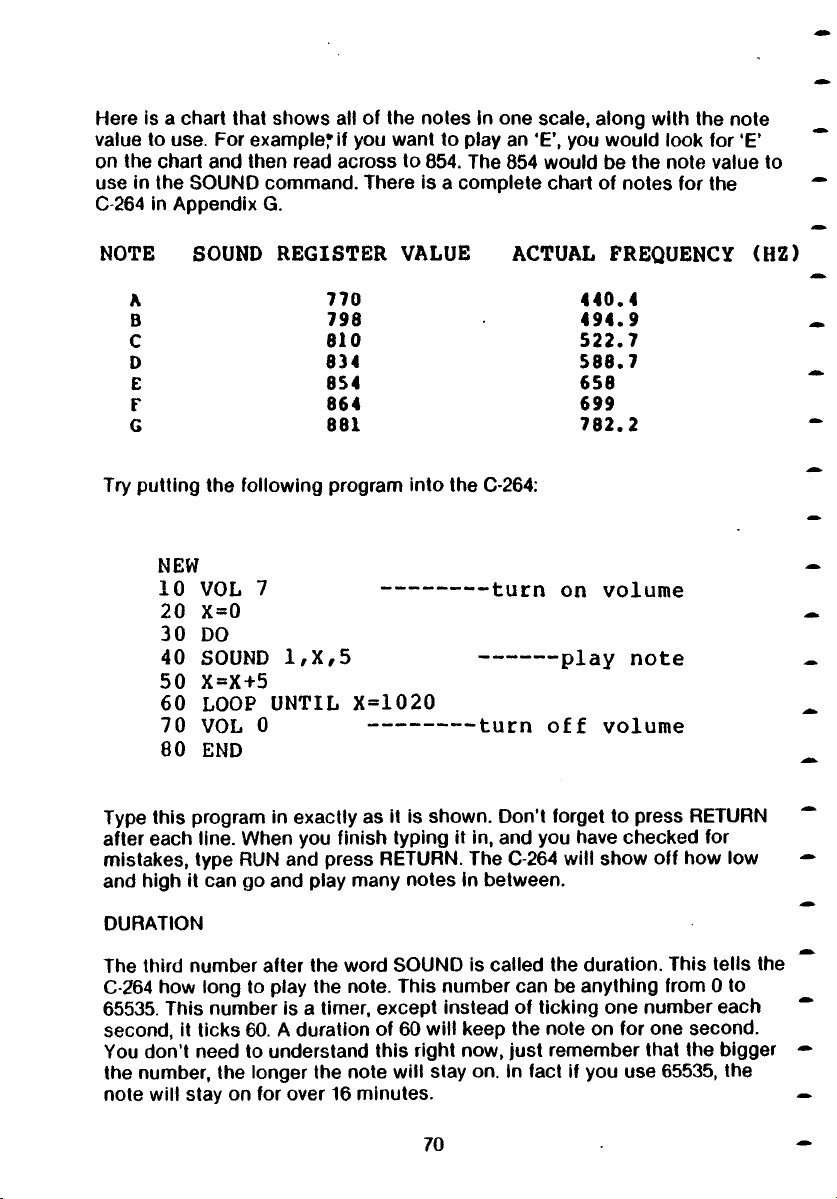
Here is a chart that shows all of the notes in one scale, along with the note
value to use. For exam plerif you want to play an *E\ you would look for ‘E’
on the chart and then read across to 854. The 854 would be the note value to
use in the SOUND command. There is a complete chart of notes for the
C-264 in Appendix G.
NOTE SOUND REGISTER VALUE ACTUAL FREQUENCY (HZ)
A
D
C
D
E
F
G
Try putting the following program into the C-264:
770 4 4 0 .4
798 49 4.9
810 52 2 .7
834 5 88 .7
854 658
864
881 7 8 2.2
699
NEW
10 VOL 7
-----
— turn on volume
20 X=0
30 DO
40 SOUND l,X,5
-----
play note
50 X=X+5
60 LOOP UNTIL X=1020
70 VOL 0
------
— turn off volume
80 END
Type this program in exactly as it is shown. Don’t forget to press RETURN
after each line. When you finish typing it in, and you have checked for
mistakes, type RUN and press RETURN. The C-264 will show off how low
and high it can go and play many notes in between.
DURATION
The third number after the word SOUND is called the duration. This tells the
C-264 how long to play the note. This number can be anything from 0 to
65535. This number is a timer, except instead of ticking one number each
second, it ticks 60. A duration of 60 will keep the note on for one second.
You don't need to understand this right now, just remember that the bigger
the number, the longer the note will stay on. In fact if you use 65535, the
note will stay on for over 16 minutes.
Page 77
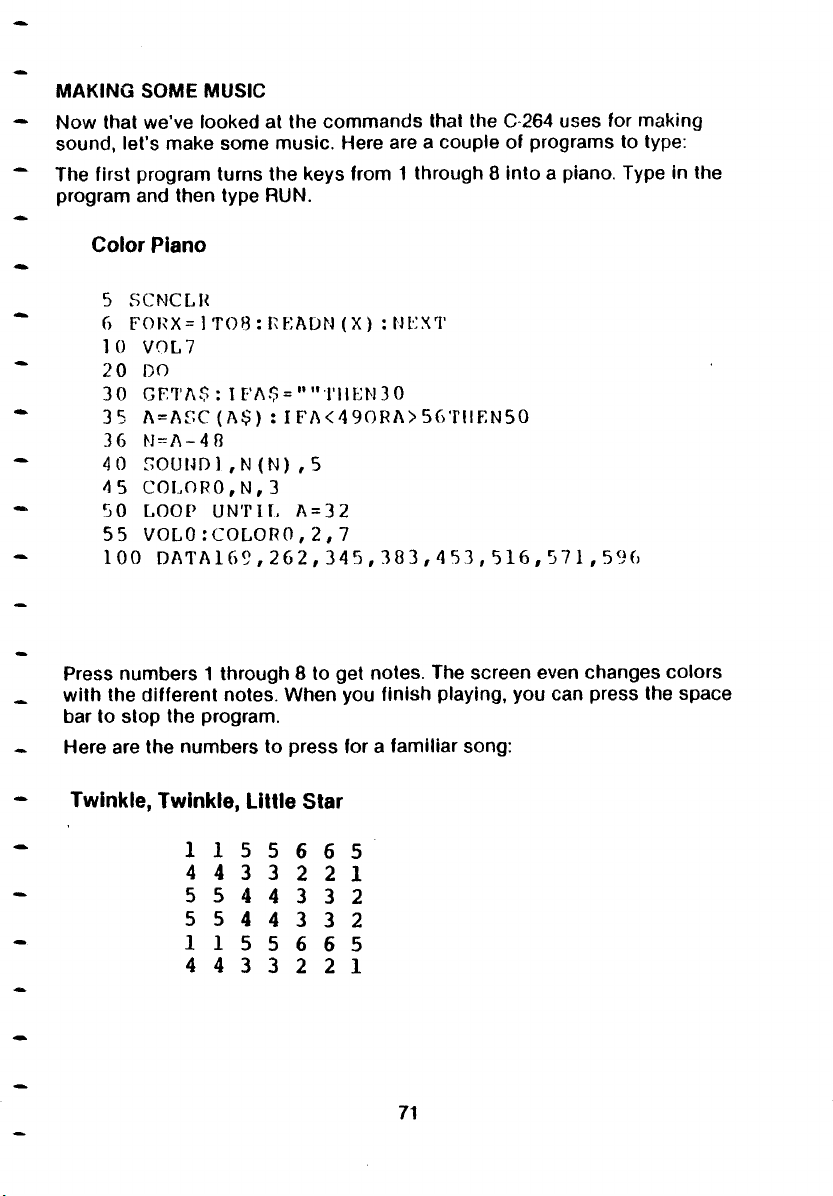
MAKING SOME MUSIC
Now that we’ve looked at the commands that the C-264 uses for making
sound, let's make some music. Here are a couple of programs to type:
The first program turns the keys from 1 through 8 into a piano. Type in the
program and then type RUN.
Colo r P ian o
5 SCNCLR
6 FOR X =1 TO 8 : RE A D N ( X ) : N F XT
10 VO L7
20 DO
30 GETA $ : 1 FA$ = "" fl l E N 3 0
35 A = Af>C(A$ ) : IF A <4 9ORA> 56T !IF,N50
36 M =f l-4 R
4 0 SOUND 1 , N(N ) ,5
45 CO L OR O,N ,3
50 LOOP U NT I L A = 3 2
55 V O L 0 :CO L O R O , 2 ,1
10 0 DATA 1 6 9 ,2 6 2 , 3 4 5 , 3 8 3 , 4 5 3 ,5 1 6 , 5 7 1 , 5 9 6
Press numbers 1 through 8 to get notes. The screen even changes colors
with the different notes. When you finish playing, you can press the space
bar to stop the program.
Here are the numbers to press for a familiar song:
Twinkle , Tw in k le, LiHle Star
1 1 5 5 6 6 5
4 4 3 3 2 2 1
5 5 4 4 3 3 2
5 5 4 4 3 3 2
1 1 5 5 6 6 5
4 4 3 3 2 2 1
71
Page 78
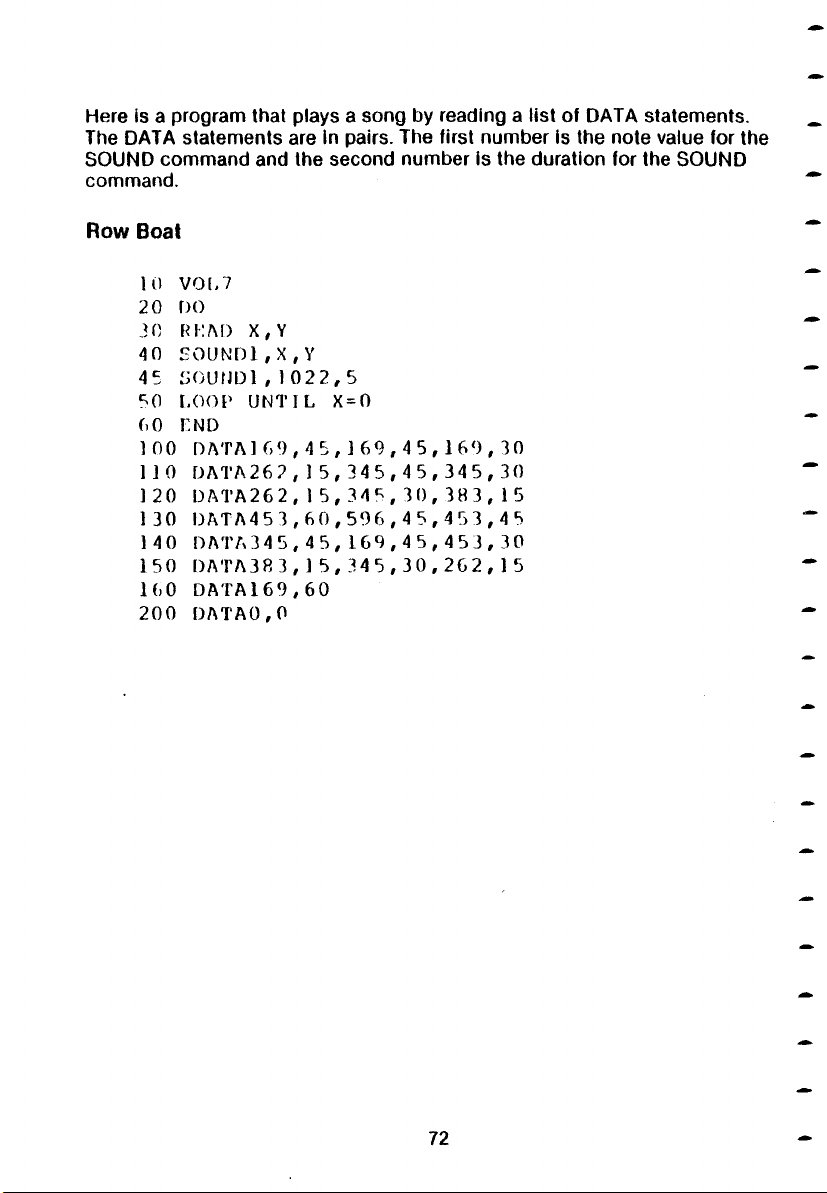
Here is a program that plays a song by reading a list of DATA statements.
The DATA statements are in pairs. The first number is the note value for the
SOUND command and the second number is the duration for the SOUND
command.
Ro w Boat
VOl,7
10
f)0
20
3 0 Ri:M) X , Y
40
SO U ND1 , X
45 SO U N Dl,1 0 2
50
LOOP UNT I L
6 0 LND
1 00 DA T Al6 9
DATA26 ?
1 1 0
1 20 D A TA 2 6 2
13 0 D AT A 4 5 3
14 0 DATA 3 4 5.45
15 0 DA TA 3 83,15
DATA 16 9 , 6 0
l(.0
20 0
D A TA 0, 0
,Y
2 , 5
X = 0
t
, 1 6 9 , 45,1 6 0,
,4
5 , 34 5 ,
,1
, 3 45 , 3
5
, 1
0
, 5 0 6 ,
,6
, 1 69 ,
, 34 5 ,
4
5 ,
0,
4
5 ,
4
5,
3
0 ,
30
30
34 5 ,
15
38 3 ,
45 3 , 45
30
453 ,
2 6 2 ,
1 5
72
Page 79
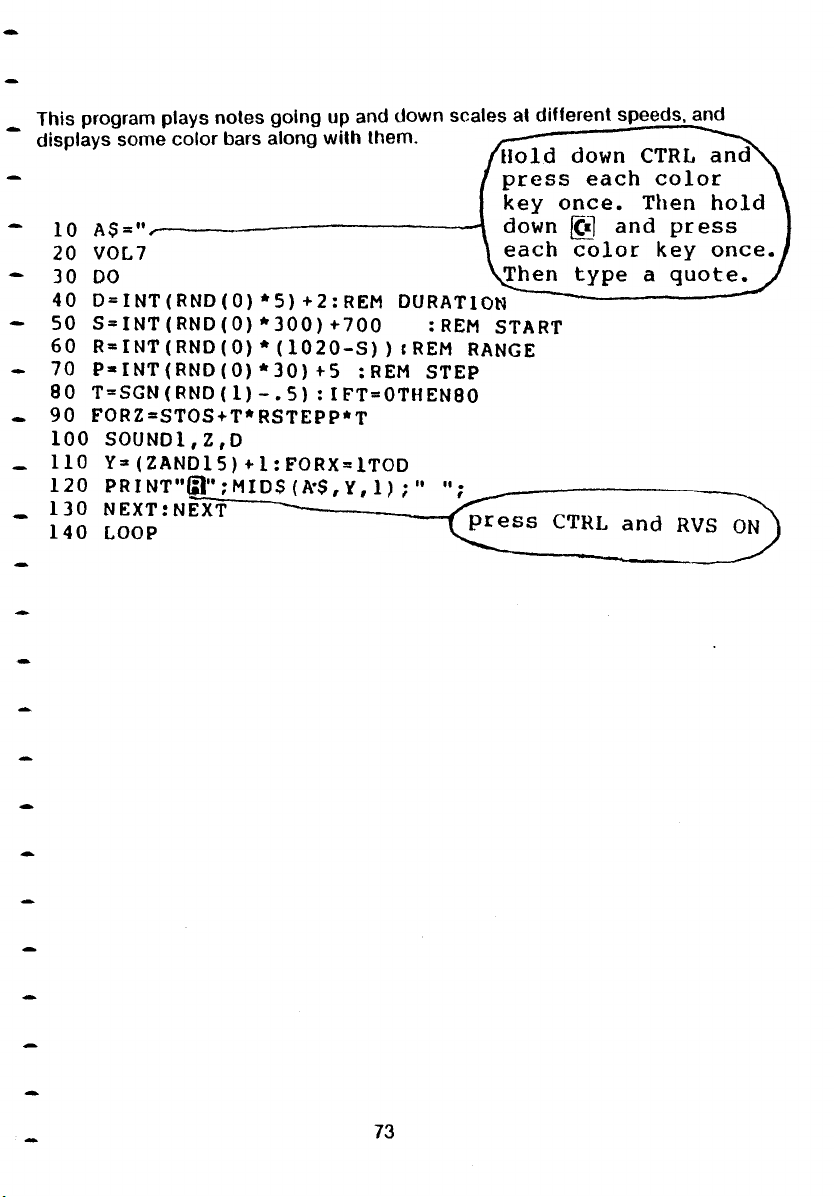
This program plays notes going up and down scales at different speeds, and
displays some color bars along with them.
10 A$="
20 VOL7
3 0 DO
40 D=INT(RND(0)*5)+2:REM DURATIuN
- 50 S=INT(RND(0)*300)+700 :REM START
60 R=INT(RND(0)* (1020-S))t REM RANGE
• 70 P*INT(RND(0)*30)+5 :REM STEP
80 T*SGN(RND(1)-.5):IFT=0THEN80
• 90 FORZ*STOS+T*RSTEPP*T
100 SOUNDl,Z,D
_ 110 Y = (ZAND15)+1:FORX=lTOD
120 PRINT"S1''; MID$ (A*$, Y, 11 : " '•: ____
_ 130 NEXT:NEXT
140 LOOP
CTRL
73
Page 80
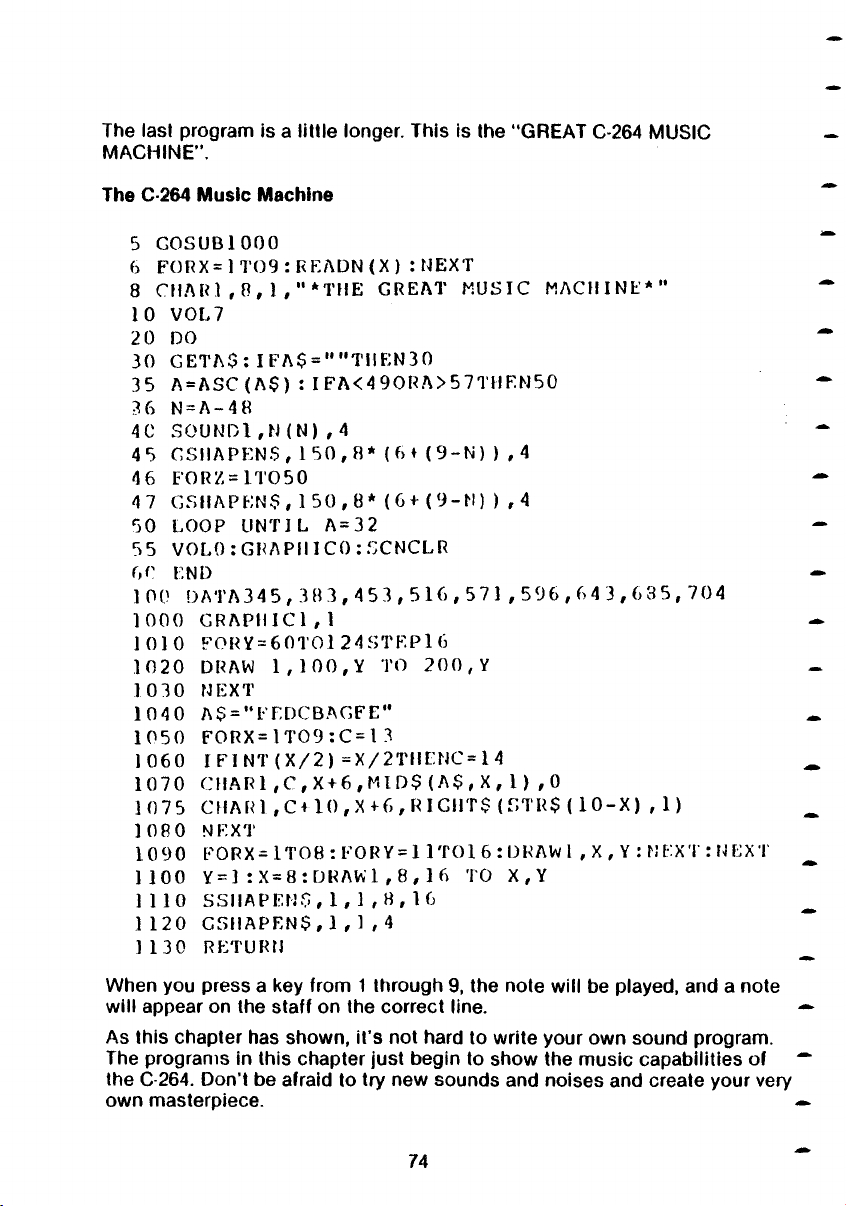
The last program is a little longer. This is the “GREAT C-264 MUSIC
MA C H INE” .
The C-264 Music Machine
5 GO S U Bl0 0 0
6 FORX = 1T 0 9 : R E A DN ( X ) : NEXT
8 CH A R1 , 8 , 1 , "* T H E G REAT MUSIC M AC HIN E *”
10 VOL7
2 0 DO
30 G E TA $: I FA$ = ""T H EN 3 0
35 A = ASC ( A $ ) : I FA<4 9 0 R A> 5 7 TH FN 50
36 N = A - 4 8
4 C S O U N D l, N < N ) , 4
4 5 G SII A P E N$ , 1 5 0 , 8 * ( 6 r ( 9 -N ) ) ,4
46 F O R Z = lT 05 0
47 G S H AP E N $, 1 5 0 , 8 * ( 6 + ( 9 - N ) ) , 4
60 LOOP U NT IL A = 3 2
55 V O LO : GRAPH IC O : SCN CLR
6 r END
10 0 D A T A 3 4 5 ,3 8 3, 4 5 3 , 5 1 6 , 5 7 1 , 5 9 6 ,6 4 3 ,6 3 5 , 7 0 4
10 0 0 GRAPH I C 1 ,1
1 0 10 FO R Y= 6 0 T Ol 2 4 S TF .P l6
10 2 0 DRAW 1 , 1 0 0 , Y TO 2 0 0 ,Y
10 3 0 NEXT
10 4 0 A$ = "FF.DC BAGFE"
10 5 0 F O R X = I T 0 9 : C = l3
]0 6 0 I F I N T (X / 2 ) = X /2 T H E N C = 14
107 0 C H A R l ,C , X + 6 , M1D $ ( A $ , X , 1 ) ,0
1 0 75 CHAR 1 , C + 1 0 , X + 6 , R I G H T $ (S T R $ (1 0 - X ) ,1 )
1 0 8 0 NEXT
109 0 F 0 R X = lT 0 8 : FORY = l l T O l 6 : DRAW 1 , X , Y : N EX T: NEXT
1100 Y = 1 : X = 8 : DRAW 1 , 8 , 1 6 TO X ,Y
111 0 S S HA PE N 0, 1 , 1 , 8 , 1 6
1 12 0 C5 HA PE N$ , 1 , 1 ,4
113 0 RETURN
When you press a Key from 1 through 9, the note will be played, and a note
will appear on the staff on the correct line.
As this chapter has shown, it’s not hard to write your own sound program.
The programs in this chapter just begin to show the music capabilities of
the C-264. Don’t be afraid to try new sounds and noises and create your very
own masterpiece.
74
Page 81
CHAPTER
BASIC TRICKS
75
Page 82
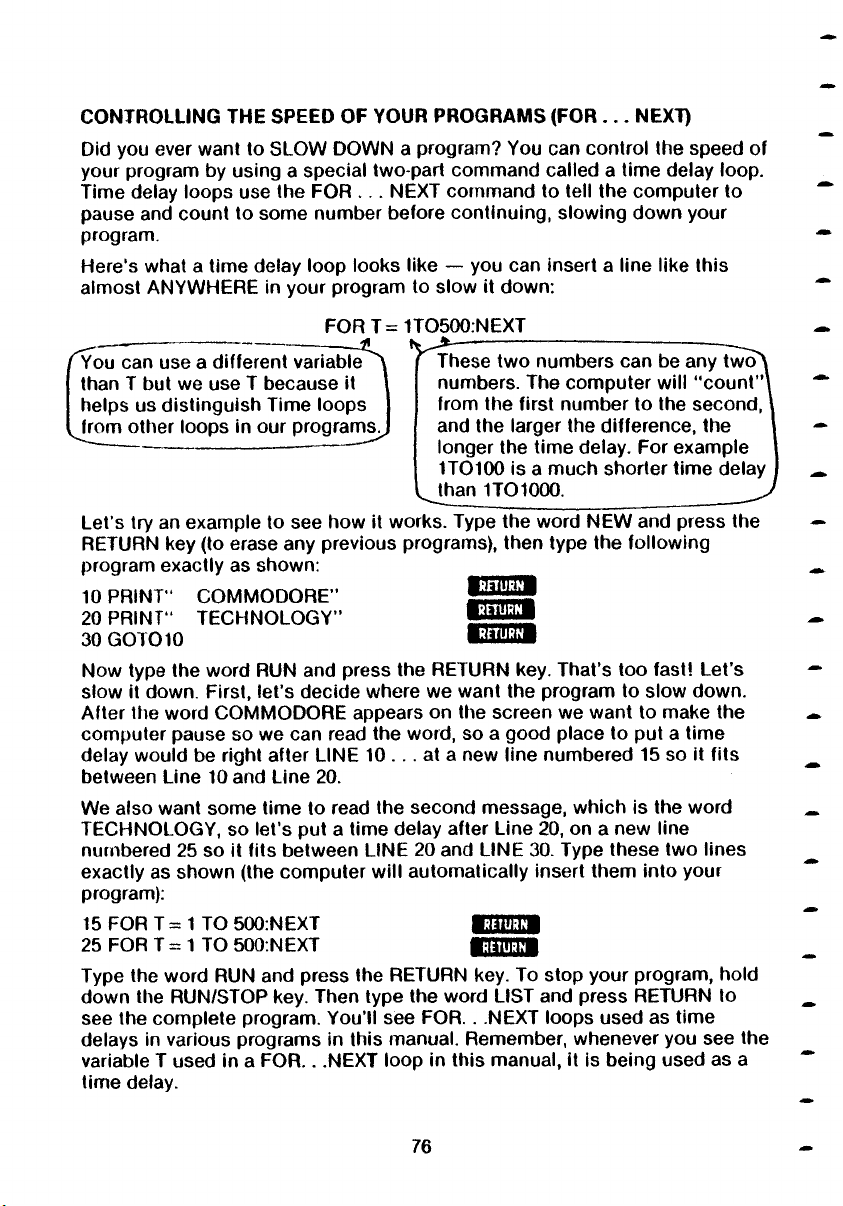
CONTROLLING THE SPEED O F YOUR PROGRAMS (FOR . . . NEXT)
Did you ever want to SLOW DOWN a program? You can control the speed of
your program by using a special two-part command called a time delay loop.
Time delay loops use the FOR . . . NEXT command to tell the computer to
pause and count to some number before continuing, slowing down your
program.
Here’s what a time delay loop looks like — you can insert a line like this
almost ANYWHERE in your program to slow it down:
FOR T = 1TO500:NEXT
v ^
^You can use a different variable
than T but we use T because it
helps us distinguish Time loops
from other loops in our programsJ
These two numbers can be any two*
numbers. The computer will "count”^
from the first number to the second,
and the larger the difference, the
longer the time delay. For example
ITOIOO is a much shorter time delay
than ITOIOOO.
Let’s try an example to see how it works. Type the word NEW and press the
RETURN key (to erase any previous programs), then type the following
program exactly as shown:
10 PR INT' COMMODORE”
20 PRINT” TECHNOLOGY”
30 GOTOIO
______
RETURN
RETURN
RETURN
Now type the word RUN and press the RETURN key. That’s too fast! Let’s
slow it down. First, let’s decide where we want the program to slow down.
After the word COMM ODORE appears on the screen we want to make the
computer pause so we can read the word, so a good place to put a time
delay would be right after LINE 10 . .. at a new line numbered 15 so it fits
between Line 10 and Line 20.
We also want some time to read the second message, which is the word
TECHNOLOGY, so let’s put a time delay after Line 20, on a new line
numbered 25 so it fits between LINE 20 and LINE 30. Type these two lines
exactly as shown (the computer will automatically insert them into your
program):
15 FOR T = 1 TO 500:NEXT
25 FOR T = 1 TO 500:NEXT
RETURN
RETURN
Type the word RUN and press the RETURN key. To stop your program, hold
down the RUN/STOP key. Then type the word LIST and press RETURN to
see the complete program. You’ll see FO R.. .NEXT loops used as time
delays in various programs in this manual. Remember, whenever you see the
variable T used in a F OR .. .NEXT loop in this manual, it is being used as a
time delay.
76
Page 83
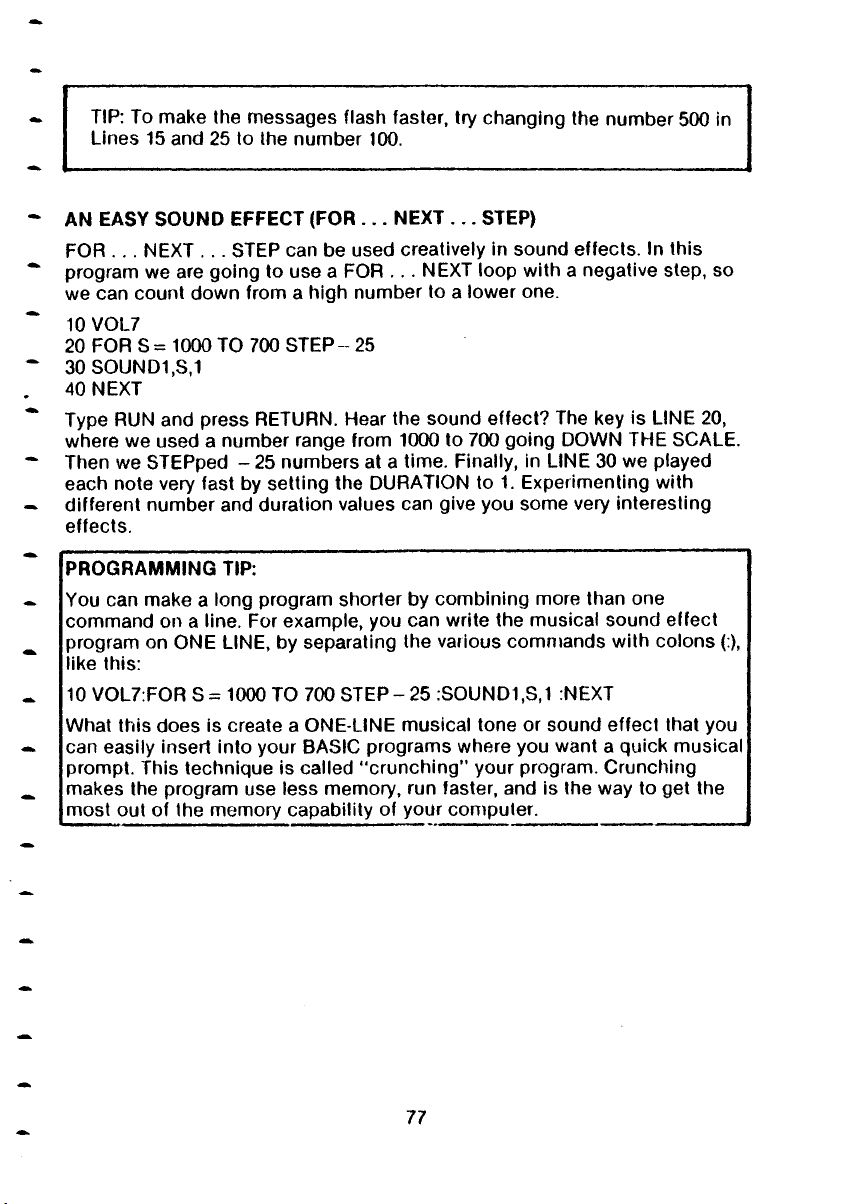
TIP: To make the messages flash faster, try changing the number 500 in
Lines 15 and 25 to the number 100.
• AN EASY SOUND EFFECT (FOR . .. NEXT . . . STEP)
FOR .. . NEXT . .. STEP can be used creatively in sound effects. In this
*■ program we are going to use a FOR . . . NEXT loop with a negative step, so
we can count down from a high number to a lower one.
* 10 VOL7
20 FOR S = 1000 TO 700 STEP - 25
~ 30 SOUND1,S,1
40 NEXT
~ Type RUN and press RETURN. Hear the sound effect? The key is LINE 20,
where we used a number range from 1000 to 700 going DOWN THE SCALE.
*~ Then we STEPped - 25 numbers at a time. Finally, in LINE 30 we played
each note very fast by setting the DURATION to 1. Experimenting with
— different number and duration values can give you some very interesting
effects.
PROGRAMMING TIP:
You can make a long program shorter by combining more than one
command on a line. For example, you can write the musical sound effect
program on ONE LINE, by separating the various commands with colons (:),
like this:
10 VOL7:FOR S = 1000 TO 700 S TE P-2 5 :SOUND1,S,1 :NEXT
What this does is create a ONE-LINE musical tone or sound effect that you
can easily insert into your BASIC programs where you want a quick musical
prompt. This technique is called "crunching” your program. Crunching
makes the program use less memory, run faster, and is the way to get the
most out of the memory capability of your computer.
77
Page 84
UNDERSTANDING RANDOM NUMBERS
Take 10 pieces of paper and wrile a number from 1 to 10 on each piece.
Next, put the 10 pieces of paper into a hat or other container where you can't
see them. Now, cover your eyes and draw out one piece of paper. What
number did you get? That number is a RANDOM number. Now put the
number back into the hat, mix up the papers and draw again. Each time you
draw a number, put that number back in the hat so there are always 10
pieces of paper to choose from. Keeping 10 numbers in the hat means you
always have 10 random numbers in the hat. When you take a number, you
DO N ’T know what number Is going to come up next, but you DO know that
the number will be between 1 and 10. This is the basis of RANDOM
NUMBERS.
In programming, random numbers usually have a RANGE. This means
there’s an UPPER LIMIT and a LOWER LIMIT to the numbers you can draw.
In our hat example, the range of number is 1 to 10. The lower limit is “ 1” and
the upper limit is “10”, which means that ANY NUMBER FROM 1 TO 10 CAN
COME UP AT RANDOM W HEN YOU DRAW.
Now let’s see how your Commodore computer handles random numbers,
and some of the fun things you can do with them. Here’s a program that
generates 5 completely RANDOM numbers:
10 FOR X = 1T05: PRINT RND(X): NEXT
These random numbers are all rather complex, with several places on the
right side of the decimal p oin t. . . but most uses for random numbers
require WHOLE NUMBERS. You can make your numbers come out as whole
numbers (without decimal places) by using the INTeger function, which cuts
off all the digits on the RIGHT side of the decimal point. The next section
gives you a formula for using random numbers.
REtURN
78
Page 85
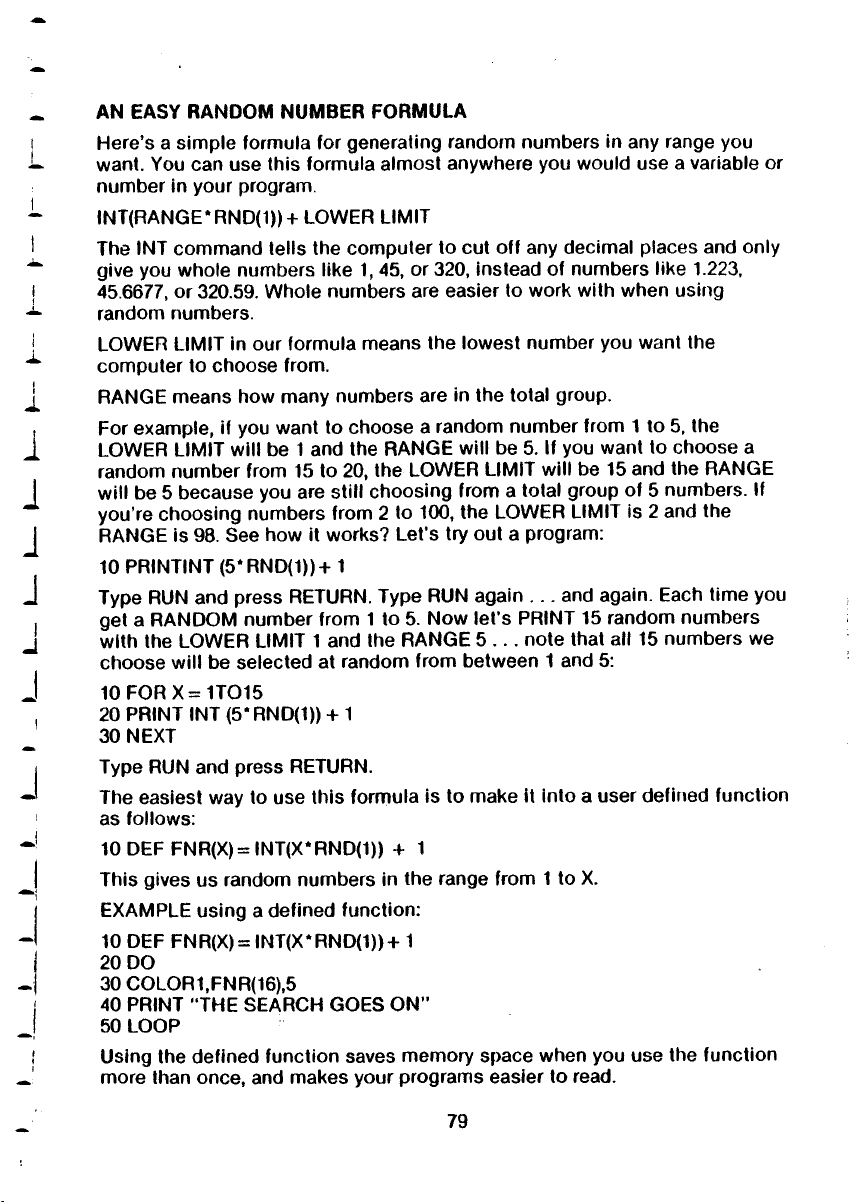
AN EASY RANDOM NUMBER FORMULA
Here’s a simple formula for generating random numbers in any range you
want. You can use this formula almost anywhere you would use a variable or
number in your program.
INT(RAN G E*RND(1))+ LOWER LIMIT
The INT command tells the computer to cut off any decimal places and only
give you whole numbers like 1, 45, or 320, instead of numbers like 1.223,
45.6677, or 320.59. Whole numbers are easier to work with when using
random numbers.
LOWER LIMIT in our formula means the lowest number you want the
computer to choose from.
RANGE means how many numbers are in the total group.
For example, if you want to choose a random number from 1 to 5, the
LOWER LIMIT will be 1 and the RANGE will be 5. If you want to choose a
random number from 15 to 20, the LOWER LIMIT will be 15 and the RANGE
will be 5 because you are still choosing from a total group of 5 numbers. If
you’re choosing numbers from 2 to 100, the LOWER LIMIT is 2 and the
RANGE is 98. See how it works? Let's try out a program:
10 PRINTINT (5*R N D (1))+ 1
Type RUN and press RETURN. Type RUN again .. . and again. Each time you
get a RANDOM number from 1 to 5. Now let’s PRINT 15 random numbers
with the LOWER LIMIT 1 and the RANGE 5 . . . note that all 15 numbers we
choose will be selected at random from between 1 and 5:
10 FOR X = 1T015
20 PRINT INT (5*RND(1)) + 1
30 NEXT
Type RUN and press RETURN.
The easiest way to use this formula is to make it into a user defined function
as follows:
10 DEF FNR (X)= INT(X*RND(1)) + 1
This gives us random numbers in the range from 1 to X.
EXAMPLE using a defined function:
10 DEF FNR(X) = INT(X*RND(1))+ 1
20 DO
30 COLOR1,FNR(16),5
40 PRINT “THE SEARCH GOES ON "
50 LOOP
Using the defined function saves memory space when you use the function
more than once, and makes your programs easier to read.
79
Page 86
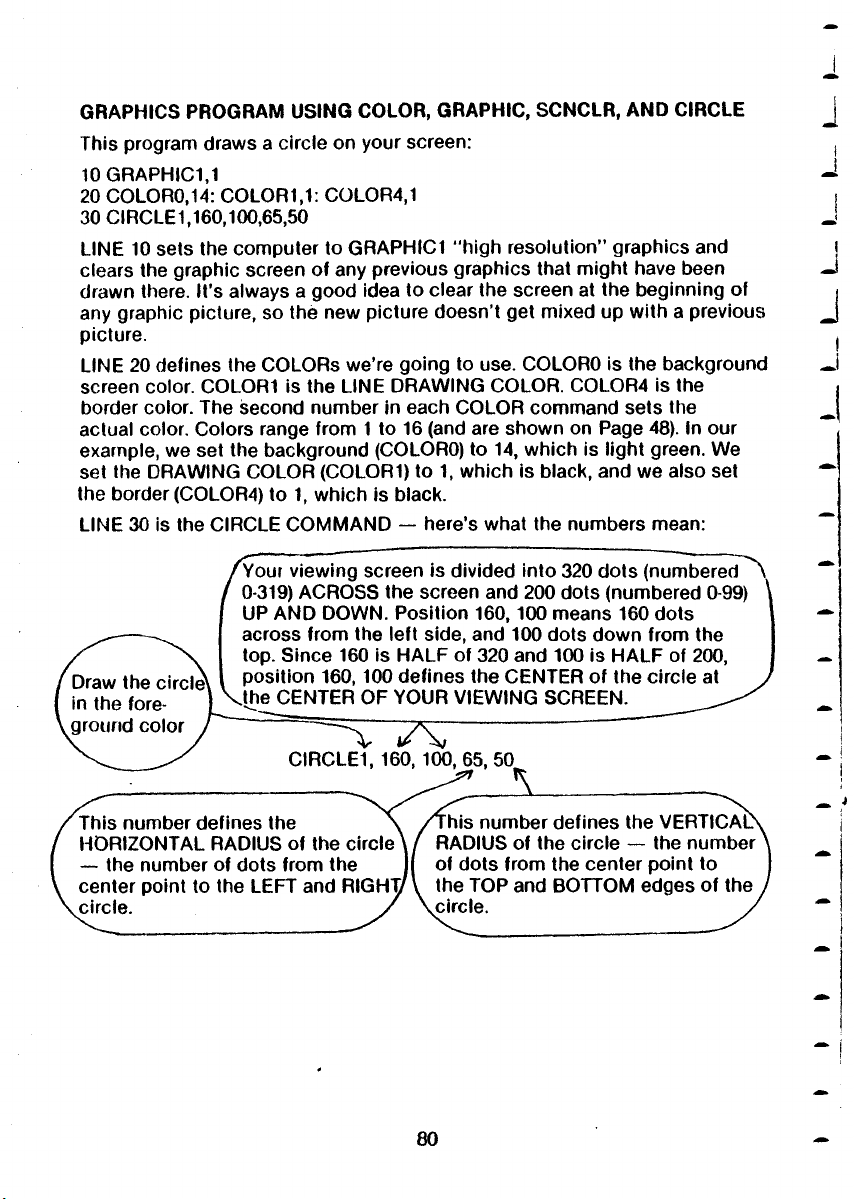
GRAPHICS PROGRAM USING COLOR, GRAPHIC, SCNCLR, AND CIRCLE
This program draws a circle on your screen:
10 GRAPHIC1,1
20 COLORO,14: COLOR1,1: COLOR4,1
30 CIRCLE1,160,100,65,50
LINE 10 sets the computer to GRAPHIC1 "high resolution” graphics and
clears the graphic screen of any previous graphics that might have been
drawn there. It’s always a good idea to clear the screen at the beginning of
any graphic picture, so the new picture doesn’t get mixed up with a previous
picture.
LINE 20 defines the COLORs we’re going to use. COLORO is the background
screen color. COLOR1 is the LINE DRAWING COLOR. COLOR4 is the
border color. The isecond number in each COLOR command sets the
actual color. Colors range from 1 to 16 (and are shown on Page 48). In our
example, we set the background (COLORO) to 14, which is light green. We
set the DRAWING COLOR (COLOR1) to 1, which is black, and we also set
the border(COLOR4) to 1, which is black.
LINE 30 is the CIRCLE COMMAN D — here’s what the numbers mean:
^Your viewing screen is divided into 320 dots ( n um be re d\
0-319) ACROSS the screen and 200 dots (numbered 0-99) ^
UP AND DOWN. Position 160,100 means 160 dots
across from the left side, and 100 dots down from the
top. Since 160 is HALF of 320 and 100 is HALF of 200,
Draw the circle\
in the fore-
.ground color
. position 160,100 defines the CENTER of the circle at
V th e CENTER OF YOUR VIEWING SCREEN.
v ^ v
CIRCLE1, 160, 100, 65,5 0
\
This number defines the
HORIZONTAL RADIUS of the circ le1
— the number of dots from the
center point to the LEFT and R IG H ^
.circle.
This number defines the VERTICALS
RADIUS of the circle — the number
of dots from the center point to
the TOP and BOTTOM edges of the
.circle.
Page 87
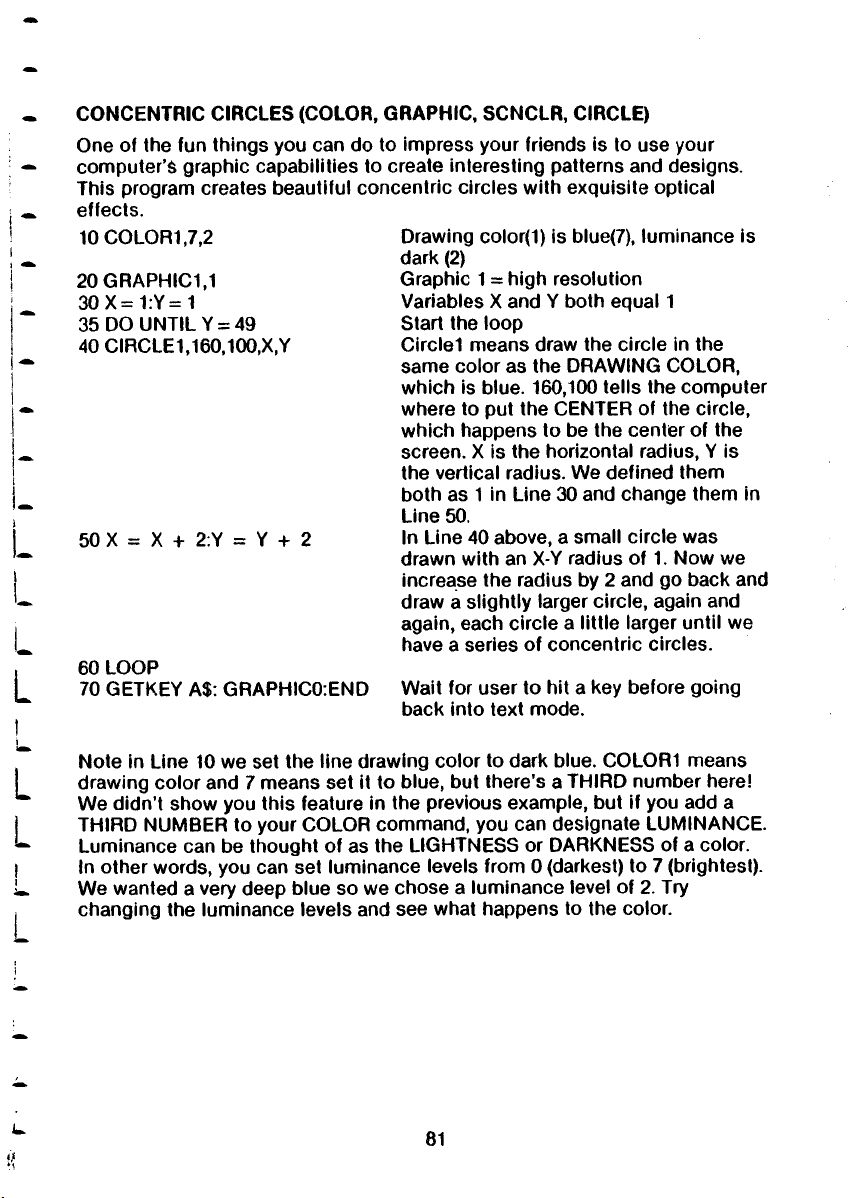
CONCENTRIC CIRCLES (COLOR, GRAPHIC, SCNCLR, CIRCLE)
One of the fun things you can do to impress your friends is to use your
computer’s graphic capabilities to create interesting patterns and designs.
This program creates beautiful concentric circles with exquisite optical
effects.
10 COLOR1,7,2 Drawing color(1) is blue(7), luminance is
dark (2)
20 GRAPHIC1,1
30X=1:Y=1
35 DO UNTIL Y = 49
40 CIRCLE1,160,100,X,Y
50 X = X + 2.Y = Y + 2
60 LOOP
70 GETKEY A$: GRAPHICO:END Wait for user to hit a key before going
Graphic 1 = high resolution
Variables X and Y both equal 1
Start the loop
Circle1 means draw the circle in the
same color as the DRAWING COLOR,
which is blue. 160,100 tells the computer
where to put the CENTER of the circle,
which happens to be the center of the
screen. X is the horizontal radius, Y is
the vertical radius. We defined them
both as 1 in Line 30 and change them in
Line 50.
In Line 40 above, a small circle was
drawn with an X-Y radius of 1. Now we
increase the radius by 2 and go back and
draw a slightly larger circle, again and
again, each circle a little larger until we
have a series of concentric circles.
back into text mode.
Note in Line 10 we set the line drawing color to dark blue. COLOR1 means
drawing color and 7 means set it to blue, but there’s a THIRD number here!
We didn’t show you this feature in the previous example, but if you add a
THIRD NUMBER to your COLOR command, you can designate LUMINANCE.
Luminance can be thought of as the LIGHTNESS or DARKNESS of a color.
In other words, you can set luminance levels from 0 (darkest) to 7 (brightest).
We wanted a very deep blue so we chose a luminance level of 2. Try
changing the luminance levels and see what happens to the color.
81
Page 88
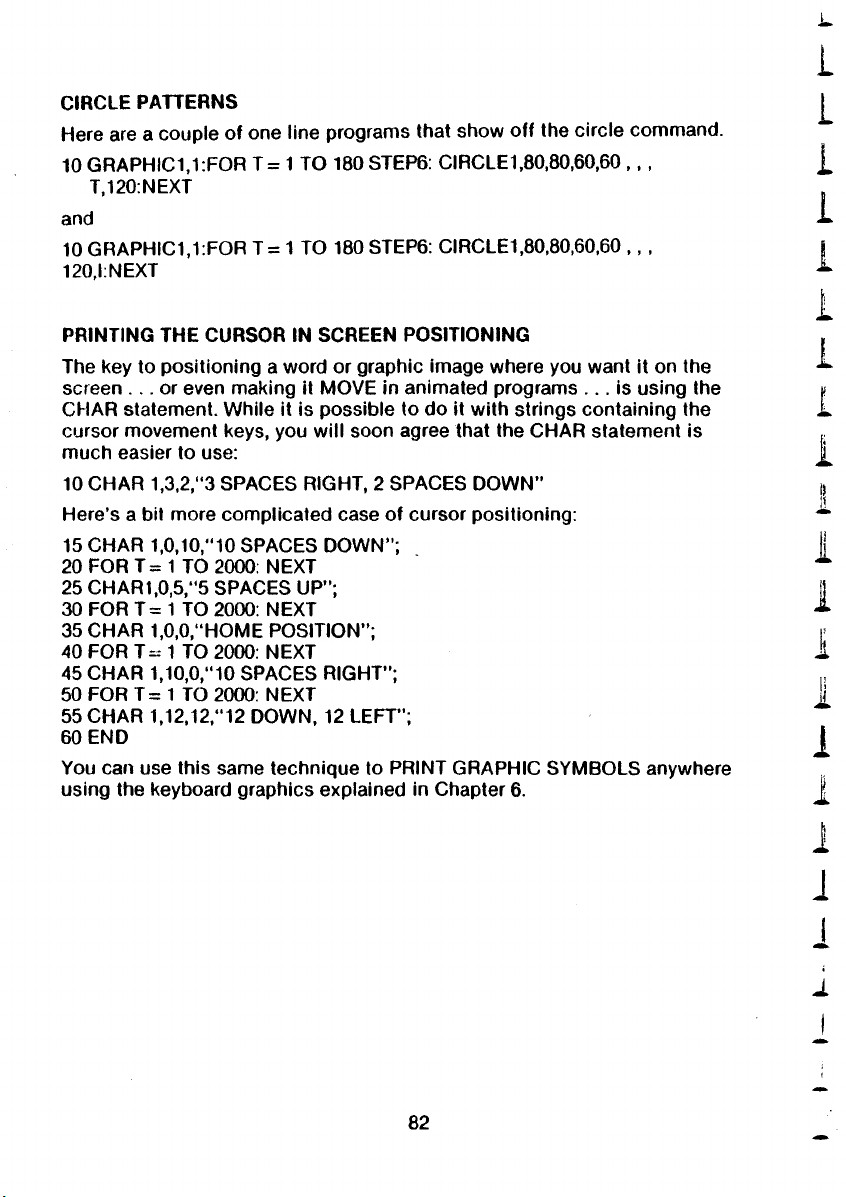
CIRCLE PATTERNS
Here are a couple of one line programs that show off the circle command.
10 GRAPHIC1,1:FOR T = 1 TO 180 STEP6: CIRCLE1,80,80,60,60 , , ,
T,120:NEXT
and
10 GRAPHIC1,1:FOR T = 1 TO 180 STEP6: CIRCLE1,80,80,60,60 , , ,
120,I:NEXT
PRINTING THE CURSOR IN SCREEN POSITIONING
The key to positioning a word or graphic image where you want it on the
screen . .. or even making it MOVE in animated programs . . . is using the
CHAR statement. While it is possible to do it with strings containing the
cursor movement keys, you will soon agree that the CHAR statement is
much easier to use:
10 CHAR 1,3,2,"3 SPACES RIGHT, 2 SPACES DOW N"
Here’s a bit more complicated case of cursor positioning:
15 CHAR 1,0,10,"10 SPACES DOWN";
20 FOR T = 1 TO 2000: NEXT
25 CHAR1,0,5,"5 SPACES UP";
30 FOR T = 1 TO 2000: NEXT
35 CHAR 1,0,0,"HOME POSITION”;
40 FOR T = 1 TO 2000: NEXT
45 CHAR 1,10,0,"10 SPACES RIGHT";
50 FOR T = 1 TO 2000: NEXT
55 CHAR 1,12,12,"12 DOWN, 12 LEFT”;
60 END
You can use this same technique to PRINT GRAPHIC SYMBOLS anywhere
using the keyboard graphics explained in Chapter 6.
L
L
i
1
I
i
1
I
i
|
I
1
i
I
1
1
82
i
i
j
Page 89
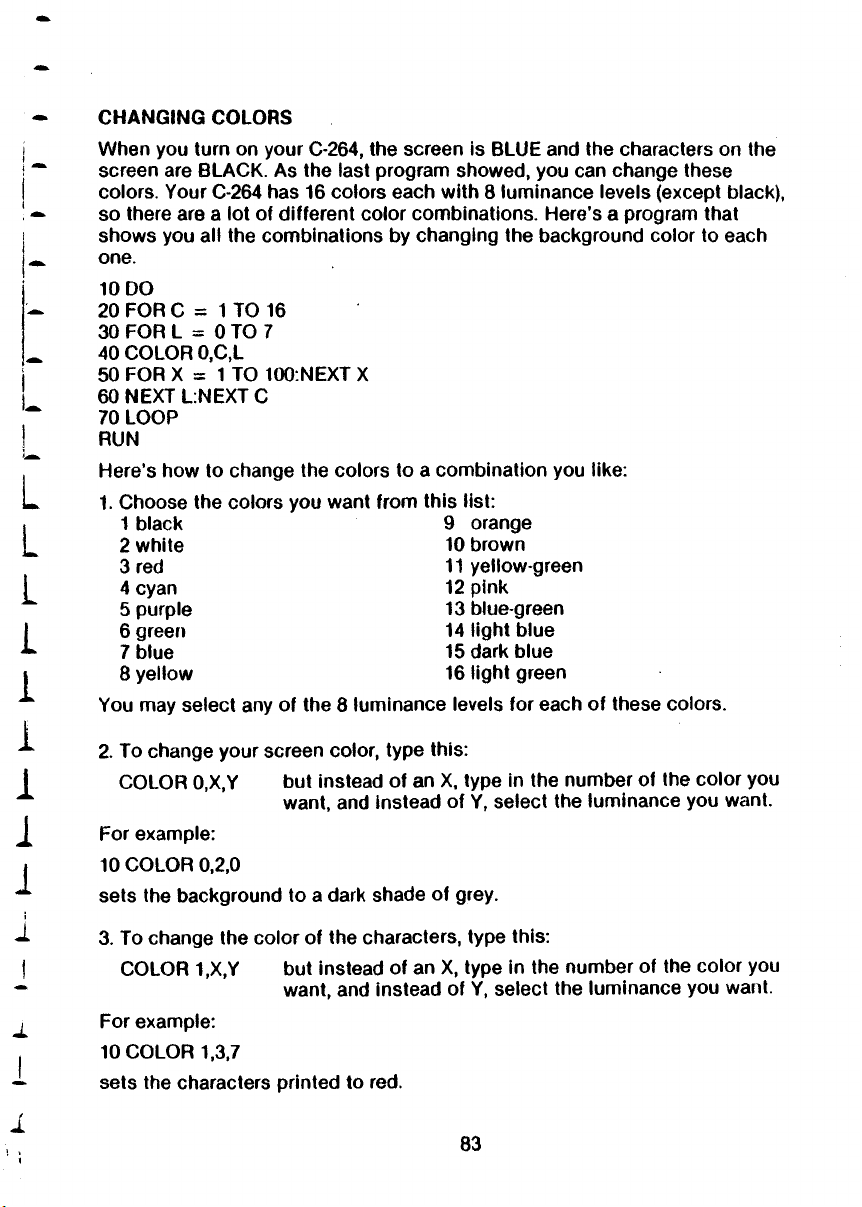
CH ANGING COLORS
When you turn on your C-264, the screen is BLUE and the characters on the
screen are BLACK. As the last program showed, you can change these
colors. Your C-264 has 16 colors each with 8 luminance levels (except black),
so there are a lot of different color combinations. Here’s a program that
shows you all the combinations by changing the background color to each
one.
10 DO
20 FOR C = 1 TO 16
30 FOR L = 0 TO 7
40 COLOR 0,C,L
50 FOR X = 1 TO 100:NEXT X
60 NEXT L:NEXT C
70 LOOP
RUN
Here’s how to change the colors to a combination you like:
1. Choose the colors you want from this list:
1 black
2 white
3 red
4 cyan
5 purple
6 green
7 blue
8 yellow
You may select any of the 8 luminance levels for each of these colors.
9 orange
10 brown
11 yellow-green
12 pink
13 blue-green
14 light blue
15 dark blue
16 light green
2. To change your screen color, type this:
COLOR 0,X,Y but instead of an X, type in the number of the color you
want, and instead of Y, select the luminance you want.
For example:
10 COLOR 0,2,0
sets the background to a dark shade of grey.
3. To change the color of the characters, type this:
COLOR 1,X,Y but instead of an X, type in the number of the color you
want, and instead of Y, select the luminance you want.
For example:
10 COLOR 1,3,7
sets the characters printed to red.
83
Page 90
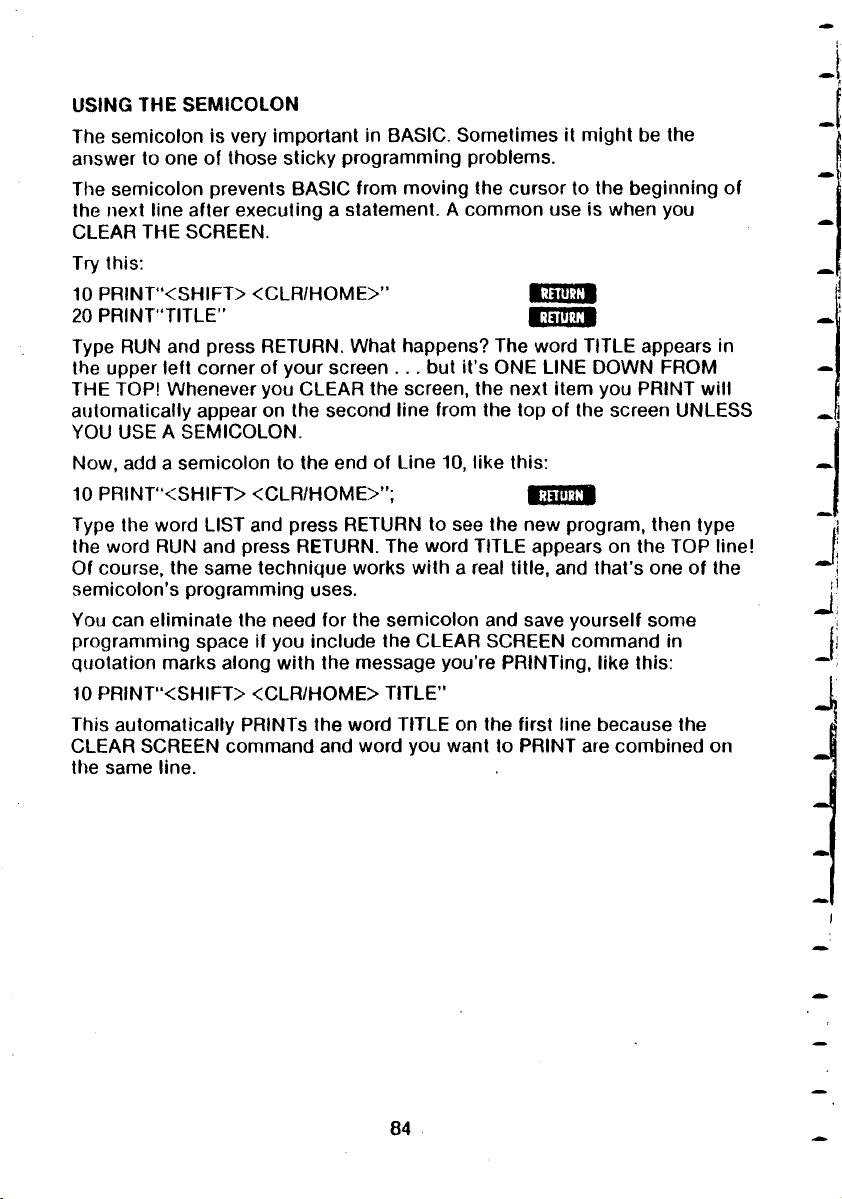
USING THE SEMICOLON
The semicolon is very important in BASIC. Sometimes it might be the
answer to one of those sticky programming problems.
The semicolon prevents BASIC from moving the cursor to the beginning of
the next line after executing a statement. A common use is when you
CLEAR THE SCREEN.
Try this:
10 PRINT"<SHIFT> <C LR/HOME>"
20 PR IN T ’TITLE”
RETURN
RETURN
Type RUN and press RETURN. What happens? The word TITLE appears in
the upper left corner of your screen .. . but it’s ONE LINE DOWN FROM
THE TOP! Wheneveryou CLEAR the screen, the next item you PRINT will
automatically appear on the second line from the top of the screen UNLESS
YOU USE A SEMICOLON.
Now, add a semicolon to the end of Line 10, like this:
10 PRINT"<SHIFT> <CLR/HOME>";
RETURN
Type the word LIST and press RETURN to see the new program, then type
the word RUN and press RETURN. The word TITLE appears on the TOP line!
Of course, the same technique works with a real title, and that’s one of the
semicolon’s programming uses.
You can eliminate the need for the semicolon and save yourself some
programming space if you include the CLEAR SCREEN command in
quotation marks along with the message you’re PRINTing, like this:
10 PR INT"<SHIFT> <CLR/HOME> TITLE”
This automatically PRINTs the word TITLE on the first line because the
CLEAR SCREEN command and word you want to PRINT are combined on
the same line.
Page 91
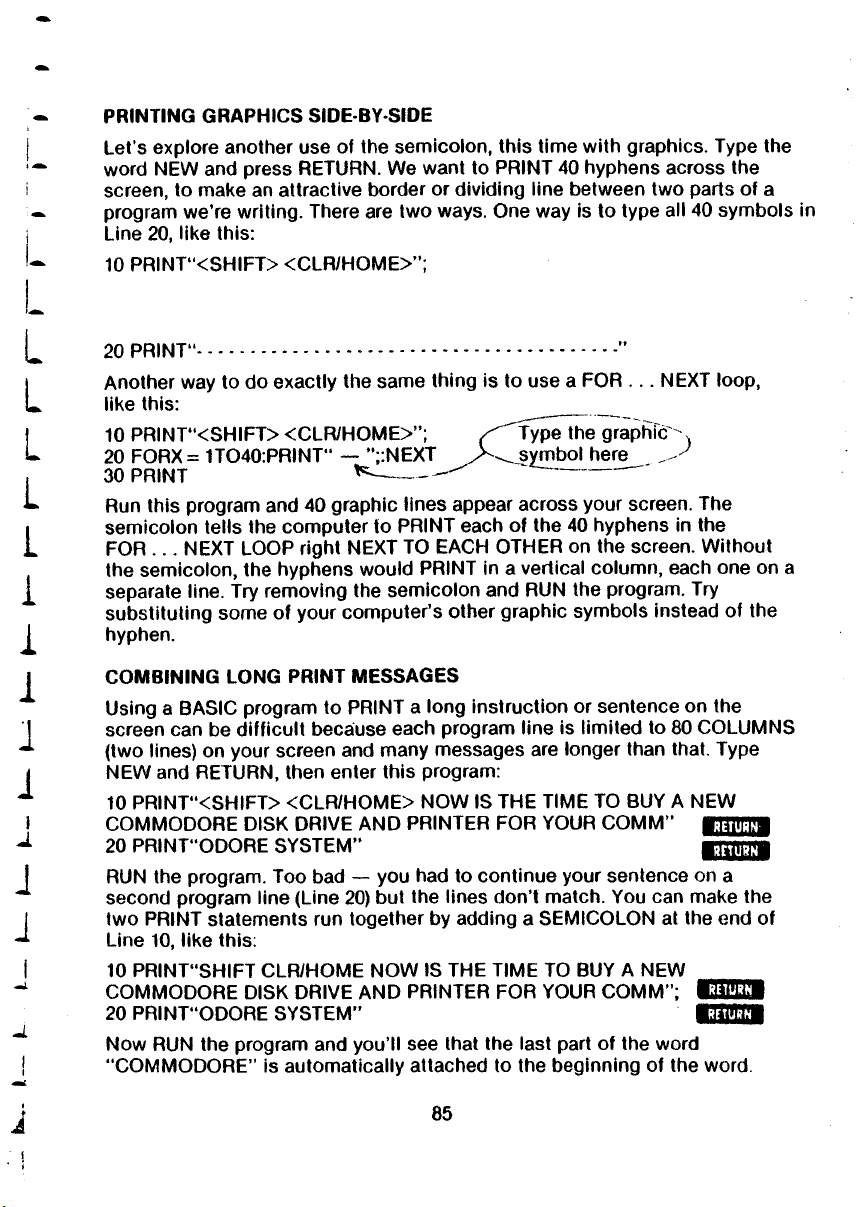
PRINTING GRAPHICS SIDE-BY-SIDE
Let's explore another use of the semicolon, this time with graphics. Type the
word NEW and press RETURN. We want to PRINT 40 hyphens across the
screen, to maKe an attractive border or dividing line between two parts of a
program w e ’re writing. There are two ways. One way is to type all 40 symbols in
Line 20, like this:
10 PRINT"<S HIFT> <CLR/HOME>";
20 PRINT"....................................................................................”
Another way to do exactly the same thing is to use a FOR . . . NEXT loop,
like this:
10 PRINT"<SHIFT> <CLR /H OME>"; j ^ T y p e the graphLc ^
20 FORX = 1TO40:PRINT" — ";:NEXT > ^ s y m b o l here ^
30 PRINT K
Run this program and 40 graphic lines appear across your screen. The
semicolon tells the computer to PRINT each of the 40 hyphens in the
FOR .. . NEXT LOOP right NEXT TO EACH OTHER on the screen. Without
the semicolon, the hyphens would PRINT in a vertical column, each one on a
separate line. Try removing the semicolon and RUN the program. Try
substituting some of your computer’s other graphic symbols instead of the
hyphen.
CO M BININ G LONG PRINT MESSAGES
Using a BASIC program to PRINT a long instruction or sentence on the
screen can be difficult because each program line is limited to 80 COLUMNS
(two lines) on your screen and many messages are longer than that. Type
NEW and RETURN, then enter this program:
10 PRINT"<SH IFT> <CLR/HOME> NOW IS THE TIME TO BUY A NEW
COMMODORE DISK DRIVE AND PRINTER FOR YOUR CO M M”
20 PRINT"ODORE SYSTEM”
RUN the program. Too bad — you had to continue your sentence on a
second program line (Line 20) but the lines don’t match. You can make the
two PRINT statements run together by adding a SEMICOLON at the end of
Line 10, like this:
10 PRINT"SHIFT CLR/HOME NOW IS THE TIME TO BUY A NEW _ _ _ _ _
COMMODORE DISK DRIVE AND PRINTER FOR YOUR C O MM ”; * W
20 PRINT"ODORE SYSTEM” 0 2 3 3 9
Now RUN the program and you’ll see that the last part of the word
“CO M M ODORE” is automatically attached to the beginning of the word.
---------
^ ' ~ "
85
Page 92
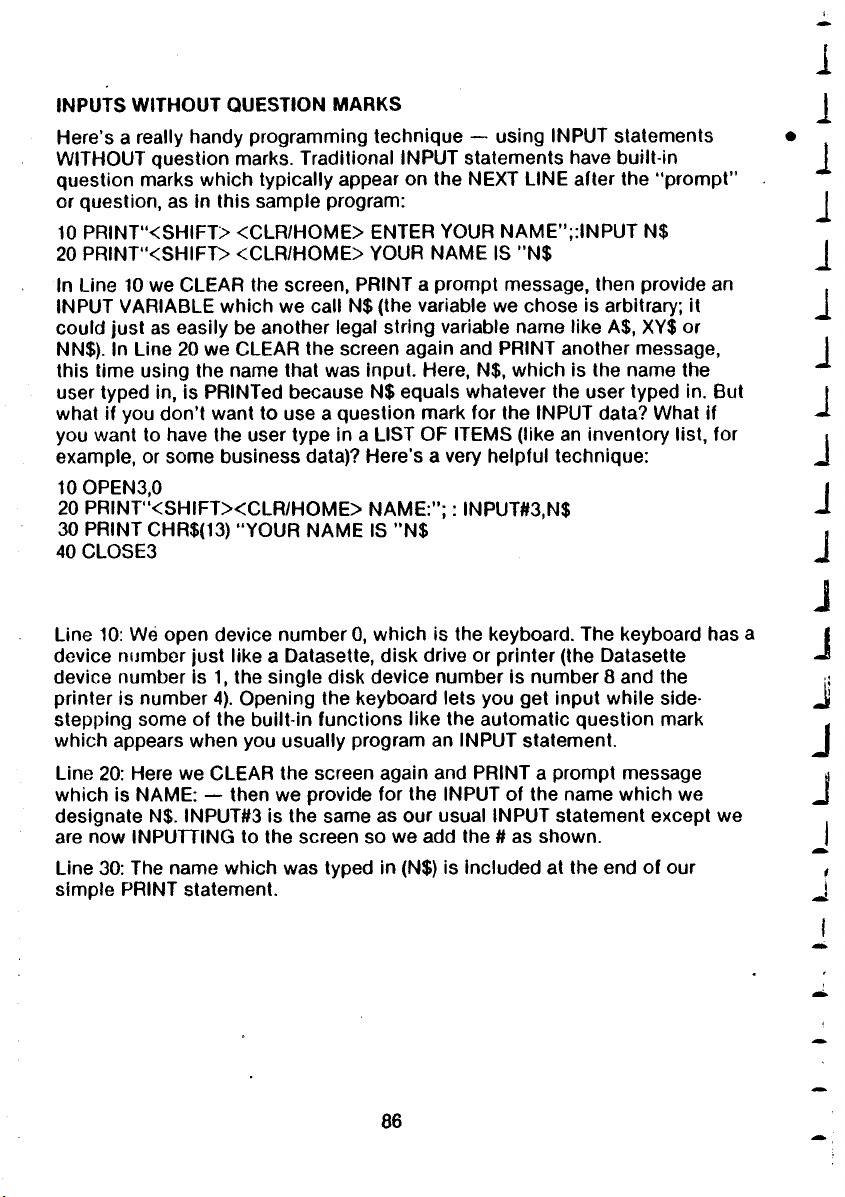
i
INPUTS WITHOUT QUESTION MARKS
Here’s a really handy programming technique — using INPUT statements
WITHOUT question marks. Traditional INPUT statements have built-in
question marks which typically appear on the NEXT LINE after the “prompt”
or question, as in this sample program:
10 PRINT"<SH IFT> <CLR /HO M E> ENTER YOUR NAME";:INPUT N$
20 PRINT '<SHIFT> <CLR/HOME> YOUR NAME IS "N$
In Line 10 we CLEAR the screen, PRINT a prompt message, then provide an
INPUT VARIABLE which we call N$ (the variable we chose is arbitrary; it
could just as easily be another legal string variable name like A$, XY$ or
NN$). In Line 20 we CLEAR the screen again and PRINT another message,
this time using the name that was input. Here, N$, which is the name the
user typed in, is PRINTed because N$ equals whatever the user typed in. But
what if you don’t want to use a question mark for the INPUT data? What if
you want to have the user type in a LIST OF ITEMS (like an inventory list, for
example, or some business data)? Here’s a very helpful technique:
10 OPEN3,0
20 PRINT *<SH IFT><CLR/HOME> NAME:”; : INPUT#3,N$
30 PRINT CHR$(13) “ YOUR NAME IS ” N$
40 CLOSE3
Line 10: We open device number 0, which is the keyboard. The keyboard has a
device number just like a Datasette, disk drive or printer (the Datasette
device number is 1, the single disk device number is number 8 and the
printer is number 4). Opening the keyboard lets you get input while side
stepping some of the built-in functions like the automatic question mark
which appears when you usually program an INPUT statement.
Line 20: Here we CLEAR the screen again and PRINT a prompt message
which is NAME: — then we provide for the INPUT of the name which we
designate N$. INPUT#3 is the same as our usual INPUT statement except we
are now INPUTTING to the screen so we add the # as shown.
Line 30: The name which was typed in (N$) is included at the end of our
simple PRINT statement.
1
1
i
i
J
1
J
J
J
1
J
J
j
J
J
86
Page 93
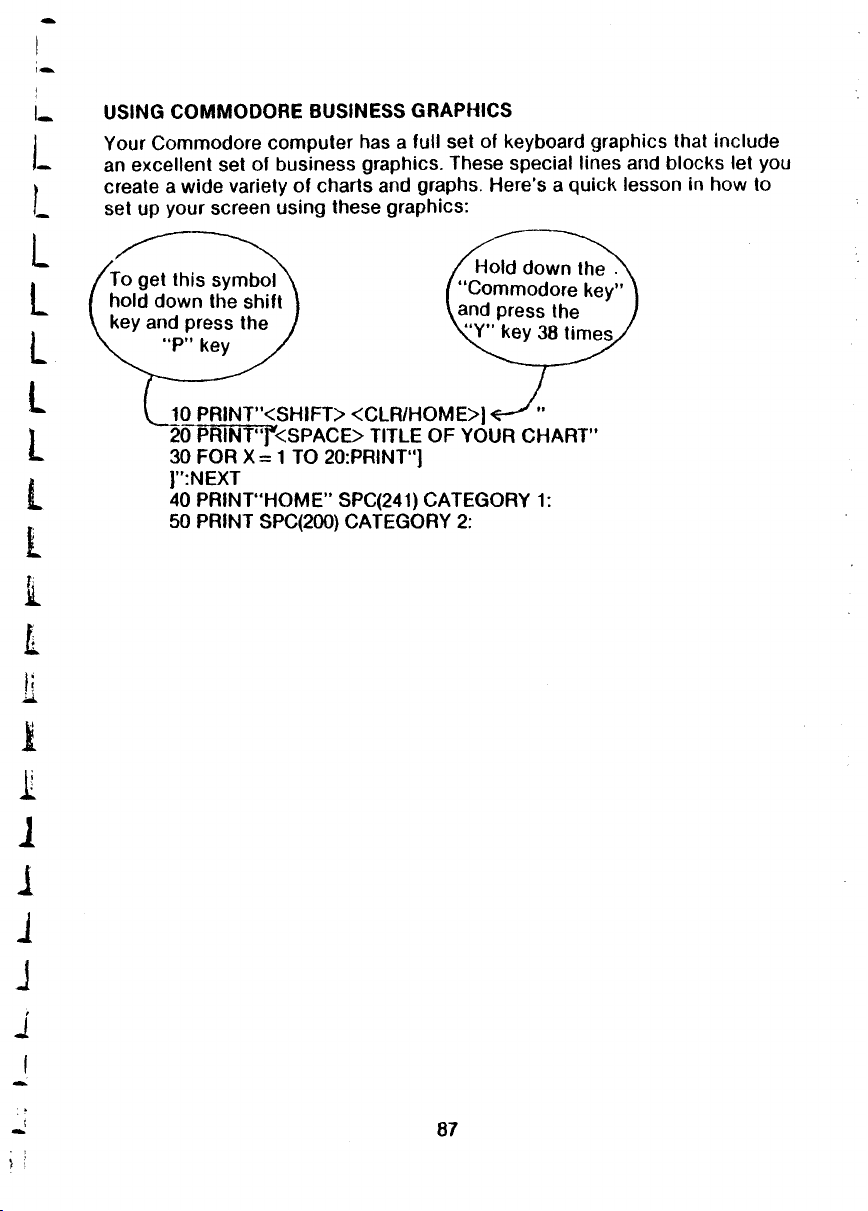
USING COMM ODORE BUSINESS GRAPHICS
Your Commodore computer has a full set of keyboard graphics that include
an excellent set of business graphics. These special lines and blocks let you
create a wide variety of charts and graphs. Here’s a quick lesson in how to
set up your screen using these graphics:
To get this symbol
hold down the shift
key and press the
“P" key
‘ “Commodore key”
iand press the
x^Y” key 38 times.
10 PRINT"<SHIFT> <CLR /HO M E>] -
20 PR lNTY<SPAC E > TITLE OF YOUR CHART"
30 FOR X = 1 TO 20:PRINT"1
]":NEXT
40 PRINT“ H O M E” SPC(241) CATEGORY 1:
50 PRINT SPC(200) CATEGORY 2:
Hold down the
87
Page 94
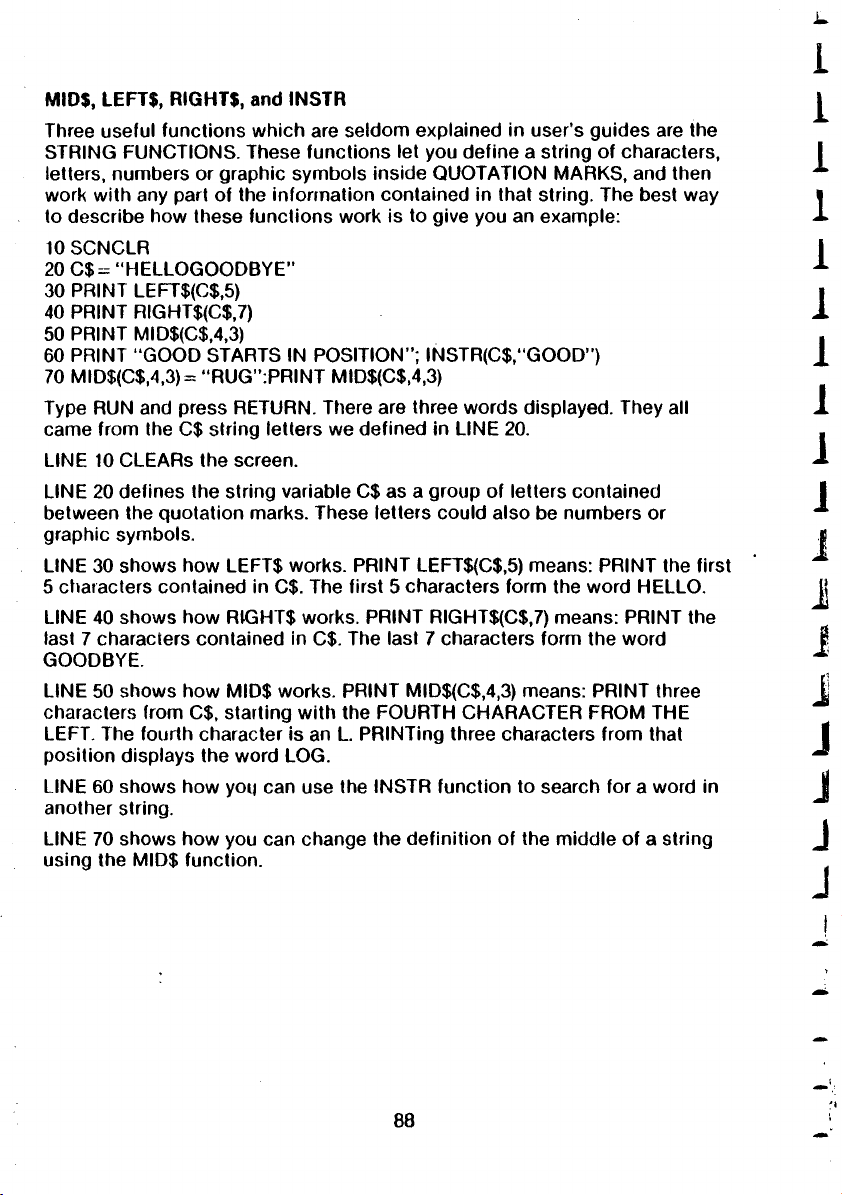
MIO$, LEFT$, RIGHT$, and INSTR
Three useful functions which are seldom explained in user’s guides are the
STRING FUNCTIONS. These functions let you define a string of characters,
letters, numbers or graphic symbols inside QUOTATION MARKS, and then
work with any part of the information contained in that string. The best way
to describe how these functions work is to give you an example:
10 SCNCLR
20 C $ = “ HELLOGOODBYE”
30 PRINT LEFT$(C$,5)
40 PRINT RIGHT$(C$,7)
50 PRINT MiD$(C$,4,3)
60 PRINT “GOOD STARTS IN POSITION”; INSTR(C$,"GOOD")
70 MID$(C$,4,3) = “RUG”:PRINT MID$(C$,4,3)
Type RUN and press RETURN. There are three words displayed. They all
came from the C$ string letters we defined in LINE 20.
LINE 10 CLEARs the screen.
LINE 20 defines the string variable C$ as a group of letters contained
between the quotation marks. These letters could also be numbers or
graphic symbols.
LINE 30 shows how LEFT$ works. PRINT LEFT$(C$,5) means: PRINT the first
5 characters contained in C$. The first 5 characters form the word HELLO.
LINE 40 shows how RfGHT$ works. PRINT RIGHT${C$,7) means: PRINT the
last 7 characters contained in C$. The last 7 characters form the word
GOODBYE.
LINE 50 shows how MID$ works. PRINT MID$(C$,4,3) means: PRINT three
characters from C$, starting with the FOURTH CHARACTER FROM THE
LEFT. The fourth character is an L. PRINTing three characters from that
position displays the word LOG.
LINE 60 shows how yoij can use the INSTR function to search for a word in
another string.
LINE 70 shows how you can change the definition of the middle of a string
using the MID$ function.
I
i
i
1
1
1
1
J
1
J
I
i
J
i
J
J
J
J
88
Page 95
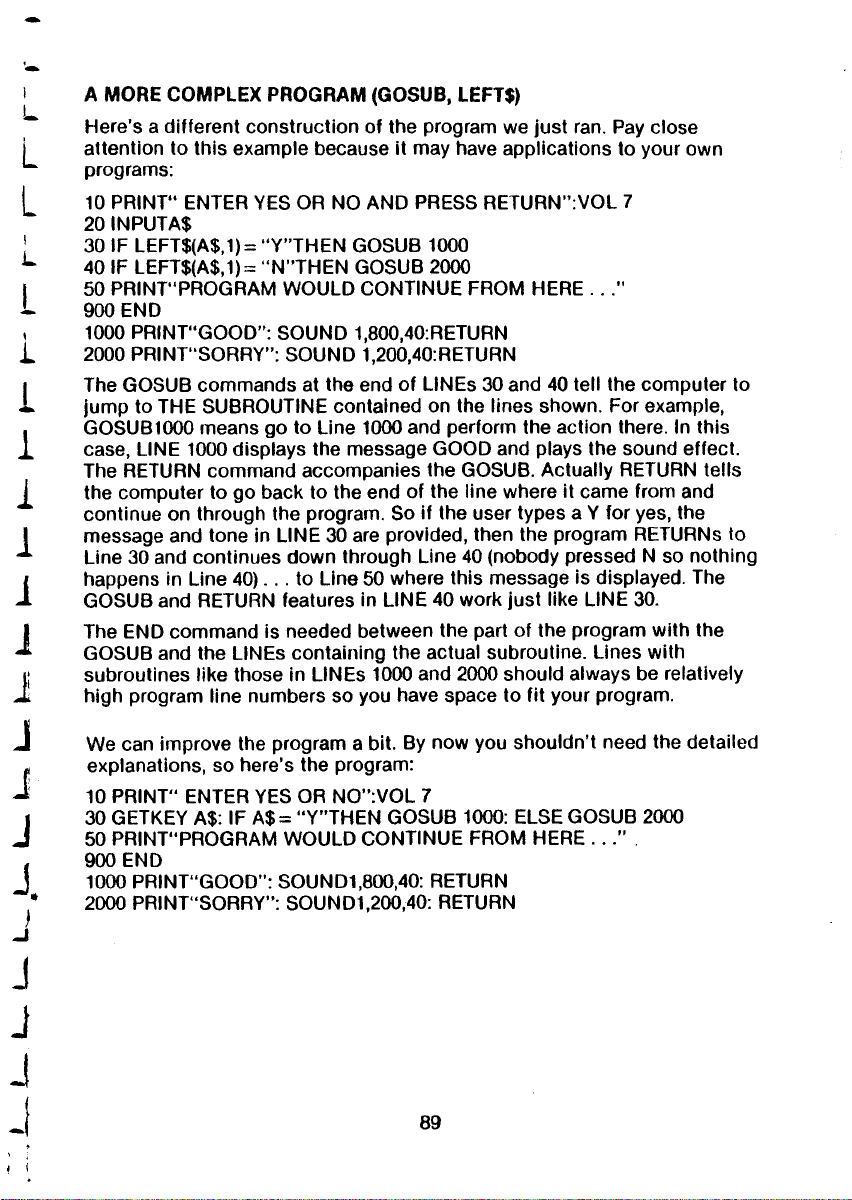
A MORE COMPLEX PROGRAM (GOSUB, LEFT$)
Here’s a different construction of the program we just ran. Pay close
attention to this example because it may have applications to your own
programs:
10 PRINT” ENTER YES OR NO AN D PRESS RETURN":VOL 7
20 INPUTA$
30 IF LEFT$(A$,1)=“Y”TH EN GOSUB 1000
40 IF LEFT$(A$,1)= “ N”THEN GOSUB 2000
50 PRINT"PROGRAM W OULD CONTINUE FROM HERE . . .”
900 END
1000 PRINT“GOOD”: SOUND 1,800,40:RETURN
2000 PRINT’ SORRY”: SOUND 1,200,40:RETURN
The GOSUB commands at the end of LINEs 30 and 40 tell the computer to
jump to THE SUBROUTINE contained on the lines shown. For example,
GOSUB1000 means go to Line 1000 and perform the action there. In this
case, LINE 1000 displays the message GOOD and plays the sound effect.
The RETURN command accompanies the GOSUB. Actually RETURN tells
the computer to go back to the end of the line where it came from and
continue on through the program. So if the user types a Y for yes, the
message and tone in LINE 30 are provided, then the program RETURNs to
Line 30 and continues down through Line 40 (nobody pressed N so nothing
happens in Line 40)... to Line 50 where this message is displayed. The
GOSUB and RETURN features in LINE 40 work just like LINE 30.
The END command is needed between the part of the program with the
GOSUB and the LINEs containing the actual subroutine. Lines with
subroutines like those in LINEs 1000 and 2000 should always be relatively
high program line numbers so you have space to fit your program.
We can improve the program a bit. By now you shouldn’t need the detailed
explanations, so here’s the program:
10 PRINT” ENTER YES OR NO”:VOL 7
30 GETKEY A$: IF A $ = “Y’’THEN GOSUB 1000: ELSE GOSUB 2000
50 PRINT"PROGRAM W OULD CONTINUE FROM HERE . ..’’
900 END
1000 PRINT"GOOD": SOUND1,800,40: RETURN
2000 P RIN T ’SORRY”: SOUND1,200,40: RETURN
Page 96
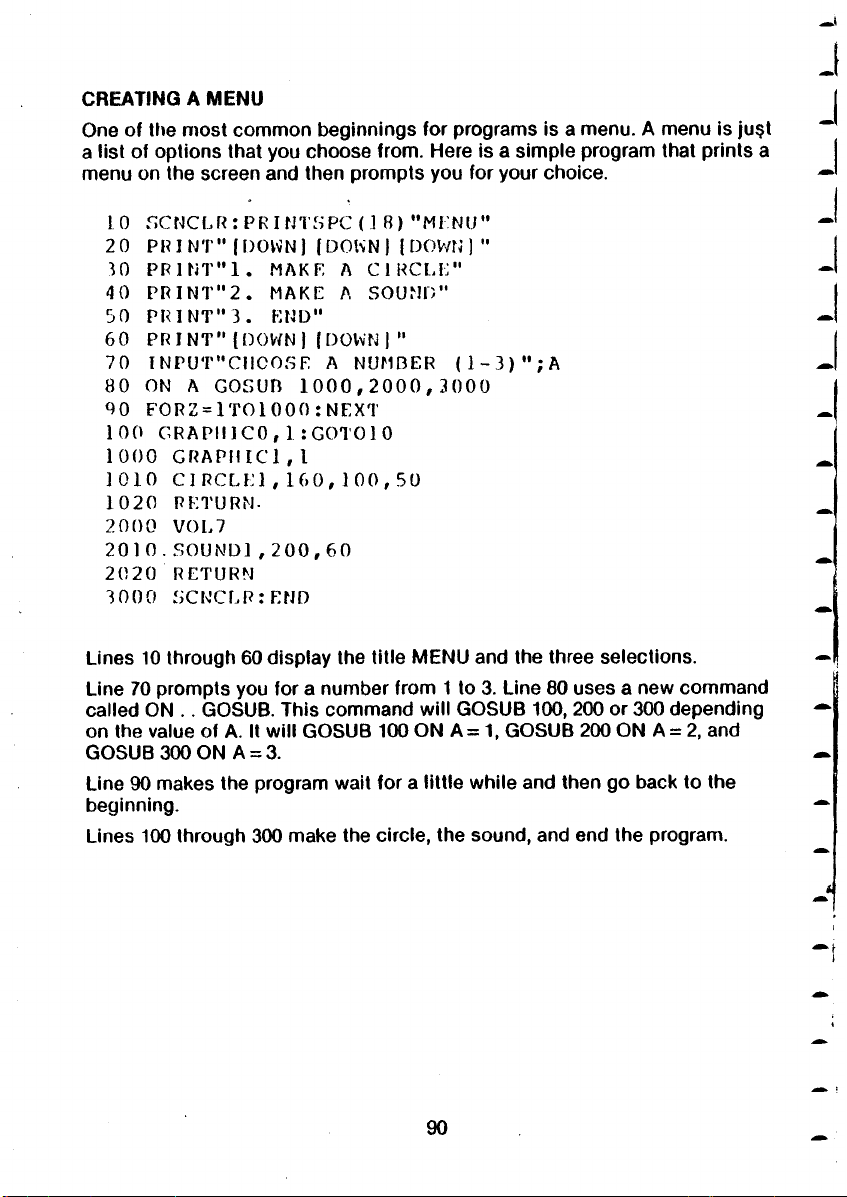
CREATING A MENU
One of fhe most common beginnings for programs is a menu. A menu is ju§t
a list of options that you choose from. Here is a simple program that prints a
menu on the screen and then prompts you for your choice.
10 SCNCLR:PRINTSPC(lB) "MENU"
2 0 PRINT" |DOWN 1 [DOWN| [DOWN)"
10 PRINT"1. MAKF, A CIRCLE"
40 PRINT"2. MAKE A SOUND"
50 PR I NT"3. END"
60 PRINT"{DOWN 1 |DOWN|"
70 I NPUT"CIICOS F A NUMBER (l-3)";A
80 ON A GOSUB 1000,2000,3000
00 FORZ=lTOl000:NEXT
100 GRAPll 1C0,1 : GOTO 1 0
1000 GRAP!IICl,l
1010 C IRCL F1 , 16 0,10 0,5 0
1020 RFTURM-
2000 VOL7
2010.SOUNDl,200,60
2020 RETURN
3000 SCNCFR:END
Lines 10 through 60 display the title MENU and the three selections.
Line 70 prompts you for a number from 1 to 3. Line 80 uses a new command
called ON .. GOSUB. This command will GOSUB 100, 200 or 300 depending
on the value of A. It will GOSUB 100 ON A = 1, GOSUB 200 ON A = 2, and
GOSUB 300 ON A = 3.
Line 90 makes the program wait for a little while and then go back to the
beginning.
Lines 100 through 300 make the circle, the sound, and end the program.
Page 97
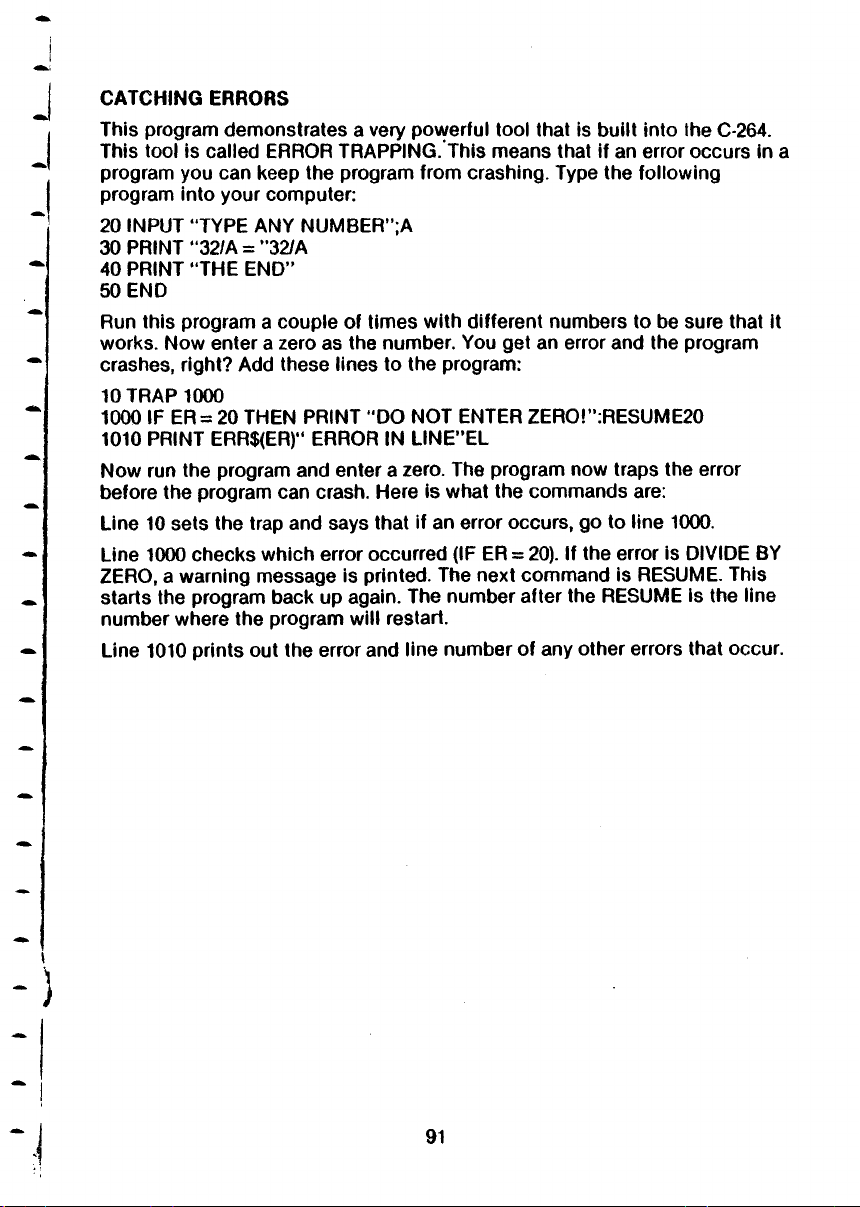
CATCHING ERRORS
This program demonstrates a very powerful tool that is built into the C-264.
This tool is called ERROR TR APPING.This means that if an error occurs in a
program you can keep the program from crashing. Type the following
program into your computer:
20 INPUT “TYPE ANY NUMBER";A
30 PRINT “32/A = "32/A
40 PRINT “THE END ”
50 END
Run this program a couple of times with different numbers to be sure that it
works. Now enter a zero as the number. You get an error and the program
crashes, right? Add these lines to the program:
10 TRAP 1000
1000 IF ER = 20 THEN PRINT "DO NOT ENTER ZERO!":RESUME20
1010 PRINT ERR$(ER)" ERROR IN LINE"EL
Now run the program and enter a zero. The program now traps the error
before the program can crash. Here is what the commands are:
Line 10 sets the trap and says that if an error occurs, go to line 1000.
Line 1000 checks which error occurred (IF ER = 20). If the error is DIVIDE BY
ZERO, a warning message is printed. The next command is RESUME. This
starts the program back up again. The number after the RESUME ls the line
number where the program will restart.
Line 1010 prints out the error and line number of any other errors that occur.
Page 98
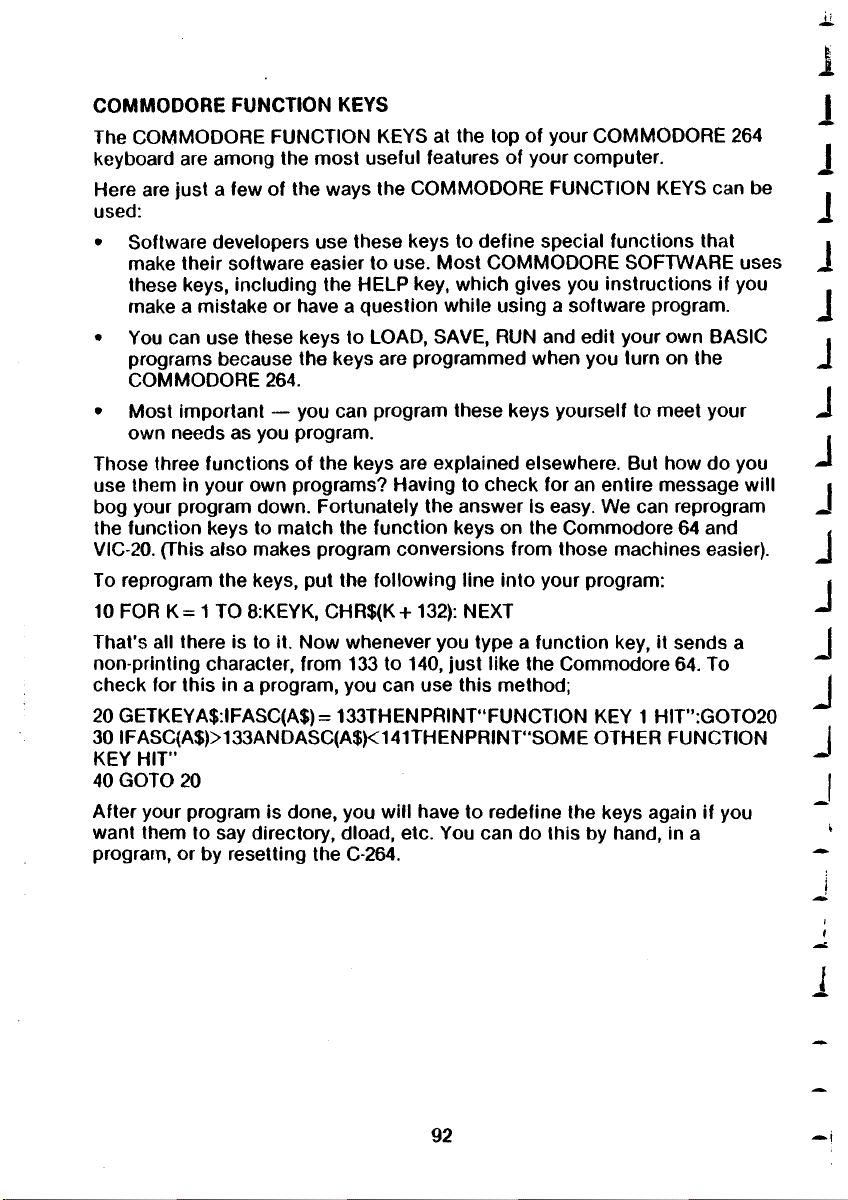
COMMODORE FUNCTION KEYS
The COMMODORE FUNCTION KEYS at the top of your COMMODORE 264
keyboard are among the most useful features of your computer.
Here are just a few of the ways the COMMODORE FUNCTION KEYS can be
used:
• Software developers use these keys to define special functions that
make their software easier to use. Most COMMO DORE SOFTWARE uses
these keys, including the HELP key, which gives you instructions if you
make a mistake or have a question while using a software program.
• You can use these keys to LOAD, SAVE, RUN and edit your own BASIC
programs because the keys are programmed when you turn on the
COMM ODORE 264.
• Most important — you can program these keys yourself to meet your
own needs as you program.
Those three functions of the keys are explained elsewhere. But how do you
use them in your own programs? Having to check for an entire message will
bog your program down. Fortunately the answer is easy. We can reprogram
the function keys to match the function keys on the Commodore 64 and
VIC-20. fThis also makes program conversions from those machines easier).
To reprogram the keys, put the following line into your program:
10 FOR K = 1 TO 8:KEYK, CHR$(K+ 132): NEXT
That's all there is to it. Now whenever you type a function key, it sends a
non printing character, from 133 to 140, just like the Commodore 64. To
check for this in a program, you can use this method;
20 GETKEYA$:IFASC(A$)= 133THENPRINT"FUNCTION KEY 1 HIT":GOTO20
30 IFASC{A$)>133ANDASC(A$)<141THENPRINT"SOME OTHER FUNCTION
KEY HIT”
40 GOTO 20
After your program is done, you will have to redefine the keys again if you
want them to say directory, dload, etc. You can do this by hand, in a
program, or by resetting the C-264.
92
Page 99
APPEN DICES
93
Page 100
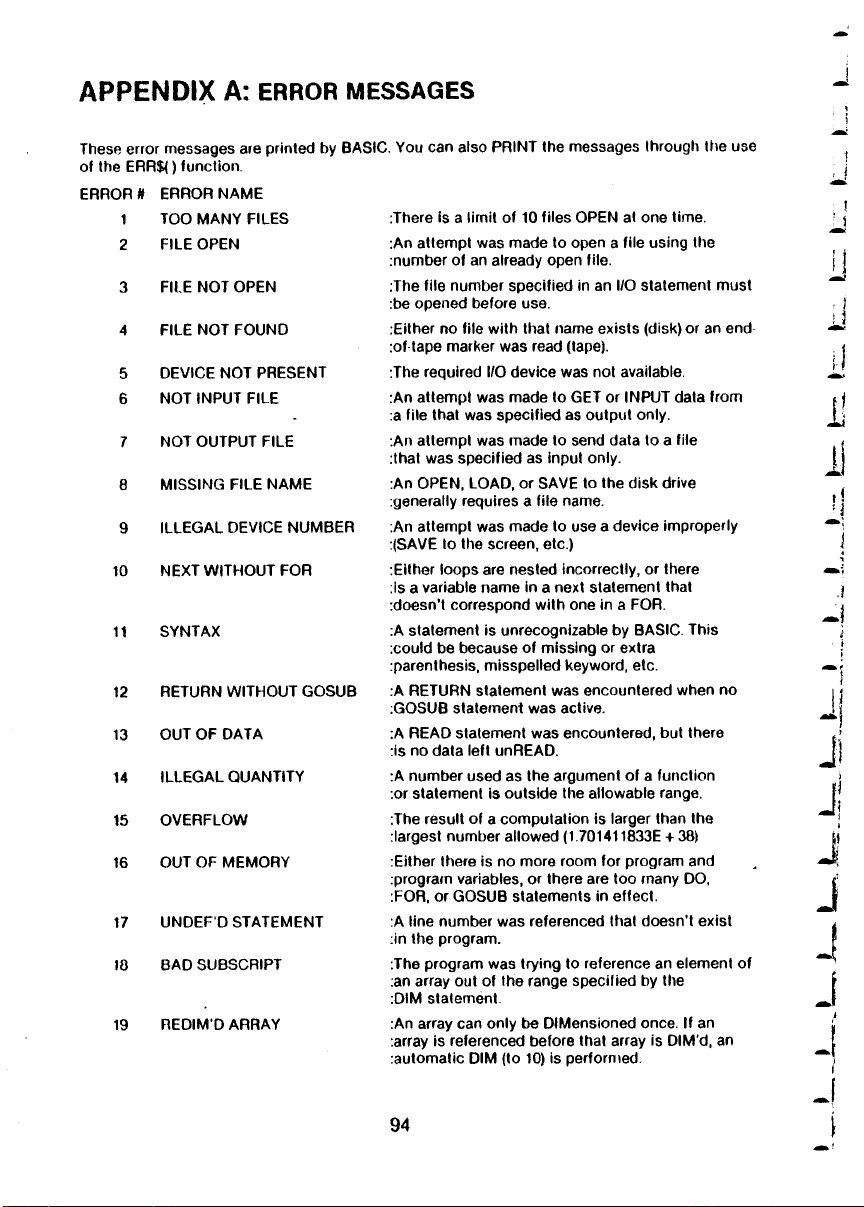
APPENDIX A: ERROR MESSAGES
These error messages are printed by BASIC. You can also PRINT the messages through the use
of the ERR $() function.
ERROR #
ERROR NA ME
1 TOO MANY FILES
FILE OPEN
2
FILE NOT OPEN
3
4 FILE NOT FOUN D
DEVICE NOT PRESENT
5
NOT INP UT FILE
6
NOT OUTPU T FILE
7
MIS SING FILE NAME
8
ILLEGAL DEVICE NUM BE R
9
10 NEX T WITHOU T FOR
SYNTAX
11
RETURN WITHOU T GOSUB
12
OUT O F DATA
13
ILLEGAL QUANTITY
14
OVERFLOW
15
OUT OF MEMORY
16
UNDE F*D STATEM ENT
17
BAD SUBSCRIPT
10
REDIM’D ARRAY
19
:There is a lirnit of 10 files OPEN at one time.
:An atte mp t was made to open a file using the
:number of an already open file.
:The file number specified in an I/O statement must
:be opened before use.
:Either no file with that name exists (disk) or an end
:of tape marker was read (tape).
:The required I/O device was not available.
:An atte mp t was made to GET or INPU T data from
:a file that was specified as output only.
:An atte mp t was made to send data to a file
:that was specified as input only.
:An OPE N, LOAD, or SAVE to the disk drive
:generally requires a file name.
:An attemp t was made to use a device improperly
:(SAVE to the screen, etc.)
:Either loops are nested incorrectly, or there
:is a variable name in a next statement that
:doesn't correspond with one in a FOR.
:A s tatement is unrecognizable by BASIC. This
:could be because of missing or extra
:parenthesis, misspelled keyword, etc.
:A RETURN sta tem ent was e nco untered when no
:GOSUB staternen1 was active.
:A REA D statem ent was encountered, but there
:is no data left unREAD.
:A num ber used as the argument of a function
:or statement is outsid e the allowable range.
:The result of a computation is larger than the
:largest number allowed (1.701411833E + 38)
:Either there is no more room for program and
:program variables, or there are too many DO,
:FOR, or G OSUB statements in e ffect.
:A line number was referenced that doesn’t exist
:in the program.
:The program was trying to reference an element of
:an array out of the range specified by the
:DIM statement.
:An array can only be DIMensione d once. If an
:array is referenced before that array is D IM'd, an
:automatic DIM (to 10) is performed.
94
 Loading...