

Commodore 16 Owner's Manual
Hlliillll
III III
■III
■1
1
11
II
II
1
II
III
OWNER'S
GUIDE
STATEMENT
"This
equipment
generates
and
uses
radio
frequency
energy.
Ifitis
not
properly
instaT"1
ed
and
usedinstrict
accordance
with
the
manufacturer's
instructions,
this
equipmen.
may
interfere
with
radio
and
television
reception.
This
machine
has
been
tested
and
-
foundtocomply
with
the
limits
toraClassBcomputing
deviceinaccordance
with
the—
specifications
in
SubpartJof
Part15of
the
FCC
Rules,
which
are
designedtoprovidf"
reasonable
protection
against
such
interference
inaresidential
installation.
If
you
w'
suspect
interference,
you
can
test this
equipmentbyturning
it
off
and
on.Ifyou
dete^_^
mine
that
thereisinterference,
with
radioortelevision
reception,
try
oneormoreofth«
following
measurestocorrect
It:
•
reorient
the
receiving
antenna
__^
•
move
the
computer
away
from
the
receiver
•
change
the
relative
positions
of
the
computer
equipment
and
the
receiver
•
plug
the
computer
into
a different
outletsothat
the
computer
and
the
receiver
are
different
branch
circuits
If
necessary,
consult
your
Commodore
dealeroran experienced
radio/television
technT'
cian
for
additional
suggestions.
You
may
aiso
wishtoconsult the
following
booklet.
^J
which
was
prepared by
the
Federal
Communications
Commission
"HowtoIdentify
and
Resolve
Radio-TV
Interference
Problems".
This
booklet
is
available
from
the
U.S.
Government
Printing
Office,
Washington.
D.C.
20402,
Stock
Nfe^
004-000-00345-4."
You
should
use
only the
cables,
accessories,
and
peripherals
recommended
by
Com
modore
for
your
Commodore
16.
All
cables,
including
the
cables
for
the
television
WP
hookup,
serial
port,
video
port,
Datassette,
and
joysticks,
are
specially
shielded,
in
accordance
with
the
regulations
of
the
Federal
Communications
Commission.
Failure'to'
use
the
appropriate
accessories
and
cables
will
invalidate
the
FCC
grantofCertifica-
w-
tion,
and
may
cause
harmful
radio
interference.
U
U
-
—
~~
COMMODORE
16
OWNER'S
GUIDE
A
FRIENDLY
INTRODUCTION
TO
YOUR
COMMODORE
16
Published
by
Commodore
Business
Machines,
Inc.

THE
INFORMATIONINTHIS
MANUAL
HAS
BEEN
REVIEWED
ANDISBELIEVEDTOBE
ENTIRELY
RELIABLE.
NO
RESPONSIBILITY.
HOWEVER,ISASSUMED
FOR
INACCURACIES
THE
MATERIALINTHIS
MANUALISFOR
INFORMATION
PURPOSES
ONLY,
ANDISSUBJECTTOCHANGE
WITHOUT
NOTICE.
Copyright©l98dbyCommodore
Electronics
Limited
All
rights
reserved.
THIS
GUIDE
CONTAINS
COPYRIGHTED
AND
PROPRIETARY
INFORMATION.NOPARTOFTHIS
PUBLICATION
MAYBEREPRODUCED.
STOREDINA RETRIEVAL
SYSTEM,ORTRANSMITTED
IN
ANY FORM ORBYANY
w^
MEANS.
ELECTRONIC.
MECHANICAL,
PHOTOCOPYING,
RECORDINGOROTHERWISE.
WITHOUT
THE
PRIOR
WRITTEN
PERMISSION
OF
COMMODORE
ELECTRONICS
LIMITED.
^
Commodore
BASICv3.5
Copyright=1984byCommodore
Electronics
Limited,
all
righis
reserved.
"-—
Copynahi©1977byMicrosoft,
all
riahls
reserved.
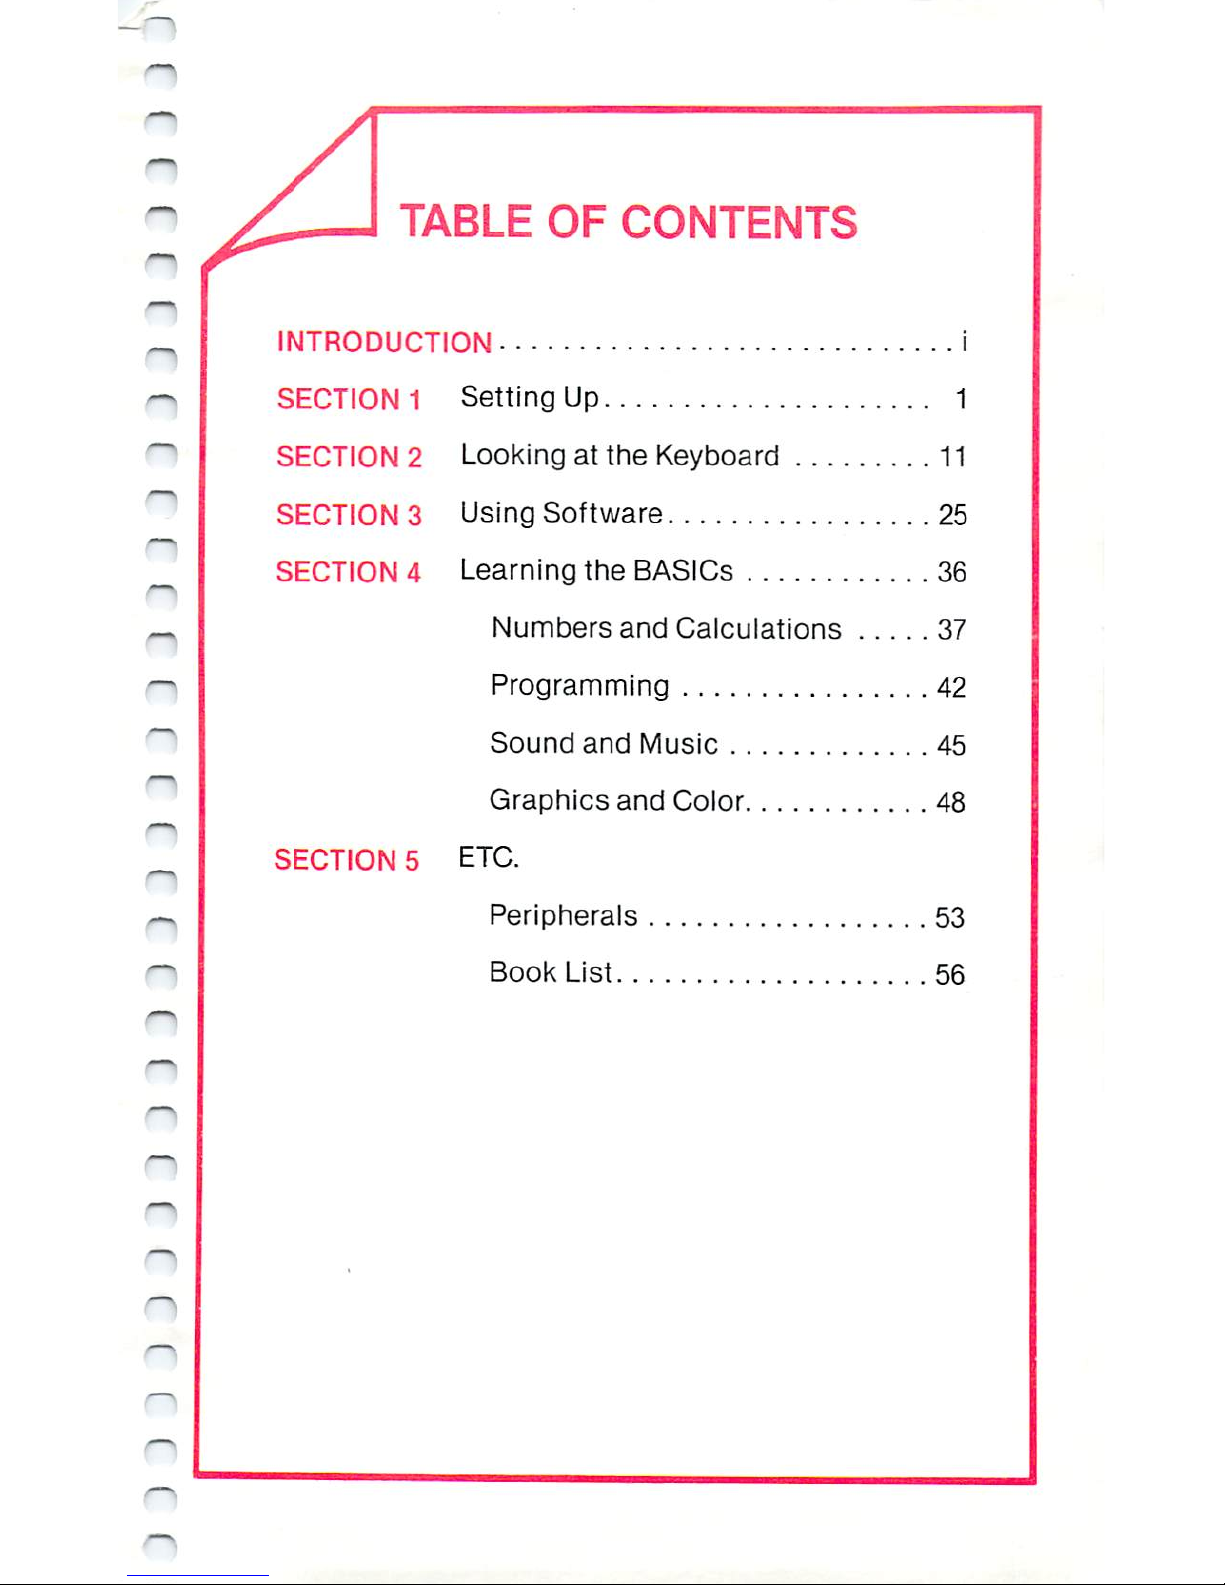
TABLE
OF
CONTENTS
INTRODUCTION
i
SECTION1Setting
Up
1
SECTION2Looking
at
the
Keyboard
11
SECTION3Using
Software
25
SECTION4Learning
the
BASICs
36
Numbers
and
Calculations
37
Programming
42
Sound
and Music
45
Graphics
and
Color
48
SECTION5ETC.
Peripherals
53
Book
List
56

\
Introduction
The
Commodore
16 personal
computer
is
your
pass
porttothe
Information
Age. With
the
Commodore
16.
you
have
the
ability
to
quickly
process
many
kinds
of
information—personal,
educational,
scientific,
finan
cial.
And
with
the
Commodore
16
you
can
present
this
information
in
almost
any
form—in
words,
numbers,
pictures
or
sound,
or
in
any
combination
of
these
forms.
You
can
use
your
Commodore
16
inanumber
of
ways.
You
can
select
from
many
easy-to-use
software
products
that
are
availableoncartridge,
tape
and
disk.
You
can
also
create
and
store
your
own
pro
grams.
In
either
case,
the
full
processing
power
of
the
Commodore
16
is
at
your
disposal.
Using
This
Guide
To
start
using
your
Commodore
16,
follow
these
steps:
•
Unpack
all
the
equipment
and
set
it
up
according
to
the
directions
given
in
Section
1,
Setting
Up
Your
Computer.
•
Plug
in
the
Commodore
16
Tutor
Cartridge
which
will
give
you
complete
"hands-on"
training
on
all
keyboard
functions.
(Note:
Information
related
to
what
this
cartridge
covers
is
presented
in
Section
2
of
this
Guide,
Looking
At
The
Keyboard.
You
can
refer
to
the
printed
version
of
the
instructions
when
you
are
away
from
the
keyboard,
or
when
you
have
another
cartridge
plugged
in.)
Read
Section
3,
Using
Software.
This
section
tells
you
how
to
use
software
that
is
packaged
in
any
of
the
three
basic
packaging forms—cartridge,
cassette
tape,
and
disk—as
well
as
the
units
needed
to
use
cassettes
and
disks.
When
you have
completed
this
section,
you
will
be
ready
to
use
the
—
Commodore
software
packages
available
at
your
local
dealer.
You'll
be
able
to
use
software
even
without reading
the
rest of
the
Guide.
If
you
are
interested
in
programming
the
Commodore
16
yourself,
you
will
want
to
read
Sec
tion
4,
Learning
the
BASICs.
This
section
describes
the
Commodore
16's
computational
capabilities
and
introduces
the
advanced
BASIC
programming
language
that
is
built
into
your
computer.
The
sophisticated
sound,
music,
color,
and
graphics
capabilities
of
the
Commodore
16
are
also
intro
duced
in
this
section.
For
detailed
descriptions
of
all
these
topics,
see
the
Commodore
16
Intermediate
User's
Manual.
Consult
the
appendices
for
additional
helpful
infor
mation,
including
information
on
equipment
that
can
expand
the
Commodore
16's
capabilities
even
more,
andalist
of
books
you
may
find
helpful.
You'll
soon
see
that
you
can
begin
to
use
your
Commodore
16
as
soon
as
you
have
set
up
and
connected
all
the
equipment.
How
far
and
how
fast
you go
from
here
is
up
to
you.
You
are
in
control.
-A
.
unpacking
your
Commodore
16
.
setting
up
your
Commodore
16
.Troubleshooting
chart

—

SETTING
UP
YOUR
COMPUTER
Unpacking
Your
Commodore
16
When
you
open
the
box,
here's
what
you
should
have:
1.
Your
Commodore
16
2.
The
supply
power
3.
The
TV
switchbox
4.
The
RF
(Radio
Frequency)
cable
5.
The
Owner's
Guide
6.
Tutor
cartridge
7.
Warranty
card
8.
Commodore
Magazines
subscription
card
If
you
don't
find
all
these
items
in
the box,
check
with
your
dealer
immediately
for
replacements.

SETTING
UP
YOUR
COMPUTER
Getting
To
Know
The
Switches
And
Sockets
Take
the
time
to
review
the
next
few
pages
while
making
sure
where
each
switch
or
socket
is
located
on
your
computer.
This
will
save
time
and
confusion
later
on.
The
Right
Side
Of
Your
Commodore
16
—
—
—
SETTING
UP
YOUR
COMPUTER
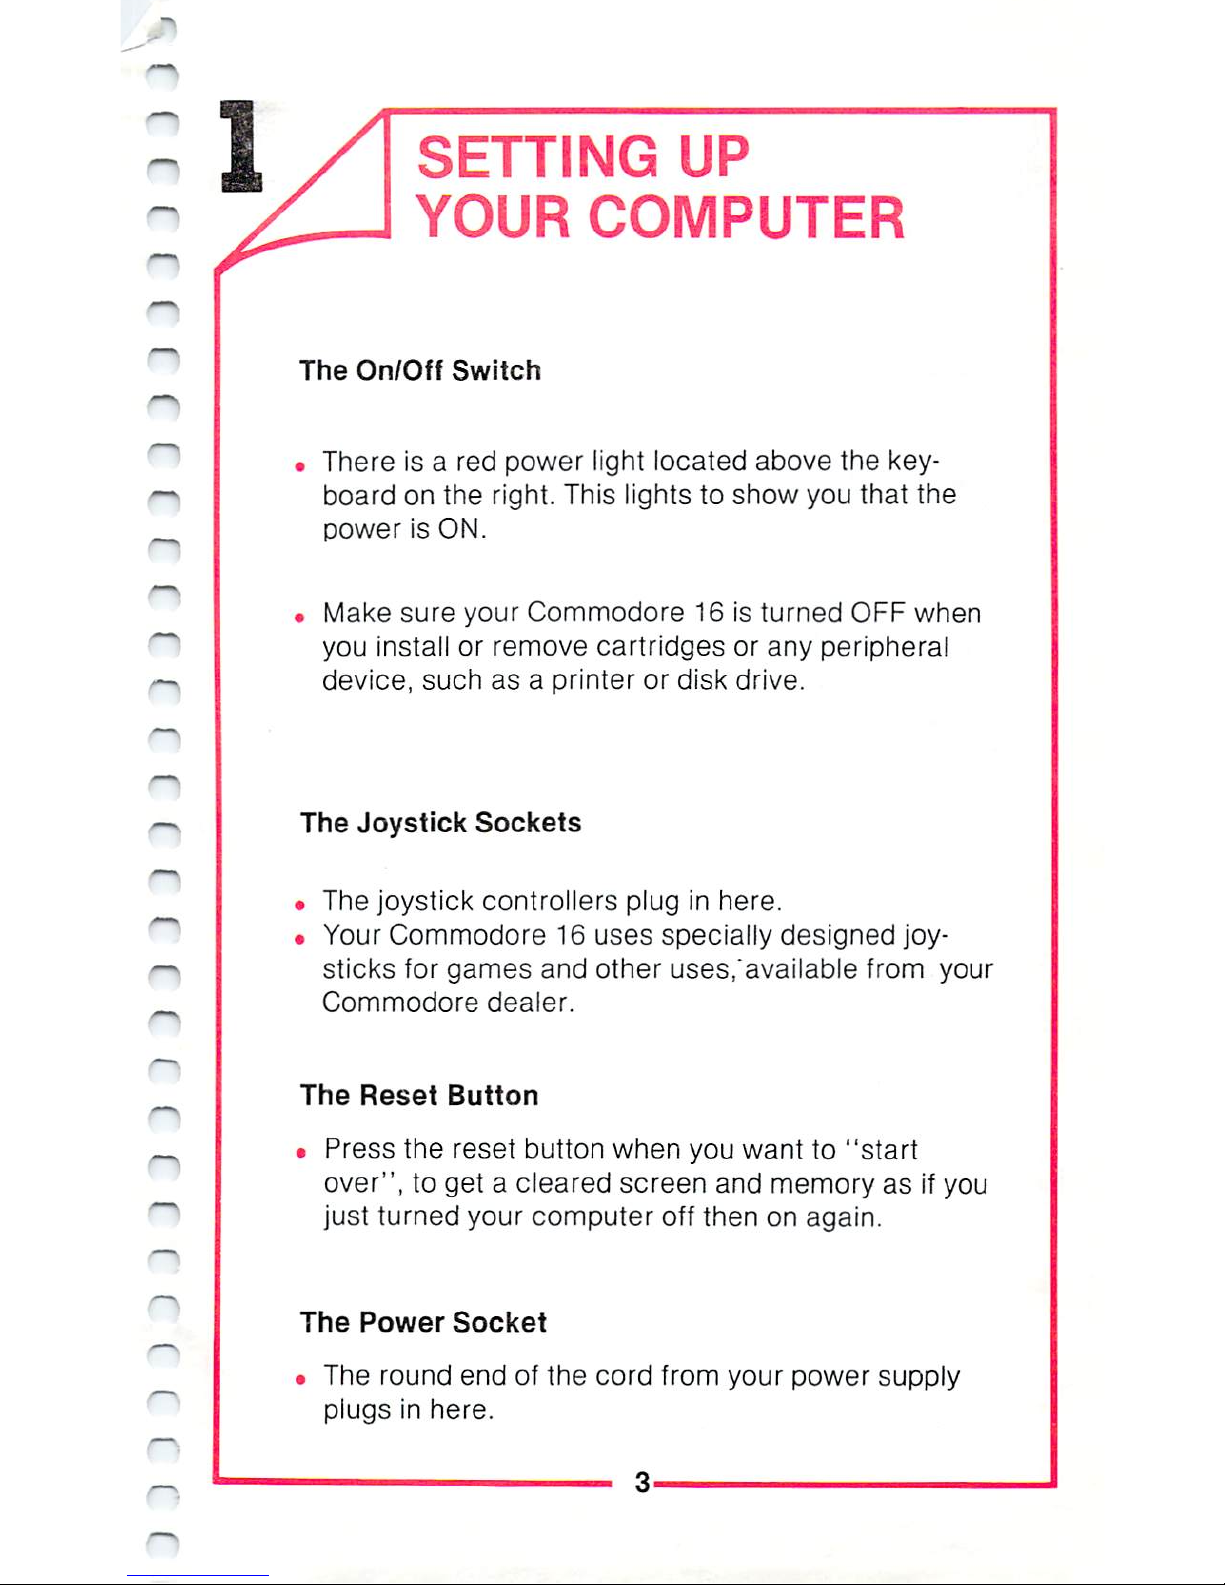
The
On/Off
Switch
•
There
is
a red
power
light
located
above
the
key
board
on
the
right.
This
lights
to
show
you
that
the
powerisON.
•
Make
sure your
Commodore
16
is
turned
OFF
when
you
install
or
remove
cartridges
or
any
peripheral
device,
such
asaprinter
or
disk
drive.
The
Joystick
Sockets
•
The
joystick
controllers
pluginhere.
•
Your
Commodore
16
uses
specially
designed
joy
sticks
for
games
and
other
uses/available
from
your
Commodore
dealer.
The
Reset
Button
•
Press
the
reset
button
when
you
want
to
"start
over",
to
get a
cleared
screen
and
memory
as
if
you
just
turned
your
computer
off
then
on
again.
The
Power
Socket
•
The
round
endofthe
cord
from
your
power
supply
plugs
in
here.
-
SETTING
UP
YOUR
COMPUTER
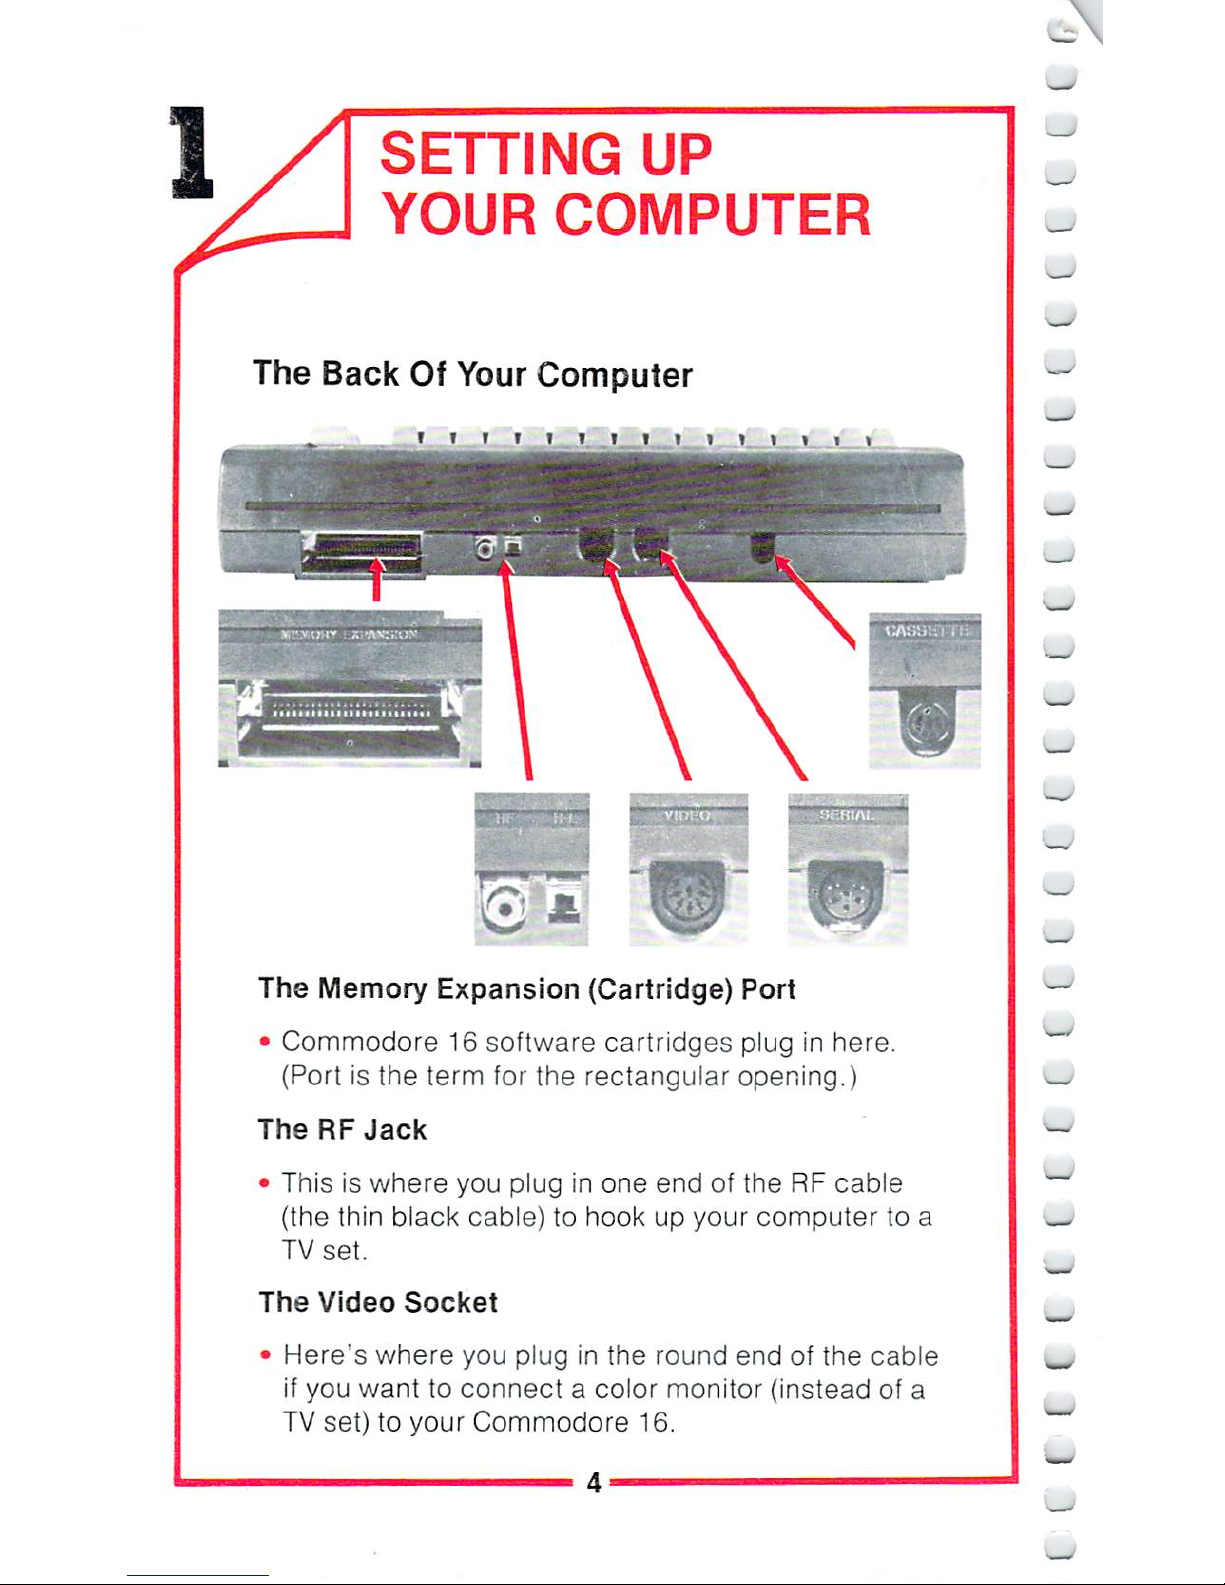
The
Back
Of
Your
Computer
-
The
Memory
Expansion
(Cartridge)
Port
•
Commodore
16
software
cartridges
plug
in
here.
(Port
is
the
term
for
the
rectangular
opening.)
The
RF
Jack
•
This
is
where
you
plug
in
one end
of
the
RF
cable
(the
thin
black
cable)tohookupyour
computertoa
TV
set.
The
Video
Socket
•
Here's
where
you
plug
in
the
round
end
of
the
cable
if
you
want
to
connectacolor
monitor
(instead
of
a
TV
set) to
your
Commodore
16.

SETTING
UP
YOUR
COMPUTER
YOU
CAN
USE
EITHER
THE
RF
JACK
OR
VIDEO
SOCKET—YOU
WONT
NEED
BOTH!
The
High/Low
Switch
•
Use
this
switch
to
set
your
Commodore
16s
TV
channel
output:
You
can
use
either
channel3or4on
your
TV
to
display
the
video
picture
from
your
computer.
Set
this
switchtoLtouse
your
computer
on
channel
3,
or
toHfor
channel
4.
If
you
have
a
TV
stationonchannel3in
your
area, select
channel
4,
and
vice
versa.
Experiment
to
see
which
setting
gives
you
the
best
picture.
If
you
haveamonitor,
you
won't
need
to
worry
about
this
switch.
The
Serial
Socket
•
You
can
plug a
disk
drive
oraprinter
into
this
socket.
To use
both,
first
plug
the
disk
drive
into
this
open
ing,
then
plug
the
printer
cable
into
the
back
of
the
disk
drive.
The
Cassette
Port
•
The
Commodore
1531
Datassette™
tape recorder
for
cassette tape
software
plugs
in
here.
•
The
Datassette
is
used
to
load
or
store
programs
on
cassette
tape,
and
is
specially
designed
for
your
Commodore
16.
SETTING
UP
YOUR
COMPUTER
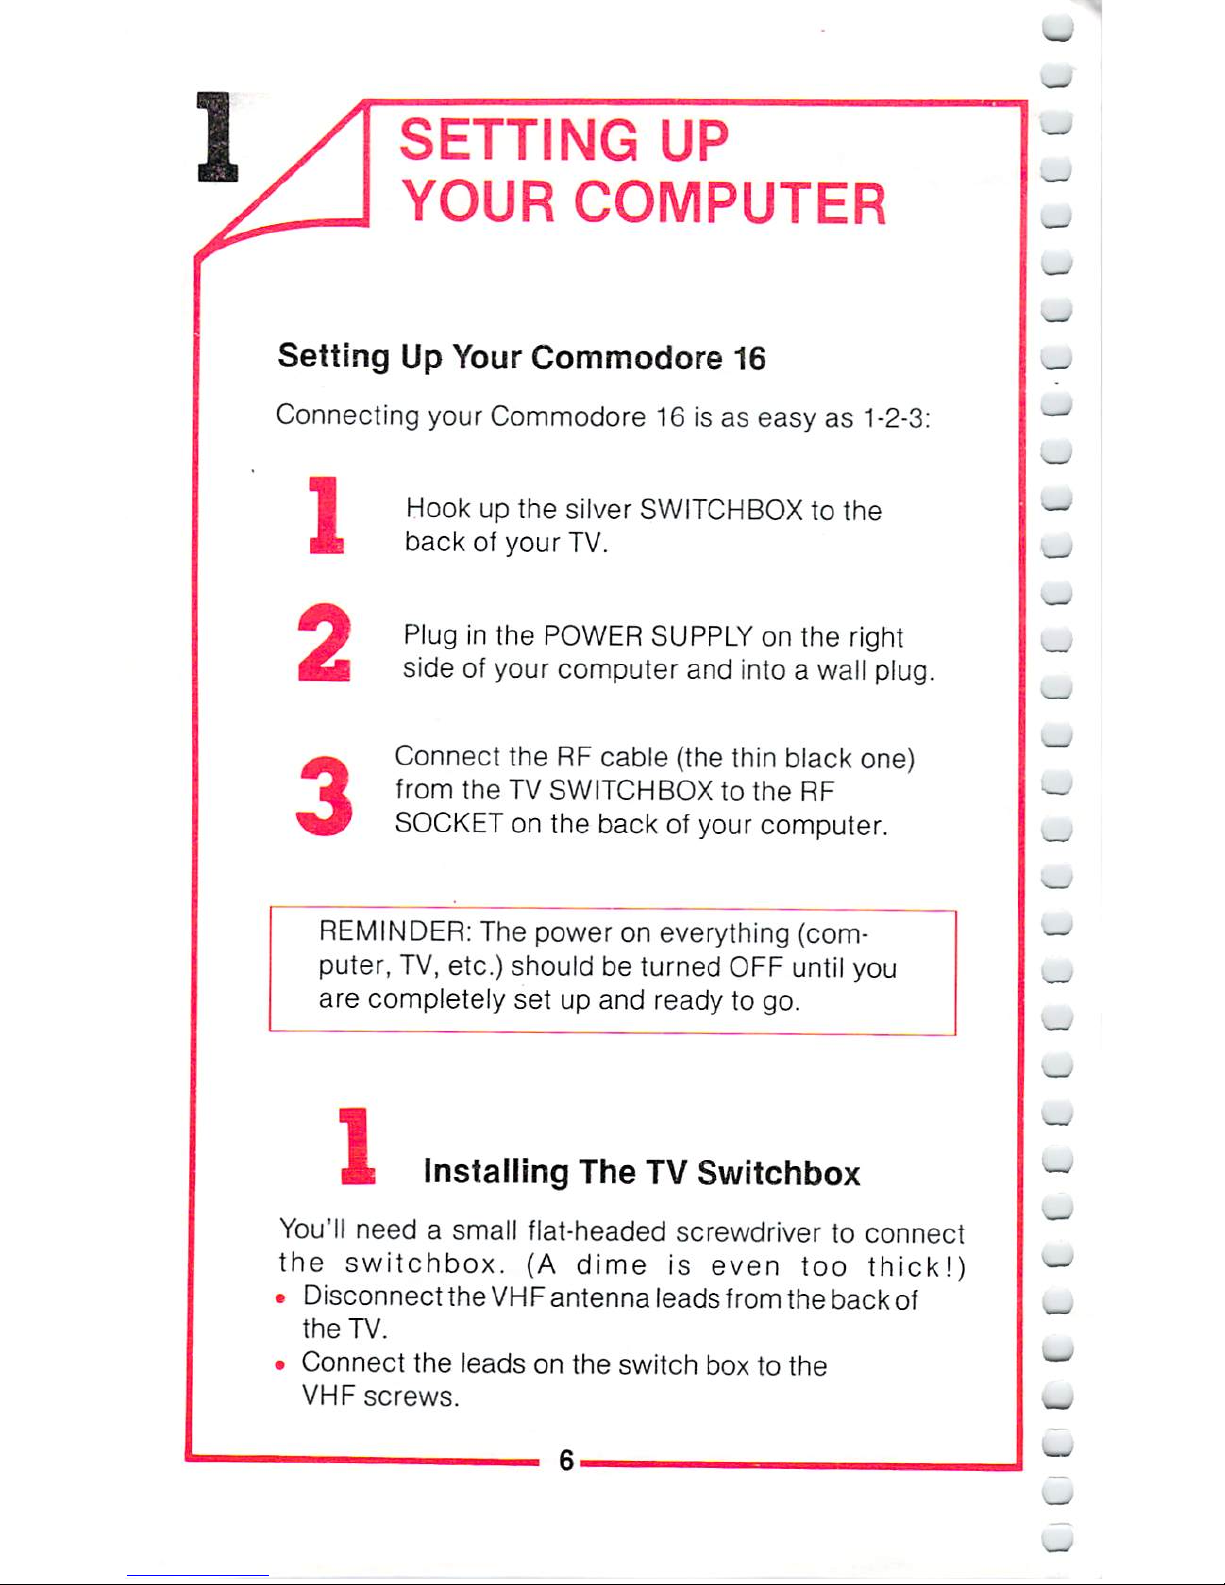
Setting
Up
Your
Commodore
16
Connecting
your
Commodore
16
is
as
easy
as
1-2-3:
1
2
3
Hook
up
the
silver
SWITCHBOX
to
the
back
of
your
TV.
Plug
in
the
POWER
SUPPLY
on
the
right
side
of
your
computer
and
intoawall
plug.
Connect
the
RF
cable
(the
thin
black
one)
from
the
TV
SWITCHBOX
to
the
RF
SOCKET
on
the
back
of
your
computer.
REMINDER:
The power
on
everything
(com
puter,
TV,
etc.)
should
be
turned
OFF
until
you
are
completely
set
up
and
ready
to
go.
1
Installing
The
TV
Switchbox
You'll
needasmall
flat-headed
screwdriver
to
connect
the
switchbox.
(A
dime
is
even
too
thick!)
•
Disconnect
the
VHF
antenna
leads
from
the
back
of
the TV.
•
Connect
the
leads
on
the
switch
box
to
the
VHF
screws.
SETTING
UP
YOUR
COMPUTER
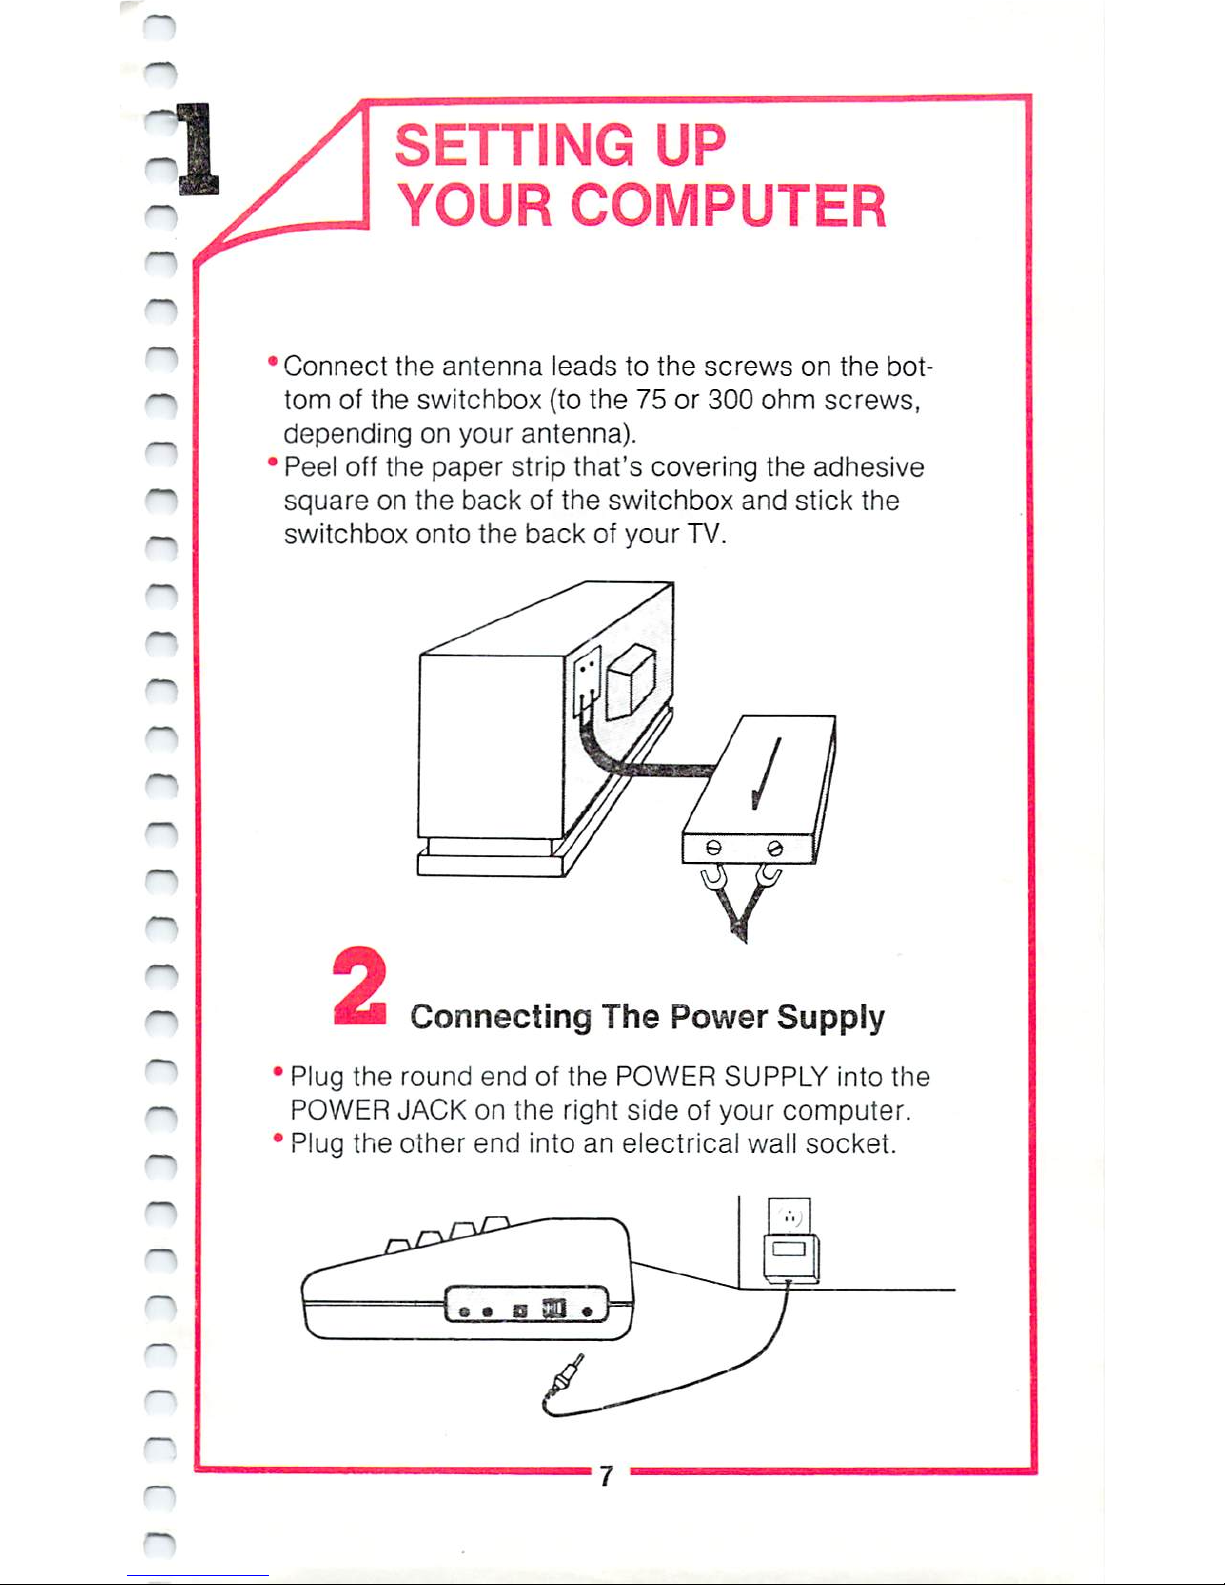
Connect
the
antenna
leads
to
the
screws
on
the bot
tom
of
the
switchbox
(to
the
75
or
300
ohm
screws,
depending
on
your
antenna).
Peel
off
the
paper
strip
that's
covering
the
adhesive
square
on
the
back
of
the
switchbox
and
stick
the
switchbox
onto
the
backofyour
TV.
2
Connecting
The
Power
Supply
•
Plug
the
round
end
of
the
POWER
SUPPLY
into
the
POWER
JACK
on
the
right
side
of
your
computer.
"
Plug
the
other
end
into
an
electrical
wall
socket.

SETTING
UP
YOUR
COMPUTER
Plugging
In
The
RF
Cable
Plug
either
end
fit
doesn't
matter which)
of
the
RF
cable
into
the
top
of
the
SWITCHBOX
in
the
opening
labelled
"COMPUTER".
Plug
the
other
end
of
the
cable
into
the
RF
jack
on
the
back
of
your
computer.
You
need
to
connect
everything
to
your
TV
only
once.
When
you
want
to
use
your
computer,
move
the
switch
on
the
SWITCHBOX
to
the
COMPUTER
position.
When
you
want
lo
watch
TV,
move
the
switch
to
TV.
The
switchbox
will
not
interfere
with
your
TV
reception.
Connecting
Your
Commodore
16
ToAMonitor
If
you're
connecting
your
computer
toamonitor
instead
ofaTV,
follow
the
instructions
in
the
monitor
manual.
Hooking upamonitor
like
the
Commodore
1702
Color
Monitor
is
simple.
You
need
to
connect
only
one
cable
which
goes
directly
from
your monitor
to
the
VIDEO
socket
on
the
back
of
your
computer.
You
do
NOT
need
to
use
the
switchbox
and
the
RF
cable.
S
SETTING
UP
YOUR
COMPUTER
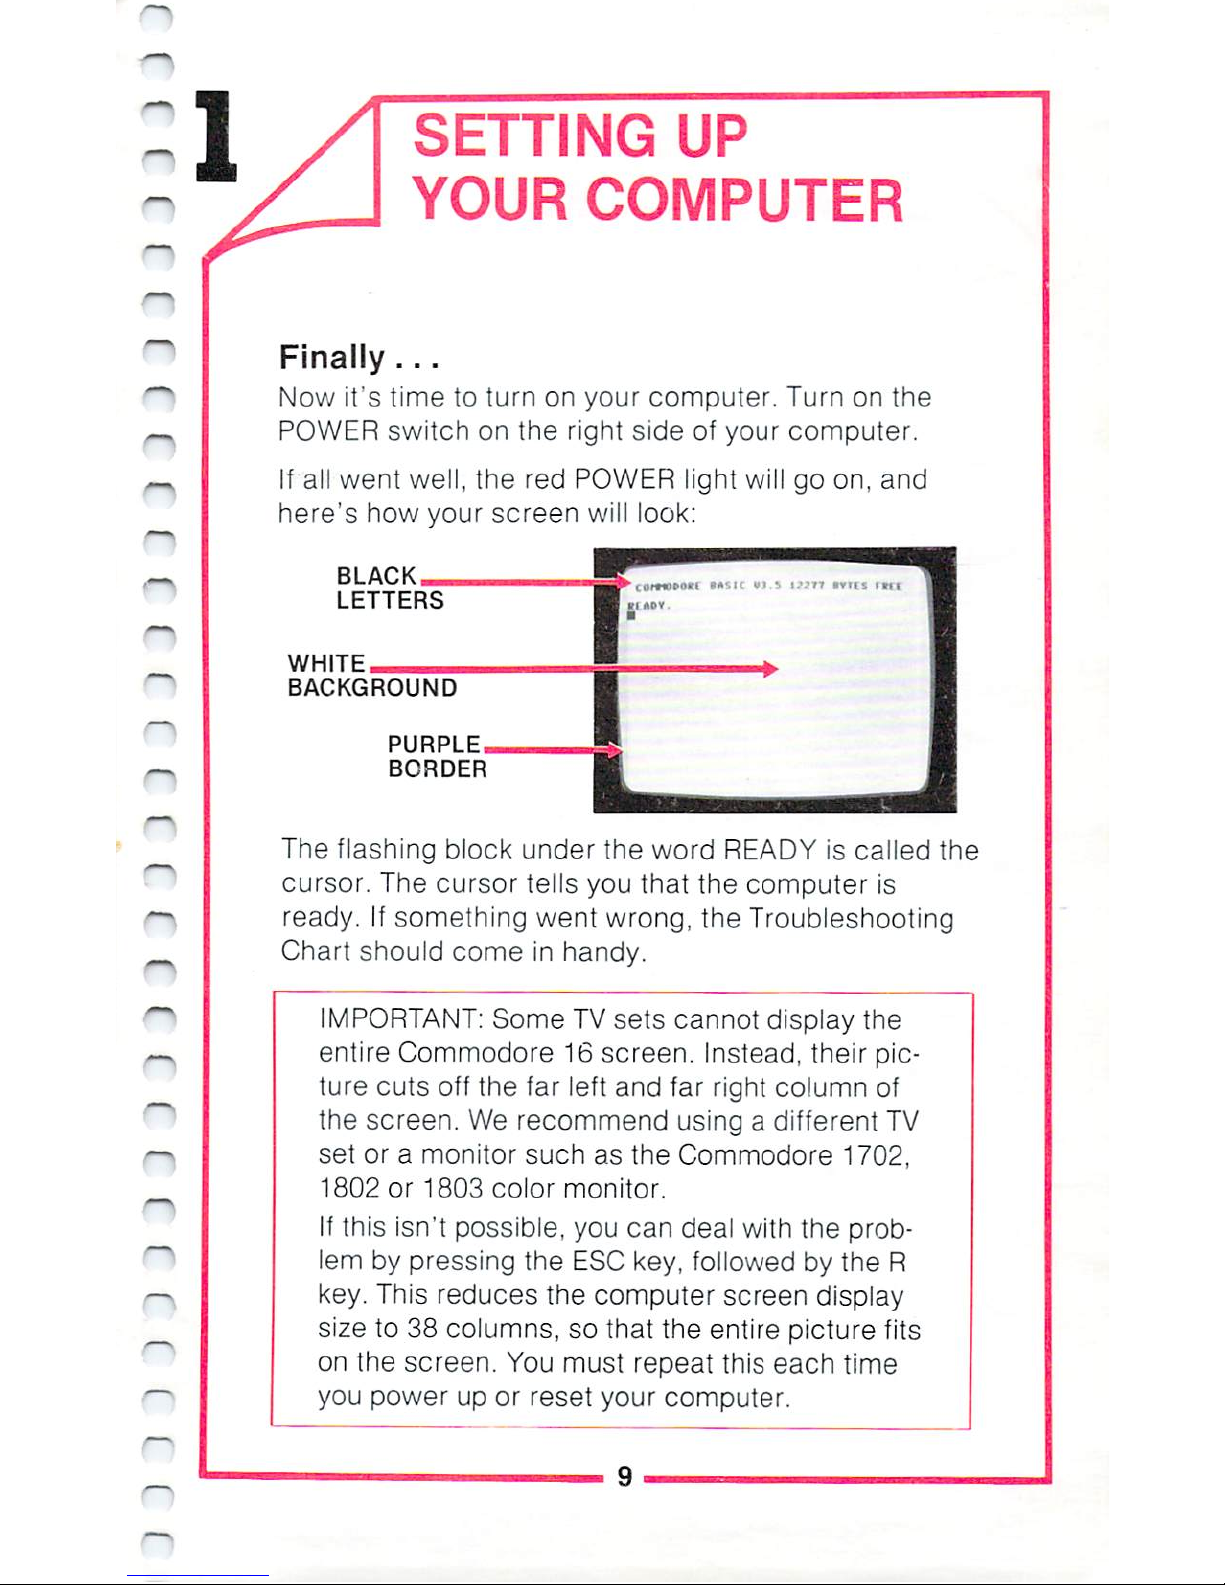
Finally
...
Now
it's
time
to
turn
on
your
computer.
Turn
on
the
POWER
switch
on
the
right
side
of
your
computer.
If
all
went
well,
the
red
POWER
light
will
go
on,
and
here's
how
your
screen
will
look:
BLACK
LETTERS
WHITE
BACKGROUND
PURPLE
BORDER
The
flashing
block
under
the
word
READY
is
called
the
cursor.
The
cursor
tells
you
that
the
computer
is
ready.
If
something
went
wrong,
the
Troubleshooting
Chart
should
come
in
handy.
IMPORTANT:
Some
TV
sets
cannot
display the
entire
Commodore
16
screen.
Instead,
their
pic
ture
cuts
off
the
far
left
and
far
right
column
of
the
screen.
We
recommend
usingadifferent
TV
set
or
a monitor
such
as
the
Commodore
1702,
1802
or
1803
color
monitor.
If
this
isn't
possible,
you
can
deal
with
the
prob
lem
by
pressing
the
ESC
key,
followed
by
the
R
key.
This
reduces
the
computer
screen
display
size
to
38
columns, so
that
the
entire
picture
fits
on
the
screen.
You
must
repeat
this
each
time
you
powerupor
reset
your
computer.
SETTING
UP
YOUR
COMPUTER
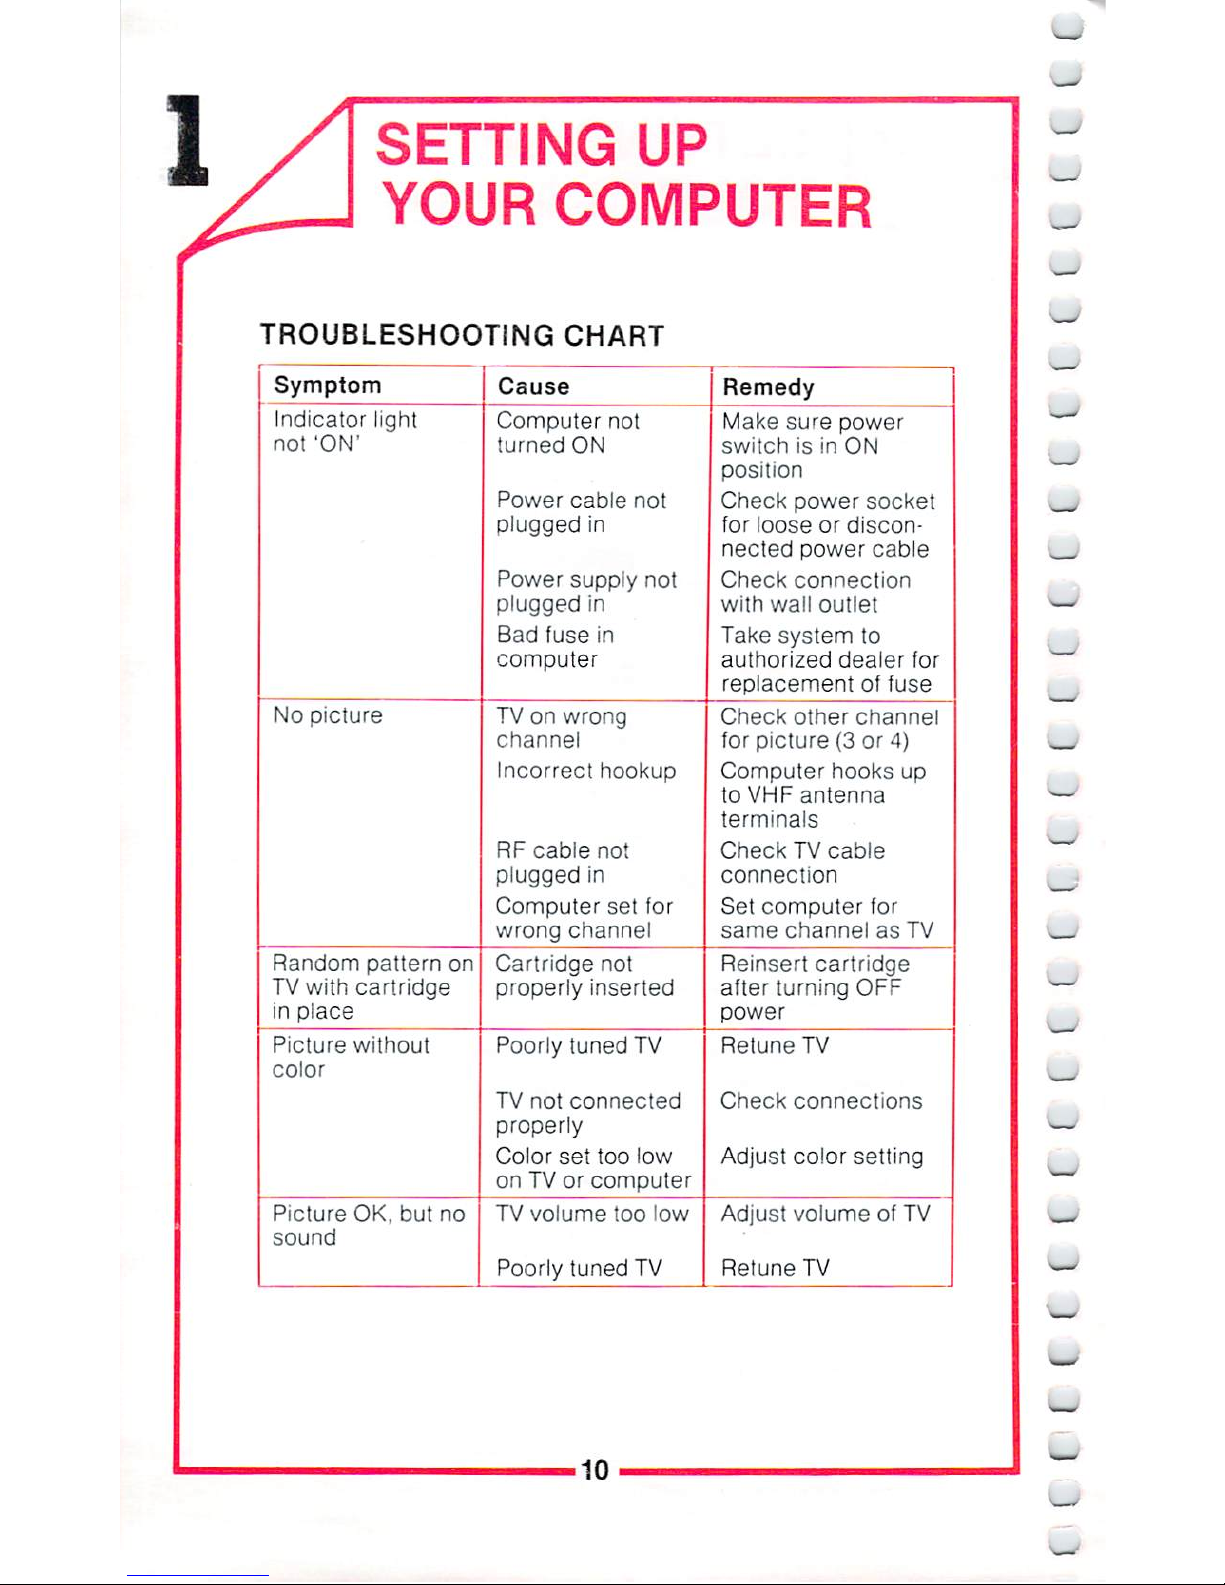
TROUBLESHOOTING
CHART
Symptom
Indicator
light
not
'ON1
No
picture
Random
pattern
on
TV
with
cartridge
in
place
Picture
without
color
Picture
OK,
but
no
sound
Cause
Computer
not
turned
ON
Power
cable
not
plugged
in
Power
supply
not
plugged
in
Bad
fuse
in
computer
TVonwrong
channel
Incorrect
hookup
RF
cable
not
plugged
in
Computer
set
for
wrong
channel
Cartridge
not
properly
inserted
Poorly
tuned
TV
TV
not
connected
properly
Color
set
too
low
onTVor
computer
TV
volume
too
low
Poorly
tuned
TV
Remedy
Make
sure
power
switchisin
ON
position
Check power
socket
for
looseordiscon-
necled
power
cable
Check
connection
with
wall
outlet
Take
system
to
authorized
dealer
for
replacementoffuse
Check
other
channel
for
picture(3or
4)
Computer
hooks
up
to
VHF
antenna
terminals
CheckTVcable
connection
Set
computer
for
same
channelasTV
Reinsert
cartridge
after
turning
OFF
power
RetuneTV
Check
connections
Adjust
color
setting
Adjust
volumeofTV
RetuneTV
10
2
LOOKING
AT
THE
KEYBOARD
.
introduction
.Using
your
computer
likeatypewriter
.
special
keys

-
w
_
LOOKING
AT
THE
KEYBOARD
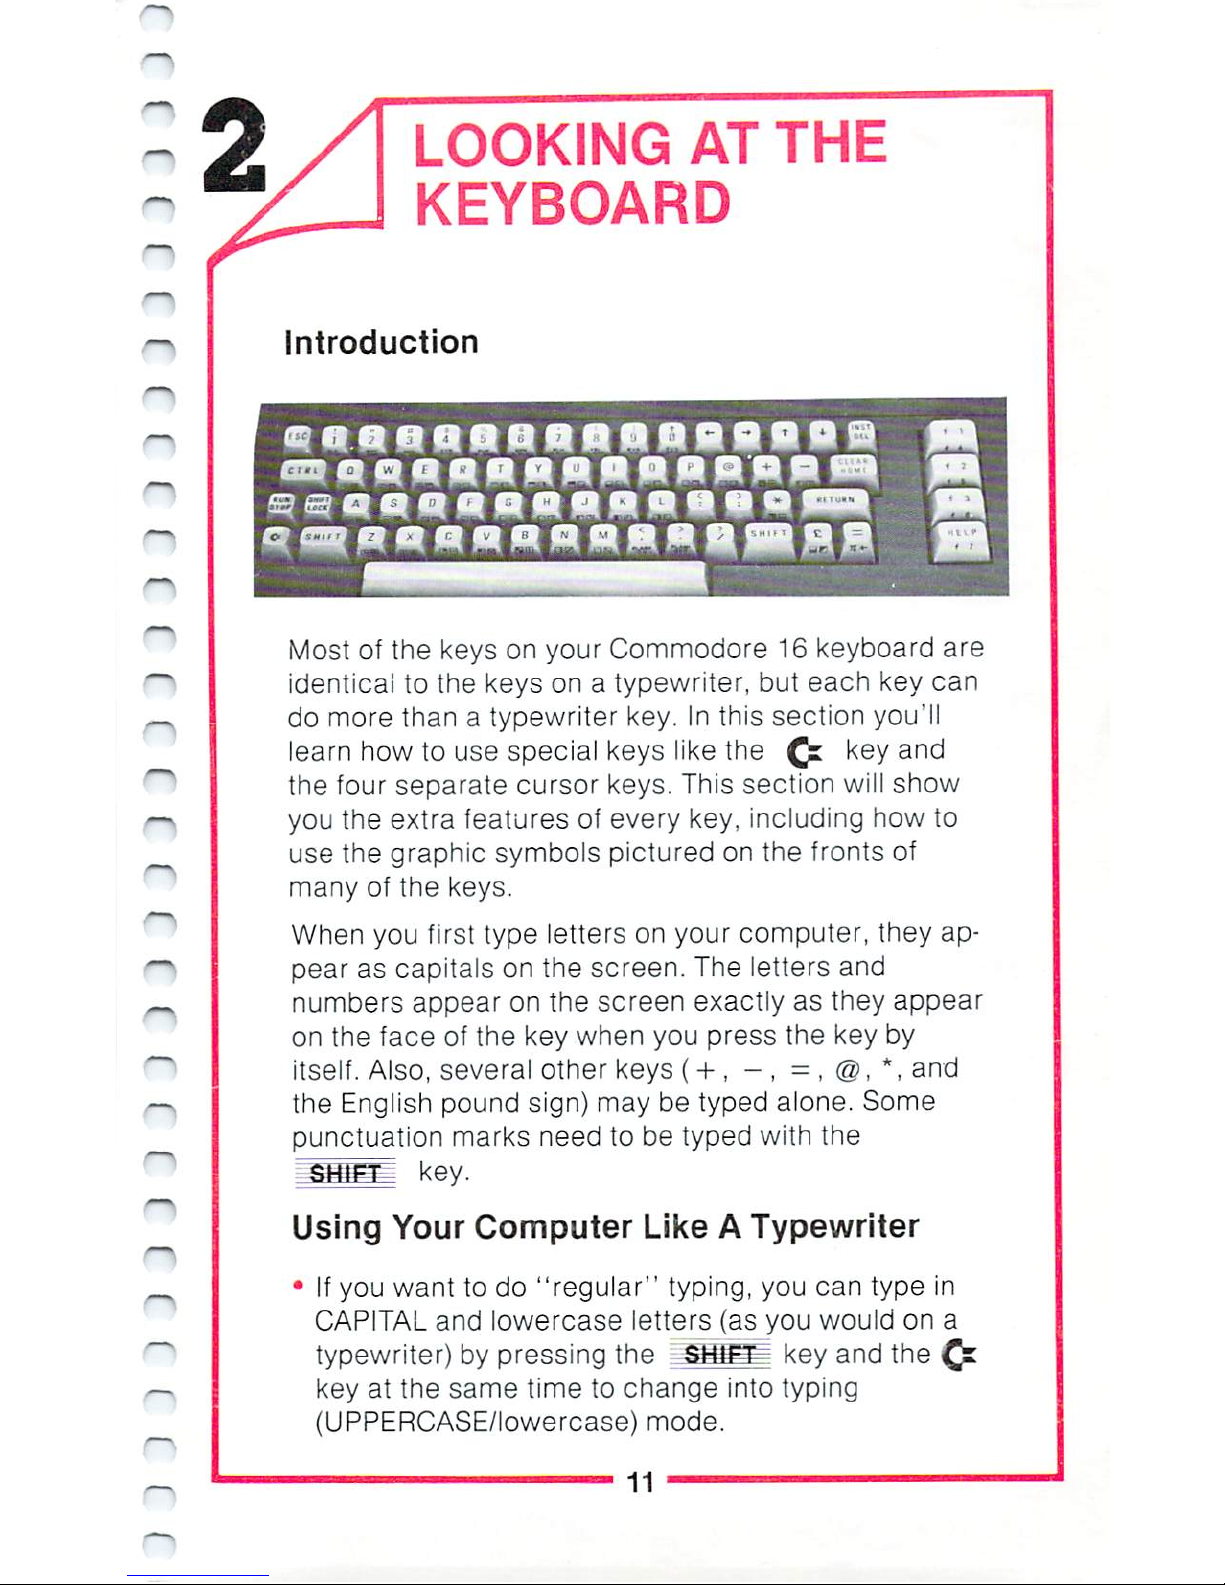
Introduction
Most
of
the
keys
on
your
Commodore
16
keyboard
are
identical
to
the
keys onatypewriter,
but
each
key
can
do
more
thanatypewriter
key.
In
this
section
you'll
learn
how
to
use
special
keys
like
the
£s
key
and
the
four
separate
cursor
keys.
This
section
will
show
you
the extra
features
of
every
key,
including
how
to
use
the
graphic
symbols
pictured
on
the
fronts of
many
of
the
keys.
When
you
first
type
letters
on
your
computer,
they
ap
pear
as
capitals
on
the
screen.
The
letters
and
numbers
appear
on
the
screen
exactly
as
they
appear
on
the
face
of
the
key
when
you
press
the
key
by
itself.
Also,
several
other
keys(+,-,-,@,
*,
and
the
English
pound
sign)
may
be
typed
alone.
Some
punctuation
marks
need
to
be
typed
with the
Using
Your
Computer
LikeATypewriter
•
If
you
want
to
do
"regular"
typing,
you
can
type
in
CAPITAL
and
lowercase
letters
(as
you
would
on
a
typewriter)
by
pressing
the
SHiCCr
key
and
the
£x
key
at
the
same
time
to
change
into
typing
(UPPERCASE/lowercase)
mode.
11
LOOKING
AT
THE
KEYBOARD
After
you
do
this,
all
letter
keys
typed alone
are
in
lower-case.
When
you
press
the
"SHf^
key
along
withaletter,
you
getacapita!
letter.
Try
typing
with
and
without
the
^iaigf^
key.
Numbers
and
punctuation
keys
work
the
same
as
they
would
in
non-typing
mode.
To
get
outoftyping
mode,
just
press
the
two
keys
(^Sffiflf
and
C*)together
again.
The
lower-case
letters
on
your
screen
become
capitalized
and
the
capitals
become
graphic
symbols.
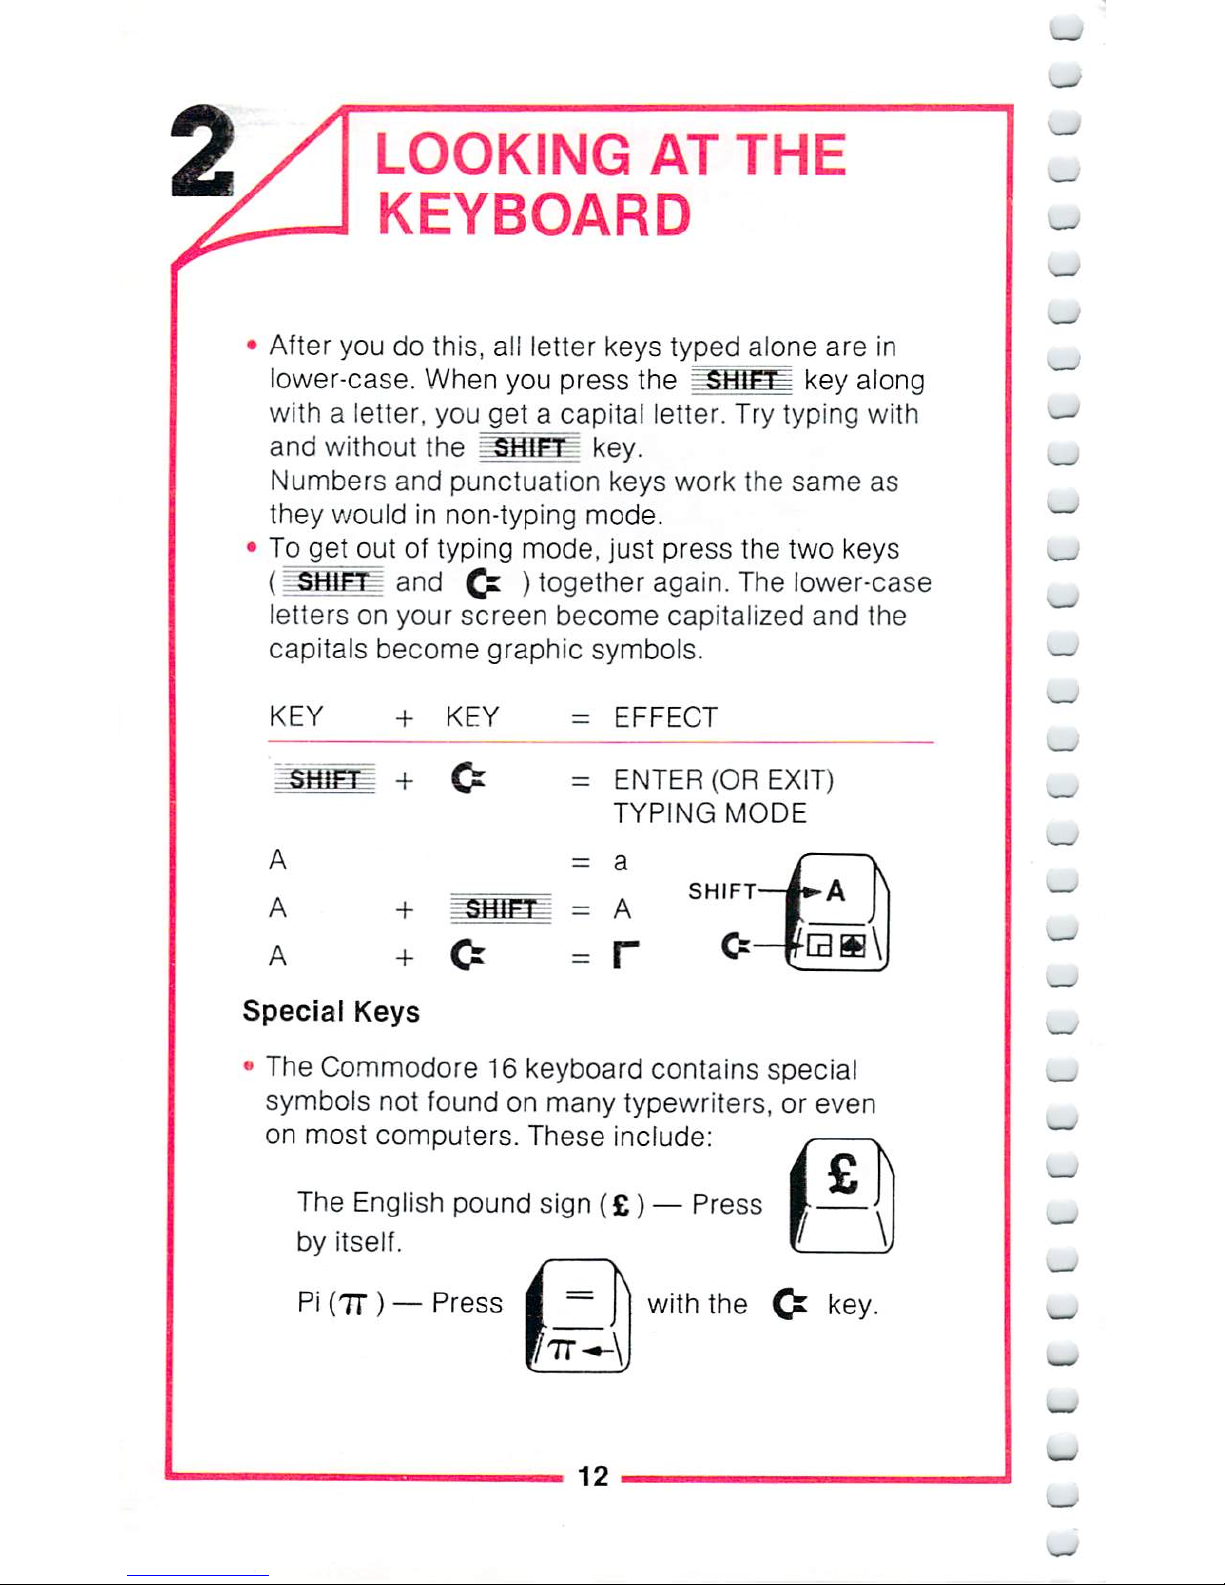
KEY
+ KEY
=
EFFECT
=
ENTER
(OR
EXIT)
TYPING
MODE
The
Commodore
16
keyboard
contains
special
symbols
not
found
on
many
typewriters,
or
even
on
most
computers.
These
include:
The
English
pound
sign
(£)—Press
by
itself.
Pi
(7D —Press
I
=
|
with
the
key.
_
_
12
_
LOOKING
AT
THE
KEYBOARD
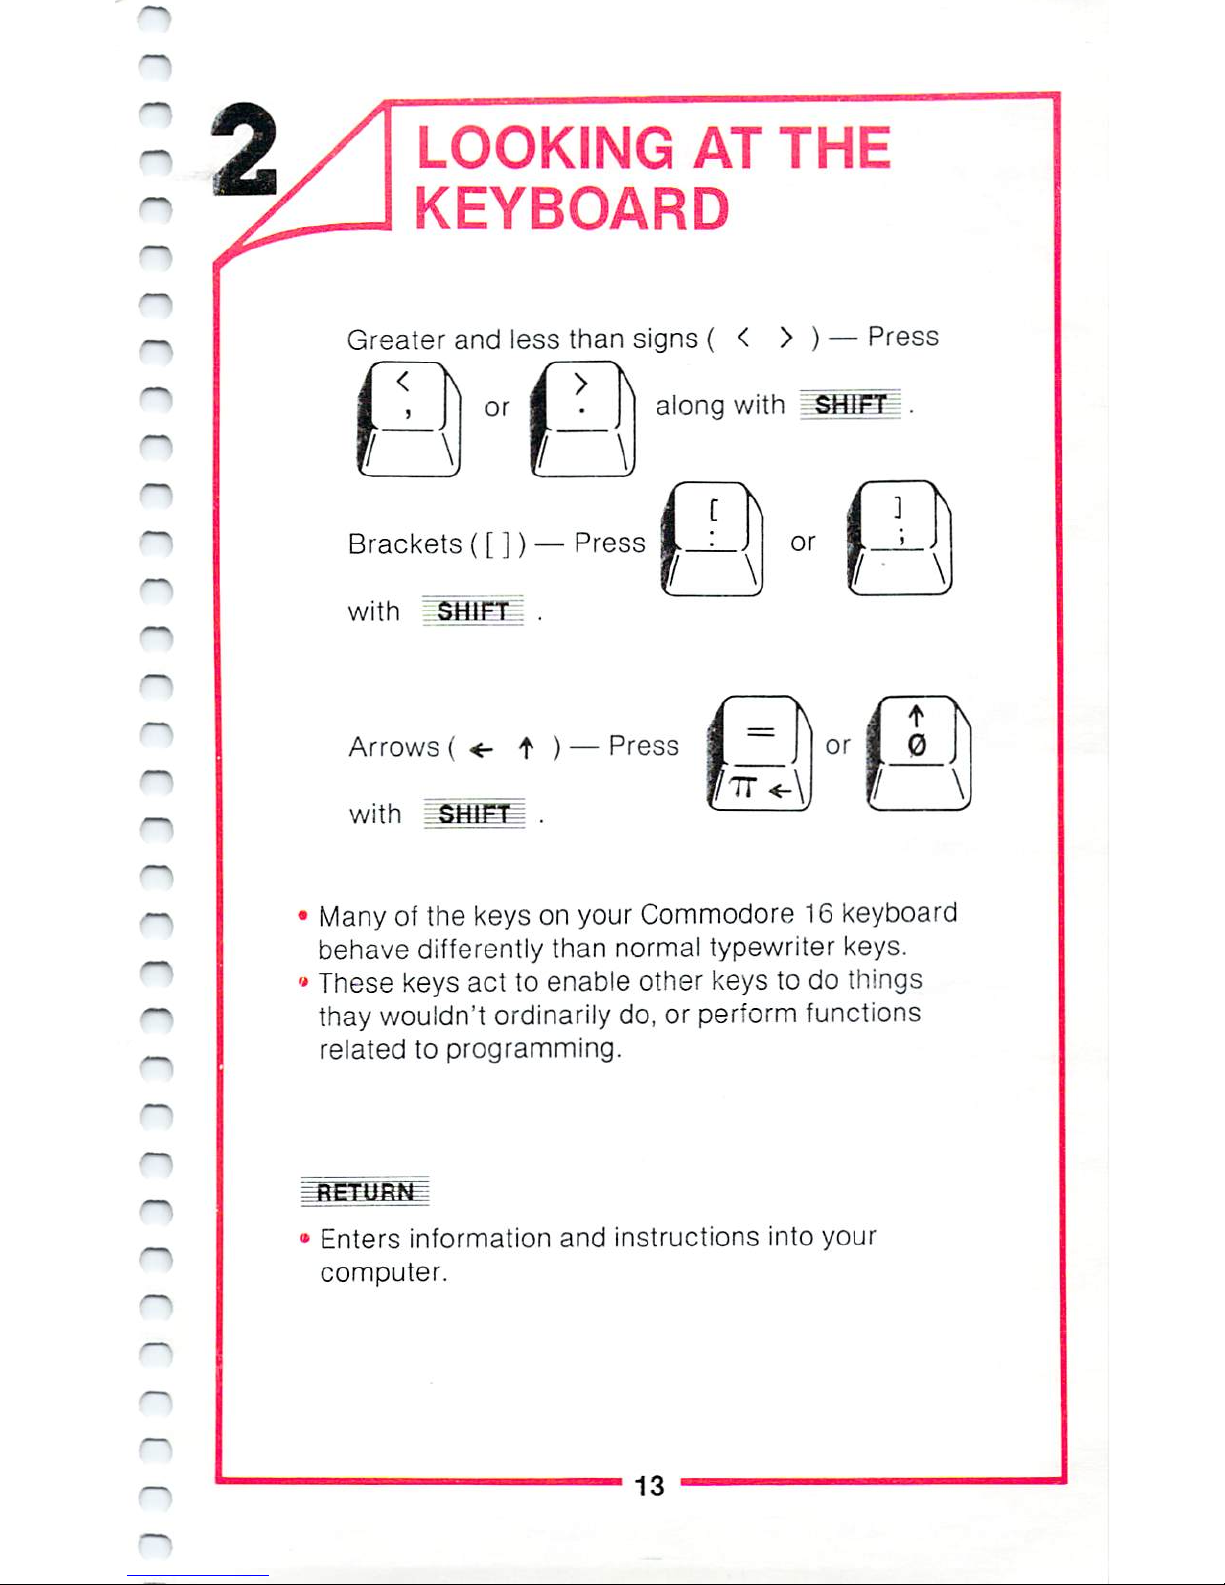
Greater
and
less
than
signs(<
>)—Press
along
with
SHIFT
.
or
Brackets
([ ])—Press
with
SHIFT
.
or
Arrows(<-f)—
Press
with
.!
or
Many
of
the
keys
on
your
Commodore
16
keyboard
behave
differently
than
normal
typewriter
keys.
These
keys
act
to
enable
other
keys
to
do
things
thay
wouldn't
ordinarily
do,
or
perform
functions
related
to
programming.
Enters
information
and
instructions
into
your
computer.
13
LOOKING
AT
THE
KEYBOARD
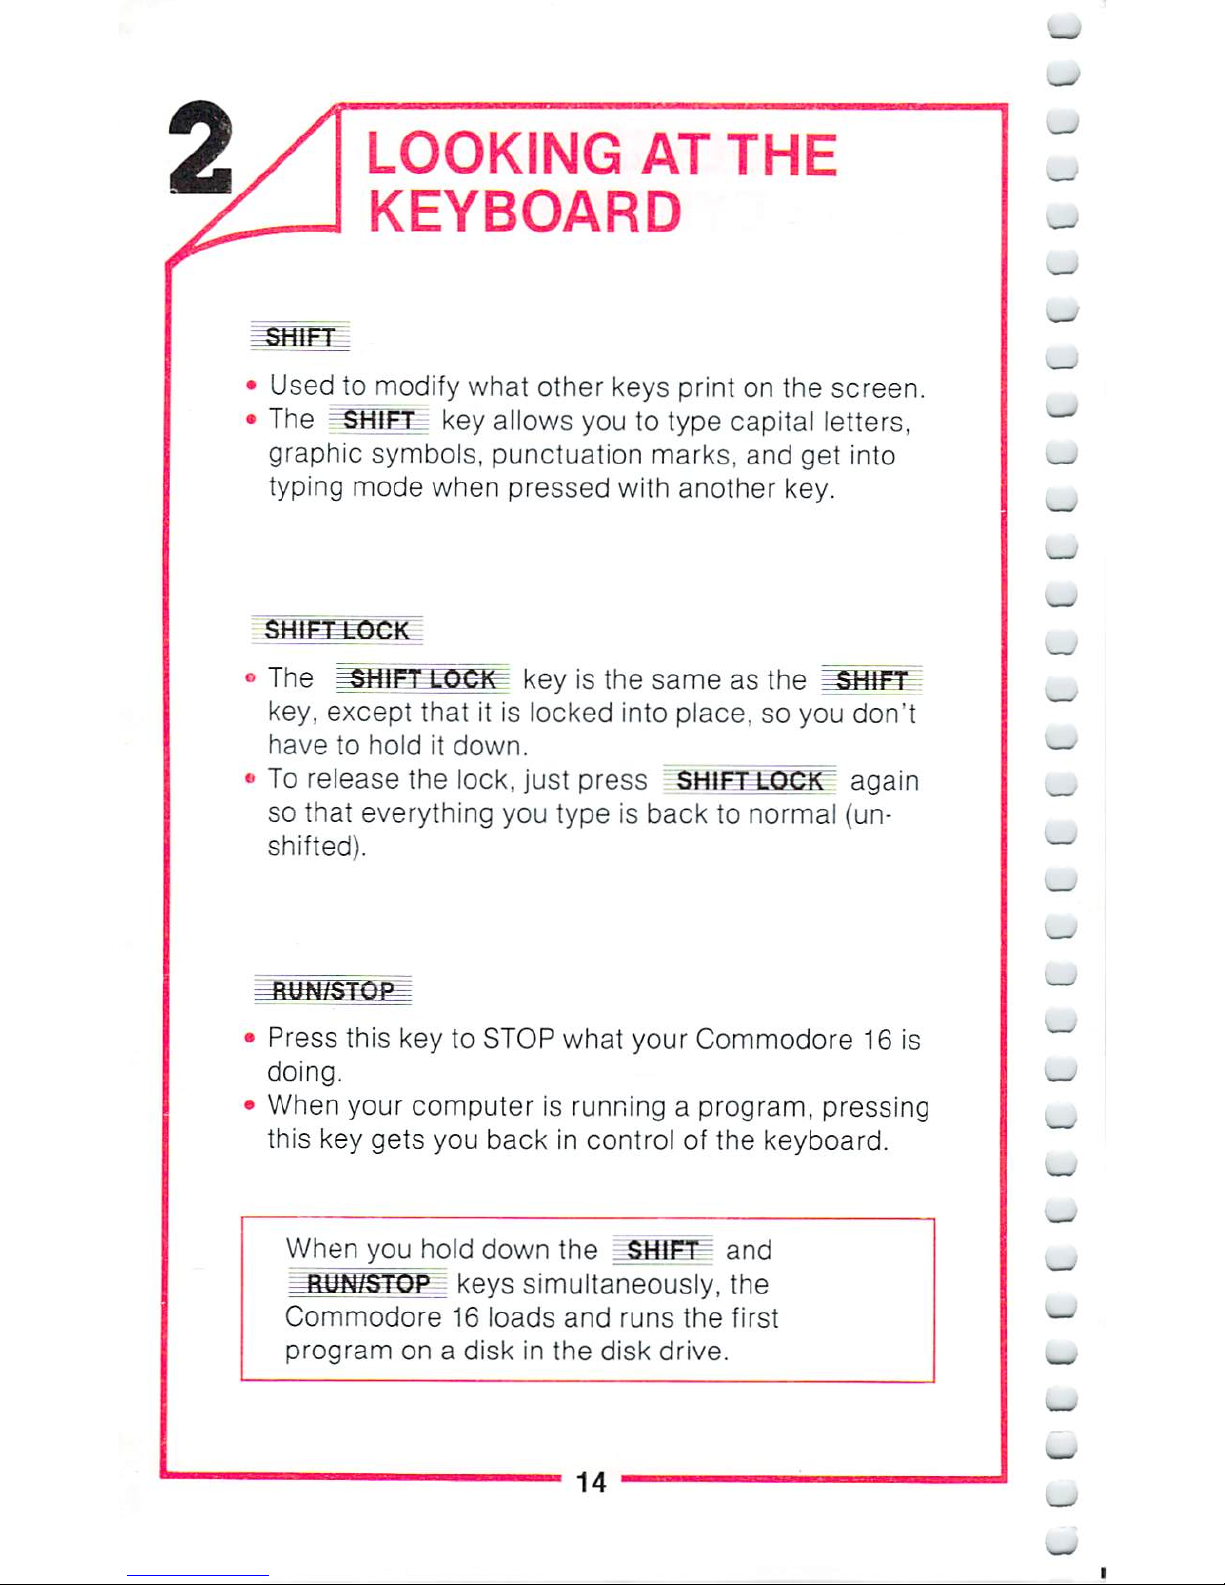
Used
to
modify
what
other
keys
print
on
the
screen.
The
=SHIFT
key
allows
you
to
type
capital
letters,
graphic
symbols,
punctuation
marks,
and
get
into
typing
mode
when
pressed
with
another
key.
keyisthe
sameasthe
key,
except
that
it
is
locked
into
place,
so
you
don't
have
to
hold
it
down.
To
release
the
lock,
just
press
SHIFT
LOCK
again
so
that
everything
you
type
is
back
to
normal
{un-
shifted).
—
Press
this
key
to
STOP
what
your
Commodore
16
is
doing.
When
your
computer
is
runningaprogram,
pressing
this
key
gets
you
back
in
control
of
the
keyboard.
When
you
hold
down
the
JSHIFT
and
1_B1IN/STQP_
keys
simultaneously,
the
Commodore
16
loads
and
runs
the
first
program
onadisk
in
the
disk
drive.
^
—
14
 Loading...