

Page 1
1
CMB-67K-02
Mini Barebone system
Intel High Performance Platform
User’s Manual
Installation Guide
Edition 1.0
2014/06/09
Page 2
CMB-67K-02 Installation Guide
2
Document Content:
z Packing List
z Product Specification
z Hardware Installation
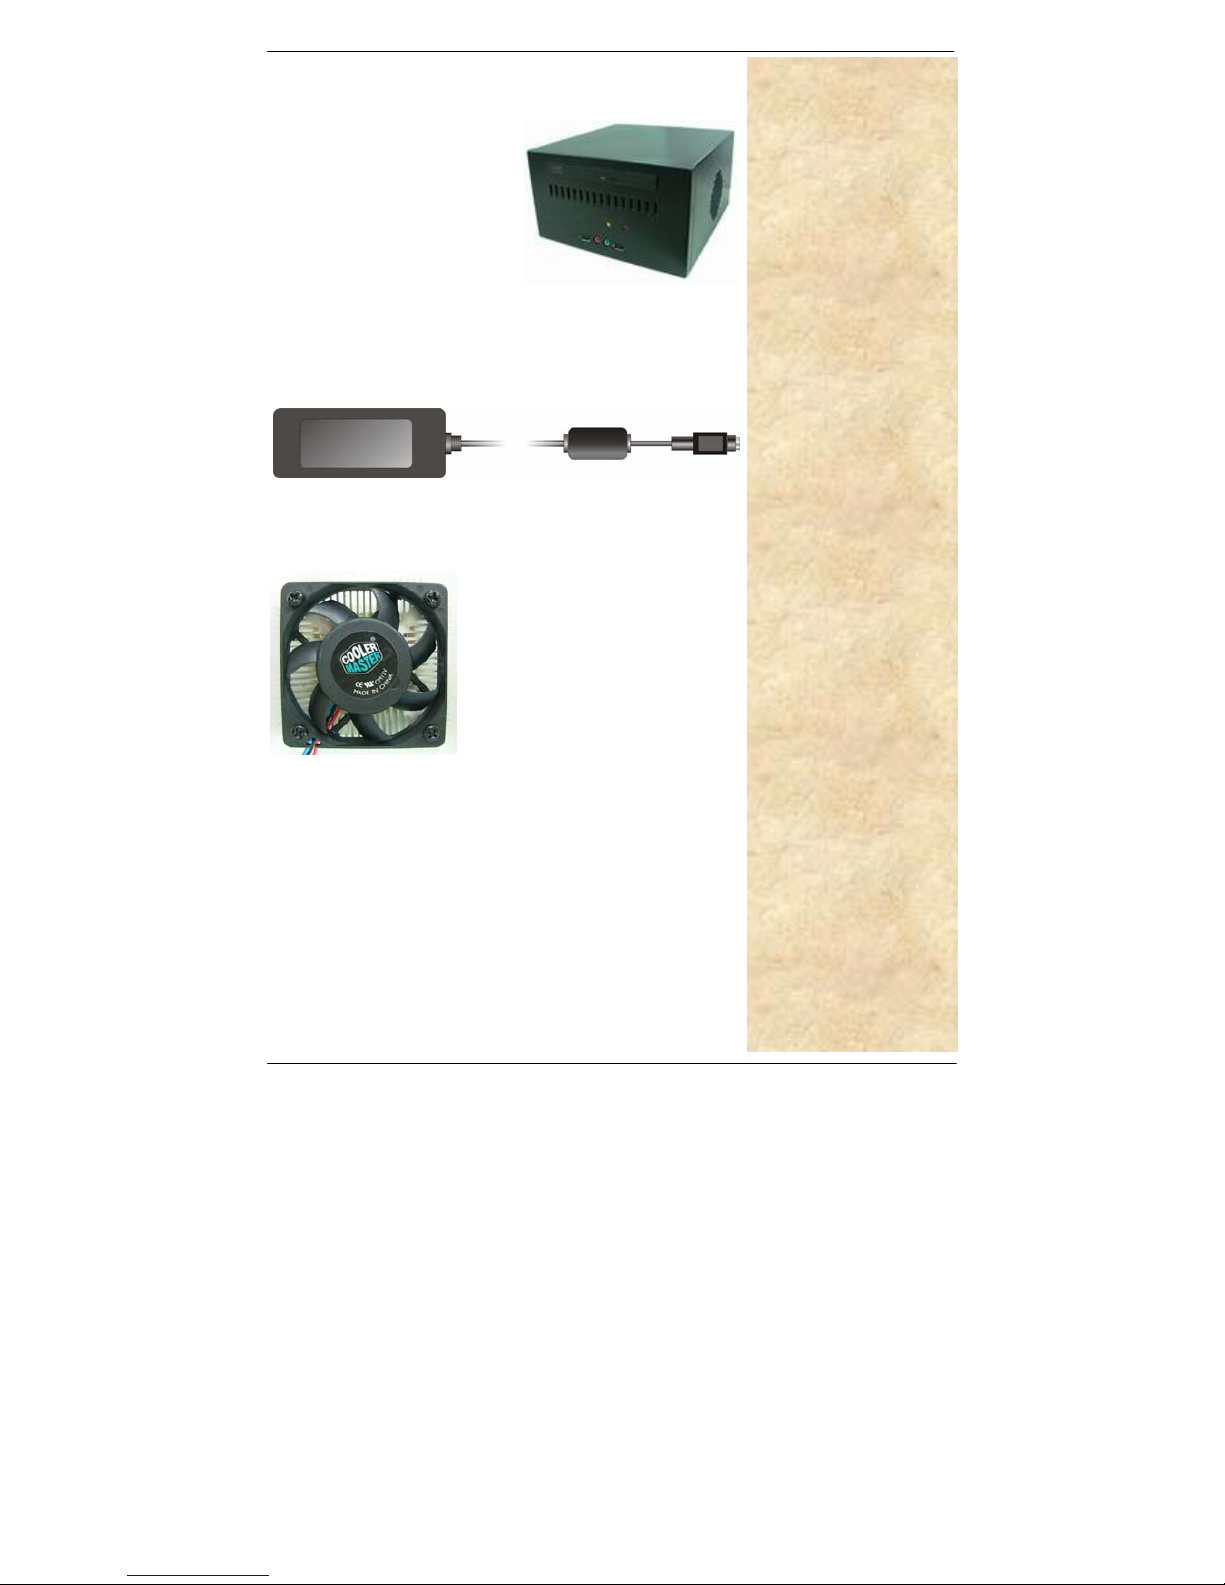
Packing List:
CMB-67K-02 Chassis x1
(Including LV-67K Motherboard)
DSPD-120-19 120W 19V AC-DC Adapter x 1
Power Cord x 1
CPU Cooler x 1
13-pin to 7-pin SATA Cable x1
SATA Cable 50 cm x1
ATX POWER output 20P to 4P*1 + SATA15P*1
20-pin DVI cable x1
DC JACK CABLE 26cm x1
CD Driver x1 (Including User’s Manual)
Hanging holders x2
CMB-67K-02
Page 3
CMB-67K-02 Installation Guide
3
Hardware Installation:
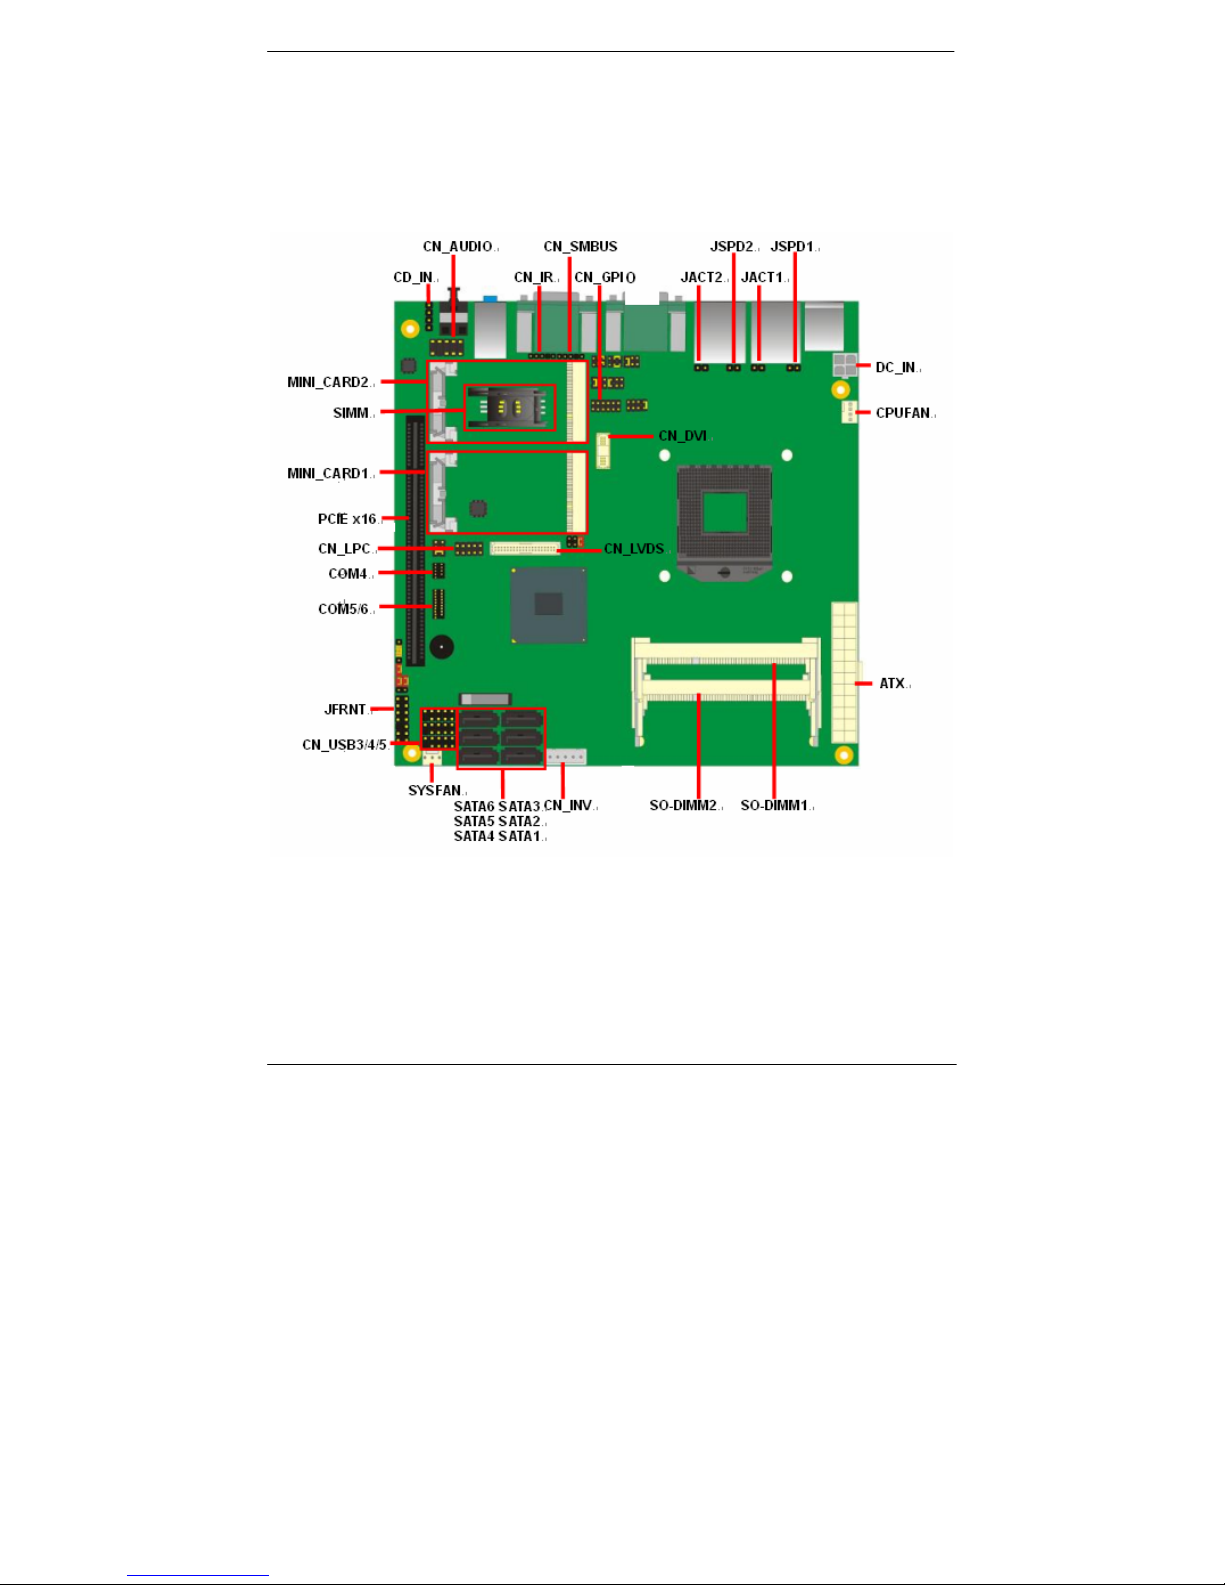
Motherboard placement
Page 4
CMB-67K-02 Installation Guide
4
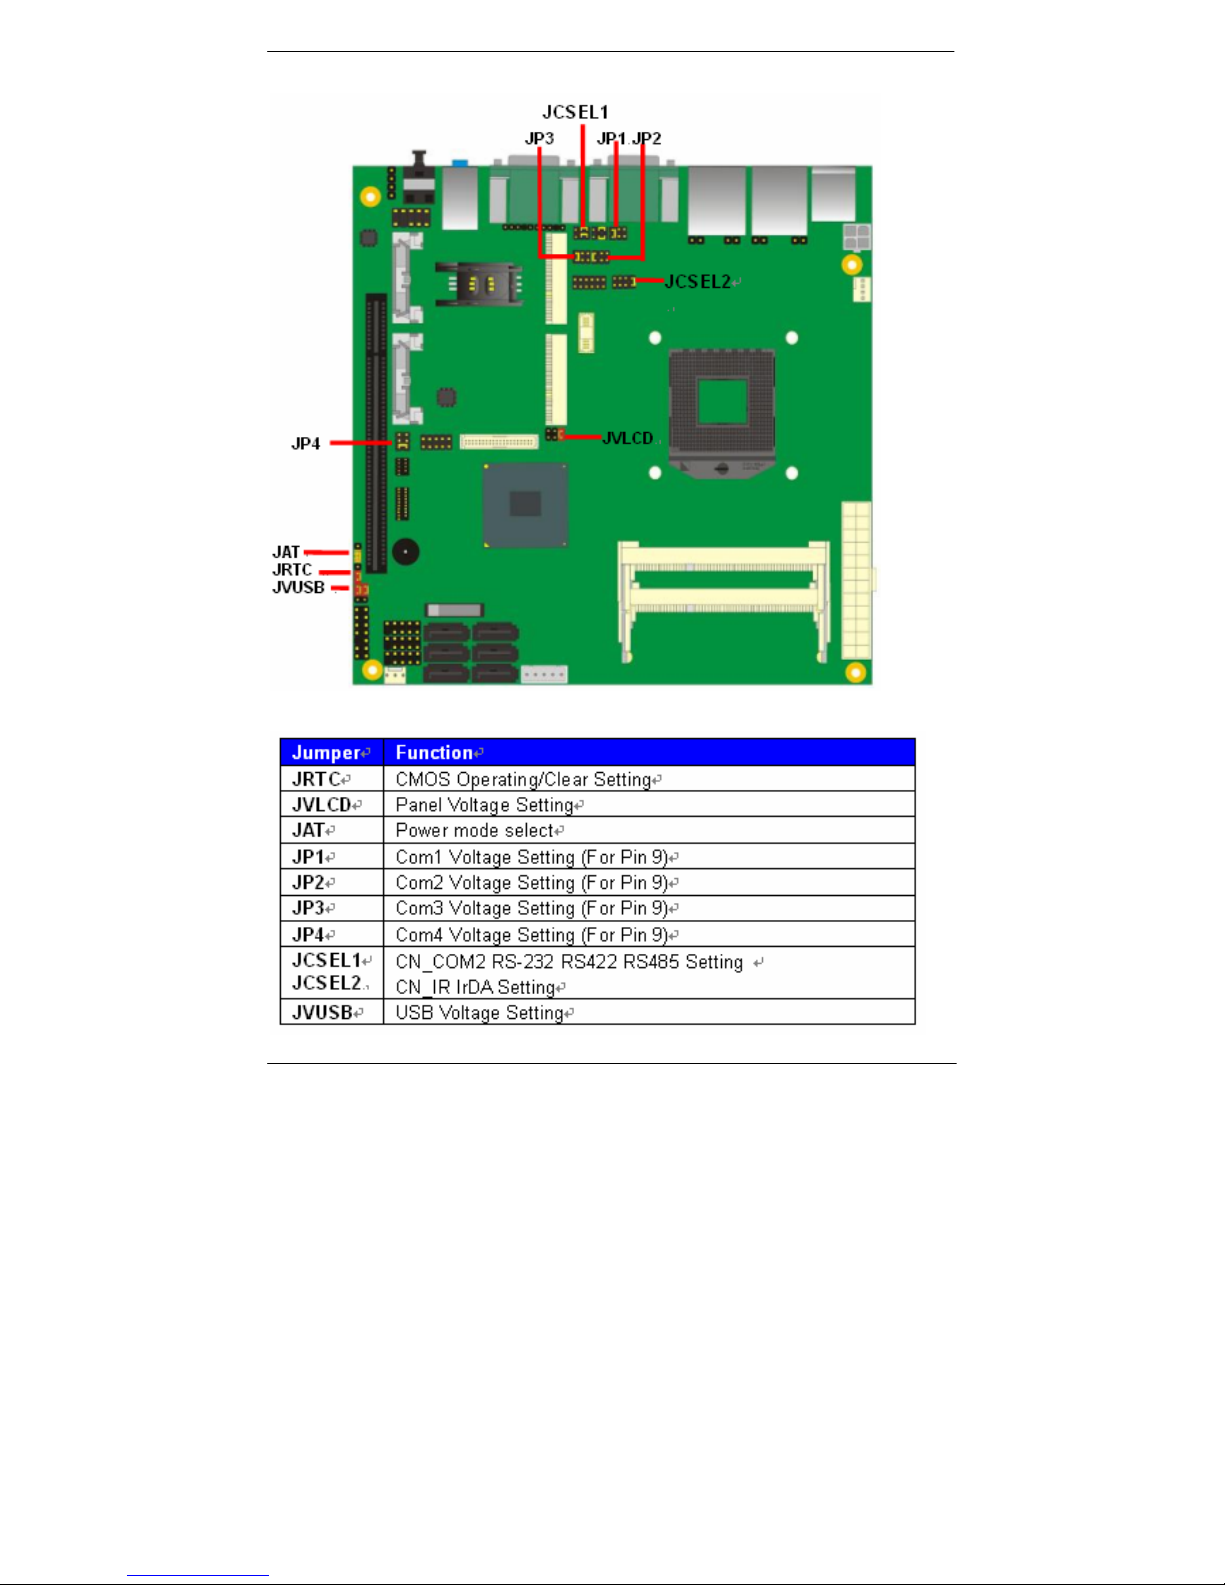
Jumper Location & Reference
Page 5
CMB-67K-02 Installation Guide
5
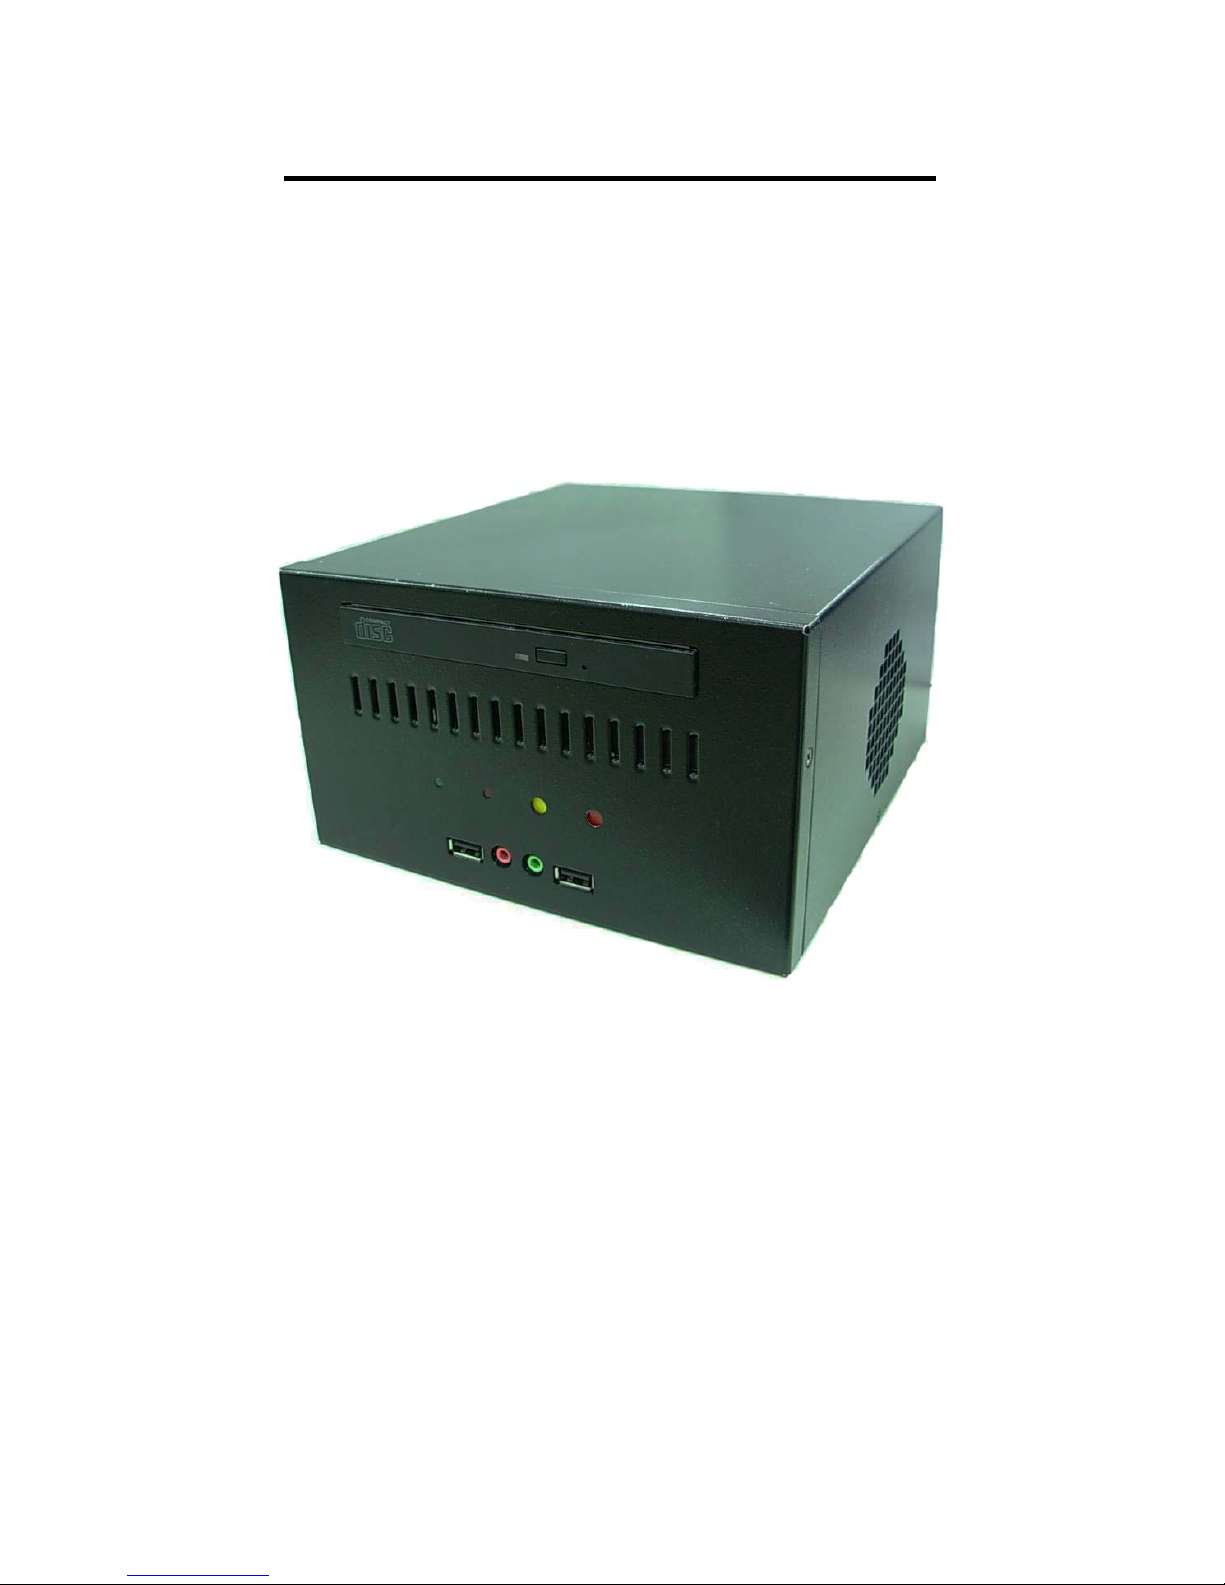
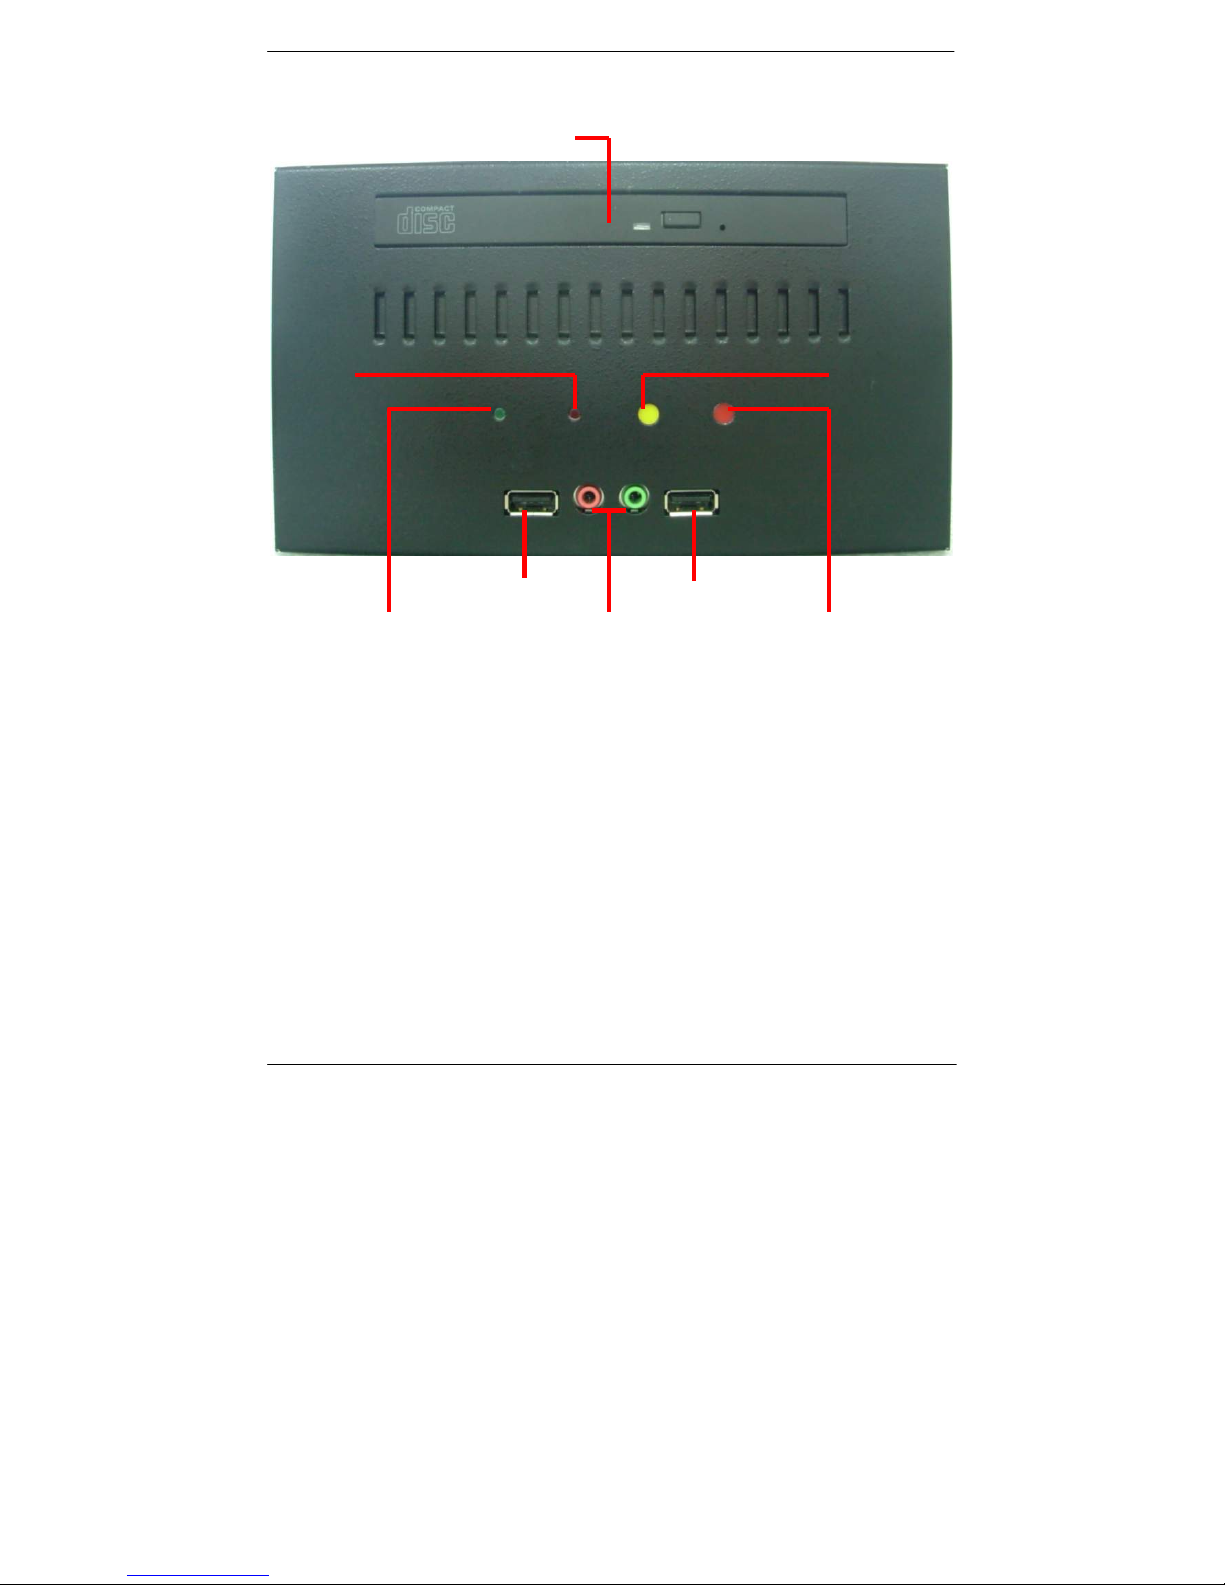
I/O panel:
Front:
CD-ROM
Reset Button
HD LED
Power LED Power Button
USB 2.0USB 2.0
Mic / Ear-Phone
Page 6
CMB-67K-02 Installation Guide
6
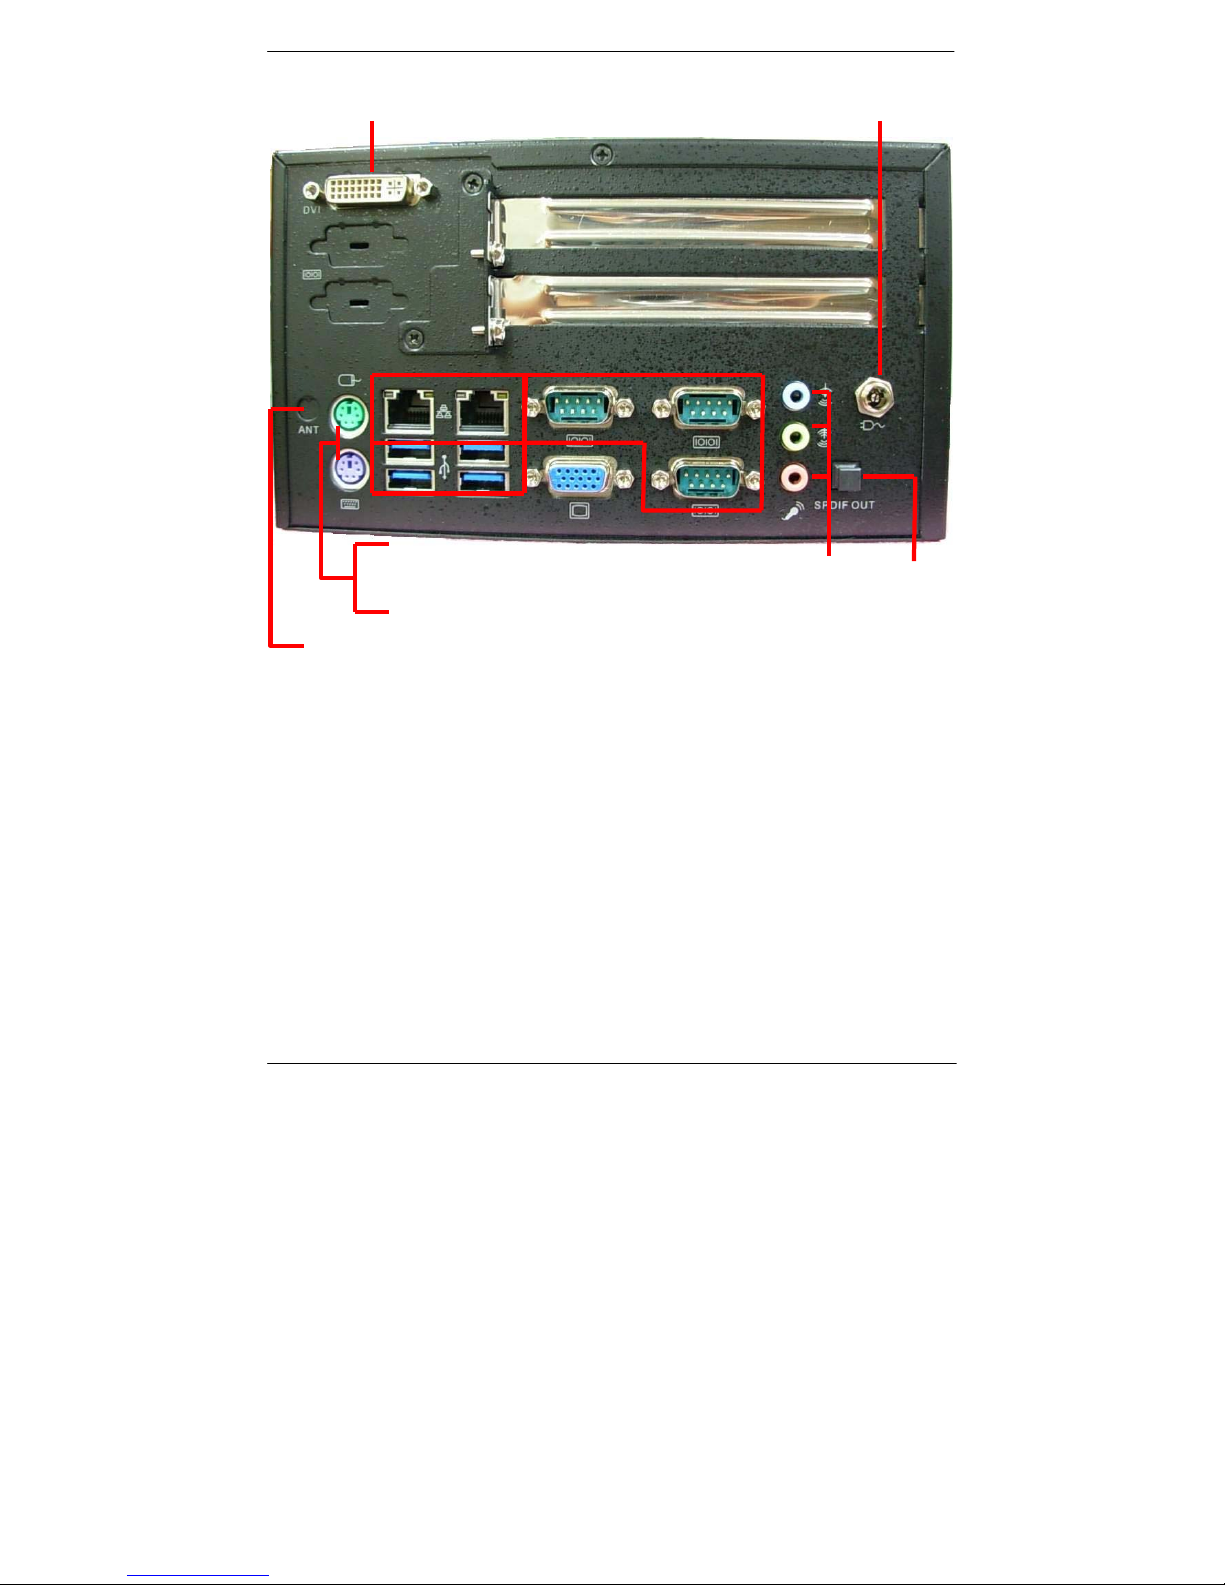
Rear:
Power input : DSPD-120-19 120W 19V AC-DC Adapter Input.
SPDIF
USB 3.0
COM Port
VGA
DVI DC-IN
Antenna Port
Mouse
Keyboard
Line-In
Line-Out
Mic
LAN
Page 7
CMB-67K-02 Installation Guide
7
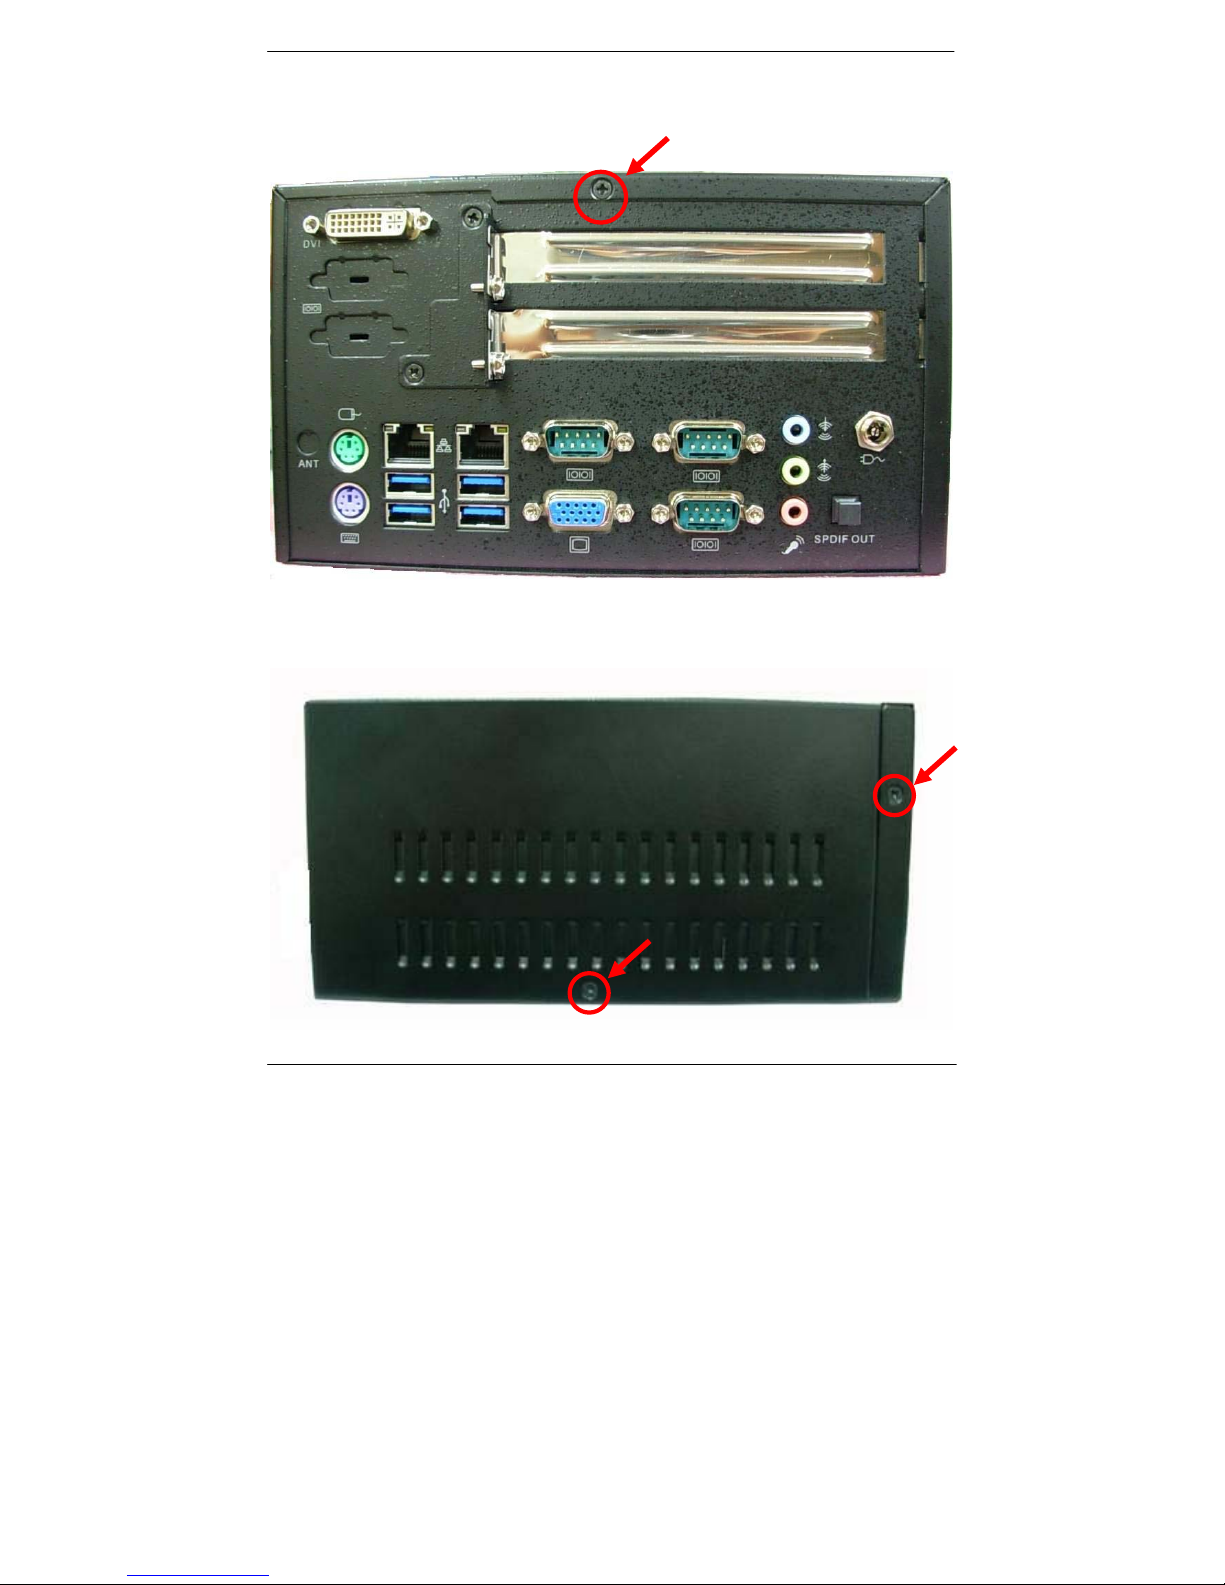
Chassis Setup procedure:
1. T urn the screws and refer the picture A and B and C.
(A)
(B)
Page 8
CMB-67K-02 Installation Guide
8
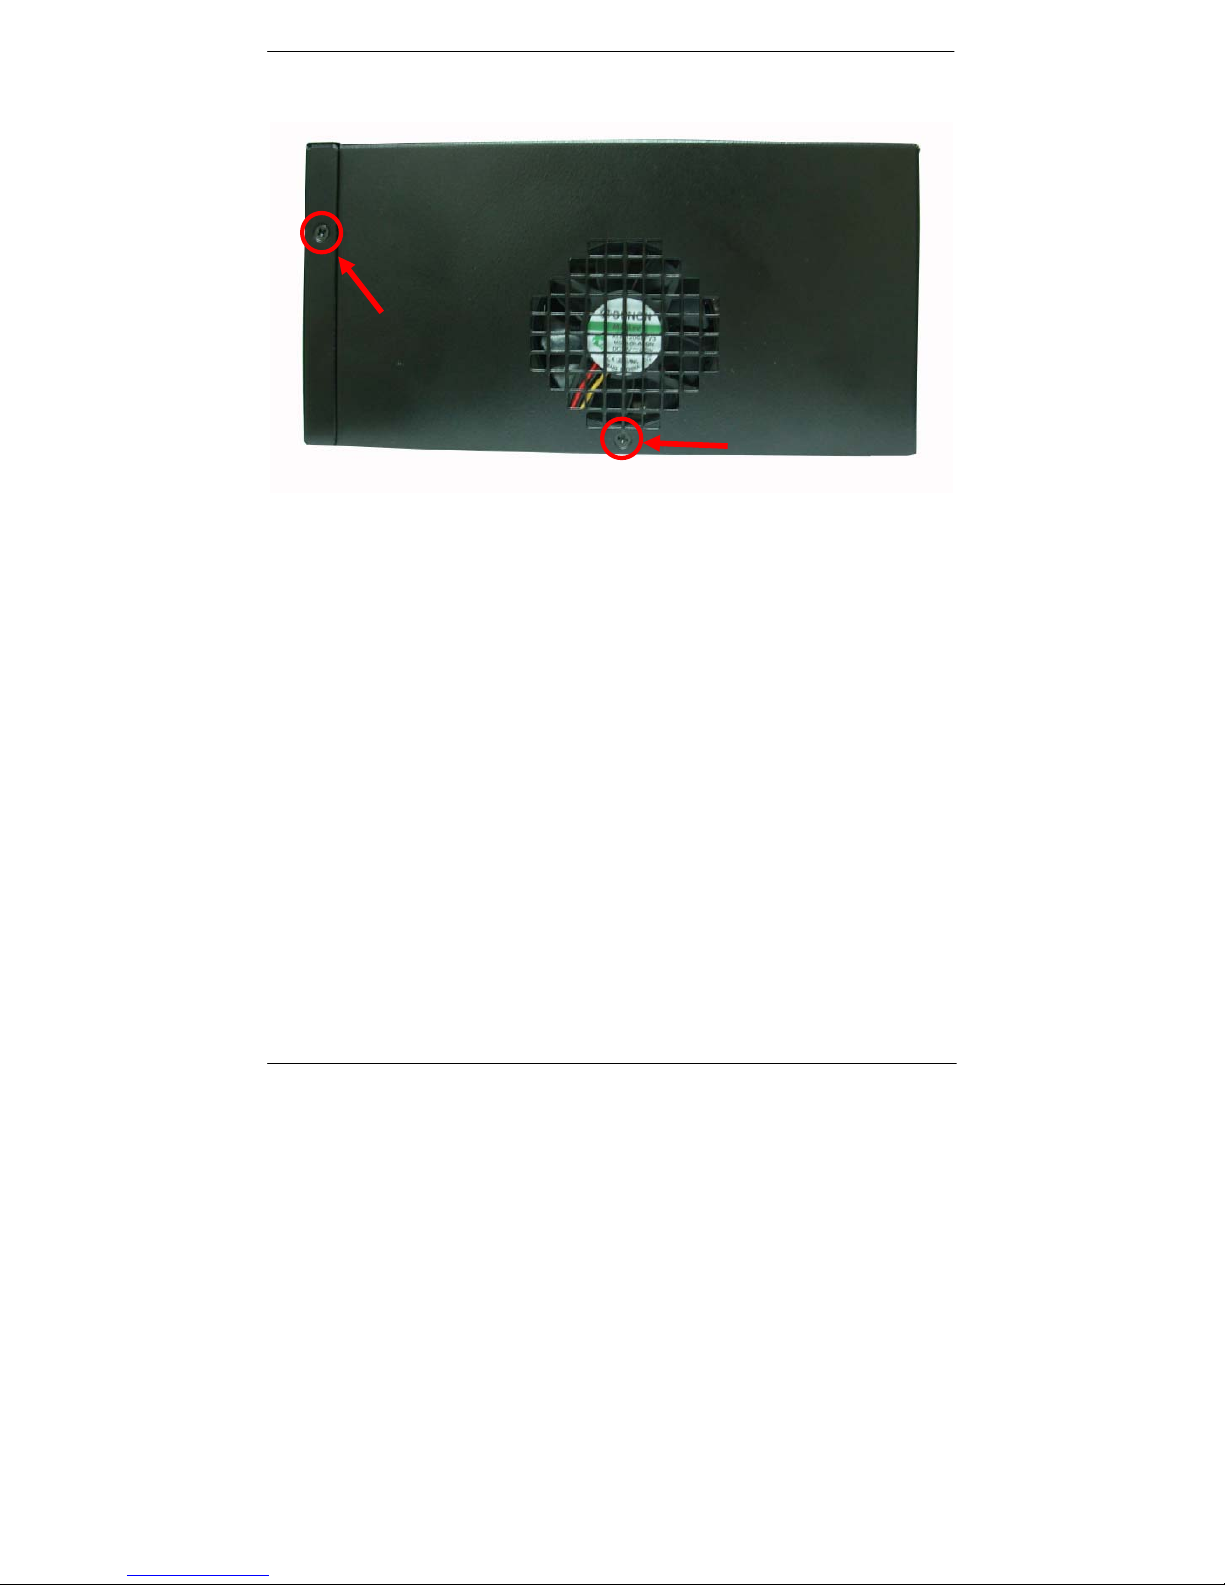
(C)
Page 9

CMB-67K-02 Installation Guide
9
2. Push the Chassis shield towards the back then open it.
2
1
Page 10

CMB-67K-02 Installation Guide
10
3. Turn the screws.
Page 11

CMB-67K-02 Installation Guide
11
4. Push the front panel towards the front then take the CD-ROM holder
off.
Page 12

CMB-67K-02 Installation Guide
12
5. T urn the CPU cooler screws and then refer the motherboard manual
page.16 to install the CPU.
(After installing CPU, please turn the CPU FAN screws to tighten.)
Page 13

CMB-67K-02 Installation Guide
13
Page 14

CMB-67K-02 Installation Guide
14
6. Open the Dimm holder then check the pin number to match the socket
side well before installing memory module. (It has two slots to choice,
or use both of them.)
Page 15

CMB-67K-02 Installation Guide
15
7. Press down the memory module then check dimm holder hook well.
Page 16

CMB-67K-02 Installation Guide
16
8. After inst all HD driv er, Turn the CD-ROM holder and front p anel scre w well
refer picture.
Page 17

CMB-67K-02 Installation Guide
17
9. Check the CD-ROM driver SATA input direction.
(If you don’t install CD-ROM drive please direct to step.14)
10. Check the CD-ROM driver and SATA cable connects well, then connect
the ATX output (4-pin).
Page 18

CMB-67K-02 Installation Guide
18
11. After install HD driver, Turn the CD-ROM holder and front panel screw
well. Refer picture A and B.
(A).
(B).
Page 19

CMB-67K-02 Installation Guide
19
12. T urn the CD-ROM driver screws and SATA cable connects well.
Page 20

CMB-67K-02 Installation Guide
20
13. Find out the HD holder to install HD driver, it is under backside of the
CD-ROM holder.
Page 21

CMB-67K-02 Installation Guide
21
14. Put on HD driver into HD holder then turn the HD drive screws to tighten.
Refer picture A , B and C.
(If you don’t install HD drive please direct to step.17)
(A)
(B)
(C)
Page 22

CMB-67K-02 Installation Guide
22
15. Connect SATA cable from motherboard to the HD drive, then connect
the ATX output (15-pin).
Page 23

CMB-67K-02 Installation Guide
23
16. Turn the CD-ROM driver screws and SATA cable connects well and
turn the screws.
17. Turn the chassis shield screws to tighten well.
Page 24

CMB-67K-02 Installation Guide
24
Page 25

CMB-67K-02 Installation Guide
25
18. T urn the chassis shield screws with the hanging holders to tighten well.
Page 26

CMB-67K-02 Installation Guide
26
Contact Information
Any advice or comment about our products and service, or anything
we can help you please don’t hesitate to contact with us. We will do
our best to support you for your products, projects and business
Taiwan Commate Computer Inc.
Address
19F, No. 94, Sec. 1, Xintai 5th Rd., Xizhi Dist., New Taipei City, Taiwan
TEL +886-2-26963909
FAX +886-2-26963911
Website
TUhttp://www.commell.com.twUT
E-Mail
TUinfo@commell.com.twUT (General Information)
TUtech@commell.com.twUT (Technical Support)
Facebook https://www.facebook.com/pages/Taiwan-Commate-Computer-Inc/547993955271899
Twitter https://twitter.com/Taiwan_Commate
Commell is a brand name of Taiwan Commate Computer Inc.
 Loading...