

Page 1
Interactive Touchscreens
CommBox
Control Hub
Quick Start Guide
Page 2
Introduction
The CommBox Control Hub gives intuitive control of your touchscreen and motorised stand right where you need
it. It also oers ports to plug in your media stick and laptop at the front where you can see them clearly.
This guide is intended for end users who are using a Control Hub that is fully setup ready for use. The guide explains how to operate the control buttons and how to connect you laptop or a USB media stick.
WARNING:
The motorised stand will automatically stop moving at the upper and lower limits, but you should always take
care to watch for obstructions and manually stop the stand by releasing the button in the event of a collision.
Controlling your Screen and Stand
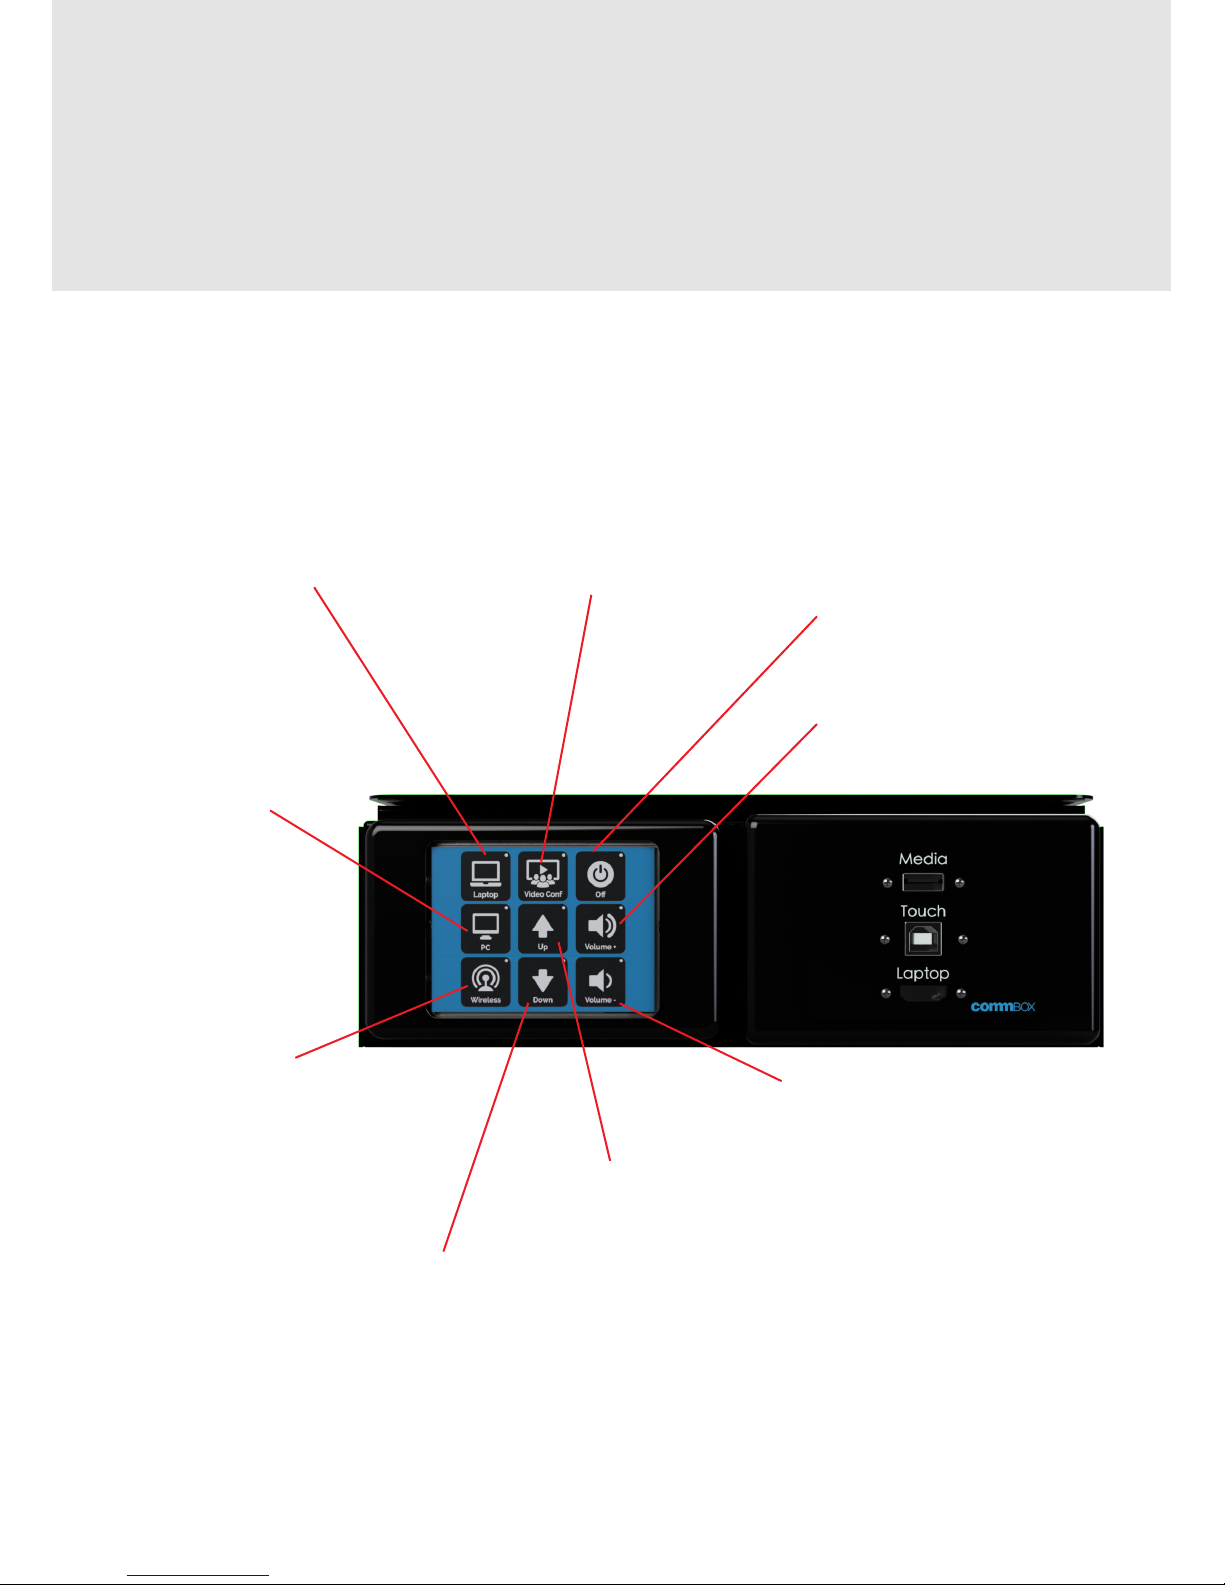
Use the 9 touch buttons on the front to control your screen and optional motorised stand. Blue indicator lights will
show which of the four inputs is currently selected.
Press and hold
to raise stand
Press and hold
to lower stand
Turn o the
screen
Press and hold to lower
volume
Switch to Screen-
Beam (HDMI 3)
(optional)
Will also turn the
screen on
Switch to rear PC
(HDMI 2)
Will also turn the
screen on
Press and hold to raise
volume
Switch to front lap-
top port (HDMI 1)
Will also turn the screen
on
Switch to HDMI 4
Will also turn the
screen on
Page 3
Connecting Your Laptop
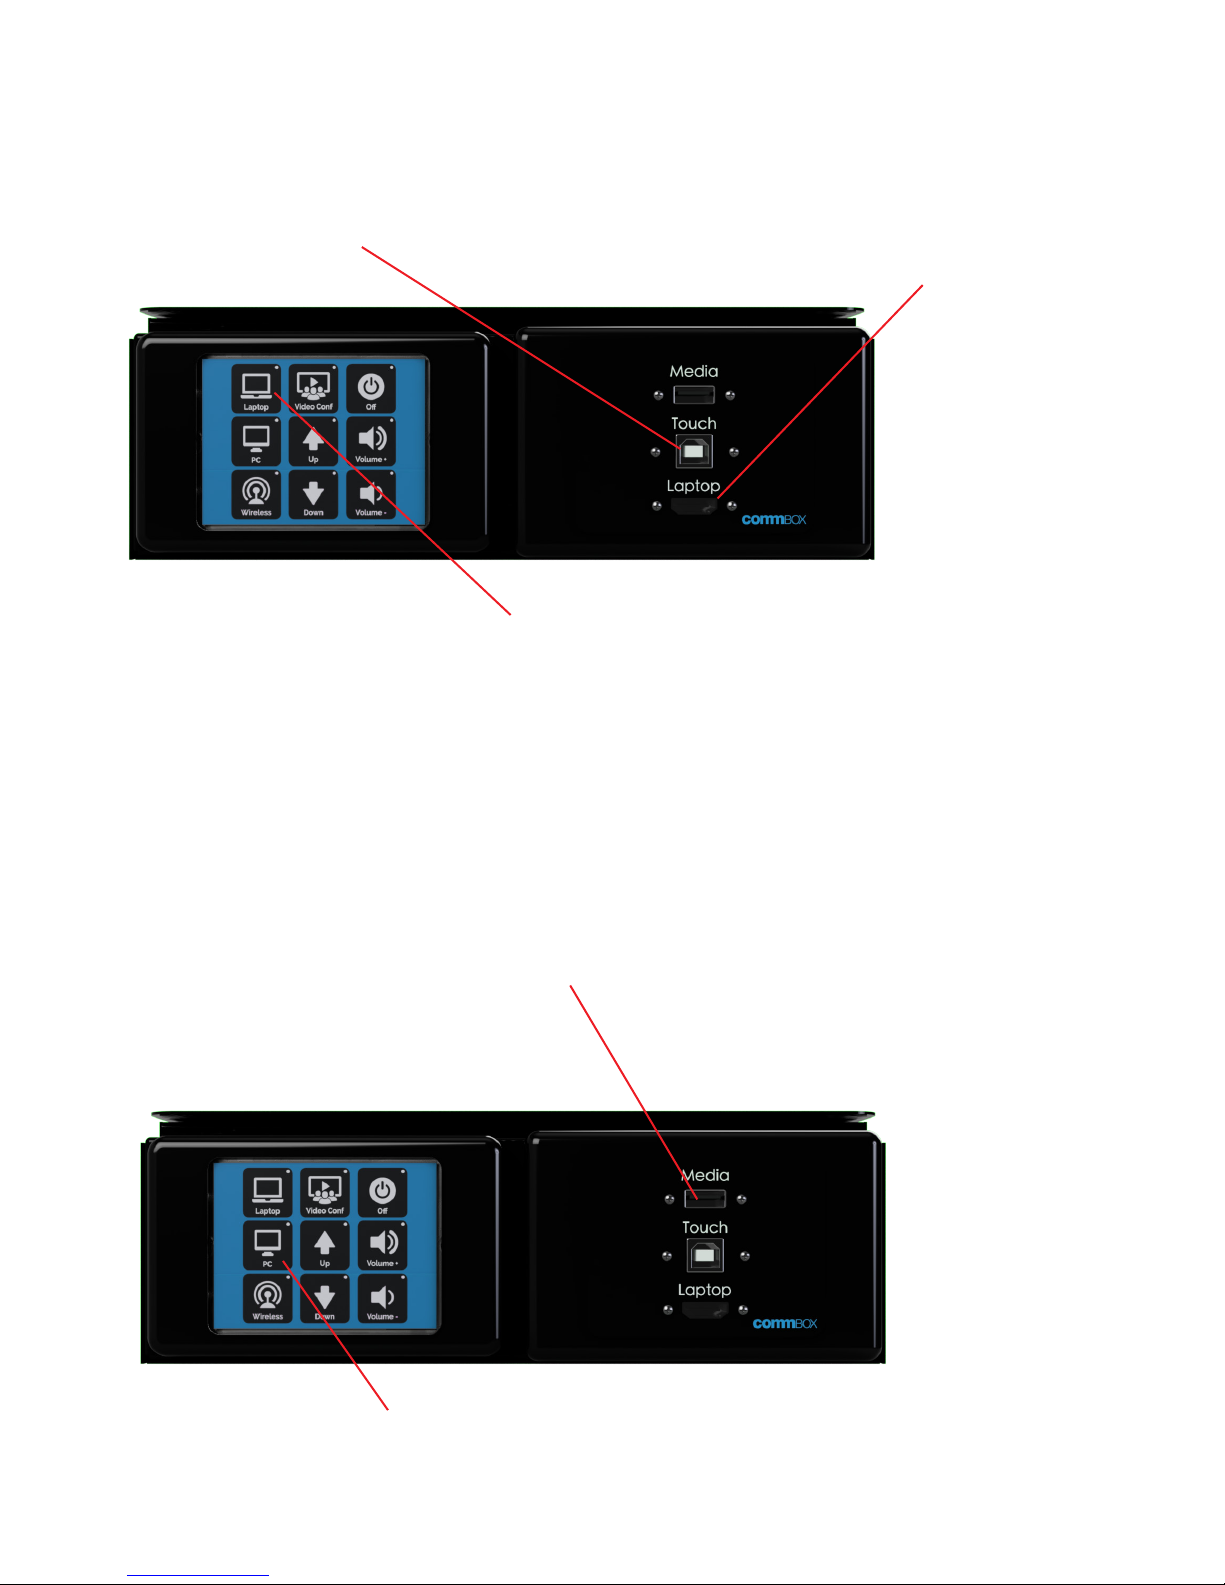
The Hub has HDMI and USB type B ports on the front to connect your laptop and provide touch.
Connecting Your Media Stick
The Hub has a USB type A port on the front to plug in a media stick. In a standard installation, this port is connected to the rear PC, although it could dier if your installer has set the system up dierently.
1. Plug your USB media
stick in here
2. If not already on the PC input,
press this button to access your
media
1. Plug your USB touch cable into
your laptop and this port
3. If not already on the laptop
input, press this button to access
your laptop
2. Connect a short HDMI cable be-
tween your laptop and this port
Page 4

 Loading...