

Page 1
Page 2

Table of Contents
Important notes……………………………............................................…. 1
Introduction to the PS2000AN.............................................................… 1
Unpacking the PS2000AN...................................................................…. 2
Installing the PS2000AN.........................................................….....……. 2 - 4
Positioning the PS2000AN..................................................…..… 2, 3
Connecting power to the PS2000AN..................................…….. 3
Installing/replacing pager batteries...............................................….… 3
Using the PS2000AN……………………................................................… 4 - 6
Overview………………..........................................................................… 4
Storing the system code………...........................................................… 4
Storing the pager code........................................................................… 5
Transmitting a message code to a single pager...............................…. 5
Transmitting a message code to a group of pagers........…...............…
6
Alarm notification paging.....................................……………………...…
7, 8
Installation…………………….....................................................…. 7
Storing the pager assignment..................................................…. 7
Contact paging priority sequence.........................................…... 8
Receiving a message code................................................…...……….… 8
VM200 pager
VP200 pager
VP201 pager
Reviewing stored message codes......................................................… 9
Troubleshooting - - helpful hints............................................................
9
One year limited warranty/Service information............................…..…
10
International return policy………............................................................ 11
FCC Rules Part 95…………………...........................................................
11
Page 3
Important notes
According to standard industry practice, surge protection is recommended for use with all electronic devices. A
surge suppressor should be used on the input power supply of the PS2000AN.
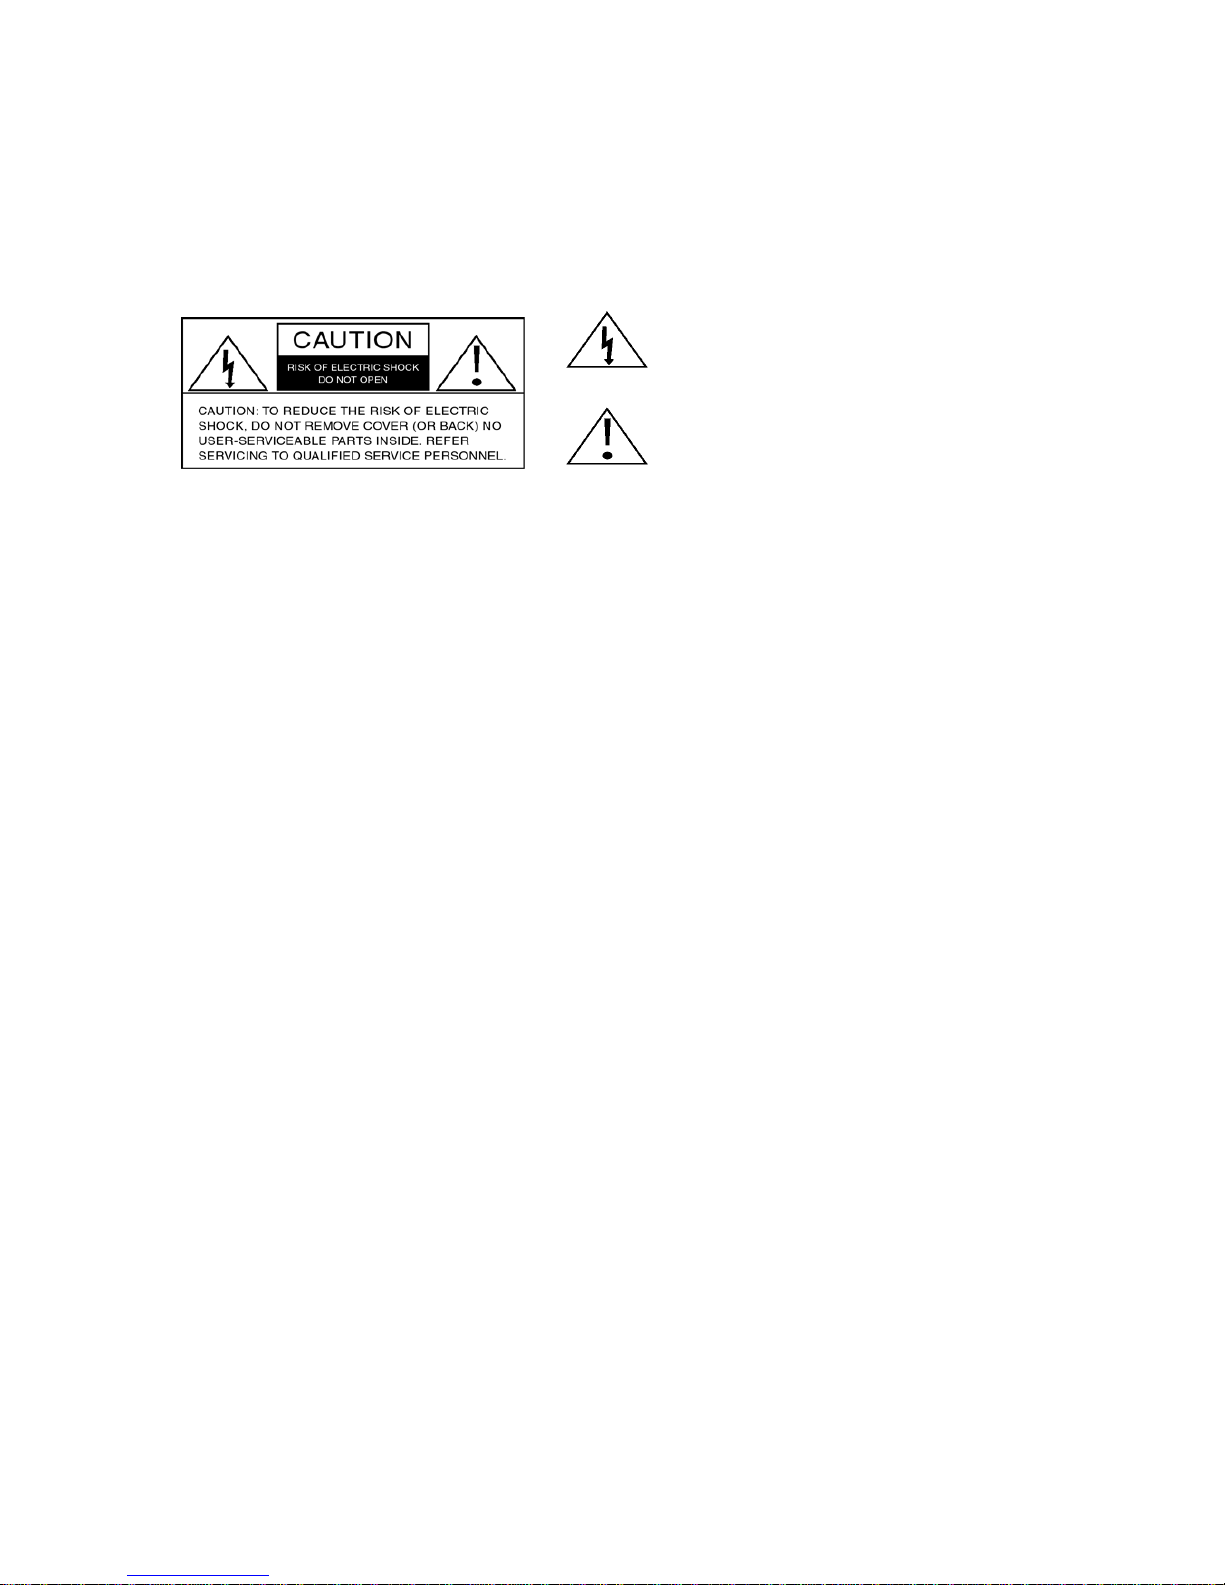
This symbol is intended to tell the user that
parts inside the product present a risk of
electric shock to persons.
This symbol is intended to tell the user that
important operating and servicing instructions
are included in the Owner's Guide.
Warning: TO REDUCE THE RISK OF FIRE OR ELECTRIC SHOCK, DO NOT EXPOSE THIS
APPLIANCE TO RAIN OR MOISTURE.
Caution: TO REDUCE THE RISK OF FIRE, DO NOT PLACE ANY HEATING OR COOKING
APPLIANCE BENEATH THIS UNIT.
Introduction to the PS2000AN
Thank you for purchasing the PS2000AN. The
PS2000AN is a wireless, on-premise paging system
that alerts you to important messages through its
individual system pagers. The PS2000AN is also
equipped with two dry contact closures that when
triggered, each contact will page a single pager or
group of pagers automatically. Listed below are
examples of various applications where the
PS2000AN can be used:
z
churches
z
construction sites
z
restaurants
z
offices
z
hospitals/clinics
z
hotels
z
camp grounds
z
retail outlets
z
apartment complexes
z
factories
z
residential properties
The PS2000AN operates in most environments where
you need unlimited/direct paging.
The PS2000AN can send 10 different message codes
(0-9), and address up to 1,000 individual (system)
pagers.
Other PS2000AN system features include:
Non-Volatile Memory --stores system and pager
codes for over one year, even if power fails.
Group Page Feature --sends a message to specific
groups of pagers simultaneously.
Page All Feature --sends a message to all pagers
simultaneously.
AC/DC Operation --allows use from a standard 120
volt AC wall outlet, or from a standard 12 volt DC
cigarette lighter. (Adapter cable not included.)
Center-Loaded Antenna --provides up to a
maximum of 2 miles transmitting range (depending on
reception conditions). This antenna can be replaced
with an outdoor antenna for extended transmitting
range. (An outdoor antenna can be purchased at a
consumer electronics store.)
Please read through the rest of this guide to learn how to properly install and operate the PS2000AN.
Page 4
1 PS2000AN Operator’s Guide
Unpacking the PS2000AN
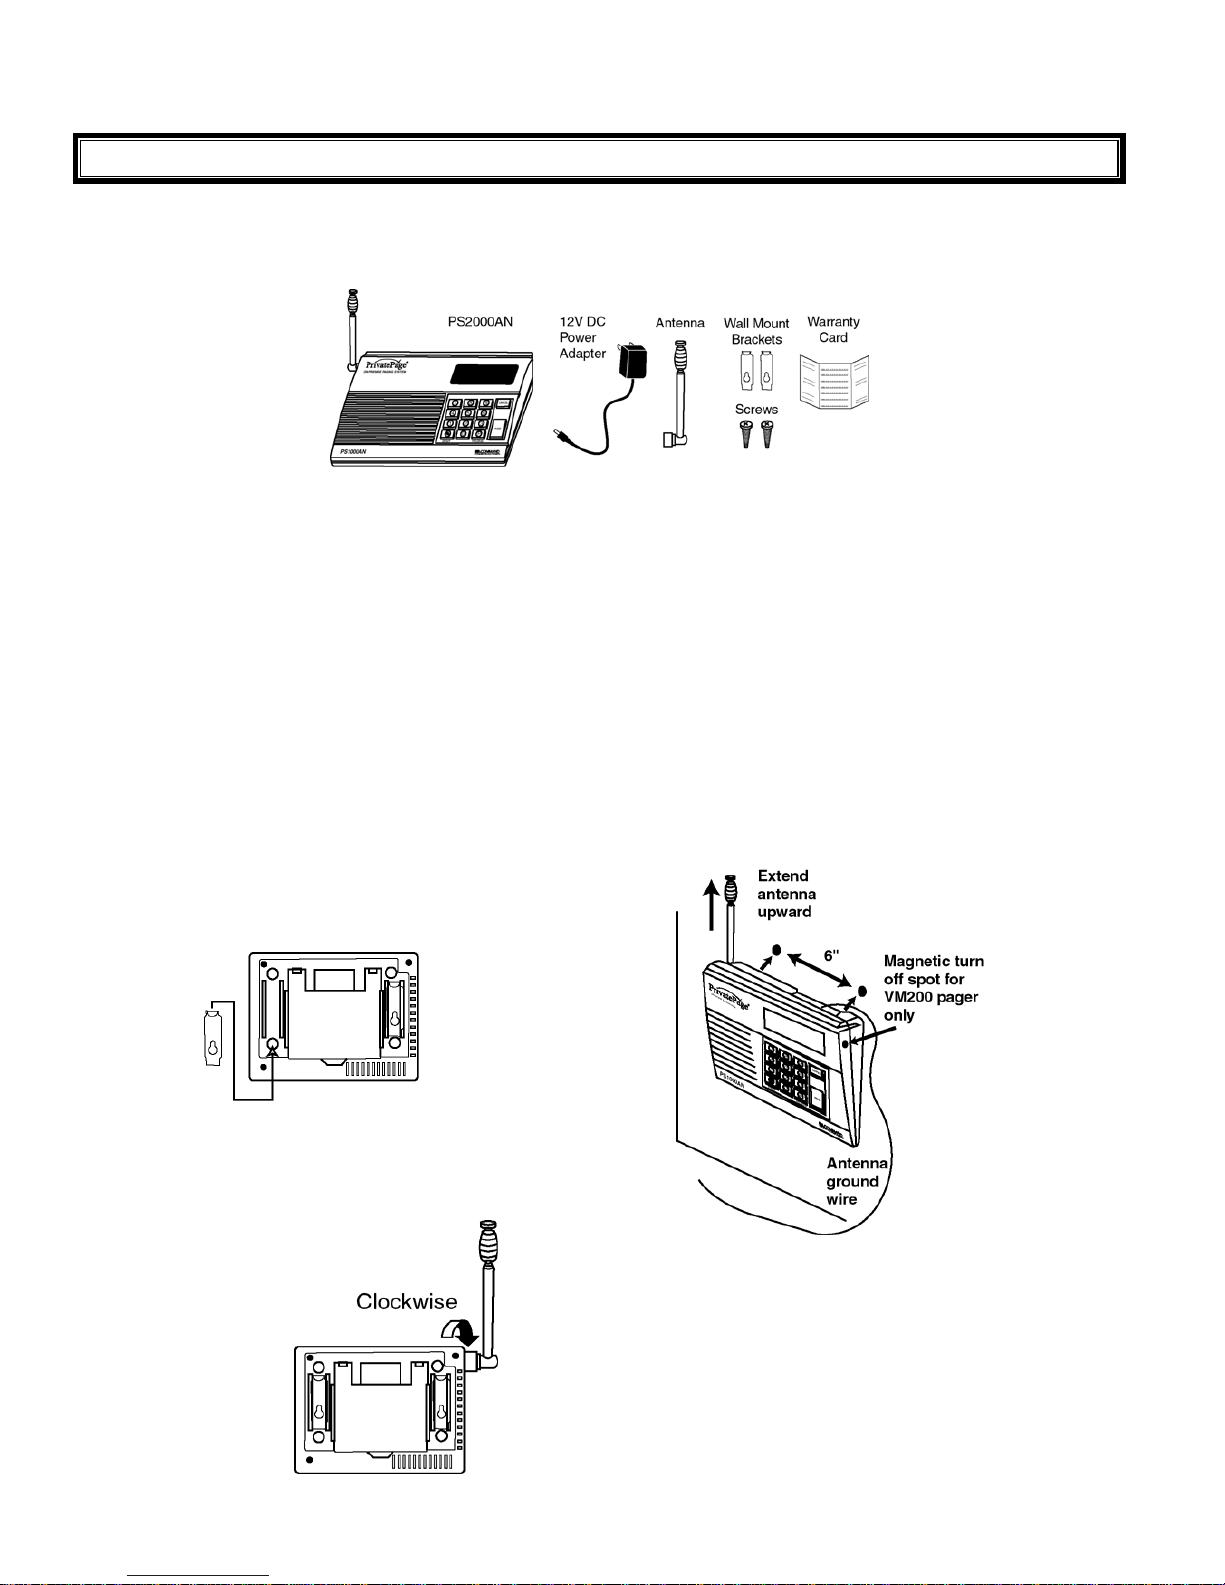
When you open the PS2000AN box for the first time, inspect the contents. In the box, you should find the following
items:
If any of these items are missing or damaged, contact the dealer where you purchased the unit, or call Customer
Service at the number listed in "Service Information."
Installing the PS2000AN
Positioning the PS2000AN
You can operate the PS2000AN from a flat surface
such as a table, counter, or shelf. Or, you can use the
supplied wall-mount brackets to mount it on a wall.
Steel and concrete walls reduce transmitting range. If
the PS2000AN is located in a concrete or steel
building, and part of the coverage area is located
outside the structure, place the unit and antenna close
to a window.
To mount the PS2000AN on a wall, perform the
following steps:
1. Slide the wall-mount brackets into the 2 wall-mount
slots, as shown.
Back of the
PS2000AN
2. Insert the center-loaded antenna connector into the
ANTENNA jack on the PS2000AN. Turn the
connector clockwise until the antenna locks in
place. For maximum efficiency, extend the antenna
to its full length, orient it vertically, and avoid
contact with walls and metal objects.
3. Mark the positions for the 2 supplied mounting
screws on the wall. The positions should be 6"
apart. Drill the 2 holes, then thread the screws into
the wall. The screws should extend 3/16". Do not
over tighten the screws.
4. Align the keyholes on the back of the brackets with
the 2 screws, then push in and press down to secure
the PS2000AN to the wall.
For best transmission, both the center-loaded antenna
and the black antenna ground wire must be fully
extended. Do not coil the antenna ground wire, as this
will decrease transmission efficiency.
Back of the
PS2000AN
Page 5
PS2000AN Operator’s Guide 2
You can use an outdoor base station antenna in
place of the supplied antenna to increase
transmitting range. The PL259-type antenna jack
allows use with a variety of antennas.
When installing or removing a base station
antenna, use extreme caution.
If it starts to fall, let it go. It could contact overhead
power lines. If the antenna touches the power line, contact
with the antenna, mast, cable, or guy wires can cause
electrocution and death.
Call the power company to remove the antenna. Do not
attempt to do so yourself.
Connecting power to the PS2000AN
120V AC power (in home or office)
Connect the small end of the power cord into the port
labeled DC 12V. Plug the power adapter into a
standard AC wall outlet.
The PS2000AN does not operate when power fails, but
it maintains the system code in memory. (See "Storing
the system code.")
Because the PS2000AN maintains its memory through
power failure, there is no need to reprogram the unit
when power is restored. The PS2000AN can maintain
this code for more than one year without power.
12V DC power (in car, truck or boat)
The PS2000AN can also operate from a 12V DC
power source, such as in a car, truck or boat that has a
cigarette lighter receptacle.
Simply connect the PS2000AN to the cigarette lighter
with an optional adapter cable. (In this application,
transmission range may be reduced.)
Contact Customer Service at the number listed in "Service information" for information about purchasing a 12V DC
adapter cable.
Installing/replacing pager batteries
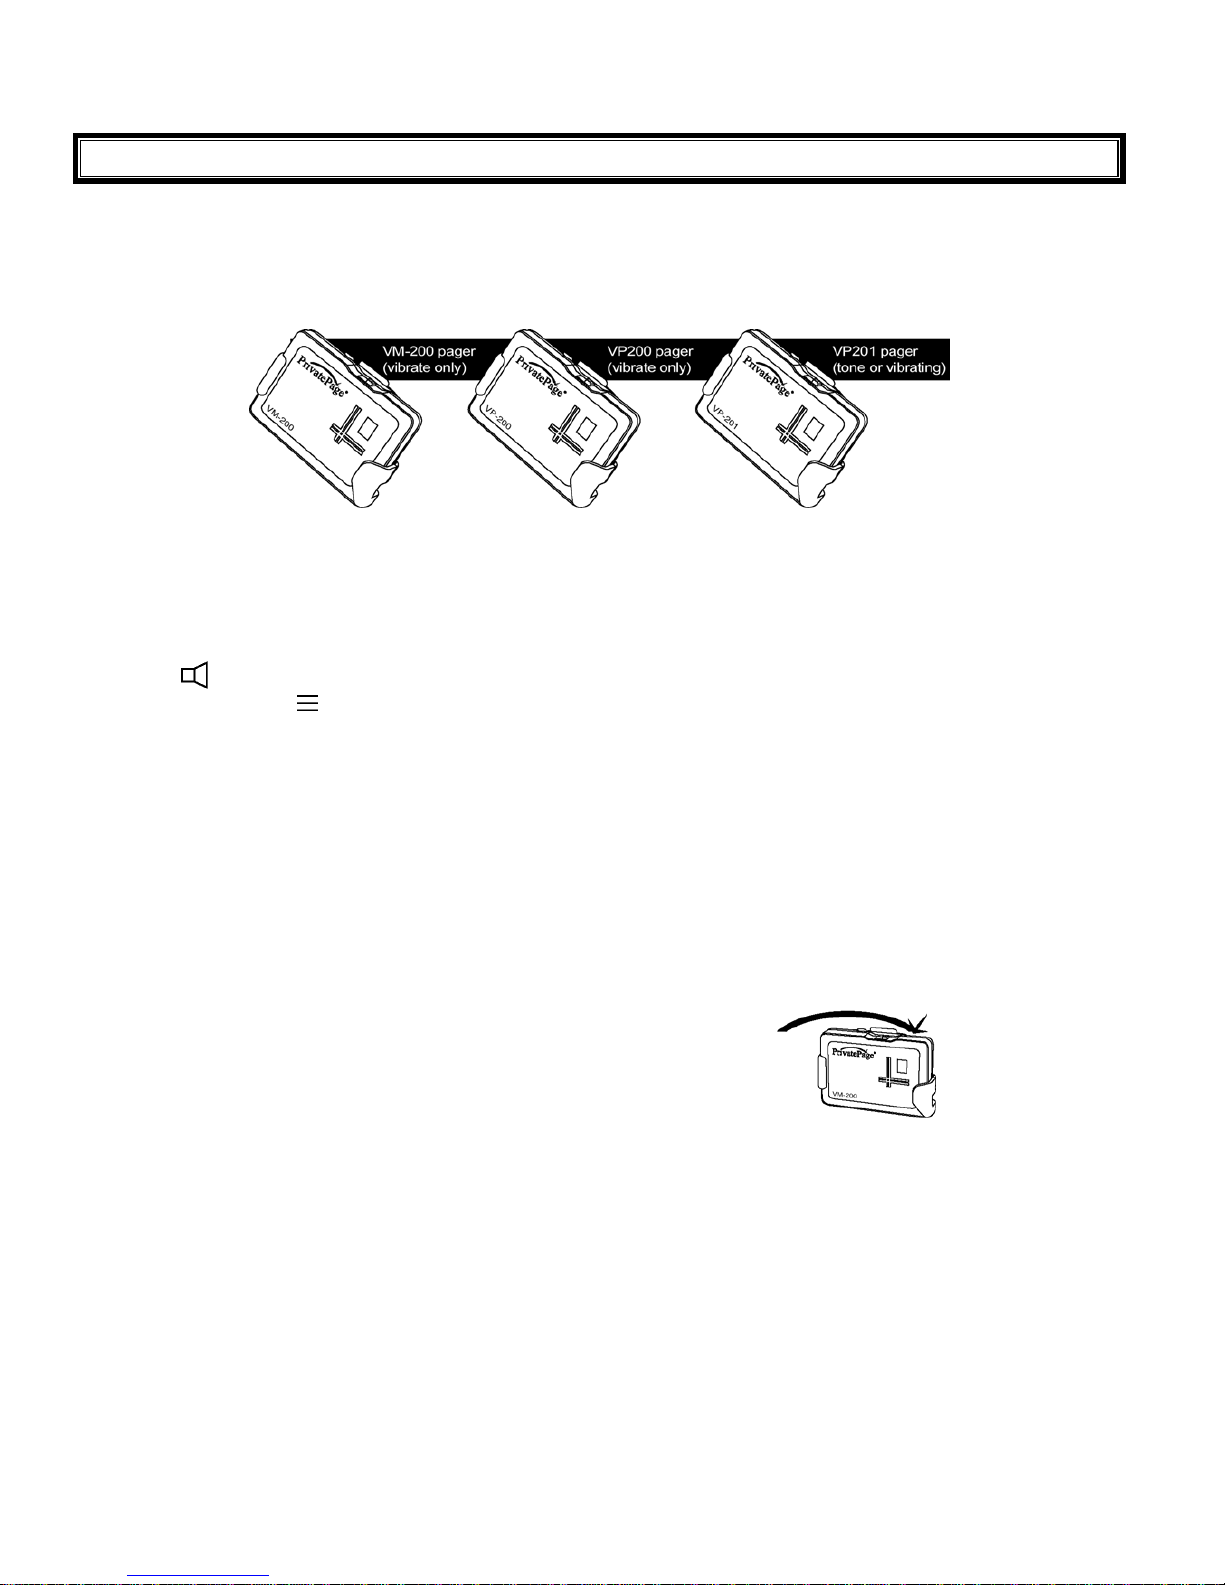
The PS2000AN works with both VM200 (vibrating), VP200 (vibrating) and VP201 (tone or vibrating) system
pagers (not included).
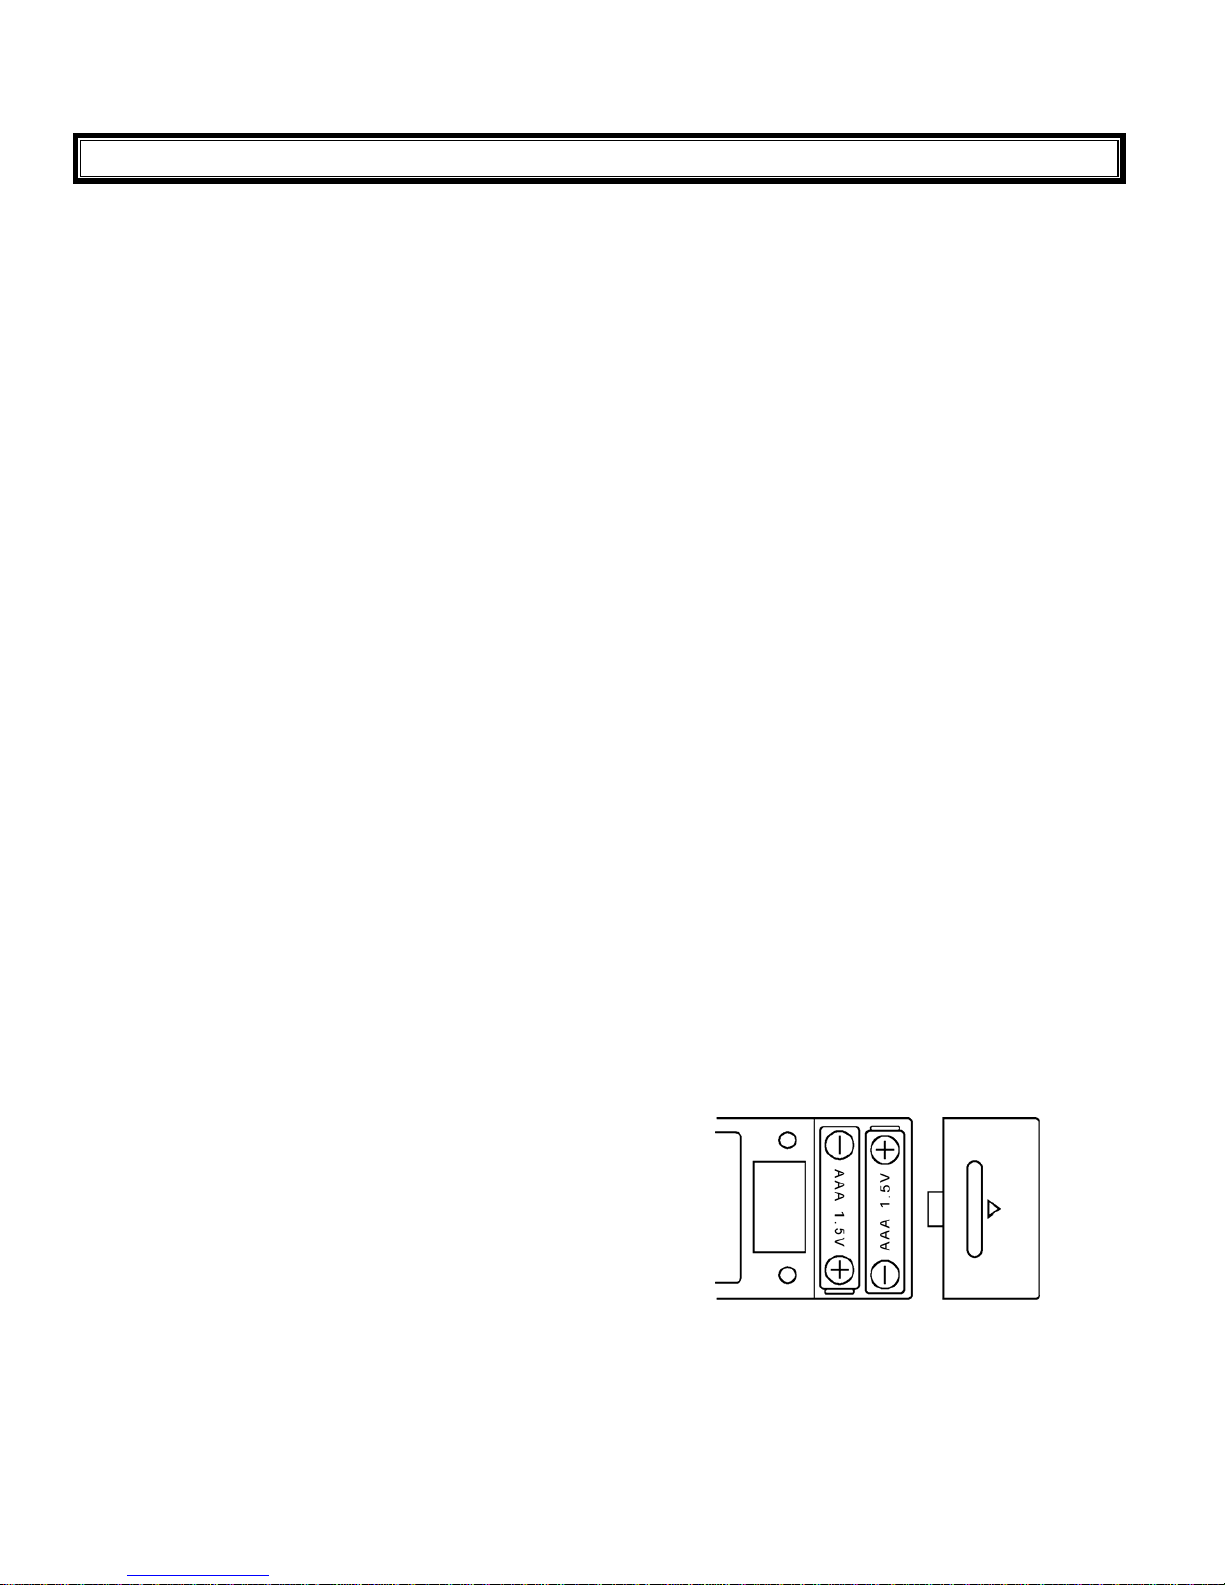
The individual pagers are powered by two (2) AAA batteries (not supplied). We recommend that you use alkaline
batteries to power the pagers. To install or replace the pager's batteries, follow these steps:
1. Slide the battery compartment door open.
2. Insert 2 fresh alkaline batteries as indicated by the
polarity symbols (+ and -) marked inside the
compartment.
3. Slide the battery compartment door closed.
The pager will notify you when the batteries are
getting low, by displaying b on the pager's LED when
you press the pager's ON/OFF switch. It will also
notify you by beeping every 5 minutes.
The pagers also maintain memory during power loss,
therefore, you do not need to re-enter the pager codes
(see "Storing the pager code").
Page 6
3 PS2000AN Operator’s Guide
Using the PS2000AN
In this section, there are operating notes for using the PS2000AN. Read these notes before attempting to operate the
system.
Overview
Before operating the PS2000AN, be sure that you understand the following information concerning the paging
system's capabilities.
The PS2000AN covers a maximum range of up to 2
miles using the supplied center-loaded antenna. This
distance is based on optimum conditions over a lineof-sight path. The range might be less, depending on
surrounding conditions.
The PS2000AN sends a number (from 0-9) to a single
pager, a group of pagers, or all system pagers. The
pagers in turn beep or vibrate (VM200 vibrates, VP200
vibrates, VP201 beeps or vibrates) and displays the
numeric message. Each pager has a label where you
can record the message you've assigned for each
number. We recommend that you use a pencil, so the
number can be easily changed at a later date.
Each pager has its own pager code, which allows the
PS2000AN to send a message to selected pagers. You
can record up to 100 pager codes and their
corresponding users on the card located under the
PS2000AN (additional space is provided on the last
page of these instructions).
The card is inside the bottom of the unit and must be
pulled out from the front. You can also write down the
messages represented by each message code. Again,
we recommend that you use a pencil, so the number
can be easily changed at a later date.
Storing the system code
Before you can use the PS2000AN, you must designate a system code. The system code ensures proper signaling
between the PS2000AN and the pagers.
To enter and store a system code, follow these steps:
1. Turn the PS2000AN power ON. (The power switch
is located on the back panel of the PS2000AN.)
2. Press CANCEL to clear display.
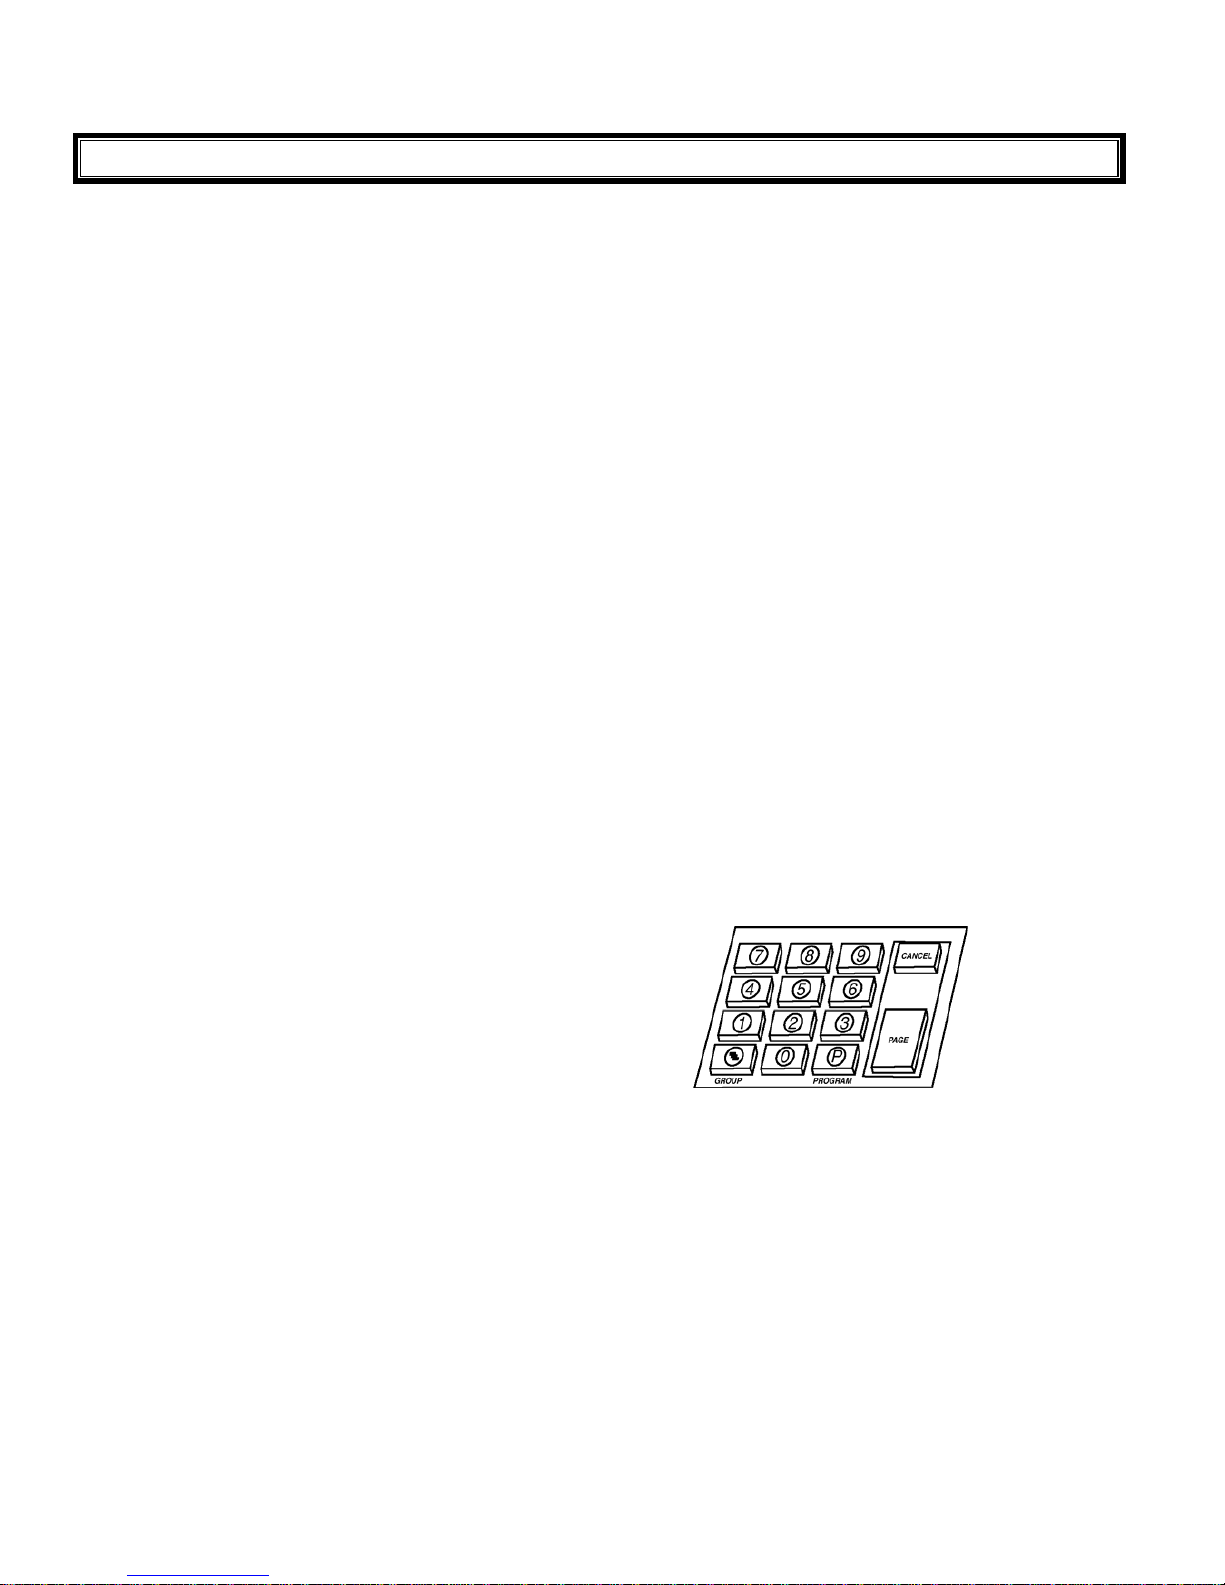
3. Press PROGRAM, then 0. The TRANSMIT
display will show the stored system code
momentarily, then _ _ _ will appear (after pressing
PROGRAM, the display flashes).
4. Enter a 3-digit system code. After about 1 second,
the display shows - - - -, indicating the system code
is stored.
(Keypad on the PS2000AN.)
If you enter a wrong code, repeat steps 2 through 4 to reset the system code.
NOTE: If your application requires more than 1,000 pagers, you can use multiple PS2000AN systems. If using
more than one PS2000AN, each system should have a unique system code.
Page 7
PS2000AN Operator’s Guide 4
Storing the pager code
Before you can use the pagers with the PS2000AN, you must designate a pager code for each of the pagers.
NOTE: You must reset all pager codes when you enter a new system code.
To enter and store a pager code in either the VM200,
VP200, or the VP201 pagers, follow these steps:
1. Turn the pager OFF.
2. Press and hold the ON/OFF switch, then slide it to
. Continue holding this switch down until the
display shows
(about 5 seconds). The display
then shows an L indicating that the pager is ready to
receive a new code.
3. Make sure that the PS2000AN is turned ON, then
enter a 3-digit pager code (000-999) and then 0.
4. Press the PAGE button on the PS2000AN, and the
unit will transmit the pager code to the pager. The
pager will beep 5 times, and flash 8 on its display,
indicating that it received the message code 0.
5. Once the pager code is successfully stored, turn the
pager OFF and then ON before attempting to transmit
a message code.
Example: If you want the pager to have a new pager
code such as: 450, enter 4500, and press PAGE.
After you press the PAGE button, the PS2000AN
LED flashes the 4 digits 7 times, and simultaneously
transmits the pager code to the pager. The 4 digits will
remain illuminated until you perform one of the
following actions:
z
Turn the PS2000AN OFF
z
Press the CANCEL button
z
Transmit a message to a pager
Perform the preceding steps for each pager used with
the PS2000AN.
NOTE: If the pager does not successfully store the pager code, repeat the preceding steps.
Transmitting a message code to a single pager
1. Turn the PS2000AN power ON. (The power switch
is located on the back panel of the PS2000AN.)
2. Press the CANCEL button if the display shows
unwanted pager or message codes.
3. Enter the 3-digit code for the pager you want to
receive the message, then the one digit message
code that you want to send. If you enter the wrong
pager or message code, press the CANCEL button,
then re-enter the correct codes.
NOTE: You cannot reset either of these codes after
you press the PAGE button.
4. Press the PAGE button. The TRANSMIT display
lights during transmission, and the pager's display
flashes the message code number 7 times. The 4
digits will remain illuminated until you perform 1 of
the following actions:
z
Turn the PS2000AN OFF
z
Press the CANCEL button
5. Press CANCEL, then repeat steps 3 and 4 if you
want to transmit another message code to another
pager.
Page 8
5 PS2000AN Operator’s Guide
Transmitting a message code
to groups of pagers
1. Turn the PS2000AN power ON.
2. Press the CANCEL button if the display shows
unwanted pager or message codes.
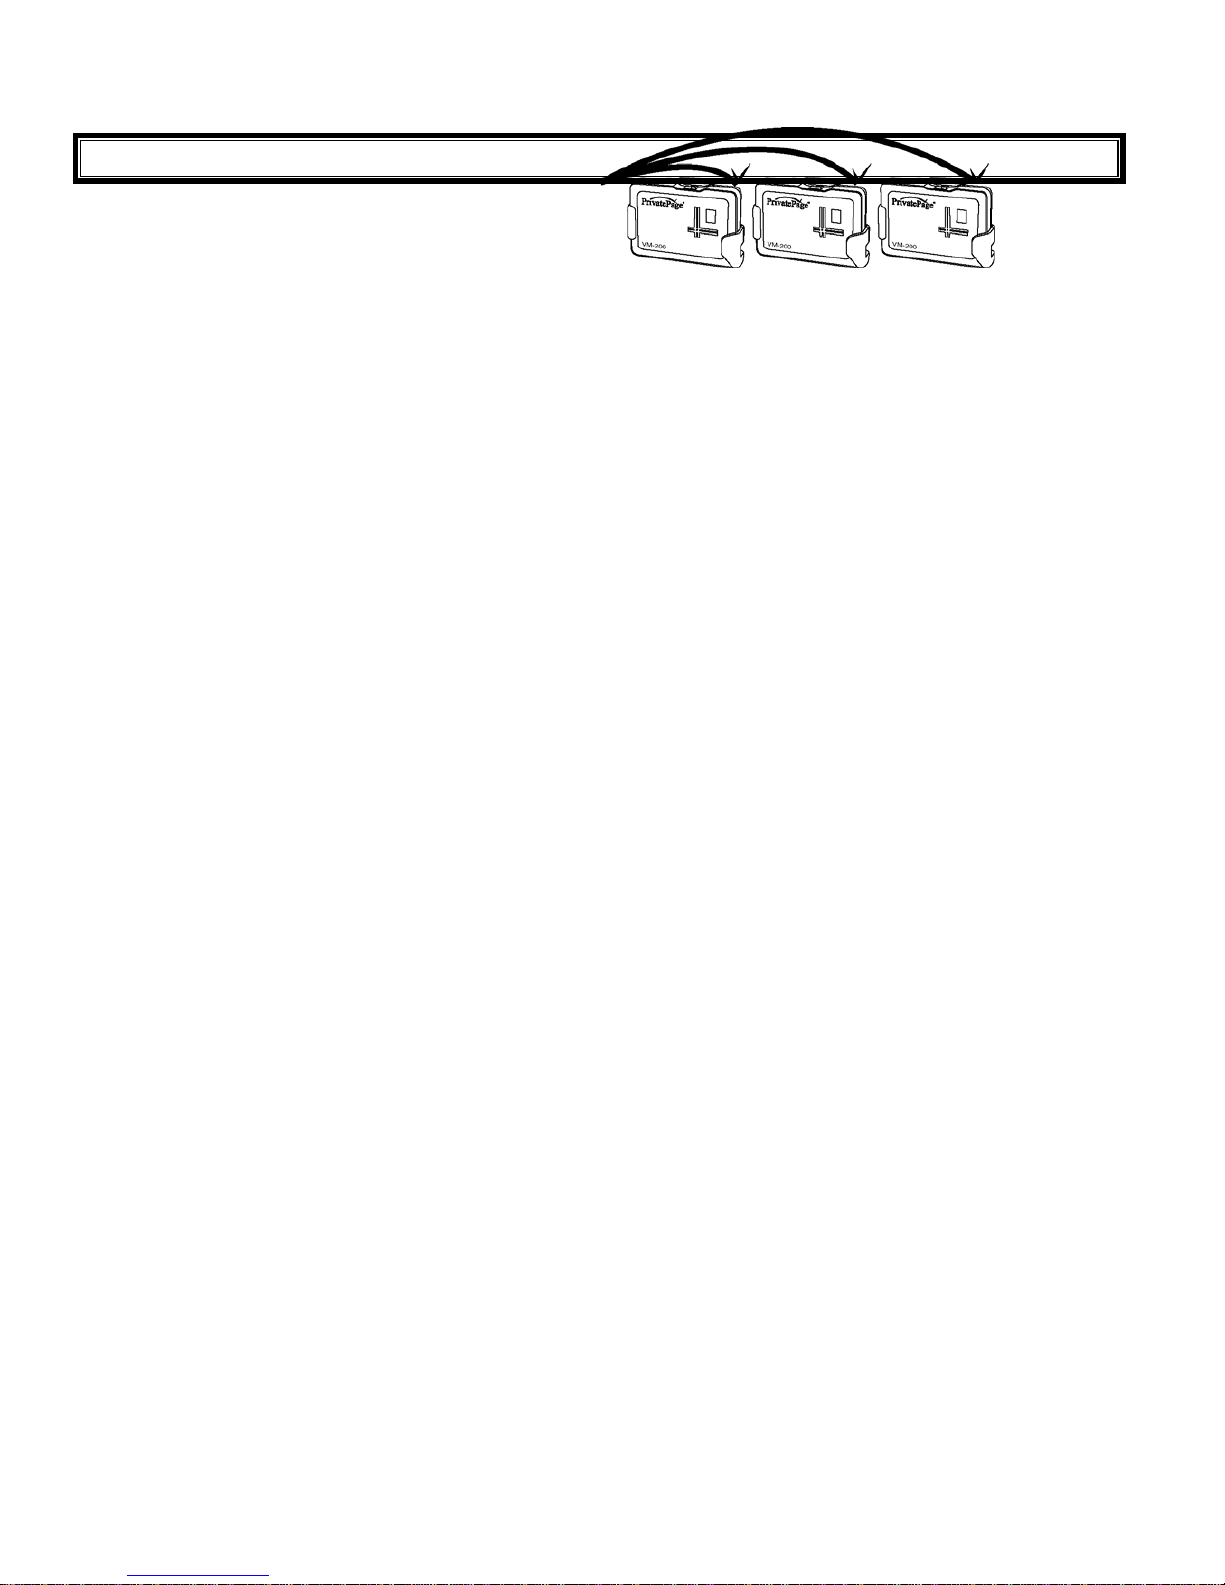
3. Enter the 3-digit code for the group of pagers you
want to receive the message, then the 1-digit
message code that you want to send.
The
GROUP button represents 0-9 and can be inserted
into any position of this 3-digit code. This designates
the specific group of pagers to receive the message
code. Example:
Press
10 GROUP (then message code) - sets message
code for pagers numbered 100, 101, 102, 103, 104,
105, 106, 107, 108, 109.
Or, press
1 GROUP 0 (then message code) - sets
message code for pagers numbered 100, 110, 120, 130,
140, 150, 160, 170, 180, 190.
Or, press
GROUP 0 0 (then message code) - sets
message code for pagers numbered 000, 100, 200, 300,
400, 500, 600, 700, 800, 900.
Or, press
0 GROUP GROUP (then message code) -
sets message code for all pagers numbered 000 through
099.
Or, to page all pagers, press
GROUP GROUP GROUP
(then message code) - sets message code for all pagers
numbered 000 through 999.
If you enter the wrong pager or message code, press
the CANCEL button, then re-enter the correct codes.
NOTE: You cannot reset either of these codes after
you press the PAGE button.
4. Press the PAGE button. The TRANSMIT display
lights during transmission, and the pager's display
flashes the message code number 7 times. The four
digits (
GROUP is represented as "n" on the display)
will remain illuminated until you perform one of the
following actions:
z
Turn the PS2000AN OFF
z
Press the CANCEL button
If desired, press PAGE again to re-send the current
message code to the pager.
5. Press CANCEL, then repeat steps 3 and 4 if you
want to transmit another message code.
Page 9
PS2000AN Operator’s Guide 6
Alarm notification paging
The PS2000AN is equipped with two dry contact
closures that when triggered, each contact will page a
single pager or group of pagers automatically.
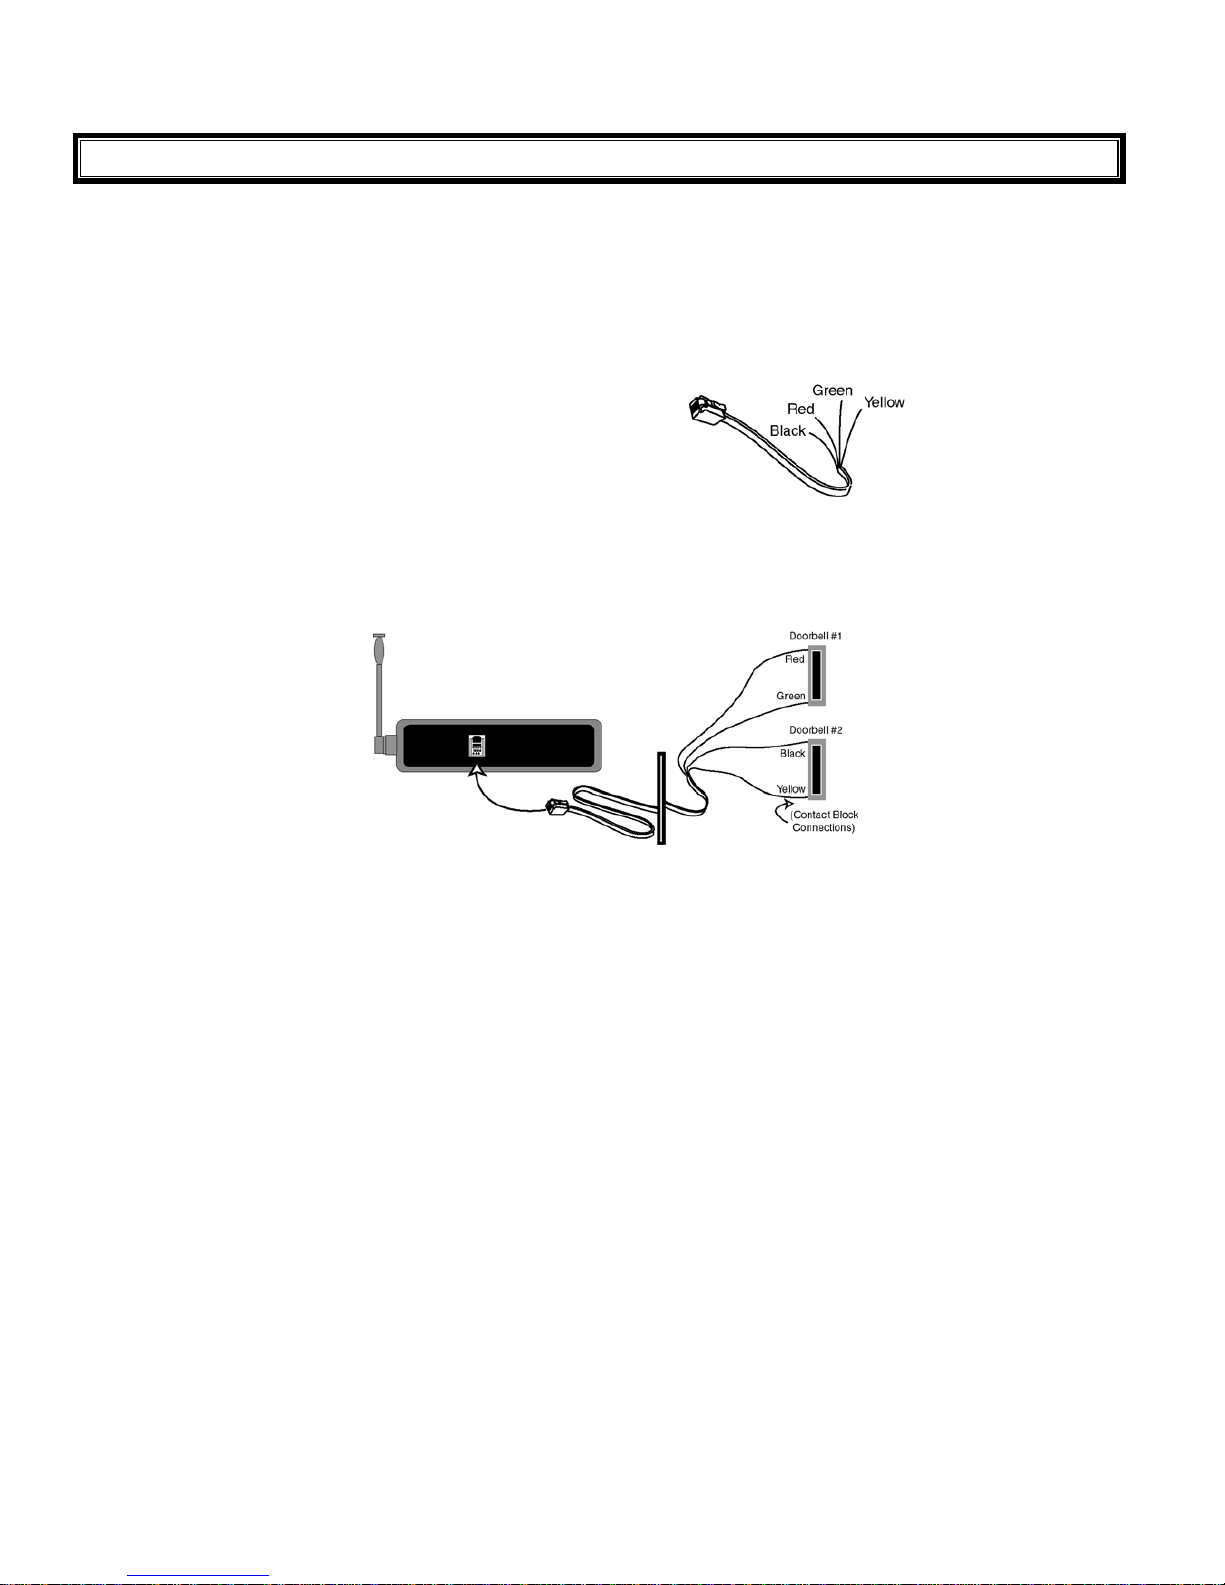
On the back of the PS2000AN, you will find an RJ-11
four-wire jack that is the contact connection.
The inside two wires are contact number one and the
outside two wires are contact number two.
Installation
To connect one or both contacts, connect a four-wire
RJ-11 telephone cable into the jack connection on the
PS2000AN. Strip the other end of this cable to expose
the red, green, black, and yellow wires.
Contact 1: Connect the red wire to one side on the
contact block. Connect the green wire to the other side
on the contact block.
Contact 2: Connect the black wire to one side on the
contact block. Connect the yellow wire to the other
side on the contact block.
Connect to
PS2000AN jack
When either contact is momentarily closed and then opened (in the case of a doorbell trigger), the PS2000AN will
automatically page the pre-assigned pager.
Storing the pager assignment:
Contact 1 memory position:
1. Turn the PS2000AN power ON.
2. Press the CANCEL button to clear the display.
3. Press the PROGRAM button (the display will
flash) then press the 1 button. The display will
momentarily show what is stored in the memory
position, then _ _ _ _ will appear in the display.
4. Enter the three-digit pager assignment number and
the digit to be displayed. Example: 3526.
5. After the four-digit code has been entered into the
memory position, the PS2000AN will display
_ _ _ _ again to show that the new entry has been
stored.
Contact 2 memory position:
1. Press the CANCEL button to clear the display.
2. Press the PROGRAM button (the display will
flash)
then press the 2 button. The display will
momentarily show what is stored in the memory
position, then _ _ _ _ will appear in the display.
3. Enter the three-digit pager assignment number
and the digit to be displayed. Example: 3527.
4. After the four-digit code has been entered into
the memory position, the PS2000AN will display
_ _ _ _ again to show that the new entry has been
stored.
A group or all pagers can be activated from either contact (see Transmitting a message code to a group of pagers,
page 6).
Page 10
7 PS2000AN Operator’s Guide
Contact priority paging sequence
When the PS2000AN is in a normal paging cycle (the
base unit is transmitting a signal to a pager) and either
of the two contacts is triggered, the system will
override the current paging selection and page the
pager(s) assigned to the contact memory.
If Contact 1 is triggered and the system is paging the
assigned pagers, and then Contact 2 is triggered,
it will ignore Contact 2 and continue to page the pagers
assigned to Contact 1.
If Contact 2 is in a paging cycle, and Contact 1 is
triggered, it will immediately stop paging the pagers
assigned to Contact 2, and start paging the pager(s)
assigned to Contact 1. In other words, Contact 1 can
override Contact 2, but Contact 2 cannot override
Contact 1.
Receiving a message code
VM200 pager
When a pager is turned ON, and receives a page, it
sounds 12 beeps and flashes the received message code
on its display, unless you press the ON/OFF switch to
silence the pager before it finishes beeping. Press
ON/OFF to silence the pager when it beeps again, or
the pager beeps once about every 60 seconds to remind
you that there is a new call.
Press ON/OFF to stop the pager from beeping every
60 seconds.
(If the ??? is set to
it will flash only when
receiving a message code.)
VP200 pager
The VP200 pager…Need Info.
VP201 pager
The VP201 pager has two modes of operation as
follows:
1. In the tone mode
the pager beeps when it
receives a message. The pager sounds 12 beeps and
flashes the received message code on its display,
unless you press the ON/OFF switch to reset. Press
ON/OFF to silence the pager when it beeps again,
or the pager beeps once about every 60 seconds to
remind you that there is a new message.
Press ON/OFF to silence the pager from beeping
every 60 seconds.
2. In the vibrating mode
the pager vibrates
when it receives a message. The pager vibrates for
3 1/2 seconds and flashes the received message
code on its display.
Press ON/OFF to reset the pager, or the pager beeps
once about every 60 seconds to remind you that there
is a new message.
Press ON/OFF to silence the pager from beeping
every 60 seconds.
Page 11

PS2000AN Operator’s Guide 8
Reviewing stored message codes
The pagers can store eight message codes. Repe
press the black pager switch to view the stored
message codes one by one, from newest to oldest. A
atedly
ash (-) indicates the end of the stored message codes.
he oldest message code is deleted from
dentical to the last message
ceived, it is not stored.
e codes are erased when the pagers
OFF
g procedures, the PS2000AN isn't reaching my pagers. What can I do to increase
Connect a base station antenna to substantially increase the PS2000AN's transmitting range.
1. Adjust or reposition the antenna and the antenna ground wire.
2. Check the pager's batteries.
ect pager code.
2.
1. Set both of the PS2000AN base units to the same system code.
d
When the memory is full and a new message is
received, t
emory. m
If a new message code is i
re
All stored messag
re turned . a
Troubleshooting -- helpful hints
After following all operatin
the range of transmission?
1. Adjust or reposition the antenna to obtain optimum transmitting range.
2.
What can I do to reduce the interference on my phone when using the PS2000AN?
What can I do if my pager doesn't display a message code?
and try again. 1. Review operating procedures
What do I do if my pager won't receive a message code?
1. Verify the PS2000AN system code and corr
Complete the steps to store the pager code.
How can I use two PS2000AN base units with multiple pagers?
Page 12

9 PS2000AN Operator’s Guide
One year limited warranty/Service information
WARRANTOR: Command Communications, Inc.
ELEMENTS OF WARRANTY: Command Communications, Inc. warrants, for the duration of this warranty, the
PrivatePage PS2000AN (hereafter referred to as the "Product") to be free from defects in materials and
craftsmanship with only the limitations or exclusions set out below.
WARRANTY DURATION: This warranty shall terminate and be of no further effect one year after the date of
original purchase of the Product or at the time the Product is (A) damaged or not maintained as reasonable and
necessary, (B) modified, (C) improperly installed, (D) repaired by someone other than the warrantor for defect or
malfunction covered by this warranty, (E) used in a manner or purpose for which the Product was not intended, (F)
damaged by an act of God (such as a lightning strike), or (G) sold by the original purchaser.
STATEMENT OF REMEDY: In the event the product does not conform to this warranty at any time that this
warranty is in effect, the warrantor shall repair the defect, return it to you without charge for parts, service, or any
other costs incurred by the warrantor or its representative in connection with the p erformance with this warranty.
This warranty does not cover or provide for the reimbursement or payment of incidental or consequential damages.
Some states do not allow this exclusion or limitation of incidental or consequential damages, so the above exclusion
or limitation may not apply to you.
SERVICE INFORMATION/PROCEDURE FOR OBTAINING PERFORMANCE OF WARRANTY:
1. Pack the PS2000AN in the original carton or equivalent.
2. Enclose a copy of the bill of sale or other documentation sho wing original purchase date.
3. Contact the dealer where you purchased the PS2000AN, or call the service center listed below to obtain a
return material authorization number (RMA #).
4. Mail the above prepaid and insured to the warrantor at:
Command Communications, Inc.
14510 E. Fremont Avenue
Centennial, CO 80112
(303) 792-0870
Fax (303) 792-0899
Customer Service: 1-888-843-4399
Customer Service email: [email protected]
Web Site: www.commandcommunications.com
Command Communications, Inc. cannot be held responsible for any loss or damage in transit.
Please retain proof of purchases to establish date of original purchase. Your warranty starts with the date of original
purchase.
LEGAL REMEDIES: This warranty gives you specific legal rights, and you may also have rights that vary from
state to state.
Though every effort has been made to ensure accuracy, these instructions may include technical or typographical
errors. Content of these instructions may be changed from time to time due to product improvement. These changes
will be incorporated in new editions of these instructions. We d isclaim liability for any changes, errors, or omissions.
NOTE: Any unit returned without an RMA # clearly marked on the exterior package will be refused and returned at
the sender's expense.
Page 13

PS2000AN Operator’s Guide 10
International return policy
Command Communications, Inc. does not guarantee that this product will be compatible with the
telecommunications systems of all countries. Modifications may have been made to the product in order to function
in certain locations. Therefore, it is best to purchase our products in the country in which it will be used.
If this product is purchased outside the U.S. from an authorized Command Communications' dealer, it should be
returned for repair at the location where it was purchased, as provisions have been established to handle warranty
repair outside the U.S.
If you send the product directly to Command Communications for repair, you will be responsible to pay all freight,
handling, and Custom charges (both ways).
FCC Rules Part 95
WARNING: Do not make adjustments that could result in a violation of the rules or that are recommended to be
performed by or under the immediate supervision and responsibility of a person certified as technically qualified to
perform transmitter maintenance and repair duties in the private land mobile services and fixed services by an
organization or committee representative of users of those services.
WARNING: Replacement of any transmitter component (crystal, semiconductor, etc.) could result in a violation of
the rules.
Page 14
11 PS2000AN Operator’s Guide
www.commandcommunications.com
© 2008 Command Communications, Inc.
All rights reserved. Printed in China
COMMAND COMMUNICATIONS, PRIVATEPAGE, and
the Arrow logo are registered trademarks of
Command Communications, Inc., Centennial, CO 80112
14510 E. Fremont Avenue
Centennial, CO 80112
email: [email protected]
Customer Service 888-843-4399
Page 15

AC062402 kr MN080
 Loading...