

Page 1

Comigo Duo
Quick User Guide
Page 2
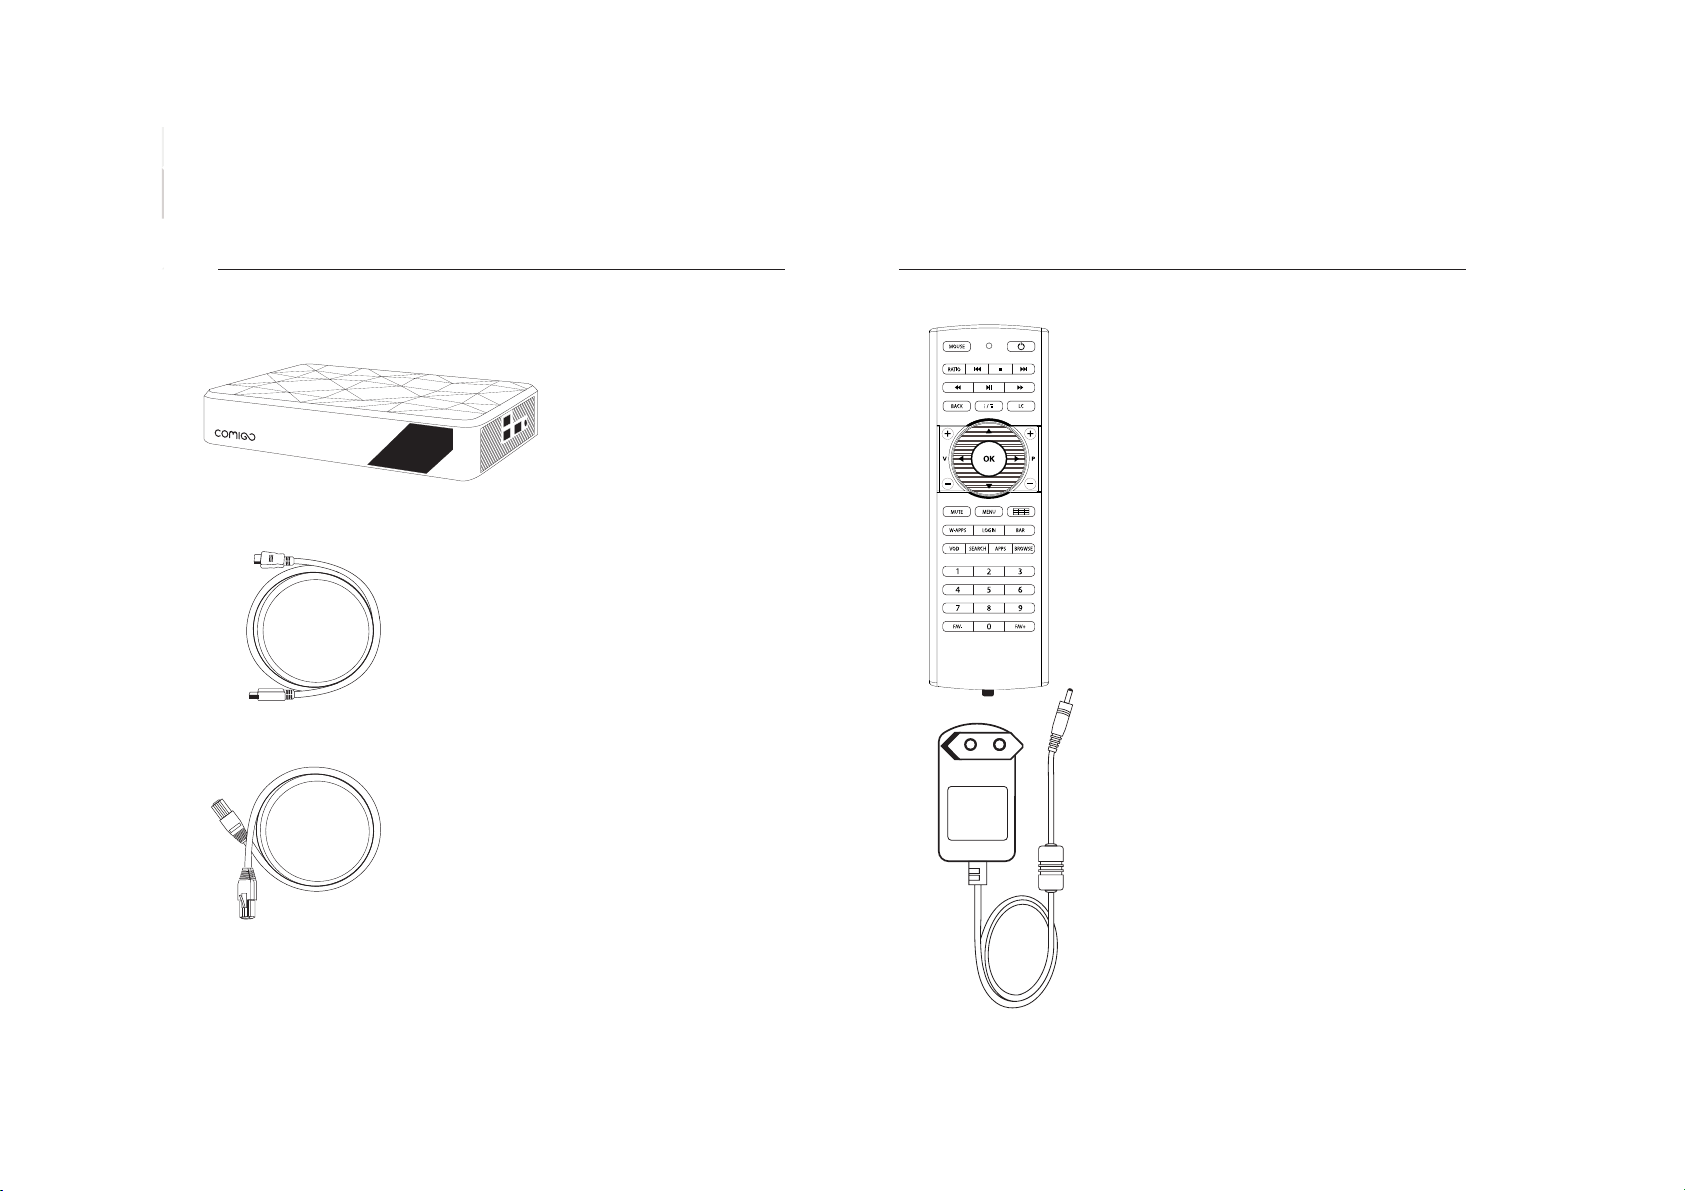
What’s in the box?
Remote Control (including batteries
and a plastic tab)
HDMI cable
Ethernet cable
Power adapter
Comigo Duo
2 3
Page 3
Setting up your system
HDMI cable:
Connect the HDMI cable to Comigo Duo
and to your TV
Ethernet cable:
If you use a wired network, connect the cable
to the Comigo Duo and to your router.
If you use a wireless network you will be able
to set it up during the welcome process (see
page 12).
Power adapter:
Connect the power adapter to your
Comigo Duo and to the wall outlet
!
Important: the power adapter is the
last one to be connected (it should be
plugged-in only after the HDMI and the
Ethernet cables are plugged-in)
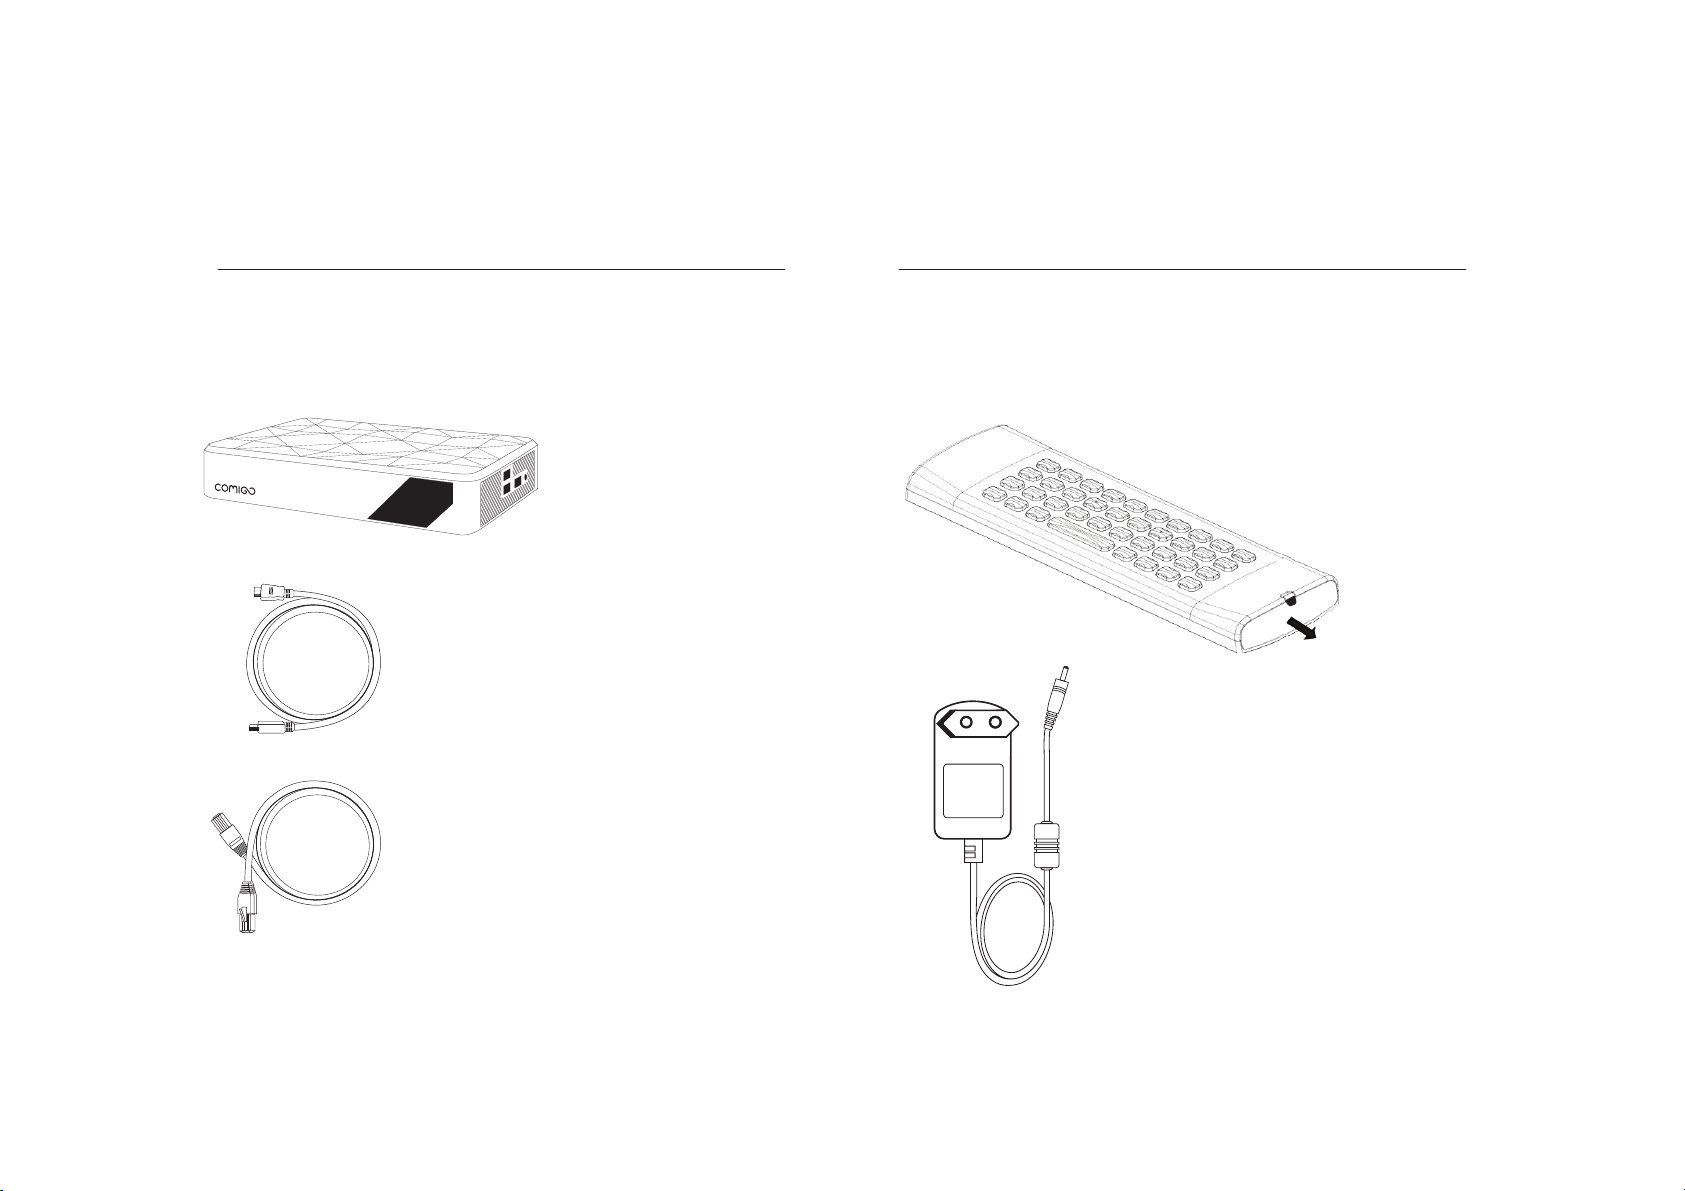
Comigo Duo
Using a 3.0mm Ňat head
screw driver, insert it into
the baƩery lid slot
Step : 1
Prepare the remote control:
Remove the plastic tab to enable battery contact before
using your remote control for the first time
4 5
Page 4

Remote control
navigation buttons
content information
dashboard of your
favorite activities
user login
socialize
with your
friends
mouse
on/off
change
the channel
aspect ratio
system
menu
system information
letters / other characters
special letters
Control Side Keyboard Side
Comigo Duo STBY
last TV channel
6 7
Page 5

Completing the setup:
1. Turn on your TV, make sure it’s tuned to the same HDMI input
your Comigo Duo is connected to
2. You will either see a “Welcome” screen, or a Comigo logo
screen (if so, please wait about one minute for a “Welcome”
screen to appear)
3. Continue following the on-screen instructions and you will be
able to:
Set up your internet connection
Adjust screen size to your TV
* Note: During the initial setup the Comigo Duo will reset itself.
4. At this stage, information and system-introduction screens
will appear
5. Choose your Comigo Duo name
6. Login to your Facebook account. If you don’t have a Facebook
account, press “Skip”. We recommend you to login later
on, to enjoy the unique social and interactive features and
capabilities of your Comigo Duo.
Having trouble completing the guided setup?
Check out pages 12-13
Congratulations – you are now connected!
Pressing the Up/Down arrows on the 4-way navigation keys of
the Remote Control will allow you to view the list of available
channels
8 9
Page 6

Learn more about Comigo Duo
Access Multimedia files residing on the wireless home
network or on a hard drive connected to your Comigo Duo:
whether it’s music, photos or personal content
Browse the web and enjoy the wide variety of internet based
content
Access the VOD library
Access Online Videos to watch videos which were shared by
your friends in Facebook
Explore and search for friends or content and other items,
whether in your personal files, VOD catalogue or in specific
pre-defined websites
Control your network settings, user profiles, privacy settings
and more
Enjoy some Android Apps
Please note: Comigo Duo features are constantly being
enhanced and enriched.
Therefore, you will always be able to enjoy our new various
features and capabilities as will be released from time to
time.
All you have to do is just keep your Comigo Duo plugged in
and connected to the internet so that it can download the
latest software updates automatically.
10 11
Page 7

Troubleshooting
on the “Network connection” screen
5. If your network has security-enabled then make
sure you input the correct password (casesensitive)
Changing the remote control batteries:
When the batteries are low, replace it
with another CR2032 batteries
Cannot connect to your wireless home network during the setup?
1. For Wi-Fi operation you need to ensure that you
have at least the minimum required signal strength.
If you are not getting 2 or more signal-strength
bars in the“wireless network” setup screen,
then adjust the location of your Comigo Duo and/
or the location of your wireless router
2. Make sure there are no obstructions, like cement walls,
between your Comigo Duo and your wireless router
3. Make sure you select “Wireless” and not “Ethernet”
on the “Network connection” screen
4. Make sure you select the correct wireless router name
Black screen? Your TV does not display a Comigo screen?
Make sure your TV input source matches the physical
connection used to connect your Comigo Duo. Press the
Input selection button (also called Source) on your TV or TV
Remote to cycle through the various video inputs until you
see a Comigo screen.
You cannot see a picture on your TV?
1. Make sure your TV is turned on
2. Make sure all connectors are pushed in properly
3. Make sure that the Comigo Duo is connected to the power
and turned on (front panel LED should be green)
Push toward the remote to
open the Battery Lid
Step : 2
Using a 3.0mm flat head
screw driver, insert it into
the battery lid slot
Step : 1
12 13
Page 8

FCC part 15.21:
Warning: Changes or modifications to this unit not expressly
approved by the party responsible for compliance could void the
user’s authority to operate the equipment.
FCC part 15.105:
NOTE: This equipment has been tested and found to comply with
the limits for a Class B digital device, pursuant to Part 15 of the
FCC Rules. These limits are designed to provide reasonable
protection against harmful interference in a residential
installation. This equipment generates, uses, and can radiate radio
frequency energy and, if not installed and used in accordance
with the instructions, may cause harmful interference to radio
communications. However, there is no guarantee that interference
will not occur in a particular installation. If this equipment does
cause harmful interference to radio or television reception, which
can be determined by turning the equipment off and on, the user is
encouraged to try to correct the interference by one or more of the
following measures:
Reorient or relocate the receiving antenna.
Increase the separation between the equipment and
receiver.
Connect the equipment into an outlet on a circuit
different from that to which the receiver is
connected.
Consult the dealer or an experienced radio TV
technician for help.
FCC WARNING
This device complies with Part 15 of the FCC rules.
Operation is subject to the following two conditions:
1. This device may not cause harmful interference.
2. This device must accept any interference
received, including interference that may cause
undesired operation.
FCC ID: RGE-COMIGODUOOTT
Exposure to radio frequency energy:
This device and its antenna must not be co-located or operated in
conjunction with any other antenna or transmitter. To comply with
FCC RF exposure requ irements, only use supplied antenna.
14 15
The equipment complies with FCC RF exposure limits set forth
for an uncontrolled environment. This equipment must be
installed and operated with a separation distance of at least 20
cm from all persons.
Page 9
Rev-1 P/N: PAC200015
Need more help? Go to:
www.comigo.com
 Loading...