

Comfort Company Flexion Footbox Single User Manual
FLEXION FOOTBOX
™
- SINGLE
Toll Free 800.564.9248 www.comfortcompany.com 509 South 22nd Ave Bozeman, MT 59718
www.comfortcompany.com
IS-FLEXIONFOOTBOXSINGLE
REV0413
FLEXION FOOTBOX™ - SINGLE
Parts Included:
Pre-Attached
1 - (A) Screw 1/4-20 x 1/2” Button Head
1 - (B) Washer 0.25” ID, 0.75” OD
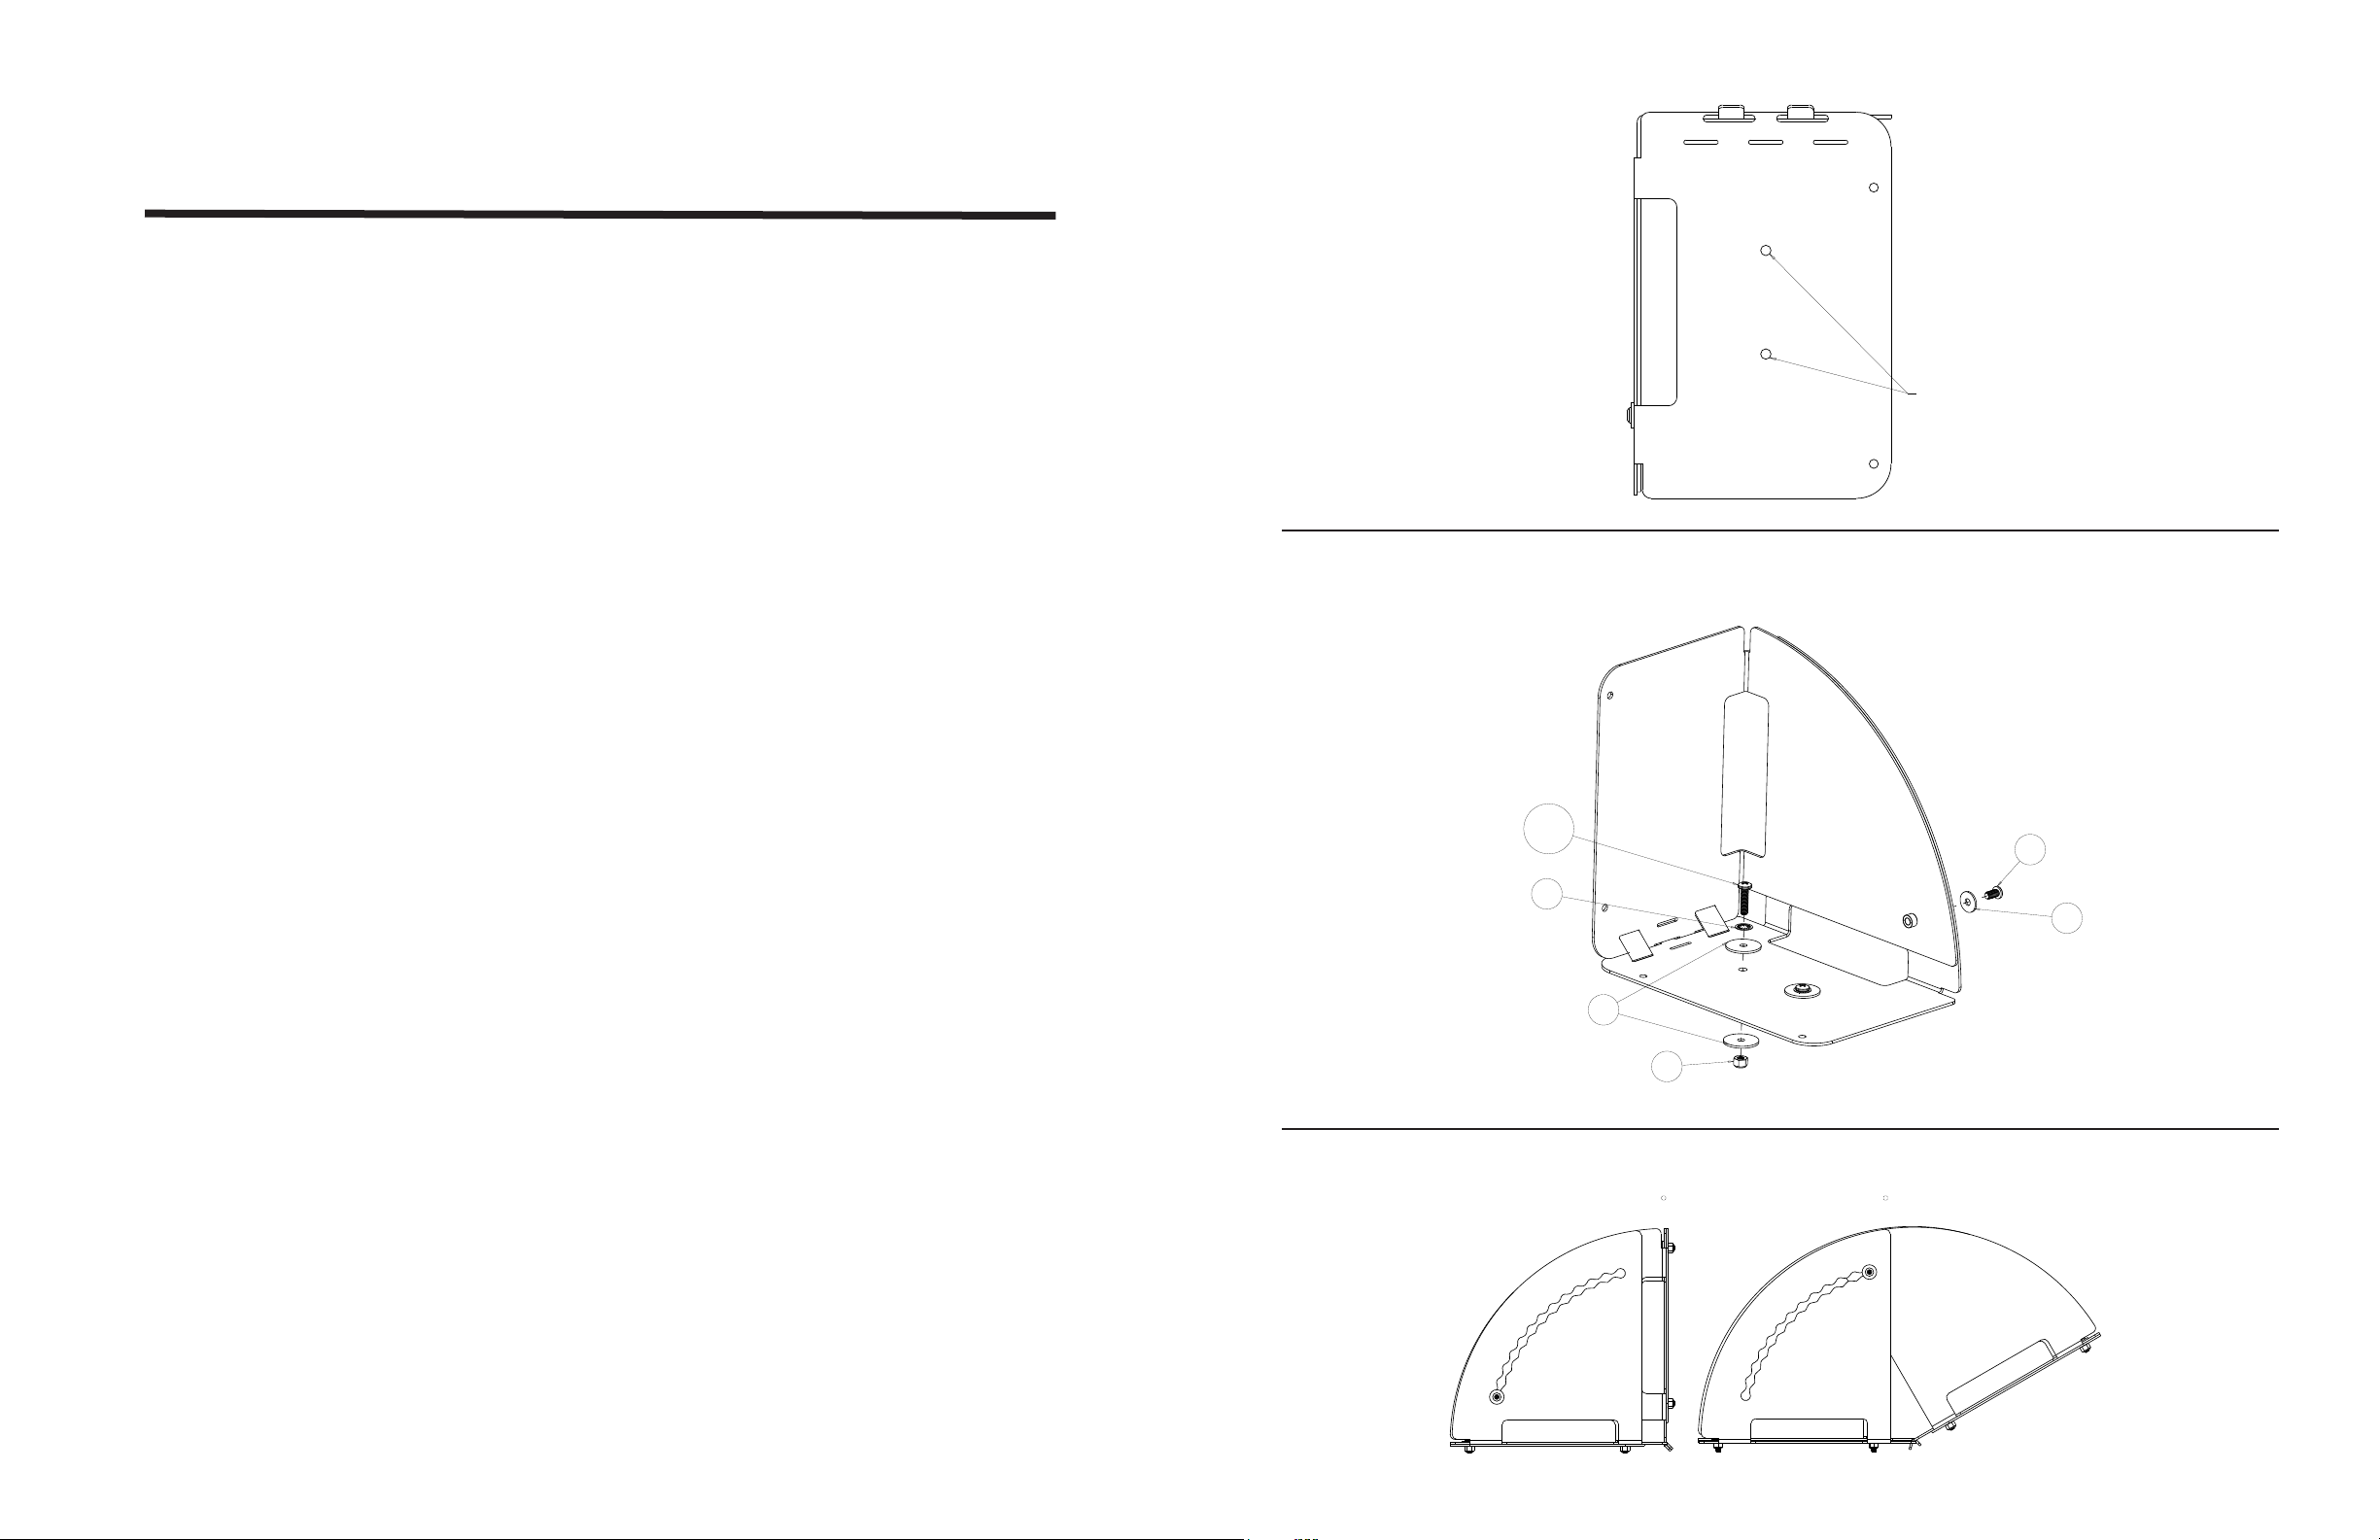
FIGURE 1: MOUNTING HOLES
From Kit Bag
1 - (C) Allen Wrench 5/32
2 - (D) Screw 1/4-20 x 1.25” Phillips Pan Head
2 - (E) Screw 1/4-20 x 1” Phillips Pan Head
2 - (F) Washer Internal Tooth, 5/16” ID
4 - (G) Washer 0.25” ID, 1.25” OD
2 - (H) Nut 1/4-20 Nylon Lock
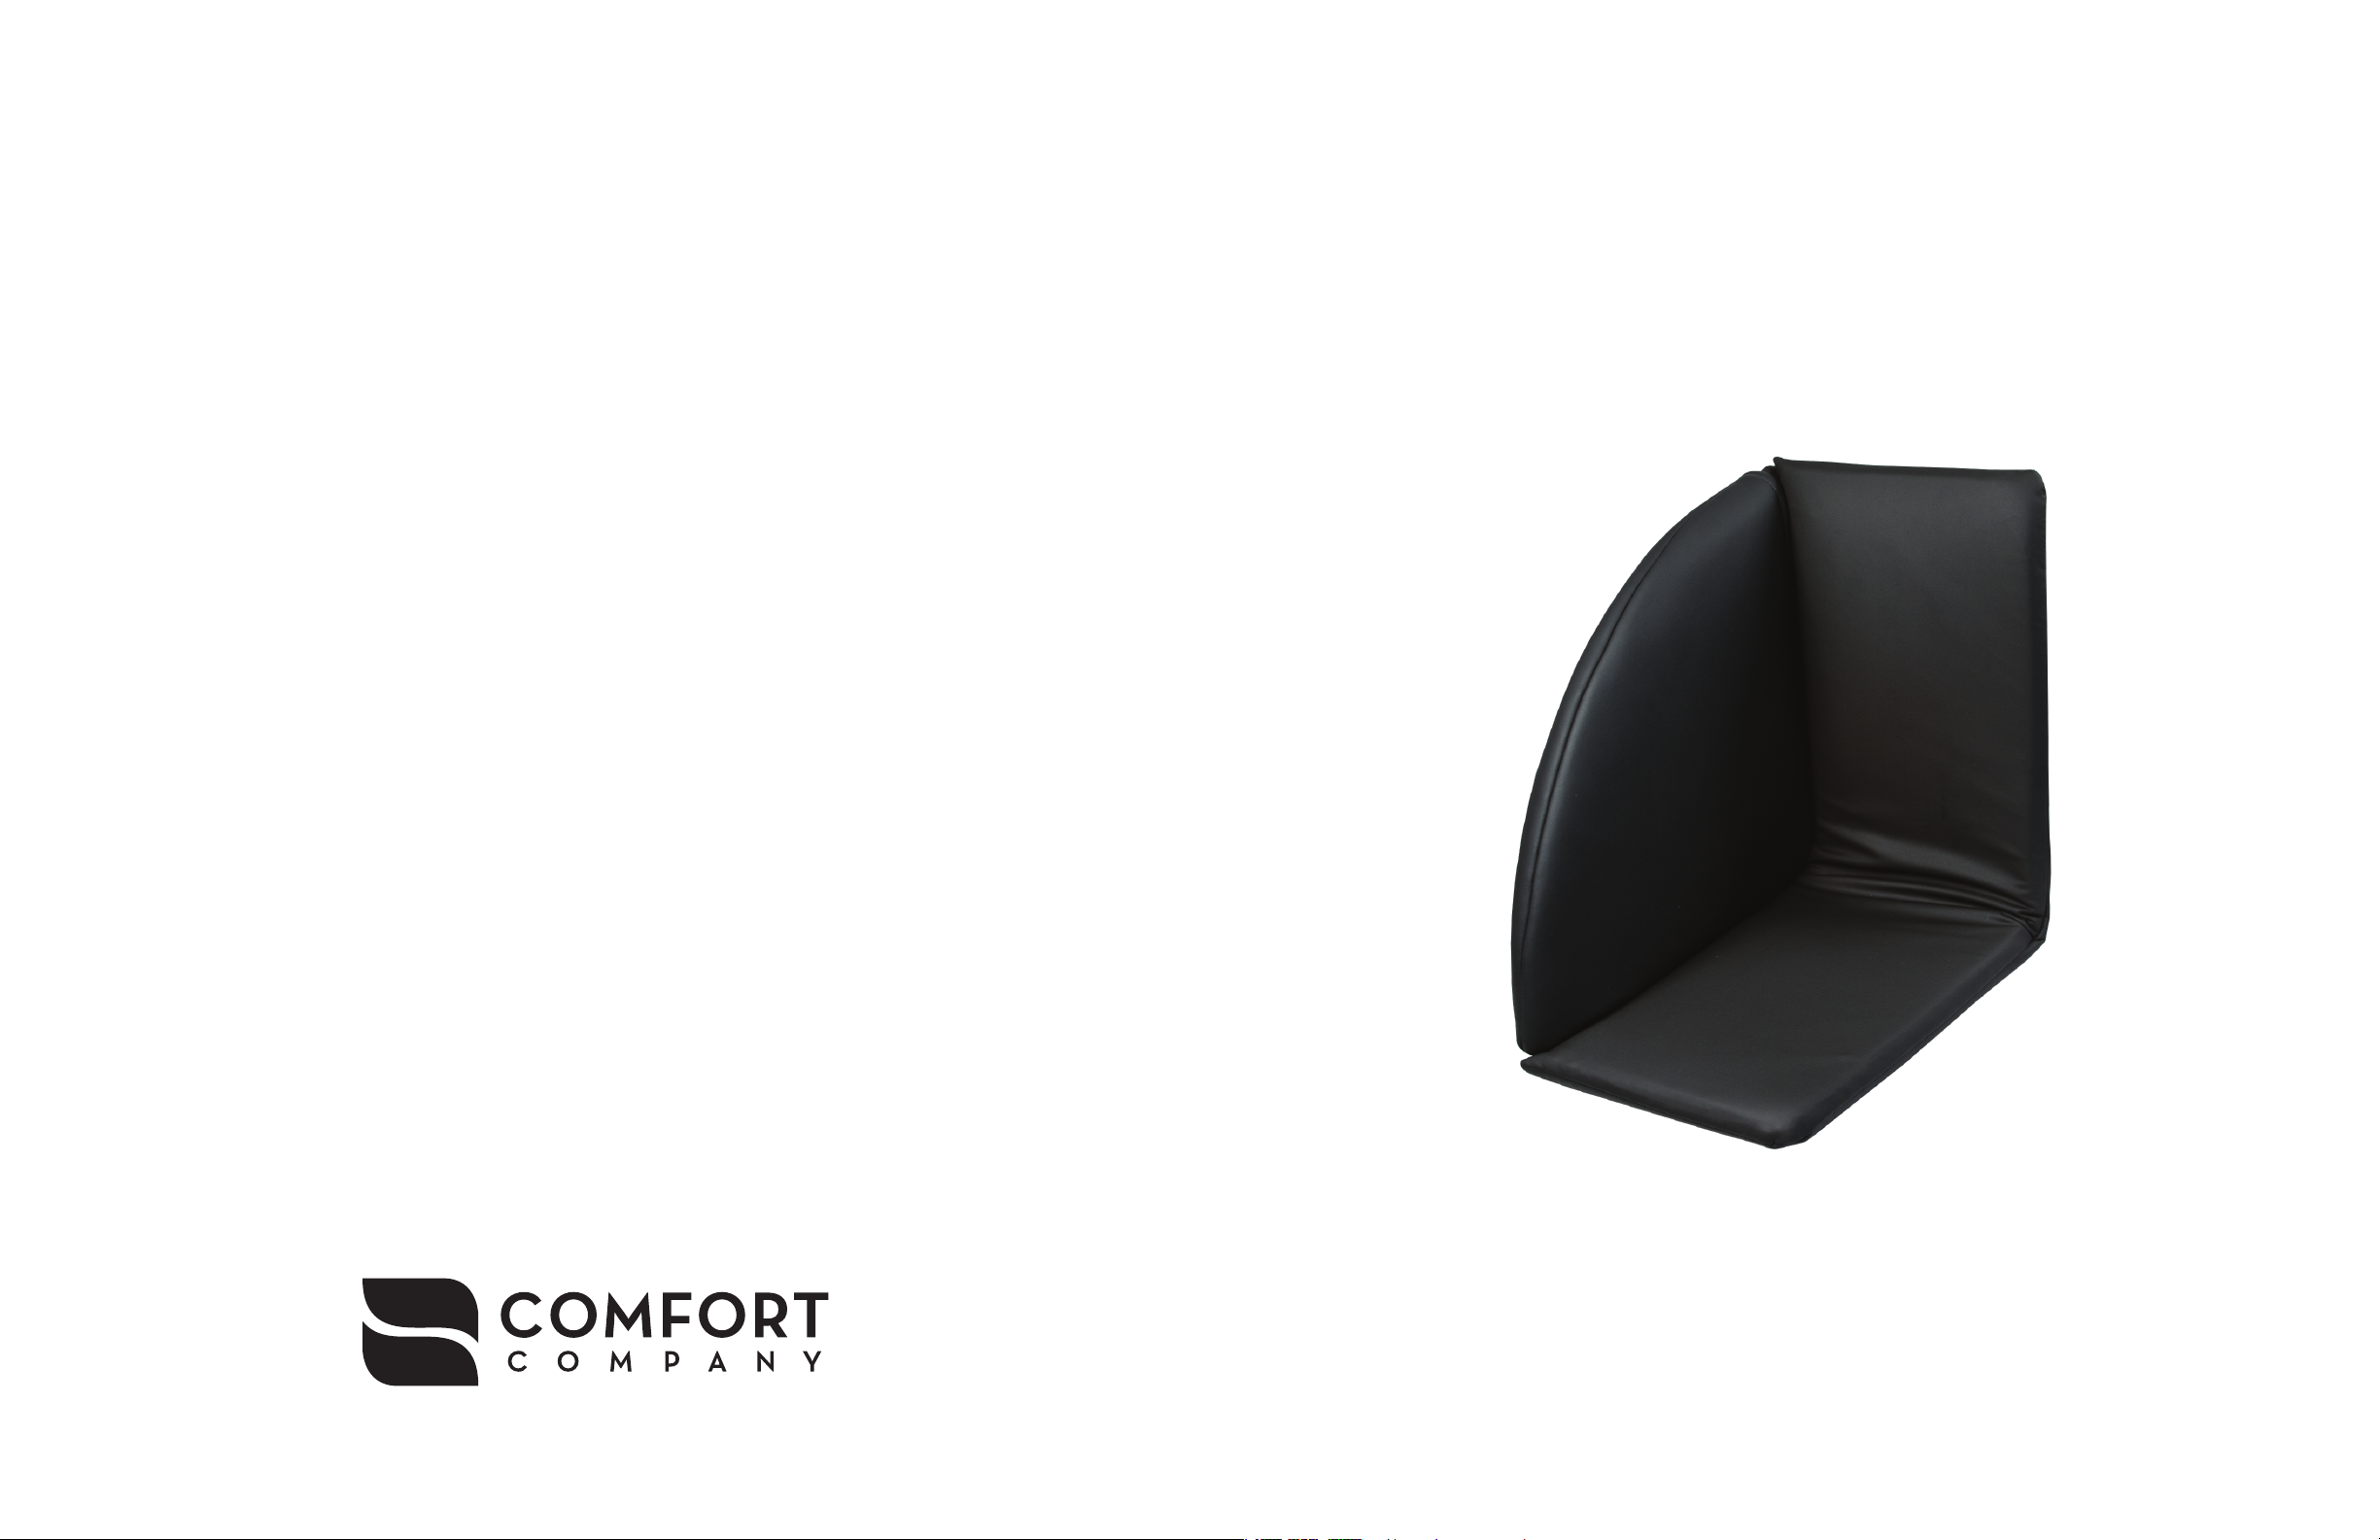
Remove center foam/cover piece.
1
Place the Flexion Footbox on the wheelchair footplates in the required position.
2
Drill 2 mounting holes through the bottom of the wheelchair footplates and through the bottom of
3
the Flexion Footbox plate as shown in Figure 1. Holes must be big enough for a ¼”-20 screw.
Attach the Flexion Footbox to the foot plate with screw (D or E) depending on the thickness of the
4
foot plate; along with the washer (F), washers (G), and nut (H) using Allen Wrench (C) as shown in
Figure 2.
Reattach the center foam/cover piece.
5
DRILL MOUNTING HOLES
FIGURE 2: HARDWARE ATTACHMENT
D OR E
A
F
B
Remove screw (A) and washer (B) on both sides using Allen Wrench (C) as shown in Figure 2.
6
Adjust the angle of the Flexion Footbox to the required position as shown in Figure 3 and then
7
reattach screw (A) and washer (B) to lock the Flexion Footbox in place.
G
FIGURE 3: ANGLE ADJUSTMENT
90
H
160
 Loading...