


Comfort Company External Fixator Leg User Manual
EXTERNAL FIXATOR LEG REST
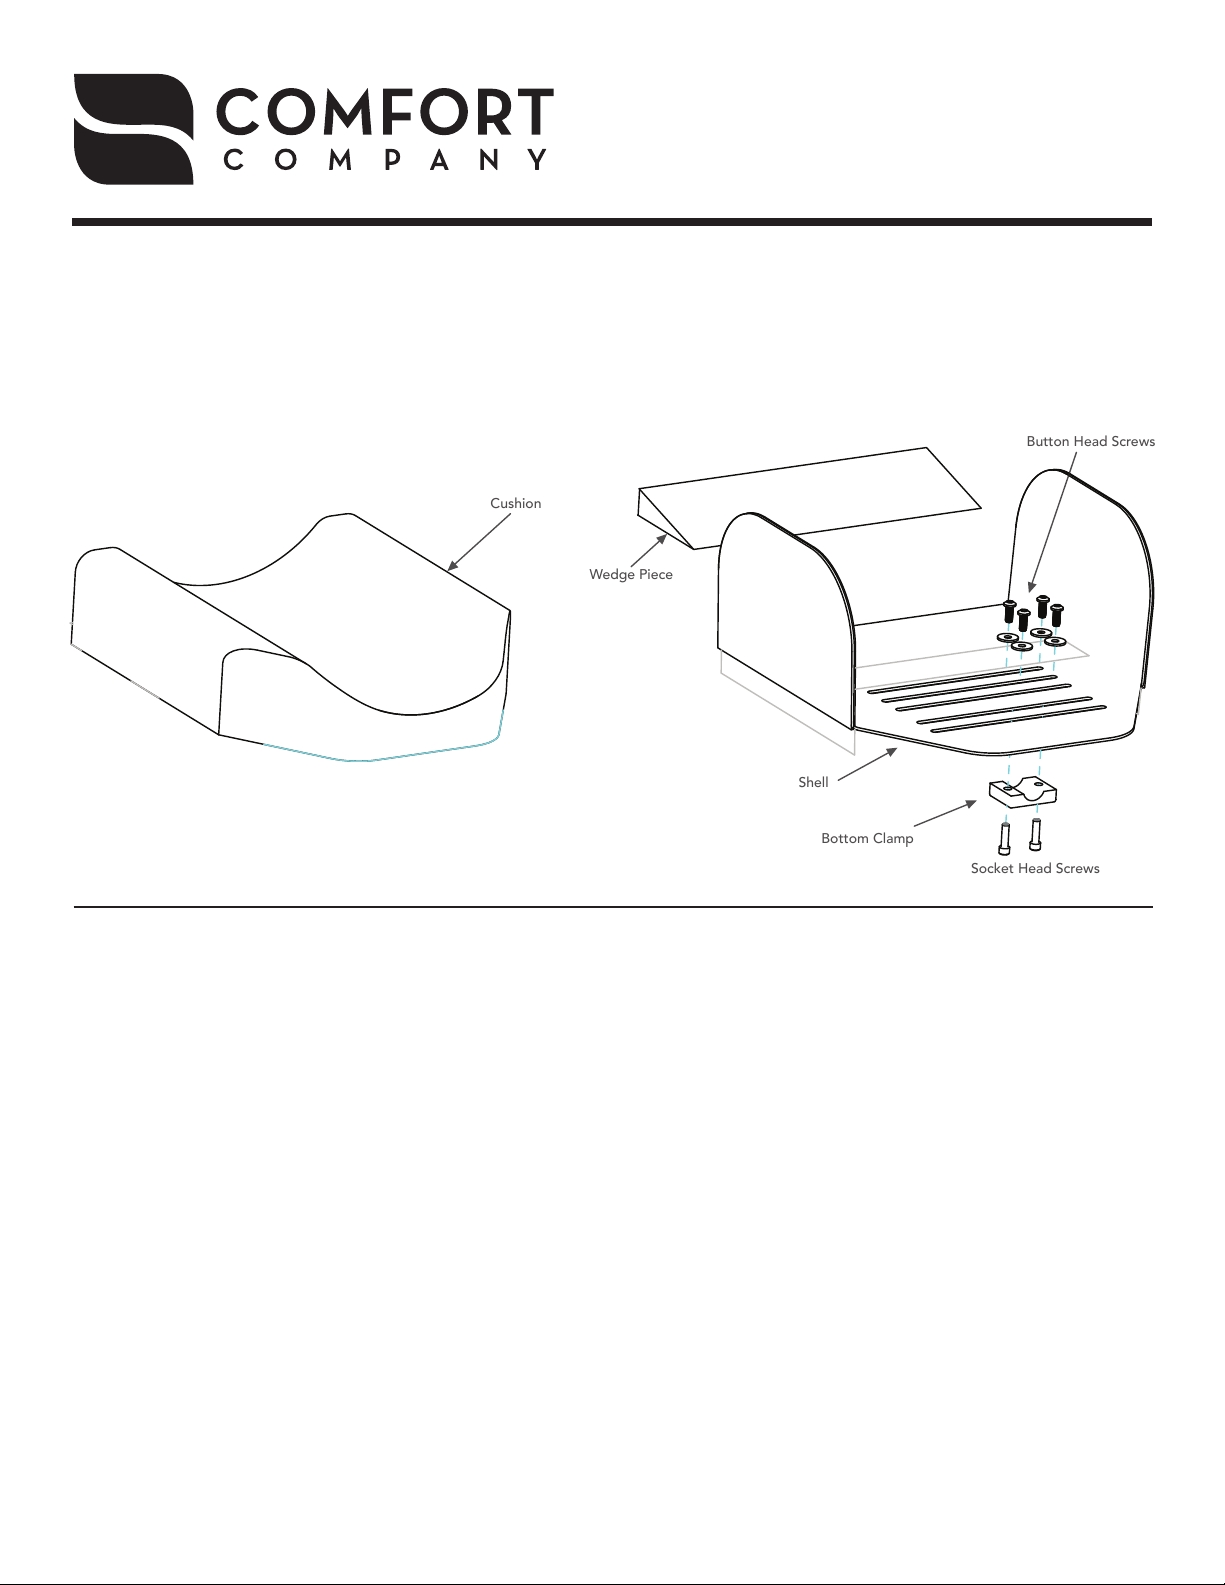
Bottom Clamp
Shell
Button Head Screws
Socket Head Screws
Wedge Piece
Cushion
Parts Included:
2 - 1/4-20 x .875” Socket Head Screws
2 - 1/4-20 x 1.125” Socket Head Screws
2 - 1/4-20 x .625 Button Head Screws
1 - 3/16 Hex Key
1 - 5/32 Hex Key
Toll Free 800.564.9248
www.comfortcompany.com
509 South 22nd Ave Bozeman, MT 59718
1
2
3
4
5
Remove the leg rest cushion.
Remove the bottom clamp by loosening the
1/4-20 x .875” socket head screws with the
3/16” hex key.
Align the shell on the Elevating Leg Rest to the
desired distance from the seat cushion. Once in
place, lock the shell by bolting the bottom
clamp on the Elevating Leg Rest with the 1/4-20
x .875” socket head screws. For Elevating Leg
Rests with larger poles, use the 1/4-20 x 1.125”
socket head screws from the kit bag.
If the shell cannot reach the required distance
from the seat cushion, remove the clamp
assembly by loosening the 1/4-20 x .625”
button head screws with the 5/32 hex key and
mount it to one of the other open slots.
Loosen the 1/4-20 x .625” button head screws
with the 5/32 hex key in kit bag.
Slide the shell left or right through the open
6
slots to align with leg. Lock the shell in place
by tightening the 1/4-20 x .625 button head
screws.
Once everything is locked in place, attach the
7
leg rest cushion back on the shell.
If the shell is needed for the lower part of the
8
leg and the front of the cushion needs to be
slightly elevated, insert the foam wedge piece
found in the kit bag. To insert the wedge piece,
remove cushion, and remove the paper on the
adhesive side of the wedge. Stick the wedge
piece on the shell in the desired location and
place the cushion back on to the shell.
IS-EXTERNALFIXATORLEG
REV0413