

Comfort Company Acta-Back Pride 18W-24W User Manual
Toll Free 800.564.9248
www.comfortcompany.com
509 South 22nd Ave Bozeman, MT 59718
ACTA-BACK
®
Attaching an Acta-Back to a Pride TRU-Balance 3 Power Chair, Sizes 18W – 24W
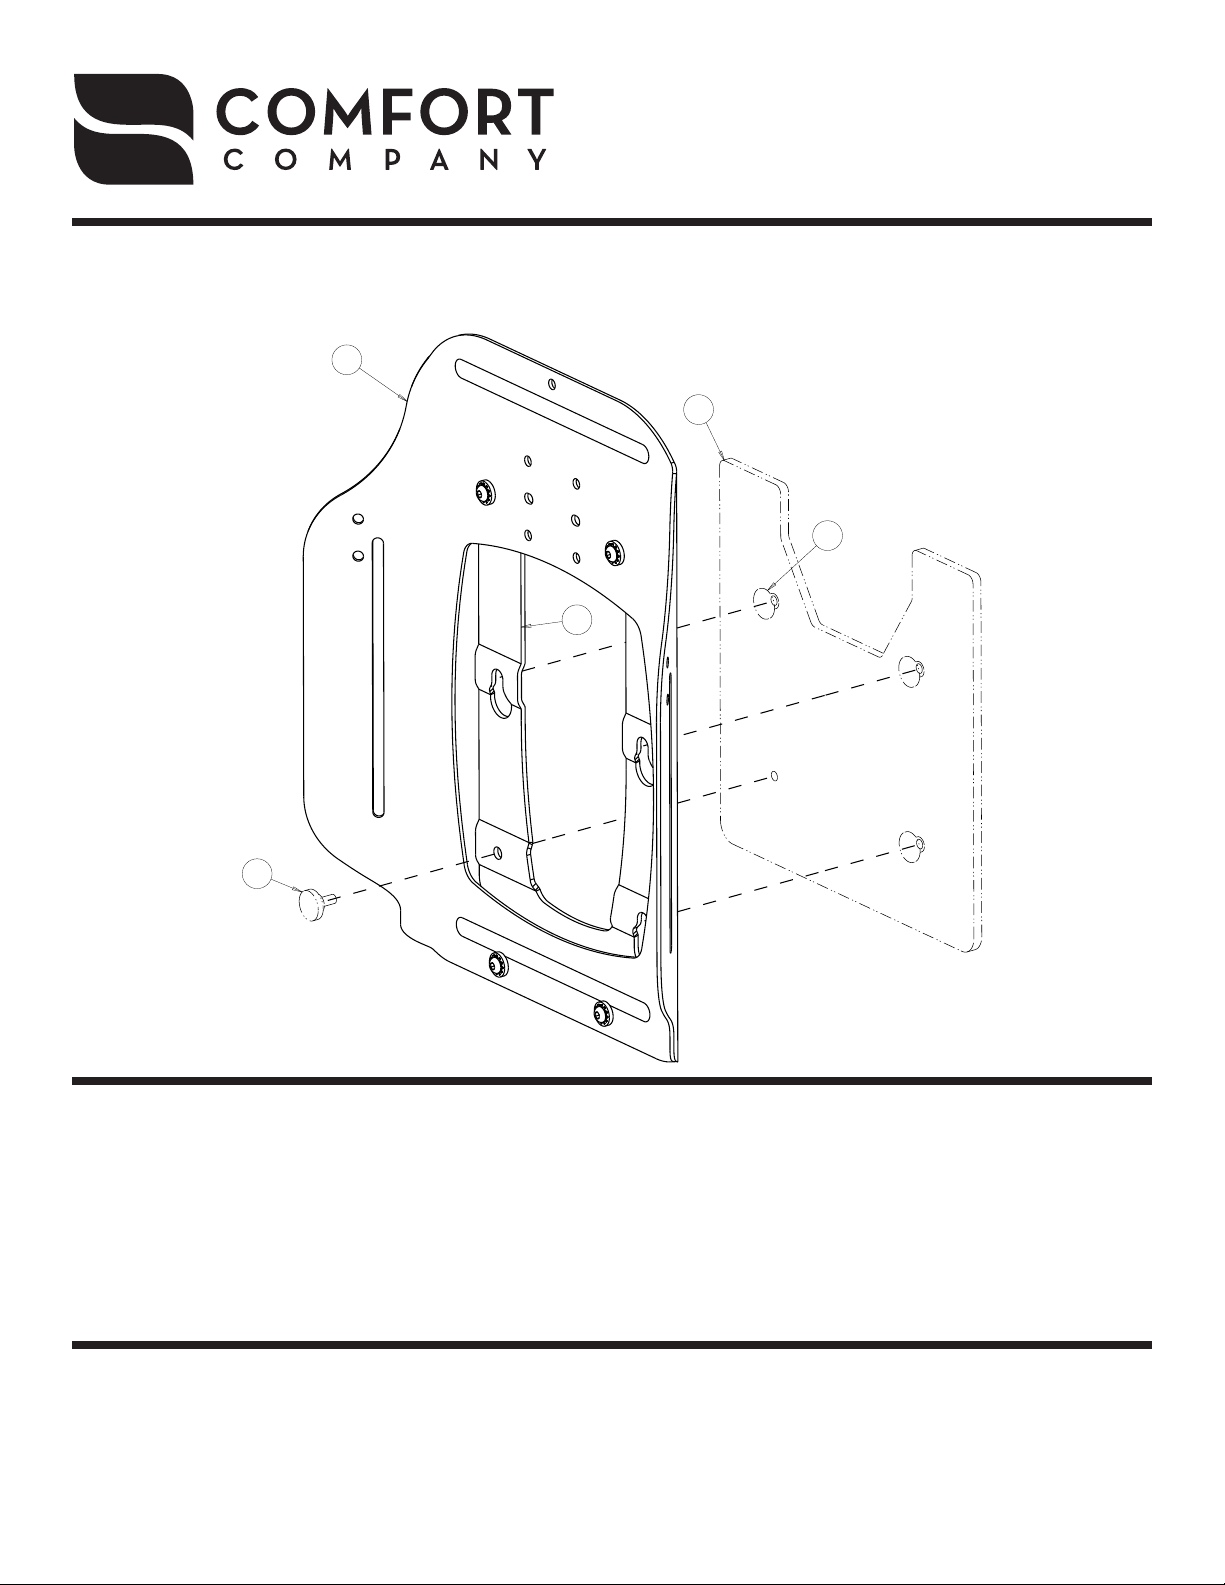
E
A
B
D
C
Parts Included:
1 - Complete Acta-Back® Assembly with Mounting Bracket
1
To remove current backrest from back plate (A), remove knob (C).
2
Attach Acta-Back Assembly with Mounting Bracket (E/D) to back plate (A) by aligning buttons (B) with
1 - 5/32” Hex Key
cut outs in bracket (D).
Lift the bottom of the foam/cover up and thread knob (C) through the bracket (D) into the back plate (A).
3
Re-attach foam/cover to shell (E).
4
The Acta-Back® has patented moldable aluminum stays inserted into the cover.
These stays can be molded to meet the contour of the spine.
How to Mold the Aluminum Stays:
1. Feel between the backrest and the user's back for gaps and/or identify areas that require positioning adjustments.
2. Unzip access at the top of the back and remove the stays.
3. Mold the stays to fill in the gaps and/or provide positioning.
4. Reinstall the stays and have the user rest against the Acta-Back®.
5. This is an iterative process, continue making adjustments until the proper support and positioning goals have been met.
IS-ACTAPRIDE1824
REV0813
 Loading...