

Page 1

Quick Installation Guide
MGB100
Portable Wireless AP Storage
English version 1.1
Page 2
2
1. Check Your Package Contents
l MGB100 device
l 2.4GHz dipole antenna
l Power adapter (5 Volts DC, 2A)
l RJ-45 Ethernet cable
l Quick installation guide
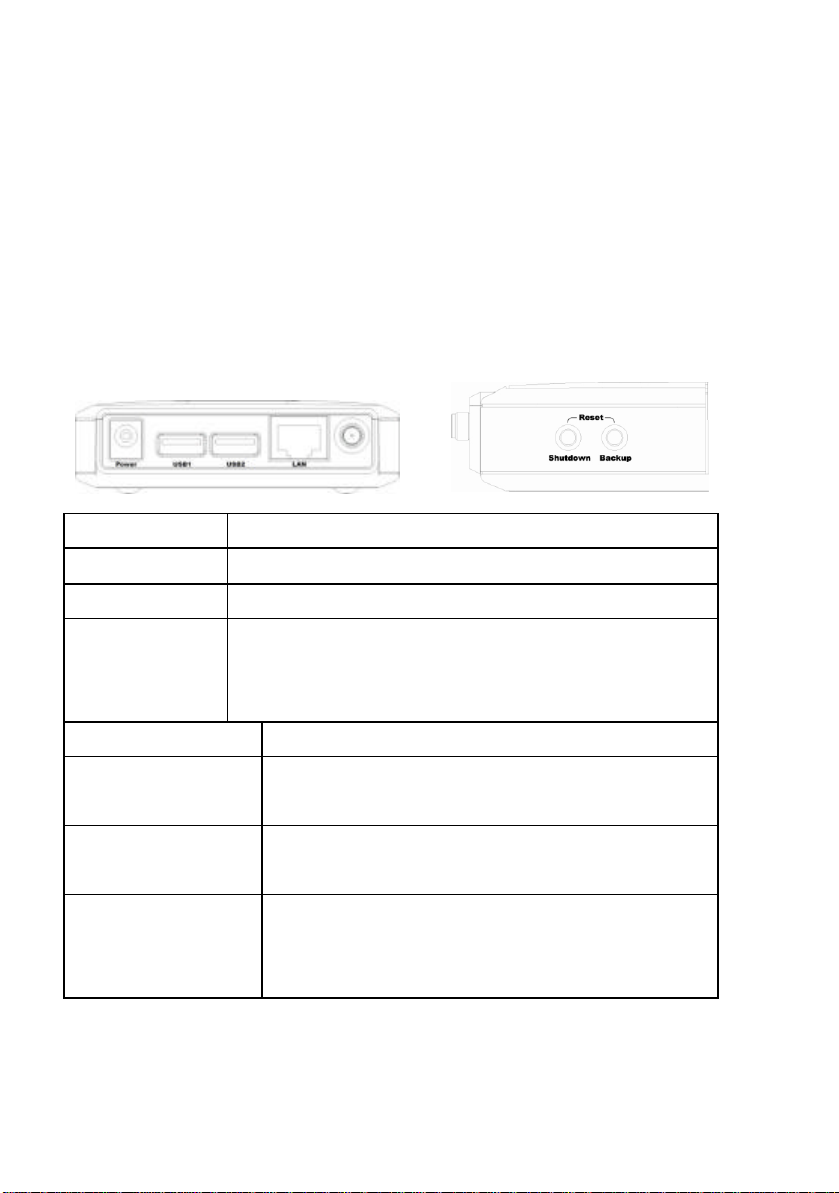
2. Hardware Configuration
Ports Description
Power 5V / 2A Power inlet
USB1 / USB2 The ports where you can connect to any USB storage.
LAN Automatically MDI / MDIX LAN port can sense the cable
type when connecting to Ethernet-enabled computer,
network of hub, switch, or router.
Buttons Description
Shutdown Press the button about 4 seconds to shut down the
whole system before power-off.
Backup Press the button over 4 seconds to copy data form
USB device to HDD
Reset Press the buttons of “Shutdown” and “Backup”
simultaneously over 6 seconds to reset the system
setting to factory default.
Page 3
3
PWR
USB1
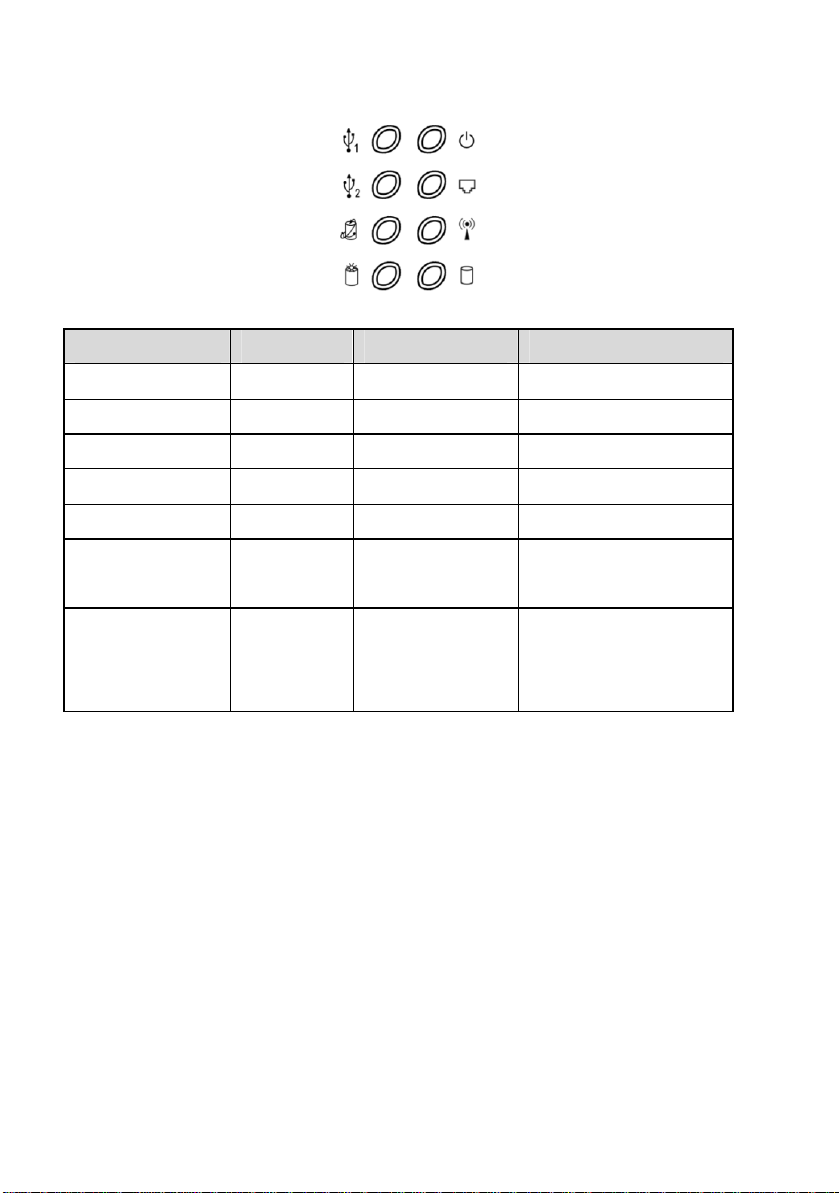
3. LED Indicators
HDD Status
USB2
Backup
LAN
WLAN
HDD
LED Off On Blinking
PWR Power off Power on
LAN No device Linked In use
WLAN No packet On Transmitting
HDD Not in use HDD read/write
USB 1 / USB 2 No device USB drive ready
Backup Backup files from USB
HDD Status No HDD HDD full or error More blinking quickly,
to HDD
fewer available HDD
capacity.
Page 4

4
4. Making Connections
Check TCP/IP settings:
Step 1: Select the “My Network Places” on the Desktop Menu, and click the right
button of mouse to choose the “Properties”
Step 2: Choose the “Properties” of Local Area Connection.
Step 3: Check the “Client for Microsoft Networks”, “File and Printer Sharing
for Microsoft Networks”, and “Interne t Protocol (TCP/IP)” are installed or not.
If not, please install those communication protocols.
Wired Ethernet settings:
Use one Ethernet cable to connect the MGB100 and your computer directly. Then
follow the step below to connect the MGB100 under the wired Ethernet
environment.
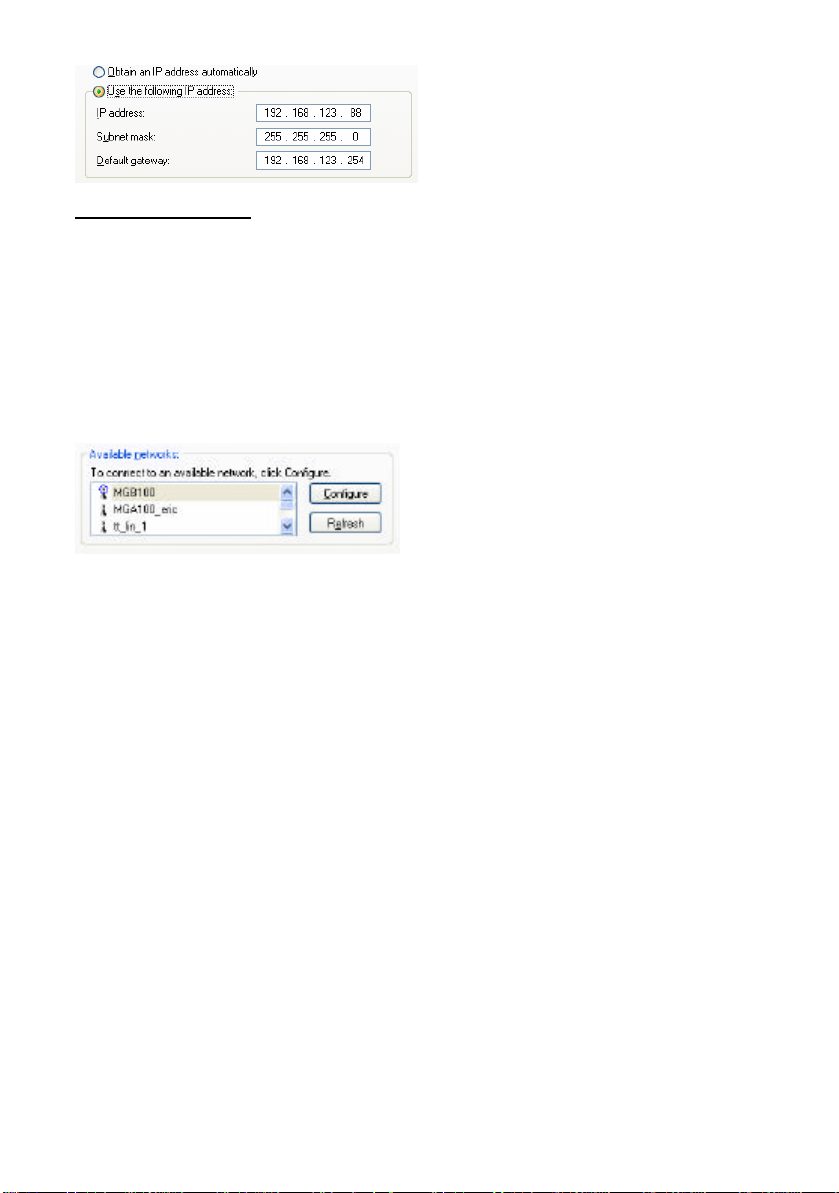
Find the Internet Protocol (TCP/IP) Properties from the My Network Places and
check the Properties of Local Area Network Connection. And click the
“General” icon and assign one IP address which can be from 192.168.123.1 to
192.168.123.253. Here we use the 192.168.123.88 as the IP address. The Subnet
mask must be: 255.255.255.0 and the Default gateway must be:
192.168.123.254. Then click “OK” button to complete TCP/IP setup.
Page 5
5
Wireless connection:
Follow the steps below to connect the MGB100 in a wireless environment.
Step 1: Enabling the WLAN card first, and check the Wireless Network
Connection properties from My Network Places
Step 2: Select the Wireless Networks icon after entering the “Wireless Network
Connection Properties”. You will find the MGB100 in the Available networks,
then select the MGB100, and click Configure to connect.
After clicking the “Configure” icon, make sue the Network name (SSID) is
MGB100.
Page 6

6
5. File Sharing
The MGB100 can be a shared network hard drive in an existing wireless or wired
network environment. The users in the same network area can read or write data
from the device as required. The following various steps are for users to start using
the network hard drive.
Accessing the network hard drive via My Network Places
Select the “My Network Places” and type the address of “\\mgb100” and press
“Enter”, then you will find the Storage icon.
Searching the computers
Open “My Computer” on the desktop menu, and use the “Search” function to
search the computer of “mgb100” as below.
Search the “Entire Network” manually
Open Windows Explorer, and then click the My Network Places icon.
Double click the Entire Network to view the components of the network.
Select and click the Microsoft Windows Network icon, then the various networ k
components showed in the list. The default Workgroup of MGB100 is Mshmoe.
Page 7
7
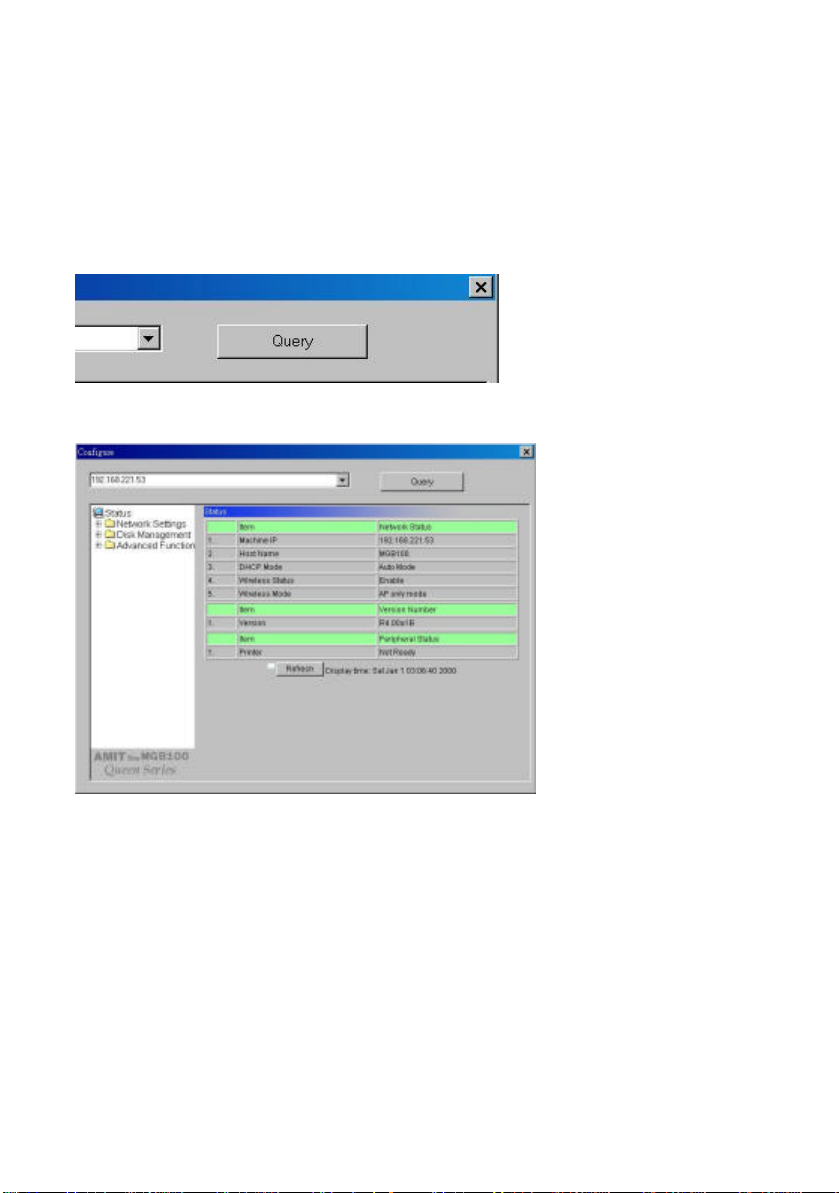
6. Making Configuration
The MGB100 can be configured various settings through the Configuration Tool.
Even you don’t know which IP is being used by MGB100, the Configuration Tool
will help you to find it. All you have to do is click the “Query” button of the
Configuration Tool.
NOTE: The status of your environment may not be the same as this picture.
 Loading...