

Page 1

MONITORING, DATA LOGGING AND
CONTROL SYSTEM
MS5, MS5D
INSTRUCTION MANUAL
Basic Part
SYSTEM s.r.o.
Page 2

2 ie-ms2-MS5-02
CONTENT: page
INSTRUCTION MANUAL........................................................................................................... 1
INTRODUCTION ............................................................................................................................. 3
1. GENERAL SAFETY PRECAUTIONS ........................................................................................ 5
2. WIZARD for INSTALLATION and CONFIGURATION of DATA LOGGER.......................... 5
3. RULES for MOUNTING and CONNECTION of DATA LOGGER...........................................7
3.1. Mechanical location of data logger and the way of cable routing...................................... 7
3.2. Data logger interface connectors......................................................................................11
3.3. Mounting and connection of output relays module MP018............................................. 13
3.4. Mounting and connection of external terminal with display............................................ 14
3.5. Connection of data logger to the computer ...................................................................... 14
3.6. Wiring of data logger with supported SMS messages...................................................... 20
3.7. Connection of data logger to power ................................................................................. 21
4. USER PROGRAM and CONFIGURATION OF DATA LOGGER ......................................... 21
4.1. Program features............................................................................................................... 21
4.2. Installation of program..................................................................................................... 21
4.3. Setting of communication with data logger ..................................................................... 21
4.4. Basic items in menu program........................................................................................... 26
5. DESCRIPTION of CONFIGURATION and DATA LOGGER MODES .................................. 27
5.1. Bookmark Common.......................................................................................................... 27
5.2. Bookmark Communication............................................................................................... 28
5.3. Bookmark Profile............................................................................................................. 29
5.4. Bookmark Ch.. Identity & Calculations........................................................................... 30
5.5. Bookmark Ch.. Measuring & recording .......................................................................... 31
5.6. Bookmark Ch..Conditions............................................................................................... 33
5.7. Bookmark Ch..Alarms and indication............................................................................. 38
6. CONTROL and INDICATION COMPONENTS of DATA LOGGER...................................... 40
7. APPLICATION NOTES.............................................................................................................. 45
7.1. Processes and how to work with ...................................................................................... 45
7.2. Configuration Profiles and how to work with.................................................................. 46
7.3. SMS message and how to work with ................................................................................ 46
7.4. Possibilities of setting Logging interval........................................................................... 46
7.5. Identification of person, who deactivated alarm.............................................................. 47
7.6. Way of entering PIN code from data logger keyboard..................................................... 47
7.7. Sharing of Display mode on several computers together with automatic storing of data
on network.................................................................................................................................... 47
7.8. How to ensure alarm report, in case of power failure..................................................... 48
7.9. Back-up of data logger configuration and its restoring................................................... 48
7.10. Other possibilities in data logger configuration.............................................................. 48
7.11. What to do if data logger does not work .......................................................................... 48
7.12. Self test error.................................................................................................................... 48
7.13. Problems with correct measurement................................................................................ 48
7.14. Problems in communication with computer..................................................................... 49
8. RECOMMENDATION FOR OPERATION AND MAINTENANCE...................................... 50
9. TECHNICAL DESCRIPTION AND PARAMETERS OF DATA LOGGER ........................... 52
Note: Manual Appendixes are available in electronic pdf format.
Page 3

ie-ms2-MS5-02 3
INTRODUCTION
Data loggers are designed for measurement, record, evaluation and consequent processing of input
electrical signals, characterized by relatively slow changes (>1s). Together with proper transmitters and
transducers are suitable for monitoring of physical values.
Device enables:
• to measure and process 1 to 16 input signals
• to acquire autonomous time record of measured values
• create alarm states
• to perform other actions based on created alarms (audible, visual indication, controlling of
relay outputs, sending SMS message, controlling of telephone dialer etc.)
• to monitor on-line measured values and states
The basic model is data logger MS5. Data logger MS5D is equipped on the top of it with and
display and simple keyboard.
Drawing (MS5D):
Items marked Accessory are not included in delivery and it is necessary to order separately.
Page 4

4 ie-ms2-MS5-02
Architecture of measuring system with data logger MS5:
Page 5

ie-ms2-MS5-02 5
1.GENERAL SAFETY PRECAUTIONS
The following list of precautions serves to reduce risk of injury or damage of described
instrument. To prevent injuries use instrument accordingly with rules in this manual.
• Follow rules specified in part Not allowed manipulations and notice
• Service should be performed only by qualified person.
• Use suitable power source. Use only source with power voltage recommended by the
manufacturer and approved in accordance with proper standards. Pay attention, the source has
undamaged cables or cover.
• Connect and disconnect correctly. Do not connect and disconnect cables, if device is under
electrical voltage.
• Do not use instrument without covers.
• Do not use instrument, if it does not work correctly. If you mean instrument does not correctly,
let it check by qualified service person.
• Do not use instrument in environment with danger of explosion.
2.WIZARD for INSTALLATION and CONFIGURATION of DATA LOGGER
2.1.1
Mounting of data logger and its accessory
• Select suitable location for placing data logger – pay attention to parameters of ambient
environment, minimize the number of cables, avoid sources of interference
• Mounting of sensors and routing of cables – pay attention to rules of theirs installation, use
recommended working positions, avoid devices and distribution of power electricity
• Check proper connection – before first switching on. If data logger controls other actuating
devices of regulation, it is recommended to put them out of operation before configuration of
data logger.
Detailed rules for mounting of data logger including different ways of connection to the
computer are described in chapter RULES for MOUNTING and CONNECTION DATA
LOGGER.
2.1.2
Basic activation of data logger
• Connection of data logger to power - connect data logger to power and visually check its
function (indication of power, optionally the display and keyboard)
• Installation of software - install user program to the PC (see part PROGRAM for DATA
LOGGER)
Configuration of data logger communication with computer – in user SW in part
Configuration-Setting of communication configure and test the data logger connection to
computer. Detailed description of Setting of communication interface is in chapter
RULES for MOUNTING and CONNECTION of DATA LOGGER.
Program enables to work simultaneously with several data loggers, that are connected to the
computer in different ways.
2.1.3
Configuration of data logger – read and change the data logger configuration by means of
the SW in part Configuration – Configuration of data logger (icon i). Detailed description
of data logger configuration is in
part DESCRIPTION of CONFIGURATION and MODES of
DATA LOGGER.
• set data logger Name, Date and Time in data logger
!
Page 6

6 ie-ms2-MS5-02
• assign names to each measured point and optimize the display for your requirements (signal
conversions, decimal point position etc.)
• switch on each input channel needed and set record function:
- on channels where recorded value with fixed interval is required, use Continuous record
with fixed interval.
- if record with fixed interval only under certain conditions is required, use Conditional
record.
- if only values and time under defined conditions are required, use Sampled record
- each type of record can be limited in time
- different record modes can be combined
• if needed set alarm functions
- first define conditions for consequent actions
- assign to each alarm conditions for creation of alarm
- assign to each alarm actions to be performed in alarm creation (lightening of LED diode
on data logger panel, activation of ALARM OUT output, activation of audible
indication, sending SMS message, sending e-mail etc.)
- maximum four conditions and two different alarm actions on one channel can be
defined; if there is a need for one channel to link several alarms (maximum four), it is
enabled to use available alarms from different channels
- activity of output ALARM-OUT can be cancel by the user directly from data logger or
remotely, at the same time it is possible to record it (including information on way of
canceling)
- changes of state for each alarms can be recorded separately
• if there is a need during data logger operation to describe from its keyboard parts of record
with predefined notes, it is enabled by means of Processes.
• if there is a need during data logger operation to change entire data logger configuration from
its keyboard, it is enabled by means of storing several configuration Profiles.
• if it is required to secure data transfer and access to data logger and program functions,
system of passwords and access rights can be used
2.1.4
Usual work with data logger
• reading, viewing, archiving and print/export recorded data from selected data logger or from
file on disk
• on-line viewing of measured values – Display mode, enables to watch simultaneously all
connected data loggers
• Display mode can be shared simultaneously on several computers in the network
Instructions for regular check and maintenance of data logger are specified in part
RECOMMENDATIONS for OPERATION and MAINTENANCE.
Page 7

ie-ms2-MS5-02 7
3.RULES for MOUNTING and CONNECTION of DATA LOGGER
3.1. Mechanical location of data logger and the way of cable routing
Location of data logger must match the operating conditions and not allowed manipulations.
Working position of data logger:
• data logger lies on horizontal nonflammable surface
• data logger is fixed by means of mounting consoles on the wall from nonflammable
material or at low current switchboard – working position is with input connectors
downward
The way of mounting of consoles to data logger and mounting holes dimensions:
• data logger is fixed by means of the holder on DIN rail at low current switchboard -
working position is with input connectors downward
The way of mounting the holder to data logger:
Page 8

8 ie-ms2-MS5-02
Mechanical drawing (without cables and connectors):
Connection terminals and connectors can be protected by magnetically fixed side covers MP027.
Recommendations for mounting:
• do not mount data logger near sources of interference (data logger must not be
mounted directly to power switchboard nor to its nearness. Also do not mount data logger
near power contactors, motors, frequency converters and other sources of strong
interference).
• In cable routing follow rules of standards for installation of low current distribution (EN
50174-2), especially it is necessary to pay attention to avoid electromagnetic interference
intrusion to the leads, transmitters, transducers and sensors. Do not locate cabling near
sources of interference.
!
Page 9

ie-ms2-MS5-02 9
• Do not use leads in parallel with power distribution network leads
• Do not use outdoor leads without corresponding protection against effects of static
electricity
• if not necessary, do not connect system with other circuitry
• fundamentally use shielded cables - e.g. SYKFY n pairs x 0.5, shielding at data logger side
connect properly
• do not create earth loops - it concerns both measuring circuits and cable shielding.
• do not create hidden earth loops - do not connect cable shielding at end device side, if these
device do not have terminal designed for shielding. Shielding must not be connected to outer
metal parts of the device nor with other devices. Do not use shielding as a signal lead.
Page 10

10 ie-ms2-MS5-02
• Do not use common leads for several channels
• It is recommended to earth data logger at one point – there is a special terminal on power
terminal. This earthing will work correctly, if system would not be grounded at other point at
the same time.
Page 11

ie-ms2-MS5-02 11
3.2. Data logger interface connectors
Connectors
Each signal is connected to self-locking terminal WAGO located on the side of the case. Insert flatbladed screwdriver to rectangle terminal hole and push screwdriver towards away from you - contact is
released. Connect wire to released terminal (circular hole behind the rectangular one) and close the terminal
by removing the screwdriver. Connect positive pole of dc voltage of input signal to terminal IN, negative to
COM, shielding to GND.
Notice: The entire input terminal block is possible to remove from data logger by pulling it up from the
connector.
Connection of leads:
Connection of transducers with current output powered by current loop
In case of connection of channels with current loop powered from data logger (inputs A0)
it is possible to insert other devices (panel meters, measuring computer cards, etc.) to
current loop. In this case it is necessary to consider, if undesirable current coupling will not
cause measurement inaccuracy. All inserted devices must be galvanic isolated from other
circuits. In case, it is not possible to ensure this, use galvanic isolated inputs A1G and power loops from
external source. Connection of input part of the module A0 including connection to two-wire probes is
described in appendix 2.
!
Page 12

12 ie-ms2-MS5-02
Connection of thermocouple probes
For connection of thermocouples use appropriate extension cable. Continuity of material of
thermocouple wire should be kept along the line up to data logger connector. Extension (compensation)
cable for thermocouples type S (PtRh-Pt) is used from different materials (due cost reasons).
Marking of subminiature thermocouple connectors and wires manufactured by OMEGA (in
accordance with US standard):
Type of
thermocouple
Connector color + wire color - wire color
K (NiCr-Ni) Yellow Yellow Red
J (Fe-Co) Black White Red
S (Pt10%Rh-Pt) Green Black Red
B (Pt30%Rh-Pt) White Black Red
T (Cu-CuNi) Blue Blue Red
If there are more thermocouple inputs in data logger not galvanic isolated, avoid thermocouples to be
mutually connected. If hazard of current leakage exists (mostly between thermocouple welded point and
surrounding metal framework), thermocouple probes with galvanic isolated weld from outer probe shield or
galvanic isolated input modules should be used. In other case high measuring errors can appear. It is
recommended to use shielded thermocouple cables for longer distance (depending on possible interference
sources).
Connection of temperature resistance transducers
• data logger enables only two-wire connection
• choose wires of maximum diameter and minimum length. In Appendix 6 additional errors
caused by leads resistance are specified.
• measurement error caused by wire resistance can be compensated by suitable configuration
of data logger
Connection of transmitters with digital output RS485 to RP input
• For connection of RS485 link for input module RS use e.g. shielded cable 2x2x0.5 mm2,
where one pair can be used for power of transducers and second pair for link RS485.
• It is recommended to terminate the link by resistor 120 Ω at the beginning and end of the
cable.
ATTENTION - it is recommended to connect to one RP module only devices
communicating with the same communication speed and the samem communication
protocol!
Connection of output ALARM OUT
This output is dual:
• switching-over galvanically isolated relay contact
• voltage (galvanically connected to data logger)
The output is set from the manufacturer, that in case of selected alarm voltage appears at the output
and simultaneously relay closes. It is enabled to set opposite behavior in data logger configuration
(service menu).
Activity of this output can be cancelled from data logger keyboard by the user or remotely from the
PC. It is enabled to identify by proper data logger configuration, who cancelled the alarm.
It is possible to connect to this output:
!
Page 13

ie-ms2-MS5-02 13
• External audio indication unit - use shielded cable up to 100m from data logger. Connect
terminal ALARM OUT and GND on data logger with the audio unit in corresponding
polarity. Connector CINCH of audio indication unit has positive pole on its central lead.
• Telephone dialer – in case of alarm telephone dialer dials specified telephone number and
announces voice message. In dialer configuration first select user mode, then store phone
number (or numbers) and record voice message. Then it is recommended to set delay of
transmitting after activation at least 10 seconds (Function 4 1). After completing of all
settings connect dialer to phone line and check the function.
• Simultaneously galvanically isolated contact relay can be used for control of other devices.
If indication controls external circuitry, it is recommended to set delay after activation at least
10 seconds to prevent possible false alerts.
3.3. Mounting and connection of output relays module MP018
Module contains 16 output relays with switching-over contact, which can be used for control of
external devices (see parameters of relay and not allowed manipulations precautions). It is possible to assign
any number of relays to any alarm to be closed if alarm appears. Relay are identified by numbers 1 to 16.
Each relay has three self-locking terminals (switching-over contact). Activity of relay can be checked
visually on assigned LED diodes.
Mounting:
Relay module is designed for mounting to switchboard with corresponding protection.
Fix module (140x211 mm) by means of DIN rail holder MP019 or screw by means of
side wall holders MP013 with four suitable screws (mounting holes are identical as for
data logger with wall holders MP013, see figure above).
Connection:
Connect module to data logger with special cable MP017 (wiring diagram is specified
in Appendix 10). Plug one cable end to corresponding connector on relay module,
second end to data logger, connector Ext. Display & Relays (upper or lower connector
half can be used, both parts are connected identically). Connect slave device on output
terminals of relay. Pay attention to necessary safety (depending on the character of
connected device).
Configuration:
Activate relay module function for proper operation in service menu of user SW. If data
logger is delivered together with relay module, this function is activated already from the
manufacturer.
Relay module layout:
Page 14

14 ie-ms2-MS5-02
3.4. Mounting and connection of external terminal with display
External terminal with display is designed for visualization of measured values, alarms and for data logger
controlling from point up to maximum 50 m from data logger. Its function is identical with internal built-in
display of MS5D (keyboard and display work in parallel).
Mounting:
External terminal with display is designed for mounting to suitable case. It can be
mounted to low-current switchboard lid where data logger itself is located or to a
separate case. Cut rectangular hole 133 x 94 mm to the lid. Insert terminal unit and four
screws from the front side and screw by means of metal holders from the back side.
Tighten slightly.
Connection:
Connect external terminal to data logger with special cable (wiring diagram is specified
in Appendix 10). Follow identical rules for cable routing as for input signals. Plug one
cable end to corresponding connector on display unit, second end to data logger,
connector Ext. Display & Relays (upper or lower connector half can be used, both parts
are connected identically).
Configuration:
Activate display module for proper operation in service menu of user SW. If data logger
is delivered together with display module, this function is activated already from the
manufacturer. Newer displays are equipped with internal audio indication. Audio
indication behaves in the same way as
External audio indication unit
connected to the
output ALARM OUT. This function can be enabled or disabled in service menu of the
SW.
3.5. Connection of data logger to the computer
Data logger contains for communication with computer one internal communication interface, which is
separated to several external interfaces:
Page 15

ie-ms2-MS5-02 15
Do not connect to these connectors simultaneously more than one device!
3.5.1 Connection of data logger to the computer by means of interface RS232
Application:
• only short distance between data logger and master device up to approximately 10 m
• 2 meters cable is included in delivery (wiring diagram is specified in Appendix 4).
3.5.2 Connection of data logger to computer by means of USB interface
Application:
• only short distance between data logger and master device up to approximately 5 m
• Use usual USB cable A-B
• Before Setting of communication in user SW it is necessary to connect converter physically to
the computer to allow operating system to create virtual communication port. Drivers are
installed to your computer during installation of user SW for data logger (valid for Windows
2000 and higher).
!
Page 16

16 ie-ms2-MS5-02
3.5.3 Connection of data logger to the computer by means of Ethernet interface
Parameters:
• Access enabled from different computers also via Internet
• Near data logger Ethernet network socket is available. Connection cable is not included in
delivery
• data logger configuration and data download is not enabled simultaneously for several
users
3.5.4 Connection of data loggers to the computer by means of interface RS485
Parameters:
Page 17

ie-ms2-MS5-02 17
• designed for long distance communication up to 1200m in indoor environment
• enables to communicate via one RS485 link with 32 data loggers
• necessary RS485 port in computer or suitable converter to other interface (RS232, USB, Ethernet)
• see detailed wiring diagrams of connection cables for recommend types of converters in Appendix
4
• recommended cable – shielded twisted two-wire, e.g. cable SYKFY n x 0.5, connect RS485 link
(lead A and B) and cable shielding. Cable shielding is not connected to any circuitry of data logger,
only continues on parallel terminal. Ground shielding near converter at the computer side,
preferably to the PC frame.
• termination resistor - see Appendix 4.
• if using several data loggers connected to one RS485 network, then all must be set to the same
communication speed and each unit must have its own address (no data logger in the network with
the same address is allowed). This configuration can be changed both from user SW and directly
from the data logger keyboard.
• do not connect to network of data loggers MS5 RS485 any other device, than data logger MS5,
MS2+, MS3+ or MS4+
Page 18

18 ie-ms2-MS5-02
Drawing of connection by means of converter RS232/RS485 (recommended type E06D):
Drawing of connection by means of converter USB/RS485 (recommended type: E214):
Page 19

ie-ms2-MS5-02 19
Drawing of connection by means of converter Ethernet/RS485 (recommended type:
UDS100,UDS1000):
3.5.5 Connection of data logger via modem
Parameters:
• Computer is far from data logger
• In data logger and PC location is covering by GSM signal of the operator
• Possible work with SMS messages
• Except described GSM connection dialed connection via land line is enabled
Parameters:
• at the data logger side and PC side suitable modem must be used (recommended type: Wavecom
M1306B)
• WARNING – data logger must be connected first by means of RS232 interface and configured, then
connected to the modem! Detailed description is specified in the following chapter with the
description of Configuration of communication.
• connect interface RS232 of data logger with modem by cable, delivered with modem !
• Used SIM card must enable data transfers (verify at your operator, not every operator
automatically supports).
Page 20

20 ie-ms2-MS5-02
Drawing of data logger connection to the PC by means of GSM modem:
3.6. Wiring of data logger with supported SMS messages
There are two possibilities of connection with supported SMS messages:
a) if data logger is connected to the PC by means of GSM modem – SMS message are sending and
receiving when data logger does not communicate with the PC, drawing connection see above
b) data logger is connected to the PC in different way than by means of GSM modem
• data logger must be equipped with independent SMS port
• this independent SMS port must be connected to GSM modem (recommended type
Wavecom M1306B), use original connection cable delivered with modem
• modem must contain SIM card enabling transfer of SMS messages. Must not be blocked by
PIN code
• area must be covered by GSM signal
Drawing of connection:
Page 21

ie-ms2-MS5-02 21
3.7. Connection of data logger to power
Data logger is powered from suitable power source (can be ordered). When powered from a different
source it is necessary to use dc voltage at range specified in technical parameters of data logger and take
into attention data logger consumption (see Appendix 1). In some applications it is necessary record runs
correctly even in case of mains failure. In this case it is necessary to use back-up source UPS as for the
computer. Above solution is necessary in cases power mains has extreme fluctuations and interference.
4.USER PROGRAM and CONFIGURATION OF DATA LOGGER
The following text describes especially possibilities of data logger setting and some procedures of work
with data. More detailed information on program is in Program Help.
4.1. Program features
Software for data logger enables to configure data logger and process measured data. It is delivered
on the CD or can be download freely from www.cometsystem.cz. After installation program can run in
two modes as:
• basic (unregistered) version – enables configuration of data loggers and table processing of
data. It does not enable graphic processing of data, administration of users and passwords,
automatic data download, storing of data outside of local computer, www display
• optional (registered) version – after entering of purchased registration key optional
functions of the SW are enabled. Entering of key is enabled in installation of the SW or
anytime later.
Hardware requirements:
• recommended configuration: processor Pentium 1 GHz and higher, 512 MB RAM, Windows 2000
and higher
4.2. Installation of program
Insert disk with programs for Comet instruments to the CD drive and run program setup.exe.
Installation wizard appears to perform all installation. Run installed program from menu Start-Program
files-CometLoggers-MSPlus (if you did not change its location during installation).
Drivers for data logger USB interface are installed automatically for operation systems Windows
2000 and higher. For other USB devices, e.g. ELO214, installation of proper drivers to these devices is
necessary.
4.3. Setting of communication with data logger
User SW enables to work simultaneously with several data loggers connected in different ways to
the computer. Configuration is performed in two steps:
• selection of communication device of the computer
• assignment of data logger to selected communication interface
If SW serves simultaneously to several data loggers, user is invited before each communication with data
logger to select data logger from the list. In Display mode all data loggers are displayed simultaneously
(except those connected via modem).
Page 22

22 ie-ms2-MS5-02
Configuration of data logger must correspond with configuration in the computer.
E.g. if data logger is set to RS232 interface and the SW is set to network serial
interface, data logger will not communicate.
4.3.1 Communication with data logger connected by means of interface RS232
• connect data logger to the computer and switch on its power
• In the software select menu item Configuration –Communication settings and continue in options
New communication device - Simple serial without addressing
•
In the next window select number of COM port and enter your name of the device (selectable,
from letters and digits)
•
Confirm window and choose selection Search. Program goes through all used communication
speeds and displays found data loggers in bottom window part (Dataloggers). Finally confirm
window Setting of communication (OK).
!
Page 23

ie-ms2-MS5-02 23
4.3.2 Communication with data logger connected by means of interface USB
• procedure is the same as in previous case. USB interface is interpreted in the computer as Virtual
COM port. Drivers would be installed automatically during installation of the SW. Drivers are
available also on installation CD or at www.cometsystem.cz .
If you disconnect the converter from the computer, it can happen, data logger will not be found in the
next communication. The cause is, operation system assigned to converter different number of
communication port. You can change it in the above window of communication device or in operation
system – Device Administrator, COM and LPT ports – Parameters – Specify.
4.3.3 Communication with data logger connected by means of Ethernet interface
• connect data logger to the computer and switch on the power
• Select software menu item Configuration –Communication settings and continue in selections New
communication device - Simple serial without addressing
• select in the following window type of interface Ethernet/RS232, enter your name of device
(selectable, from letters and digits)
• enter IP address of data logger (if you do not know you can search the network by button Search)
and number of port (10001)
• Confirm window and enter selection Search. Program goes through all used communication speeds
and displays found data loggers in the bottom window part (Dataloggers). Confirm finally
Communication settings (OK).
• In menu Configuration – Datalogger setting or directly on data logger by means of the keyboard
and display switch communication interface to Ethernet. If you have set to RS232, data logger will
work, but items referred to Ethernet interface will not be displayed (warning e-mails, traps etc.)
Then again verify functionality of the connection.
4.3.4 Communication with data loggers connected by means of interface RS485
• connect data logger to computer and switch on the power
• check on display of data loggers, if the same communication speed and different addresses are set
• In the software select menu item Configuration –Communication settings and continue in options
New communication device - Net serial
Page 24

24 ie-ms2-MS5-02
• in the following window enter your name of the device (selectable, from letters and digits) and
accordingly with the type of used converter enter next configuration:
• for converter RS232/RS485 (E06D):
• for converter USB/RS485 – configuration is analogical as in previous case, after first connection of
the converter to the PC corresponding driver to converter must be installed.
• for converter Ethernet/RS485
More details – see chapter 5.3.3.
Used converter must support interface RS485 and be switched to interface RS485!
• Confirm window and enter selection Search. Program goes through all addresses and displays
found data loggers in the bottom window part (Dataloggers). Finally confirm window
Communication settings (OK).
Page 25

ie-ms2-MS5-02 25
4.3.5 Communication with data logger connected by means of modem
• connect data logger to the computer by means of interface RS232, switch on the power and set
connection with the computer to RS232 in accordance with above instructions
• read configuration of data logger and set communication interface data logger RS232-modem.
Depending on the modem type select preset configuration string for its configuration, store to data
logger
• connect data logger to the modem (use original modem cable), on computer side connect to its
serial interface second modem
• connect modem to power and after about 10s connect data logger to power. This way it is ensured
data logger after first switching on will configure the modem.
• In the software select menu item Configuration –Communication settings and continue with
selection New communication device - Modem
• In the next window select number of COM port, where modem is connected and enter your name of
the device (selectable, from letters and digits). Some modem types work only on speed 9600 Bd.
• confirm window and in part Dataloggers enter selection New, select communication device and
enter telephone number of modem at data logger
Page 26

26 ie-ms2-MS5-02
• perform Test of connection
SIM cards of both modems must enable data transfers and must not be blocked by PIN code. More
information concerning solution of problems is specified in Appendix 5.
4.4. Basic items in menu program
Item menu File:
• reading stored file from disk to table
Data in files are stored on disk in a special binary format, which is not compatible with standard
formats. In case, value in table is not available or is not correct, error message is displayed – more
information see in Appendix 7
• reading data from data logger
After this selection window for selection of data logger is displayed (if there are more than one) ,
user can select name of file, where data will be stored and after if data logger will be erased after
data transfer
• configuration of the printer
• print – if graph was created, first query is displayed, if printing of table or graph is required
• configuration of program Options – only in optional version of program
• configuration of language localization
• logout of user – only in optional version of program
Item menu Show:
• table – displays measured values, can be set different numbers of channels. Exports to dbf and xls
format are available
• graph – only in optional version of program
• Event viewer – here actions are stored run by the SW with data logger and theirs result
Item menu Configuration:
• Datalogger settings – detailed description will follow
• Erase datalogger memory – after confirmation erasing is performed
Page 27

ie-ms2-MS5-02 27
• Reset counter inputs and erase memory - after this selection counter in counter modules (CTU,
CTK) are reset and consequently data logger data memory is erased totally.
• Reading configuration from file – reads configuration from already downloaded file with data
record. It is possible to restore configuration to data logger memory.
• Deactivate alarm signalisation – if enabled, it is possible to cancel activity of ALARM OUT output
remotely from the PC.
• Communication settings – configuration was described above
Item of menu Display - online visualization of measured values on the computer, reading interval can be set
in section File-Options, bookmark Display (in basic version it is fixed to 10s, in optional version can be
set from 10 s). In suitable configuration the mode can be shared on several computers. See Application
notes.
5. DESCRIPTION of CONFIGURATION and DATA LOGGER MODES
Use menu item Configuration – Datalogger configuration to configure data logger parameters. After
reading of configuration window is displayed with several bookmarks. If you work with Profiles, window
with Profile offer is displayed before.
5.1. Bookmark Common
• enter data logger name – maximum length is 16 characters, use letters (no diacritic marks),
digits, underline.
A folder under this name is created in computer, to store downloaded files with recorded
data in. Data logger name is displayed on the display after switch on and is available in data
logger Menu. The name is used for identification in user SW.
• check if Date and time in data logger is set correctly
When changing time in data logger, always all recorded data erasing will be
required by the SW.
• Security
– if need to secure data transfer by a password, tick Communication data encryption with
password and enter password (8 characters)
– if you need to define names and rights users of the system, first tick Communication data
encryption with password, enter password and then switch on Protection of access to HW
functions and define each system user.
– if you need to assign PIN codes to users for theirs identification in canceling of alarms or
optionally other rights, do it in window Users and password – Parameters – Details and
switch on Alarm confirmation with PIN and create new PIN code. Then switch on
Confirmation of alarm signalisation protected by user PIN or Condition setting from PC
protected by user PIN.
– if you need to secure some menu items of data logger against arbitrary overwriting, tick
proper selection and enter PIN. This PIN is different from users PIN.
If you use Communication data encryption with password and forget the
password, then it is not possible to recover the communication in simple way!
• if you will need to mark parts of record with your notes during operation from data logger
keyboard, use Processes. More detailed description is specified in chapter Application notes.
• if you will need to swap between different configurations during data logger operation, use
Profiles. More detailed description is specified in chapter Application notes.
!
!
Page 28

28 ie-ms2-MS5-02
• if you will use alarm output ALARM OUT, define, if and how data logger user can cancel its
activity. If you need to identify person, alarm was cancelled by, proceed in accordance with
chapter Application notes.
5.2. Bookmark Communication
Here you can set:
• Datalogger communication interface - you can change the type of used data logger
communication interface
Change of communication interface can cause after storing data logger configuration
you would have to physically connect via this interface and change data in
Ccommunication setting. If data logger has display with keyboard, you can change it
directly on data logger. If you set on data logger interface RS485, you must assign the
same interface also in SW, otherwise data logger will not communicate!
If you set Ethernet communication interface, you will be able to use data logger www
pages, send warning e-mails and traps. (Condition is to have installed Ethernet
interface in data logger).
• Baudrate – preset value is 115 200 Bd. If you use classic connection via RS232 (COM port), then
this is the highest available speed. For USB connection you can use higher speed. For Ethernet
interface cannot be changes (fixed to 115 200 Bd). For RS485 with larger networks a need to
decrease the speed can appear.
• RS485 network address – relevant in communication via RS485, each data logger in the network
must have different address!
• Datalogger responds to incoming SMS messages – if data logger is connected to GSM modem,
you can get actual measured values and alarm states by sending SMS from mobile telephone to
number of modem. Data logger reacts on three texts of received SMS messages: Info, Alarm, Ch1
to Ch16. For more details see chapter Application notes.
• Datalogger sends SMS message when selected alarms are activated – if data logger is connected
to GSM modem, you can assign one to four telephone numbers to each alarm states warning SMS
message containing description of created alarm is sent to.
Quick and reliable SMS message delivery depends on quality of GSM network.
Features and settings of data logger Ethernet interface:
If data logger is connected to the computer via Ethernet interface, then functions of this interface can be set
at the right part of the window. Some setting is necessary to perform in cooperation with your network
administrator.
It is possible to set:
IP address of data logger – it must be unique address in your network, assigned by your network
administrator (if you use DHCP, tick this selection, address then will be presented as 0.0.0.0.)
IP address of gateway – address of gateway or router, providing communication with other LAN
segments. Address of gateway must be at the same network segment as data logger.
Mask of subnetwork – defines range of possible IP addresses in local network, e.g. 255.255.255.0
Configuration password - password for access to setting of transmitter
Size of MTU – size of packets, default is 1400 bytes. It is possible to lower it with some networks.
Sending of warning e-mails - if ticked, warning e-mails will be sent to below specified addresses
Sending of traps - if ticked, warning SNMP traps will be sent to below specified addresses
SysLog - if ticked, warning messages will be sent to below address of SysLog server
Web enabled
– if ticked, www pages of data logger will be created
!
Page 29

ie-ms2-MS5-02 29
Soap – if ticked, actual measured values will be sent to below address of Soap server (in mode
„Display“)
Bookmark Emails:
IP address of SMTP server - If needed to send e-mails by the data logger, it is necessary to set
correctly the address.Administrator of your network gives you the value of the address.
Recepient of e-mails 1-3 - e-mail addresses of recepients. E-mails will be sent to those adresses in
case of selected alarms
Sender - enables to set addresses of the e-mail sender. Selection Original sender sets sender name to
MS5@IP address
Send testing e-mail - sends testing e-mails to selected addresses
Bookmark SNMP:
Recepient of trap 1 – 3: IP addresses of recepients of SNMP traps.
Password for reading - setting of password for access to SNMP MIB tables.
Password for write - setting of password for write do SNMP MIB table of data logger.
Send testing trap - sends testing trap of 1/0 type to specified IP addresses.
Bookmark Web
Refresh - refresh time of automatic pages reading (update of displayed measured
values). Range 10-65535 s.
Bookmark Syslog
IP address of SysLog server – IP address of server, messages are sent to.
Bookmark SOAP
IP address of SOAP server – IP address of server, on-line measured values, messages with data
logger and alarms state are sent to (similar to the „Display“ mode)
Target web page – name of pages, where server has running script for incoming message processing
Source port – port number, data logger sends SOAP message from. Default set to 8080
Target port – port of server, where SOAP message is expected
Sending interval – how often data logger sends data to server
Note: MIB tables are downloadable free at the manufacturer´s www pages.
5.3. Bookmark Profile
• Cyclic record – if it is not ticked, then after fulfilling of memory data record ends. Measurement
and evaluation of alarms continues. If it is ticked, then after fulfilling of memory
oldest data are overwriting with newest.
• Alternative record times – record must not run in fixed time intervals, but it is enabled also to
define up to four times in day, when measured values will be stored.
• Language – language localization of fixed messages on data logger LCD. It does not concerns
language localization of program
• Alarm signalisation – alarms can also be signalized acoustically or by ALARM OUT output.
Signalization of alarm can be deactivated (cancelled) by the user, if it is enabled. It can be done in
several ways:
- by pressing of the ENTER key on data logger
- by means of data logger menu with possibility to require PIN of user
- remotely from the computer
In case alarm which activated the indication is cancelled and appears again, indication is activated
again. Canceling (deactivation) of indication simultaneously refers to internal audible indication
and to ALAM OUT output.
Page 30

30 ie-ms2-MS5-02
- if there is a need to indicate acoustically some alarms directly in data logger, tick Internal acoustic
alarm signalisation and specify for each alarm, if alarm is indicated this way.
- If there is a need to activate ALARM OUT output, tick ALARM OUT and specify for each alarm,
if alarm is indicated this way.
- changes of ALARM OUT output state can be recorded and it is enabled consequently to identify the
user canceling the alarm by means of Administration of users and passwords.
- if there is a need to record changes of all alarm states, tick selection Recording of ALARM OUT
state changes and Recording of all alarms changes
- if there is a need to indicate acoustically the state of memory occupation, tick this selection
• SMS phone number list – if you use sending of SMS messages after alarm creation, then enter here
telephone numbers for sending messages. Enter numbers in international format with country code,
e.g. 0049... or +49....
• Critical states actions – it is enabled to assign actions similar to alarms to some error states,
evaluated by data logger (error of measurement on some of input channels, error in configuration of
data logger, reaching of specified occupation of data memory and self test error). Do not use zero
duration time of critical state for evaluation of the action. Use at least 10s delay. If this state lasts
this time without interruption, selected actions will be performed.
5.4. Bookmark Ch.. Identity & Calculations
This and the following bookmark refer to data logger input channels to be switched over in left lower
window corner.
Set your own identification of measured points and optional conversion of measured values at this
bookmark:
• in upper part of bookmark name and range of installed input module is specified for information.
• Channel name: - enter name of measured points in length of maximum 16 characters.
• Physical unit (except binary inputs) – you can select from the list or write your own in length of
maximum 6 characters
• Description of state open/closed (in binary inputs) – user selectable strings in length 16 of
characters to describe state „closed“/ „open“ (input S,SG) resp. „without voltage“/ „with voltage“
(input S1)
• Number of decimal places (except binary inputs) – you can set maximum 5 digits behind decimal
point.
• Recalculation (except binary inputs)- measured value from input module can be recomputed by
means of two-point linear transformation to other value. Default state is set to conversion 1:1 and
full scale points of module input range module or value 0-0, 1-1 are used. Value can be arbitrary
with the exception of state, both input values are the same.
Example: data logger with current input 4 - 20 mA is connected to temperature transducer with
current output, which generates at temperature -30°C output current 4 mA and at
temperature 80°C current 20 mA. Enter following values to the table:
Measured value 4.000 [ mA] will be shown as -30.0 [°C].
Measured value 20.000 [ mA] will be shown as 80.0 [°C].
• Processes (except binary inputs) – allow which processes are enabled to use. See Application notes.
• Show increments (only CTU, CTK inputs) – LCD displays always absolute, resp. converted
absolute counter value. It is enabled to display in record table only increments between consequent
measurements in accordance with adjusted logging interval.
Page 31

ie-ms2-MS5-02 31
• Bouncing filter (only CTU, CTK inputs) – designed to avoid possible transient effects during
change of logical level of the input signal. Filter parameters are specified in description of input
modules.
• Address of connected device, Maximum waiting etc. – setting of RP/RS input module, for more
information see Appendix 3.
5.5. Bookmark Ch.. Measuring & recording
• tick Input channel is measuring and fires alarms to enable this channel for measuring,
• if there is a need record measured value, select one from three available record mode.
These modes can be combined. Binary inputs S, S1, SG enable only the third mode –
record of state changes on input.
A)
Continuous record
- if there is a need to record measured value to the instrument memory
without respecting any other conditions, use this selection and select suitable logging interval.
Logging function can be limited in time both globally (i.e. Date and time from ...to) and daily (daily
from...to).
If no from offered logging intervals suit you, use record in alternative daily times, defined before
on bookmark Profile.
Example of table with continuous record:
Date and time Channel 1: T[°C]
1.1.2004 08:00:00 23,8
1.1.2004 08:30:00 24,5
1.1.2004 09:00:00 26,8
1.1.2004 09:30:00 33,2
1.1.2004 10:00:00 37,5
1.1.2004 10:30:00 42,3
1.1.2004 11:00:00 45,1
1.1.2004 11:30:00 45,2
1.1.2004 12:00:00 44,1
1.1.2004 12:30:00 40,1
1.1.2004 13:00:00 35,2
1.1.2004 13:30:00 30,1
B)
Conditional record– if there is
need to record measured value to the instrument memory only in
case, if defined conditions are valid, then use this selection. Select suitable logging interval and
assign conditions for the record. Logging function can be limited in time both globally (i.e. Date
and time from ...to) and daily (daily from...to).
If no from offered logging intervals suit you, use record in alternative daily times, defined before
on bookmark Profile.
Example of measured values list (condition for record – temperature is higher than 40°C):
Date and time Channel 10: T[°C]
1.1.2004 10:55:00 40,1
1.1.2004 11:00:00 41,3
1.1.2004 11:05:00 40,2
1.1.2004 11:30:00 40,3
1.1.2004 11:35:00 42,5
1.1.2004 11:40:00 40,1
Page 32

32 ie-ms2-MS5-02
By means of continuous and conditional record situation can be solved, when device operation is
monitored. In case of its trouble-free operation record with long logging interval is sufficient, but in
case of failure there is a need to have detailed record with failure.
Example of list of measured values (continuous record with interval 30 minutes and conditional
record with interval 5 minutes at temperature higher than 40°C):
Date and time Channel 1: T[°C]
1.1.2004 08:00:00 23,8 continuous
1.1.2004 08:30:00 24,5 continuous
1.1.2004 09:00:00 26,8 continuous
1.1.2004 09:30:00 33,2 continuous
1.1.2004 10:00:00 37,5 continuous
1.1.2004 10:30:00 39,3 continuous
1.1.2004 10:55:00 40,1 conditional
1.1.2004 11:00:00 41,3 continuous +conditional
1.1.2004 11:05:00 40,2 conditional
1.1.2004 11:30:00 40,3 continuous +conditional
1.1.2004 11:35:00 42,5 conditional
1.1.2004 11:40:00 40,1 conditional
1.1.2004 12:00:00 34,1 continuous
1.1.2004 12:30:00 30,1 continuous
1.1.2004 13:00:00 25,2 continuous
1.1.2004 13:30:00 20,1 continuous
Conditional record can be linked to a simple Condition or on logical Combination of conditions
(maximum four conditions from different channels linked by operators AND and OR).
Example of conditional record in case of logical combination of conditions:
C) Sampled record - if there is a need to know time and measured value when certain event appeared
defined by Condition or Combination of conditions, use this selection. Work with conditions is
similar as in previous case. Always time and value is stored when defined state of conditions started
or was terminated.
Example table with sampled record:
Date and time Channel 1: T[°C]
1.1.2004 08:01:11 23,8
condition
3 at channel 2
condition
2 at channel
5
conditio
n 4
at channel
1
condition
1 at channel
2
record will run, if equation is valid:
(condition 3 at channel 2 AND condition 2 at channel 5)
OR
(condition 4 at channel 1 AND condition 1 at channel 2)
Conditioned
record
at channel 10
runs
Page 33

ie-ms2-MS5-02 33
1.1.2004 08:40:23 24,5
1.1.2004 09:05:07 26,8
1.1.2004 09:12:44 33,2
1.1.2004 10:08:09 37,5
1.1.2004 10:32:48 42,3
Record of binary channels behaves analogically as sampled record, when each change on binary
inputs is stored. Value is replaced by text description, which corresponds with user configuration.
5.6. Bookmark Ch..Conditions
Condition defines certain state of measured value (exceeding of adjusted limit
upwards/downwards, defined state of binary input) on specified input channel. It can have two
states: valid-invalid. Up to four independent conditions at one channel can be defined. Creation of
alarm states depends on state of conditions and sampled and conditional record can be controlled
by them:
Data logger enables to set condition depending on measured value, on time and condition, which validity is
remotely controlled from the computer. Each from four conditions it is possible to switch on for evaluation.
Binary inputs has lower number of possibilities to set conditions, setting is analogical.
A) If there is a need to activate some actions dependent on Measured value, select Start of validity: Input
value
Example:
Select, if condition will be valid, if measured (Input) value is higher or lower than adjusted limit (170) and
how long must this state last without interruption. Than condition becomes valid (30s, maximum 65535s).
Define further circumstances for termination of condition validity. If no validity termination is defined,
condition remains permanently valid (till change of data logger configuration). You can select validity
termination after value return back with hysteresis (2) OR (optionally AND) if defined time expired
(maximum 65535 s).
You can also define, how the state of the condition works if measurement error appears:
measured
value,
channel state
or time value
condition
1 valid/invalid
condition
2 valid/invalid
condition
3 valid/invalid
condition
4 valid/invalid
conditioned data
record
sampled data
record
ALARM 1
ALARM 2
Page 34

34 ie-ms2-MS5-02
If other devices are controlled based on validity of the condition (relay outputs, sending
of SMS message, audible indication etc.), always use nonzero hysteresis and nonzero
time delay for creation of condition validity to avoid false alarms at transient effects of
input value.
Description of function:
Area 1... measured value exceeded limit, but was not over this limit for required duration, condition invalid.
Area 2 ... measured value exceeded limit and was over this limit for required duration. After finishing
adjusted condition became valid.
Area 3 ... measured value is still over limit, condition is valid
Area 4 ... measured value already dropped below limit, but nonzero hysteresis is adjusted, for finishing of
condition validity measured value must drop of adjusted hysteresis value
Area 5 ... measured value dropped below limit decreased of hysteresis, condition is invalid
Switching of data logger power in different condition states:
1. if power of data logger is switched OFF in area 2, after switching ON measured value si still over
limit and required delay is not over, data logger continues in testing on, as no power failure would
appear.
2. if power of data logger is switched OFF in area 2, after switching ON measured value is still over
limit and required delay is over already, condition becomes valid immediately
3. if power of data logger is switched OFF in area 2 and after switching ON measured value is not
over limit, cycle of time testing is interrupted (similarly as in area 1).
4. if power of data logger is switched OFF in area 3 or 4, after switching ON measured value is over
limit decreased of hysteresis, condition stays valid. But if measured value does not match this,
condition is invalid immediately.
Other examples of configuration of conditions depended on measured value:
• Setting of condition validity at measured value drop:
30s
30s
2.0
170
t
[s]
condition invalid
measured
value
condition valid
!
Page 35

ie-ms2-MS5-02 35
• Condition with fixed specified time validity
30s
30s
1.0
170
t
[s]
condition invalid
measured
value
condition valid
Page 36

36 ie-ms2-MS5-02
To renew validity of condition measured value first must drop below specified limit and then to
exceed the limit.
• Combination of condition validity termination with hysteresis OR after specified delay
30s
30s
170
t
[s]
condition invalid
measured
value
3600s
condition valid
Page 37

ie-ms2-MS5-02 37
To renew validity of condition measured value first must drop below specified limit and then to
exceed the limit.
Combination of condition validity termination with hysteresis AND after specified
delay
30s
30s
170
t
[s]
condition invalid
measured
value
3600s
1.0
condition valid
30s
30s
170
t
[s]
condition invalid
measured
value
3600s
1.0
condition valid
Page 38

38 ie-ms2-MS5-02
B)
if there is a need to control validity of condition only by date, time and day in the week, use
selection
Valid in time interval
Example:
C) if there is a need to control validity of condition directly from computer, use selection
Set
remotely from PC. In
this case authorized access by user PIN code entering is enabled (if using
Administration of users and passwords).
Example:
5.7. Bookmark Ch..Alarms and indication
Two alarm states for each channel are enabled to define. Several actions are enabled to assign to each
alarm. Alarms are defined based on validity of Conditions or based on logical Combinations of conditions
(maximum four conditions from different channels).
Wiring diagram of possibility of alarm states creation and associated actions:
30s
30s
170
t
[s]
condition valid
condition invalid
measured
value
3600s
1.0
Page 39

ie-ms2-MS5-02 39
Example of alarm creation at used logical combination of conditions:
Alarm is active, if input conditions are valid. By means of combination of conditions you can solve also
complex situations including remote control. Some actions last during all alarm time (audible indication,
ALARM OUT output activity, visual indication, relay closing), other actions last only at the moment of
alarm creation (SMS message, e-mails).
alarm is activated, if equation is valid:
(condition 3 on channel 2 AND condition 2 on
channel 5)
OR
(condition 4 on channel 1 AND condition 1 on
channel 2)
ALARM2
on channel 10
activated
measured
value
condition num. 1
(2,3,4)
is valid
ALARM 1
activated
yellow LED shines (always)
internal audio indication
activate ALARM OUT sig.
SMS & e-mail sending
selected relay activation
condition num. 2
(1,3,4)
is valid
ALARM 2
activated
red LED shines (always)
internal audio indication
activate ALARM OUT sig.
SMS & e-mail sending
selected relay activation
Page 40

40 ie-ms2-MS5-02
6. CONTROL and INDICATION COMPONENTS of DATA LOGGER
6.1.
Indication of power and state of output ALARM OUT
Indication is performed visually by LED diodes located at case side next to power terminals (see
Drawing). Green LED indicates the presence of power voltage, red LED activity of output ALARM OUT.
6.2.
Display and keyboard (only for models equipped with this accessory)
Left from display are three indication LED diodes:
• Power - indication of presence of power voltage
• Alarm - indication of activity of output ALARM OUT. Its function is identical to LED
from case side
• Error – lights, if configuration violence of data logger appears or error in self test
appears
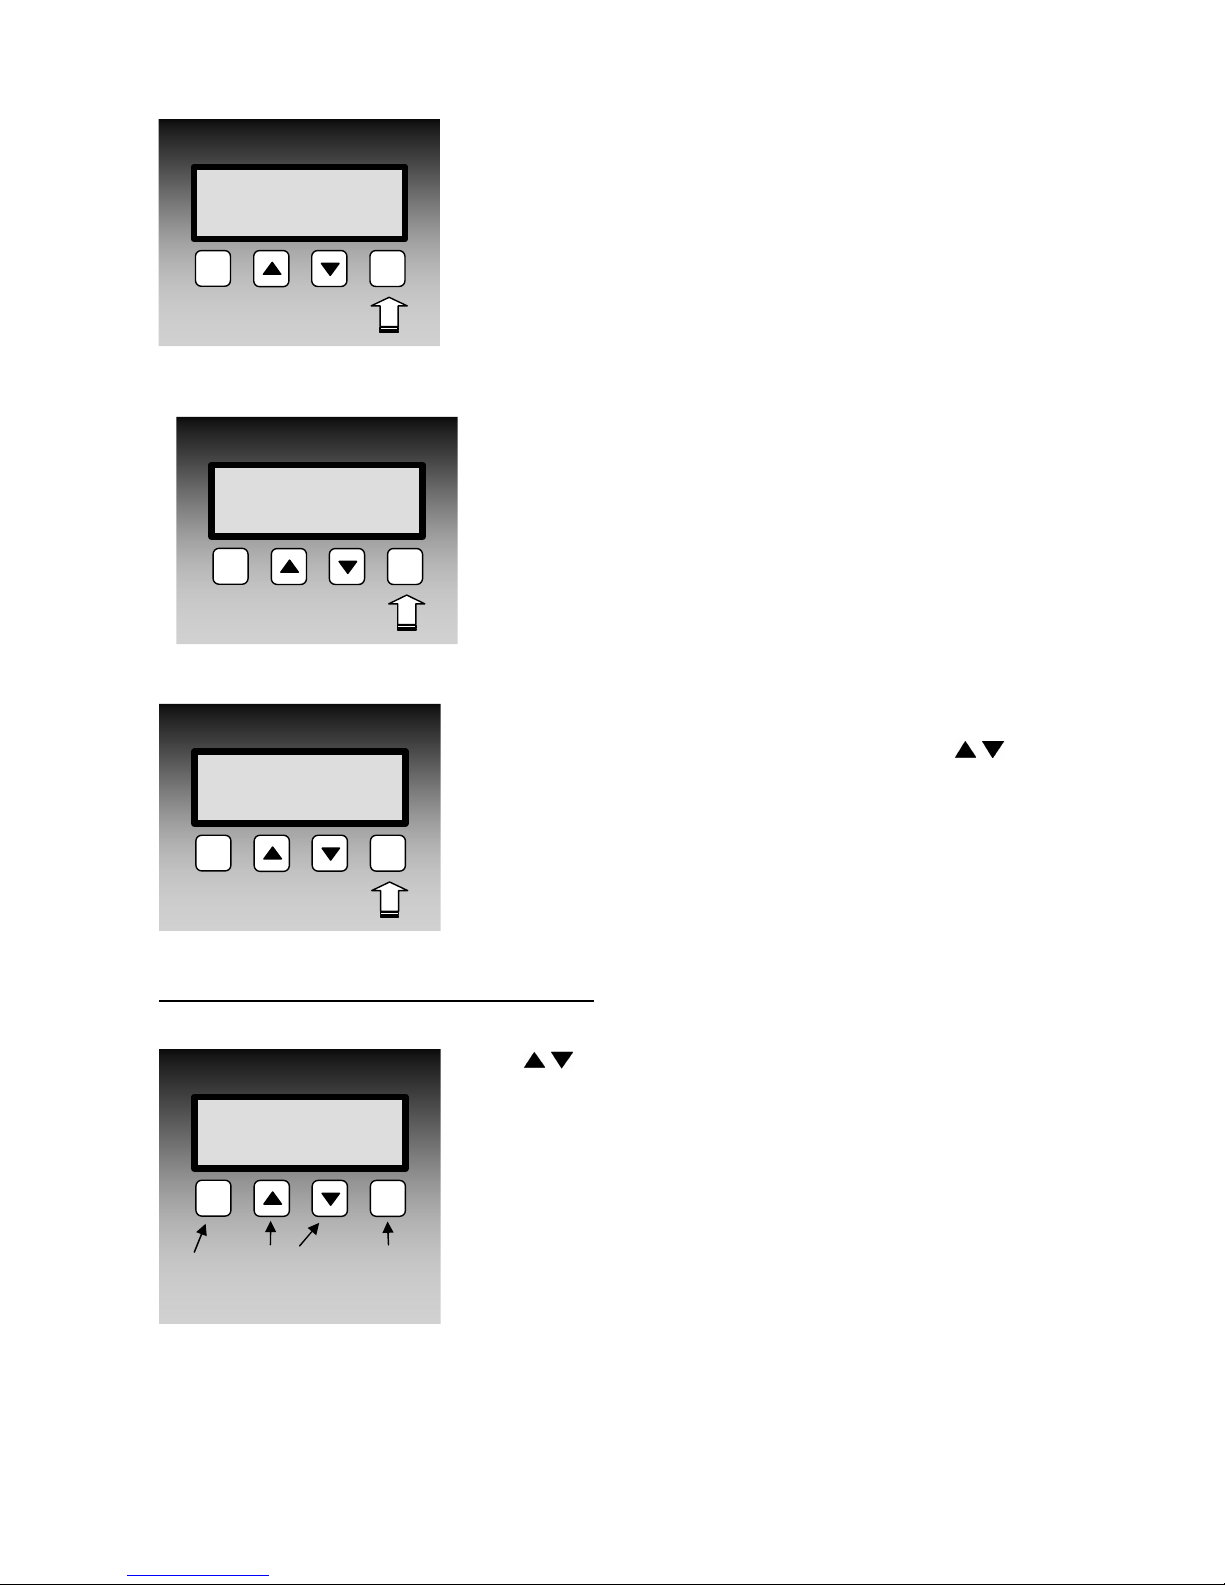
Display is dual line, display can be controlled by means of four button keyboard located next below it
(buttons MENU, , ,ENTER). After connection of data logger to power self test of several internal
voltages is performed first. If everything correct, data logger starts to display values.
Display after connection power to data logger.
Datalogger model and name is displayed for several seconds.
Then data logger evaluates self test of internal voltages. If
everything correct, data logger starts to display values. If self test
is not correct, data logger reports Self Test Error with specified
voltage, which is not correct (power voltage, internal battery and
source of negative voltage). The failure is necessary to fix. If
specified error message is confirmed by pressing ENTER key,
data logger goes on to basic display.
Basic display on the LCD
In basic display upper line displays user specified name of
measuring point, adjusted from user program. Lower line
displays measured value with physical unit respective state of
input channel. All active channels can be checked by keys , .
Error message can occur instead of measured value. Binary
inputs display at the whole LCD bottom line user defined
description of state closed/open. In case value is not available or
is not correct error message is displayed – see Appendix 7.
ENTER
MENU
Unit name: MS5
Laboratory
ENTER
MENU
Temperature 1
-12.6 [°C]
Page 41
ie-ms2-MS5-02 41
Deactivation of audible alarm and output ALARM OUT by
pressing ENTER key
If is these function is enabled, then in basic display of measured
values short pressing of this key deactivates audible indication
and ALARM OUT output. In case another alarm appears with
requirement for audible indication, alarm is activated. Similarly,
if data logger deactivates alarm, which activated audible
indication and consequently this alarm appears again, it is
activated.
Display of adjusted process
If using Processes, shortly press ENTER key in basic display
mode on required channel to display actual process in progress.
Selection of new process
If using Processes, press and hold for about 5s ENTER key in
basic display to enter selection of preset processes. Use ,
keys to go through process names enabled for input channel. If
no process is needed use selection No process. Press ENTER key
to activate selected process.
Press MENU key to leave the display without storing new
process.
Items and function available in Menu data logger
Press MENU key in basic display to enter the data logger Menu.
Use , keys to go through all menu items. Press MENU key
to leave menu to the basic display.
ENTER
MENU
Temperature 1
-12.6 [°C]
ENTER
MENU
Process:
Smoked Ham
ENTER
MENU
Select process:
Smoked Ham
cca 5 s
ENTER
MENU
Menu item
>>>
one step
back
another menu
item
enter to
submenu
Page 42

42 ie-ms2-MS5-02
Menu item Information
Item Information contains another Sub-Menu. Press ENTER key
to enter sub-menu and use , keys to move between items.
Leave Sub-Menu by pressing MENU key.
In submenu Information it is possible to display one fixed
message after another Data Logger Model, Data Logger Name,
Serial number, Record mode (cyclic/non-cyclic), Memory
occupation, Date and time in data logger, Language .
Menu item Communication
Submenu Communication – enables to display and change
Setting of communication interface, Communication speed and
Data logger address in the RS485 network. Displayed items in
menu depends on actually adjusted communication interface and
optionally on implemented HW.
Change of configuration can be selectable protected by PIN
code, entered by the user. Way of entering PIN code is specified
in Application notes.
Change of data logger communication interface
Press ENTER key to enter selection of communication
interface. Use , keys to select required communication
interface and press ENTER key to confirm the selection.
Adjusted communication interface must correspond with
physical connection and with SW configuration. If you
choose selection Ethernet, corresponding items in Data
Logger Configuration become active.
Change of data logger communication speed
Press ENTER key to enter selection of communication speed.
Use , keys to select required communication speed and
press ENTER key to confirm the selection. This selection is
not available for some communication interface.
ATTENTION – standard computer COM port does not
support communication speed 230 400 Bd. This highest speed
you can use at USB connection.
ENTER
MENU
Information
>>>
ENTER
MENU
Communication
>>>
ENTER
MENU
Com. port:
RS232, USB
ENTER
MENU
Com. speed
115200 Bd
Page 43

ie-ms2-MS5-02 43
Change of data logger RS485 address
Press ENTER key to enter address selection. By means of
, keys select new address and press ENTER key to
confirm selection. This selection is available only for active
RS485 interface.
Menu item Acoustic signalisation & ALARM OUT
Submenu for switch OFF the audio indication. This item appears
only, if user allowed in Common parameters Alarm
Confirmation via menu. After entering actual states of audio
indication and ALARM OUT output are displayed. If in active
state, it is possible to deactivate by pressing ENTER key. In case
password requirement function is activated in SW, it is necessary
to enter password first. Way of entering PIN code is specified in
Application notes.
Menu item Configuration
Submenu enables to set data logger to another predefined
configuration – Profile. This item of menu is displayed only, if
user enabled in Common parameters administration of
Profiles and allowed to change configuration from keyboard
of data logger. Change of configuration can be secured by PIN
code. Way of entering PIN code is specified in Application
notes..
Change of configuration profile
Press ENTER key to enter selection of configuration profiles.
By means of , keys select new profile and confirm by
pressing ENTER key. This action also causes reset of all
conditions, which were created or were preparing to be created.
ENTER
MENU
Logger address
in net: 02
ENTER
MENU
Acoustic sign.
&ALARM OUT >>>
ENTER
MENU
Configuration
>>>
ENTER
MENU
Select config.:
Profile 1
Page 44

44 ie-ms2-MS5-02
Menu item Service
Submenu enabling to display value of some Service parameters
of data logger.
Service – display of self test of internal voltages
Self test of data logger internal voltage. First value indicates
approximate power voltage (9 to 30 V, see technical
parameters). Second value is voltage of negative source (-2V to
-6V) and third value is voltage of internal back-up battery (2,6V
to 3,3 V).
Service – display of firmware version and uP speed
Service – display of cold junction temperature of
thermocouple
ENTER
MENU
Service
>>>
ENTER
MENU
Selftest:
24V -3.7V 3.0V
ENTER
MENU
Firmware ver.:
5.2.1 6MHz
ENTER
MENU
Cold junction:
25.5 [°C]
Page 45

ie-ms2-MS5-02 45
Service – display of state of processing SMS
Actual state of communication with GSM modem is displayed
on the LCD. Press ENTER key to enter directly the display of
receiving and sending SMS buffer.
Service – display of A/D converter values for measured
channels
Value read from A/D converter of analog inputs at range 0 to
65535. Limit value 0 indicates converter lower limitation
(corresponds to Error1) and value 65535 (corresponds to Error
2) indicates converter upper limitation. With counter inputs
binary state of counter is displayed. With binary inputs state of
input (ON/OFF) is displayed and with RS input symbols „---“
are displayed.
7. APPLICATION NOTES
7.1. Processes and how to work with
Process is the name of action recorded by data logger in time. User of data logger can enter from its
keyboard to each input channel different previously preset names of processes and such way to
distinguish in record, which action was performed at that time. Example can be smoke-box for
meat. During one working shift different products are processed consequently (names are known
before and stored in data logger).
Way of work with processes:
• In configuration of data logger write to Process label list all processes (e.g. kind of products)
meant for the data logger. Maximum processes is 16 and each process name can contain
maximum 16 characters
• select for each channel, which processes will be used (all-some-no). This selection simplifies
choosing process (kind of product), when only relevant processes will be offered for the
channel.
• at the beginning of the process (e.g. after inserting one kind of product to the meat smoke-
box) user finds the desired input channel and presses and holds ENTER key on the data
logger keyboard. The name of the first process is displayed. By means of arrow keys preset
name corresponding with the product can be selected. By pressing ENTER key again this
process in data logger will be activated.
• when the operation is finished and user requires another process (e.g. another kind of product
is inserted to the meat smoke-box), it is activated in similar way. Optionally no process is
assigned.
• after recorded data download to the PC each time section of the record will be described with
name of process, which was active in specified time
• by short pressing of ENTER key on data logger it is possible to display actually active
process
ENTER
MENU
SMSStatus:00:56
SMS: Waiting...
ENTER
MENU
Temperature 1
ADC: 37782
Page 46

46 ie-ms2-MS5-02
Using of Processes is not possible with binary channels (S, SG, S1).
7.2. Configuration Profiles and how to work with
Configuration Profiles are designed for applications, where it is required data logger is portable and
quick change of configuration is enabled without necessity to erase actual record and without
necessity to use computer. User stores required Configuration Profiles to data logger in advance.
Maximum number of Configuration profiles is 20, minimum number is 6. Each Configuration
profile has its name defined by the user (12 characters).
Profile management– enables user to work with several predefined configurations of data logger
and change them.
Enable profile change from datalogger keyboard – data loggers with display enables to swap each
Configuration Profiles from data logger keyboard without necessity of connection to the computer.
If administration of profiles is active, then after reading of data logger configuration always
window with list of existing profiles appears first enabling to create new, edit or remove actual
profile. Before storing of edited profile or removing profile erasing of all measured data is
necessary. So optional data download to the PC is useful before erasing.
7.3. SMS message and how to work with
If data logger is connected to modem with support SMS function, it is possible enable the following
action:
response on incoming SMS queries, when following possibilities exist:
a) Info – if SMS is sent to modem with this text (both capital/lower-case letters are allowed), SMS
response is received containing basic information on data logger (type, name, memory occupation,
channel names, measured values and alarm states). This SMS can consist of up to four partial SMS
messages depending on configuration of data logger. One long SMS can be displayed on mobile
telephones with support of long SMS.
b) Alarm - if SMS is sent to modem with this text (both capital/lower-case letters are allowed), SMS
response is received containing basic information on data logger (type, name) and channel numbers
in active alarm states.
c) Ch1 - if SMS is sent to modem with this text (both capital/lower-case letters are allowed), SMS
response is received containing basic information on data logger (type, name), channel 1 name,
actual measured value and alarm state at channel 1. For other channels enter corresponding number
(e.g. Ch11 for channel 11).
sending of SMS with alarm report - in case alarm at one of input channels appears, data logger can
activate modem and send SMS message. Up to four telephone numbers are enabled to enter to
common parameters for each profile. It is possible to select for each alarm at each channel to which
telephone number SMS message will be sent. If alarm state of measured value appears, data logger
sends SMS in above format Alarm. If critical state in data logger appears, one SMS is sent with
specification of data logger type, name and names of critical states (error of configuration,
measurement, selftest or memory occupation limit).
ATTENTION – always set corresponding time delay (minimum of 1 minute is recommended) and
non-zero hysteresis for sending SMS. It will prevent possible frequent sending of SMS in states
close to alarms.
More detailed information on support of SMS messages are in Appendix 8.
7.4. Possibilities of setting Logging interval
Logging interval is for each record mode (continuous, conditional) and for each channel individually
selectable. These intervals are available: 1s, 2s, 5s, 10s, 15s, 30s, 1min, 2min, 5min, 10min, 15min, 30min,
1h, 2h, 3h, 4h, 6h, 8h, 12h, 24h. Storing is performed always in whole number multiples of above intervals.
E.g. if data logger is switched on at 5:05 and the interval is set to 1 hour, first data are stored at 6:00, next
Page 47

ie-ms2-MS5-02 47
at 7:00 etc. Additionally to above logging intervals record is enabled also in alternative daily time.
Maximum of four alternative logging times can be defined for entire data logger. For each channel is
possible to select from them.
Note: Data logger measure one channel after another. Measurement of one channel takes approximately 80
ms. It means if all 16 channels are active, the total measurement time is about 1.3s. This is important with
shortest logging intervals.
7.5. Identification of person, who deactivated alarm
- switch on administration of users and passwords (including encryption of communication)
- define PIN code for each user in part Users and password and switch on Alarm
confirmation with PIN
- switch on Confirmation of alarm signalisation protected by user PIN
- check if Confirmation of alarm signalisation by menu is switched ON and by enter key is
switched OFF.
7.6. Way of entering PIN code from data logger keyboard
Data logger can work with two kinds of PIN codes:
• PIN codes related to particular user names and used to cancel alarm and for remote setting of
conditions - maximum 16 PINs
• PIN code designed only for protection of data logger configuration against undesirable changes
from data logger keyboard. This code is only one for all secured selections and has no relationship
with Administration of users and passwords.
Way of entering PIN code:
- on data logger LCD is displayed requirement Enter PIN and four asterisks
- by means of arrow keys enter first (highest digit) and press Enter
- after entering the last digit and pressing button Enter validity of PIN code is checked. If
valid editing of selected item is allowed
- if you make an error in entering code, press several time button Enter to get back to the
beginning of entering PIN code and repeat the whole action
7.7. Sharing of Display mode on several computers together with automatic storing of data on
network
• Optional SW version is required
• On the computer connected to data logger set in operation system After Start user program
of MS monitoring system.
• Run program and in menu File – Options on bookmark Folder and data files enter path to
server where data will be stored.
• At bookmark Display tick Run at program start and tick below Remote www access. Note
specified computer name or IP address.
• At bookmark Automatic download select day and hour of data download, optionally other
selections and confirm window.
• Check in menu Configuration- Communication settings, if for the data logger automatic
data download is allowed – "A" must be ticked next to data logger name (if not, tick via
Modify button).
• Restart the computer. A while after user MS program would run with Display mode.
• Go over another computer and in internet browser to the Address filed enter computer
name you have noted before. You would see www pages with actual measured values.
Page 48

48 ie-ms2-MS5-02
7.8. How to ensure alarm report, in case of power failure
Data logger can be set in the way relay of ALARM OUT output will be closed in the state
without alarm and will only open in the alarm state. Such inverse configuration can be set in
service menu of the SW. Then it is sufficient to back up with batteries only suitable alarm dialer
(e.g. telephone dialer) and state without power for data logger will correspond with alarm state,
which causes alarm report to the user.
7.9. Back-up of data logger configuration and its restoring
If there is a need to back up data logger configuration to the computer and have the
possibility to upload the configuration to the same or another data logger, read record from data
logger. Stored file on disk contains among others also complete configuration of data logger. If
you use selection in menu Configuration – Reading configuration from file, you can display this
configuration and store to the connected data logger. If connected data logger has different serial
number from numbers stored in file, this number and some other items related to particular board
will not be overwritten. The rest of configuration is stored to the data logger.
7.10. Other possibilities in data logger configuration
Some settings are not accessible to usual users and are designed for qualified user. The work is described in
special Service manual. It concerns especially the possibility to change and add input modules, to configure
some HW peripherals, options of configuration for SMS transfer including diagnostic tools.
7.11. What to do if data logger does not work
• Does the LED diode light on power source? – if not then there is no mains voltage or the source is
faulty or the fuse is broken (then the cause can be in data logger). Check connection of
power to data logger. If the fuse breaks after source plug in mains disconnect all
terminals and connectors except power from data logger and try again. If it works
connect cables one after another and try to find the failure.
• Does the LED diode light on power source? - if not replace fuse in data logger. Use the same type!
• If the LCD display is off and data logger does not communicate probably qualified repair will be
necessary.
7.12. Self test error
If self test is not OK, data logger after switching ON reports self test error with specification of
incorrect voltage (power voltage, internal battery and negative source voltage). If error in Ucc, try to
measure the power voltage on data logger. It is necessary to fix the failure. If sending of SMS
message in selfest error is set, use suitable delay, e.g. 30 s.
7.13. Problems with correct measurement
• Data logger measures incorrectly at some inputs:
Disconnect all inputs and let connected always only one and watch values on data logger. If
correct then problem can be in cabling or in input device (incorrect connection, undesirable
loops).
Typical values on display when current loop is open (4 to 20) mA with inputs A0 and A1 for
several selected input ranges:
Assignment of input value for current 4
to 20 mA in user calibration
measured value by data logger
if current loop is open
-30 to 60 -52,5 or Error1
-30 to 80 -57,5 or Error1
-50 to 30 -70,0 or Error1
0 to 150 -37,5 or Error1
0 to 100 -25,0 or Error1
Page 49

ie-ms2-MS5-02 49
Message Error2 with current loops indicates exceeding of current 20 mA
Data logger works, as some input channel does not exist, although it is installed:
Check if input channel is switched ON or optionally if input module is installed.
Data logger time from time and totally irregularly indicates totally incorrect value:
Failure shows nonsensical value in record, on the display and short alarm activation. Most
probably it is caused by electromagnetic interference. Effect is typical if correct rules for
installation are not followed. It is necessary to check cabling, to change cable routing, to try
to reduce interference etc. Most often this effect appears with current loops powered from A0
module, which are connected to transducers of resistance sensor to current, if resistance
sensor shielding is not connected properly or shielding is perforated to ground of other
devices. Adjust suitable alarm delay tON (see setting conditions) in risky installations. Also
faulty probe or transducer can cause such troubles.
Audio alarm indication of data logger does not work:
Check if Audio alarm indication is switched ON. Also check if alarm delay tON (see setting
conditions) is adjusted and wait for this time. Check if alarm in audio indication is not deactivated by
pressing ENTER key (try to active other alarm, to activate the audio indication). Also check the connection
of external audio indication unit.
7.14. Problems in communication with computer
• For trouble free communication with computer use only one from communication interfaces
of data logger (RS232, USB, RS485 or Ethernet) and the rest let not connected!
Data logger does not communicate (via RS232 with delivered cable):
Try to find if problem is in data logger or in computer. Always use delivered cable RS232
(simplified communication). Most frequent problems can be: too high communication speed
(19200 Bd would work always), device conflict, e.g. COM1 port interruption is used by
internal modem, which is at COM3 port (same is valid for relation COM2-COM4), or network
card is set to same interruption, as desired COM port (or other device). Also some resident
programs can cause problems.
Data logger communicates via RS232, but does not communicate via RS485:
First check cabling, correct connection of link polarity, correction of connection of converter
RS232/RS485 including jumper and connection of its power. If several data loggers are
connected, let only one in the network (disconnect others by unplugging connector) and try
communication. If correct, the cause can be address conflict, improper speed of
communication or short circuit of the link. If using converter RS232/RS485 - type E06D or
AUT485, always set communication device to selection S with automatic direction switching.
Communication could not work with each type of converter RS232/RS485. If user uses other
type than recommended, problem can be in its dynamic parameters. Also try other
communication port and recommended type of converter.
• Data logger does not communicate via Ethernet
Set communication interface RS232 from the data logger display, disconnect Ethernet cable
from data logger and connect data logger to the computer via RS232 cable. If communication
works properly, proceed in accordance with Appendix 9. If does not work probably service
check will be necessary.
Page 50

50 ie-ms2-MS5-02
8.RECOMMENDATION FOR OPERATION AND MAINTENANCE
8.1.1 Operation of data logger in various applications
Before application it is necessary to consider if data logger is suitable for required purpose, adjust
optimal configuration and create instructions for its periodical metrological and functional verifications.
Unsuitable and hazard applications: data logger is not design for applications, where failure of
operation could cause endanger of health or function of other device supporting life functions. In
applications, where failure of data logger could cause loss on property, it is recommended to amend
system of independent indication device to monitor this state and avoid damages. It concerns especially
control and indication outputs of data loggers. In critical applications it is suitable to power data logger
from backed-up sources (UPS) dimensioned to required operation without mains power. Furthermore
critical can be data logger connection to power itself. It is not suitable to power both data logger and
critical device – e.g. freezing box – to one fuse. If fuse is disconnected, then neither data logger nor
monitored device is working.
Location of temperature transducers: locate them to places with sufficient airflow and where most
critical point is supposed (in accordance with application requirements). Transducer must be located
sufficiently inside of measured room or be connected to, to avoid thermal influence of leading wires to
measured temperature. In monitoring of temperature in air-conditioned room, do not locate transducer
to direct flow of air conditioning unit. E.g. at large chamber refrigerators can be temperature profile
very inhomogeneous, deviations can reach up to 10 °C.
Location of humidity transducers: in measuring of humidity in refrigeration boxes without additional
humidity stabilization, strong changes of humidity can occur in switching on/off the refrigeration (up to
tens of % RH) even though mean RH value is stable.
Optimum data logger operation: it depends on particular application. Important is the setting of logging
and alarm parameters. It is necessary to take into account the memory capacity of data logger and
frequency of data transfer to the computer. Select logging mode depending on preferable way of data
management. If newest data are preferred select cyclic mode, if oldest data are preferred, select
noncyclic mode. Further more consider if data will be erased from data logger after data transfer to the
computer. In case data will be erased, then a long-term record is not stored in one file and it is not
possible to identify eventual failures. In case memory is not erased, then data transfer duration to
computer can be a problem. If there are problems with data logger, it is recommended not to erase data.
Alarm delay and hysteresis settings are very important.
8.1.2 Recommendation for metrological verification
Metrological verification is performed in accordance with application requirements specified by the
user. One year the manufacturer recommends periodical verification.
Notice: accuracy of data logger input means accuracy of input itself without probes.
In verification of thermocouple inputs it is necessary to take into account that cold end compensation is
perform inside of data logger, where temperature is mostly slightly higher than ambient temperature on
the outer connector. Best way is verification together with connected thermocouple.
8.1.3 Recommendation for periodical verification
Manufacturer recommends periodical verification of the system yearly. Interval and range of verification
depends on the application. In stationary installations following verification is recommended:
1. Metrological verification
2. Regular overhaul in intervals accordingly to corresponding standards
3. Evaluation of all problems from the last verification
4. Visual inspection of data logger
5. Functional verification of data logger (functions used in application):
A) verification of data transfer to computer
B) verification of alarms – change input value to activate alarm and check on display and also
in external audio indication (if used)
C) evaluate in data logger if relay contacts live
D) evaluate internal battery – third value in self test must be at least 2.6 V
Page 51

ie-ms2-MS5-02 51
6. Verification of cabling – check the connection quality of cables, check visually entire cable length
for damage and the route of cables for interference, especially whether some parallel power wires
are not near.
7. Visual inspection of transducers for possible interference or water penetration.
Make a verification protocol.
8.1.4 Recommendation for service
Service of data logger is made at manufacturer or authorized partner. There is no service
allowed without authorization from manufacturer. Unauthorized encroachment leads to
loss of all warranty. The most common damage due unauthorized manipulation with
input modules is damage of the motherboard, when modules are connected in improper
way.
8.1.5 Placing out of operation after end of device life
Disconnect the power cord and return data logger to the supplier or specialized company. Notice: data
logger contains back-up Lithium battery on motherboard and on each counter input module (CTU, CTK)
!
Page 52

52 ie-ms2-MS5-02
9. TECHNICAL DESCRIPTION AND PARAMETERS OF DATA LOGGER
9.1 Circuit concept of data logger
Data logger is designed as autonomous complex controlled by its own microprocessor, which fully
works if power voltage is connected. If power voltage is not present, data logger does not work, but
recorded data and internal time are saved. Exception is with counter inputs CTU and CTK, which internal
counter works even in case of switched OFF power of data logger.
Each input module is replaceable. Due to the possibility of data logger damage in incorrect
manipulation with modules it is not allowed to manipulate with modules to unauthorized
persons.
Input signals are connected by means of 2x24 pin dual part terminals. Part with connected leads can
be taken out from data logger.
Not allowed manipulation and warning
Power source is a device connected to electric mains and if it is damaged including power
cord there is danger of injury by electric current. It is not allowed to connect it to mains, if
power cord is damaged or if its cover is damaged or removed. It is also not allowed to place it
in humid and dangerous environment (e.g. bathroom etc.), at points exposed to direct sun
radiation and other thermal sources, to prevent damage and deformation of the case. Data
logger should not be operated with not protected terminals if dangerous voltage is connected.
Galvanic isolation is not designed for protection from electric current injury. In those cases it
is necessary to apply additional isolation modules (e.g. measuring transformers). With this
data logger operation of input modules with higher input voltage than is 50V AC / 75V DC is
not allowed.
9.2 Technical parameters of data logger
9.2.1 Power
Data logger is powered from mains 230V 50 Hz by means of external ac/dc adapter or from other
suitable DC source.
Power of data logger
Power voltage: 24 V DC
(2)
Maximum consumption: 25 W
(1)
Recommended power source: SYS1308-2424-W2E or ENCO NZ 21/25/1000
Protection: tube fuse F2A on mother board
(1)
It concerns maximum consumption with 16 inputs of A0 type with short circuited input terminals.
These input modules contain source for powering of current loops of connected transmitters and
are capable to supply to short circuit approximately 25 mA/input. With power 24V this additional
power loss is approximately 10 W. For more details see Appendix 1.
(2)
Detailed information on power voltage for data logger and current consumption is specified in
Appendix 1.
9.2.2 Output relay module for data logger
Module contains 16 mains relay with switching-over contacts connected to self-locking Wago
terminal on the module. Each relay has three terminals available.
Maximum voltage on the contact: 250 V AC
Maximum current through the contact: 8A
Maximum switching power: 2000 W
Mechanical life of relay contact: 3 x 10
7
cycles
!
!
Page 53

ie-ms2-MS5-02 53
Electric life of relay contact: 1 x 10⁵ cycles
Material of contact: Ag Cd O
Maximum wire cross section in terminal: 1,5 mm2
Dimensions 140 x 211 mm
Mounting MP019 on DIN rail 35mm or
MP013 holders
*... Pay attention to all required safety rules in mounting and during operation!
9.2.3 Output ALARM OUT
This output is designed especially for connection of external audio indication or telephone dialer.
Way its activation can be programmed in data logger configuration. Output is available both in
voltage version and as galvanically isolated relay contact.
Parameters of output ALARM OUT in activation: approximately 4.8 in DC, maximum 50
mA
Parameters of inactivated output: 0V, no load allowed
Connection: terminal Wago
Length of connection cable: maximum 100 m, only at indoor
environment
Used relay 250 V AC/ 8A
Maximum connectable voltage on relay and current 50 V AC/ 1A
Galvanic isolation is not designed for safety function (not sufficient isolating distances).
The case of external audio indication is designed for wall mounting and the connection is by means
of connector CINCH (outer contact – GND, central pin – ALARM OUT).
9.2.4 Communication interface
Each data logger is equipped with interface RS232C, RS485 and USB. Ethernet interface is optional.
Communication interfaces are mutually connected internally and as one functional unit galvanically
isolated from other data logger circuitry.
RS232C:
Used signals: RxD, TxD, GND
RTS-CTS selectable from SW
Galvanic isolation: electrical strength 500 V DC
Connector: DSub 9 male, signals DTR-DSR are
connected
Maximum cable length: 10 m, only in indoor environment
RS485:
Input impedance:
approximately 12 kΩ
Galvanic isolation: electrical strength 500 V DC
Connection: dual terminals
Maximum cable length: 1200 m in indoor environment
USB
Compatibility: USB1.1. and USB 2.0
Connector: USB type B
Vendor ID: 0403
Product ID: 6001
Ethernet
Compatibility: 10/100 MBit Ethernet
Connector: RJ45
Galvanic isolation is not designed for safety function - protection against electrical
current injury!
the way of communication
Setting of communication serial link, 1 start bit, 8 data bits, 1 stop bit, without
parity
!
Page 54

54 ie-ms2-MS5-02
communication speed 1200Bd, 9600 Bd, 19200 Bd, 57600 Bd, 115200 Bd
Optional serial interface for reception and sending SMS message:
RS232/B
Used signals: RxD, TxD, GND
RTS-CTS selectable from SW
Galvanic isolation: galvanically not isolated from data logger
internal circuitry
Connector: DSub 9 male
Maximum cable length: 10 m, only in indoor environment
Format of transfered data: 1 start bit, 8 data bits, 1 stop bit, without
parity
Communication speed 1200 Bd, 9600 Bd, 19200 Bd, 57600 Bd,
115200 Bd
9.2.5 Real time clock circuitry
Contains actual data with seconds, minutes, hours, days, months and years. Circuitry works even
if data logger is disconnected from power.
Error of time value: maximum 255 ppm ± 5 ppm/year at temperature 23°C ± 10 °C
9.2.6 Internal battery
Serves to back-up recorded data and to power of real time clock (RTC) in case, data logger is not
connected to power.
Type of battery: Lithium 3V, VARTA CR ½ AA
Estimated life: 10 years from date of production of data logger
9.2.7 Electromagnetic compatibility
Device is tested in accordance with EN 61326-1: 2006 article 6 table 1
radiation: EN 55022 A1, A2: class B
immunity: EN 61000-4-2: class and (4/8 kV)
EN 61000-4-3: class and (3V/m)
EN 61000-4-4: class and (0,5/1 kV)
EN 61000-4-6: class and (3 V)
9.2.8 Operating condition
Outer influence accordingly with EN 33-2000-3: normal environment
Operating
temperature:
(0..50) °C
AC1 altitude up to 2000 m above sea level
AE1 influence of other elements negligible
AM1 influence of radiation negligible
AN1 influence of sun radiation negligible
BA4 qualification of persons – knowledgeable
BE1 materials without fire danger in the object
Settling time after switching ON: 15 minutes
Page 55

ie-ms2-MS5-02 55
9.2.9 Storing condition
Storing temperature: -10 to +70 °C
Relative humidity: 5 to 95 %
9.2.10 Mechanical parameters
Dimensions of the case:
215 x 165 x 60 mm without connectors and without mounting
consoles
215 x 225 x 60 mm with DSub connectors with covers
Weight: approximately 800 g
Protection: IP20
Input terminals: removable, maximum cross section of lead: 1.5 mm2
Mounting: desk top – standard version
by means of two mounting consoles – optional accessory
by means of DIN rail 35 mm holder – optional accessory
9.3 Technical parameters of input modules
Input modules are designed as individual replaceable units plugged in sockets behind connection
terminals of input channels. Manufacturer does not recommend to replace modules by unskilled personnel.
Each input module is adjusted to fixed maximum measuring range, where it works correctly in
specified limits of accuracy. Input modules contain part of protection circuitry, circuitry for signal
unification and memory with stored calibration and configuration constants. With galvanic isolated inputs
optical isolation of the signal by analog operational amplifier is used. User is not able to modify
configuration of input modules. If needed user can recalculate measured value to desired real value with
physical unit by means of a special menu item Recalculations in the PC program.
Galvanic isolated inputs have isolation strength of 500 V. It is not tested as safety isolation, see Not
allowed manipulations and warning.
9.3.1 Input modules for measurement of dc voltage and currents
These input modules are available in version without galvanic isolation or as galvanic isolated (with
the exception of A0 input). Input with galvanic isolation is marked by additional letter G behind its
type name.
Time response to step change of input signal is negligible referred to logging interval (1 s).
Input module type A0
Measured value: dc current, se source two-wire connection transmitters powered
from current loops
Range: (4.. 20) mA
Accuracy: 0.1 % from range (± 0.02 mA)
Current in short circuit
of input terminals:
limited to approximately 25 mA
Voltage across open
terminals:
voltage source - 3V, at power 24V approximately 21V
Input module type A1 and A1G
Measured value: dc current
Range: (4.. 20) mA
Page 56

56 ie-ms2-MS5-02
Accuracy: 0.1 % from range (± 0.02 mA)
Input resistance:
approximately 14 Ω
Overload capacity: 100 % (current ± 40 mA maximum)
Input module type B0 and B0G
Measured value: dc current
Range: (0.. 20) mA
Accuracy: 0.1 % from range (± 0.02 mA)
Input resistance:
approximately 14 Ω
Overload capacity: 100 % (current ± 40 mA maximum)
Input module type B1 and B1G
Measured value: dc current
Range: (0.. 1) A
Accuracy: 0.1 % from range (± 1 mA)
Input resistance:
approximately 0.04 Ω
Overload capacity: ± 5 A maximum
Input module type B2 and B2G
Measured value: dc current
Range: (0.. 5) A
Accuracy: 0.1 % from range (± 5 mA)
Input resistance:
approximately 0.04 Ω
Overload capacity: 10% (current ± 5.5 A maximum)
Input module type D0 and D0G
Measured value: dc voltage
Range: (0.. 100) mV
Accuracy: 0.1 % from range (± 0.1 mV)
Input resistance:
>10 MΩ
Overload capacity: ± 5 V maximum
Input module type D1 and D1G
Measured value: dc voltage
Range: (0.. 1) V
Accuracy: 0.1 % from range (± 1 mV)
Input resistance:
>10 MΩ for input D1
>400 kΩ for input D1G
Overload capacity: ± 5 V maximum for input D1
± 10 V maximum for input D1G
Input module type D2 and D2G
Measured value: dc voltage
Range: (0.. 10) V
Accuracy: 0.1 % from range (± 10 mV)
Input resistance:
>1 MΩ
Overload capacity: ± 30 V maximum
Input module type D4 and D4G
Measured value: dc voltage
Range: (0.. 75) V
Accuracy: 0.1 % from range (± 75 mV)
Input resistance:
>900 kΩ
Overload capacity: ± 100 V maximum (from safety aspect 75 V maximum)
Input module type D5 and D5G
Measured value: dc voltage
Range: (-10.. +10) V
Accuracy: 0.1 % from range (± 20 mV)
Input resistance:
>1 MΩ (D5), >400 kΩ (D5G)
Page 57

ie-ms2-MS5-02 57
Overload capacity: ± 30 V maximum
9.3.2 Input modules for measurement of ac voltage and current
These input modules are produced always in version with galvanic isolation (without additional
marking with letter G). These inputs contain RMS/DC converter, which is designed for measurement
of signals with sine course. Specified measurement accuracies below are valid for sine signal with
frequency 50 Hz.
General parameters of ac inputs
non-sine signal: symmetric rectangular 1:1 additional error 11%
symmetric triangle additional error – 4%
time response t90 step from 0 to 3/4 of range approximately 2 s
step from 3/4 of range to 0 approximately 10 s
Input module type C0
Measured value: ac current
Range: (0.. 20) mA
Accuracy: 1 % from range (± 0.2 mA)
Input resistance:
approximately 14Ω
Overload capacity: 100% (current 40 mA maximum),
Input module type C1
Measured value: ac current
Range: (0.. 1) A
Accuracy: 1 % from range (± 10 mA)
Input resistance:
approximately 0.04 Ω
Overload capacity: 5 A maximum
Input module type C2
Measured value: ac current
Range: (0.. 5) A
Accuracy: 1 % from range (± 50 mA)
Input resistance:
approximately 0.04 Ω
Overload capacity: 5,5 A maximum
Input module type E0
Measured value: ac voltage
Range: (0.. 100) mV
Accuracy: 1 % from range (± 1 mV)
Input resistance:
>10 MΩ
Overload capacity: 5 V maximum
Input module type E1
Measured value: ac voltage
Range: (0.. 1) V
Accuracy: 1 % from range (± 10 mV)
Input resistance:
>10 MΩ
Overload capacity: 5 V maximum
Input module type E2
Measured value: ac voltage
Range: (0.. 10) V
Accuracy: 1 % from range (± 100 mV)
Input resistance:
>1 MΩ
Overload capacity: 50 in maximum
Input module type E4
Page 58

58 ie-ms2-MS5-02
Measured value: ac voltage
Range: (0.. 50) V
Accuracy: 1 % from range (± 0,5 V)
Input resistance:
>700 kΩ
Overload capacity: 100 V maximum (from safety aspect only 50 V AC)
9.3.3 Input modules for measurement of resistance and resistance transmitters
These input modules are produced in version without galvanic isolation or galvanically isolated. Input
with galvanic isolation is marked with additional letter G behind its type marking.
Time response to jump change of input signal is negligible refer to fastest sampling interval (1 s).
Modules are produced only for two-wire measurement. Possible error due lead lengths can be
corrected by means of user conversions.
Input module type F and FG
Measured value: resistance
Range:
0.. user defined range (from 100Ω to 1 MΩ)
Accuracy: 0.1 % from range
Measuring current:
approximately I = 1.25/range [A, Ω]
Maximum voltage on
input:
± 5 V maximum
Input module type J and JG
Measured value: temperature from resistance sensor Nickel 1000/ 6180 ppm
Range: (-50 .. 250) °C
Accuracy (without
probe):
±0.2 °C at range (-50..100) °C,
±0.2 % from value at range (100 .. 250) °C
Measuring current: approximately 0.25 mA (depends on temperature)
Maximum voltage on
input:
± 5 V maximum
Input module type K and KG
Measured value: temperature from resistance sensor Pt100/ 3850 ppm
Range: (-140 .. 600) °C
Accuracy (without
probe):
±0.2 °C at range (-140..100) °C,
±0.2 % from value at range (100 .. 600) °C
Measuring current: approximately two mA (depends on temperature)
Maximum voltage on
input:
± 5 V maximum
Input module type K1 and K1G
Measured value: temperature from resistance sensor Pt1000/ 3850 ppm
Range: (-140 .. 600) °C
Accuracy (without
probe):
±0.2 °C at range (-140..100) °C,
±0.2 % from value at range (100 .. 600) °C
Measuring current: approximately 0,2 mA (depends on temperature)
Maximum voltage on
input:
± 5 V maximum
Input module type K3
Measured value: temperature from resistance sensor Pt1000/ 3850 ppm
Range: (-10 .. 50) °C
Accuracy (without
probe):
±0.06 °C
Measuring current: approximately 0,2 mA (depends on temperature)
Maximum voltage on
input:
± 5 V maximum
Page 59

ie-ms2-MS5-02 59
9.3.4 Input modules for temperature measurement from thermocouple transmitters
Inputs for measurement of thermocouple (except thermocouple type B) have compensation of cold
junction temperature inside of data logger. Compensation temperature is measured on data logger
motherboard between terminals for channel 7 and channel 8. Value of this temperature is converted to
thermoelectric voltage and added to value of thermoelectric voltage measured by thermocouple. Result is
converted to temperature again, which is resulting measured temperature. If using thermocouples operate
data logger in working position with input signal terminals towards down and do not install heat sources in
the neighborhood.
These input modules are produced in version without galvanic isolation or galvanically isolated. Input
with galvanic isolation is marked with additional letter G behind its type marking.
Time response to jump change of input signal is negligible refer to fastest sampling interval (1 s).
Input module type N and NG
Measured value: temperature measured thermocouple type K (NiCr-Ni)
Range: (-70..1300) °C
Accuracy without probe: ± (0.3 % from measured value + 1,5 °C)
Cold junction: compensated at temperature range (0..50) °C
Maximum voltage on
input:
± 5 V maximum
Input module type O and OG
Measured value: temperature measured thermocouple type J (Fe-Co)
Range: (-200..750) °C
Accuracy without probe: ± (0.3 % from measured value + 1,5 °C)
Cold junction: compensated at temperature range (0..50) °C
Maximum voltage on
input:
± 5 V maximum
Input module type P and PG
Measured value: temperature measured thermocouple type with (Pt10%Rh-Pt)
Range: (0..1700) °C
Accuracy without probe: ± (0.3 % from measured value + 1,5 °C)
Cold junction: compensated at temperature range (0..50) °C
Maximum voltage on
input:
± 5 V maximum
Input module type Q and QG
Measured value: temperature measured thermocouple type B (Pt30%Rh-Pt)
Range: (100..1800) °C
Accuracy without probe: ± (0.3 % from measured value + 1 °C) at range (300..1800)°C
Cold junction: not compensated
Maximum voltage on
input:
± 5 V maximum
Input module type T and TG
Measured value: temperature measured thermocouple type T (Cu-CuNi)
Range: (-200..400) °C
Accuracy without probe: ± (0.3 % from measured value + 1,5 °C)
Cold junction: compensated at temperature range (0..50) °C
Maximum voltage on
input:
± 5 V maximum
9.3.5 Input modules for counting pulses
Counter inputs are designed for counting of incoming pulses (gas meters, electrometers..). Modules
contain own processor unit, which registers incoming pulses even if power is switched OFF (module has its
own battery for power, if data logger is not switched ON). Record is performed similarly as with analog
Page 60

60 ie-ms2-MS5-02
inputs, i.e. by writing counter value to data memory in adjusted logging interval. Value from counter can be
displayed in absolute format or as recalculated, in record it is possible to display relative format as
increments in logging intervals. Counter module contains switch-able overshoot filter (fast changes) of
input pulses.
Input module CTU - galvanic isolated counter for voltage signal
Capacity of counter: 31 bits, activated by downward edge of input signal
maximum value of counter: 2147483647
Input level: state „L“: 0 to 0,8 V
state „H“: 3 to 24 V maximum
Input current: approximately 7 mA in state „H“
Input frequency: 0 to 5 Hz, length of pulse minimum 200 ms, if Filter is switched ON
0 to 5 kHz, length of pulse minimum 30 µs, if Filter is switched OFF
Galvanic isolated: 500 V, not designed for safety function
Battery life: minimum 6 months, if data logger is switched OFF
Input module CTK - galvanic non-isolated counter for potential-less contact
Capacity of counter: 31 bits, activated by leading edge of input signal
maximum value of counter: 2147483647
Input level: state „L“: resistance of opened contact >250 k Ohms
state „H“: resistance of closed contact < 10 k Ohms
Input frequency: 0 to 5 Hz, length pulse minimum 200 ms, if is Filter switched ON
0 to 5 kHz, length pulse minimum 30 µs, if is Filter switched OFF
Galvanic isolated: module is not galvanic isolated from other circuitry of data logger
Battery life: minimum 6 months, if data logger is switched OFF
9.3.6 Input modules for monitoring of binary event
Binary inputs serve for evaluation of two-state level input signals (contact closed/opened respectively
voltage present/not present).
Input module S and SG - binary input for potential-less contact
Input level: state „L“: resistance of opened contact >100 k Ohms
state „H“: resistance of closed contact < 1000 Ohms
Minimum length of
input pulse:
200 ms
Galvanic isolated: only with input module SG: 500 V, not designed for safety function
Input module S1 - binary input for voltage level, galvanic isolated
Input level: state „L“: 0 to 0,8 V
state „H“: 3 to 30 V maximum
Input current: (1..9) mA .. depending on applied input voltage in state „H“
Minimum length of
input pulse:
200 ms
Galvanic isolated: 500 V, not designed for safety function
9.3.7 Input modules for measurement frequency
Module contains its own processor, processing measured values is identical as with analog inputs.
Input module FU - galvanic isolated input for measurement of frequency voltage signal
Range:
0 to 5 kHz, duration of input pulse minimum 30 µs
Resolution: 1 Hz
Accuracy: ± (0,2% from reading +1Hz)
Input level: state „L“: 0 to 0,8 V
state „H“: 3 to 24 V maximum
Input current: approximately 7 mA in state „H“
Page 61

ie-ms2-MS5-02 61
Galvanic isolated: 500 V, not designed for safety function
Input module FK - galvanic non-isolated input for measurement of frequency of contact switching
Range:
0 to 5 kHz, duration of input pulse minimum 30 µs
Resolution: 1 Hz
Accuracy: ± (0,2% from reading +1Hz)
Input level: state „L“: resistance of opened contact >250 k Ohms
state „H“: resistance of closed contact < 10 k Ohms
9.3.8 Input RP - galvanically isolated input for transmitters with serial output RS485
This input module contains its own processor unit and serves for reading from intelligent transmitters,
supporting basic form of protocol ModBus RTU or ADVANTECH. Data logger can contain several RP
modules. For each input channel of data logger it is possible to select, which RP (or other) module
measured values are getting from.
Input communication interface: RS485
Address of input device: must be from interval 1 to 247 (decimal)
Communication speed: (1200, 2400, 4800, 9600, 19200, 57600, 115200) Bd
Parity: 1 stop bit with odd/even parity, 1 stop bit without parity, 2 stop
bits without parity
Transfer protocol: ModBus RTU, Advantech
Impedance of input (reception): approximately 12 k Ohms
Maximum length of cable: 1200 m at indoor rooms
Galvanic isolated: 500 V, not designed for safety function
This input module can cooperate with 1 up to 16 devices (resp. measured points). Module works that way,
command for reading of data from the first transmitter is sent, then it waits for the response. Maximum
waiting time is possible to set to aproximately 210 ms. After waiting time error of communication is
reported and reading of next channel continues. If device responses in adjusted time, response is evaluated
and also reading of next channel continues.
Note: for more information see Appendix 3.
 Loading...