

Comelit SMON156A, SMON185A, MMON185A, MMON215A User Manual

0
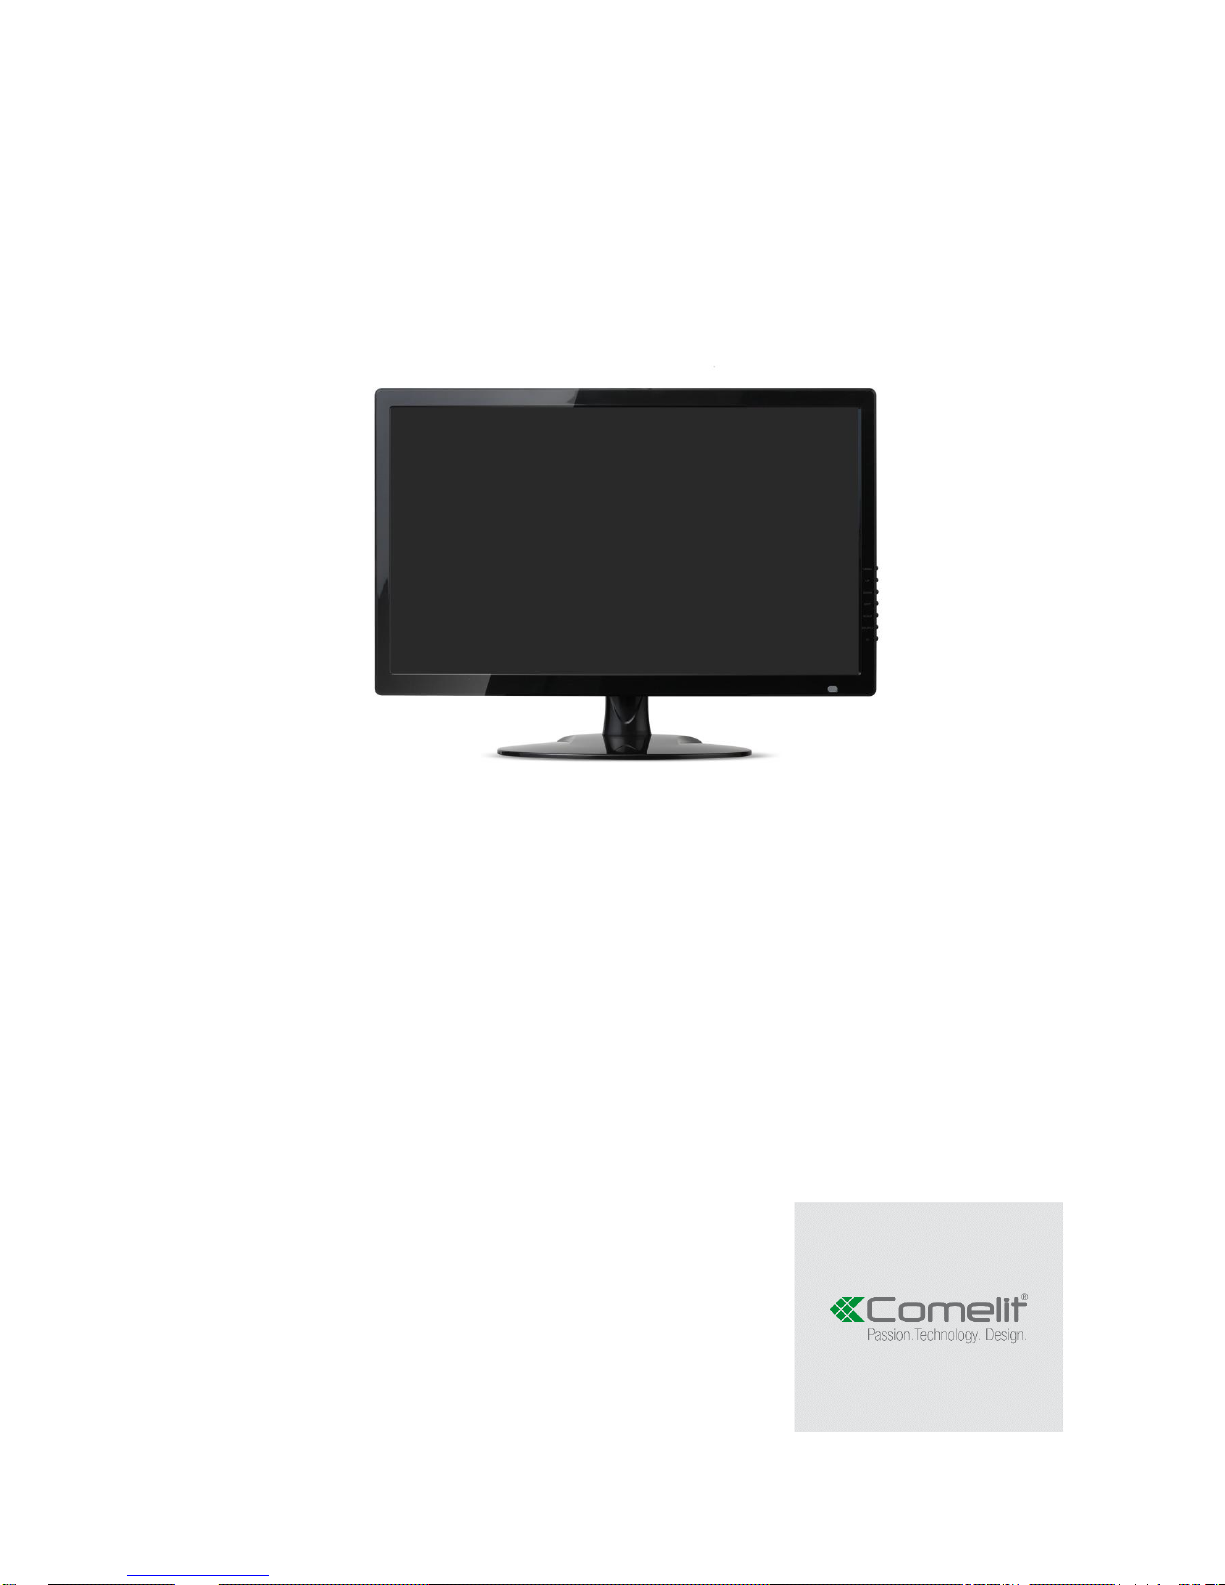
MONITOR ART. SMON156A
SMON185A
MMON185A
MMON215A
Please read this manual thoroughly before use and keep it for future reference
1
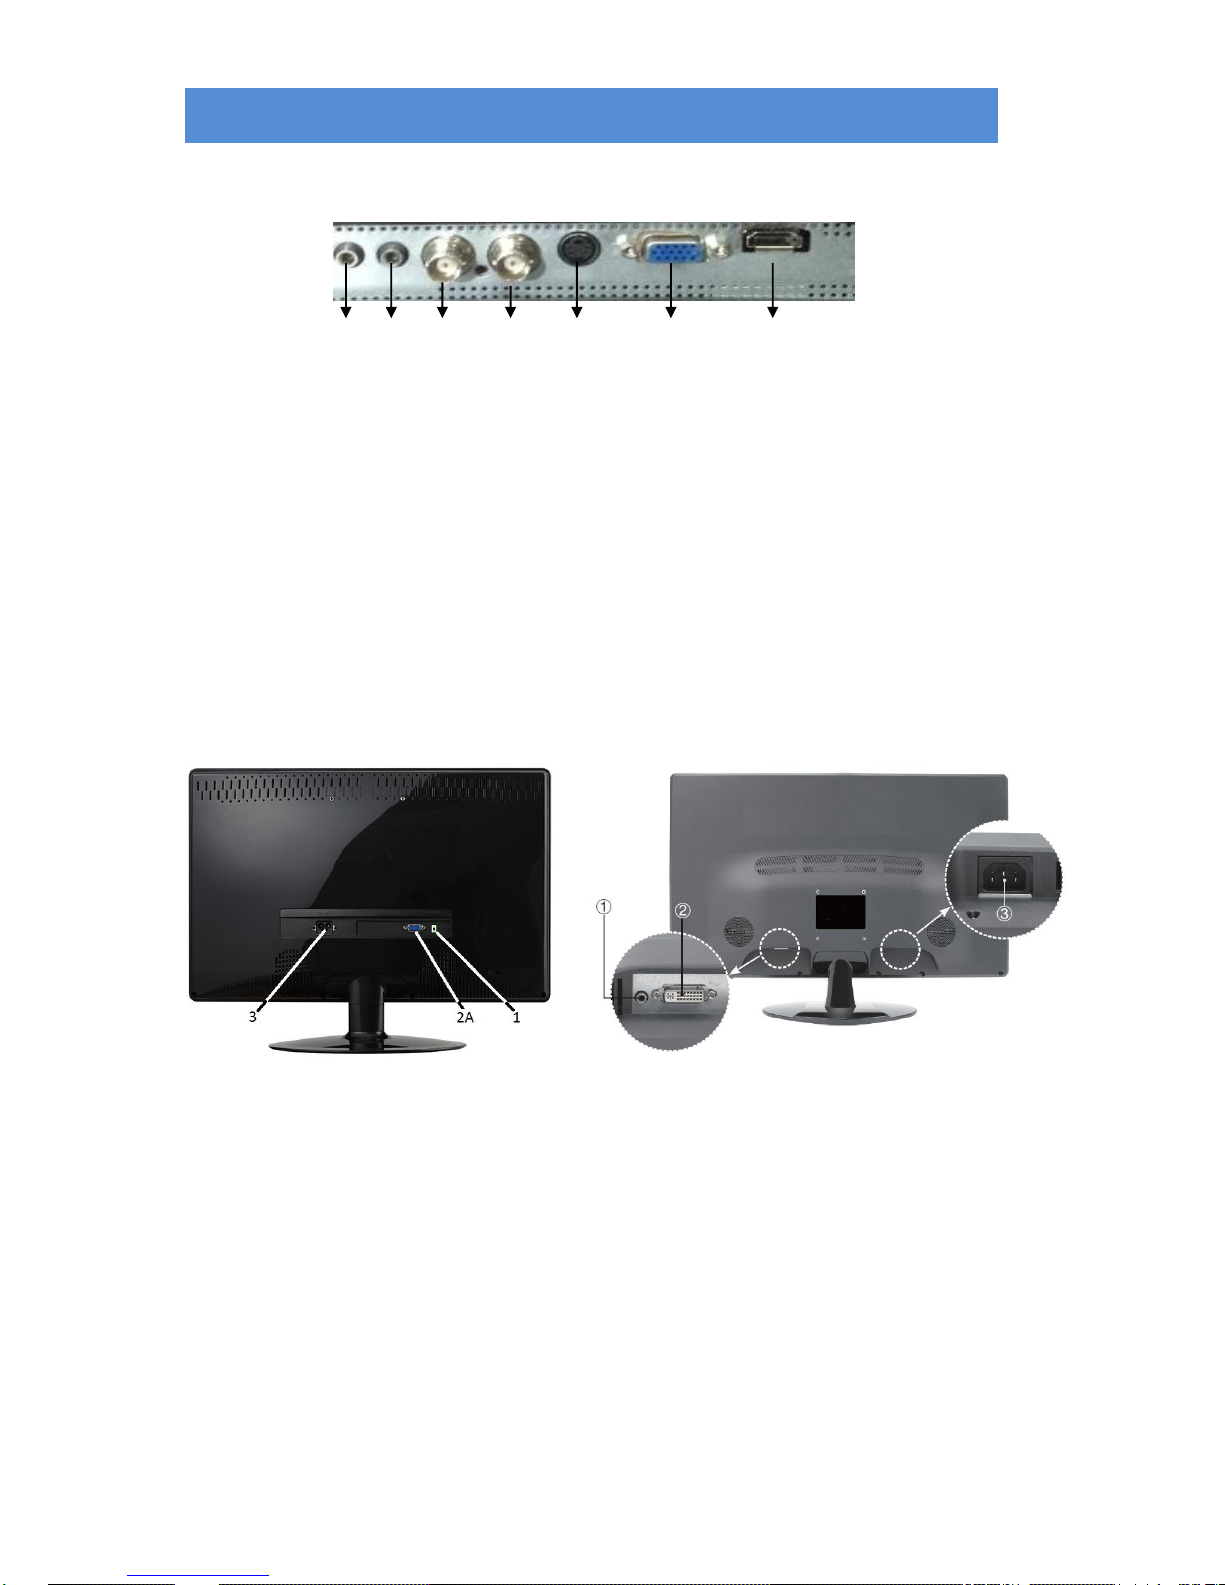
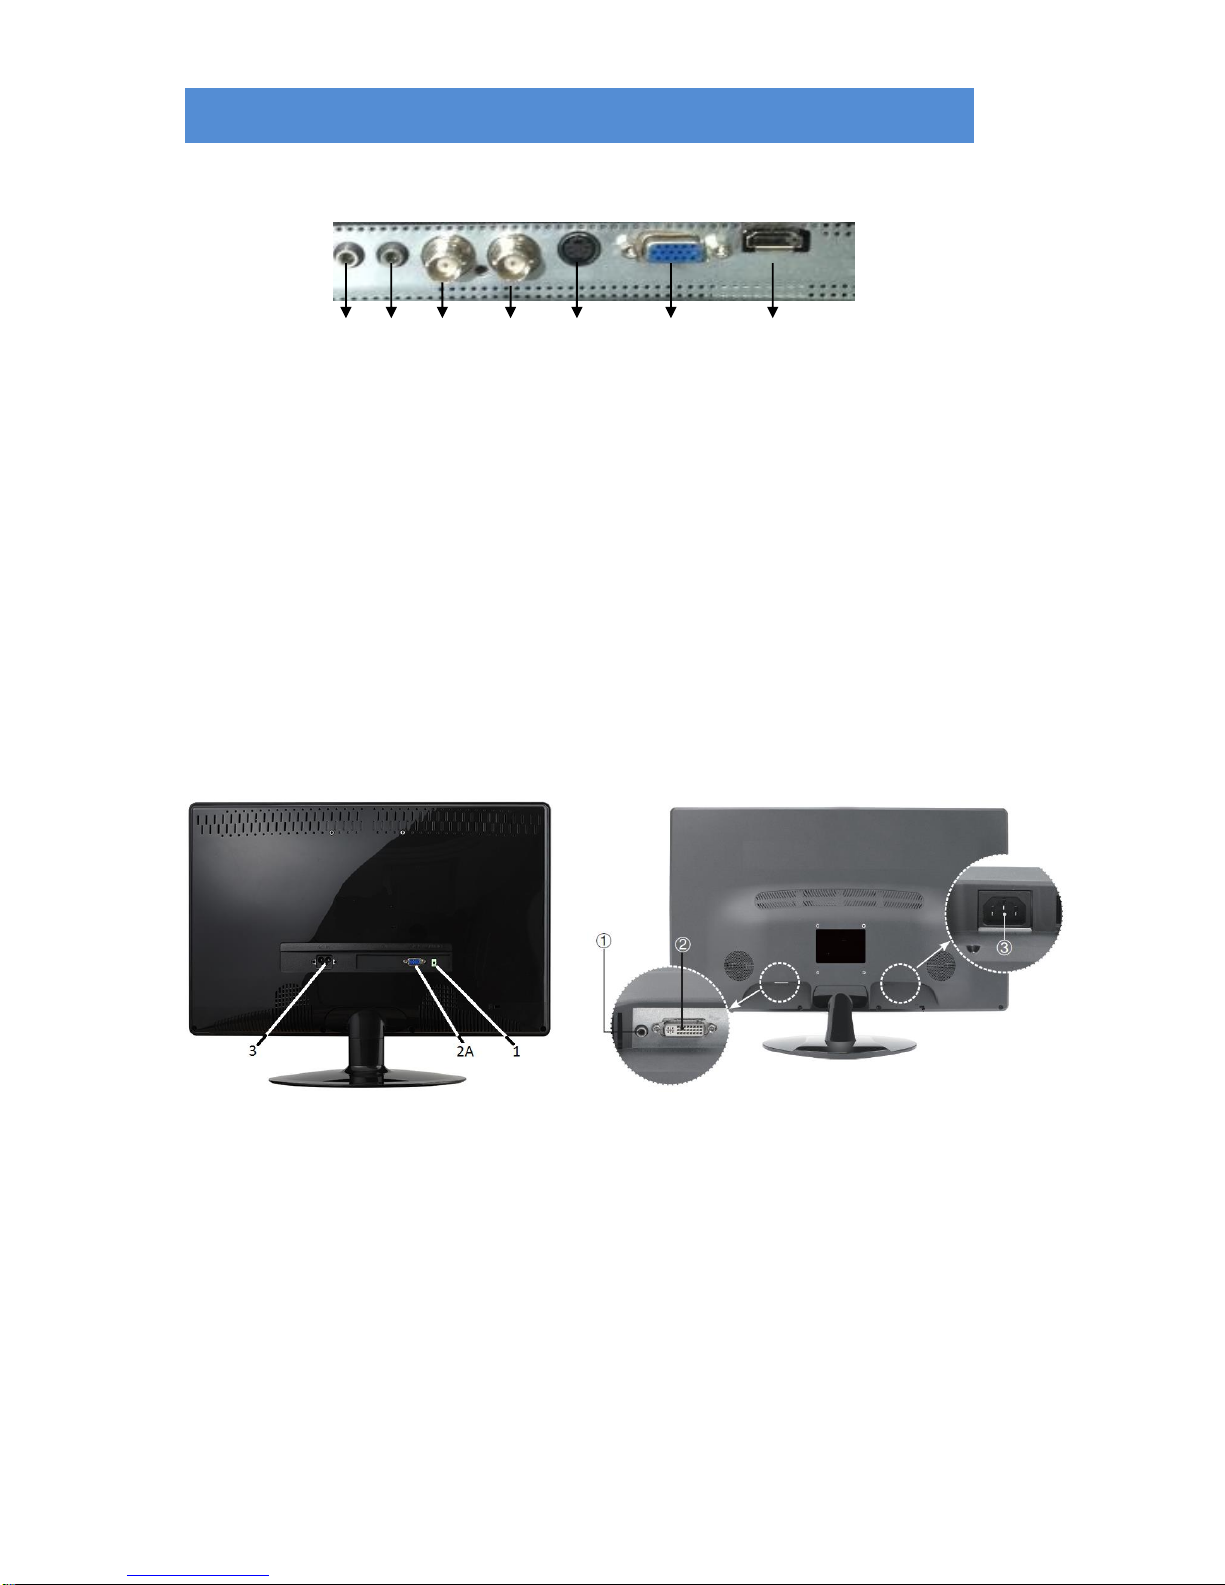
Connectors
Art. MMON185A, MMON215A
A B C D E F G
A .AUDIO OUTPUT: Phone Jack, Stereo (art. MMON185A only)
B. AUDIO INPUT: Phone Jack, Stereo
C. CVBS/BNC OUTPUT: BNC connector (art. MMON185A only)
D. CVBS/BNC INPUT: BNC connector (art. MMON185A only)
E. S-VIDEO (Y/C) INPUT: Mini-DIN 4 pins connector (art. MMON185A only)
F. VGA INPUT: D-SUB 15 pins connector
G. HDMI INPUT: HDMI connector
SMON156A SMON185A
1 .AUDIO INPUT: phone jack, Stereo
2. DVI-I INPUT: DVI-I connector (art. SMON185A only, DVI-I – VGA cable in equipment)
2A. VGA INPUT: VGA connector (art. SMON156A only)
3. POWER
2
Controls and indicators art. MMON185A
SOURCE/EXIT button
Press the button to show source menu.
Select HDMI, S-Video,VGA or VIDEO input signal (BNC)
“ ” UP button
Press the button to scrolling the cursor to desired function.
“ ” Down button
Press the button to scrolling the cursor to desired function.
“ ” Right button
Press the button to increase volume
Press the button to increase the value of selected function in sub OSD menu.
“ ” Left button
Press the button to decrease volume
Press the button to decrease the value of selected function in sub OSD menu.
MENU button
Press the button to show the OSD main menu.
As a confirmation key during the OSD operation.
“ ” Power button
Press the button to turn ON or turn OFF the monitor
POWER LED Indication
Green - Power on
LED light off - Power off
Flash Green - Sleep mode (PC mode only)
Controls and indicators art. MMON215A
SOURCE button
Press the button to show source menu.
Select HDMI and VGA input signal
UP button
Press the button to scrolling the cursor to desired function.
Press the buttons to increase the value of selected function in sub OSD menu
DOWN button
Press the button to scrolling the cursor to desired function.
Press the button to decrease the value of selected function in sub OSD menu
EXIT button
Press the button to back to the last menu
Press the button for Auto Adjust.

3
SCALE button
Press the button to change ratio (Wide or Normal)
MENU button
Press the button to show the OSD main menu.
As a confirmation key during the OSD operation.
“ ” Power button
Press the button to turn ON or turn OFF the monitor
POWER LED Indication
Green - Power on
LED light off - Power off
Flash Green – No signal input
Controls and indicators art. SMON156A
and SMON185A
UP button
Press the button to scrolling the cursor to desired function.
Press the button to increase the value of selected function in sub OSD menu
DOWN button
Press the button to scrolling the cursor to desired function.
Press the button to decrease the value of selected function in sub OSD menu
EXIT button
Press the button to back to the last menu
Press the button for Auto Adjust.
MENU button
Press the button to show the OSD main menu.
As a confirmation key during the OSD operation.
“ ” Power button
Press the button to turn ON or turn OFF the monitor
POWER LED Indication
Green - Power on
LED light off - Power off
Flash Green – No signal input
4
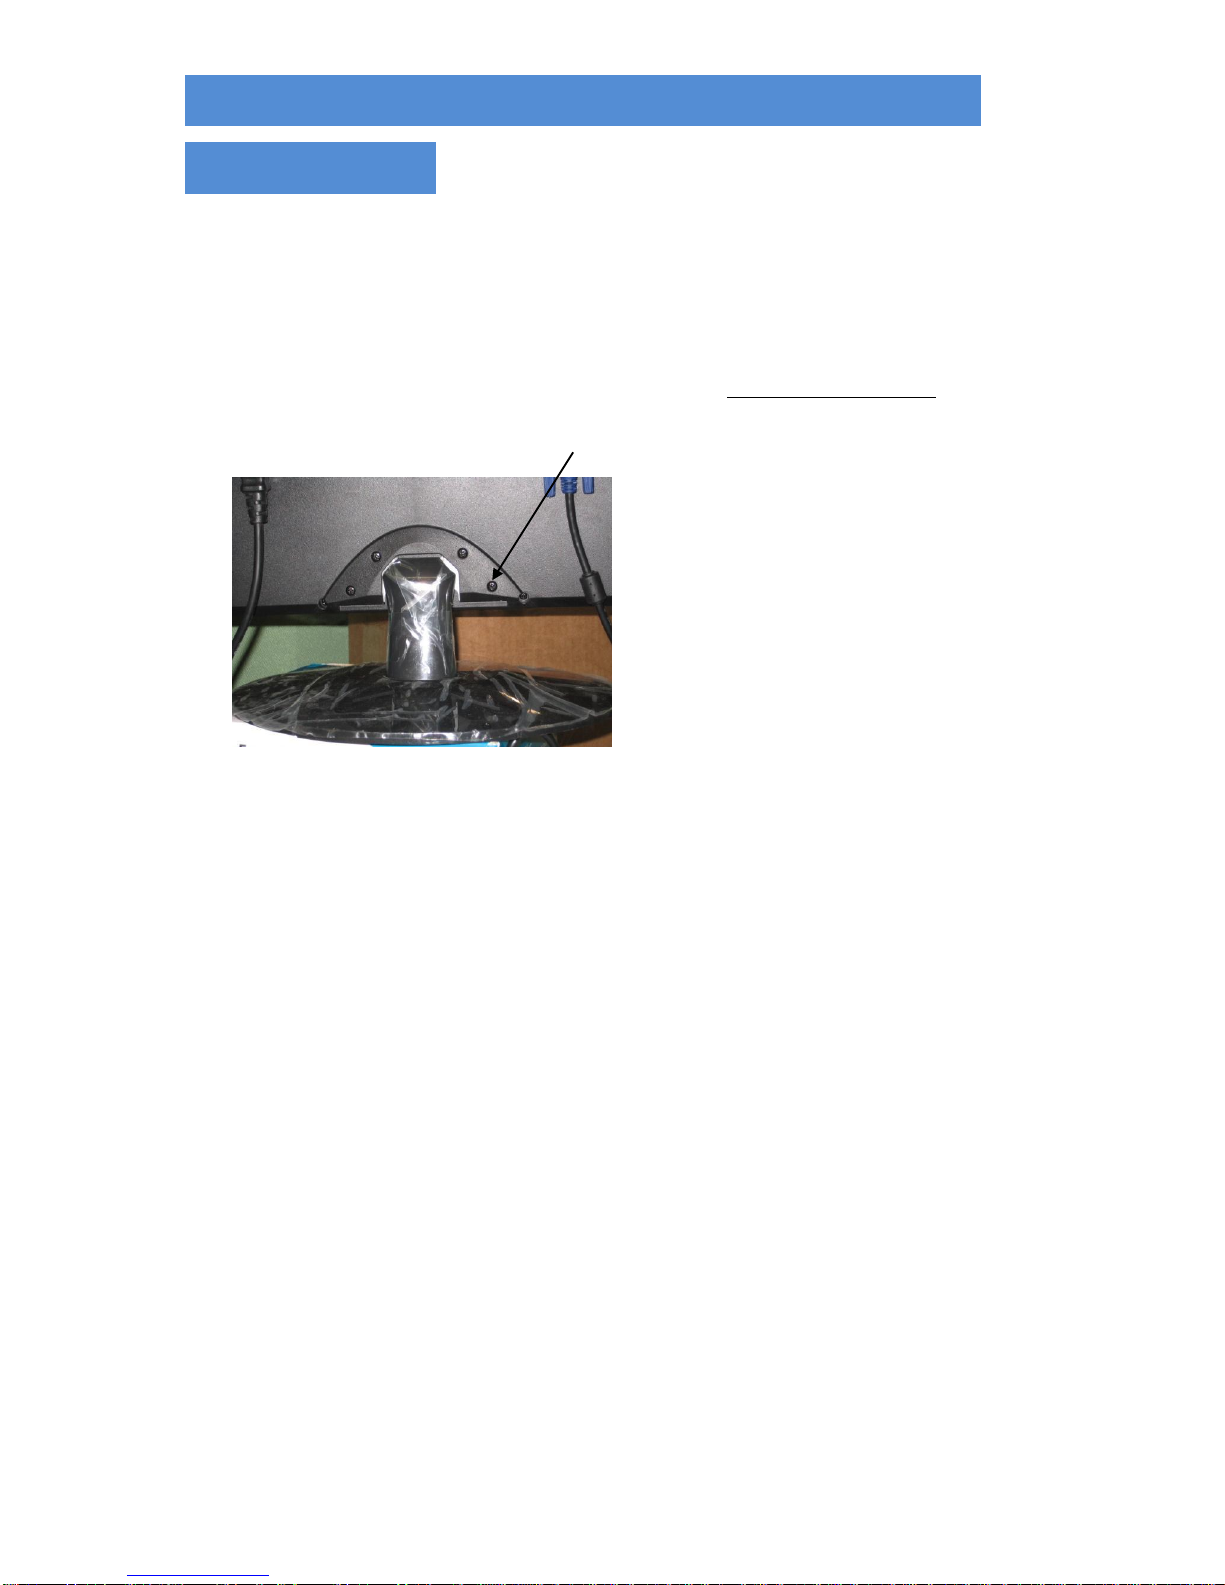
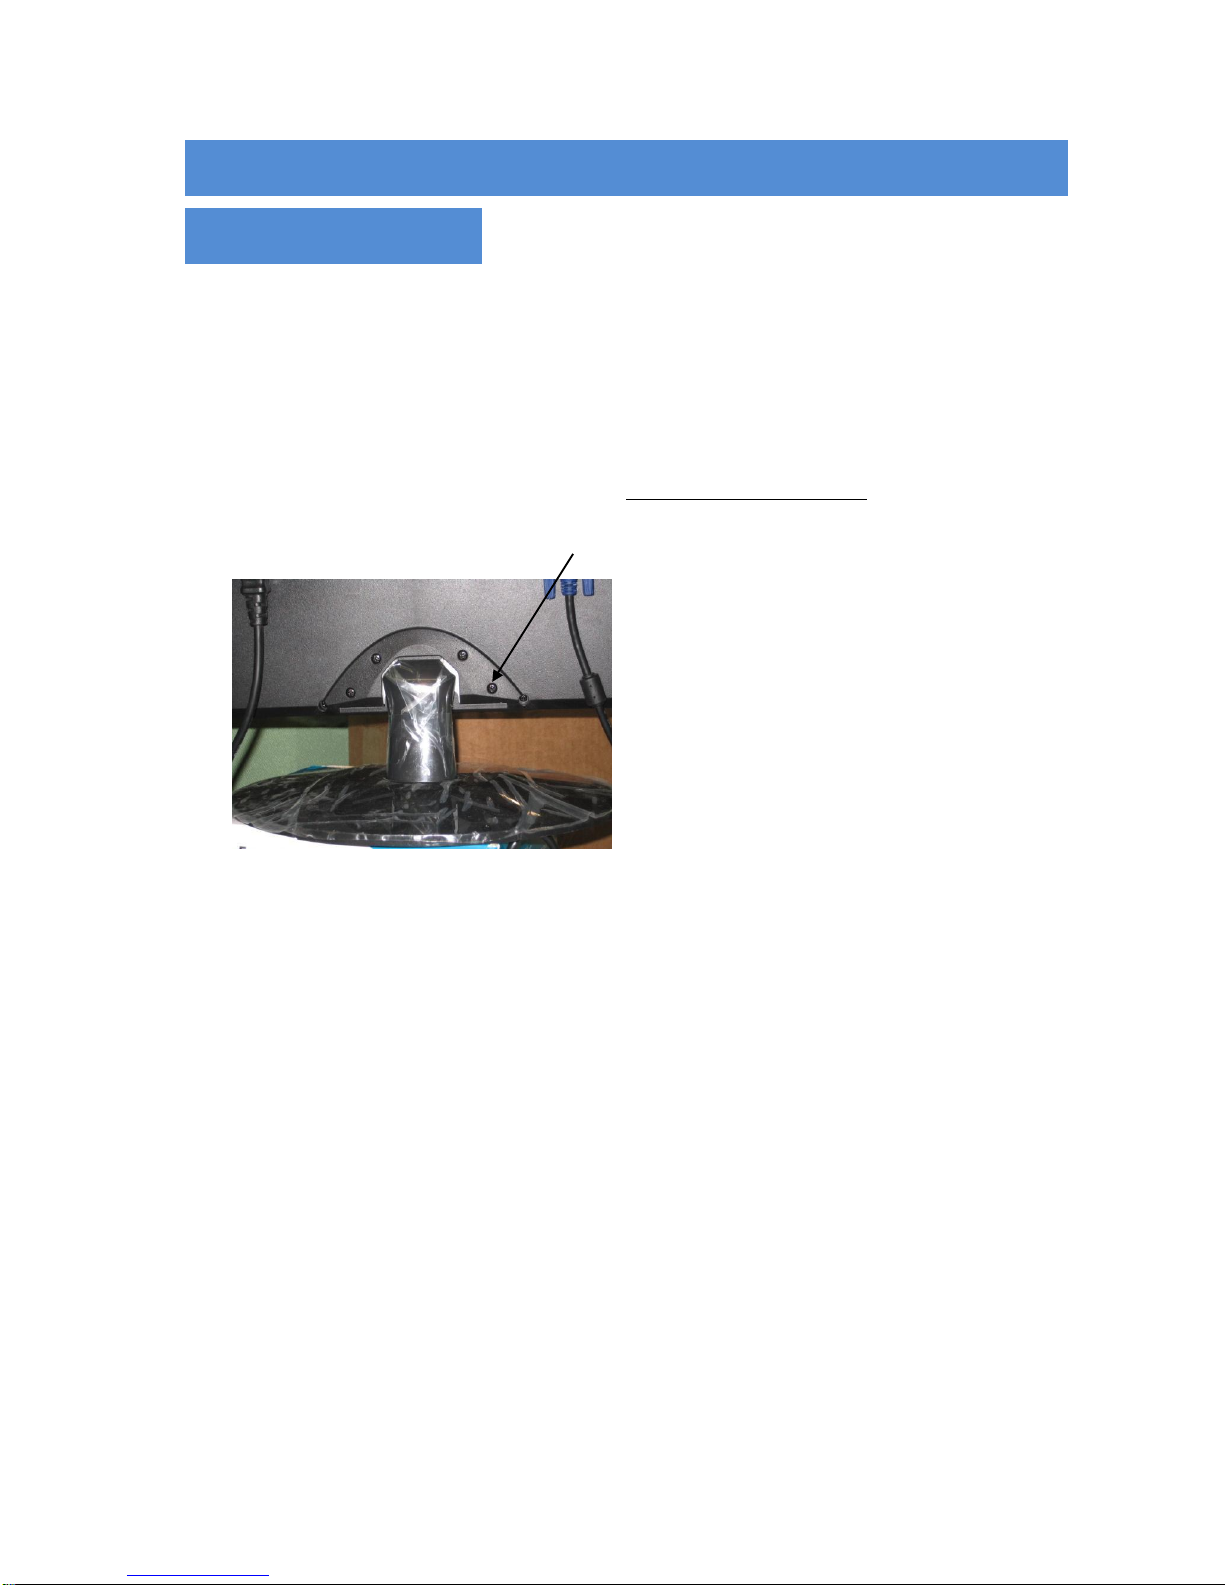
Mounting Guide art. MMON185A and
MMON215A
Wall or Other Mounting with VESA Standard
CAUTION: the wall mount must be a minimum of five times the monitor’s net weight. To mount your
MONITOR to the wall or another surface, you need to purchase a VESA wall mount. Use four M4 x 8 mm
screws (not included) to attach the mount. The monitor mount VESA hole pattern is 100 mm x 100 mm.
Note: Metric (M4 x 8 mm) is the type screw that should be used (do not use longer screws or the monitor
may be damaged).
SCREW
1. Before mounting the monitor, remove the base riser (vertical portion of the base) by removing the two
screws at the top with a screwdriver. Then the base and the riser can be removed. In order to prevent
losing the two screws, we suggest replacing the screws in their original holes.
2. Attach the VESA mount (100 mm x 100 mm) plate to the rear of the monitor and follow all of the
instructions provided with the mount to complete the mounting process.
5
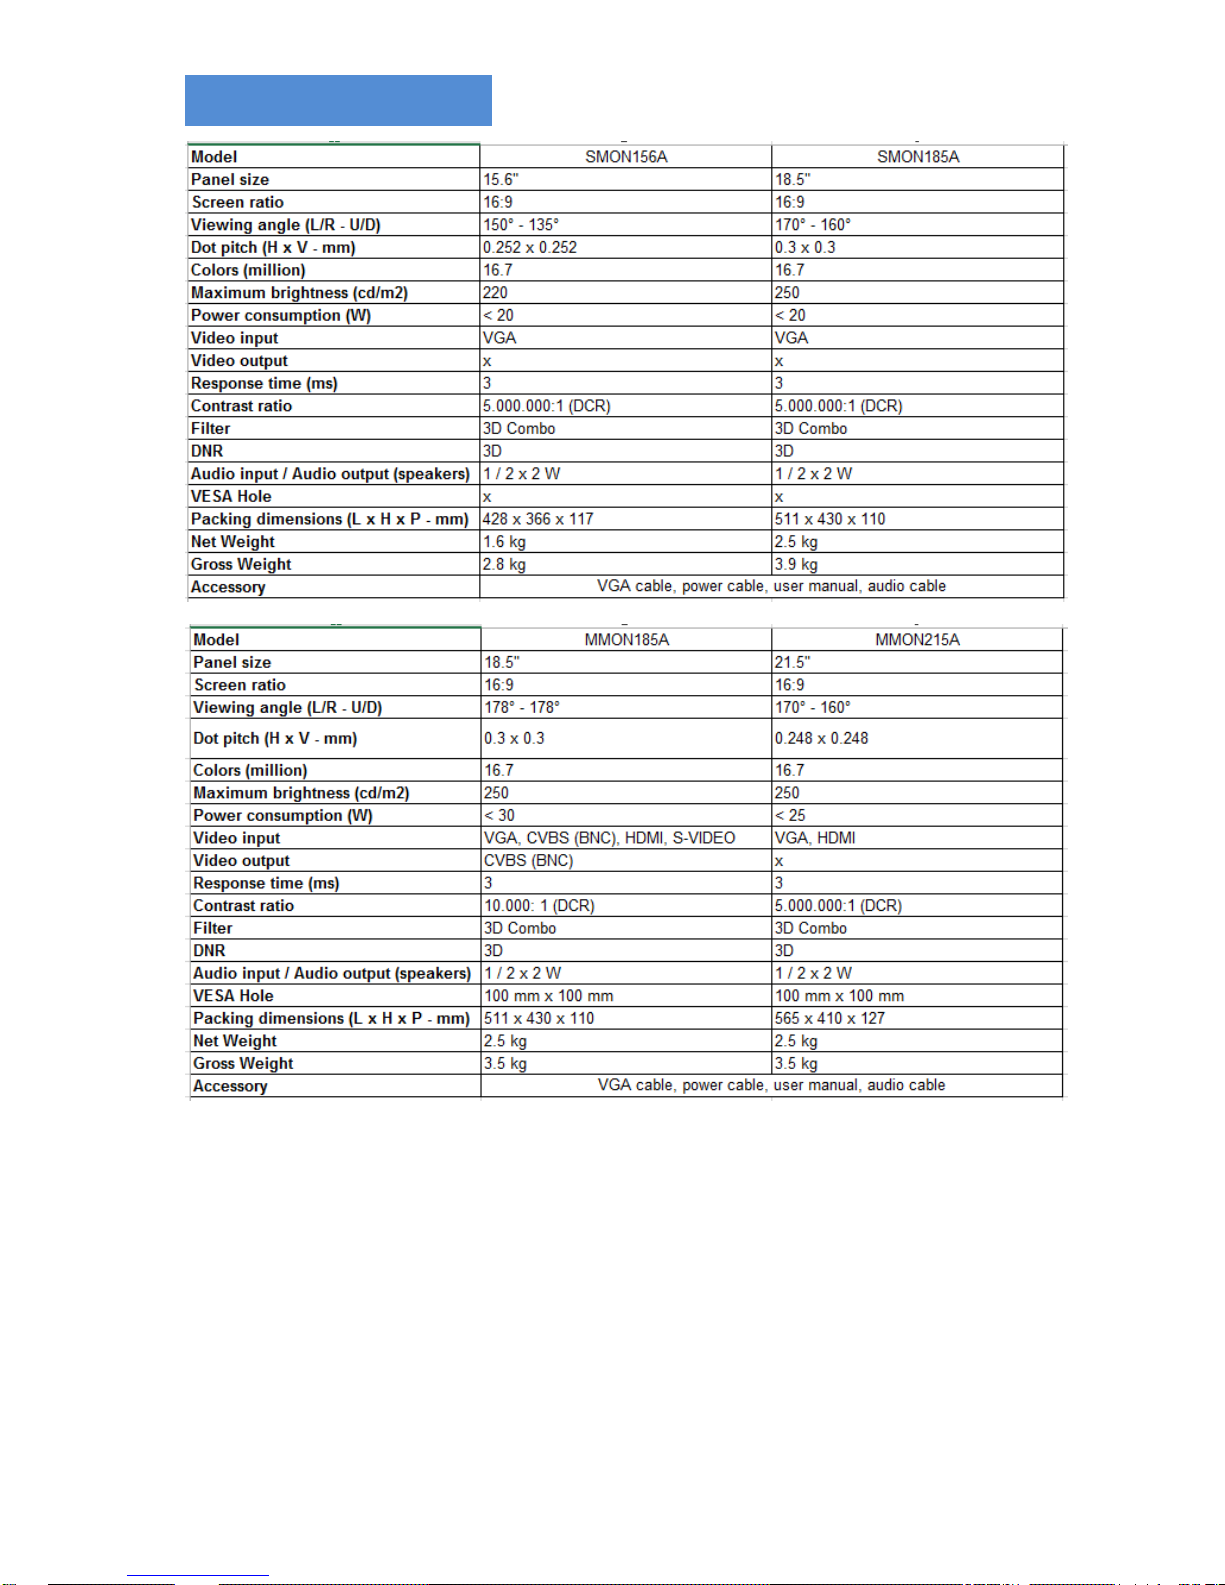
Specifications
▶ ▶ NOTE: technical specifications are subject to change without notice.
6
MONITOR ART. SMON156A
SMON185A
MMON185A
MMON215A
Prima di utilizzare questo dispositivo, si prega di leggere attentamente questo manuale e di
conservarlo per future consultazioni
7
Connettori
Art. MMON185A, MMON215A
A B C D E F G
A .AUDIO OUTPUT (uscita audio): Jack, Stereo (solo art. MMON185A)
B. AUDIO INPUT (ingresso audio): Jack, Stereo
C. CVBS/BNC OUTPUT (uscita BNC): connettore BNC (solo art. MMON185A)
D. CVBS/BNC INPUT (ingresso BNC): connettore BNC (solo art. MMON185A)
E. S-VIDEO (Y/C) INPUT (ingresso S-Video): connettore Mini-DIN 4 pin (solo art.
MMON185A)
F. VGA INPUT (ingresso VGA): connettore D-SUB 15 pin
G. HDMI INPUT (ingresso HDMI): connettore HDMI
SMON156A SMON185A
1 .AUDIO INPUT (ingresso audio): Jack, Stereo
2. DVI-I INPUT (ingresso DVI-I): connettore DVI-I (solo art. SMON185A, cavo DVI-I –
VGA in dotazione)
2A. VGA INPUT (ingresso VGA): connettore VGA (solo art. SMON156A)
3. POWER (alimentazione)
8
Controlli e indicatori art. MMON185A
Pulsante SOURCE/EXIT (sorgente video/uscita)
Premere il pulsante per visualizzare il menu Sorgente Video.
Selezionare tra gli ingressi video HDMI, S-Video,VGA o VIDEO (BNC)
“ ” pulsante SU
Premere il pulsante per spostare il cursore sulla funzione desiderata.
“ ” pulsante GIU’
Premere il pulsante per spostare il cursore sulla funzione desiderata.
“ ” pulsante DESTRA
Premere il pulsante per incrementare il volume
Premere il pulsante per incrementare il valore della funzione selezionata nel
sottomenu OSD.
“ ” pulsante SINISTRA
Premere il pulsante per decrementare il volume
Premere il pulsante per decrementare il valore della funzione selezionata nel
sottomenu OSD.
Pulsante MENU
Premere il pulsante per visualizzare il menu principale OSD.
Premere il pulsante per confermare le modifiche effettuate.
“ ” pulsante di Alimentazione
Premere il pulsante per accendere/spegnere il monitor
Led verde indicatore dell’alimentazione
Led acceso – monitor acceso
Led spento – monitor spento
Led acceso lampeggiante – modalità “Sleep” (solo se collegato a PC)
Controlli e indicatori art. MMON215A
Pulsante SOURCE (sorgente video)
Premere il pulsante per visualizzare il menu Sorgente Video.
Selezionare tra gli ingressi video HDMI e VGA
Pulsante UP (su)
Premere il pulsante per spostare il cursore sulla funzione desiderata.
Premere il pulsante per incrementare il valore della funzione selezionata nel
sottomenu OSD.
Pulsante DOWN (giù)
Premere il pulsante per spostare il cursore sulla funzione desiderata.
Premere il pulsante per decrementare il valore della funzione selezionata nel
sottomenu OSD.

9
Pulsante EXIT (uscita)
Premere il pulsante per tornare al menu precedente
Premere il pulsante per attivare la Regolazione Automatica.
Pulsante SCALE (scala)
Premere il pulsante per cambiare il tipo di visualizzazione (Wide o Normale).
Pulsante MENU
Premere il pulsante per visualizzare il menu principale OSD.
Premere il pulsante per confermare le modifiche effettuate.
“ ” pulsante di Alimentazione
Premere il pulsante per accendere/spegnere il monitor
Led verde indicatore dell’alimentazione
Led acceso – monitor acceso
Led spento – monitor spento
Led acceso lampeggiante – nessun segnale in ingresso
Controlli e indicatori art. SMON156A
e SMON185A
Pulsante UP (su)
Premere il pulsante per spostare il cursore sulla funzione desiderata.
Premere il pulsante per incrementare il valore della funzione selezionata nel
sottomenu OSD.
Pulsante DOWN (giù)
Premere il pulsante per spostare il cursore sulla funzione desiderata.
Premere il pulsante per decrementare il valore della funzione selezionata nel
sottomenu OSD.
Pulsante EXIT (uscita)
Premere il pulsante per tornare al menu precedente
Premere il pulsante per attivare la Regolazione Automatica.
Pulsante MENU
Premere il pulsante per visualizzare il menu principale OSD.
Premere il pulsante per confermare le modifiche effettuate.
“ ” pulsante di Alimentazione
Premere il pulsante per accendere/spegnere il monitor
Led verde indicatore dell’alimentazione
Led acceso – monitor acceso
Led spento – monitor spento
Led acceso lampeggiante – nessun segnale in ingresso
10
Guida al montaggio art. MMON185A e
MMON215A
Montaggio a muro con fissaggio standard VESA
Attenzione: la parete su cui viene fissato il monitor deve pesare minimo 5 volte il peso netto del
monitor . Per fissare il monitor a parete è necessario acquistare un fissaggio a standard VESA. Utilizzare viti
M4 x 8 mm (non incluse). Il modello del fissaggio VESA deve essere quello con i fori di fissaggio distanti 100
mm x 100 mm.
Nota: utilizzare solo viti di tipo metrico (M4 x 8 mm) (NON utilizzare viti più lunghe per non danneggiare il
monitor!).
VITI
1. Prima di montare il monitor, rimuovere la parte verticale della base svitando le 2 viti in alto con un
cacciavite. Ora la base e la sua parte verticale posso essere smontate. Per evitare di perdere le viti,
riavvitarle nella loro posizione originale.
2. Attaccare la placca del fissaggio VESA (100 mm x 100 mm) sul retro del monitor e seguire le
istruzioni allegate al fissaggio.
 Loading...