

Page 1
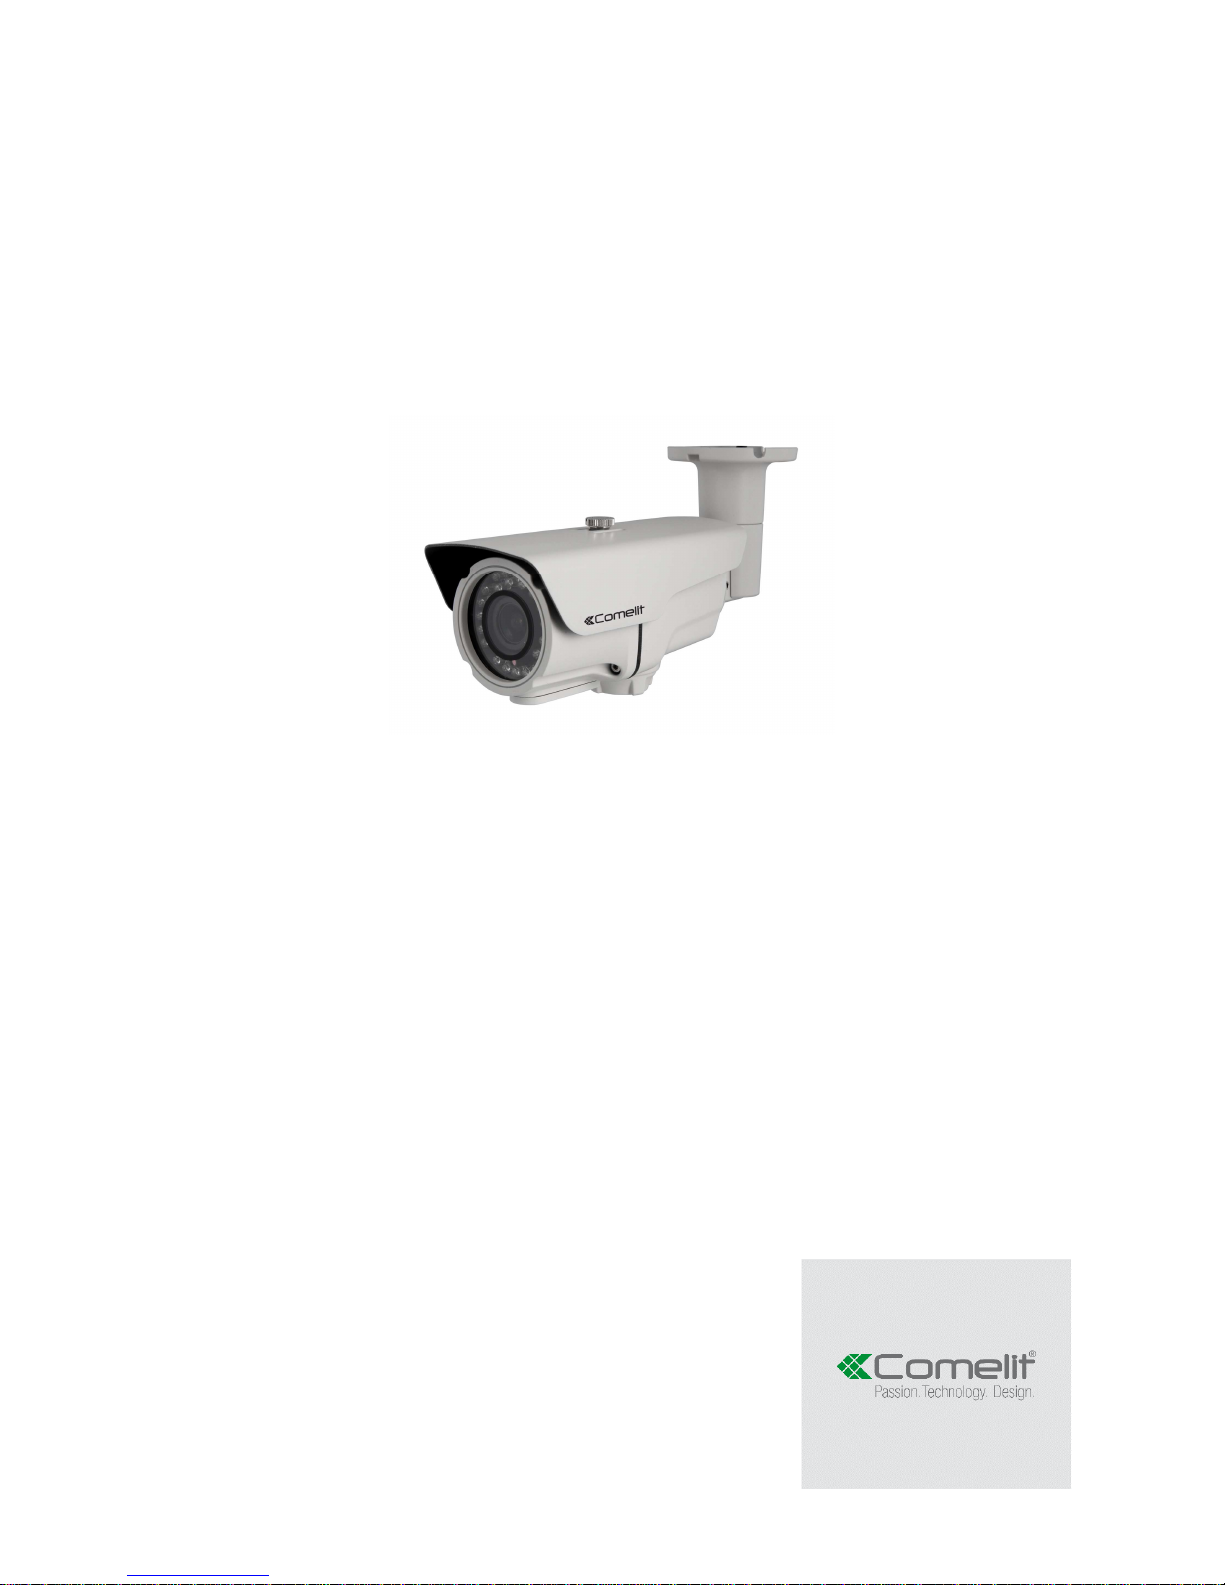
3MP BULLET
MOTORIZED ZOOM IP CAMERA
ART. IPCAM753ZA
QUICK GUIDE
Please read this guide thoroughly before use and keep it handy for future reference.
Page 2

2
Page 3
3
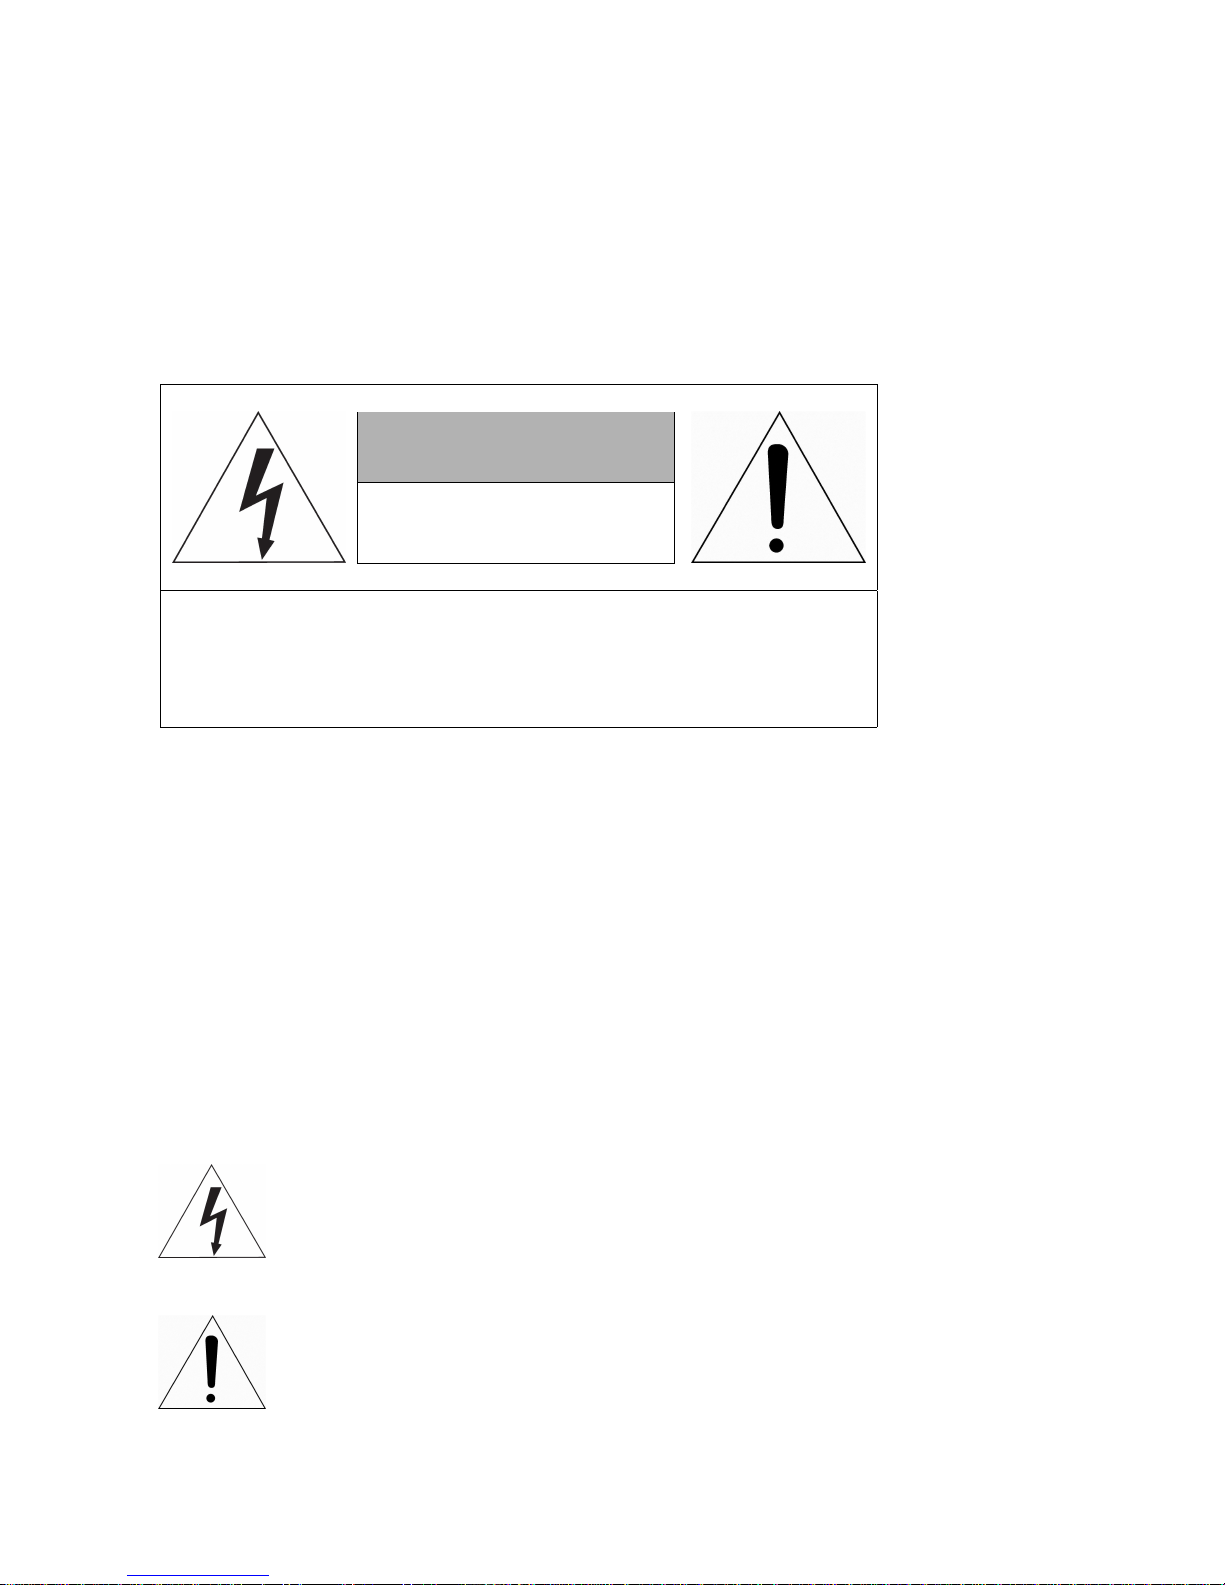
WARNING
TO REDUCE THE RISK OF FIRE OR ELECTRIC SHOCK, DO NOT EXPOSE THIS PRODUCT TO RAIN OR MOISTURE. DO NOT INSERT ANY
METALLIC OBJECT THROUGH THE VENTILATION GRILLS OR OTHER
OPENNINGS ON THE EQUIPMENT.
CAUTION
EXPLANATION OF GRAPHICAL SYMBOLS
The lightning flash with arrowhead symbol, within an equilateral triangle, is intended to alert the user to the presence of dangerous voltage within the products
enclosure that may be of sufficient magnitude to constitute a risk of electric shock
to persons.
The exclamation point within an equilateral triangle is intended to alert the user
to the presence of important operating and maintenance (servicing) instructions
in the literature accompanying the product.
CAUTION
RISK OF ELECTRIC SHOCK
DO NOT OPEN
WARNING: TO REDUCE THE RISK OF ELECTRIC SHOCK,
DO NOT REMOVE COVER (OR BACK).
NO USER-SERVICABLE PARTS INSIDE.
REFER SERVICING TO QUALIFIED SERVICE PERSONNEL
Page 4

4
FCC COMPLIANCE STATEMENT
CE COMPLIANCE STATEMENT
This device complies with Part 15 of the FCC Rules. Operation is subject
to the following two conditions: (1) this device may not cause harmful interference, and (2) this device must accept any interference received, including
interference that may cause undesired operation.
FCC INFORMATION:
This equipment has been tested and found to
comply with the limits for a Class A digital device, pursuant to Part 15 of
the FCC Rules. These limits are designed to provide reasonable protection
against harmful interference when the equipment is operated in a commer-
cial environment. This equipment generates, uses, and can radiate radio
frequency energy and, if not installed and used in accordance with the instruction manual, may cause harmful interference to radio communications.
Operation of this equipment in a residential area is likely to cause harmful interference in which case the user will be required to correct the interference
at his own expense.
CAUTION:
Changes or modifications not expressly approved by the party
responsible for compliance could void the user’s authority to operate the
equipment.
This Class A digital apparatus complies with Canadian ICES-003.
Cet appareil nume
`
rique de la classe A est conforme a
´
la norme NMB-003 du
Canada.
WARNING
This is a Class A product. In a domestic environment this product may cause
radio interference in which case the user may be required to take adequate
measures.
CAUTION
RISK OF EXPLOSION IF BATTERY IS REPLACED BY AN INCORRECT TYPE.
DISPOSE OF USED BATTERIES ACCORDING TO THE INSTRUCTIONS.
Page 5

5
IMPORTANT SAFETY INSTRUCTIONS
1.
Read these instructions.
2.
Keep these instructions.
3.
Heed all warnings.
4.
Follow all instructions.
5.
Do not use this apparatus near water.
6.
Clean only with dry cloth.
7.
Do not block any ventilation openings. Install in accordance with the manufacturers in-
structions.
8.
Do not install near any heat sources such as radiators, heat registers, stoves, or other
apparatus (including amplifiers) that produce heat.
9.
Do not defeat the safety purpose of the polarized or grounding-type plug. A polarized
plug has two blades with one wider than the other. A grounding type plug has two blades
and a third grounding prong. The wide blade or the third prong are provided for your
safety, If the provided plug does not fit into your outlet, consult an electrician for
replacement of the obsolete outlet.
10.
Protect the power cord from being walked on or pinched particularly at plugs, conve-
nience receptacles, and the point where they exit from the apparatus.
11.
Only use attachments/accessories specified by the manufacturer.
12.
Use only with the cart, stand, tripod, bracket, or table specified
by the manufacturer, or sold with the apparatus. When a cart is used.
Use caution when moving the cart/apparatus combination to avoid injury from tip-over.
13.
Unplug this apparatus during lightning storms or when unused for
long periods of time.
14.
Refer all servicing to qualified service personnel. Servicing is required when the apparatus has been damaged in any way, such as
power-supply cord or plug is damaged, liquid has been spilled or
objects have fallen into the apparatus, the apparatus has been exposed to rain or
moisture, does not operate normally, or has been dropped.
15.
CAUTION THESE SERVICING INSTRUCTIONS ARE FOR USE BY QUALIFIED
SERVICE PERSONNEL ONLY. TO REDUCE THE RISK OF ELECTRIC SHOCK DO
NOT PERFORM ANY SERVICING OTHER THAN THAT CONTAINED IN THE
OPERATING IN- STRUCTIONS UNLESS YOU QRE QUALIFIED TO DO SO.
16.
Use satisfy clause 2.5 of IEC60950-1/UL60950-1 or Certified/Listed Class 2
power
source only.
17.
ITE is to be connected only to PoE networks without routing to the outside plant.
Page 6

6
Contents
1
Introduction 7
1.1 Components
. . . . . . . . . . . . . . . . . . . . . . . . . . . . . . . . . . . . 7
1.2
Key Features . . . . . . . . . . . . . . . . . . . . . . . . . . . . . . . . . . . . 8
2
Installation 9
2.1
Overview . . . . . . . . . . . . . . . . . . . . . . . . . . . . . . . . . . . . . . 9
2.2
Connection ........................................................................................................................ 11
2.3
Resetting to the factory default settings ....................................................................... 12
A Appendix 13
A.1 Product Specification ....................................................................................................... 13
Page 7

7
1
Introduction
The network camera supports the network service for a sensor image with progressive scan,
which can be monitored on a real-time screen regardless of distances and locations. By using its dedicated program, many users are able to have an access to the network camera
at once or a single user can monitor various network cameras at the same time. It also
enables users to play, store and retrieve a monitoring image by using a PC. All the settings
and real-time monitoring screens are also provided through an access to the web.
The network camera is fully featured for security surveillance and remote monitoring needs.
It is based on the DSP compression chip, and makes it available on the network as real-time,
full frame rate Motion JPEG and H.264 video streams.
The alarm input and alarm output can be used to connect various third party devices, such
as, door sensors and alarm bells.
1.1
Components
This system comes with the following components;
Bullet Camera 1
Installation Guide/CD 1
Accessory Kit 1
Note 1. Check your package to make sure that you received the complete system, includ-
ing all components listed above.
Note 2. Adapter for DC 12V is not supplied.
Page 8

8
1.2
Key Features
•
Brilliant video quality
The network camera offers the highly efficient H.264 video compression, which drastically reduces bandwidth and storage requirements without compromising image quality. Motion JPEG is also supported for increased flexibility.
•
Wide Dynamic Range
The network camera provides digital WDR (Wide Dynamic Range) that improves video
exposure quality in scenes with high contrast between bright and dark areas in the
video, for example a shady area and a sunny area in the same scene.
•
Dual or Triple Streams
The network camera can deliver dual or triple video streams simultaneously at full
frame rate in all resolutions up to 3MP (2048 x 1536p) using H.264 and Motion JPEG.
This means that several video streams can be configured with different compression
formats, resolutions and frame rates for different needs.
•
Intelligent video capabilities
The network camera includes intelligent capabilities such as enhanced video motion
detection. The network cameras external inputs and outputs can be connected to devices such as sensors and relays, enabling the system to react to alarms and activate
lights or open/close doors.
•
Improved Security
The network camera logs all user access, and lists currently connected users. Also, its
full frame rate video can be provided over HTTPS.
•
PoE (Power over Ethernet)
This network camera can be powered through PoE (IEEE802.3af), which simplifies
installation since only one cable is needed for carrying power, as well as video controls.
•
ONVIF Certificate
This is a global interface standard that makes it easier for end users, integrators, consultants, and manufacturers to take advantage of the possibilities offered by network
video technology. ONVIF enables interoperability between different vendor products,
increased flexibility, reduced cost, and future-proof systems.
•
Micro-SD Recording support
The Network Camera also supports a micro-SD memory slot for local recording with
removable storage of type SDHC and SDXC.
•
Audio support
The Network Camera also supports two-way audio.
Page 9
9
2
Installation
For the operation of the Network Camera, it is necessary to connect a network cable for
data transmission, power connection from supplied power adapter. Depending on operation
methods, it is possible to connect an alarm cable additionally. For its fixation on different
locations, please consult with an installer.
2.1
Overview
•
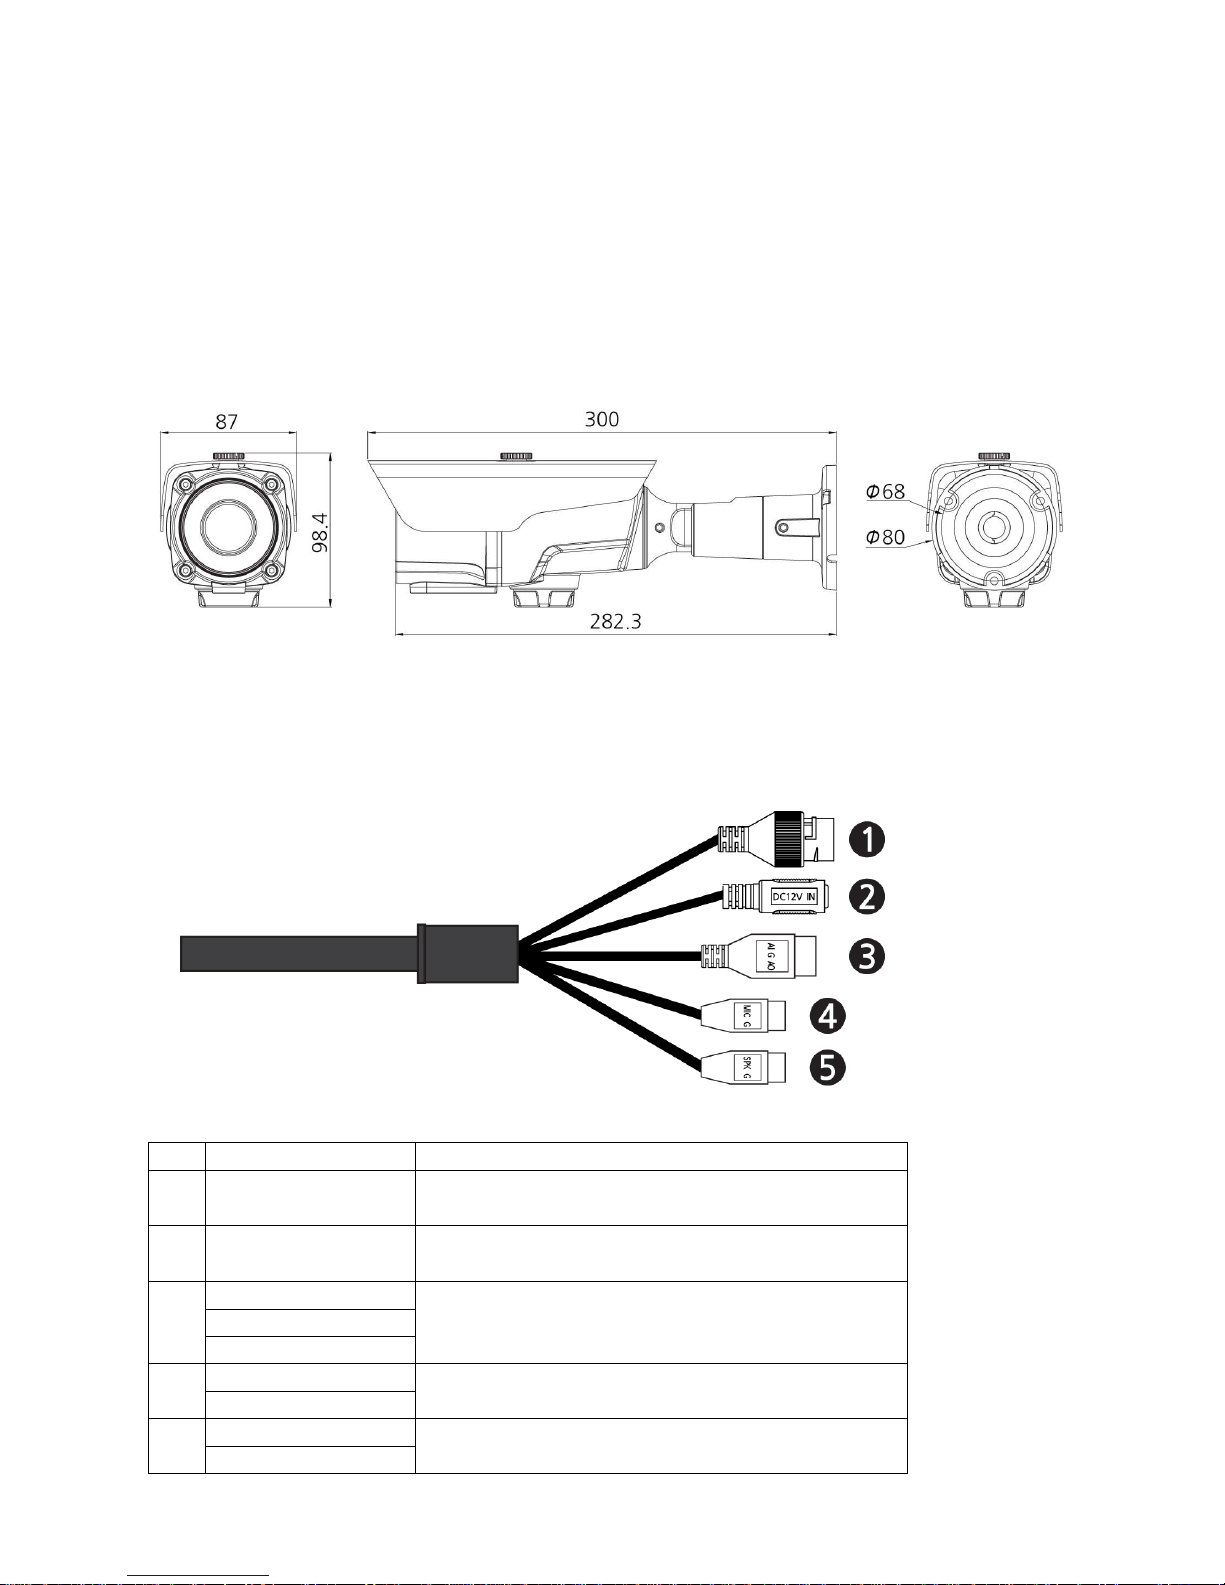
Dimension
Dimensions Unit: mm
•
Extension Cable
NO Item
Description
1
RJ-45
Ethernet, RJ
-
45
port compatible
with 10/100Mbps PoE Modular Jack
2
DC Jack
Main Power, DC Jack, DC12V
3
AI: Alarm In
Alarm input and output, 3pin terminal
G: GND
AO: Alarm Out
4
MIC: Audio In
Audio line input, 2pin terminal
G: GND
5
SPK: Audio Out
Audio line output, 2pin terminal
G: GND
Page 10
10
•
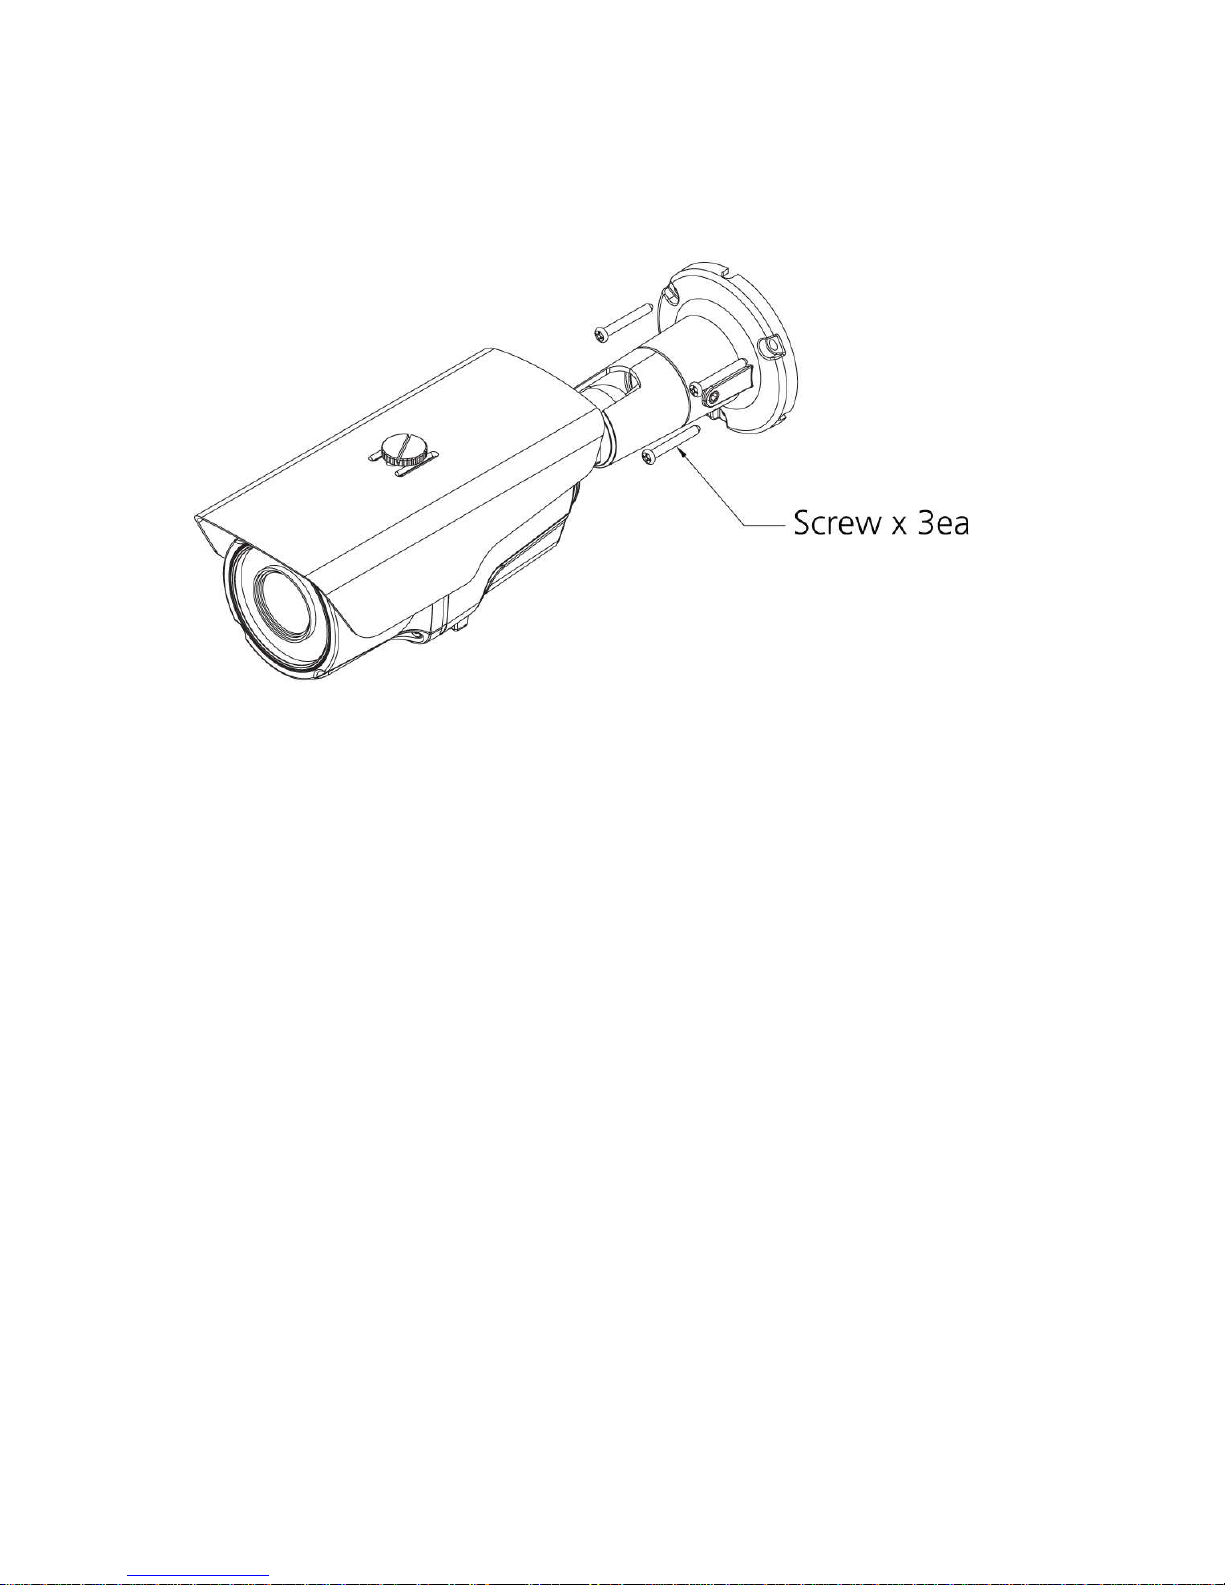
Installing Camera
To mount the bullet camera, fix the bace of the camera with the three screws provided in the
accessory kit.
Page 11
11
2.2
Connection
•
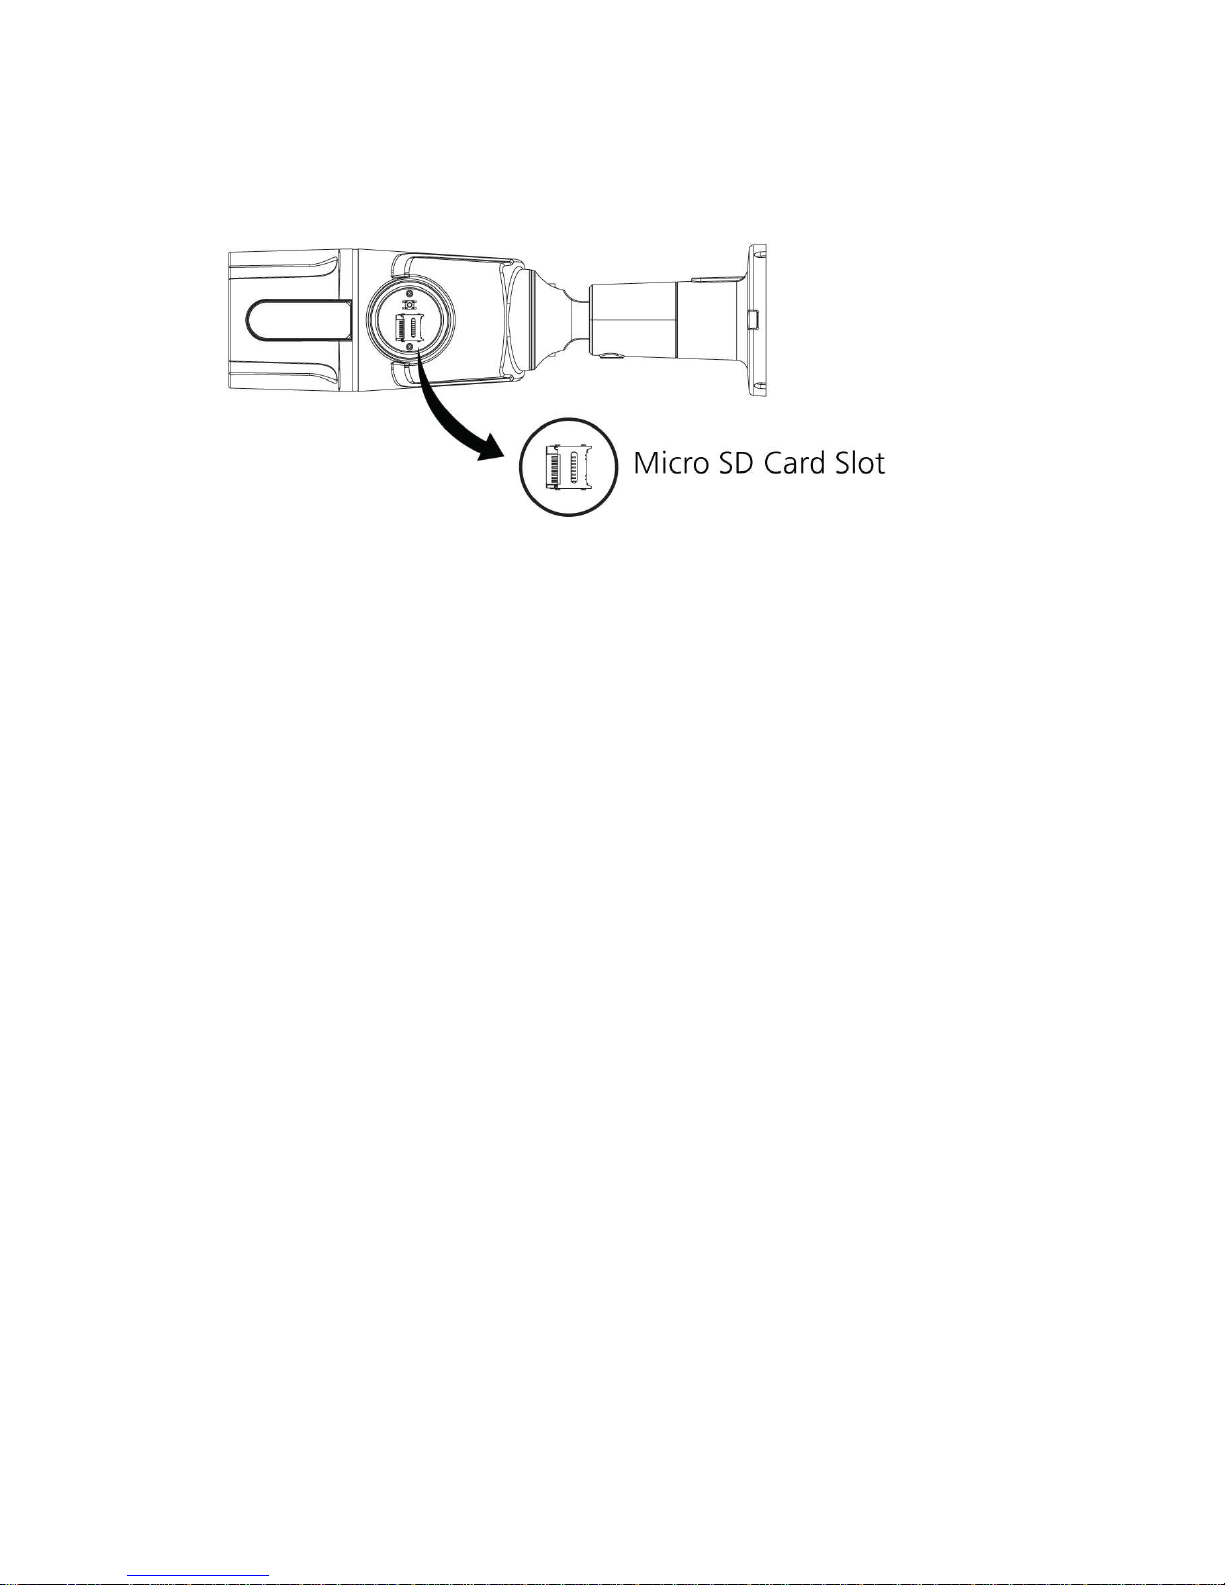
Micro SD memory slot on the Bottom Board
Remove the cap at buttom of the camera to insert the SD memory card.
•
Connecting to the RJ-45
Connect a standard RJ-45 cable to the network port of the network camera. Generally
a cross-over cable is used for directly connection to PC, while a direct cable is used for
connection to a hub. You can also use a router featuring PoE (Power over Ethernet) to
supply power to the camera.
•
Connecting Alarms
AI(Alarm In): You can use external devices to signal the network camera to react on
events. Mechanical or electrical switches can be wired to the AI (Alarm In) and G
(Ground) connectors.
G(Ground): Connect the ground side of the alarm input and/or alarm output to the G
(Ground) connector.
AO(Alarm Out): The network camera can activate external devices such as buzzers
or lights. Connect the device to the AO (Alarm Out) and G (Ground) connectors.
•
Connecting the Power
Connect the power of 12 VDC 450mA for the network camera. Connect the positive
(+) pole to the ‘+’ position and the negative (-) pole to the ‘-’ position for the DC power.
–
Be careful not to reverse the polarity when connecting the power cable.
–
A router featuring PoE (Power over Ethernet) can also be used to supply power to
the camera.
–
For the power specifications, refer to the Appendix, Product Specification.
–
If PoE and 12 VDC are both applied, the camera will be supplied with power from
PoE.
•
Connecting Audio
Connect Speaker to Audio line output and external Mic to Audio input line.
Page 12
12
2.3
Resetting to the factory default settings
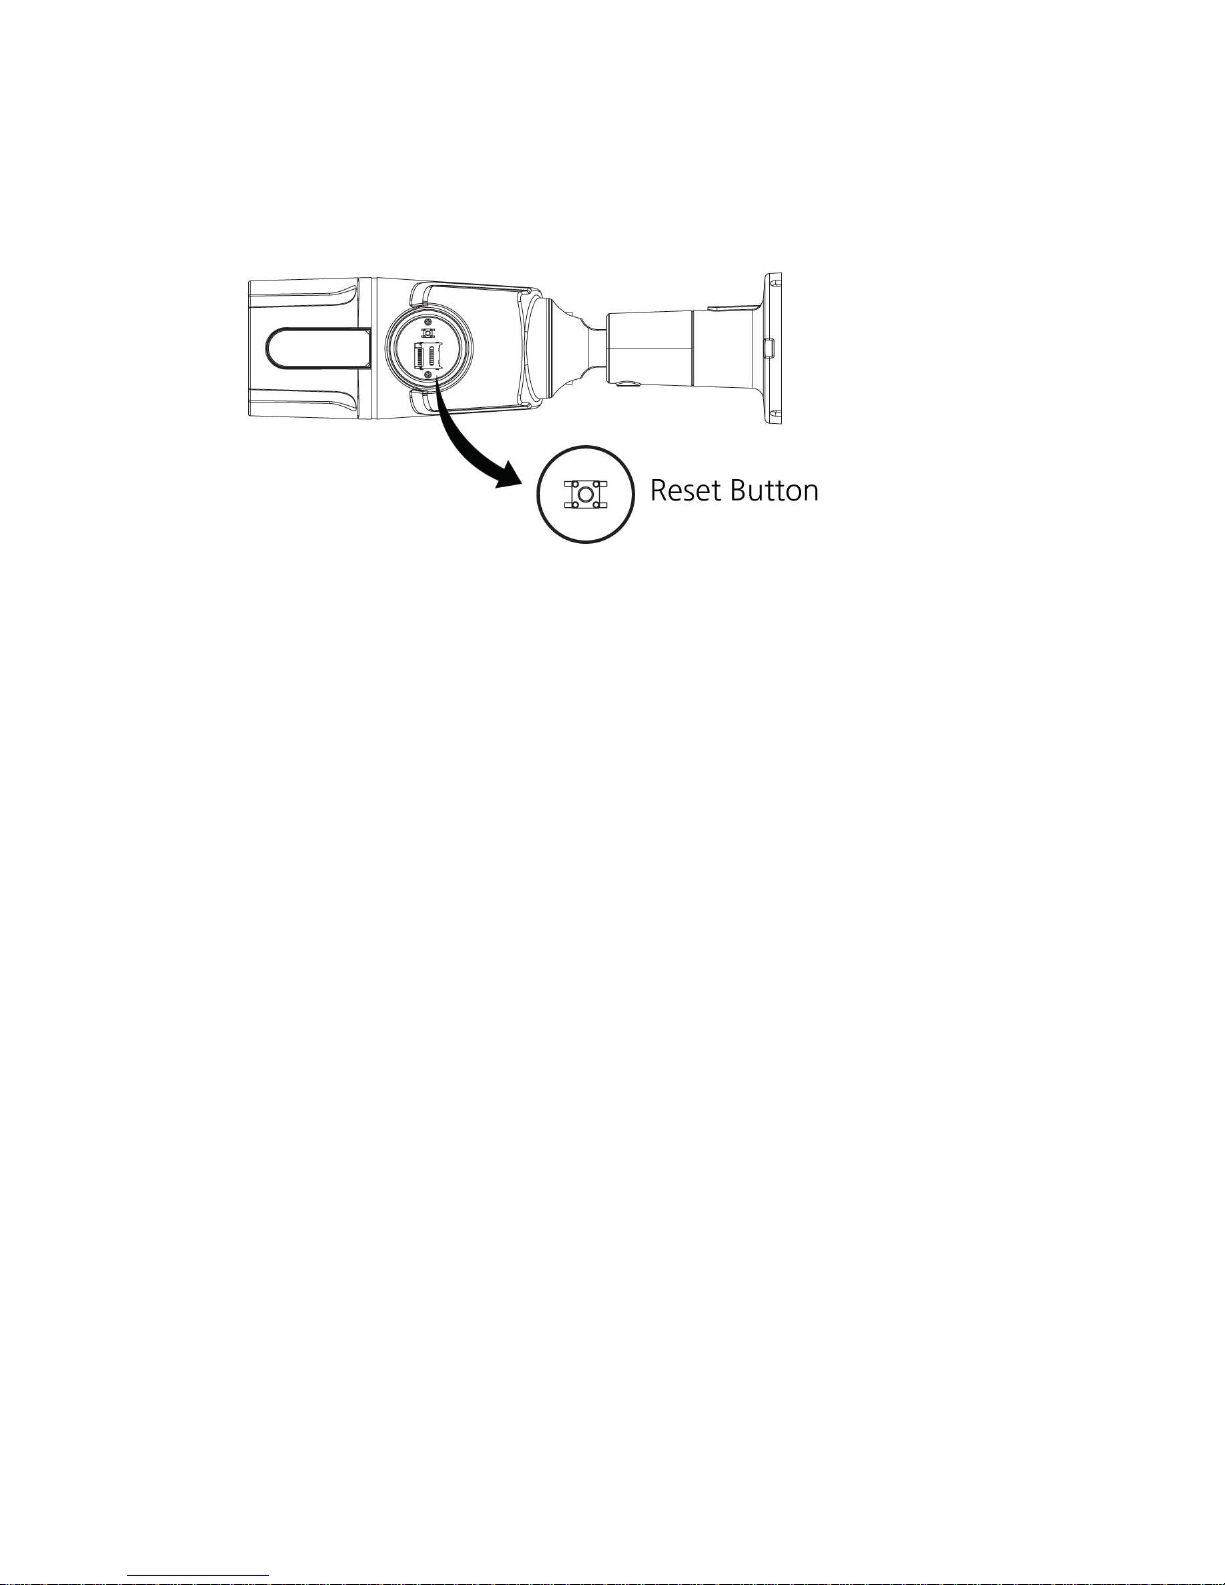
To reset the network camera to the original factory settings, go to the Setup > System >
Maintenance web page (described in “System > Maintenance” of Users Manual) or use
the Reset button on the network camera inside the bottom cap.
•
Using the Reset button:
Follow the instructions below to reset the network camera to the factory default settings
us- ing the Reset button.
1.
Switch off the network camera by disconnecting the power adapter.
2.
Open the top cap.
3.
Press and hold the Reset button with a straightened paperclip while reconnecting
the power.
4.
Keep the Reset button pressed until the Status indicator blink.
5.
Release the Reset button.
6.
When the Power Indicator changes to Green (may take up to 40 seconds), the
process is complete and the network video camera has been reset.
7.
The network camera resets to factory defaults and restarts after completing the
factory reset.
8.
Close the bottom cap tightly to ensure waterproof.
CAUTION: When performing a Factory Reset, you will lose any settings that have
been saved. (Default IP 192.168.30.220)
Page 13

13
A Appendix
A.1 Product Specification
3MP VCA BULLET IP CAMERA
Model IPCAM753ZA
Image
Lens
Motorized
Varifocal
2.8mm
∼
12.0mm,
F1.4,
DC
IRIS
Angle of View
97o (H)
∼
37o (H)
Image Sensor
Type 1/2.8” Sony Exmor CMOS
Pixels 2048 (H) x 1536 (V)
Min. Illumination
Color: 0.1 Lux @ F1.4
B/W: 0 Lux @ F1.4
Scanning Mode Progressive Scan
Wide Dynamic Range D-WDR (72dB)
Day and Night Mode True D/N (Auto, Day, Night)
Noise Reduction 2DNR, 3DNR
Digital Zoom Yes (ROI)
Exposure Control Auto
Auto White Balance Control Auto, Incandescent, Fluorescent, Outdoor, Manual
Back Light Compensation Yes
Image Effect Flip, Mirror, Aisle, Defog, HLC, S-LDC
Flicker Free Mode 50Hz, 60Hz
Shutter Speed
Auto(1/10,000
∼
1 sec),
Manual
IR Illuminator
Quality 32 IR LEDs
Angle 76
o
Distance up to 30m
Motorized Lens Control Smart Focus, Manual
Video/
Audio
Video Compression H.264 (Baseline, Main, High Profile), MJPEG
Bitrate Control CVBR, VBR
Video Resolution
2048x1536, 1920x1080, 1280x1024, 1280x720/960,
1024x768, 704x480/576, 640x360/480, 320x240
Video Frame Rate Max. 25fps/30fps
Video Streaming 25/30fps (Triple Stream : H.264 x 2, MJPEG x 1)
Composite Out
Audio Compression G.711
Audio Streaming 2 Way
System
Video Contents Analysis Tampering, Line Detector, Field Detector
Motion Detection Area 16 Programmable Area (Include Area 8, Exclude Area 8)
Privacy Mask 8 Programmable Zone
FTP Uploading MJPEG
Event Notification
E-mail, FTP, Notification Server,
XML Notification, Audio Alert, AIHM
Audio Alert User-Defined 3 Audio files
Login Authority Administrator, Operator, Guest
Event Buffering
FTP Pre : 30sec, Post : 30sec
SD Record Pre : 10sec, Post : 60sec
Manual Trigger 4 Programmable Trigger
Security Multi User Authority, IP Filtering, HTTPS, SSL
Network Time Sync NTP Server, Synchronize Computer, Manual
Software Reset Restart, Reset, Factory Default
Hardware Factory Reset Yes
Auto Recovery Backup, Restore
Remote Upgrade Web Browsing(IE, Chrome, Safari, Firefox), SmartManager
SD Recording Mode Event, Continuous
Page 14

14
Network
Protocols
TCP/IP, UDP, IPv4/IPv6, HTTP, HTTPS, QoS, FTP,
UPnP, RTP, RTSP,RTCP, DHCP, ARP, Zeroconf, Bonjour
Client Software Web, SmartManager, Client S/W, Mobile S/W
Max. User Connection Live : 10 Users, Playback : 3 Users
API Support Open API, ONVIF Compliance
Mobile Support Android, i-OS
External
In/Out
Video Composite Out
Audio 1 Input, 1 Output (Terminal Block)
Alarm 1 Input, 1 Output (Terminal Block)
Ethernet RJ-45 (10/100Base-T)
µ
-SD Card SDHC, SDXC
RS485
OSD-Remote Control
-
ETC
Operating Humidity
0
∼
90% RH
(Non
-
condensing)
Operating Temperature
-
20oC
∼
+50oC
Power Supply PoE(IEEE802.3af compliant, Class0), 12VDC
Power Consumption 150ma (7.2W)@PoE, 600mA (7W)@12VDC
Dimensions 300mm (W) x 98.4mm (H) x 87mm (D)
Net Weight 1.030g
Ingress Protection IP67
> Specifications are subject to change without notice.
Page 15

Page 16

 Loading...