

Page 1
DX-80 Technical Manua
l
I
g
Volume I
Programmin
Page 2

DX-80 Technical Manual
Volume II
Programming
Copyright © 2003 Comdial Corporation
All rights reserved. Unauthorized use of this document is
prohibited.
Comdial Corporation
106 Cattleman Road, Sarasota, FL 34232
(941) 554-5000 or (800) 266-3425
-Notice-
Comdial reserves the right to make any
changes and improvements in the product
described in this document at any time and
without prior notice.
DX-80, PC-DBA, and DET are trademarks of Comdial Corporation. All other product names are trademarks of their
respective owners.
First Edition
October, 2003
ii GCA60-001 October ‘03
Page 3

DX-80 Programming Manual
REVISION HISTORY
Version Changes Date
01 Initial version 10-31-2003
October, 03 Comdial iii
Page 4

This Page Intentionally Left Blank
iv Comdial October, 03
Page 5

DX-80 Programming Manual
Introduction
This manual describes how to set up the database and related settings of the DX-80 system once you
have installed it. It also contains procedures covering how to modify an existing system’s programming.
This manual is intended to provide:
• basic knowledge of the functions and features of the DX-80 hardware and software
• step-by-step procedures for programming the DX-80 database, either on or off site.
Audience Description
This manual is intended for persons who:
• plan for, install, and program hardware and software in support of telecommunications switching
systems, using the Comdial DX-80 switch and analog and digital phones.
• maintain and update such phone systems on a day-to-day basis.
• support their onsite client base.
This manual assumes:
• knowledge of the telephony industry, in particular small PBX switches and telephones.
• familiarity with personal computer hardware and software, including modems, and the Microsoft
DOS operating environment (applicable to using PC-DBA only).
You should:
• read this manual in normal reading sequence before starting this programming task.
• refer to this manual as necessary while performing programming, servicing, and upgrading tasks.
Related Publications
This manual refers you to related publications, when appropriate, for additional information.
• DX-80 Technical Manual, Volume 1, Installation and Maintenance, part number IMI72-001.
Conventions Used in this Manual
Many of the procedures require you to enter settings or to choose from a list of variables. To signify
when you are to act upon an item, parameter, button, etc. we italicize the name of the item being acted
upon. For example, the following sentences instruct you to press a specific key on your keyboard.
• Press Enter.
• Press Esc.
• Press Page Up or Page Down.
• Press and hold the Shift and Ctrl keys simultaneously.
In contrast, the following sentence instructs you to type in a required response; notice the word “Enter”
when used in this way is not italicized because you are not pushing a specific key name.
• Enter the value you want to use for this feature.
October, 03 Comdial v
Page 6

Introduction
Similarly, when you select a menu option, we italicize the name of the menu item because you are
required to take the action of choosing it, even though the item may not appear in italics on the system
menu or display.
• Use the arrow keys to highlight Programming and press Enter.
At other times in the manual, we discuss prompts that the system displays to you. In these cases, we
enclose the exact wording of the prompt in quotation marks to signify that the system is, in essence,
speaking to you.
• The system prompts, “Enter your password now.”
If the system is actually playing a recording aloud, we enclose the exact wording of the prompt in quotation marks and italics to signify that the system is in actually speaking to you.
• The system says, “You have no more new messages.”
Italics and quotes are also of course used in their normal contexts, that is, for emphasis and to identify
what words are spoken.
• This is called a hot transfer, that is, the system transfers the call without ringing the extension.
There are times when this manual will instruct you to enter a number from within a range of numbers.
In this instance, we use the “~ “ character to indicate the range. For example, 05-01-1~3-001~100 tells
you to enter:
• 05
• 01
• a 1, 2, or 3,
• a three-digit number that falls in the 001 to 100 range.
vi Comdial October, 03
Page 7

DX-80 Programming Manual
TABLE OF CONTENTS
Introduction
Audience Description ..................................................................................................v
Related Publications ...................................................................................................v
Conventions Used in this Manual ...............................................................................v
Chapter 1. Overview
1.1 Programming Methods ...................................................................................... 19
1.2 Upgrading an Existing System .......................................................................... 21
1.3 Programming a New System ............................................................................. 22
1.3.1 Setting Up the System Features .......................................................................... 23
1.3.2 Setting Up CO Lines ............................................................................................ 24
1.3.3 Setting Up Call Handling ...................................................................................... 24
1.3.4 Setting Up Toll Restrictions .................................................................................. 25
1.3.5 Setting Up UCD Groups ....................................................................................... 25
1.3.6 Setting Up Voice Mail ........................................................................................... 26
1.3.7 Setting Up Extensions .......................................................................................... 26
1.3.8 Setting Up Feature Buttons on Phones ............................................................... 27
Chapter 2. Programming Options
2.1 Using PC-Database Administration (PC-DBA) .................................................. 29
2.1.1 Loading PC-DBA Software .................................................................................. 30
2.1.2 Programming Using PC-DBA ............................................................................... 30
2.1.3 Database Save and Restore ................................................................................ 33
2.1.3.1 Performing a Save .....................................................................................................33
2.1.3.2 Performing a Restore ................................................................................................. 34
2.1.4 PC-DBA Control Keys .......................................................................................... 35
2.1.4.1 F1 – Help .................................................................................................................... 35
2.1.4.2 F2 – A-Save/U-Save .................................................................................................. 35
2.1.4.3 F3 – Receive ..............................................................................................................35
2.1.4.4 F4 – Send ................................................................................................................... 36
2.1.4.5 F5 – Connect .............................................................................................................. 37
2.1.4.6 F6 – Disconnect ......................................................................................................... 38
2.1.4.7 F7 – Print .................................................................................................................... 39
2.1.4.8 F8 – Initialize .............................................................................................................. 39
2.1.4.9 F9 – Modem ...............................................................................................................39
2.1.4.10 F10 – RS232C .........................................................................................................40
October, ‘03 Comdial vii
Page 8

2.2 Using Any Digital Extension Telephone (DET) .................................................. 41
2.2.1 Entering the Database Administration Mode ........................................................41
2.2.2 LCD Interactive buttons ........................................................................................41
2.2.3 Database Item Select Screen ...............................................................................41
2.2.4 Exiting Database Administration ...........................................................................42
2.2.5 Changing Database Administration Password .....................................................42
Chapter 3. Getting Started
3.1 Shortcuts to Help You Work Faster ................................................................... 43
3.1.1 Using a Database Programming Template ...........................................................43
3.1.2 Copying Baseline CO Line Setups .......................................................................45
3.1.2.1 Programming Using the DET .....................................................................................45
3.1.2.2 Programming Using PC-DBA .....................................................................................46
3.1.3 Copying Baseline Extension Setups .....................................................................48
3.1.3.1 Programming Using the DET .....................................................................................49
3.1.3.2 Programming Using PC-DBA .....................................................................................50
3.1.4 Feature / Directory Number Lookup .....................................................................53
3.1.4.1 Directory Numbers .....................................................................................................54
3.1.4.2 Feature Access Codes ...............................................................................................55
3.1.4.3 Suffix Codes ...............................................................................................................57
3.1.5 Resetting an Extension to the Default Set............................................................ 57
Chapter 4. Programming System Features
4.1 Establishing Database Administrator Password ................................................ 60
4.1.1 Programming Using the DET ..............................................................................60
4.1.2 Programming Using PC-DBA ...............................................................................60
4.2 Assigning Attendants ......................................................................................... 61
4.2.1 Programming Using the DET ................................................................................63
4.2.2 Programming Using PC-DBA ...............................................................................63
4.3 Assigning System Reminders ............................................................................ 65
4.3.1 Programming Using the DET ................................................................................65
4.3.2 Programming Using PC-DBA ...............................................................................65
4.4 Setting User Password Lengths, Setting Passwords for System
Directory Numbers 101, 102, and 108 .............................................................. 67
4.4.1 Programming Using the DET ...............................................................................67
4.4.2 Programming Using PC-DBA ...............................................................................68
viii Comdial October, ‘03
Page 9

DX-80 Programming Manual
4.5 Specifying User Names for x101 and x108 ....................................................... 69
4.5.1 Programming Using the DET .............................................................................. 69
4.5.2 Programming Using PC-DBA ............................................................................... 69
4.6 Naming CO Lines .............................................................................................. 70
4.6.1 Programming Using the DET ............................................................................... 70
4.6.2 Programming Using PC-DBA ............................................................................... 71
4.7 Setting Up Pre-Programmed Messages ............................................................ 72
4.7.1 Programming Using the DET ............................................................................... 72
4.7.2 Programming Using PC-DBA ............................................................................... 73
4.8 Programming Speed Dial Numbers ................................................................... 74
4.8.1 Programming Using the DET ............................................................................... 74
4.8.2 Programming Using PC-DBA ............................................................................... 76
4.9 Controlling the Number of Caller ID Entries in the CID Table ........................... 80
4.9.1 Programming Using the DET ............................................................................... 80
4.9.2 Programming Using PC-DBA ............................................................................... 80
4.10 Establishing Music Sources ............................................................................. 81
4.10.1 Programming Using the DET ............................................................................. 82
4.10.2 Programming Using PC-DBA ............................................................................. 82
4.11 Assigning External Pager ID ............................................................................ 83
4.11.1 Programming Using the DET ............................................................................. 84
4.11.2 Programming Using PC-DBA ............................................................................. 84
4.12 Assigning Ancillary Devices (Loud Bell, External Page, or Music on Hold) ..... 85
4.12.1 Programming Using the DET ............................................................................. 85
4.12.2 Programming Using PC-DBA ............................................................................. 86
4.13 Assigning the DSS Port/Owner ....................................................................... 87
4.13.1 Programming Using the DET ............................................................................. 87
4.13.2 Programming Using PC-DBA ............................................................................. 88
4.14 Setting Up Optional Internal Modem ............................................................... 89
4.14.1 Programming Using the DET ............................................................................. 89
4.14.2 Programming Using PC-DBA ............................................................................. 89
4.15 Specifying PC-DBA Transmit Rate .................................................................. 90
4.15.1 Programming Using the DET ............................................................................. 90
4.15.2 Programming Using PC-DBA ............................................................................. 91
October, ‘03 Comdial ix
Page 10

4.16 Selecting SMDR Transmit Rate ....................................................................... 92
4.16.1 Programming Using the DET ..............................................................................92
4.16.2 Programming Using PC-DBA .............................................................................92
4.17 Setting Up Ring Scheme ................................................................................. 93
4.17.1 Programming Using the DET ..............................................................................94
4.17.2 Programming Using PC-DBA .............................................................................95
4.18 Setting Up Letter Type (Enhanced Lettering Scheme) .................................... 96
4.18.1 Programming Using the DET .............................................................................98
4.18.2 Programming Using PC-DBA .............................................................................99
4.19 Setting System Time, Date, and Hour Mode ................................................. 100
4.19.1 Programming Using the DET ............................................................................100
4.19.2 Programming Using PC-DBA ...........................................................................100
4.20 Customizing the Numbering Plan .................................................................. 102
4.20.1 Programming Using the DET ............................................................................105
4.20.2 Programming Using PC-DBA ...........................................................................106
4.20.2.1 Numbering Plan 1 ...................................................................................................106
4.20.2.2 Numbering Plan 2 ...................................................................................................107
4.20.2.3 Numbering Plan 3 ...................................................................................................108
4.20.2.4 Numbering Plan 4 ...................................................................................................109
Chapter 5. Programming CO Lines
5.1 Phantom Lines / Virtual Numbers 112
5.2 Assigning the Tenant Group ............................................................................ 112
5.2.1 Programming Using the DET .............................................................................113
5.2.2 Programming Using PC-DBA .............................................................................113
5.3 Assigning the CO Group .................................................................................. 114
5.3.1 Programming Using the DET ..............................................................................114
5.3.2 Programming Using PC-DBA .............................................................................115
5.4 Setting the Day and Evening Class of Services and Music On Hold (MOH)
Source ............................................................................................................ 116
5.4.1 Programming Using the DET ..............................................................................116
5.4.2 Programming Using PC-DBA .............................................................................117
5.5 Setting the Dial Type ....................................................................................... 118
5.5.1 Programming Using the DET ..............................................................................118
5.5.2 Programming Using PC-DBA .............................................................................118
x Comdial October, ‘03
Page 11

DX-80 Programming Manual
5.6 Setting the CO Line Type ................................................................................ 119
5.6.1 Programming Using the DET ............................................................................. 120
5.6.2 Programming Using PC-DBA ............................................................................. 120
5.7 Setting Call Abandon ....................................................................................... 121
5.7.1 Programming Using the DET ............................................................................. 121
5.7.2 Programming Using PC-DBA ............................................................................. 121
5.8 Setting Privacy and Privacy Release ............................................................... 122
5.8.1 Programming Using the DET ............................................................................. 123
5.8.2 Programming Using PC-DBA ............................................................................. 123
5.9 Assigning Ring Type for the CO Line .............................................................. 124
5.9.1 Programming Using the DET ............................................................................. 124
5.9.2 Programming Using PC-DBA ............................................................................. 125
5.10 Setting the Answer Position for Day and Evening ........................................ 126
5.10.1 Programming Using the DET ........................................................................... 126
5.10.2 Programming Using PC-DBA ........................................................................... 127
5.11 Set CO Line Time Switching .......................................................................... 128
5.11.1 Programming Using the DET ........................................................................... 129
5.11.2 Programming Using PC-DBA ........................................................................... 129
5.12 Setting the Pre-Defined Call Forward No Answer ......................................... 131
5.12.1 Programming Using the DET ........................................................................... 131
5.12.2 Programming Using PC-DBA ........................................................................... 131
5.13 Setting Up the PBX Code and Hunt Method ................................................. 132
5.13.1 Programming Using the DET ........................................................................... 133
5.13.2 Programming Using PC-DBA ........................................................................... 133
5.14 Setting Up the Alternate CO Line Group ....................................................... 134
5.14.1 Programming Using the DET ........................................................................... 135
5.14.2 Programming Using PC-DBA ........................................................................... 136
5.15 Setting Up FAX Detection .............................................................................. 137
5.15.1 Programming Using the DET ........................................................................... 137
5.15.2 Programming Using PC-DBA ........................................................................... 137
October, ‘03 Comdial xi
Page 12

Chapter 6. Programming Call Handling
6.1 Ringing Line Priority ......................................................................................... 140
6.2 Programming Conference Calls ....................................................................... 141
6.2.1 Programming Using the DET .............................................................................142
6.2.2 Programming Using PC-DBA .............................................................................142
6.3 Specifying CO Flash Time ............................................................................... 144
6.3.1 Programming Using the DET .............................................................................144
6.3.2 Programming Using PC-DBA .............................................................................145
6.4 Specifying PBX Flash Time ............................................................................. 146
6.4.1 Programming Using the DET ..............................................................................146
6.4.2 Programming Using PC-DBA .............................................................................147
6.5 Specifying Pause Time .................................................................................... 147
6.5.1 Programming Using the DET ..............................................................................148
6.5.2 Programming Using PC-DBA .............................................................................148
6.6 Specifying Ring Abandon ................................................................................ 149
6.6.1 Programming Using the DET ..............................................................................150
6.6.2 Programming Using PC-DBA .............................................................................150
6.7 Setting Up Hold Remind .................................................................................. 151
6.7.1 Programming Using the DET ..............................................................................151
6.7.2 Programming Using PC-DBA .............................................................................151
6.8 Selecting Exclusive Hold Time ........................................................................ 152
6.8.1 Programming Using the DET ..............................................................................153
6.8.2 Programming Using PC-DBA .............................................................................153
6.9 Establishing Warning Time for Limited Call Lengths ....................................... 154
6.9.1 Programming Using the DET ..............................................................................155
6.9.2 Programming Using PC-DBA .............................................................................155
6.10 Setting Up Transfer Recalls for Idle and Busy Extensions ............................ 156
6.10.1 Programming Using the DET ............................................................................157
6.10.2 Programming Using PC-DBA ...........................................................................158
6.11 Setting Up Hold Recall ................................................................................... 158
6.11.1 Programming Using the DET ............................................................................159
6.11.2 Programming Using PC-DBA ...........................................................................160
xii Comdial October, ‘03
Page 13

DX-80 Programming Manual
6.12 Setting Up Dial Wait Time and Dial Delay ..................................................... 161
6.12.1 Programming Using the DET ........................................................................... 161
6.12.2 Programming Using PC-DBA ........................................................................... 161
6.13 Establishing the Dialing Ratio ........................................................................ 163
6.13.1 Programming Using the DET ........................................................................... 163
6.13.2 Programming Using PC-DBA ........................................................................... 164
6.14 Establishing Start and End of SLT Hook Flash ............................................. 165
6.14.1 Programming Using the DET ........................................................................... 165
6.14.2 Programming Using PC-DBA ........................................................................... 166
6.15 Programming Auto Redial ............................................................................. 167
6.15.1 Programming Using the DET ........................................................................... 167
6.15.2 Programming Using PC-DBA ........................................................................... 168
6.16 Programming External Call Forward ............................................................. 169
6.16.1 Programming Using the DET ........................................................................... 169
6.16.2 Programming Using PC-DBA ........................................................................... 170
6.17 Setting Conference Talk Time Intervals and Conference Tones ................... 171
6.17.1 Programming Using the DET ........................................................................... 171
6.17.2 Programming Using PC-DBA ........................................................................... 172
6.18 Setting Up Camp On Interval ......................................................................... 173
6.18.1 Programming Using the DET ........................................................................... 173
6.18.2 Programming Using PC-DBA ........................................................................... 174
6.19 Setting Up Alarm Play Intervals ..................................................................... 174
6.19.1 Programming Using the DET ........................................................................... 175
6.19.2 Programming Using PC-DBA ........................................................................... 175
6.20 Enabling/Disabling Hotel Feature .................................................................. 176
6.20.1 Programming Using the DET ........................................................................... 176
6.20.2 Programming Using PC-DBA ........................................................................... 176
6.21 Enabling/Disabling System Speed Toll Check .............................................. 177
6.21.1 Programming Using the DET ........................................................................... 178
6.21.2 Programming Using PC-DBA ........................................................................... 178
6.22 Enabling/Disabling TSI Connection ............................................................... 179
6.22.1 Programming Using the DET ........................................................................... 179
6.22.2 Programming Using PC-DBA ........................................................................... 179
October, ‘03 Comdial xiii
Page 14

6.23 Enabling/Disabling Conference Tone ............................................................ 180
6.23.1 Programming Using the DET ............................................................................180
6.23.2 Programming Using PC-DBA ...........................................................................181
6.24 Specifying Call Duration ................................................................................ 181
6.24.1 Programming Using the DET ............................................................................182
6.24.2 Programming Using PC-DBA ...........................................................................182
6.25 Programming Caller ID Codes and Local Calling Areas ................................ 183
6.25.1 Programming Using the DET ............................................................................184
6.25.2 Programming Using PC-DBA ...........................................................................185
6.26 Programming Tenant Groups ........................................................................ 186
6.26.1 Programming Using the DET ............................................................................187
6.26.2 Programming Using PC-DBA ...........................................................................188
6.27 Setting Up SMDR Call Output ....................................................................... 189
6.27.1 Programming Using the DET ............................................................................190
6.27.2 Programming Using PC-DBA ...........................................................................191
6.28 Programming Voice Mail ................................................................................ 193
6.29 Setting Fax Ring Time ................................................................................... 193
6.29.1 Programming Using the DET ............................................................................193
6.29.2 Programming Using PC-DBA ...........................................................................194
6.30 Setting Predefined Call Forward Time ........................................................... 195
6.30.1 Programming Using the DET ............................................................................195
6.30.2 Programming Using PC-DBA ...........................................................................195
6.31 Setting Ring On Recognition Time Interval .................................................... 196
6.31.1 Programming Using the DET ............................................................................196
6.31.2 Programming Using PC-DBA ...........................................................................197
6.32 Setting Talk Abandon Time Interval ............................................................... 198
6.32.1 Programming Using the DET ............................................................................198
6.32.2 Programming Using PC-DBA ...........................................................................198
6.33 Setting Hold Abandon Time Interval .............................................................. 199
6.33.1 Programming Using the DET ............................................................................200
6.33.2 Programming Using PC-DBA ...........................................................................200
6.34 Setting Unsupervised Talk Time .................................................................... 201
6.34.1 Programming Using the DET ............................................................................201
6.34.2 Programming Using PC-DBA ...........................................................................201
xiv Comdial October, ‘03
Page 15

DX-80 Programming Manual
6.35 Programming Auto Attendant Module (AAM) ................................................ 202
6.35.1 Programming Using the DET ........................................................................... 205
6.35.2 Programming Using PC-DBA ........................................................................... 207
6.36 Setting Direct Inward System Access (DISA) ................................................ 210
6.36.1 Programming Using the DET ........................................................................... 211
6.36.2 Programming Using PC-DBA ........................................................................... 212
Chapter 7. Programming Toll Restrictions
7.1 Class of Service and Digit Intervals ................................................................. 215
7.1.1 Programming Using the DET ............................................................................. 216
7.1.2 Programming Using PC-DBA ............................................................................. 217
7.2 Account Code Length and Password .............................................................. 219
7.2.1 Programming Using the DET ............................................................................. 219
7.2.2 Programming Using PC-DBA ............................................................................. 220
Chapter 8. Programming Uniform Call Distribution (UCD) Groups
8.1 Controlling Overflow and Reroute Situations ................................................... 225
8.2 UCD Agent Log Off/Log On ............................................................................. 226
8.3 Programming UCDs ........................................................................................ 226
8.3.1 Programming Using the DET ............................................................................ 226
8.3.2 Programming Using PC-DBA ............................................................................. 228
8.4 Setting Up UCD Voice Announce (VA) Groups ............................................... 231
8.4.1 Programming Using the DET ............................................................................ 231
8.4.2 Programming Using PC-DBA ............................................................................. 231
Chapter 9. Programming Voice Mail
9.1 Programming Third Party VM, Analog Ports 234
9.1.1 Programming Using the DET ............................................................................. 235
9.1.2 Programming Using PC-DBA ............................................................................. 239
9.2 Programming Optional Internal VM, Digital ..................................................... 243
9.2.1 Programming Using the DET ............................................................................. 244
9.2.2 Programming Using PC-DBA ............................................................................. 245
October, ‘03 Comdial xv
Page 16

Chapter 10. Programming Extensions
10.1 Reminder Tones ............................................................................................ 249
10.2 Assigning a User Name to the Extension ...................................................... 249
10.2.1 Programming Using the DET ............................................................................250
10.2.2 Programming Using PC-DBA ...........................................................................250
10.3 Assigning a Password to the Extension ......................................................... 251
10.3.1 Programming Using the DET ...........................................................................251
10.3.2 Programming Using PC-DBA ...........................................................................252
10.4 Assigning Extensions to Tenant Groups ........................................................ 253
10.4.1 Programming Using the DET ............................................................................253
10.4.2 Programming Using PC-DBA ...........................................................................254
10.5 Assigning Extensions to Pickup Groups ........................................................ 255
10.5.1 Programming Using the DET ............................................................................255
10.5.2 Programming Using PC-DBA ...........................................................................255
10.6 Assigning Extensions to Paging Groups ........................................................ 256
10.6.1 Programming Using the DET ............................................................................257
10.6.2 Programming Using PC-DBA ...........................................................................257
10.7 Assigning Extensions to a Class of Service ................................................... 258
10.7.1 Programming Using the DET ............................................................................258
10.7.2 Programming Using PC-DBA ...........................................................................259
10.8 Setting up Monitoring Privileges .................................................................... 260
10.8.1 Programming Using the DET ............................................................................260
10.8.2 Programming Using PC-DBA ...........................................................................261
10.9 Setting up Intrusion ........................................................................................ 262
10.9.1 Programming Using the DET ............................................................................262
10.9.2 Programming Using PC-DBA ...........................................................................263
10.10 Setting up Warning Tones, Incoming Call Drops, Outgoing Call Drops ...... 264
10.10.1 Programming Using the DET ..........................................................................264
10.10.2 Programming Using PC-DBA .........................................................................265
10.11 Setting Up Off Hook Voice Announce .......................................................... 266
10.11.1 Programming Using the DET ..........................................................................266
10.11.2 Programming Using PC-DBA .........................................................................267
xvi Comdial October, ‘03
Page 17

DX-80 Programming Manual
10.12 Setting Up Paging Privileges ....................................................................... 268
10.12.1 Programming Using the DET ......................................................................... 268
10.12.2 Programming Using PC-DBA ......................................................................... 269
10.13 Setting Up Call Forward – Extension Predefined ........................................ 270
10.13.1 Programming Using the DET ......................................................................... 271
10.13.2 Programming Using PC-DBA ......................................................................... 272
10.14 Programming Extensions for SMDR Output ................................................ 273
10.14.1 Programming Using the DET ......................................................................... 273
10.14.2 Programming Using PC-DBA ......................................................................... 273
10.15 Assigning Recording Announcement Devices ............................................. 274
10.16 Assigning Port Type .................................................................................... 275
10.16.1 Programming Using the DET ......................................................................... 276
10.16.2 Programming Using PC-DBA ......................................................................... 276
10.17 Assigning Extensions to CO Lines .............................................................. 277
10.17.1 Programming Using the DET ......................................................................... 277
10.17.2 Programming Using PC-DBA ......................................................................... 278
10.18 Setting Up Receive Assignments ................................................................ 279
10.18.1 Programming Using the DET ........................................................................ 279
10.18.2 Programming Using PC-DBA ......................................................................... 279
10.19 Setting Up Extension Ring Level ................................................................. 280
10.20 Assigning Feature Buttons .......................................................................... 281
10.21 Performing Directory/Extension Swapping .................................................. 281
10.21.1 Programming Using the DET ......................................................................... 281
10.21.2 Programming Using PC-DBA ......................................................................... 281
10.22 Configuring Single Line Telephones (Analog Device Support) ................... 283
Chapter 11. Programming Feature Buttons
11.1 Programming Using the DET ......................................................................... 285
11.2 Programming Using PC-DBA ........................................................................ 286
11.3 Programming DSS Console Feature Buttons ................................................ 287
11.4 Programming a Release Key ......................................................................... 288
October, ‘03 Comdial xvii
Page 18

11.5 Flexible Feature Button Inquiry ...................................................................... 288
11.5.1 Looking up Codes using the DET .....................................................................288
11.6 Feature Key Reset ......................................................................................... 289
Worksheets .......................................................................................................... 291
Button Labeling ................................................................................................... 305
Index ...................................................................................................................... 309
xviii Comdial October, ‘03
Page 19

DX-80 Programming Manual
1. OVERVIEW
Once you have installed the system hardware, it is time to specify how you want the system to operate,
using the programmable DX-80 features. You need to set up the following:
• the numbering plan you want to use, and other system settings such as system date and time and
day/evening modes,
• the interface to the CO lines coming into the system,
• how you want the system to handle and process calls,
• any restrictions you want in place for toll calls,
• Uniform Call Distribution (if applicable),
• voice mail (if applicable), internal or external,
• privileges for all extensions, and
• feature buttons on individual DET phones and DSS consoles.
1.1 Programming Methods
There are three approaches you can take when programming a DX-80 system.
• You can program the system on site using any Digital Extension Terminal (DET) phone.
• You can program the system on site using PC-DBA, the PC-based software program.
• Or, you can program the database using PC-DBA on a laptop prior to arriving at your customer’s
site. Then when you arrive on site, you can download the pre-programmed database into the
DX-80 system in a minimal amount of time.
October, ‘03 Comdial 19
Page 20

Overview
Each approach has its advantages and disadvantages. You may prefer one approach and use it often,
but you may occasionally need to use an alternative approach.
Programming
Advantages Disadvantages
Interface
DET phone • You do not need a laptop PC
to program the database.
• The phone is a direct
interface to the CPU, so
there is no chance of
database corruption during
transmission. If you are
having a unidentifiable or
persistent problem, use DET
phone programming to
eliminate the possibility of a
corrupt database.
PC-DBA laptop
on site
• You can save the existing
database residing on the
switch via a RECEIVE ALL
command. When you need
to modify the database, you
can use the switch version as
a basis so you will not have
to reprogram all its custom
settings.
• If you lose the switch
database because of battery
failure or because you must
perform a Master Clear, you
will NOT have to
completely reprogram the
database (provided you have
previously saved a copy of
the custom switch database
onto your laptop).
• You have a limited visual
interface (the phone display)
vs. a menu screen.
• You have to do all
programming on site.
• DET phone programming
can take longer to perform
than PC-DBA
programming.
• You cannot save the current
switch database. If you lose
this database because of
battery failure or because
you have to perform a
Master Clear, you will have
to completely reprogram the
database.
• You need a laptop with a
serial port.
• You do all programming on
site.
• PC-DBA is not a direct
interface to the CPU.
Therefore, the possibility
exists that a corruption can
occur when transmitting the
laptop database to the
switch.
• You must be diligent in
performing a RECEIVE
ALL when first arriving on
the customer site, and prior
to modifying their database.
If you neglect to do so, you
may inadvertently perform a
SEND ALL first, thus
writing over their custom
programmed database with
whatever database you last
used on the laptop.
20 Comdial October, ‘03
Page 21

DX-80 Programming Manual
Programming
Interface
PC-DBA laptop
remotely
Advantages Disadvantages
• You can program the
customer’s database while
off site, and simply
download it to the switch
when you arrive on site.
This reduces the amount of
time you have to spend on
site.
• You can save the existing
database residing on the
switch via a RECEIVE ALL
command. When you need
to modify the database, you
can use the switch version as
a basis so you will not have
to reprogram all its custom
settings.
• If you lose the switch
database because of battery
failure or because you must
perform a Master Clear, you
will NOT have to
completely reprogram the
database (provided you have
previously saved a copy of
the switch database on your
laptop).
• You need a laptop with a
serial port.
• PC-DBA is not a direct
interface to the CPU.
Therefore, the possibility
exists that a corruption can
occur when transmitting the
database to the switch.
• You must be diligent in
performing a RECEIVE
ALL prior to modifying
their database. If you
neglect to do so, you may
inadvertently perform a
SEND ALL first, thus
writing over their custom
programmed database with
whatever database you last
used on the laptop.
For step-by-step procedures on programming using the PC-DBA, see Section 2.1, Using PC-Database
Administration (PC-DBA). For step-by-step procedures on programming using the DET phone, see
Section 2.2, Using Any Digital Extension Telephone (DET).
1.2 Upgrading an Existing System
Occasionally you may need to perform maintenance programming or install an upgrade to an existing
system.
October, ‘03 Comdial 21
Page 22
Overview
When you are upgrading an existing system, the database is already in place and functional. You may
want to program your changes offline using PC-DBA on a laptop, and then download the newly modified database to the system. When you use this method, be sure to perform a RECEIVE ALL
command first to overwrite the database currently on your laptop with the database the switch is using.
Then make your programming changes to the laptop database, and when you are finished perform a
SEND ALL to upload the new modified version onto the DX-80 switch.
CAUTION
If you fail to perform a RECEIVE ALL before you make your pro-
gramming changes and you then perform a SEND ALL, the system
writes over the switch database with whatever DX-80 database resides on your desktop.
Use care that you do not overwrite the current site’s database with a database residing on
your laptop from your previous customer site. It is a good practice to always perform a
RECEIVE ALL when first arriving at a new customer site or prior to modifying your
customer’s database.
During a hardware upgrade, you need to add the new hardware and then program the corresponding
feature set in the existing database. There are specific procedures to follow when adding new
hardware to an existing system. See the DX-80 Technical Manual, Volume 1, Installation and Mainte-
nance, part number IMI72-001, for more information.
1.3 Programming a New System
This manual provides information for completely programming a new DX-80 system from scratch.
Comdial also provides you with some tools you can use to reduce your programming time. These
tools include:
• a series of worksheets for you to plan your system structure, and record the programming for
future reference if necessary. For more details, see Appendix A, Worksheets.
• copying a base CO line or extension’s setups to several other CO line or extensions thereby
eliminating the need to program them individually, and
• using one of four standard database programming templates provided with the DX-80 on CD part
number DX80UTILCD. You can choose the template that most closely matches your new
customer’s site needs, and then add whatever custom changes you need to make. This approach
saves you the time of programming the entire system from scratch.
For more information on these and other aids the DX-80 provides to allow you to program a system
efficiently, see Section 3.1, Shortcuts to Help You Work Faster.
When you are programming a new system from scratch, perform the following basic tasks:
1. Set up the system features.
2. Set up the CO lines.
3. Set up call handling.
4. Set up the toll restrictions.
5. Set up the UCD groups.
6. Set up Voice Mail (if applicable).
22 Comdial October, ‘03
Page 23

DX-80 Programming Manual
7. Set up the extensions.
8. Program the feature buttons on the individual DET phones and DSS consoles.
The DX-80 provides some shortcuts to help you perform these tasks efficiently. For example, when
you are setting up the individual extensions, you can first set up a “base” extension that is typical of
how you will set up the majority of extensions. After you have set up this base extension, you can
copy its programming to all of the other extensions in the system. Then, you can modify the few specific extensions that require different programming.
The DX-80 provides a similar shortcut for setting up CO lines with a CO Line Copy command. For
more details on helpful shortcuts provided with your system, see Section 3.1, Shortcuts to Help You
Work Faster.
1.3.1 SETTING UP THE SYSTEM FEATURES
The system features allow you to control system administration and to assign system resources.
Perform the following steps.
1. Establish the database administrator password.
2. Assign the attendant extension for each tenant group.
3. Assign the system reminder for each tenant group.
4. Set the user passwords for extensions 101, 102, and 108.
5. Specify the user names for extensions 101 and 108.
6. Name each CO line (1-8).
7. Set up the pre-programmed incoming and outbound messages.
8. Program speed dial numbers.
9. Set the number of items in the Caller ID table.
10. Establish the music source for the each tenant group.
11. Assign the external pager ID to a tenant group. Enable/disable page group 1 and 8.
12. Program ancillary devices (loud bell, external page, music on hold source).
13. Allocate the DSS.
14. Set up the optional internal modem.
15. Select the PC-DBA transmit rate.
16. Select the SMDR transmit rate.
17. Set up the ring scheme.
18. Specify the letter type.
19. Set up the system time, date, and hour mode.
20. Set up the numbering plan you want to use. The DX-80 has a built-in numbering plan that you
can use as is or modify if necessary.
Details on how to perform these tasks are included in Section 4, Programming System Features. The
DX-80 provides programmable features that allow you to establish these various settings.
October, ‘03 Comdial 23
Page 24

Overview
1.3.2 SETTING UP CO LINES
Once you have set up the extensions, you can begin programming the CO lines into the system.
Perform the following tasks for each CO line.
1. Assign the CO line to a tenant group.
2. Assign the CO line to a pickup group.
3. Assign the Day classification for the CO line.
4. Assign the Evening classification for the CO line.
5. Select the MOH source for the CO line.
6. Assign the dial type this CO line.
7. Assign the CO line type.
8. Enable/disable call abandon.
9. Set up privacy for this CO line.
10. Set up the CO ring type.
11. Assign the answer position for Day and Evening modes for this CO line.
12. Set up Time Switching.
13. Set up Pre-Defined Call Forward for this line.
14. Set up the PBX code for line group 1-8.
15. Set up the hunt method
16. Set up the alternate CO group.
17. Set up Fax detection.
Details on how to perform these tasks are included in Section 5, Programming CO Lines. The DX-80
provides programmable features that allow you to establish these various settings.
1.3.3 SETTING UP CALL HANDLING
Next, set up how you want the DX-80 to handle calls. Perform the following steps.
1. Program conference calls.
2. Specify the CO flash time.
3. Specify the PBX flash time.
4. Specify the pause time.
5. Specify the ring abandon.
6. Set up the hold remind.
7. Select the exclusive hold time.
8. Establish the warning time.
9. Set the transfer intercom recall and transfer busy recall.
10. Set up hold recall.
11. Set up the dial wait time and dial delay.
12. Establish the dialing ratio.
13. Establish the start and end of the SLT hook flash.
14. Program auto redial.
24 Comdial October, ‘03
Page 25

15. Set up external call forward.
16. Set up conference talk time intervals and conference tones.
17. Set up the camp on interval.
18. Set up the alarm play intervals.
19. Enable/disable the hotel feature.
20. Enable/disable the system speed check.
21. Enable/disable the TSI connection.
22. Enable/disable the conference tone.
23. Specify the call duration.
24. Specify caller ID codes and establish the local area code.
25. Enable/disable tenant calling per tenant group.
26. Enable/disable SMDR call output.
27. Program the voice mail
28. Set the Fax ring time.
29. Set the pre-defined call forward time.
30. Program the recognition time interval.
31. Set the conference talk time intervals.
32. Set the hold abandon time interval.
33. Set the unsupervised talk time.
34. Program the auto attendant.
35. Set the DISA access.
DX-80 Programming Manual
Details on how to perform these tasks are included in Section 6, Programming Call Handling. The
DX-80 provides programmable features that allow you to establish these various settings.
1.3.4 SETTING UP TOLL RESTRICTIONS
Toll restrictions allow you to place restrictions on outbound toll calls, per tenant group and account
code. Perform the following steps.
1. Set up the Class of Services.
2. Set up the digit interval from 1 to 100, per tenant group.
3. Assign the account code length.
4. Program the account code passwords, from 1 to 600 as necessary.
Details on how to perform these tasks are included in Section 7, Programming Toll Restrictions. The
DX-80 provides programmable features that allow you to establish these various settings.
1.3.5 SETTING UP UCD GROUPS
Uniform Call Distribution (UCD) groups allow you to link extensions for call handling. To set up the
UCD groups, perform the following steps for each UCD group (maximum of 24).
1. Assign the tenant group for this UCD.
2. Select the UCD attribute (UCD or VA).
October, ‘03 Comdial 25
Page 26

Overview
3. Assign the UCD group member numbers 1 through 24 as applicable.
4. Select the hunt method you want to use for this UCD group.
5. Specify the no answer time.
6. Set up the timer and destination for overflow 1.
7. Set up the timer and destination for overflow 2.
8. Specify the overflow count.
9. Specify the reroute destination (extension number).
10. Set the UCD Voice Announce (VA) groups.
Details on how to perform these tasks are included in Section 8, Programming Uniform Call Distri-
bution (UCD) Groups. The DX-80 provides programmable features that allow you to establish these
various settings.
1.3.6 SETTING UP VOICE MAIL
You can set up the DX-80 to interface with either an external, analog third party voice mail system or
to the internal digital DX-80 Voice option. If you use analog voice mail, you must assign system ports
to the voice mail system. If you use the digital in-skin voice mail, you do not use analog system ports
and therefore do not have any port loss.
To set up voice mail, perform the following tasks for each tenant group.
1. Program third-party voice mail on analog ports.
Or,
2. Program the optional, internal, digital voice mail.
Details on how to perform these tasks are included in Section 9, Programming Voice Mail. The DX-80
provides programmable features that allow you to establish these various settings.
1.3.7 SETTING UP EXTENSIONS
Once you have set up the system, CO line, call handling, toll restriction, UCD (if applicable), and
voice mail (if applicable), the next task in setting up a new system is to program the extensions. To
program the extensions in the system, perform the following steps for each extension in the system.
1. Assign a user name and password to the extension.
2. Assign the extension to a tenant group.
3. Assign the extension to a pickup group.
4. Assign the extension to a paging group.
5. Assign a class of service to the extension.
6. Set up the Monitor classification.
7. Set up intrusion—active, accept, and tone.
8. Set up warning tones, incoming call drops, outgoing call drops.
9. Set up Off Hook Voice Announce (OHVA).
10. Enable/disable paging.
11. Set up external call forward.
12. Set up SMDR output.
26 Comdial October, ‘03
Page 27

DX-80 Programming Manual
13. Assign RAD devices.
14. Enable/disable recording.
15. Set up port type.
16. Set up CO line assignment
17. Set up receive assignment.
18. Set up extension ring level.
19. Assign feature buttons.
20. Perform directory/extension swapping.
21. Configure Single Line Telephones (SLTs).
Details on how to perform these tasks are included in Section 10, Programming Extensions. The DX80 provides programmable features that allow you to establish these various settings.
1.3.8 SETTING UP FEATURE BUTTONS ON PHONES
The final task in setting up a new system is to program the feature buttons on the individual DET
phones and DSS consoles. You can program feature buttons for directory numbers or feature codes.
Note: You can only program feature buttons on DSS consoles for directory numbers. Buttons assigned
to feature codes are not permitted on the DSS.
Details on programming feature buttons for the DET and the DSS are provided in Section 11, Programming Feature Buttons.
October, ‘03 Comdial 27
Page 28

Overview
This Page Intentionally Left Blank
28 Comdial October, ‘03
Page 29
DX-80 Programming Manual
2. PROGRAMMING OPTIONS
There are two programming interfaces you can use to program the DX-80:
• PC-DBA
• Digital Extension Telephone (DET).
2.1 Using PC-Database Administration (PC-DBA)
The DX-80 system allows you to administer system database parameters using any IBM® compatible
Personal Computer (PC).
The use of a PC has distinct advantages over programming the system using the digital telephone,
including:
• specific database archiving (via save function),
• remote programming, and
• outboard programming (programming the system template in the PC memory, then downloading
it to the DX-80 switch memory when ready).
The PC program that interfaces with the DX-80 system is called PC-Database Administration (PCDBA).
PC-DBA requires the following resources in the PC environment:
• PC running DOS. Note: While you can run PC-DBA in a DOS Window, performance can be
impacted by other Windows modules. Comdial does not guarantee or provide warranty for any
level of performance in the Windows environment.
• 640k minimum RAM.
• 386 minimum microprocessor.
• minimum 2 megabytes space on the hard disk.
CAUTION
PC-DBA is available on the Comdial Web page at www.comdial.com.
This software is not available by any other means.
You must have a well-rounded understanding of the PC environment and the DOS file
structure to use this DX-80 utility. Comdial cannot support users who are unfamiliar with
these basic requirements. If any of these issues concern you, program the DX-80 instead
by using any DET phone. (See Section 2.2, Using Any Digital Extension Telephone
(DET)).
October, ‘03 Comdial 29
Page 30
Programming Options
2.1.1 LOADING PC-DBA SOFTWARE
When you download PC-DBA from the Comdial web site it is contained in an archived format to
expedite the download. Comdial recommends that you perform the following steps when downloading PC-DBA.
1. Create a separate directory on the PC where you can load PC-DBA (typically “DX-80”). This
becomes the working directory.
2. Copy the archive file into that directory and then open the archived format.
When you want to use PC-DBA, start the computer and open the PC-DBA directory. To start PC-DBA
type DX-80 at the DOS prompt. Then press Enter.
2.1.2 PROGRAMMING USING PC-DBA
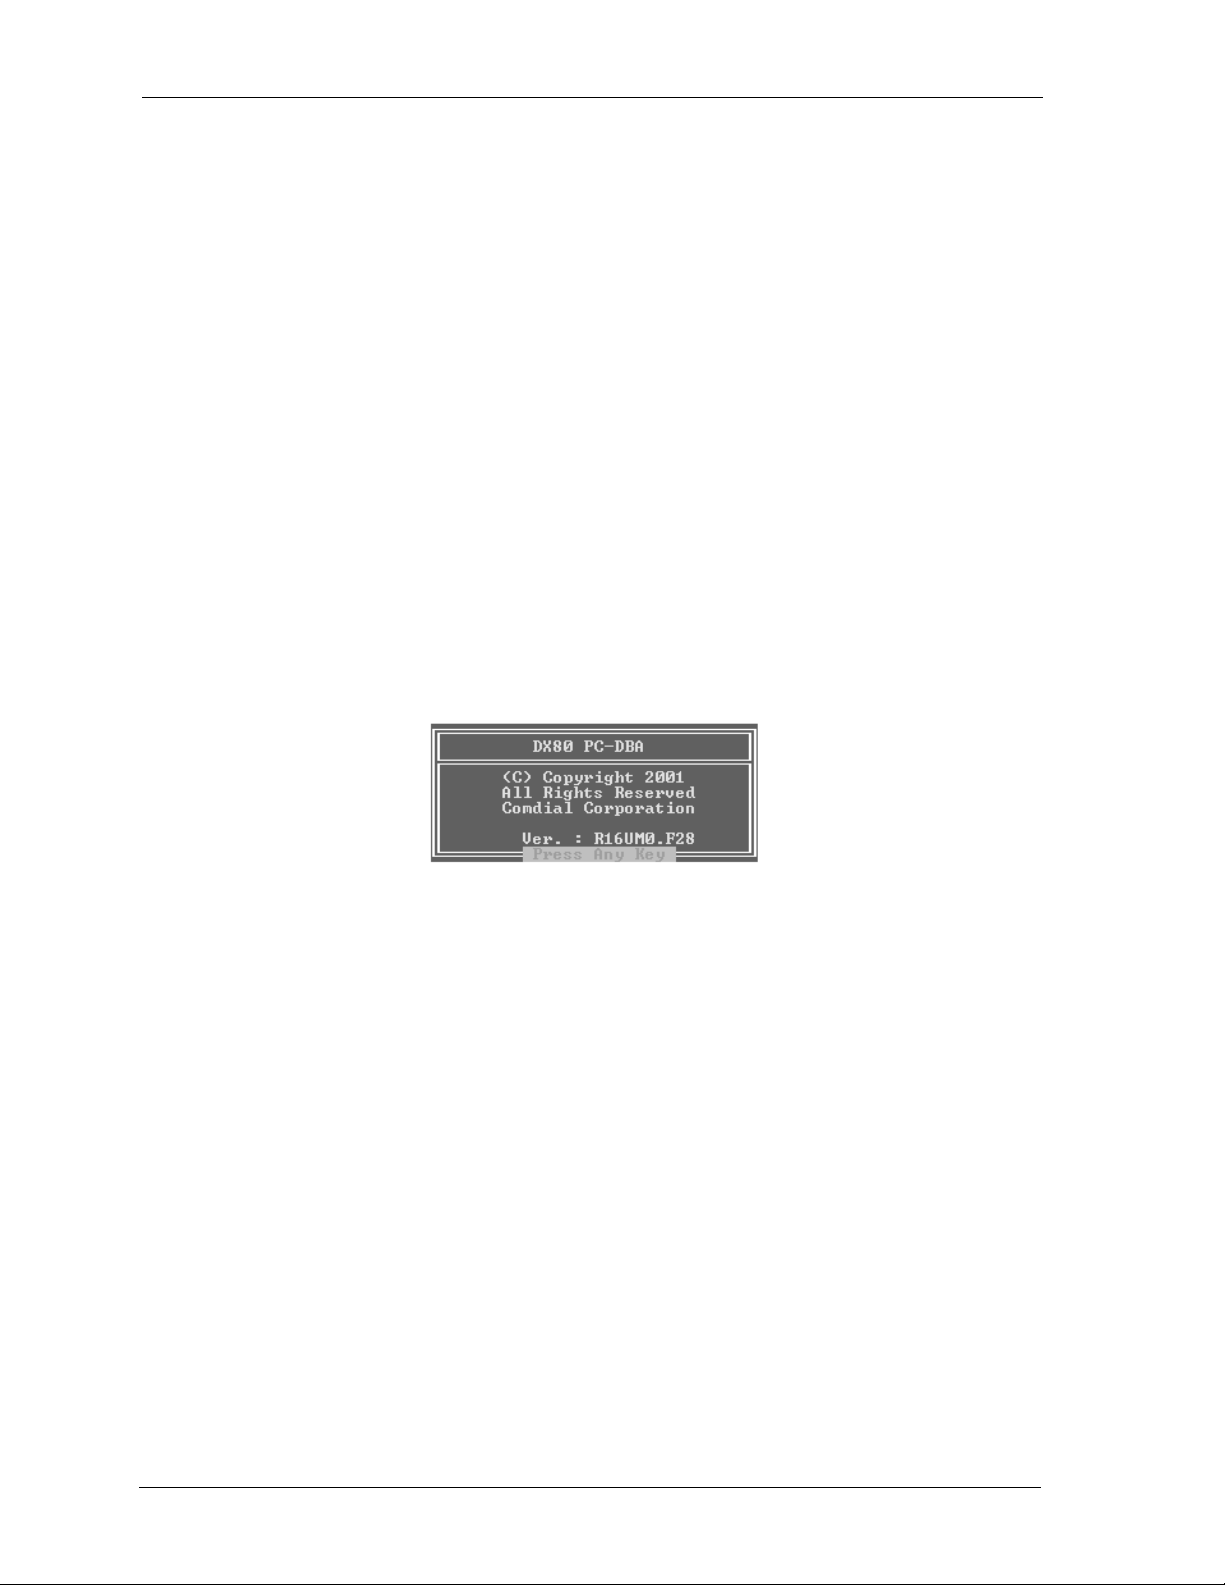
1. Enter PC-DBA by typing DX-80 at the DOS prompt in the PC-DBA working directory, and then
pressing Enter. The system responds by displaying the title page.
2. When you press a key, the system displays the Main menu and positions the cursor on PC-DBA.
30 Comdial October, ‘03
Page 31

DX-80 Programming Manual
3. Press Enter to enter into the programming and maintenance functions of PC-DBA. The system
responds by displaying the PC-DBA screen and positioning the cursor on Programming.
4. Press Enter to begin programming. The system displays the Database Programming screen and
positions the cursor on Extension. You access all of the various programming parameters of the
system from the Database Programming screen.
October, ‘03 Comdial 31
Page 32

Programming Options
While you are programming the database using PC-DBA programming, the system stores any
changes you make in its working directory—not in the DX-80 system memory. When you have
finished making your programming changes, you must perform a SEND operation. They system then overwrites the system memory with whatever you have programmed into the working
directory. Until you perform the SEND command, none of your changes are in effect.
• Use the arrow keys to highlight the category of your choice, then press Enter to open that
category and begin programming database parameters as required.
• Use the arrow keys on your keyboard to select (highlight) the various menu levels and
database parameters. Then press Enter to open that level/parameter.
• There are many menu levels within Database Programming. It is often necessary to use
Page Up and Page Down to view all elements of some categories.
• Use Esc (the escape key on your keyboard) to exit one category and return to the previous
level.
5. When you have completed all changes, press the Esc key to exit this database programming
screen. You will see the prompt: “Exit This Feature”; press Y for yes.
6. You will then be prompted to “Save Current Setting?”
Press N to abort changes and leave all data unchanged.
Press Y to save changes.
7. If you press Y, you will then be prompted “File Exists, Override?”
Press N to abort changes and leave all data unchanged.
Press Y to continue with the save operation.
32 Comdial October, ‘03
Page 33

DX-80 Programming Manual
8. Press Esc again to return to the Database Programming menu. Continue making other programming changes, or exit PC-DBA programming by pressing Esc again to return to the Main menu.
Then select Exit to DOS and press Enter.
CAUTION
The changes you make using PC-DBA are stored in a temporary
working directory. They are not uploaded to the DX-80 system
memory until you perform a SEND function. Do not forget this crucial step, or you may
lose the programming changes you just made, and have to start over again.
2.1.3 DATABASE SAVE AND RESTORE
The working directory is the location allocated in the PC for all changes while the PC-DBA programming session is in progress. You may want to save the data in this directory for later retrieval
since you may be working on many various databases.
CAUTION
Always perform a database SAVE prior to database RESTORE if you
intend to preserve the current contents of the working directory.
2.1.3.1 Performing a Save
To perform a database save, follow these steps.
1. Go to the Main menu. Use the arrow keys to highlight Database Save then press Enter. The
system displays the following window to confirm your requested operation.
+------------------------------------------------------------+
¦ ¦
¦ Do you want to backup data files ? (Y/N) ¦
¦ ¦
¦ ¦
+------------------------------------------------------------+
2. Press Y. The system responds as follows.
+------------------------------------------------------------+
¦ ¦
¦ Do you want to backup data files ? (Y/N) ¦
¦Backup to : C:\DX-80 ¦
¦ ¦
+------------------------------------------------------------+
3. Enter a new directory (DOS file system directory) where you want to store these files. You can
also specify the “A” drive if you want to sore the files on a floppy disk. Regardless of where the
files are to be stored, remember the location so you can retrieve them at the appropriate time.
4. After you enter the drive/directory name, press Enter. If it is a new directory the following alert
displays.
Directory Not Exist! Create it ? (Y/N)
October, ‘03 Comdial 33
Page 34

Programming Options
5. Press Y. The files are copied to the location specified and the following message displays to con-
firm the procedure:
Backup Completed, Press Any Key To Exit
6. Press any key. Your database save is now complete.
2.1.3.2 Performing a Restore
To perform a database restore, follow these steps.
1. Go to the Main menu.
2. Use the arrow keys to highlight Database Restore, then press Enter. The system prompts you to
enter the destination for the restored database.
3. Enter the directory/drive data and press Y. The system asks you to confirm the action, “Replace
Files in Current Directory? (Y/N).”
When the system performs a database restore operation it copies the files from the selected
directory or floppy disk into the working directory on your laptop, overwriting the current files
in that directory.
CAUTION
It is imperative that you are sure you no longer need the files in the
working directory. You cannot retrieve them later without using
specific DOS retrieval steps outside of PC-DBA.
4. Press Y. The system copies the files into the working directory. When this is done, PC-DBA dis-
plays the following message.
Copy Complete, Old Data Files Are Renamed to '.BAK'
Press Any Key To Exit
5. Press any key. The restored files are now available for editing.
34 Comdial October, ‘03
Page 35

DX-80 Programming Manual
2.1.4 PC-DBA CONTROL KEYS
Special control functions of PC-DBA are shown at the bottom of the PC-DBA screen.
F1-Help F2-U-save F3-RCV F4-SND F5-Cnt F6-Disc F7-Prn F8-Init F9-Mdm F10-RS232C
Use the associated function keys across the top of the PC keyboard to access the various operations.
2.1.4.1 F1 – Help
Press F1 to view the keystroke help menu of PC-DBA. There are two help screens.
2.1.4.2 F2 – A-Save/U-Save
Press F2 to select A-Save (Automatic Save) or U-Save (User Save). This selection determines how
PC-DBA will save data during the programming process. The system displays the current setting for
this key, i.e., A-Save if automatic save is set or U-Save if user save is set.
If you select U-Save, PC-DBA prompts you to confirm all save operations. During the save process,
the system writes the changed data to the working directory, not to system memory on the switch.
When you have finished programming, you must perform a SAVE operation (part or all) to send the
modified data in the working directory on the laptop to the system memory on the switch. Once the
system saves the new data in system memory, the old switch data is lost.
If you select A-Save, PC-DBA automatically saves data whenever you exit any programming screen
where you have made changes. This option can save time and keystrokes, but leaves no margin for
error since the system immediately saves your changes in system memory. For this reason you must
be confident that your changes are correct, and that the previous switch database is no longer needed.
Once the system saves the new data in system memory on the switch, the old data is lost.
CAUTION
Comdial recommends using U-Save because of the risk of
inadvertently writing over a working database.
There is no recovery when using A-Save.
2.1.4.3 F3 – Receive
Before data can be exchanged between the PC and the DX-80 system, you must make a connection
between the two devices via a serial (RS-232 – COM Port or Modem) link. While on site you may
connect the PC to the DX-80 via a standard RS-232C “straight-through” cable. When accessing the
system remotely, you can make this connection via a modem.
You can connect the DX-80 system on site via the PC serial port (COM port). Use a straight-through
9-pin to 9-pin cable from the PC serial port to the DX-80 CPM – PC-DBA port. Once you make this
connection, you can connect to the DX-80 system processor and download (receive) DX-80 database
switch memory to the PC-DBA laptop working directory.
Once you make a physical connection (cable or modem) between the PC and the DX-80 system., you
must link the two devices using the F5-Connect function. See Section 2.1.4.5, F5 – Connect.
October, ‘03 Comdial 35
Page 36

Programming Options
After you establish a successful connection between the DX-80 processor and the PC-DBA software,
the following icon displays in the upper left corner of the PC-DBA screen:
[Cnt]
To receive data, perform the following steps.
1. Press F3. The system displays the receive options.
+------------------+
¦ Receive Request ¦
+------------------¦
¦ * Receive All ¦
¦ * Receive Part ¦
¦ * Receive Item ¦
+------------------+
2. Use the arrow keys to select the receive technique you want to use. If you select Receive All, the
system starts the data exchange immediately. If you select Receive Part or Receive Item, you
must chose either the specific data item (item) or data category (part) you wish to receive. Use
the arrow keys to select from the menus provided with these two functions.
CAUTION
Always perform a Database Save before a Database Receive
operation if you want to preserve the current contents of the working
directory on the laptop.
CAUTION
Comdial recommends that if you are making database changes to a
system that has been in operation for an extended period of time, that
you perform a Receive All operation prior to making any database changes on the laptop.
Since some database fields (including Speed Dial and Service Mode) are user adjustable,
these fields will be overwritten if you perform a Send All operation using an outdated
PC-DBA laptop database.
2.1.4.4 F4 – Send
Before data can be exchanged between the PC and the DX-80 system, you must make a connection
between the two devices. This connection is a serial (RS-232 – COM port or modem) link. While onsite, you can connect the PC to the DX-80 via a standard RS-232C “straight-through” cable. When
you are accessing the system remotely you can make this connection via a modem.
You can connect the DX-80 system on site via the PC serial port (COM port). Use a straight-through
9-pin to 9-pin cable from the PC serial port to the DX-80 CPM – PC-DBA port. Once you make this
connection, you can connect to the DX-80 system processor and download (receive) the DX-80
database memory to the PC-DBA laptop working directory.
Once you make a physical connection (cable or modem) between the PC and the DX-80 system., you
must link the two devices using the F5-Connect function. See Section 2.1.4.5, F5 – Connect.
36 Comdial October, ‘03
Page 37

DX-80 Programming Manual
After you establish a successful connection between the DX-80 processor and the PC-DBA software,
the following icon displays in the upper left corner of the PC-DBA screen:
[Cnt]
Since PC-DBA programming operates on the database on the PC laptop working directory only, you
must send this information to the DX-80 system memory before it is operational on the switch.
To send data, press F4. The system displays the Send options.
+------------------+
¦ Send Request ¦
+------------------¦
¦ * Send All ¦
¦ * Send Part ¦
¦ * Send Item ¦
+------------------+
Use the arrow keys to select from list the send technique you want to use. If you select Send All, the
system starts the data exchange immediately. If you select Send Part or Send Item, you must chose
either the specific data item (item) or data category (part) you wish to send. Use the arrow keys to
select from the menus provided with these two functions.
CAUTION
Comdial recommends that if you are making database changes to a
system that has been in operation for an extended period of time, that
you perform a Receive All operation prior to making any database changes.
Since some database fields (including Speed Dial and Service Mode) are user adjustable,
these fields will be overwritten if you perform a Send All operation using an outdated
PC-DBA laptop database.
2.1.4.5 F5 – Connect
Once you make a physical connection (cable or modem) between the PC and the DX-80 system, you
must link the two devices using the F5-Connect function key.
1. Press F5. If an adequate connection exists between the DX-80 system and the PC, the system
responds as follows.
+----------------------------------------------------------------------+
¦ Connect ¦
+----------------------------------------------------------------------¦
¦ (1) : Receive Data From KSU ¦
¦ (2) : Don't Receive Data From KSU ¦
¦ Please Select : ¦
¦ Note : To select (1) will receive [Numbering Plan],[Ext DIR No.] ¦
¦ [CO Group DIR No.],[User Password] from KSU automatically, ¦
¦ so these data you set previously on PC will be lost. ¦
¦ To select (2), the data about 'DIR No.','User Password' on ¦
¦ PC may be inconsistent with KSU. ¦
+----------------------------------------------------------------------+
Select 1 to receive the database items listed at the time of connection.
October, ‘03 Comdial 37
Page 38

Programming Options
Select 2 to connect to the system processor without an automatic data receive operation.
2. Once you make your selection, the system prompts you to enter the Database Administration
password.
+--------------------------------+
¦ Connect ¦
+--------------------------------¦
¦ ¦
¦ Please Input KSU Password: ¦
¦ ¦
+--------------------------------+
At default this password is “ ” (eight spaces). Press the space bar eight times.
3. When you enter all eight characters, the system begins the connection process. If the system is
unsuccessful in making the connection (due to a wrong password or poor connection), it displays
the following error screen.
+--------------------------------+
¦ Connect ¦
+--------------------------------¦
¦ ¦
¦ Failure ¦
¦ Press Any Key ¦
+--------------------------------+
If the system is successful at making the connection, it confirms this in the following screen.
+--------------------------------+
¦ Connect ¦
+--------------------------------¦
¦ ¦
¦ Succeed ¦
¦ Press Any Key ¦
+--------------------------------+
4. After the system makes a successful connection between the DX-80 processor and the PC-DBA
software, it displays the following icon in the upper left corner of the PC-DBA screen.
[Cnt]
5. Press any key to return to the PC-DBA programming screens. At this time you can perform F4Send and/or F3-Receive operations to exchange databases between the laptop and the switch.
2.1.4.6 F6 – Disconnect
After you have established a link between the DX-80 and PC-DBA, you must also disconnect this link
after you are finished using the Send or Receive operations. The system will disconnect automatically
if the connection path (cable or modem connection) is interrupted, or if you exit PC-DBA while the
link is active.
To force a disconnect between the DX-80 processor and PC-DBA, press F6-Disconnect. The system
disconnects within only a few seconds.
38 Comdial October, ‘03
Page 39

DX-80 Programming Manual
2.1.4.7 F7 – Print
At times you may need a printout of the laptop database. The F7 command is a print screen function
that allows you send a copy of each PC-DBA screen, including its settings, to a printer. You have to be
using the particular screen you want to print when you press F7. Note: It may be more convenient to
use Database Save and view a database configuration through PC-DBA, rather than reviewing the
database using a hard copy.
A printer must be connected to the PC parallel port for this command to work.
2.1.4.8 F8 – Initialize
In the programming process it is often desirable to revert to factory defaults. The F8-Initialize function
key allows you to revert the laptop database settings to the factory defaults. While using the various
database programming menus, you can press F8 to initialize the current category. Keep in mind that
when you use F8-Init, the system saves the restored data only when you exit the programming screen.
The system then only sends it to the DX-80 switch database when you perform the F4-Send operation.
Note: You can initialize all of the PC-DBA parameters when you install a new system. After you
perform a cold start, connect to the DX-80 processor by pressing F4. Then press F3 to perform a
Receive All and download all factory settings to the database.
Or, you can initialize all of the PC-DBA parameters by navingating to the working file directory, and
at the DOS prompt, copying all files with a“.DEF’ extension to all “.DAT” extensions. To do this, use
the DOS command: COPY *.DEF *.DAT.
2.1.4.9 F9 – Modem
You can connect to the DX-80 switch remotely by using a modem. You can purchase the optional
modem that allows you to remotely administrate the DX-80 system database. The default directory
number of the modem is 199. Some working knowledge of modem operation and connection is useful.
To establish a modem connection, perform the following steps.
1. Make sure that the attendant at the site location is aware that a modem connection will be taking
place. (Using the automated attendant can greatly assist the modem connection process by
removing the human element at the site location.)
2. Press F9. The following modem control screen displays:
+--------------------------------------+
¦ MODEM ¦
+--------------------------------------¦
¦ Connect ¦
¦ Disconnect ¦
+--------------------------------------+
October, ‘03 Comdial 39
Page 40

Programming Options
3. Use the arrow keys to select Connect, then press Enter. The system displays the following
modem control string.
+----------------------------------------+
¦ MODEM Connect ¦
+----------------------------------------¦
¦ Input MODEM control string : ¦
¦ ATX1E0Q0V0&C1&D2&H0&I0&K0&M0&N3....... ¦
+----------------------------------------+
4. If your modem requires some different control string, enter that string now. Then press Enter.
+----------------------------------------+
¦ MODEM Connect ¦
+----------------------------------------¦
¦ Input dial number: ¦
¦ ...................................... ¦
+----------------------------------------+
5. Enter the telephone number to dial (at the site location). Then press Enter.
+----------------------------------------+
¦ MODEM Connect ¦
+----------------------------------------¦
¦ ¦
¦ Waiting ¦
+----------------------------------------+
6. The system begins dialing, and then the modems negotiate a connection. If this is successful,
the system displays the following.
+----------------------------------------+
¦ MODEM Connect ¦
+----------------------------------------¦
¦ ¦
¦ Connect Succeed ¦
+----------------------------------------+
The system also displays an icon in the upper left corner of the display.
[Mdm]
Once you have established a modem connection, you can perform an F4-Connect, which is required to
link PC-DBA to the DX-80 system processor.
2.1.4.10 F10 – RS232C
The F10-RS232C function allows you to set up the PC COM port. To successfully do this, you must
know how the PC hardware is configured. Specifically, you must know the COM port number (1 or 2)
and the baud rate that will be used for the connection. By default, PC-DBA is set up to use COM port
1 at 9600 bps (9600 bps matches the default baud rate set for the DX-80 CPM – PC-DBA port.)
If you are using a modem connection, set the COM port baud rate to 2400 bps since this is the speed of
the DX-80 optional modem (setting this speed can shorten the time it takes for the modem to connect).
For details on setting the baud rate of the internal modem, see Section 4.14, Setting Up Optional
Internal Modem.
40 Comdial October, ‘03
Page 41

DX-80 Programming Manual
2.2 Using Any Digital Extension Telephone (DET)
The DX-80 system allows you to program system database parameters using any DX-80 DET. It is
possible to program the DX-80 system while the telephone is in use; however, certain button operations are used during programming and cannot be used for telephone call processing. Therefore,
Comdial suggests not using these features simultaneously unless you have been directed to do so by
the servicing technician.
The Database Administration password is set by default to ######## (eight #s). You can use any combination of alphanumeric characters using the conventions of extension/CO line name.
2.2.1 ENTERING THE DATABASE ADMINISTRATION MODE
1. Enter Feature # * to enter Database Administration. The system then prompts for the system
Database Administration password. (The default set at the factory is ########.)
2. Enter the password and press show (show is an LCD interactive button).
After you have correctly entered the password, the system enters you into Database Administration.
2.2.2 LCD INTERACTIVE BUTTONS
The LCD interactive buttons are essential to completing database programming tasks. These buttons
take on many functions while in the database administration mode. LCD interactive buttons include
the following.
• next —moves the cursor to the next item or parameter
• back—moves the cursor back one item or parameter
• show—shows the contents of the current item or parameter
• chg—changes the contents of the current item or parameter
• bksp—when you are entering data, backspaces over what you entered so you can correct it
• save—saves entered data
2.2.3 DATABASE ITEM SELECT SCREEN
After you enter the correct password and press show, the system opens DX-80 Database Adminis-
tration and displays the Database Item Select screen. This screen allows you to skip to the necessary
database item for immediate programming of that item. The coding instructions you enter for each
database item corresponds to the following list.
To Program Enter
EXTENSION 01-
CO LINE 02-
CALL HANDLING 03-
SYSTEM RESOURCE 04-
RESTRICTION 05-
October, ‘03 Comdial 41
Page 42

Programming Options
To Program Enter
EXTENSION APPLICATION 06-
CO LINE APPLICATION 07-
SYSTEM APPLICATION 08-
For example, to skip to the extension application section of database administration, enter 06 at the DB
Item Select screen and press save. If you want instead to go to system resources, enter 04 at the DB
Item Select screen and press save.
2.2.4 EXITING DATABASE ADMINISTRATION
To exit Database Administration press the ON/OFF button twice. Or, lift and replace the handset in
the hook-switch cradle.
2.2.5 CHANGING DATABASE ADMINISTRATION PASSWORD
1. Enter Database Administration using the feature code Feature # * and then enter the DB Admin
password. The default set at the factory is ########.
2. Press show. The DB Item Select screen displays.
3. Enter 04-01 and press save. The system advances to the System Resources – DB PSWD screen
and displays the current password. The default is all spaces (blanks).
4. Press chg to change the password. Enter the new eight-character, alphanumeric password.
5. Press save.
6. Exit the programming mode.
42 Comdial October, ‘03
Page 43

DX-80 Programming Manual
3. GETTING STARTED
Before beginning to program a new system, it is important that you determine what configuration will
best meet your customer’s needs.
The DX-80 Numbering Plan contains all of the configuration defaults provided with the system. If you
need settings other than those provided, you will need to customize the Numbering Plan. Since you
will be programming aspects that can be affected by the Numbering Plan, it is best to customize the
plan before programming the remainder of the system. For details on modifying the default Numbering Plan see Section 4.20, Customizing the Numbering Plan.
3.1 Shortcuts to Help You Work Faster
Comdial also provides you with some tools you can use to reduce your programming time. These
tools include:
• a series of worksheets for you to plan your system structure, and to record the programming for
future reference if necessary. These worksheets are provided in Appendix A, Worksheets.
• using one of four standard database programming templates provided with the DX-80 on CD part
number DX80UTILCD. You can choose the template that most closely matches your new
customer’s site needs, and then add whatever custom changes you need to make. This approach
saves you the time of programming the entire system from scratch.
• copying a baseline CO line or extension’s setups to several other CO line or extensions, thereby
eliminating the need to program them individually.
• using the directory number/feature number lookup when you need to know a specific directory
number or feature code you need to enter at the DET speakerphone, and
• resetting an extension to its default settings during troubleshooting and fault isolation procedures.
In addition, button label templates for customizing individual DET button definitions are provided in
Appendix B, Button Labeling.
3.1.1 USING A DATABASE PROGRAMMING TEMPLATE
Comdial supplies six programming templates that you may use as a shortcut to setting up your customer’s database; one template with no voice mail and five templates with voice mail options. You can
copy the template that is closest to your customer’s requirements, and then customize it further if necessary to further meet their needs.
October, ‘03 Comdial 43
Page 44

Getting Started
File Name Summary Settings
default.zip Modified Default
Database
novm.zip No Voice Mail
Installed
del8port.zip Delayed Ring to In-
skin 8 Port Voice
Mail
del4port.zip
aa8port.zip Auto Attendant
aa4port.zip Auto Attendant
Delayed Ring to Inskin 4 Port Voice
Mail
Answer, In-skin 8
port Voice Mail
Answer, In-skin 4
port Voice Mail
Call Handling Category 1, corrects premature recall issues:
Hold Reminder: 60 sec.
XFER_I Recall: 60 sec.
Hold Recall Slt: 5 min.
Hold Recall Dekt: 5 min.
Call Handling Category 3, corrects VM transfer issues:
VM Dialing Ratio
Tone Time: 60 ms.
Int_Dgt Time 60 ms.
Call restriction table added. To restrict an extension from dialing long
distance, change the extension class of service to 7.
All of the settings in default.zip, plus no voice mail
All of the settings in default.zip, plus 8 port voice mail, plus the following.
Incoming CO calls ring phones in UCD group 23 (directory 432) three or
four times, then re-routes to the Auto Attendant main greeting. Currently the
only extension in UCD group 23 is extension 101. Extension call forwarding
to voice mail is also enabled.
All of the settings in default.zip, plus 4 port voice mail, plus the following.
Incoming CO calls ring phones in UCD group 23 (directory 432) three or
four times, then re-routes to the Auto Attendant main greeting. Currently the
only extension in UCD group 23 is extension 101. Extension call forwarding
to voice mail is also enabled.
All of the settings in default.zip, plus 8 port voice mail, plus the following.
All incoming CO calls will be answered immediately by the Auto Attendant
main greeting. Extension call forwarding to voice mail is also enabled.
All of the settings in default.zip, plus 4 port voice mail, plus the following.
All incoming CO calls will be answered immediately by the Auto Attendant
main greeting. Extension call forwarding to voice mail is also enabled.
These six database templates are provided on the DX-80 product CD, part number DXUTILCD.
While you are not allowed to modify the templates on the CD, you can download them to your laptop
and then customize them further as needed.
44 Comdial October, ‘03
Page 45

DX-80 Programming Manual
CAUTION
These templates are provided to reduce your programming time when
setting up a new system. You can use them for existing systems, but
you will lose whatever custom settings are currently in place on that system. Be aware of
this when downloading a template from PC-DBA to an existing system with a lot of
customized features, as you will have to reprogram those features.
For further details on using the database templates, refer to the Read Me file on DXUTILCD.
3.1.2 COPYING BASELINE CO LINE SETUPS
This is a programming aid feature. Once you have programmed one CO line for the baseline configuration settings, you can copy those setting to other CO lines using this utility.
First program the CO line you want to use as a baseline. For details on how to program a CO line, see
Section 5, Programming CO Lines. When you have finished setting up the CO line you want to use as
a baseline, use the following procedures to copy that baseline CO line’s setups into other CO lines.
3.1.2.1 Programming Using the DET
Note: chg, bksp, save, one, always, del, and ack are interactive LCD button operations. Use the three
buttons below the LCD display to activate the associated operation.
1. Enter Database Administration using the feature code Feature # * and then enter the DB Admin
password.
2. Press show. The system displays the DB Item Select screen.
You can copy CO line setups individually, or to all lines in a line group. To copy CO line programming line by line, perform the following steps.
1. Enter 08-11-01.
2. Press save. The system displays the Individual CO Line Copy screen.
3. Press show. The system prompts “COPY FROM.” Enter the CO line directory number you
want to use as a baseline.
4. Press save. The system prompts “COPY TO.” Enter the CO line directory number you want to
copy the baseline’s programming into (740-755).
5. Press save. The system prompts “COPY TO” again.
6. Continue entering CO line directory numbers CO lines to which you want to copy the baseline
setups. Press save each time you enter a directory number.
7. When you are finished, press the Hold button to return to the previous menu level,
Or, press the Vo lu me button (up or down) to return to the DB Item Selection screen,
Or, exit programming.
To copy a CO line setup to all the lines in a line group, perform the following steps.
1. Enter 08-11-02.
2. Press save. The system displays the Group CO Line Copy screen.
October, ‘03 Comdial 45
Page 46

Getting Started
3. Press show. The system prompts “COPY FROM.” Enter the CO line directory number you
want to use as a baseline.
4. Press save. The system prompts “COPY TO.” Enter the CO line group directory number you
want to copy the baseline’s programming into (9, 800-806).
5. Press save. The system saves the setups to all of the CO lines that are part of that CO line
group.
6. Now you can save the setups to another line group if desired. The system prompts “COPY TO”
again.
7. Continue entering CO line group directory numbers where you want to save the baseline setup.
Press save each time you enter a CO line group directory number.
8. When you are finished, press the Hold button to return to the previous menu level,
Or, press the Vo lu me button (up or down) to return to the DB Item Selection screen,
Or, exit programming.
3.1.2.2 Programming Using PC-DBA
1. Select Programming from the PC-DBA menu and press Enter. The system displays the Data-
base Programming menu.
2. Highlight System Application and press Enter. The system displays the System Application
menu.
3. Highlight CO Line Copy and press Enter. The system displays the CO Copy menu.
You can copy CO lines individually, or to all lines in a line group. To copy CO lines one at a time,
perform the following steps.
1. Highlight Individual and press Enter. The system displays the System Application — CO Line
Copy Individual menu.
46 Comdial October, ‘03
Page 47

DX-80 Programming Manual
2. The system places the cursor in the Source DIR No. field. Key in the CO line directory number
you want to use as a baseline, and press Enter. Valid directory numbers are 740 through 755.
There is no default.
3. Once you enter a valid CO line number, the system moves you to the Destination DIR No.field.
4. Enter the CO line directory number you want to copy the baseline’s programming into (740-
755) and press Enter. Once you enter a valid CO line number, the system accepts that number
and scrolls down a line to allow you to enter another CO line number into which you want to
copy the baseline’s programming. Note: If you enter an invalid number, the system erases your
input.
5. In the same manner, enter any other CO line numbers as needed. When you are finished copying the setups, press Esc. The system then performs the CO line copy that you specified, and
returns you to the System Application — CO Line Copy Individual menu.
6. If needed, you can enter another source CO line directory number to copy from, and continue
the process for other CO lines.
7. When you are done, press Esc to return to the Database Programming screen. The system
prompts: “Exit This Feature?”; press Y for yes.
8. The system prompts “Save Current Setting?” Press Y to save your changes.
9. The system then prompts “File Exists, Override?” Press Y to continue with the save operation.
10. Press Esc to return to the Database Programming menu.
11. When you have finished all programming changes, perform a Send operation to copy your new
database to the DX-80 switch system memory. For more details, see Section 2.1.4.4, F4 – Send.
To copy a CO line setup to all the lines in a line group, perform the following steps.
1. Highlight Group and press Enter. The system displays the System Application — CO Line
Copy Group menu.
October, ‘03 Comdial 47
Page 48

Getting Started
2. The system places the cursor in the Source DIR No. field. Key in the CO line directory number
you want to use as a baseline, and press Enter. Valid directory numbers are 740 through 755.
There is no default. Once you enter a valid CO group number, the system moves you to the
Destination DIR No.field.
3. Enter the CO group number you want to copy the baseline’s programming into (9 and 800
through 806) and press Enter. Once you enter a valid CO group number, the system accepts
that number and scrolls down a line to allow you to enter another CO group number into which
you want to copy the baseline’s programming. Note: If you enter an invalid number, the system
erases your input.
4. In the same manner, enter any other CO group numbers as needed. When you are finished
copying the setups, press Esc. The system then performs the CO group copy that you specified,
and returns you to the System Application — CO Line Copy Group menu.
5. If needed, you can enter another source CO line directory number to copy from, and continue
the process for other CO groups.
6. When you are done, press Esc to return to the Database Programming screen. The system
prompts: “Exit This Feature?”; press Y for yes.
7. The system prompts “Save Current Setting?” Press Y to save your changes.
8. The system then prompts “File Exists, Override?” Press Y to continue with the save operation.
9. Press Esc to return to the Database Programming menu.
10. When you have finished all programming changes, perform a Send operation to copy your new
database to the DX-80 switch system memory. For more details, see Section 2.1.4.4, F4 – Send.
3.1.3 COPYING BASELINE EXTENSION SETUPS
You can use this database feature to quickly copy the various programming and settings for one
extension to other extensions. There are two methods to copy extension data:
• individual—copies from the baseline extension to another extension, one at a time;
• group—copies from the baseline extension to all extensions in a pick up group.
The following conditions apply to copying extension programming.
48 Comdial October, ‘03
Page 49

DX-80 Programming Manual
• You must complete all the programming for the baseline extension before making a copy. For
details on how to program an extension, see Section 10, Programming Extensions.
• When using group copy, all extensions you want to receive the programming must be
programmed for the same pickup group.
The DX-80 allows you to copy:
• extension setups,
• feature key setups,
• DSS setups, and
• CO lines. For further information on copying CO lines, see Section 3.1.1, Using a Database
Programming Template.
When you have finished setting up the extension you want to use as a baseline, use the following procedures to copy that baseline extension’s setups into other extensions.
3.1.3.1 Programming Using the DET
Note: chg, bksp, save, one, always, del, and ack are interactive LCD button operations. Use the three
buttons below the LCD display to activate the associated operation.
1. Enter Database Administration using the feature code Feature # * and then enter the DB Admin
password.
2. Press show. The system displays the DB Item Select screen.
To use the Individual Copy mode, perform the following steps.
1. Enter 08-12-01, then press save. This advances you to the INDIVIDUAL COPY programming
screen.
2. Press show. This advances you to the COPY FROM screen.
3. Enter the extension directory number you want to use as a baseline.
4. Press save. This advances you to the COPY TO screen.
5. Enter the extension number you want to copy the baseline setups into, then press save.
6. The system immediately displays the COPY TO screen again so you may copy another exten-
sion. Repeat the process for all extensions you want to receive the baseline programming.
7. When you have finished copying, press the Hold button to return to the previous menu level,
Or, press the Vo lu me button (up or down) to return to the DB Item Selection screen,
Or, exit programming.
To use the Group Copy mode, perform the following steps.
1. Enter 08-12-02, then press save. This advances you to the GROUP COPY programming
screen.
2. Press show. This advances you to the COPY FROM screen.
3. Enter the extension directory number you want to use as a baseline.
4. Press save. This advances you to the COPY TO screen.
October, ‘03 Comdial 49
Page 50

Getting Started
5. Enter the pickup group number you want to copy the baseline setups into, then press save. The
system then copies the programming of the baseline extension into all extensions in the pickup
group you specified.
6. Next, the system displays the COPY TO screen again so you may copy the data to another
pickup group extension. Repeat the process for all pickup groups you want to receive the baseline programming.
7. When you have finished copying, press the Hold button to return to the previous menu level,
Or, press the Vo lu m e button (up or down) to return to the DB Item Selection screen,
Or, exit programming.
3.1.3.2 Programming Using PC-DBA
1. Select Programming from the PC-DBA menu and press Enter. The system displays the Data-
base Programming menu.
2. Highlight System Application and press Enter. The system displays the System Application
menu.
3. Highlight Extension Copy and press Enter. The system displays the Extension Copy menu.
You can copy extensions individually, or to all extension in a pickup group. To copy extensions one at
a time, perform the following steps.
1. Highlight Individual and press Enter. The system displays the System Application — Exten-
sion Copy Individual menu.
50 Comdial October, ‘03
Page 51

DX-80 Programming Manual
2. The system places the cursor in the Source DIR No. field. Key in the extension directory number you want to use as a baseline, and press Enter. You can enter any valid extension number in
the system. There is no default.
3. Once you enter a valid extension number, the system moves you to the Destination DIR
No.field. Enter the extension directory number you want to copy the baseline’s programming
into (any valid extension number) and press Enter. Once you enter a valid extension number,
the system accepts that number and scrolls down a line to allow you to enter another extension
number into which you want to copy the baseline’s programming. Note: If you enter an invalid
number, the system erases your input.
4. In the same manner, enter any other extension numbers as needed. When you are finished
copying the setups, press Esc. The system then performs the extension copy that you specified,
and returns you to the System Application — Extension Copy Individual menu.
5. If needed, you can enter another source extension directory number to copy from, and continue
the process for other extensions.
6. When you are done, press Esc to return to the Database Programming screen. The system
prompts: “Exit This Feature?”; press Y for yes.
7. The system prompts “Save Current Setting?” Press Y to save your changes.
8. The system then prompts “File Exists, Override?” Press Y to continue with the save operation.
9. Press Esc to return to the Database Programming menu.
10. When you have finished all programming changes, perform a Send operation to copy your new
database to the DX-80 switch system memory. For more details, see Section 2.1.4.4, F4 – Send.
To copy a extension setup to all the extensions in a pickup group, perform the following steps.
1. Highlight Group and press Enter. The system displays the System Application — Extension
Copy Group menu.
October, ‘03 Comdial 51
Page 52

Getting Started
2. The system places the cursor in the Source DIR No. field. Key in the extension directory number you want to use as a baseline, and press Enter. You can use any valid extension number in
the system. There is no default.
3. Once you enter a valid extension number, the system moves you to the Destination DIR
No.field. Enter the extension pickup directory number you want to copy the baseline’s programming into (any valid pickup directory number) and press Enter. Once you enter a valid
pickup number, the system accepts that number and scrolls down a line to allow you to enter
another pickup number into which you want to copy the baseline’s programming. Note: If you
enter an invalid number, the system erases your input.
4. In the same manner, enter any other extension pickup numbers as needed. When you are finished copying the setups, press Esc. The system then performs the extension group copy that
you specified, and returns you to the System Application — Extension Copy Group menu.
5. If needed, you can enter another source extension directory number to copy from, and continue
the process for other pickup groups.
6. When you are done, press Esc to return to the Database Programming screen. The system
prompts: “Exit This Feature?”; press Y for yes.
7. The system prompts “Save Current Setting?” Press Y to save your changes.
8. The system then prompts “File Exists, Override?” Press Y to continue with the save operation.
9. Press Esc to return to the Database Programming menu.
10. When you have finished all programming changes, perform a Send operation to copy your new
database to the DX-80 switch system memory. For more details, see Section 2.1.4.4, F4 – Send.
52 Comdial October, ‘03
Page 53

DX-80 Programming Manual
3.1.4 FEATURE / DIRECTORY NUMBER LOOKUP
The DX-80 system has many features and codes, and at times it may be difficult to remember the code
for the necessary feature. The DX-80 has a built-in feature code directory to allow you to look up the
codes from a DET phone.
To look up a feature or directory number from a DET, perform the following steps.
1. While the telephone is idle (no call activity), press Feature # 5. The display shows
DIR#/CODE LOOKUP
dir ftr suffix
2. To find a system directory number, press dir. The first screen of directory number listings dis-
plays. If you don’t see the system resource listed press next until the resource displays, then
press that interactive LCD button. (For example, to show the directory number assigned to CO
line groups, press co gp.)
3. To find a system feature access code, press ftr. Features are listed alphabetically and are abbre-
viated. Note: All codes in this list require that you press the Feature button before entering the
code.
4. To find a suffix code, press suffix. The list of digits dialed after system resource directory numbers displays.
5. Use the back and next buttons to move through the display categories.
6. Use the Hold button to return to a previous menu level.
7. Go off-hook, then on-hook (or press the ON/OFF button twice) to exit Feature/Directory Number Lookup.
October, ‘03 Comdial 53
Page 54

Getting Started
3.1.4.1 Directory Numbers
Feature Directory
Co gp
(CO line group)
Page (Paging) Tenant 400
Hunt Hunt/UCD Group 1~24 410~433
Pickup Pickup Group 1~8 440~447
Music Music Channel 1, 2 771, 772
Bell Loud Bell/E.P./M.S. 779
Mmcnf Meet Me Conf. 1~8 390~397
Vir Virtual Numbers 1-30 700~729
Spd Speed Dial – Individual 470~499
Note: These are the defaults, which can be changed by modifying the
Numbering Plan.
Numbers
19
2~8 800~806
Group 1~8 401~408
EXT PAGE (External) 777
Speed Dial – System (common) 500~699
54 Comdial October, ‘03
Page 55

3.1.4.2 Feature Access Codes
Feature Enable Code Disable Code
Agent Log Off Feature 9 1 Feature * 9 1
Alarm Clock Feature 9 2 Feature * 9 2
Alarm Key Feature 6 2 N/A
All Forward Feature 2 Feature 2
Attendant Administration Feature # 0 Password: 9999 (x101)
Auto Hold Feature 9 4 Feature * 9 4
Auto Line Select Feature 9 5 Feature * 9 5
Auto Redial Feature 7 8 N/A
Busy Forward Feature 2 Feature 2
Busy Ring Allow Feature # 2 Feature # 2
Call Forward Feature 2 Feature 2
CBCK (Callback) Delete Feature # # Feature # #
CID Table Feature 6 # Password: 9999 (x101)
Conference Feature 6 0 Feature 6 0
DB (Database) Programming Feature # * N/A
Default Set Feature 6 9 N/A
Distinctive Ringing Feature # 7 N/A
Do Not Disturb Feature 4 Feature 4
DSS Key Programming Feature # 4 N/A
External Call Forward Feature 2 Feature 2
Feature Status Feature # 8 N/A
Flash Feature 3 N/A
Follow Call Forward – From Feature 2 Feature 2
Follow Call Forward – To Feature 2 N/A
Forced Release (Conference) Feature 7 4 N/A
Feature Code Lookup Feature # 5 N/A
Feature Key Programming Feature # 3 N/A
Feature Key Reset Feature 5 8 Password: 9999 (x101)
Get Held CO Line Feature 7 * N/A
Headset Mode Feature 9 # Feature * 9 #
Hidden Code Feature 6 1 N/A
Hot Key Feature # 6 Feature # 6
Hotline Feature 9 * Feature * 9 *
ICM (Intercom) Key Feature 6 5 N/A
DX-80 Programming Manual
0000 (all other extensions)
0000 (all other extensions)
0000 (all other extensions)
October, ‘03 Comdial 55
Page 56

Getting Started
ICM Mode (HF/Private/Ring) Feature 9 8 Feature 9 8
Last # Redial Feature 8 N/A
Lock Phone Feature 9 7 Password: 9999 (x101)
Memo Pad Feature 5 * N/A
MSG (Message) Waiting Feature 9 6 N/A
Mute Key Feature 7 6 N/A
Night Service Mode
Note: Attendant station only
No Answer Call Forward Feature 2 Feature 2
Paging Answer Feature 5 9 N/A
Paging Receive Feature # 9 Feature # 9
Park Call Feature 7 3 N/A
Pause Feature 7 0 N/A
Private Talk (Conference) Feature 5 7 N/A
Release Key Feature 5 2 N/A
Room Status Feature 7 # N/A
Saved # Redial Feature 5 1 N/A
Speed Dialing Feature 1 N/A
Status MSG (Message) Feature 9 0 Feature * 9 0
Touch Tone Feature # 1 Feature # 1
Unsupervised Conference Feature 7 7 N/A
Voice MW Key Feature 6 4 N/A
Voice Record Feature 6 7 N/A
Feature Enable Code Disable Code
0000 (all other extensions)
Feature 6 3 Password: 9999 (x101)
0000 (all other extensions)
56 Comdial October, ‘03
Page 57

DX-80 Programming Manual
3.1.4.3 Suffix Codes
Feature Suffix Code
ICM Voice / Ring *
DND Override 3
Camp On 4
Callback #
Call Pickup 6
Intrusion 8
MSG (Message) Waiting 9
ICM (Intercom) OHVA 0
Monitor 1
Note: These can be changed.
3.1.5 RESETTING AN EXTENSION TO THE DEFAULT SET
When extension users have invoked several features on their extensions, it may be necessary to clear
all settings and return the telephone set to the factory condition. The Default Set code is used to
perform this operation.
The following extension parameters are reset to the value shown:
LNR = empty
SNR = No Saved Number
Memo = No Saved Number
Telephone Lock = No
Auto Hold = No
Page Receive = Yes
Busy Ring = Yes
Hotline to = NULL (none)
To return an extension’s settings to the default settings, perform the following steps at the DET phone.
1. Press Feature 6 9.
The system shows the following display, and asks you to confirm the action.
DEFAULT SET
go
2. Press go to load the default set into the phone. You hear the confirmation tone when the operation is complete.
October, ‘03 Comdial 57
Page 58

Getting Started
This Page Intentionally Left Blank
58 Comdial October, ‘03
Page 59

DX-80 Programming Manual
4. PROGRAMMING SYSTEM FEATURES
The system features allow you to control system administration and to assign system resources. The
DX-80 provides programmable features that allow you to establish these various settings.
To set up the system features, perform the following tasks.
1. Establish the database administrator password.
2. Assign the attendant extension for each tenant group.
3. Assign the system reminder for each tenant group.
4. Set the user passwords for extensions 101, 102, and 108.
5. Specify the user names for extensions 101 and 108.
6. Name each CO line (1-16).
7. Set up the pre-programmed incoming and outbound messages.
8. Program speed dial numbers.
9. Set the number of items in the Caller ID table.
10. Establish the music source for the each tenant group.
11. Assign the external pager ID to a tenant group. Enable/disable page group 1 and 8.
12. Program ancillary devices (loud bell, external page, music on hold source).
13. Allocate the DSS.
14. Set up the optional internal modem.
15. Select the PC-DBA transmit rate.
16. Select the SMDR transmit rate.
17. Set up the ring scheme.
18. Specify the letter type.
19. Set up the system time, date, and hour mode.
20. Set up the numbering plan you want to use. The DX-80 has a built-in numbering plan that you
can use as is or modify if necessary.
While you are programming in PC-DBA, the system saves your changes in the working directory
residing on the laptop. While it may appear that you have re-programmed the switch, the system does
not update the switch database with your changes until you perform a SEND command from the
laptop.
CAUTION
If PC-DBA is set to U-Save, your database changes reside only on
your laptop. When you have finished making all changes to the data-
base, perform a SEND operation to download the new database to the DX-80 switch.
For further details on the SEND command, see Section 2.1.4.4, F4 – Send.
October, ‘03 Comdial 59
Page 60

Programming System Features
4.1 Establishing Database Administrator Password
The DX-80 system allows you to set up and maintain the system database using any DX-80 DET telephone, once you have entered the database administrator password. Note: While it is possible to
program the DX-80 system while the telephone is in use, certain button operations are used during
programming and cannot be used for telephone call processing. Therefore, Comdial suggests not
using these features simultaneously unless you have been directed to do so by Comdial Technical
Support.
The database administration password is by default set to ######## (eight #s) when programming by
phone, and “ “ (eight spaces) when programming using PC-DBA. To change the default password,
you must first connect to the switch enter and Database Administration using the default password.
Passwords must be eight alphanumeric characters long. You can use any combination of letters and/or
numbers, plus the # symbol. Passwords are case-sensitive, so for example if you use a capital “R” you
cannot enter a lower case “r” when entering the password later.
4.1.1 PROGRAMMING USING THE DET
Note: chg, bksp, save, one, always, del, and ack are interactive LCD button operations. Use the three
buttons below the LCD display to actuate the associated operation.
1. Enter Database Administration using the feature code Feature # * and then enter the DB Admin
password. For details on how to enter numbers, upper case letters and lower case letters, see the
tables in Section 4.18, Setting Up Letter Type (Enhanced Lettering Scheme).
2. Press show. The system displays the DB Item Select screen. Note: All database programming
items are indexed for fast access.
3. Enter 04-01, then press save. The system advances you to the System Resources – DB PSWD
screen and displays the current password. The default is “########” (eight #s).
4. Press chg to change the password.
5. Enter the new eight-character, alphanumeric password and press save. Use the volume up or
down buttons to return to the DB Item Select screen.
6. To exit Database Administration press the ON/OFF button twice. Or, lift and replace the handset in the hook-switch cradle.
4.1.2 PROGRAMMING USING PC-DBA
Before changing the database administrator password, you must first connect your laptop to the
system. For details on connecting, see Section 2.1.4.5, F5 – Connect.
1. Select Programming from the PC-DBA menu and press Enter. The system displays the Data-
base Programming menu.
2. Use the arrow keys to highlight KSU DB Password and press Enter. The system prompts you to
enter the old password.
60 Comdial October, ‘03
Page 61

DX-80 Programming Manual
3. Enter the existing password and press Enter. Note: The default PC-DBA password when the
system is shipped is “ “ (eight spaces).
4. After you enter the eighth digit of the old password, the system prompts you to enter the new
password.
New Password:
Key in the eight alphanumeric characters you want to use for your new password.
5. After you enter the eighth character of the new password, the system asks you to confirm the
new password.
Confirm:
Key in the same eight alphanumeric characters you entered in the previous step.
6. After you confirm the eighth character of the new password, the system asks if you want to
send the new password to the switch to be saved.
Save New DB PSWD to KSU? (Y/N)
7. Press Y to save your new password. The system responds as follows.
Password Change Succeed!!
4.2 Assigning Attendants
You assign a primary attendant to each of the DX-80 system’s three tenant groups. The standard
Digital Speakerphone serves as the attendant telephone. When assigned as attendant, this extension
supports general system functions like line recall, forced incoming ICM call forward, and manual
evening or alternate service mode operation. The attendant receives all intercom calls directed to the
attendant directory number (“0” at default). The attendant extension has an internal call queue that
allows multiple intercom calls to be directed to the attendant at the same time.
You can designate an alternate attendant position in each tenant group for common sharing of
incoming CO line calls or load sharing during peak traffic periods.
October, ‘03 Comdial 61
Page 62

Programming System Features
The attendant’s extension password provides control of:
• system service mode (day/evening/alternate/time),
• time of day settings,
• system speed dial number programming, and
• recording of the optional auto attendant greetings.
You can connect the attendant extension to any system station port, and you can assign it any intercom
extension number in your numbering plan.
The following conditions apply to the attendant extension.
• Any extension in the tenant group can dial 0 to reach the attendant extension.
• The system routes all unanswered transferred calls and all calls from any extension that invokes
forced intercom call forward to the attendant extension. When multiple internal calls are waiting
in queue for the attendant extension, the display indicates on the second line the number of calls
waiting in the queue.
LINE 3 01:45
-->> 2
• The extension password for the attendant extension is required for entry into attendant
administration, caller ID table and ring mode. The default extension password is 9999.
• Only the designated attendant extension can manually change the system ring mode or the
extension room status (hotel mode).
Features whose settings can affect the attendant extension include the following.
• Do Not Disturb (i.e., forced DND)
• Hotel Mode
• Room Status (F7#)
• Attendant Administration (F#0)
• Service Mode Change
• Auto Attendant Message Record/Review
• Temporary Service Mode
• System Speed Dial
• Call Forward Auxiliary Lamp
• Extension User Password (F97)
• Caller ID Table (review) (F6#)
• Ring Mode (F63)
Once you have programmed the attendant extension, program the user password for that extension.
For details on programming extension user passwords, see Section 10.3, Assigning a Password to the
Extension.
62 Comdial October, ‘03
Page 63

DX-80 Programming Manual
4.2.1 PROGRAMMING USING THE DET
Note: chg, bksp, save, one, always, del, and ack are interactive LCD button operations. Use the three
buttons below the LCD display to actuate the associated operation
1. Enter Database Administration using the feature code Feature # * and then enter the DB Admin
password.
2. Press show. The DB Item Select screen displays.
3. First, program the attendant extension. Enter 04-02-x-01, where x is the tenant group number.,
then press save.
4. To change the designated attendant extension press chg. Enter the extension number you want
to assign as the attendant extension. Note: You can only assign valid extension directory num-
bers as tenant group attendants. You cannot use extensions that are programmed as attendants
for other tenant groups or as alternate attendants.
5. Press save
6. Next, program the alternate attendant extension. Return to the Database Item Select screen by
pressing the Volume button (up or down).
7. Enter 04-02-x-06, where x is the tenant group number, then press save.
8. To change the designated attendant extension press chg (change). Enter the extension number
you want to assign as the alternate attendant extension. Note: You can only assign valid exten-
sion directory numbers as tenant group attendants. You cannot use extensions that are programmed as attendants for other tenant groups or as alternate attendants.
9. Press save.
10. Program the user passwords for each attendant extension and alternate attendant extension you
have programmed.
.
4.2.2 PROGRAMMING USING PC-DBA
1. Select Programming from the PC-DBA menu and press Enter. The system displays the Data-
base Programming menu.
2. Use the arrow keys to highlight System Resource and then press Enter. The system displays the
System Resource — Attendant menu.
October, ‘03 Comdial 63
Page 64

Programming System Features
3. In the Attendant field, highlight the tenant group you want to program and press Enter. Key in
the extension directory number you want to use for the attendant, then press Enter. Valid num-
bers are any extension within the tenant group that you have not already assigned as an alternate
attendant. The default is 101. If you are not using a tenant group, set the Attendant field to
NULL.
4. In the same manner, assign attendant extension numbers to other tenant groups as needed.
5. Next, program the alternate attendant extension. Highlight the Alternate field and press Enter.
6. Enter the extension directory number you want to assign as the alternate attendant extension,
then press Enter. Valid numbers are any extension within the tenant group that you have not
already assigned as the attendant. The default is 101. If you are not using a tenant group, set
the Alternate field to NULL.
7. In the same manner, assign the alternate attendant for other tenant groups as needed.
8. When you are done, press Esc to return to the Database Programming screen. The system
prompts: “Exit This Feature?”; press Y for yes.
9. The system prompts “Save Current Setting?” Press Y to save your changes.
10. The system then prompts “File Exists, Override?” Press Y to continue with the save operation.
11. Press Esc to return to the Database Programming menu.
12. When you have finished all programming changes, perform a Send operation to copy your new
database to the DX-80 switch system memory. For more details, see Section 2.1.4.4, F4 – Send.
64 Comdial October, ‘03
Page 65

DX-80 Programming Manual
4.3 Assigning System Reminders
You can set the DX-80 system to alert all phones at predetermined intervals during the day; you can
choose up to eight reminders. You specify the play time, which tells the system how long (from 1 to
10 minutes) to play the music. The system uses the music source connected to the MC1 connector for
the system reminder (unless the internal music source is selected by an option strap on the CPM--see
the DX-80 Technical Manual Volume 1, Installation & Maintenance, part number IMI72-001).
When the system reaches the time a reminder is to start, it plays the output from the internal or MC1
music source over all digital extensions. The system plays this music for the length of time you
specify: from one to ten minutes.
The following conditions apply to system reminders.
• The music alarm will not play at an extension that is busy on a call (handset or speakerphone), or
in the Do Not Disturb (DND) mode.
• The system cancels any system reminder in progress when another function is invoked.
• The system uses the music source connected to the MC1 music input for the system reminder.
• Extensions monitoring background music channel MC1 will not recognize the system reminder.
A related feature that can affect system reminders is the Music Source field under Numbering Plan 4.
See Section 4.10, Establishing Music Sources for more details.
Note: Before programming a system reminder, make sure the system time is accurate to the current
local time by pressing ALT T. The system displays the System Time menu; from this menu you can
correct the year, month, day, weekday, hour, and minute if necessary.
4.3.1 PROGRAMMING USING THE DET
Note: chg, bksp, save, one, always, del, and ack are interactive LCD button operations. Use the three
buttons below the LCD display to actuate the associated operation.
1. Enter Database Administration using the feature code Feature # * and then enter the DB Admin
password.
2. Press show. The DB Item Select screen displays.
3. Enter 03-19.
4. Press save. The phone displays “ALARM PLAY”.
5. Press chg until the alarm play time (in seconds) you want to use displays.
6. Press back or next to continue programming. Or exit programming.
4.3.2 PROGRAMMING USING PC-DBA
1. Select Programming from the PC-DBA menu and press Enter. The system displays the Data-
base Programming menu.
2. Use the arrow keys to highlight System Resource and press Enter. The system displays the Sys-
tem Resource menu.
3. Highlight System Reminder and press Enter. The system displays the System Resource — Sys-
tem Reminder menu.
October, ‘03 Comdial 65
Page 66

Programming System Features
4. Assign the Reminder1 in the Tenant 1 field. Press Enter, then key in when you want the system
to play the reminder, in 24 hour format. Valid times are from 00:00 to 23:59. The default is
NULL (no reminder). After you have keyed in the time, press Enter.
5. In the same manner, assign reminders to tenant groups 2 and 3 as required. Then continue to
assign reminders 2 through 8 as needed.
6. Next, highlight Play Time for Tenant 1. Press Enter to choose the duration of the reminder,
from one to ten minutes. The default is one minute.
7. In the same manner, assign the reminder durations for tenant groups 2 and 3 as needed.
8. When you are done, press Esc to return to the Database Programming screen. The system
prompts: “Exit This Feature?”; press Y for yes.
9. The system prompts “Save Current Setting?” Press Y to save your changes.
10. The system then prompts “File Exists, Override?” Press Y to continue with the save operation.
11. Press Esc to return to the Database Programming menu.
12. When you have finished all programming changes, perform a Send operation to copy your new
database to the DX-80 switch system memory. For more details, see Section 2.1.4.4, F4 – Send.
66 Comdial October, ‘03
Page 67

DX-80 Programming Manual
4.4 Setting User Password Lengths, Setting Passwords for System Directory Numbers 101, 102, and 108
All extensions of the DX-80 system have an associated user password. Passwords are used to protect
the phone lock, call forward remote and attendant features. You can set the password lengths, four to
eight characters. Note: Extension passwords can be changed at the extension only by using the phone
lock feature.
Changes to the length of the user password affect existing passwords—the system adds or subtracts
one default character to the end of the password. That is, if you extend the length of the password, the
system increases all passwords by adding a 0 in the right-most position. If you reduce the length of the
password, the system truncates all passwords by one character in the right-most position.
Once you have set the password length, set the passwords for extensions 101, 102, and 108, because
these are system directory numbers.
If you need to program passwords for individual extensions, see Section 10.3, Assigning a Password to
the Extension.
4.4.1 PROGRAMMING USING THE DET
Note: chg, bksp, save, one, always, del, and ack are interactive LCD button operations. Use the three
buttons below the LCD display to actuate the associated operation.
1. Enter Database Administration using the feature code Feature # * and then enter the DB Admin
password.
2. Press show. The DB Item Select screen displays.
3. First, you will program user password length. Enter
password length displays.
4. Press chg until the appropriate extension password length displays (valid lengths 4-8). The
default length is 4.
5. Next, program the passwords you want to use for extensions 101, 102, and 108. Press next to
advance to the extension password view screen.
6. Enter 101 and press save. The system displays the password for extension 101. Enter the password you want to use. Valid passwords use any alphanumeric characters, up to the extension
length you just programmed (if you set the length to 5, valid passwords have five alphanumeric
characters, etc.). The default is for extension 101 is 9999; the default password for all other
extensions is 0000.
7. Press back or next to return to the extension number input screen.
8. In the same manner, program the passwords for extensions 102 and 108. When you are finished, press the Hold button to return to the previous menu level,
Or press the Vo lu me button (up or down) to return to the DB Item Selection screen,
Or exit programming.
04-04-01, then press save. The current user
October, ‘03 Comdial 67
Page 68

Programming System Features
4.4.2 PROGRAMMING USING PC-DBA
1. Select Programming from the PC-DBA menu and press Enter. The system displays the Data-
base Programming menu.
2. Use the arrow keys to highlight System Resource and press Enter. The system displays the Sys-
tem Resource menu.
3. Highlight User Password and press Enter. The system displays the System Resource — User
Password menu.
4. First, program the user password length. Use the arrow keys to highlight Length, then press
Enter. Key in the password length (from 4 to 8) you want to use, then press Enter. The default
length is 4.
5. Next, program the passwords you want to use for extensions 101, 102, and 108. Use the down
arrow key to highlight the Password field for directory number 101 and press Enter.
6. Enter the password you want to use. Valid passwords use any alphanumeric characters, up to
the extension length you just programmed (if you set the length to 5, valid passwords have five
alphanumeric characters, etc.). The default is for extension 101 is 9999; the default password
for all other extensions is 0000.
7. In the same manner, program the passwords for extensions 102 and 108.
8. When you are done, press Esc to return to the Database Programming screen. The system
prompts: “Exit This Feature?”; press Y for yes.
9. The system prompts “Save Current Setting?” Press Y to save your changes.
10. The system then prompts “File Exists, Override?” Press Y to continue with the save operation.
11. Press Esc to return to the Database Programming menu.
12. When you have finished all programming changes, perform a Send operation to copy your new
database to the DX-80 switch system memory. For more details, see Section 2.1.4.4, F4 – Send.
68 Comdial October, ‘03
Page 69

DX-80 Programming Manual
4.5 Specifying User Names for x101 and x108
You can assign an alphanumeric, seven-character title to each extension in the system. The system displays this title on the digital speakerphone in place of the standard “EXT” message.
You assign extension user names while programming the extension. The names may consist of upper
and lower case letters and numbers and various “special” characters as provided by the Enhanced Lettering Scheme feature selection.
The following conditions apply when entering user names for extensions.
• The system displays the user name whenever intercom calls are made for one extension to
another.
• The system displays the characters “EXT” whenever there is no extension user name
programmed. If a user name has been programmed, the system displays the name instead of
EXT.
• Names may be seven or fewer characters.
Another field that can affect the extension user name is Letter Type under System application, Category 1. See Section 4.18, Setting Up Letter Type (Enhanced Lettering Scheme) for more details.
4.5.1 PROGRAMMING USING THE DET
Note: chg, bksp, save, one, always, del, and ack are interactive LCD button operations. Use the three
buttons below the LCD display to actuate the associated operation.
1. Enter Database Administration using Feature # * and then enter the DB Admin password.
2. Press show. The system displays the DB Item Select screen.
3. Enter 04-05-101 then press save. This advances you to the Extension User Name programming
screen for extension 101. Press chg.
4. Enter the name you want to use for extension 101 using the dial pad to spell out a name. Refer
to the enhanced lettering scheme tables as needed. For more information on these tables, see
Section 4.18, Setting Up Letter Type (Enhanced Lettering Scheme).
5. Press the Hold button to return to the previous menu level.
6. Enter 04-05-108 then press save. This advances you to the Extension User Name programming
screen for extension 108. Press chg.
7. In the same manner, enter a user name for extension 108.
8. Press the Hold button to return to the previous menu level,
Or, press the Vo lu me button to return to the DB Item Selection screen,
Or exit programming.
4.5.2 PROGRAMMING USING PC-DBA
1. Select Programming from the PC-DBA menu and press Enter. The system displays the Data-
base Programming menu.
2. Use the arrow keys to highlight System Resource and press Enter. The system displays the Sys-
tem Resource menu.
October, ‘03 Comdial 69
Page 70

Programming System Features
3. Use the arrow keys to highlight User Names and press Enter. The system displays the System
Resource — User Names menu.
4. Highlight the User Names field for extension 101 and press Enter.
5. Enter the appropriate name for this extension (any alphanumeric characters up to 7 characters).
The default is NULL (no user name). Press Enter.
6. In the same manner, program a user name for extension 108.
7. When you are done, press Esc to return to the Database Programming screen. The system
prompts: “Exit This Feature?”; press Y for yes.
8. The system prompts “Save Current Setting?” Press Y to save your changes.
9. The system then prompts “File Exists, Override?” Press Y to continue with the save operation.
10. Press Esc to return to the Database Programming menu.
11. When you have finished all programming changes, perform a Send operation to copy your new
database to the DX-80 switch system memory. For more details, see Section 2.1.4.4, F4 – Send.
4.6 Naming CO Lines
DX-80 allows you to name (or label) CO lines so you can customize the appearance of the line identifier in the telephone display when the CO line is in use. This labeling can assist users when handling
CO line calls by displaying the intended purpose of that CO line.
4.6.1 PROGRAMMING USING THE DET
Note: chg, bksp, save, one, always, del, and ack are interactive LCD button operations. Use the three
buttons below the LCD display to actuate the associated operation.
1. Enter Database Administration using the feature code Feature # * and then enter the DB Admin
password.
2. Press show. The DB Item Select screen displays.
70 Comdial October, ‘03
Page 71

DX-80 Programming Manual
3. Enter 04-06-xxx, where xxx is the number of the CO line directory you want to name. Valid CO
line numbers range from 740 to 755.
4. Press save. This advances you to the selected CO Line Name/Label field and shows the current
name for the line you specified.
5. Press chg to enter a new name/label. Use the dial pad keys and reference the lettering scheme
tables to enter the name/label for the CO line. [See Section 4.18, Setting Up Letter Type
(Enhanced Lettering Scheme)].
Valid names can have up to 7 alphanumeric characters. The default is LINE1 through LINE 16,
corresponding to directory numbers 740 through 755.
6. Press save when you have finished the label to save the new name/label name.
7. Press next to enter another CO line directory name.
8. When finished programming CO line name/labels, press the Vo l u me button (up or down) to
return to the DB Item Select screen, or exit programming.
4.6.2 PROGRAMMING USING PC-DBA
1. Select Programming from the PC-DBA menu and press Enter. The system displays the Data-
base Programming menu.
2. Use the arrow keys to highlight System Resource and press Enter. The system displays the Sys-
tem Resource menu.
3. Use the arrow keys to highlight CO Line Names and press Enter. The system displays the System Resource — CO Line Names menu.
4. Highlight the CO Line Names field for the line to whom you want to assign a name, then press
Enter. Key in the name, then press Enter. Valid names can have up to 7 alphanumeric charac-
ters. The default is LINE 1 through LINE 16, corresponding to directory numbers 740 through
755.
5. In the same manner, assign names to other CO lines as needed.
6. When you are done, press Esc to return to the Database Programming screen. The system
prompts: “Exit This Feature?”; press Y for yes.
7. The system prompts “Save Current Setting?” Press Y to save your changes.
October, ‘03 Comdial 71
Page 72

Programming System Features
8. The system then prompts “File Exists, Override?” Press Y to continue with the save operation.
9. Press Esc to return to the Database Programming menu.
10. When you have finished all programming changes, perform a Send operation to copy your new
database to the DX-80 switch system memory. For more details, see Section 2.1.4.4, F4 – Send.
4.7 Setting Up Pre-Programmed Messages
The DX-80 can notify a busy or unattended DET of a call attempt via one of the DX-80 system messaging features. At the DET display, the system shows messages waiting and provides prompts to
assist the extension user in responding to the messages.
A message may be sent and received in several forms:
• A call me message
• A customized text message
• A pre-programmed text message (six total available)
• A voice mail message.
The following conditions apply to messaging.
• Custom text messages can contain 16 letters/symbols maximum.
• When you enter a custom message, the system saves it for future use.
• The system allows a total of forty-eight message wait indications in the system at any one time.
• At DETs, the system does not remove the message waiting indication until extension user presses
reply or delete.
• When the system leaves a message wait indication at an extension, it flashes the auxiliary lamp a
green, slow flash.
• Each extension may receive more than one message waiting from various extensions.
• Multiple messages are retrieved in the order that they were left.
• Each extension can leave only one message waiting at any one extension.
4.7.1 PROGRAMMING USING THE DET
Note: chg, bksp, save, one, always, del, and ack are interactive LCD button operations. Use the three
buttons below the LCD display to activate the associated operation.
1. Enter Database Administration using the feature code Feature # * and then enter the DB Admin
password.
2. Press show. The system displays the DB Item Select screen.
3. Enter 04-07-01-01, then press save. This advances you to Preprogrammed Messages – Outgoing (Text) Message – 1.
4. Press next (if necessary) to advance to the next preprogrammed message.
5. Press chg to enter a new message for the selected preprogrammed message.
6. Use the chart and the dial pad keys to enter the new message. When finished press save.
7. Continue programming messages as required.
72 Comdial October, ‘03
Page 73

DX-80 Programming Manual
8. Press the Hold button to return to the previous menu level,
Or, press the Vo lu me button (up or down) to return to the DB Item Selection screen,
Or, exit programming.
4.7.2 PROGRAMMING USING PC-DBA
1. Select Programming from the PC-DBA menu and press Enter. The system displays the Data-
base Programming menu.
2. Use the arrow keys to highlight System Resource and press Enter. The system displays the Sys-
tem Resource menu.
3. Highlight Preprogrammed Message and press Enter. The system displays the System Resource
— Preprogrammed Message menu.
4. Highlight Outgoing Message 1 and press Enter. Key in the first standard message you want to
have available for extension users when sending a message to another extension, then press
Enter.
5. In the same manner, specify the contents of outgoing messages 2 through 6 as needed.
6. Next, highlight Premises Message 1 and press Enter. Key in the first standard message you
want to have available for extension users to leave on their extensions when they must leave the
company premises, then press Enter.
7. In the same manner, specify the contents of premises messages 2 through 6 as needed.
8. When you are done, press Esc to return to the Database Programming screen. The system
prompts: “Exit This Feature?”; press Y for yes.
9. The system prompts “Save Current Setting?” Press Y to save your changes.
10. The system then prompts “File Exists, Override?” Press Y to continue with the save operation.
11. Press Esc to return to the Database Programming menu.
12. When you have finished all programming changes, perform a Send operation to copy your new
database to the DX-80 switch system memory. For more details, see Section 2.1.4.4, F4 – Send.
October, ‘03 Comdial 73
Page 74

Programming System Features
4.8 Programming Speed Dial Numbers
Speed dialing allows you to store frequently dialed numbers. The system accesses these numbers for
dialing by the associated speed dial directory number (speed number location). You can store the
directory number on any feature button for instant, one-button operation.
There are 200 speed dial bins allocated for system-wide use (locations 500-699). Extensions may also
store up to 50 personal speed numbers in memory.
You can program the DX-80 system to allow system speed dial numbers to override toll restriction settings (both CO line and extension COS). For example, suppose your customer has a branch office out
of state where they want to allow the corporate extension users to call, while still prohibiting all other
toll calls. In this case, you can set up a system speed dial to allow calls to the branch office. Note: It
must be a system speed dial, as the system checks the toll restrictions for individual speed dial numbers
and abides by them. System speed dial numbers override toll restrictions as long as you have System
Speed Toll Check enabled. See Section 6.21, Enabling/Disabling System Speed Toll Check for more
details.
The default length of both individual and system speed dial numbers is three digits. The default range
for system speed dials is directory numbers 500 to 699. The default range for individual speed dials is
directory numbers 470 to 489. You can change any of these default settings by customizing the numbering plan. For more information, see Section 4.20.2.3, Numbering Plan 3.
The following conditions apply to assigning system speed dial numbers.
• The DX-80 system has 1000 speed dial number memory locations that are dynamically allocated
to the system use (extensions individually via extension speed dial locations, or all extensions via
system speed dial locations).
• You can program system speed dial bins, using Attendant Administration on a DET.
• You can chain speed bins.
• You can store pauses and flashes within the speed dial number. Chaining, pauses, and flashes
each occupy one character position.
• If you access an empty bin the system displays the following.
SPEED NO. EMPTY
Note: You can program individual speed dial numbers at the individual extension, or across several
extensions using PC-DBA. If you use the DET to set up your speed dials, you will have to program the
speed dials at each extension; you cannot program individual speed dial numbers globally using the
DET.
4.8.1 PROGRAMMING USING THE DET
Note: chg, bksp, save, one, always, del, and ack are interactive LCD button operations. Use the three
buttons below the LCD display to actuate the associated operation.
1. Enter Database Administration using the feature code Feature # * and then enter the DB Admin
password.
2. Press show. The system displays the DB Item Select screen.
3. First, program SPD No. Assignment. Enter 04-08, then press save.
74 Comdial October, ‘03
Page 75

DX-80 Programming Manual
4. Press show, which advances you to the Assignment for Individual Speed Dial numbers screen.
5. Press show to change an extension’s speed numbers assignment. Then enter the extension number you want to set.
6. Press show, this advances you to the Increase screen for this extension.
7. Press chg to increase the assigned speed dial numbers for this extension. The range of allowable speed dials is 0 to 50. The default for extensions 101-140 is 20. The default for all others
is 0.
Or...
Press next to advance to the Decrease screen for this extension. Then press chg to decrease the
assigned speed dial numbers for this extension.
8. Press next if you want to change another extension number in the same manner.
9. When you are done programming the individual speed dial numbers, press next. The system
sends you to the Assignment for System Speed Dial numbers screen.
10. Press show.
11. Enter the tenant group number you want to change (usually tenant group 1).
12. Press show, this advances you to the Increase screen for this Tenant Group System Speed List.
13. Press chg to increase the number of allocated speed dial numbers (in increments of 50). The
range of allowable speed dials is 0 to 1000. The default is 200.
Or...
Press next to advance to the Decrease screen for this Tenant Group System Speed List.
14. Press chg to decrease the number of allocated speed dial numbers (in increments of 50).
15. Press next to enter a new tenant group and continue programming.
16. Press the Hold button to return to the previous menu level,
Or, press the Vo lu me button (up or down) to return to the DB Item Selection screen,
Or, exit programming.
17. Next, program the System Speed Numbers. Enter 04-09-1~3, then press save. This advances
you to the system speed dial entry point for the tenant group you specified.
18. Enter the speed dial number to program (500-699), then press show. The system displays the
current stored number. Press chg to change this stored number.
19. Enter the new telephone number, using special characters as required.
• Pause = Feature 7 0
• Flash = Feature 3
• Pulse-To-Tone Conversion = *
• Speed Numbering Chaining = Feature # + next speed number (500~699).
20. Press save. The system displays the speed dial number and the new contents.
21. Press next. In the same manner, program other system speed dials as needed. When you are
finished, press the Hold button to return to the previous menu level,
Or, press the Vo lu me button (up or down) to return to the DB Item Selection screen,
Or, exit programming.
Note: You cannot program individual speed dial numbers globally using the DET. If you wish
to do this, you must use PC-DBA.
October, ‘03 Comdial 75
Page 76

Programming System Features
4.8.2 PROGRAMMING USING PC-DBA
1. Select Programming from the PC-DBA menu and press Enter. The system displays the Data-
base Programming menu.
2. Use the arrow keys to highlight System Resource and press Enter. The system displays the Sys-
tem Resource menu.
3. First, program the speed number assignment (allocation). Use the arrow keys to highlight SPD
No. Assignment and press Enter. The system displays the SPD No. Assignment menu.
4. Highlight System List and press Enter. The system displays the System Resource—SPD No.
Assignment : System List menu.
5. This menu shows you how many speed dial numbers are currently assigned to each tenant
group. You can decrease or increase (if there is sufficient room) the number of speed dials
available to the tenant group.
6. Highlight the tenant group you want to program under either the Increase or Decrease column.
and press Enter. The system then automatically increases/decreases the amount of speed dials
allowed, in increments of 50 (50, 100, 150, 200, etc.). The range of allowable speed dials is 0
to 1000. The default is 200.
7. In the same manner, assign system speed dial amounts for other tenant groups, as needed.
8. When you are done, press Esc to return to the SPD No. Assignment menu. The system
prompts: “Exit This Feature?”; press Y for yes.
9. The system prompts “Save Current Setting?” Press Y to save your changes.
10. The system then prompts “File Exists, Override?” Press Y to continue with the save operation.
The system saves your changes and returns you to the SPD No. Assignment menu.
11. Next, allocate how many speed numbers you want to allow each extension to have. Highlight
Individual List and then press Enter. The system displays the System Resource—SPD No.
Assignment : Individual menu.
76 Comdial October, ‘03
Page 77

DX-80 Programming Manual
12. Highlight the Increase or Decrease fields for the extension you want to program. If you need to
program extensions 29 through 56, press Page Down to view the next page.
13. Press Enter to increment the speed number allocation for the extension. Each time you press
enter the system increases/decreases the allocation by 10. The range of allowable speed dials is
0 to 50. The default for extensions 101-140 is 20. The default for all others is 0.
14. In the same manner, assign individual speed dial amounts for other extensions, as needed.
15. When you are done, press Esc to return to the SPD No. Assignment menu. The system
prompts: “Exit This Feature?”; press Y for yes.
16. The system prompts “Save Current Setting?” Press Y to save your changes.
17. The system then prompts “File Exists, Override?” Press Y to continue with the save operation.
The system saves your changes and returns you to the SPD No. Assignment menu.
18. Next, program the system speed dial numbers. Highlight SPD No. Programming then press
Enter. The system displays the SPD No. Programming menu.
19. Highlight System SPD No. and press Enter. The system displays the System SPD. No. menu.
Highlight the tenant group you want to change, then press Enter. The system displays the Sys-
tem Resource — SPD. No Programming : System menu.
October, ‘03 Comdial 77
Page 78

Programming System Features
20. The system provides 15 pages of system speed dial numbers, from 1 to 150. Use the Page Up
and Page Down buttons to find the page containing the system speed dial number you want to
change. Highlight the SPD. No. field and press Enter.
21. Enter the new telephone number, using special characters as required.
• Pause = P
• Flash = / (forward slash)
• Speed Numbering Chaining = @ + next speed number (500-699).
Press Enter. The default is NULL.
22. In the same manner, program other system speed dial numbers as needed.
23. When you are done, press Esc to return to the SPD. No. Programming menu. The system
prompts: “Exit This Feature?”; press Y for yes.
24. The system prompts “Save Current Setting?” Press Y to save your changes.
25. The system then prompts “File Exists, Override?” Press Y to continue with the save operation.
The system returns you to the SPD. No. Programming menu.
26. Finally, program the individual speed dial numbers. Highlight Individual SPD No. and press
Enter. The system prompts you to enter the directory number you want to use for the individual
speed dial number. When you enter a valid directory number and press Enter, the system dis-
plays the System SPD. No. Programming — Individual menu.
78 Comdial October, ‘03
Page 79

DX-80 Programming Manual
27. The system provides two pages of individual speed dial numbers, from 1 to 20. Use the Page
Up and Page Down buttons to find the page containing the individual speed dial number you
want to change. Highlight the SPD. No. field and press Enter.
28. Enter the new telephone number, using special characters as required.
• Pause = P
• Flash = / (forward slash)
• Speed Numbering Chaining = @ + next speed number (500-699).
Press Enter. The default is NULL.
29. In the same manner, program other individual speed dial numbers as needed.
30. When you are done, press Esc to return to the “Please Input DIR No.” prompt. Press Esc again.
The system prompts: “Exit This Feature?”; press Y for yes.
31. The system prompts “Save Current Setting?” Press Y to save your changes.
32. The system then prompts “File Exists, Override?” Press Y to continue with the save operation.
The system returns you to the SPD. No. Programming menu.
33. When you have finished all programming changes, perform a Send operation to copy your new
database to the DX-80 switch system memory. For more details, see Section 2.1.4.4, F4 – Send.
October, ‘03 Comdial 79
Page 80

Programming System Features
4.9 Controlling the Number of Caller ID Entries in the CID Table
The system stores caller identification information for up to 100 calls, per tenant group, in the CID
(Caller ID) table. You can control how many entries (names/numbers) are in this table.
4.9.1 PROGRAMMING USING THE DET
Note: chg, bksp, save, one, always, del, and ack are interactive LCD button operations. Use the three
buttons below the LCD display to actuate the associated operation.
1. Enter Database Administration using the feature code Feature # * and then enter the DB Admin
password.
2. Press show. The system displays the DB Item Select screen.
3. Enter 04-09, then press save.
4. Press show, which advances you to the Assignment for CID Name Table screen. You can
decrease or increase (if there is sufficient room) the number of caller ID names in the table.
5. Enter 04-10-1-01 and press save if you want to add to the number of Caller ID numbers allowed
for tenant group 1. The system then automatically increases the amount of caller ID names
allowed, counting by 10. The range of allowable speed dials is 0 to 100. The default is 100.
Or,
Enter 04-10-1-02 and press save if you want to reduce the number of Caller ID numbers
allowed for tenant group 1. The system then automatically decreases the amount of caller ID
names allowed, counting by 10.
6. Enter 04-11-1-01 and press save if you want to add to the number of Caller ID numbers allowed
for tenant group 2.
Or,
Enter 04-11-1-02 and press save if you want to reduce the number of Caller ID numbers
allowed for tenant group 2.
7. Enter 04-12-1-01 and press save if you want to add to the number of Caller ID numbers allowed
for tenant group 3.
Or,
Enter 04-12-1-02 and press save if you want to reduce the number of Caller ID numbers
allowed for tenant group 3.
8. Press the Hold button to return to the previous menu level,
Or, press the Vo lu me button (up or down) to return to the DB Item Selection screen,
Or, exit programming.
4.9.2 PROGRAMMING USING PC-DBA
1. Select Programming from the PC-DBA menu and press Enter. The system displays the Data-
base Programming menu.
2. Highlight System Resource and press Enter. The system displays the System Resource — CID
Name Table Assignment screen.
80 Comdial October, ‘03
Page 81

DX-80 Programming Manual
3. This menu shows you how many caller ID names/numbers are currently assigned in the CID
table for each tenant group. You can decrease or increase (if there is sufficient room) the number of caller ID names in the table.
4. Highlight the tenant group you want to program under either the Increase or Decrease column,
and press Enter. The system then automatically increases/decreases the amount of caller ID
names allowed, counting by 10. The range of allowable speed dials is 0 to 100. The default is
100.
5. In the same manner, assign caller ID names amounts for other tenant groups as needed.
6. When you are done, press Esc to return to the Database Programming screen. The system
prompts: “Exit This Feature?”; press Y for yes.
7. The system prompts “Save Current Setting?” Press Y to save your changes.
8. The system then prompts “File Exists, Override?” Press Y to continue with the save operation.
9. Press Esc to return to the Database Programming menu.
10. When you have finished all programming changes, perform a Send operation to copy your new
database to the DX-80 switch system memory. For more details, see Section 2.1.4.4, F4 – Send.
4.10 Establishing Music Sources
The system provides two dedicated 3.5 millimeter phono-jack type inputs so you can connect two
external music sources. The external music source may be a radio tuner, tape deck, CD player,
message on hold, or other source. Note: It is the your responsibility to adhere to all applicable copy-
right laws and any other music source restrictions. You must connect an external music source to the
KSU1-CPM MC1 or KSU1-CPM MC2 ports for the music on hold and background music features to
operate.
Users can listen to these music sources at digital speakerphone extensions by using the background
music codes (771/772). Also, any caller placed on hold will hear the music source you program for
that CO line (sources are programmable on a per-CO line basis). You will assign music sources when
you program the CO lines (Chapter 5). At that time, you will specify either MC1 or MC2 as the music
source for each CO line. For more details, see Section 5.4, Setting the Day and Evening Class of Ser-
vices and Music On Hold (MOH) Source.
October, ‘03 Comdial 81
Page 82

Programming System Features
4.10.1 PROGRAMMING USING THE DET
Note: chg, bksp, save, one, always, del, and ack are interactive LCD button operations. Use the three
buttons below the LCD display to actuate the associated operation.
1. Enter Database Administration using the feature code Feature # * and then enter the DB Admin
password.
2. Press show. The system displays the DB Item Select screen.
3. First, program the Music Directory Number Length (the number of digits in the extension you
will use to access the music sources). Enter 08-09-09-01, then press save. Press chg to select 1,
2, 3, or 4. The default is 3.
4. Press next.
5. Next, program Music Directory Number Leading 1, 2 or 3. Specify what extension you want to
use for the first music source. Enter 08-09-09-02, then press save. Press chg and key in the
directory number. Valid directory numbers include any available, non-conflicting directory
number. The default is 771.
6. Press next.
7. Now specify what directory number you want to use for the second music source. Press chg
and key in the directory number. Valid directory numbers include any available, non-conflicting directory number. The default is 772. Note: The Music Source – Leading 3 field is not
used and is set to the default of NULL.
8. Press the Hold button to return to the previous menu level,
Or press the Vo lu me button (up or down) to return to the DB Item Selection screen,
Or exit programming.
4.10.2 PROGRAMMING USING PC-DBA
1. Select Programming from the PC-DBA menu and press Enter. The system displays the Data-
base Programming menu.
2. Use the arrow keys to highlight System Application and press Enter. The system displays the
System Application menu.
3. Highlight Numbering Plan 4 and press Enter. The system displays the System Application—
Numbering Plan 4 menu.
82 Comdial October, ‘03
Page 83

DX-80 Programming Manual
4. First, specify the number of digits in the extension you will use to access the music sources.
Highlight Music Source – Length and press Enter to select 1 - 4. The default is 3.
5. Next, specify what extension you want to use for the first music source. Highlight Music
Source – Leading 1 and press Enter. Key in the directory number, and then press Enter. Valid
directory numbers include any available, non-conflicting directory number. The default is 771.
6. Highlight Music Source – Leading 2 and press Enter. Key in the directory number you want to
use for the second music source, and then press Enter. Valid directory numbers include any
available, non-conflicting directory number. The default is 772. Note: The Music Source –
Leading 3 field is not used and is set to the default of NULL.
7. When you are done, press Esc to return to the Database Programming screen. The system
prompts: “Exit This Feature?”; press Y for yes.
8. The system prompts “Save Current Setting?” Press Y to save your changes.
9. The system then prompts “File Exists, Override?” Press Y to continue with the save operation.
10. Press Esc to return to the Database Programming menu.
11. When you have finished all programming changes, perform a Send operation to copy your new
database to the DX-80 switch system memory. For more details, see Section 2.1.4.4, F4 – Send.
4.11 Assigning External Pager ID
The system provides external one-way, dedicated paging access to a paging amplifier or multi-zone
one-way page controller. The external paging zone may be accessed individually, or with all eight
internal paging zones as an all-call page.
You can program the external page access code on any available feature button. To set up individual
extensions for pager use, see Section 10.6, Assigning Extensions to Paging Groups.
October, ‘03 Comdial 83
Page 84

Programming System Features
4.11.1 PROGRAMMING USING THE DET
Note: chg, bksp, save, one, always, del, and ack are interactive LCD button operations. Use the three
buttons below the LCD display to actuate the associated operation.
1. Enter Database Administration using the feature code Feature # * and then enter the DB Admin
password.
2. Press show. The system displays the DB Item Select screen.
3. First, specify the number of digits in the extension you will use to access the external pager.
Enter 08-09-11-01, then press save.
4. Press chg to select 1 - 4 then press save. The default is 3.
5. Next, program the External Page Directory Number Leading 1, 2 or 3. Enter 08-09-11-02, then
press save.
6. Press chg. Enter the directory number you want to use to access the external pager, and then
press save. Valid directory numbers include any available, non-conflicting directory number.
The default is 777.
7. Press the Hold button to return to the previous menu level,
Or press the Vo lu me button (up or down) to return to the DB Item Selection screen,
Or exit programming.
4.11.2 PROGRAMMING USING PC-DBA
1. Select Programming from the PC-DBA menu and press Enter. The system displays the Data-
base Programming menu.
2. Use the arrow keys to highlight System Application and press Enter. The system displays the
System Application menu.
3. Highlight Numbering Plan 4 and press Enter. The system displays the System Application—
Numbering Plan 4 menu.
4. First, specify the number of digits in the extension you will use to access the external pager.
Highlight External Pager – Length and press Enter to select 1 - 4. The default is 3.
84 Comdial October, ‘03
Page 85

DX-80 Programming Manual
5. Next, highlight the External Pager – Leading 1 field, then press Enter. Key in the directory
number you want to use to access the external pager, and then press Enter. Valid directory num-
bers include any available, non-conflicting directory number. The default is 777.
6. When you are done, press Esc to return to the Database Programming screen. The system
prompts: “Exit This Feature?”; press Y for yes.
7. The system prompts “Save Current Setting?” Press Y to save your changes.
8. The system then prompts “File Exists, Override?” Press Y to continue with the save operation.
9. Press Esc to return to the Database Programming menu.
10. When you have finished all programming changes, perform a Send operation to copy your new
database to the DX-80 switch system memory. For more details, see Section 2.1.4.4, F4 – Send.
4.12 Assigning Ancillary Devices (Loud Bell, External Page, or Music on Hold)
There is often a requirement to control ancillary devices via the telephone system. The DX-80 system
provides one dry contact closure (standard) for interface of the various devices.
CAUTION
It is important to adhere to the electrical requirements of this contact.
The contact closure is rated at 24vdc, 1Amp.
You can assign the contact closure to one of the following three uses.
• Loud Bell Control: If the system is installed in high noise environments, there is often a
requirement to equip a loud (high-gain) ringing device. Using the contact in this way provides
for control of an optional, ancillary loud ringing device. The device is connected to the contact
as a trigger. When ringing occurs on CO lines in CO line groups designated for loud bell, the
contact closure operates and controls the connected device.
• External Page Control: The contact may also be programmed to control external paging
apparatus. When programmed in this manner, the contact closure operates whenever the external
paging port is activated.
• Music Source Control: The contact may also be programmed to control Message On Hold
devices. In this mode of operation the contact closure operates whenever CO lines are placed on
hold. This function can reduce wear on electromechanical devices that provide the message on
hold function.
4.12.1 PROGRAMMING USING THE DET
Note: chg, bksp, save, one, always, del, and ack are interactive LCD button operations. Use the three
buttons below the LCD display to actuate the associated operation.
1. Enter Database Administration using the feature code Feature # * and then enter the DB Admin
password.
2. Press show. The system displays the DB Item Select screen.
October, ‘03 Comdial 85
Page 86

Programming System Features
3. Enter 04-13-1, then press save. This advances you to the Loud Bell – Application programming field. Press chg to select L.B., M.S.1, M.S.2, or E.P. The default is loud bell.
4. Press next to specify which CO line groups you want to use the ancillary device. Press chg to
activate/deactivate the device for each CO line group.
5. Press the Hold button to return to the previous menu level,
Or, press the Vo lu me button (up or down) to return to the DB Item Selection screen,
Or, exit programming.
4.12.2 PROGRAMMING USING PC-DBA
1. Select Programming from the PC-DBA menu and press Enter. The system displays the Data-
base Programming menu.
2. Use the arrow keys to highlight System Resource and press Enter. The system displays the Sys-
tem Resource menu.
3. Highlight Loud Bell and press Enter. The system displays the System Application — Loud Bell
menu.
4. Select the Application field and press Enter to select L.B., M.S.1, M.S.2, or E.P. The default is
loud bell.
5. Next, set the ancillary device either on or off for each CO line group. Highlight CO Group 1 to
tell the system you want to use the device for calls coming in on that CO line. Press Enter to
select Y (yes). The default is N (no).
6. In the same manner, turn the loud bell on (Y) or off (N) for each CO line group.
7. When you are done, press Esc to return to the Database Programming screen. The system
prompts: “Exit This Feature?”; press Y for yes.
8. The system prompts “Save Current Setting?” Press Y to save your changes.
9. The system then prompts “File Exists, Override?” Press Y to continue with the save operation.
10. Press Esc to return to the Database Programming menu.
11. When you have finished all programming changes, perform a Send operation to copy your new
database to the DX-80 switch system memory. For more details, see Section 2.1.4.4, F4 – Send.
86 Comdial October, ‘03
Page 87

DX-80 Programming Manual
4.13 Assigning the DSS Port/Owner
The Attendant/Extension DSS console is a self-contained digital terminal that interacts with a predetermined DET. The console has 60 programmable buttons that can be used for easy access to the DX80 system’s many CO lines, extensions, and features. The first forty-eight buttons have dual colored
LEDs that allow status monitoring of system resources such as CO lines and extensions. The
remaining twelve buttons on the Attendant/Extension Console may be used for any system feature or
resource but are not equipped with LEDs.
Although usually considered to be an attendant feature benefit, the DSS console can be assigned to any
DX-80 DET. You can add a maximum of 12 sixty-button Attendant/Extension consoles to the system.
Each requires its own dedicated digital port, and therefore reduces the number of DETs that you can
connect to the system on a one-to-one basis.
The following conditions apply when assigning DSS port owners.
• Each DSS console has 48 dual-color LED buttons and 12 buttons without LEDs.
• Each DSS console requires its own dedicated cable pair from the KSU.
• You can assign up to 12 DSS consoles in the DX-80 system.
• You can assign to any DET a maximum of four Attendant/extension DSS consoles.
Each DSS is “mapped” with a default button arrangement. See Appendix B, Button Labeling to view
the DSS button map.
4.13.1 PROGRAMMING USING THE DET
Note: chg, bksp, save, one, always, del, and ack are interactive LCD button operations. Use the three
buttons below the LCD display to actuate the associated operation.
1. Enter Database Administration using the feature code Feature # * and then enter the DB Admin
password.
2. Press show. The DB Item Select screen displays.
3. Enter 04-14-01-01 to program the owner of DSS Console #1.
4. Press save. The current programming of the DSS Console #1 owner displays.
5. To change the designated DSS console owner press chg.
6. Enter the extension number to be assigned as the DSS Console owner. Note: Only valid
(equipment installed) extension directory numbers can be assigned as DSS Console Owners.
7. Press save.
8. Press next. The current directory of the DSS Console displays (“NULL” if empty).
9. Press chg to enter the new DSS Console directory number (the extension number of the digital
port to which the DSS Console is connected).
10. Press save.
11. Press next. The display prompts you for the next DSS Console # to program. Valid entries are
1-12.
12. Enter the number of the next DSS Console to program or press the Hold button to return to the
previous programming menu for other programming requirements. Or, press the On/Off button
twice to exit programming mode.
October, ‘03 Comdial 87
Page 88

Programming System Features
4.13.2 PROGRAMMING USING PC-DBA
1. Select Programming from the PC-DBA menu and press Enter. The system displays the Data-
base Programming menu.
2. Use the arrow keys to highlight System Resource and then press Enter. The system displays the
System Resource menu.
3. Highlight the DSS Allocation field. The system displays the System Resource—DSS Allocation menu.
4. Highlight the DIR No. field for DSS Unit 1 and press Enter. Key in the directory number of the
digital port to which the DSS Console is connected, and press Enter. Valid port directory num-
bers include any available, non-conflicting port directory number. The default is NULL.
5. Highlight the DSS Owner field for DSS Unit 1 and press Enter. Key in the number of the
extension with which this DSS will operate, and press Enter. Valid extension numbers include
any available, non-conflicting extension number. The default is NULL.
6. In the same manner, assign DSS port numbers and extension numbers for the remaining DSS
units as needed.
7. When you are done, press Esc to return to the Database Programming screen. The system
prompts: “Exit This Feature?”; press Y for yes.
8. The system prompts “Save Current Setting?” Press Y to save your changes.
9. The system then prompts “File Exists, Override?” Press Y to continue with the save operation.
10. Press Esc to return to the Database Programming menu.
11. When you have finished all programming changes, perform a Send operation to copy your new
database to the DX-80 switch system memory. For more details, see Section 2.1.4.4, F4 – Send.
88 Comdial October, ‘03
Page 89

DX-80 Programming Manual
4.14 Setting Up Optional Internal Modem
The DX-80 system can be equipped with an optional internal modem so you can remotely program the
DX-80 remote using PC-DBA. When equipped, the modem module provides a dedicated communications path between the system processor and PC-DBA. This communications path does not require use
of analog port system resources.
The modem speeds are 1200 bps/ 2400 bps.
4.14.1 PROGRAMMING USING THE DET
Note: chg, bksp, save, one, always, del, and ack are interactive LCD button operations. Use the three
buttons below the LCD display to actuate the associated operation.
1. Enter Database Administration using the feature code Feature # * and then enter the admin
password.
2. Press show. The system displays the DB Item Select screen.
3. Enter 04-15 and press save. This advances you to the Built-in Modem programming screen.
4. Press show. This advances you to the Built-in Modem – Directory Number programming
screen.
5. To change the modem directory number, press chg.
6. Enter the new directory number that you want to assign to the modem resource. Valid directory
numbers are from those designated for extension directory numbers. The default is 199.
7. Press save.
8. Press next. This advances you to the Built-in Modem – Baud Rate programming screen.
9. Press chg to choose either 1200 or 2400 as the operating speed of the modem. The default is
2400.
10. Press the Hold button to return to the previous menu level,
Or, press the Vo lu me button (up or down) to return to the DB Item Selection screen,
Or, exit programming.
4.14.2 PROGRAMMING USING PC-DBA
1. Select Programming from the PC-DBA menu and press Enter. The system displays the Data-
base Programming menu.
2. Use the arrow keys to highlight System Resources and press Enter. The system displays the
System Resources menu.
3. Highlight Modem & Serial Port and press Enter. The system displays the System Resources—
Modem & Serial Port menu.
October, ‘03 Comdial 89
Page 90

Programming System Features
4. Highlight the Built-in Modem – DIR. No. field and press Enter. Key in the directory number
you want to use for the internal modem, and then press Enter. Valid directory numbers are from
those designated for extension directory numbers. The default is 199.
5. Highlight Built-in Modem – Baud Rate and press Enter to choose either 1200 or 2400 as the
operating speed of the modem. The default is 2400.
6. When you are done, press Esc to return to the Database Programming screen. The system
prompts: “Exit This Feature?”; press Y for yes.
7. The system prompts “Save Current Setting?” Press Y to save your changes.
8. The system then prompts “File Exists, Override?” Press Y to continue with the save operation.
9. Press Esc to return to the Database Programming menu.
10. When you have finished all programming changes, perform a Send operation to copy your new
database to the DX-80 switch system memory. For more details, see Section 2.1.4.4, F4 – Send.
4.15 Specifying PC-DBA Transmit Rate
The DX-80 system allows you to remotely program the DX-80 using PC-DBA on a laptop. You must
set the transmission rate for this communication between the switch and your laptop.
4.15.1 PROGRAMMING USING THE DET
Note: chg, bksp, save, one, always, del, and ack are interactive LCD button operations. Use the three
buttons below the LCD display to actuate the associated operation.
1. Enter Database Administration using the feature code Feature # * and then enter the admin
password.
2. Press show. The system displays the DB Item Select screen.
3. Enter 04-16 and press save. This advances you to the RTM X RATE field.
4. Press chg to select the transmission rate between your laptop and the DX-80 switch. Valid
choices include 1200, 2400, 4800, 9800, and 19200. The default is 9600.
5. Press save.
90 Comdial October, ‘03
Page 91

DX-80 Programming Manual
6. Press the Hold button to return to the previous menu level,
Or, press the Vo lu me button (up or down) to return to the DB Item Selection screen,
Or, exit programming.
4.15.2 PROGRAMMING USING PC-DBA
1. Select Programming from the PC-DBA menu and press Enter. The system displays the Data-
base Programming menu.
2. Use the arrow keys to highlight System Resources and press Enter. The system displays the
System Resources menu.
3. Highlight Modem & Serial Port and press Enter. The system displays the System Resources—
Modem & Serial Port menu.
4. Highlight the RMT X_Rate field and press Enter to select 1200, 2400, 4800, 9800, and 19200.
The default is 9600.
5. When you are done, press Esc to return to the Database Programming screen. The system
prompts: “Exit This Feature?”; press Y for yes.
6. The system prompts “Save Current Setting?” Press Y to save your changes.
7. The system then prompts “File Exists, Override?” Press Y to continue with the save operation.
8. Press Esc to return to the Database Programming menu.
9. When you have finished all programming changes, perform a Send operation to copy your new
database to the DX-80 switch system memory. For more details, see Section 2.1.4.4, F4 – Send.
October, ‘03 Comdial 91
Page 92

Programming System Features
4.16 Selecting SMDR Transmit Rate
The DX-80 system allows you to specify the transmission rate of SMDR data, consisting of eight bits,
one stop bit, and no polarity.
4.16.1 PROGRAMMING USING THE DET
Note: chg, bksp, save, one, always, del, and ack are interactive LCD button operations. Use the three
buttons below the LCD display to actuate the associated operation.
1. Enter Database Administration using the feature code Feature # * and then enter the admin
password.
2. Press show. The system displays the DB Item Select screen.
3. Enter 04-17 and press save. This advances you to the CIL X RATE field.
4. Press chg to select the SMDR data transmission rate. Valid choices include 1200, 2400, 4800,
9800, and 19200. The default is 9600.
5. Press save.
6. Press the Hold button to return to the previous menu level,
Or, press the Vo lu me button (up or down) to return to the DB Item Selection screen,
Or, exit programming.
4.16.2 PROGRAMMING USING PC-DBA
1. Select Programming from the PC-DBA menu and press Enter. The system displays the Data-
base Programming menu.
2. Use the arrow keys to highlight System Resources and press Enter. The system displays the
System Resources menu.
3. Highlight Modem & Serial Port and press Enter. The system displays the System Resources—
Modem & Serial Port menu.
92 Comdial October, ‘03
Page 93

DX-80 Programming Manual
4. Highlight the CIL X_Rate field and press Enter to select the SMDR data transmission rate.
Valid choices include 1200, 2400, 4800, 9800, and 19200. The default is 9600.
5. When you are done, press Esc to return to the Database Programming screen. The system
prompts: “Exit This Feature?”; press Y for yes.
6. The system prompts “Save Current Setting?” Press Y to save your changes.
7. The system then prompts “File Exists, Override?” Press Y to continue with the save operation.
8. Press Esc to return to the Database Programming menu.
9. When you have finished all programming changes, perform a Send operation to copy your new
database to the DX-80 switch system memory. For more details, see Section 2.1.4.4, F4 – Send.
4.17 Setting Up Ring Scheme
Discriminating Ringing is provided to denote ringing patterns specific to system resources. Ringing at
an extension for intercom calls is different than ringing for CO line calls; this difference is referred to
as discriminating ringing.
There are ten ring schemes from which you can choose.
Ring
Scheme
0300 ms
on, 400
ms off,
300 ms
on, 4 sec.
off, repeat
1350 ms
on, 300
ms off,
350 ms
on, 5 sec.
off, repeat
2 1 sec. on,
4 sec. off,
repeat
3 1 sec. on,
2 sec.off,
repeat
External
Ring
Internal
Ring
1 sec. on, 4
sec. off,
repeat
1 sec. on, 5
sec. off,
repeat
300 ms on,
400 ms
off, 300
ms on, 4
sec. off,
repeat
300 ms on,
400 ms
off, 300
ms on, 2
sec. off,
repeat
Call
Back
Ring
300 ms on,
400 ms
off, repeat
300 ms on,
400 ms
off, repeat
300 ms on,
400 ms
off, repeat
300 ms on,
400 ms
off, repeat
Beep Double
Beep
250 ms
on, then
off
250 ms
on, then
off
250 ms
on, then
off
250 ms
on, then
off
250 ms
on, 250
ms off,
250 ms
on, then
off
250 ms
on, 250
ms off,
250 ms
on, then
off
250 ms
on, 250
ms off,
250 ms
on, then
off
250 ms
on, 250
ms off,
250 ms
on, then
off
Alert Doorphone
Ring
500 ms on,
500 ms
off, 500
ms on,
then off
500 ms on,
500 ms
off, 500
ms on,
then off
500 ms on,
500 ms
off, 500
ms on,
then off
500 ms on,
500 ms
off, 500
ms on,
then off
2 sec. On, 1
sec. Off, then
repeated
2 sec. On, 1
sec. Off, then
repeated
2 sec. On, 1
sec. Off, then
repeated
2 sec. On, 1
sec. Off, then
repeated
October, ‘03 Comdial 93
Page 94

Programming System Features
Ring
External
Scheme
4 2 sec. on,
4 sec off,
repeat
5 1 sec. on,
3 sec. off,
repeat
6 1 sec. on,
4 sec. off,
repeat
7300 ms
on, 400
ms off,
300 ms
on, 4 sec.
off, repeat
8 1 sec. on,
3 sec. off,
repeat
9 1 sec. on,
3 sec. off,
repeat
Ring
Internal
Ring
1 sec. on, 2
sec.off,
repeat
1 sec. on, 1
sec. off,
repeat
600 ms on,
200 ms
off, 200
ms on, 4
sec. off,
repeat
1 sec. on, 3
sec. off,
repeat
1 sec. on, 3
sec. off,
repeat
300 ms on,
400 ms
off, 300
ms on, 4
sec. off,
repeat
Call
Back
Ring
300 ms on,
400 ms
off, repeat
300 ms on,
400 ms
off, repeat
200 ms on,
200 ms
off, 200
ms on, 200
ms off,
200 ms on,
4 sec. off,
repeat
300 ms on,
400 ms
off, repeat
300 ms on,
400 ms
off, repeat
300 ms on,
400 ms
off, repeat
Beep Double
Beep
250 ms
on, then
off
250 ms
on, then
off
250 ms
on, then
off
250 ms
on, then
off
250 ms
on, then
off
250 ms
on, then
off
250 ms
on, 250
ms off,
250 ms
on, then
off
250 ms
on, 250
ms off,
250 ms
on, then
off
250 ms
on, 250
ms off,
250 ms
on, then
off
250 ms
on, 250
ms off,
250 ms
on, then
off
250 ms
on, 250
ms off,
250 ms
on, then
off
250 ms
on, 250
ms off,
250 ms
on, then
off
Alert Doorphone
Ring
500 ms on,
500 ms
off, 500
ms on,
then off
500 ms on,
500 ms
off, 500
ms on,
then off
500 ms on,
500 ms
off, 500
ms on,
then off
500 ms on,
500 ms
off, 500
ms on,
then off
500 ms on,
500 ms
off, 500
ms on,
then off
500 ms on,
500 ms
off, 500
ms on,
then off
2 sec. On, 1
sec. Off, then
repeated
2 sec. On, 1
sec. Off, then
repeated
2 sec. On, 1
sec. Off, then
repeated
2 sec. On, 1
sec. Off, then
repeated
2 sec. On, 1
sec. Off, then
repeated
2 sec. On, 1
sec. Off, then
repeated
4.17.1 PROGRAMMING USING THE DET
Note: chg, bksp, save, one, always, del, and ack are interactive LCD button operations. Use the three
buttons below the LCD display to actuate the associated operation.
1. Enter Database Administration using the feature code Feature # * and then enter the DB Admin
password.
94 Comdial October, ‘03
Page 95

DX-80 Programming Manual
2. Press show. The system displays the DB Item Select screen.
3. Enter 08-02, then press save. This advances you to the Ring Scheme programming screen.
4. Press chg to change to select the ring scheme. Valid options are 0 - 9. The default is 3.
5. Press the Hold button to return to the previous menu level,
Or, press the Vo lu me button (up or down) to return to the DB Item Selection screen,
Or, exit programming.
4.17.2 PROGRAMMING USING PC-DBA
1. Select Programming from the PC-DBA menu and press Enter. The system displays the Data-
base Programming menu.
2. Use the arrow keys to highlight System Application and press Enter. The system displays the
System Application menu.
3. Highlight Category 1, and then press Enter. The system displays the System Application
menu.
4. Highlight Ring Scheme and press Enter. Valid ring schemes are 0 through 9. The default is 3.
5. When you are done, press Esc to return to the Database Programming screen. The system
prompts: “Exit This Feature?”; press Y for yes.
6. The system prompts “Save Current Setting?” Press Y to save your changes.
7. The system then prompts “File Exists, Override?” Press Y to continue with the save operation.
8. Press Esc to return to the Database Programming menu.
9. When you have finished all programming changes, perform a Send operation to copy your new
database to the DX-80 switch system memory. For more details, see Section 2.1.4.4, F4 – Send.
October, ‘03 Comdial 95
Page 96

Programming System Features
4.18 Setting Up Letter Type (Enhanced Lettering Scheme)
You can enhance extension user names, CO line names, pre-programmed messages, and UCD names
for special requirements using the choices available in the lettering schemes. DX-80 provides your
customer a choice from eight different lettering schemes. While the extension user is editing an outgoing message, and while you are programming names in the system, the chosen letter scheme characters are accessible by repeated pressing of the 1 dial pad key.
The enhanced lettering scheme applies when entering text for the following functions.
• Extension User Names
• UCD / Hunt Groups
• CO Line Names
• Alphanumeric Display
• Messaging – Call Me, Text, or Voice
Only one lettering scheme can be active at a time. Use the following tables to determine what letter
scheme best suits your client’s installation.
Use the letters associated with the number keys to spell out a name or word using lower case letters;
for example, press the 5 key twice for the letter “k.”
Number
Key
2ab c
3de f
4gh i
5jk l
6mn o
7pq r s
8tu v
9wx y z
1 *
press
2 *
presses
3 *
presses
4 *
presses
then
press
#
Note: The # button acts as an enter key. You must press it after each character you enter to save that
character in the position. You can also use # to enter a space.
So for example to enter “mary” as an extension user’s name, enter the following keystrokes.
6*#2*#7***#9***#
96 Comdial October, ‘03
Page 97

DX-80 Programming Manual
You can also use capital letters if you wish. Use the following table when entering a capital letter.
Number
Key
2AB C
3DE F
4GH I
5JKL
6MN O
7PQ RS
8TU V
9WX YZ
1
press2 presses3 presses4 presses
then
press
#
So for example to enter “Mary” as an extension user’s name, enter the following keystrokes.
6#2*#7***#9***#
If you wish to use numerals, refer to the following table.
First
Press
Then
Number
To Ge t
then
Key
*2
*3 3
*4 4
*5 5
*6 6
*7 7
*8 8
*9 9
press
#
2
So for example to enter “1846” as password, enter the following keystrokes.
*1#*8#*4#*6#
October, ‘03 Comdial 97
Page 98

Programming System Features
Finally, the DX-80 also allows you to use special characters from other languages. Which letter the
system enters is dependant on the numbering scheme you have specified, from 0 to 7. Only one numbering scheme can be active at a time. Refer to the following table for details.
Numbering
Scheme
Type
0
1
2
3
4
5
Press 1
one
time
Press 1
twice
Press 1
3 times
Press 1
4 times
Press 1
5 times
Press 1
6 times
Press 1
7 times
Press 1
8 times
then
press
#
6
7
For example, if your customer site is in a bilingual Spanish/English area, you may want to
choose lettering scheme 4, as it contains Spanish letters. The extension users can then send
text messages in Spanish or English.
4.18.1 PROGRAMMING USING THE DET
Note: chg, bksp, save, one, always, del, and ack are interactive LCD button operations. Use the three
buttons below the LCD display to actuate the associated operation.
1. Enter Database Administration using the feature code Feature # * and then enter the DB Admin
password.
2. Press show. The system displays the DB Item Select screen.
3. Enter 08-04, then press save. This advances you to the Letter Type programming screen.
98 Comdial October, ‘03
Page 99

DX-80 Programming Manual
4. Press chg to change to select the letter type. Valid options are 0 - 7. The default is 0.
5. Press the Hold button to exit system time programming and return to the previous menu level.
6. Exit the programming mode.
4.18.2 PROGRAMMING USING PC-DBA
1. Select Programming from the PC-DBA menu and press Enter. The system displays the Data-
base Programming menu.
2. Use the arrow keys to highlight System Application and press Enter. The system displays the
System Application menu.
3. Highlight Category 1, and then press Enter. The system displays the System Application
menu.
4. Highlight Letter Type and press Enter to select the enhanced lettering scheme Valid types are 0
through 7. The default is 0.
5. When you are done, press Esc to return to the Database Programming screen. The system
prompts: “Exit This Feature?”; press Y for yes.
6. The system prompts “Save Current Setting?” Press Y to save your changes.
7. The system then prompts “File Exists, Override?” Press Y to continue with the save operation.
8. Press Esc to return to the Database Programming menu.
9. When you have finished all programming changes, perform a Send operation to copy your new
database to the DX-80 switch system memory. For more details, see Section 2.1.4.4, F4 – Send.
October, ‘03 Comdial 99
Page 100

Programming System Features
4.19 Setting System Time, Date, and Hour Mode
The DX-80 system provides a built-in time clock to track system time for certain features such as
system night service mode change, SMDR, alarm clock – system, automatic CO line ringing,
extension, and time and date display at executive speakerphones. This clock is battery-protected from
power failure. You can change the system time at any DET, using the attendant password.
You can also choose what time format (standard 12-hour time or 24-hour time) the system uses to
display the time at DETs. The following conditions apply to the hour mode.
• The system does not display “AM” and “PM” indications.
• When programming time-related features, use 24-hour format.
• SMDR output is in 24-hour format regardless of the settings of hour mode.
4.19.1 PROGRAMMING USING THE DET
Note: chg, bksp, save, one, always, del, and ack are interactive LCD button operations. Use the three
buttons below the LCD display to actuate the associated operation.
1. Enter Database Administration using the feature code Feature # * and then enter the DB Admin
password.
2. Press show. The system displays the DB Item Select screen.
3. Enter 08-03, then press save. This advances you to the Hour Mode programming screen.
4. Press chg to change to select 12/24 Hour Mode.
5. Enter 08-14, then press save. This advances you to the System Time programming screen.
6. Press show. The system displays the Year field.
7. Press chg to change the year for the system clock.
Or…
Press next to advance to the next system clock field (month, day, weekday, hour, minutes).
8. Press chg and enter data as required. Program the other database items for the system clock in
the same manner.
9. Press the Hold button to exit system time programming and return to the previous menu level.
10. Exit the programming mode.
4.19.2 PROGRAMMING USING PC-DBA
1. Select Programming from the PC-DBA menu and press Enter. The system displays the Data-
base Programming menu.
2. Use the arrow keys to highlight System Application and press Enter. The system displays the
System Application menu.
3. Highlight Category 1, and then press Enter. The system displays the System Application
menu.
100 Comdial October, ‘03
 Loading...