

Page 1
NetLink Terminal for
R
Microsoft
WindowsR User Guide
DRAFT COPY
Beta Release
Version 1.0
Page 2

Page 3
NetLink Te rminal for Microsoft® Windows® User Guide
Version 1.0
Beta Release
March 7, 2002
380-10003-01-E05
www.comdev.cc
Page 4

Copyright© 2001, 2002 by COM DEV Broadband. The copyright to this document is owned, without reservation, by COM DEV Broadband. This document may not be copied in whole or part without the express,
written permission of COM DEV Broadband. The information in this document is subject to change without
notice. All rights reserved. Printed in the United States.
COM DEV Broadband is the owner of the trademark M/ERGY among others. All other products or company names are used for identification purposes only, and are trademarks of their respective owners.
Page 5

Contents
Chapter 1: Welcome to M/ERGY for Microsoft Windows. . . 1
Features of M/ERGY and Your NetLink Terminal. . . . . . . . . 1
Speed Advantages . . . . . . . . . . . . . . . . . . . . . . . . . . . . . 1
Where You Can Use Your NetLink Terminal . . . . . . . . . . . . 2
What Your System Needs . . . . . . . . . . . . . . . . . . . . . . . . . . 2
Getting More Information . . . . . . . . . . . . . . . . . . . . . . . . . . . 2
Chapter 2: Installing the Software on Your Computer . . . . . 5
Windows 2000 Considerations. . . . . . . . . . . . . . . . . . . . . . . 5
Using the Installation Wizard . . . . . . . . . . . . . . . . . . . . . . . . 5
Uninstalling M/ERGY . . . . . . . . . . . . . . . . . . . . . . . . . . . . . . 9
Chapter 3: Installing Your NetLink Terminal. . . . . . . . . . . . 13
Connecting Your NetLink Terminal. . . . . . . . . . . . . . . . . . . 13
Preparing to Use Your NetLink Terminal . . . . . . . . . . . . . . 14
Getting to Know Your NetLink Terminal . . . . . . . . . . . . . . . 15
LEDs on Your NetLink Terminal . . . . . . . . . . . . . . . . . . 15
Chapter 4: Using Your NetLink Terminal. . . . . . . . . . . . . . . 17
Getting an M/ERGY Account . . . . . . . . . . . . . . . . . . . . . . . 17
Connecting to the Internet for the First Time . . . . . . . . . . . 17
Connecting to the Internet Daily . . . . . . . . . . . . . . . . . . . . . 20
Disconnecting from the Internet . . . . . . . . . . . . . . . . . . . . . 20
Making Changes to Your M/ERGY Service . . . . . . . . . . . . 20
Viewing the M/ERGY Status Screen . . . . . . . . . . . . . . . . . 24
General Tab . . . . . . . . . . . . . . . . . . . . . . . . . . . . . . . . . 24
Details Tab . . . . . . . . . . . . . . . . . . . . . . . . . . . . . . . . . . 25
Modifying Your Internet Sharing Option . . . . . . . . . . . . . . . 25
Charging the Battery. . . . . . . . . . . . . . . . . . . . . . . . . . . . . . 25
Updating Your NetLink Terminal Software . . . . . . . . . . . . . 25
Nomadic vs. Mobile Service. . . . . . . . . . . . . . . . . . . . . . . . 25
How to Improve Data Speed. . . . . . . . . . . . . . . . . . . . . . . . 26
Conditions to Avoid. . . . . . . . . . . . . . . . . . . . . . . . . . . . . . . 26
Chapter 5: Troubleshooting . . . . . . . . . . . . . . . . . . . . . . . . . 27
Problems and Their Solutions. . . . . . . . . . . . . . . . . . . . . . . 27
Copyright © 2001, 2002 by COM DEV Broadband. The copyright to this document is owned, without reservation, by COM DEV Broadband. This document may not
be copied in whole or part without the express, written permission of COM DEV Broadband. The information in this document is subject to change without notice. All
rights reserved. Printed in the United States.
iii
Page 6

NetLink Terminal for Microsoft Windows User Guide
Copyright © 2001, 2002 by COM DEV Broadband. The copyright to this document is owned, without reservation, by COM DEV Broadband. This document may not
be copied in whole or part without the express, written permission of C OM DE V Broad band . The information in this docu men t is subject to change without notice. All
rights reserved. Printed in the United States.
iv
Page 7

Chapter 1
Welcome to M/ERGY for Microsoft Windows
Features of
M/ERGY and Your
NetLink Terminal
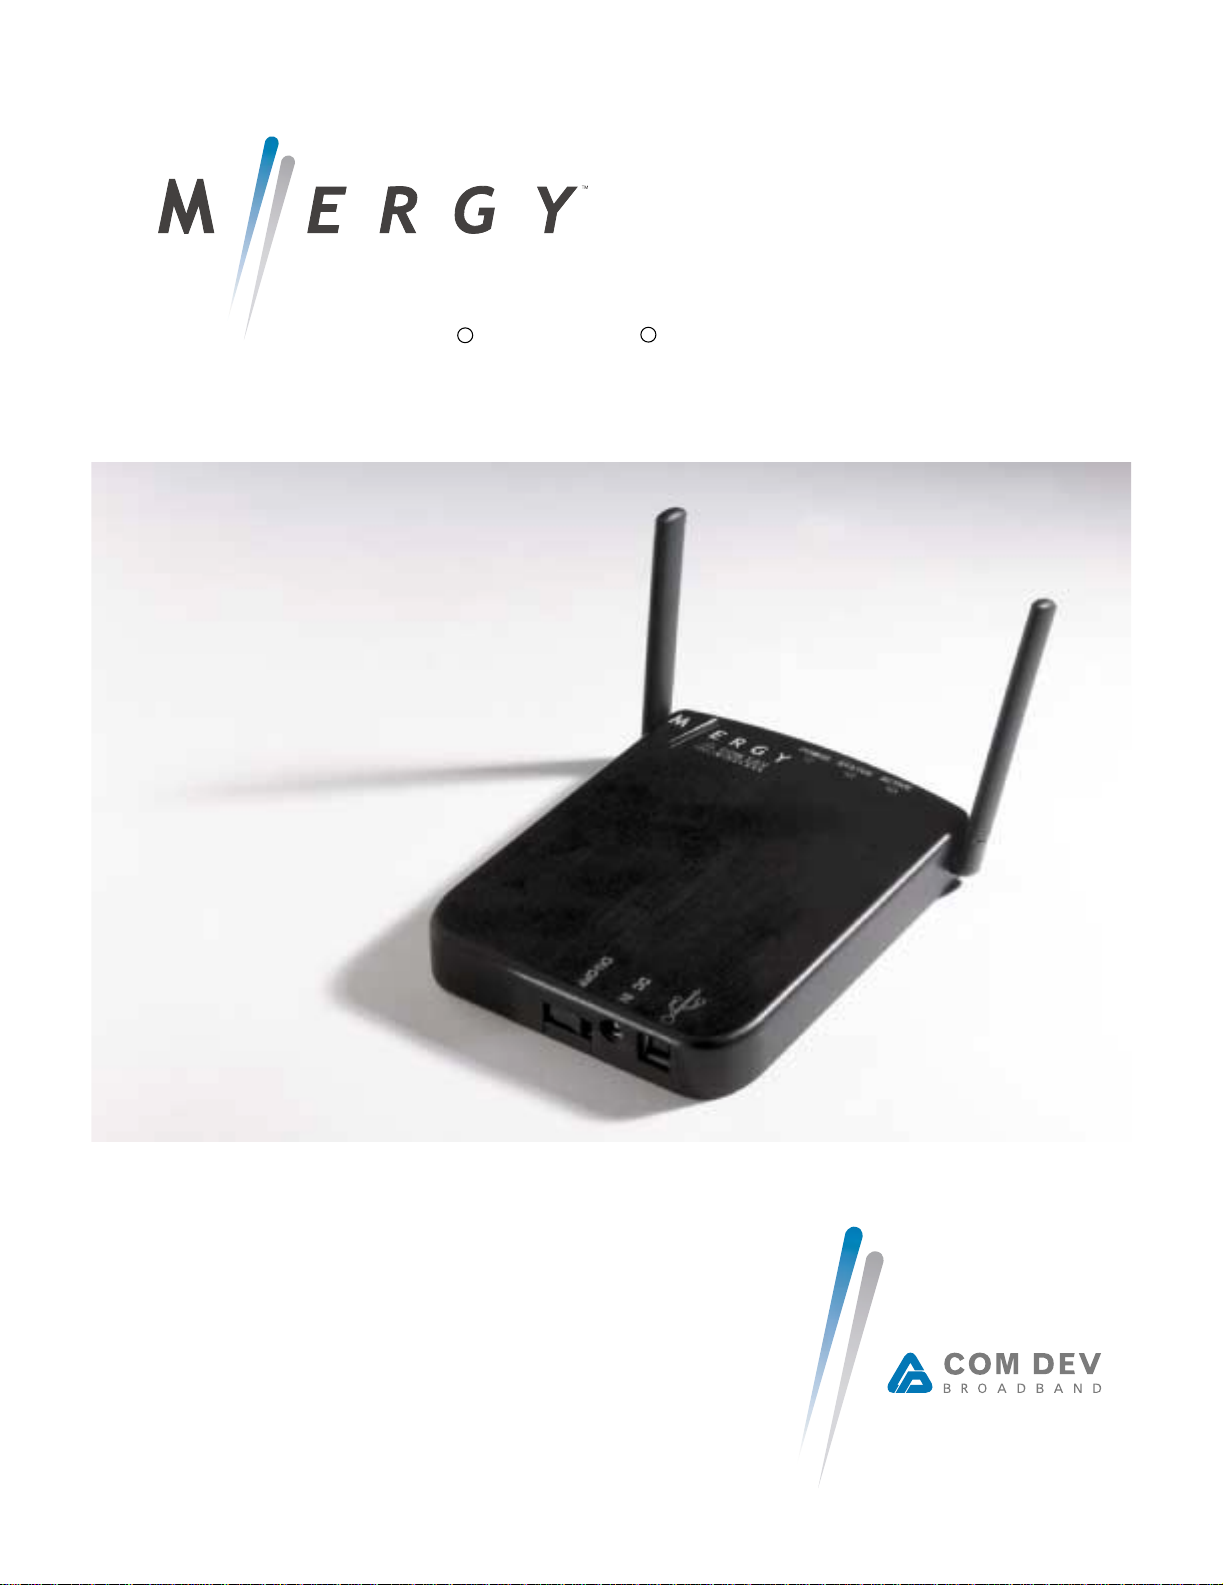
Welcome to M/ERGY™ for Microsoft
along with your NetLink Terminal, make it easy for you to obtain a wireless
Internet connection from anywhere, including your home, your office, and
even while traveling in a moving vehicle. By simply installing the M/ERGY
software and plugging in your NetLink Terminal, you can quickly begin surfing
the Web and checking your e-mail – all wirelessly.
®
Windows
®
. Your M/ERGY software,
Figure 1-1: The NetLin k Termi na l
Speed
Advantages
Copyright © 2001, 2002 by COM DEV Broadband. The copyright to this document is owned, without reservation, by COM DEV Broadband. This document may not
be copied in whole or part without the express, written permission of COM DEV Broadband. The information in this document is subject to change without notice. All
rights reserved. Printed in the United States.
Your NetLink Terminal allows you to wirelessly access the Internet at speeds
comparable to wired broadband systems such as DSL. While M/ERGY offers
peak data rates of 2.4 Mbps, average data rates are 1.2 Mbps.
1
Page 8

NetLink Terminal for Microsoft Windows User Guide
Where You Can
Use Your NetLink
Terminal
In Different Rooms of Your Home
Enjoy the ease and convenience of browsing the Internet from any spot in
your home, including your living room, bedroom, and even your backyard.
The NetLink Terminal’s light-weight design allows it to be easily transported,
along with your laptop, to anywhere inside or outside your home.
In Different Locations in Your Office
Conduct your daily business activities with the assurance that you can access
the Internet, your corporate intranet, and e-mail from anywhere within your
office. The NetLink Terminal’s light-weight design allows you to freely take it
with you as you move from your office to a conference room, or anywhere
else in your office building.
In Your Car or on the Train
Experience the convenience of browsing the Internet while traveling in the car
on business or vacation. Or you can take care of your e-mail correspondence
and update your schedule on the corporate intranet while traveling to and
from work on the train. No matter what your reasons for accessing the Internet, your NetLink Terminal allows you to do so while traveling at speeds up to
120 km/h (75 mph).
WARNING!Do not use your NetLink Terminal while in control of a moving
vehicle.
What Your System
Needs
Getting More
Information
Minimum System Requirements
Before installing the M/ERGY software and your NetLink Terminal, make sure
that your system meets the following requirements:
•Microsoft
• Universal Serial Bus (USB) port
•Pentium
• CD-ROM drive
• 32 MB RAM
• 10 MB free space on hard drive
®
Windows® 98 or Windows 2000
®
200 MHz processor
Using the NetLink Terminal for Windows Help System
In case you encounter problems with your NetLink T erminal or its accompanying software, you can find solutions in the online help system that comes with
your M/ERGY software.
To use the help system, click Help in the M/ERGY program group or click
Help on the M/ERGY taskbar menu. This opens your Web browser and
allows you to view the online help.
Copyright © 2001, 2002 by COM DEV Broadband. The copyright to this document is owned, without reservation, by COM DEV Broadband. This document may not
be copied in whole or part without the express, written permission of C OM DE V Broad band . The information in this docu men t is subject to change without notice. All
rights reserved. Printed in the United States.
2
Page 9

1 Welcome to M/ERGY for Microsoft Windows
A table of contents appears, along with an Index and a Search tab. Within the
Contents tab, click on the specific topic you would like to view. Information
about that topic appears in the main window.
When you are working in the main window, you can click on the up or down
arrows to move throughout the various topics. Click on the Index tab to view
an alphabetical list of all help topics. You can also search for a particular topic
by clicking o n the Search tab. Enter the topic you wish to search for in the text
box, and then click Go.
Contacting COM DEV Technical Support
In case you encounter problems with your NetLink T erminal or its accompanying software, you can call COM DEV technical support at 805-544-1089,
extension 2232.
Now that you know the ways in which you can use M/ERGY and your NetLink
Terminal, you are ready to install the M/ERGY software.
Copyright © 2001, 2002 by COM DEV Broadband. The copyright to this document is owned, without reservation, by COM DEV Broadband. This document may not
be copied in whole or part without the express, written permission of COM DEV Broadband. The information in this document is subject to change without notice. All
rights reserved. Printed in the United States.
3
Page 10

NetLink Terminal for Microsoft Windows User Guide
Copyright © 2001, 2002 by COM DEV Broadband. The copyright to this document is owned, without reservation, by COM DEV Broadband. This document may not
be copied in whole or part without the express, written permission of C OM DE V Broad band . The information in this docu men t is subject to change without notice. All
rights reserved. Printed in the United States.
4
Page 11
Chapter 2
Installing the Software on Your Computer
Windows 2000
Considerations
If you are not running Windows 2000, you can proceed with the instructions in
the next section titled “Using the Installation Wizard.”
However, if you are running Windows 2000, you must decide whether you
want to make the software available to all people who use your computer or
just yourself. If you indicate that you do not want to make the software available to all users, then anyone who logs onto your computer with a user name
and password other than your own will not be able to access the Internet via
your NetLink Terminal.
Here are some decision-making guidelines:
• If you do not currently use a user name and password to access your
computer, the best option is to make the M/ERGY software available
to all users.
• If you do log on to your computer with a user name and password,
and want to have exclusive Internet access, the best option is to
make the M/ERGY software available to only yourself.
IMPORTANT! You must install the M/ERGY software before plugging in
your NetLink Terminal. Failure to do so will result in improper
software installation .
Using the
Installation Wizard
Copyright © 2001, 2002 by COM DEV Broadband. The copyright to this document is owned, without reservation, by COM DEV Broadband. This document may not
be copied in whole or part without the express, written permission of COM DEV Broadband. The information in this document is subject to change without notice. All
rights reserved. Printed in the United States.
The Installation Wizard will guide you through the following steps for installing
M/ERGY on your computer.
1. Insert the M/ERGY CD into your CD-ROM drive. The Installation Wiz-
ard launches automatically.
If the Installation Wizard does not launch automatically:
• Select Run from the Start menu. The Run dialog box appears.
• Type d:\Windows\setup and clic k OK. (d represents the drive
letter for your CD-ROM drive.) The Installation Wizard window
appears.
5
Page 12

NetLink Terminal for Microsoft Windows User Guide
2. Click Next to begin installing M/ERGY on your computer.
3. The Installation Wizard opens the License Agreement window. You
must select either the I accept option or the I do not accept option.
The software will not be installed if you select the I do not accept
option.
4. Click Next.
Copyright © 2001, 2002 by COM DEV Broadband. The copyright to this document is owned, without reservation, by COM DEV Broadband. This document may not
be copied in whole or part without the express, written permission of C OM DE V Broad band . The information in this docu men t is subject to change without notice. All
rights reserved. Printed in the United States.
6
Page 13

2 Installing the Software on Your Computer
5. The Customer Information window appears, displaying the default
personal information found in your computer’s registry. If you wish,
you may modify this information.
6. If you are running Windows 2000, you must choose whether you want
to make M/ERGY available to all users or just yourself. Select the
Anyone who uses this computer option to give Internet access to
everyone who uses your computer. Select the Only for me option to
restrict Internet access to yourself.
7. Click Next.
Copyright © 2001, 2002 by COM DEV Broadband. The copyright to this document is owned, without reservation, by COM DEV Broadband. This document may not
be copied in whole or part without the express, written permission of COM DEV Broadband. The information in this document is subject to change without notice. All
rights reserved. Printed in the United States.
7
Page 14

NetLink Terminal for Microsoft Windows User Guide
8. The Installation Wizard displays a window indicating that it is ready to
install the software. Cli ck Install to begin the installation, which may
take several minutes.
When the Installation Wizard displays a window that tells you that it has finished installing the software, click Finish to exit to your desktop.
M/ERGY is now installed on your computer. An icon like the one shown below
Copyright © 2001, 2002 by COM DEV Broadband. The copyright to this document is owned, without reservation, by COM DEV Broadband. This document may not
be copied in whole or part without the express, written permission of C OM DE V Broad band . The information in this docu men t is subject to change without notice. All
rights reserved. Printed in the United States.
8
Page 15

2 Installing the Software on Your Computer
appears on your desktop, as well as on your task bar.
Uninstalling
M/ERGY
If you want to change the setting that indicates whether or not you want to
give others Internet access, you will have to uninstall the M/ERGY software,
then reinstall it with the new setting. To uninstall the software, follow the
instructions below.
1. Unplug your NetLink Terminal.
2. Select Uninstall from the M/ERGY program group. This launches the
Installation Wizard.
3. Click Next to remove M/ERGY from your computer.
Copyright © 2001, 2002 by COM DEV Broadband. The copyright to this document is owned, without reservation, by COM DEV Broadband. This document may not
be copied in whole or part without the express, written permission of COM DEV Broadband. The information in this document is subject to change without notice. All
rights reserved. Printed in the United States.
9
Page 16

NetLink Terminal for Microsoft Windows User Guide
4. The Program Maintenance window appears. This window gives you
the options of modifying, repairing, or removing M/ERGY from your
computer. Select the Remove option, then click Next.
5. The Installation Wizard verifies that you want to remove M/ERGY
from your computer. Click Remove to continue uninstalling M/ERGY.
Copyright © 2001, 2002 by COM DEV Broadband. The copyright to this document is owned, without reservation, by COM DEV Broadband. This document may not
be copied in whole or part without the express, written permission of C OM DE V Broad band . The information in this docu men t is subject to change without notice. All
rights reserved. Printed in the United States.
10
Page 17

2 Installing the Software on Your Computer
6. When the Installation Wizard displays a window that tells you that it
has finished uninstalling the software, click Finish to exit to your
desktop.
You now know how to install and uninstall the M/ERGY software. Your next
step is to connect your NetLink T erminal to your computer. Refer to Chapter 3
for instructions.
Copyright © 2001, 2002 by COM DEV Broadband. The copyright to this document is owned, without reservation, by COM DEV Broadband. This document may not
be copied in whole or part without the express, written permission of COM DEV Broadband. The information in this document is subject to change without notice. All
rights reserved. Printed in the United States.
11
Page 18

NetLink Terminal for Microsoft Windows User Guide
Copyright © 2001, 2002 by COM DEV Broadband. The copyright to this document is owned, without reservation, by COM DEV Broadband. This document may not
be copied in whole or part without the express, written permission of C OM DE V Broad band . The information in this docu men t is subject to change without notice. All
rights reserved. Printed in the United States.
12
Page 19

Chapter 3
Installing Your NetLink Terminal
Connecting Your
NetLink Terminal
You can connect your NetLink Terminal to a desktop PC or laptop.
Connecting to a Desktop PC
To install your NetLink Terminal on your desktop PC, simply plug the device
into the USB port on the back of your computer. Most USB ports are labeled
as such. Figure 3-1shows the location of a typical USB port on a desktop PC.
Figure 3-1: USB Ports on a Desktop PC
Note that your computer does not have to be turned off in order to install your
NetLink Terminal. The device can be plugged in and unplugged while the
computer is on.
To run your NetLink Terminal from electrical power, plug the AC/DC power
adapter into the DC IN port on the front of your NetLink Terminal. Then plug
the adapter into an electrical socket.
Copyright © 2001, 2002 by COM DEV Broadband. The copyright to this document is owned, without reservation, by COM DEV Broadband. This document may not
be copied in whole or part without the express, written permission of COM DEV Broadband. The information in this document is subject to change without notice. All
rights reserved. Printed in the United States.
13
Page 20

NetLink Terminal for Microsoft Windows User Guide
Connecting to a Laptop
To install your NetLink Terminal on your laptop, simply plug the device into the
USB port. The location of the USB port varies by laptop manufacturer. Check
your laptop’s user manual for the location of your USB port.
When not in use, the NetLink Terminal can be unplugged from the laptop.
Preparing to Use
Your NetLink
Terminal
To prepare your NetLink Terminal for use, simply raise the antennas, as
shown in Figure 3-2.
Here are some guidelines for ongoing use:
• If your NetLink T erminal is connected to a desktop PC, you can leave
it plugged in with the antennas up at all times.
• If the NetLink Terminal is connected to a laptop, you can fold the
antennas down whenever it is unplugged and not in use.
• Remember to raise the antennas each time you want to use the
NetLink Terminal. You will receive better service when the antennas
are up.
Figure 3-2: The NetLink Terminal With Antennas Raised
Copyright © 2001, 2002 by COM DEV Broadband. The copyright to this document is owned, without reservation, by COM DEV Broadband. This document may not
be copied in whole or part without the express, written permission of C OM DE V Broad band . The information in this docu men t is subject to change without notice. All
rights reserved. Printed in the United States.
14
Page 21

3 Installing Your NetLink Terminal
Getting to Know
Your NetLink
Terminal
Your NetLink Terminal has several ports and indicator LEDs that you should
be aware of. Figure 3-3 identifies the ports and LEDs appear on your NetLink
Terminal.
Status LED
Power LED
Active LED
LEDs on Your
NetLink Terminal
ON/OFF Switch
AC/DC Power
Adapter
Figure 3-3: NetLink Terminal Ports and LED s
USB Port
Power LED
The Power LED is used to indicate the states of the power to the NetLink Terminal as well as the charging status of the NetLink Terminal’s battery. The
states of the power LED are as follows:
• Off - The power is off.
• Green - The power is on, and the battery is fully charged.
• Red - The power is on, and the NetLink Terminal is operating from the
battery.
• Orange - The power is on, and battery is charging.
Status LED
The Status LED indicates whether or not a connection has been made with
the M/ERGY Network. The states of the Status LED are as follows:
• Green - You are connected to the M/ERGY Network and actively
transmitting or receiving data.
Copyright © 2001, 2002 by COM DEV Broadband. The copyright to this document is owned, without reservation, by COM DEV Broadband. This document may not
be copied in whole or part without the express, written permission of COM DEV Broadband. The information in this document is subject to change without notice. All
rights reserved. Printed in the United States.
15
Page 22

NetLink Terminal for Microsoft Windows User Guide
• Blinking Green - You are connected to the M/ERGY Network and not
actively transmitting or receiving data.
• Orange - You are in range of the M/ERGY Network but not connected to it.
• Red - You are not in range of the M/ERGY Network.
Active LED
The Active LED indicates whether or not you are transmitting data to or
receiving data from the M/ERGY Network. The states of the Active LED are
as follows:
• Green - You are currently transmitting or receiving data.
• Off - Your NetLink Terminal is powered off, or you are not currently
transmitting or receiving data.
Now that you have installed your NetLink Terminal, you are ready to obtain an
M/ERGY account and connect to the Internet, as explained in Chapter 4.
Copyright © 2001, 2002 by COM DEV Broadband. The copyright to this document is owned, without reservation, by COM DEV Broadband. This document may not
be copied in whole or part without the express, written permission of C OM DE V Broad band . The information in this docu men t is subject to change without notice. All
rights reserved. Printed in the United States.
16
Page 23

Chapter 4
Using Your NetLink Terminal
Getting an M/ERGY
Account
Connecting to the
Internet for the
First Time
There are two ways that you can obtain an M/ERGY Internet account. Whichever way you choose, you must follow the instructions in the section titled
“Using the Connection Wizard” later in this chapter.
Via the Internet
By following the instructions for using the Connection Wizard below, you can
obtain an M/ERGY account over-the-air, without any prior arrangements with
an Internet Service Provider (ISP).
Via the Telephone
You can also obtain an M/ERGY account in advance by phoning your ISP . Be
sure to obtain a user name and password for your account. You will need to
enter these items when you follow the instructions found in “Using the Connection Wizard.”
Using the Connection Wizard
Once you have installed the M/ERGY software and your NetLink Terminal,
you are ready to connect to the Internet for the first time. Follow these steps:
1. Double-cl ick the M-ERGY icon on your desktop, or single-click the
M/ERGY icon on your taskbar. This launches the Connection Wizard.
Copyright © 2001, 2002 by COM DEV Broadband. The copyright to this document is owned, without reservation, by COM DEV Broadband. This document may not
be copied in whole or part without the express, written permission of COM DEV Broadband. The information in this document is subject to change without notice. All
rights reserved. Printed in the United States.
17
Page 24

NetLink Terminal for Microsoft Windows User Guide
2. Click Next to begin using the Connection Wizard.
3. If your NetLink Terminal has been preset, the Connection Wizard
asks if you have an M/ERGY account. If your NetLink Terminal has
not been preset, you will skip this step.
• If you already have an M/ERGY account, select Yes, I have an
M/ERGY account, and click Next. Proceed to Step 7.
• If you do not have an M/ERGY account, select No, I do not have
an M/ERGY account, and click Next.
Copyright © 2001, 2002 by COM DEV Broadband. The copyright to this document is owned, without reservation, by COM DEV Broadband. This document may not
be copied in whole or part without the express, written permission of C OM DE V Broad band . The information in this docu men t is subject to change without notice. All
rights reserved. Printed in the United States.
18
Page 25

4 Using Your NetLink Terminal
4. Click Next to automatically launch your Web browser. You will be
taken to a Web site where you can select an ISP and set up a new
M/ERGY account.
5. Follow the instructions provided on that Web site. If you already have
an M/ERGY account, you must follow the instructions for configuring
that account.
6. Close your Web browser when you have finished setting up your
account. You will be returned to the Connection Wizard, which now
displays the Connection Information window.
7. Type the user name and password that were supplied by your ISP in
the appropriate text boxes.
Copyright © 2001, 2002 by COM DEV Broadband. The copyright to this document is owned, without reservation, by COM DEV Broadband. This document may not
be copied in whole or part without the express, written permission of COM DEV Broadband. The information in this document is subject to change without notice. All
rights reserved. Printed in the United States.
19
Page 26

NetLink Terminal for Microsoft Windows User Guide
8. Select the Save Password check box if you want to make the soft-
ware remember your password. This eliminates the need to reenter it
every time you use your M/ERGY service.
9. Click Next.
10. The Connection Wizard indicates that it is done setting up your
account.
•Click Connect to immediately connect to the Internet.
•Click Finish to exit the Connection Wizard without connecting to
the Internet.
Connecting to the
Internet Daily
There are several ways to connect to the Internet on a daily basis.
• Double-click the M-ERGY icon on your desktop and click Connect.
• Click the M-ERGY icon on your task bar, then select Connect. In the
Connect dialog box, enter your user name and password, then click
Connect.
• From the Start menu, click Connect in the M/ERGY program group.
In the Connect dialog box, enter your user name and password, then
click Connect.
Once you have successfully connected to your M/ERGY service, open your
favorite Web browser and begin surfing.
Copyright © 2001, 2002 by COM DEV Broadband. The copyright to this document is owned, without reservation, by COM DEV Broadband. This document may not
be copied in whole or part without the express, written permission of C OM DE V Broad band . The information in this docu men t is subject to change without notice. All
rights reserved. Printed in the United States.
20
Page 27

4 Using Your NetLink Terminal
IMPORTANT! Always raise the NetLink Terminal’s antennas before trying to
connect to the Internet. The NetLink T erminal will not operate
well when its antennas are down.
Disconnecting
from the Internet
Making Changes to
Your M/E RGY
Service
There are three ways to disconnect from the Internet.
• Double-click the M-ERGY icon on your desktop and click Discon-
nect.
• Click the M-ERGY icon on your taskbar, then select Disconnect.
• Open the Status screen , then click Disconnect.
Follow these steps to change your ISP, unsubscribe from your ISP, or reset
the account information that your NetLink Terminal uses.
1. Click Unsubscribe in the M/ERGY program group. This launches the
Unsubscription Wizard.
2. The Unsubscription Wizard asks you what you would like to do.
• Select I only want to reset my NetLink Terminal to remove the
current user name and password from your NetLink Terminal.
• Select I want to reset my NetLink Terminal and unsubscribe
from my ISP to remove the current user name and password
from your NetLink Terminal and unsubscribe from your current
ISP.
Click Next.
Copyright © 2001, 2002 by COM DEV Broadband. The copyright to this document is owned, without reservation, by COM DEV Broadband. This document may not
be copied in whole or part without the express, written permission of COM DEV Broadband. The information in this document is subject to change without notice. All
rights reserved. Printed in the United States.
21
Page 28

NetLink Terminal for Microsoft Windows User Guide
3. If you selected the I want to reset my NetLink Te rminal option, the
Unsubscription Wizard will confirm that the NetLink Terminal has
been reset.
If you selected the I want to reset my NetLink Terminal and unsub-
scribe from my ISP option, clic k Next to launch your Web browser
and unsubscribe from your ISP.
4. Follow the instructions provided on that Web site to unsubscribe from
your ISP. Once you have finished, you will automatically be returned
to the Unsubscription Wizard.
Copyright © 2001, 2002 by COM DEV Broadband. The copyright to this document is owned, without reservation, by COM DEV Broadband. This document may not
be copied in whole or part without the express, written permission of C OM DE V Broad band . The information in this docu men t is subject to change without notice. All
rights reserved. Printed in the United States.
22
Page 29

4 Using Your NetLink Terminal
5. The Unsubscription Successful window asks whether or not the
unsubscription process was successful. You must select either
Yes, the unsubscription was successful or
No, the unsubscription was not successful. Then click Next.
6. If your unsubscr iption was successful, the Unsubscription Wizard
confirms this.
7. If your unsubscription was not successful, you must follow the steps
in this section again.
Copyright © 2001, 2002 by COM DEV Broadband. The copyright to this document is owned, without reservation, by COM DEV Broadband. This document may not
be copied in whole or part without the express, written permission of COM DEV Broadband. The information in this document is subject to change without notice. All
rights reserved. Printed in the United States.
23
Page 30

NetLink Terminal for Microsoft Windows User Guide
Viewing the
M/ERGY Status
Screen
The M/ERGY Status screen is made up of two tabs, which contain information
that may be useful to you in monitoring your M/ERGY service.
To view your Status screen, click the M/ERGY icon on your task bar, then
select Status.
General Tab The General tab of the Status screen provides you with information about your
current Internet connection.
Figure 4-1: G ene r a l Tab of Status Screen
Received Signal Strength
This bar graph depicts the strength of the signal that you are receiving from
the M/ERGY Network. It is shown as a percentage of maximum, with the maximum signal strength being 100 percent.
Link Status
The link status bar changes color to indicate the state of your current connection.
• Red - Your NetLink Terminal is not plugged into your USB port.
• White - You are not connected to the M/ERGY Network.
• Green - You are connected to the M/ERGY Network.
Bytes Received/Bytes Sent
This indicates the amount of data you have sent or received since you connected to the Internet.
Transfer Rate
These bar charts indicate the maximum transfer rates you can achieve based
on your current signal strength. As your signal strength rises, the speed at
which you are able to send and receive data also increases. If your transfer
rate is low, files take longer to upload or download. Because of this, it is
beneficial to wait for a better signal strength before uploading or downloading
large files.
Copyright © 2001, 2002 by COM DEV Broadband. The copyright to this document is owned, without reservation, by COM DEV Broadband. This document may not
be copied in whole or part without the express, written permission of C OM DE V Broad band . The information in this docu men t is subject to change without notice. All
rights reserved. Printed in the United States.
24
Page 31

4 Using Your NetLink Terminal
Details Tab The Details tab of the Status screen provides advanced connection details
that may be useful in the event you need to contact technical support at either
COM DEV or your ISP.
Modifying Your
Internet Sharing
Option
Charging the
Battery
Updating Your
NetLink Terminal
Software
Figure 4-2: Details Tab of Status Screen
If you want to modify the setting of the check box that indicates whether or not
you want to give others Internet access, you will have to remove the M/ERGY
software and reinstall it on your computer. Instructions appear in Chapter 2.
Your NetLink Terminal can operate from its battery for approximately three
hours. The battery can be charged in two ways:
• Plug the AC/DC adapter into your NetLink Terminal and an electrical
outlet.
• When your computer is on and your NetLink Terminal is plugged into
the USB port, the battery will charge itself via the USB cable.
At times it may be necessary to update the software that runs inside your
NetLink Terminal. This is done by clicking Update NetLink Terminal in the
M/ERGY program group. If this software needs to be updated, COM DEV will
notify you and provide instructions at that time.
Nomadic vs.
Mobile Service
Copyright © 2001, 2002 by COM DEV Broadband. The copyright to this document is owned, without reservation, by COM DEV Broadband. This document may not
be copied in whole or part without the express, written permission of COM DEV Broadband. The information in this document is subject to change without notice. All
rights reserved. Printed in the United States.
Your NetLink Terminal is designed to give you both nomadic and mobile Internet service.
25
Page 32

NetLink Terminal for Microsoft Windows User Guide
Nomadic service is equivalent to roaming. It allows you to use your NetLink
Terminal in various locations throughout North America and still maintain a
wireless Internet connection.
Mobile service allows you to use your NetLink Terminal while moving. The
M/ERGY system is ca pable of providin g mobile s ervice whil e you are in tr ansit
at speeds up to 120 km/h (75 mph).
How to Improve
Data Speed
Conditions to
Avoid
WARNING!Do not use your NetLink Terminal while in control of a moving
vehicle.
Several factors may affect data speed. These include, but are not limited to,
location, distance from the M/ERGY Network, and speed of travel.
Here are some guidelines for improving data speed:
• As a primary tactic, move your NetLink Terminal around until you see
an increase in your signal streng th.
• If you are in a moving vehicle, wait until the vehicle slows down or
moves closer to an M/ERGY tower.
• If slow file transfer is a problem, wait until your signal strength
improves before uploading or downloading large files.
Your NetLink Terminal is designed to function in a protected environment. To
keep it running efficiently:
• Always avoid exposing your NetLink Terminal to temperatures lower
than -40° Celsius (-40° Fahrenheit) or greater than 40° Celsius (104°
Fahrenheit).
• Never immerse your NetLink Terminal in water or other liquids.
You now know how to use your NetLink Terminal to make a wireless connection to the Internet. If you encounter problems, refer to the next chapter.
Copyright © 2001, 2002 by COM DEV Broadband. The copyright to this document is owned, without reservation, by COM DEV Broadband. This document may not
be copied in whole or part without the express, written permission of C OM DE V Broad band . The information in this docu men t is subject to change without notice. All
rights reserved. Printed in the United States.
26
Page 33

Chapter 5
Troubleshooting
Problems and
Their Solutions
During the course of using your NetLink Terminal, you may encounter some
problems. Here are some potential problems and possible solutions.
Problem: The software does not install correctly.
Solutions:
• Make sure the NetLink Terminal is not plugged into the USB port.
• Make sure all other programs are closed.
Problem: The NetLink Terminal was plugged in before the M/ERGY software
was installed.
Solutions:
Recover the Windows drivers by using the following procedure.
1. Unplug your NetLink Terminal.
2. Remove the M/ERGY software by following the instructions for “Uninstalling M/ERGY” on page 9.
3. On the Start Menu, point to Settings, then click Control Panel.
4. Double-click Add/Remove Hardware. This opens the Add/Remove
Hardware Wizard, which will uninstall your NetLink Terminal.
5. Click Next to begin using the Wizard.
6. Select Uninstall/Unplug a device, then click Next.
7. Select Uninstall a device, then click Next.
8. Click the Show hidden devices check box.
9. Select NetLink Terminal in the scroll box, then click Next.
10. Select Yes, I want to uninstall this device, then click Next. Yo ur
NetLink Terminal has been removed.
11. You can now install the M/ERGY software and then plug in your
NetLink Terminal.
Problem: The Connection Wizard does not work.
Solution:
• Make sure all other programs are closed.
Copyright © 2001, 2002 by COM DEV Broadband. The copyright to this document is owned, without reservation, by COM DEV Broadband. This document may not
be copied in whole or part without the express, written permission of COM DEV Broadband. The information in this document is subject to change without notice. All
rights reserved. Printed in the United States.
27
Page 34

NetLink Terminal for Microsoft Windows User Guide
Problem: The NetLink Terminal does not work.
Solutions:
• Check to see that the power adapter is plugged into an electric
socket.
• If your NetLink Terminal is operating off of the battery, check to see
that the battery is charged. Instructions appear under “LEDs on Your
NetLink Terminal” on page 15.
• Make sure that the NetLink Terminal has not been exposed to any of
the situations listed under “Conditions to Avoid” on page 26.
Problem: Data speed is slow.
Solutions:
• Make sure the antennas are in the raised position.
• Move your NetLink Terminal around until you see an increase in your
signal strength.
• If you are in a moving vehicle, wait until the vehicle slows down or
moves closer to an M/ERGY tower.
Problem: You cannot connect to the Internet.
Solutions:
• Make sure the NetLink Terminal is plugged into the USB port on your
computer.
• Make sure the NetLink Terminal is on.
• Make sure you are using the correct user name and password.
• If you still cannot connect, contact your ISP.
Problem: The online help contains an empty frame on the left-hand side.
Solutions:
Use the following procedure to enable JavaScript.
If you are using Netscape:
1. Open your browser.
2. Click Edit, then click Preferences.
3. In the Category box, click Advanced.
4. Select the Enable JavaScript check box.
5. Click OK and restart your Web browser.
If you are using Internet Explorer:
1. Open your browser.
2. Click Tools, then click Internet Options.
3. Click the Security tab.
4. Move the slider in the lower half of the window so that your security
settings are set to Medium, Medium-Low, or Low.
5. Click OK and restart your Web browser.
Copyright © 2001, 2002 by COM DEV Broadband. The copyright to this document is owned, without reservation, by COM DEV Broadband. This document may not
be copied in whole or part without the express, written permission of C OM DE V Broad band . The information in this docu men t is subject to change without notice. All
rights reserved. Printed in the United States.
28
Page 35

5 Troubleshooting
Problem: Windows 98 attempts to log into a Windows network using the
NetLink Terminal.
Solutions:
1. From the Start Menu, point to Settings, then click Control Panel.
2. Click the Network icon.
3. Select TCP/IP M/ERGY USB NetLink Driver and click Properties.
4. Click the Bindings tab.
5. Click to clear the Client for Microsoft Networks check box.
6. If present, click to clear the File and printer sharing for Microsoft
Networks check box.
7. Click OK to close the Properties window.
8. Click No when asked if you want to select any drivers to bind with.
9. Click OK to close the network panel.
10. Click Yes to restart your computer.
This chapter has covered techniques for troubleshooting common problems
that you might encounter with your NetLink Terminal. If the solutions discussed here do not solve your problem, call COM DEV technical support at
805-544-1089, extension 2232.
Copyright © 2001, 2002 by COM DEV Broadband. The copyright to this document is owned, without reservation, by COM DEV Broadband. This document may not
be copied in whole or part without the express, written permission of COM DEV Broadband. The information in this document is subject to change without notice. All
rights reserved. Printed in the United States.
29
Page 36

NetLink Terminal for Microsoft Windows User Guide
Copyright © 2001, 2002 by COM DEV Broadband. The copyright to this document is owned, without reservation, by COM DEV Broadband. This document may not
be copied in whole or part without the express, written permission of C OM DE V Broad band . The information in this docu men t is subject to change without notice. All
rights reserved. Printed in the United States.
30
 Loading...