

Page 1
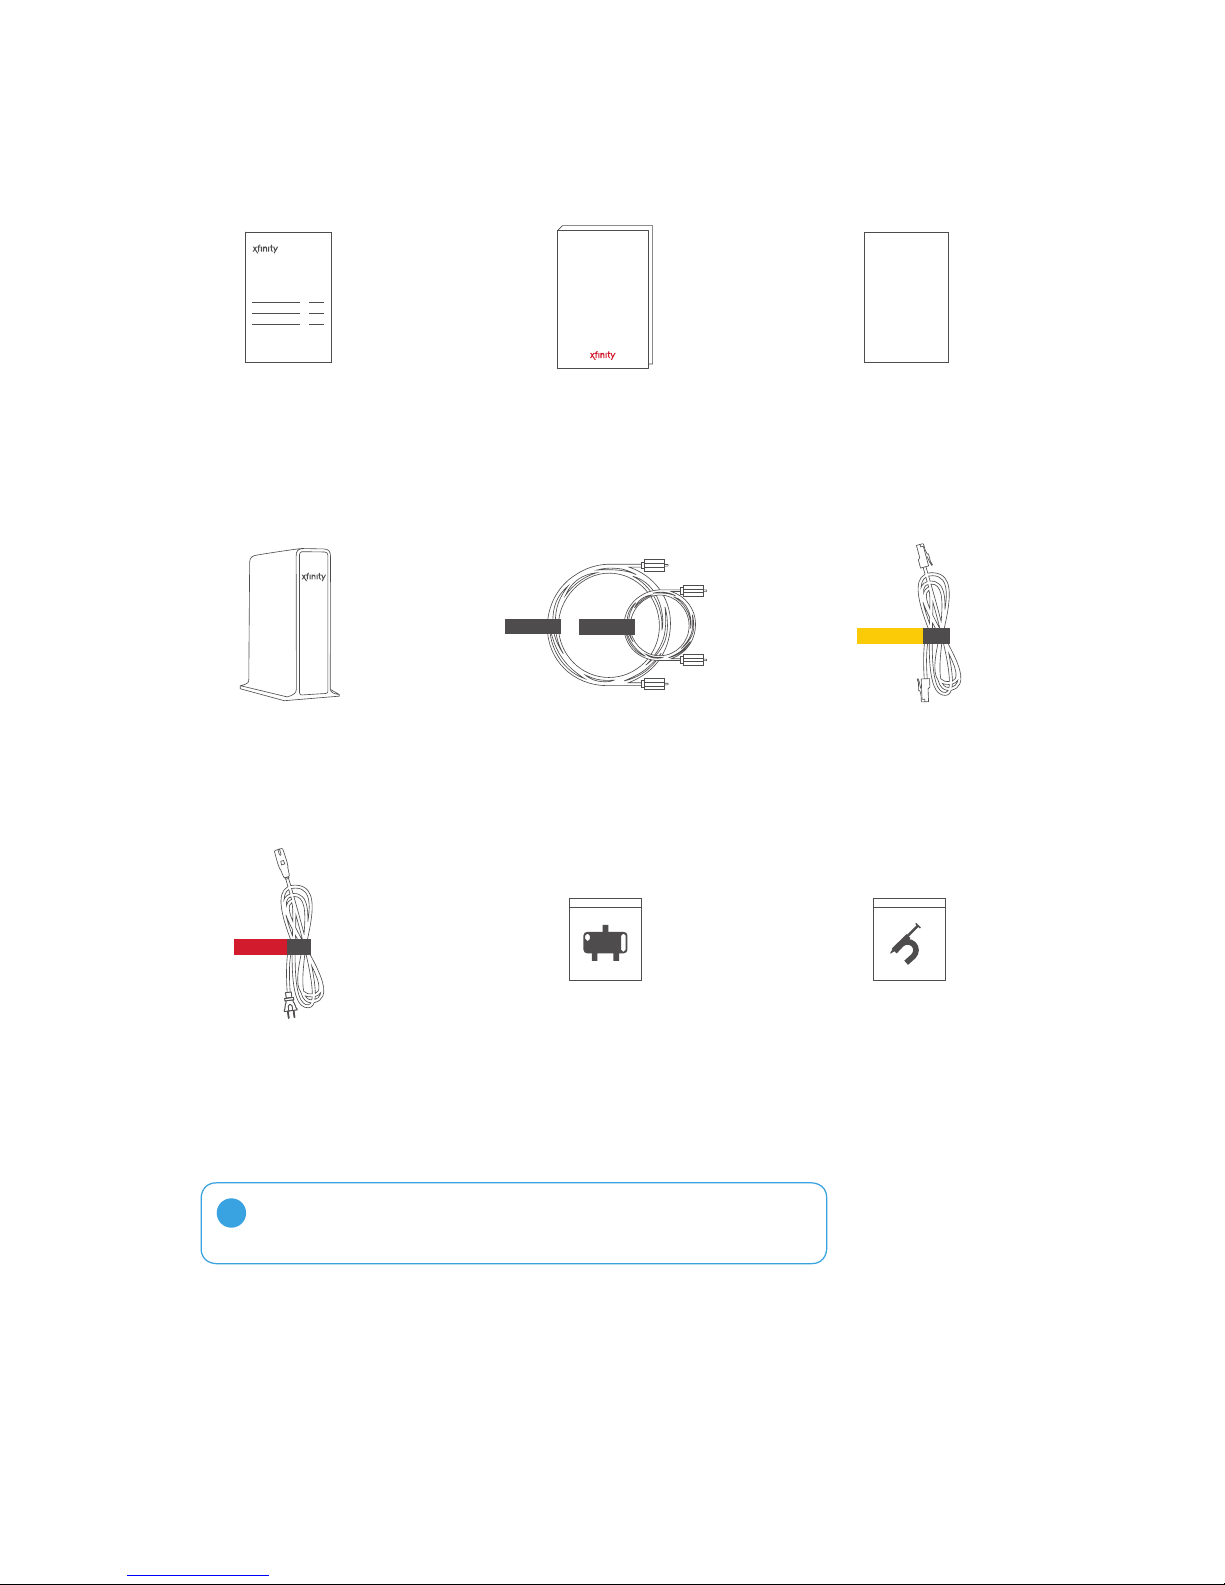
Here’s what’s inside your kit.
Welcome.
Activation
Information Card
xFi
Wireless
Gateway
Welcome Kit
XFINITY folder containing:
Welcome Information, Comcast
Customer Privacy Notice, and
Agreement for Residential Services
Coax
Coax
Coax cables
Choose from two
lengths
XFINITY
Intern et / Voice
GSG
Getting Started
Guide
Ethernet
Ethernet cable
Only needed if you are
NOT connecting with WiFi
Power
Power cord
Splitter
If connecting multiple devices
to one cable wall outlet, you
If you want to run the coax
Cable tacks
cable neatly along a wall
will need to use a splitter
Your Wireless Gateway combines the technology of a modem and router neatly
!
in one piece of equipment, soyou can enjoy in-home WiFi that’s fast and reliable.
You will not need to use a separate router to get WiFi inyour home.
Important information
The billing for your new XFINIT Y® service(s) will begin within 5 days from the date your order for service(s) is placed.
Prior to activation of your new XFINITY service(s), please read the Comcast Residential Customer Agreement and the
Comcast Customer Privacy Notice provided in the enclosed XFINITY documentation folder.
If you do not accept the terms of the above agreement and notice or want to cancel your XFINITY service(s), please
contact Comcast within 30 days of your receipt of this self-installation kit at 1-800-XFINITY to arrange for the return of
this self-installation kit.
Page 2
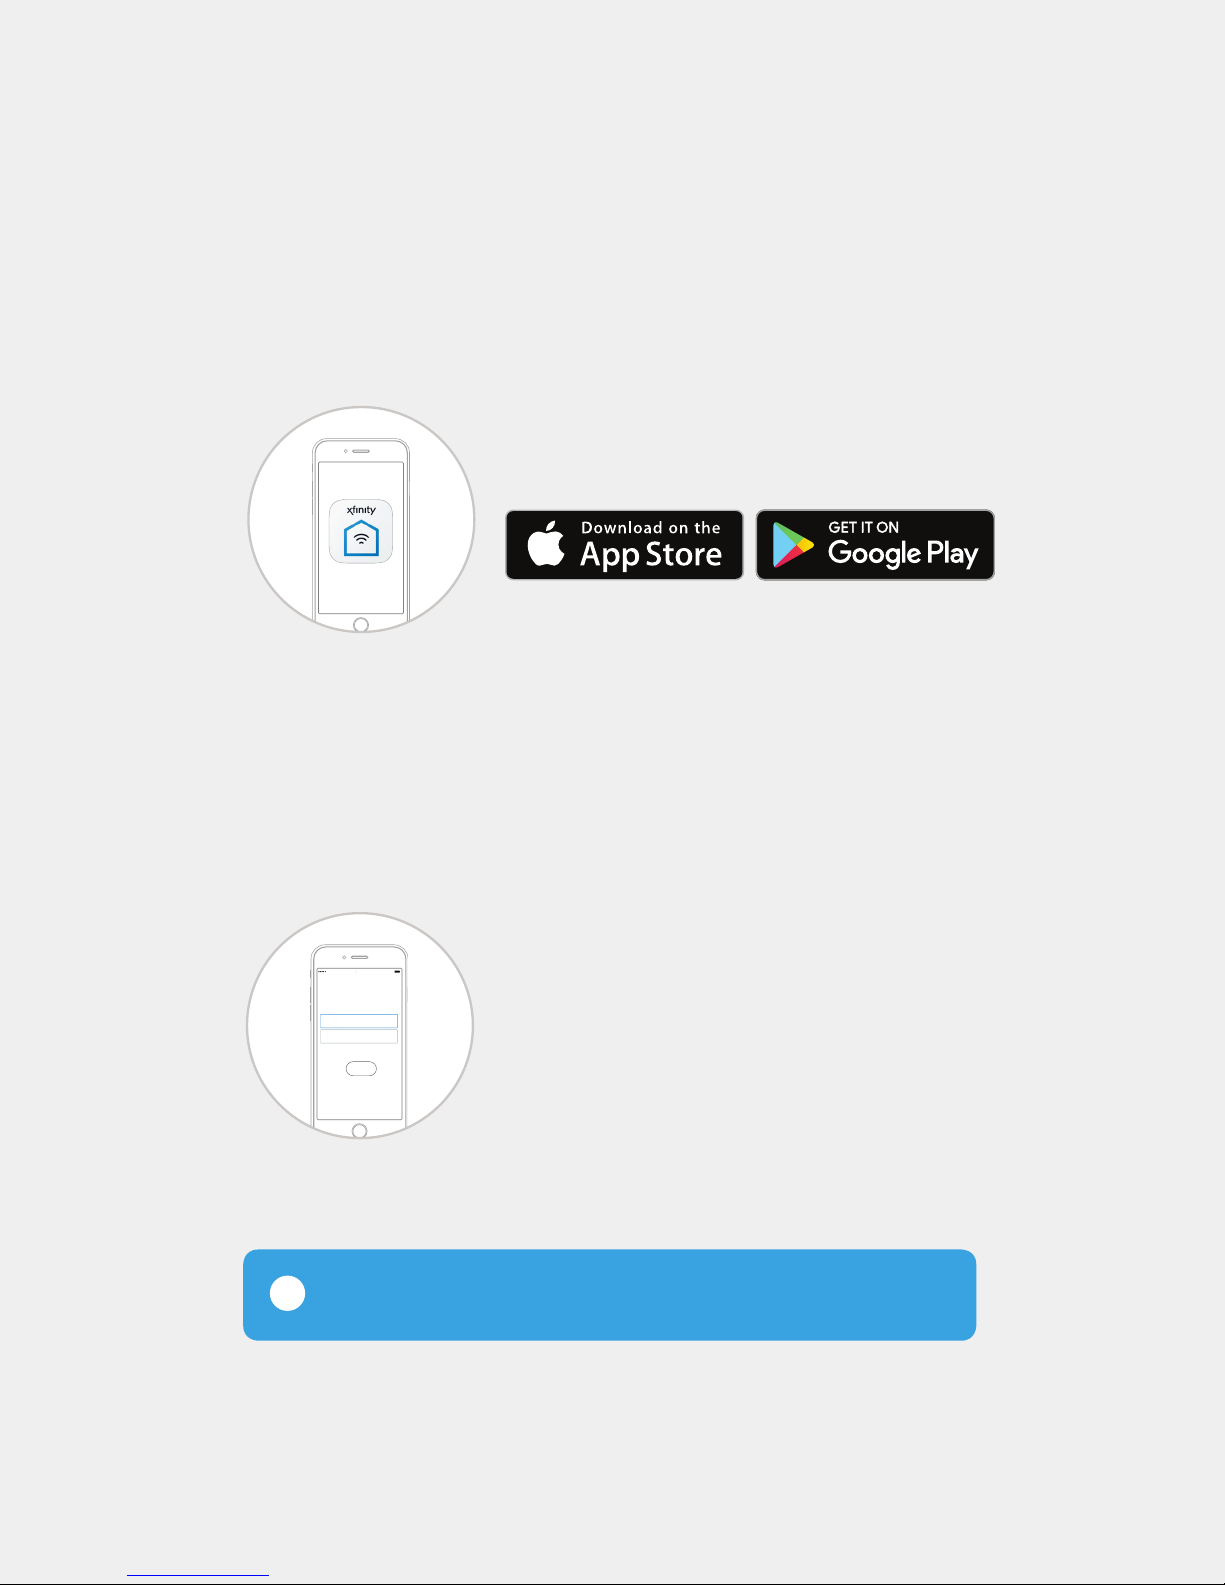
Have a Smartphone? Start Here.
Get the app and follow these simple steps.
1. Download the XFINITY xFi app.
Download for free at the App Store or Google Play
xFi
2. Put this guide aside and follow the
instructions in the app to get online.
100%941 AMXF
Name Your
WiFi Network
WIFI NAME
Simon-H|
WiFi Password
Next
If you set up using the app, you will not need to reference the guide
!
beyond this point.
Follow step-by-step instructions to install your Gateway
and set up your home WiFi network.
Then use the XFINITY xFi app to manage your home
network, troubleshoot issues and more.
Page 3
Don’t Have a Smartphone? Start Here.
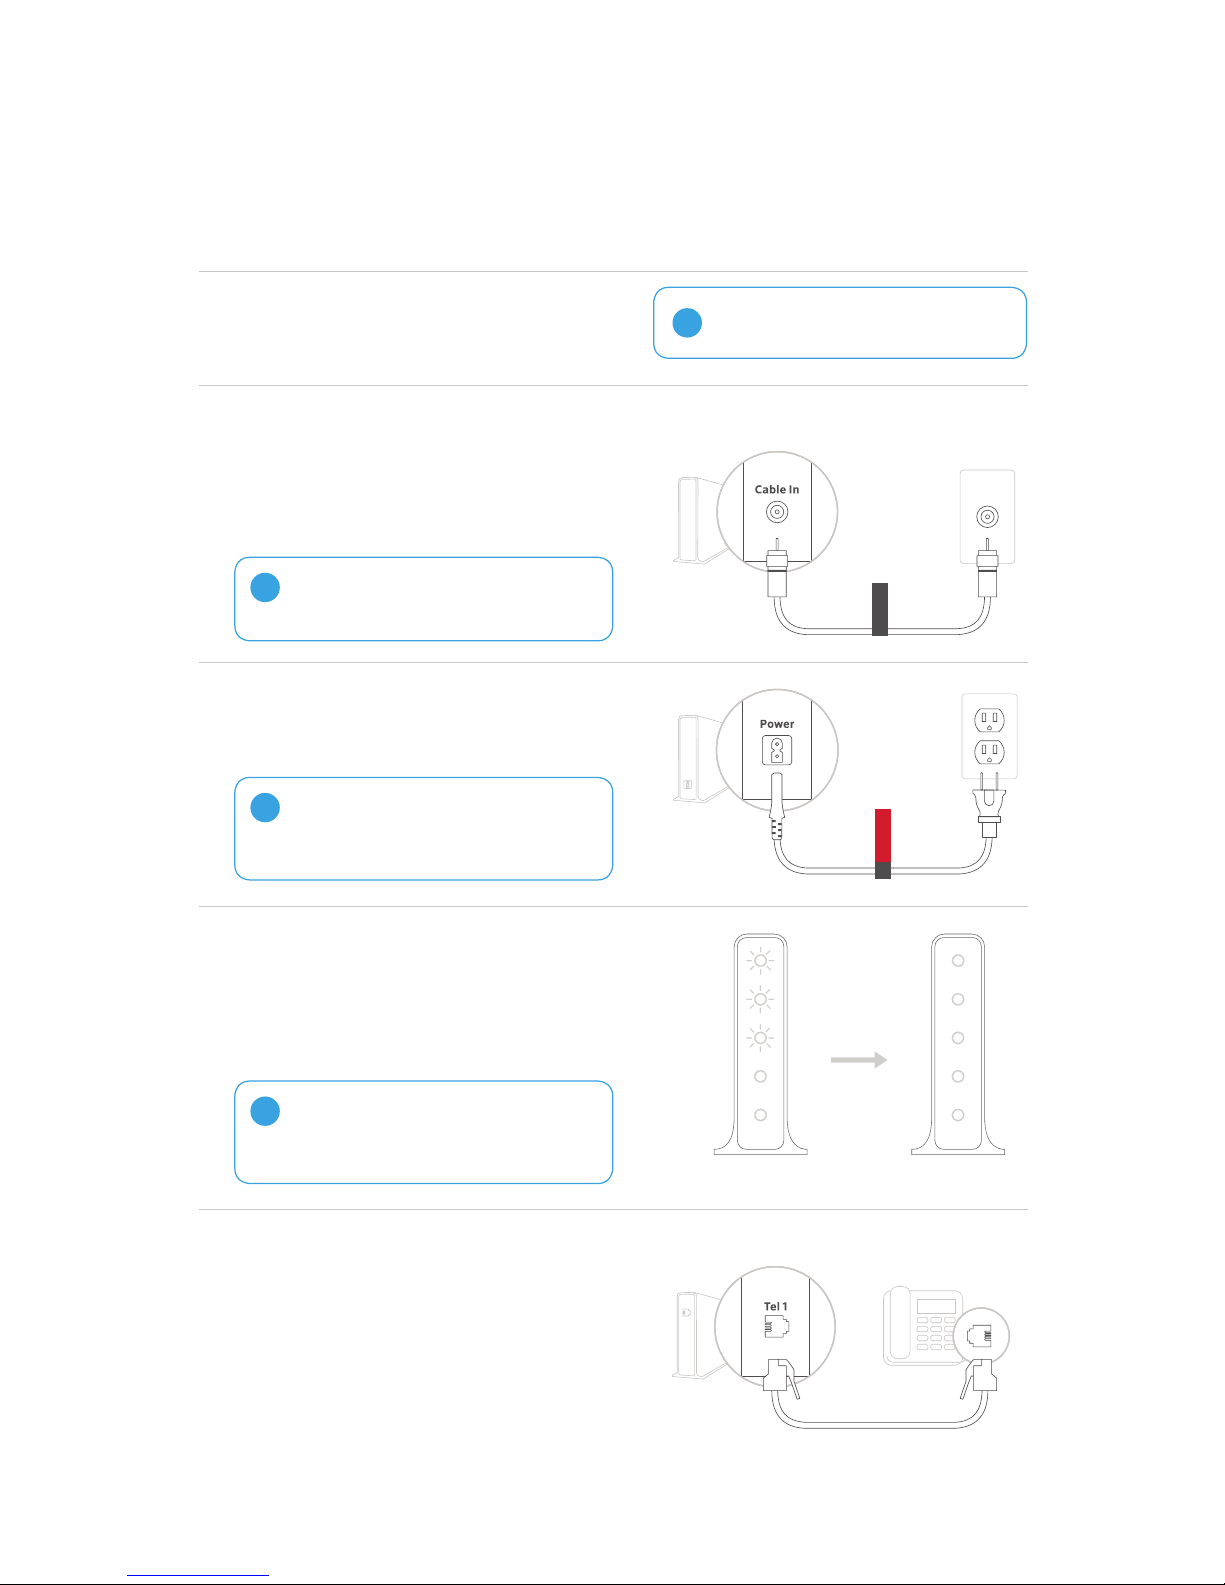
1. Connect Cables and Power Up.
Place your xFi Wireless Gateway near
A
a cable wall outlet, in a central location,
away from windows and external walls.
B
Screw one end of the coax cable to the
Cable In/RF In port on your Gateway.
Screw the other end to the cable wall outlet
or one of the ports on the splitter. Make
sure these connections are nger tight.
If connecting multiple devices to one cable
!
wall outlet, you will need to use a splitter.
If this device is replacing an existing
!
modem/Wireless Gateway, please
disconnect it before proceeding.
C Plug the power cord into the back
of your Gateway and then into an
electricaloutlet.
If your Gateway doesn’t turn on, make sure
!
your electrical outlet works. Also, check
if your electrical outlet is controlled by a
wallswitch.
Wait until the Power, US/DS, and Online
D
lights remain solid for 1 minute. The lights
may ash for up to 20 minutes, and your
Wireless Gateway may reboot. When these
lights STOP ashing, move on to Step 2.
If the lights do not stop flashing after
!
20 minutes, tighten the cables. Then
try moving your Gateway to a
different cable wall outlet.
Power
US/DS
Online
2.4 GH z
5 GHz
Flashing = Wait
Coax
Power
Power
US/DS
Online
2.4 GH z
5 GHz
Steady = Ready
For XFINITY Voice customers
If you have XFINITY Voice service, connect
your telephone to the Tel 1 connection on
your Gateway using a telephone cord (not
included). If you ordered a battery with
your service, please use the instructions
packaged with the battery to install it.
Page 4
2. Connect to Your Gateway
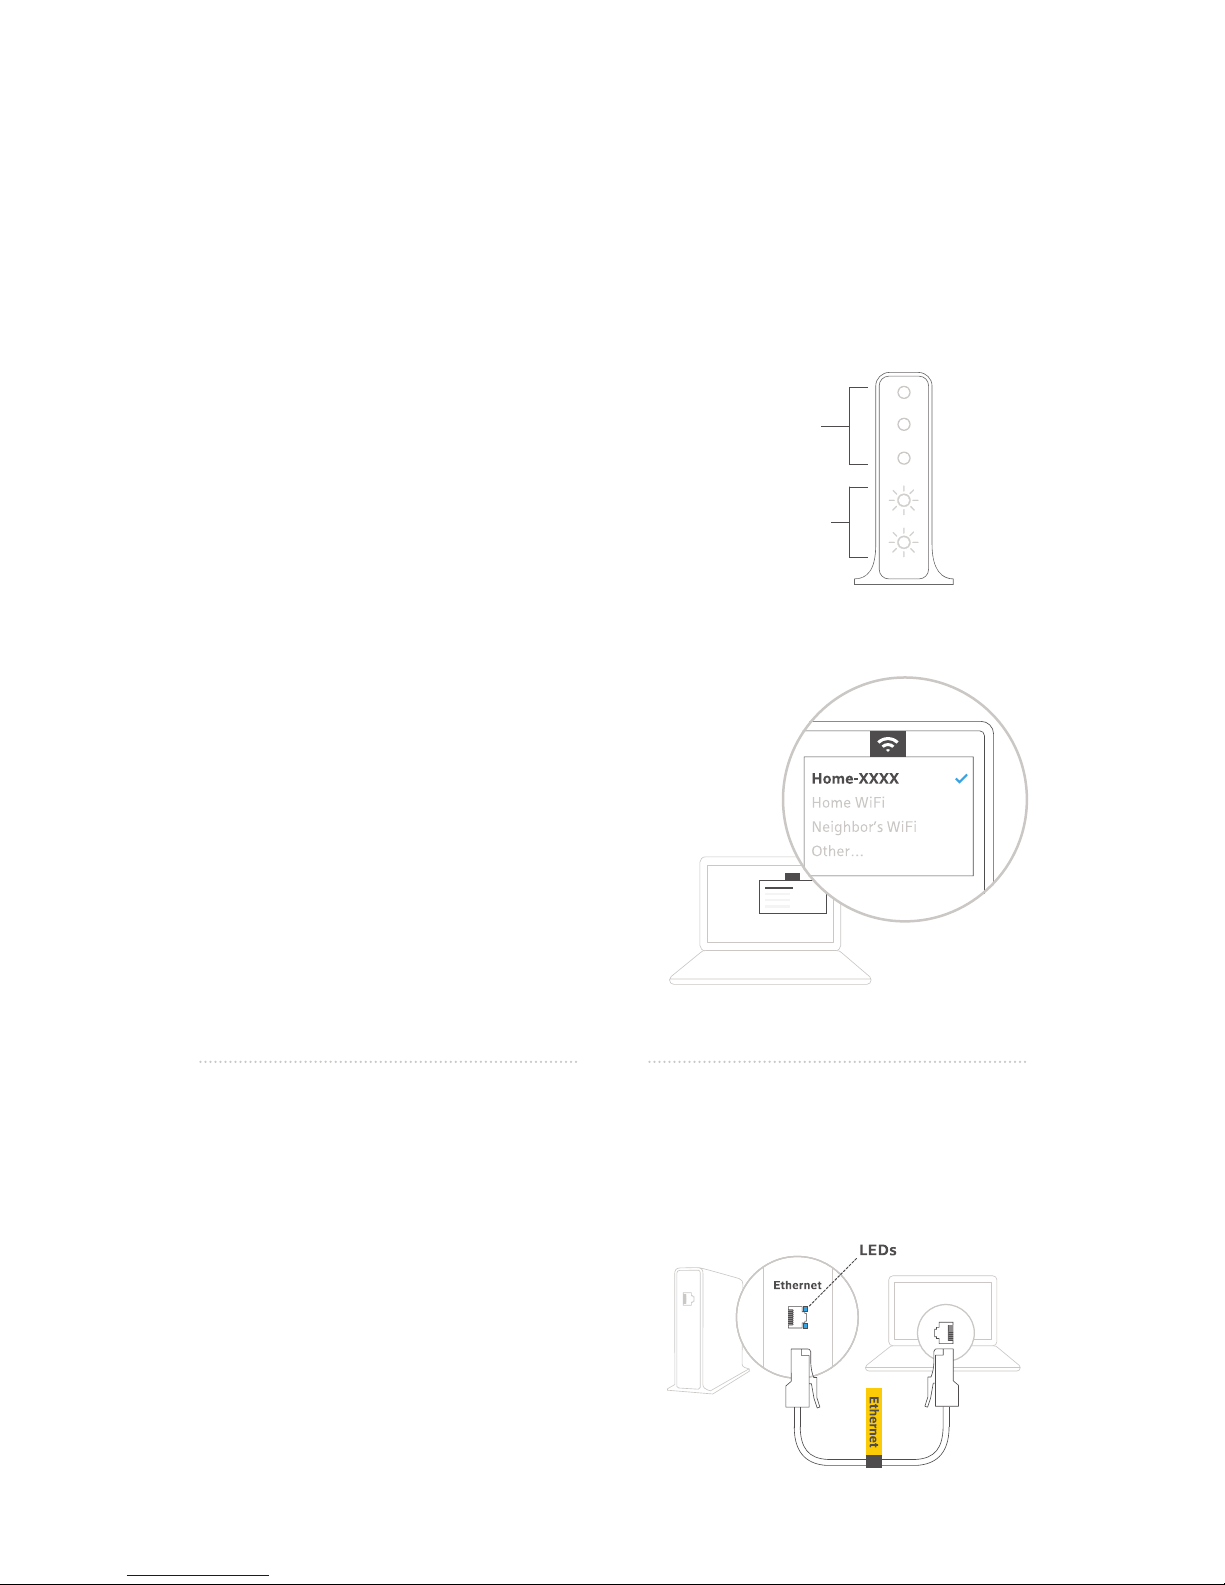
Connect with WiFi
If you have a WiFi capable device such as a smartphone, tablet, or laptop, follow the steps below
to connect to the internet wirelessly.
A Wait for the 2.4 GHz and 5 GHz WiFi lights to
START ashing. Make sure they continue to
ash as you’re completing the steps below.
B Find the Network Name (SSID) and Password
(Security Key) on the sticker onthe side, back
or bottom of your Gateway. The name should
look like Home-XXXX or XFSETUP-XXXX.
Ifmore than one is listed, choose either.
C Access the WiFi settings on your personal
device. Ensure WiFi is turned on. Then select
the Network Name (SSID) printed on the sticker
(referenced above) from the list of available
networks.
Steady Lights
Flashing Lights
Power
US/DS
Online
2.4 GH z
5 GHz
D When prompted, enter the password printed
on the sticker to connect to the network.
WindowsUsers: You may be prompted to
enter a PIN instead which you can nd on a
separate sticker on the Wireless Gateway.
You can also click the link to connect using
a security key to proceed with using the
password. Go to Step 3.
or
Connect with Ethernet
If you do not have a WiFi capable device, or if you prefer an Ethernet connection, follow the
steps below to connect to the internet with the provided Ethernet cable.
A Plug the Ethernet cable into one of the
open ethernet ports on your Gateway until it
clicks. Plug the other end into the ethernet
port in your computer.
B If this worked, the LEDs next to the ethernet
ports on your Gateway will light up. Go to
Step 3.
Page 5
3. Activate your service
A Once connected, if you’re not automatically presented with a welcome message to
begin setup, open a web browser and go to register.xnity.com.
B Follow the on-screen prompts to verify your account (reference the Activation
Information Card in your kit if needed). You will also be prompted to give your new
home WiFi network a name and password you’ll easily remember.
If you ever want to change these settings, or manage your home net work,
!
you can download the free XFINITY xFi app or visit xnity.com/myx.
C Wait while your Gateway completes activation. It may reboot during this process.
Activation should be complete when the Power, US/DS, and Online lights remain solid
for 1 minute and the 2.4 GHz and 5 GHz lights start blinking.
D Once your Gateway is activated, go to WiFi settings on your device, nd your new
WiFi name and use the password you created to join (you can skip this step if you
connected with Ethernet).
You should then be connected to your new home network and have access to XFINITY
Internet.
Enjoy your XFINITY service!
Page 6

Need help?
Watch videos, search FAQs and get troubleshooting
support at xnity.com/SelfInstall or contact
a customer service expert at 1-800-XFINITY
For help in Chinese, Korean, Vietnamese or Tagalog, please
call 1-855-955-2212.
Keep for future reference, but if you decide to toss, please recycle.
© 2017 Comcast. All rights reserved.
BL XB3 INTV GSG SIK 0417
 Loading...