

Read all instructions BEFORE assembly and USE of product. KEEP INSTRUCTIONS FOR FUTURE
USE. Record the following information for quick reference.
Note: Illustrations are only representative and not actual.
Attach copy of sales receipt.
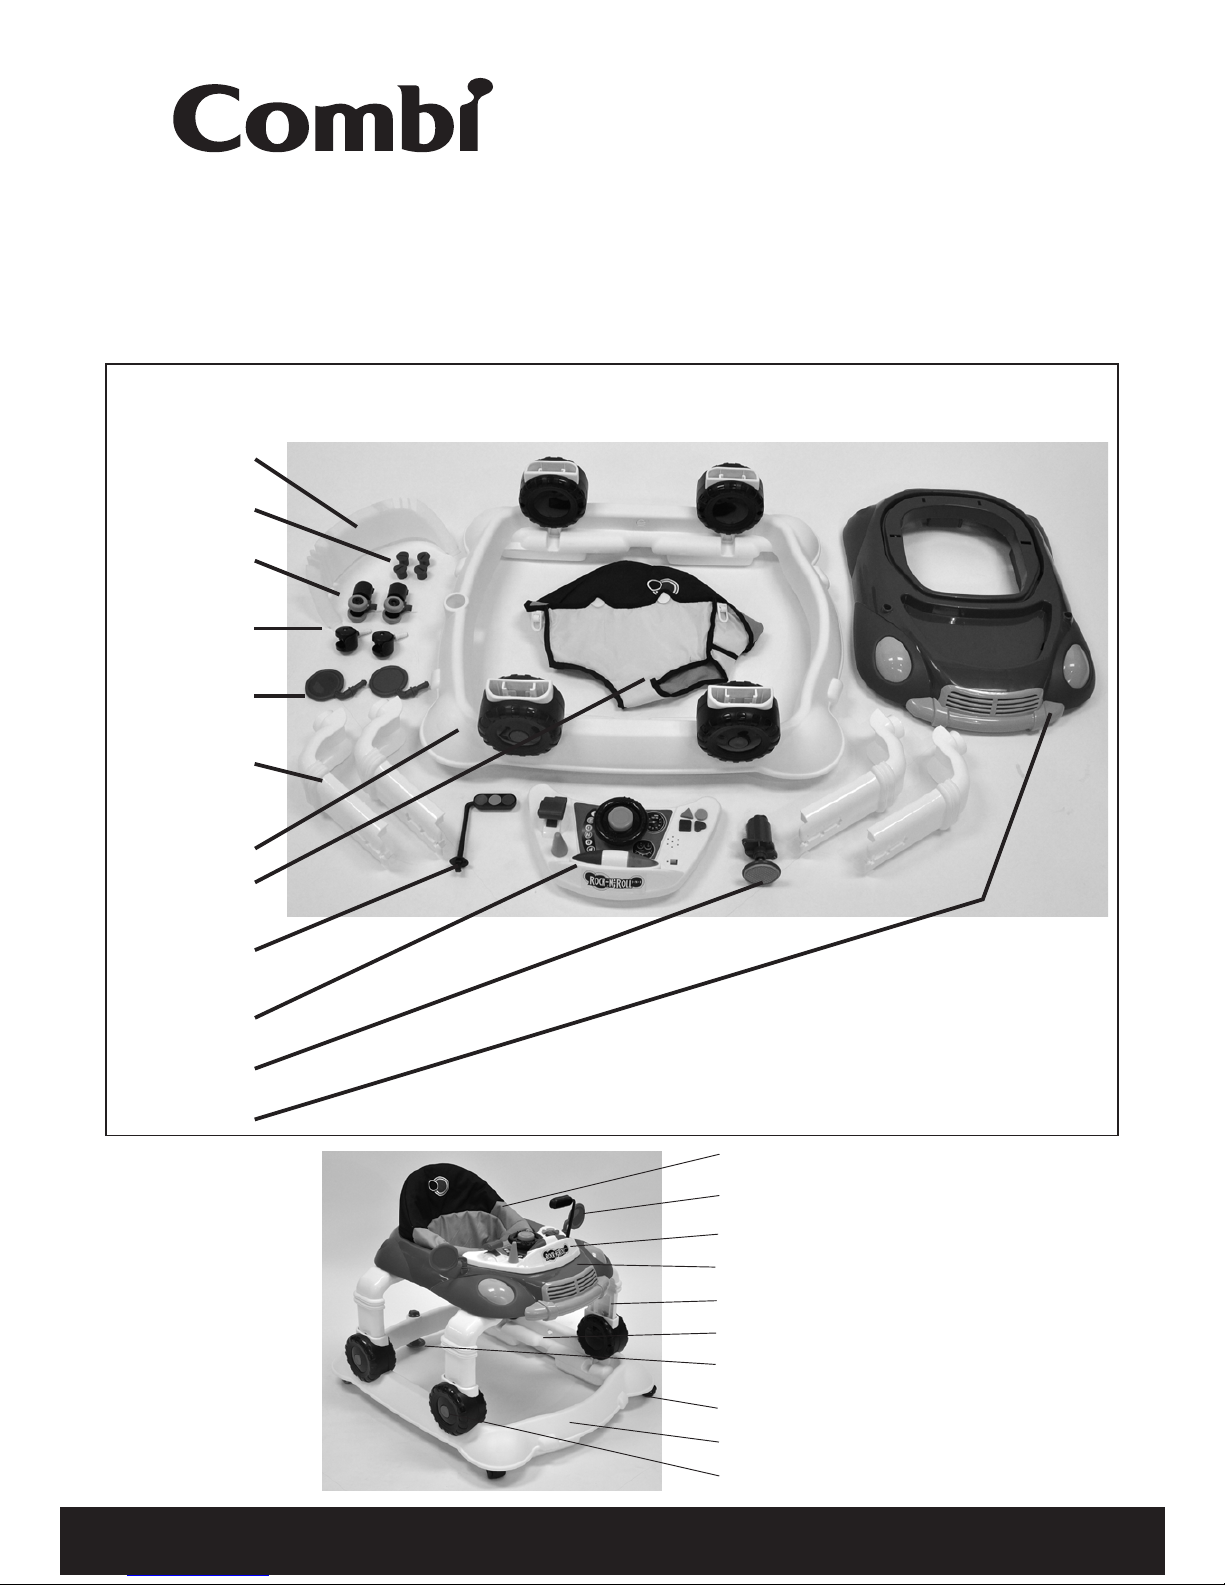
Parts List
Make sure you have all the parts listed below before using your Walker. If any parts are missing,
call Customer Service at 1-800-992-6624.
Combi USA, Inc. • 3520 Westinghouse Blvd., Suite B • Charlotte, NC 28273 • CombiUSA.com
Customer Service 1-800-992-6624
Rock N Roll Walker
Instruction Manual
Date Purchased: ______________________________ Model Number: __________ - _______ Color _______________________________________________
Name of Parts
1 Seat
2 Side Mirror
3 Toy Tray
4 Upper Tray
5 Support Legs
6 Rocker
7 Stabilizer Pad
8 Wheels
9 Base
10 Height Button
Seat back
Nut (X4)
Fixed
Wheel (X2)
Swivel
Wheel (X2)
Side
Mirror (X2)
Support
Legs (X4)
Base
Seat Pad
Traffic Signal
Toy
Toy Tray
Stabilizer
Upper Tray
Tools Needed: Screwdriver
Use only on flat surfaces
free of objects that could
cause the walker to tip over.
- 2 -
WARNINGS:
READ ALL INSTRUCTIONS BEFORE ASSEMBLY AND USE OF THE WALKER. KEEP INSTRUCTIONS
FOR FUTURE USE. ADULT ASSEMBLY REQUIRED. KEEP SMALL PARTS AWAY FROM CHILDREN.
In the event of damage or problems, discontinue use and contact Combi Customer
Service for instructions: 1-800-992-6624.
Always keep child in view
while in walker.
All products specifications are subject to change without notice. Sizes and weights are intended as guides and are approximations.
Combi® reserves the right to modify the products in its line during the course of the year. Non contractual media. Colors are as accurate as the media in which they appear allows.
©Combi USA, Inc. 2011
FAILURE TO FOLLOW THESE INSTRUCTIONS AND
WARNINGS COULD RESULT IN SERIOUS INJURY OR DEATH.
NEVER LEAVE CHILD
UNATTENDED. Always
keep child in view while in
walker.
To avoid burns, keep the
child away from hot liquids,
ranges, radiators, space
heaters, fireplaces, etc.
DO NOT use with children
who cannot sit upright
unassisted; approximately 6
months old.
WARNING-sTAIR HAZARD
Avoid serious injury or
death. Block stairs/steps
securely before using
walker, even when using
parking brake.
Clean friction pads regularly
to maintain stopping
performance (figure 1).
See Routine Maintenance
section for cleaning
instructions.
figure 1
Discontinue use of this
product once child can walk
unassisted.
Do not mix old and new
batteries. Do not mix alkaline,
standard (carbon-zinc), or
rechargeable (nickel-cadmium)
batteries.
Maximum weight capacity
is 25 lb
Do not use the walker if it is
damaged or broken.
For indoor use only.
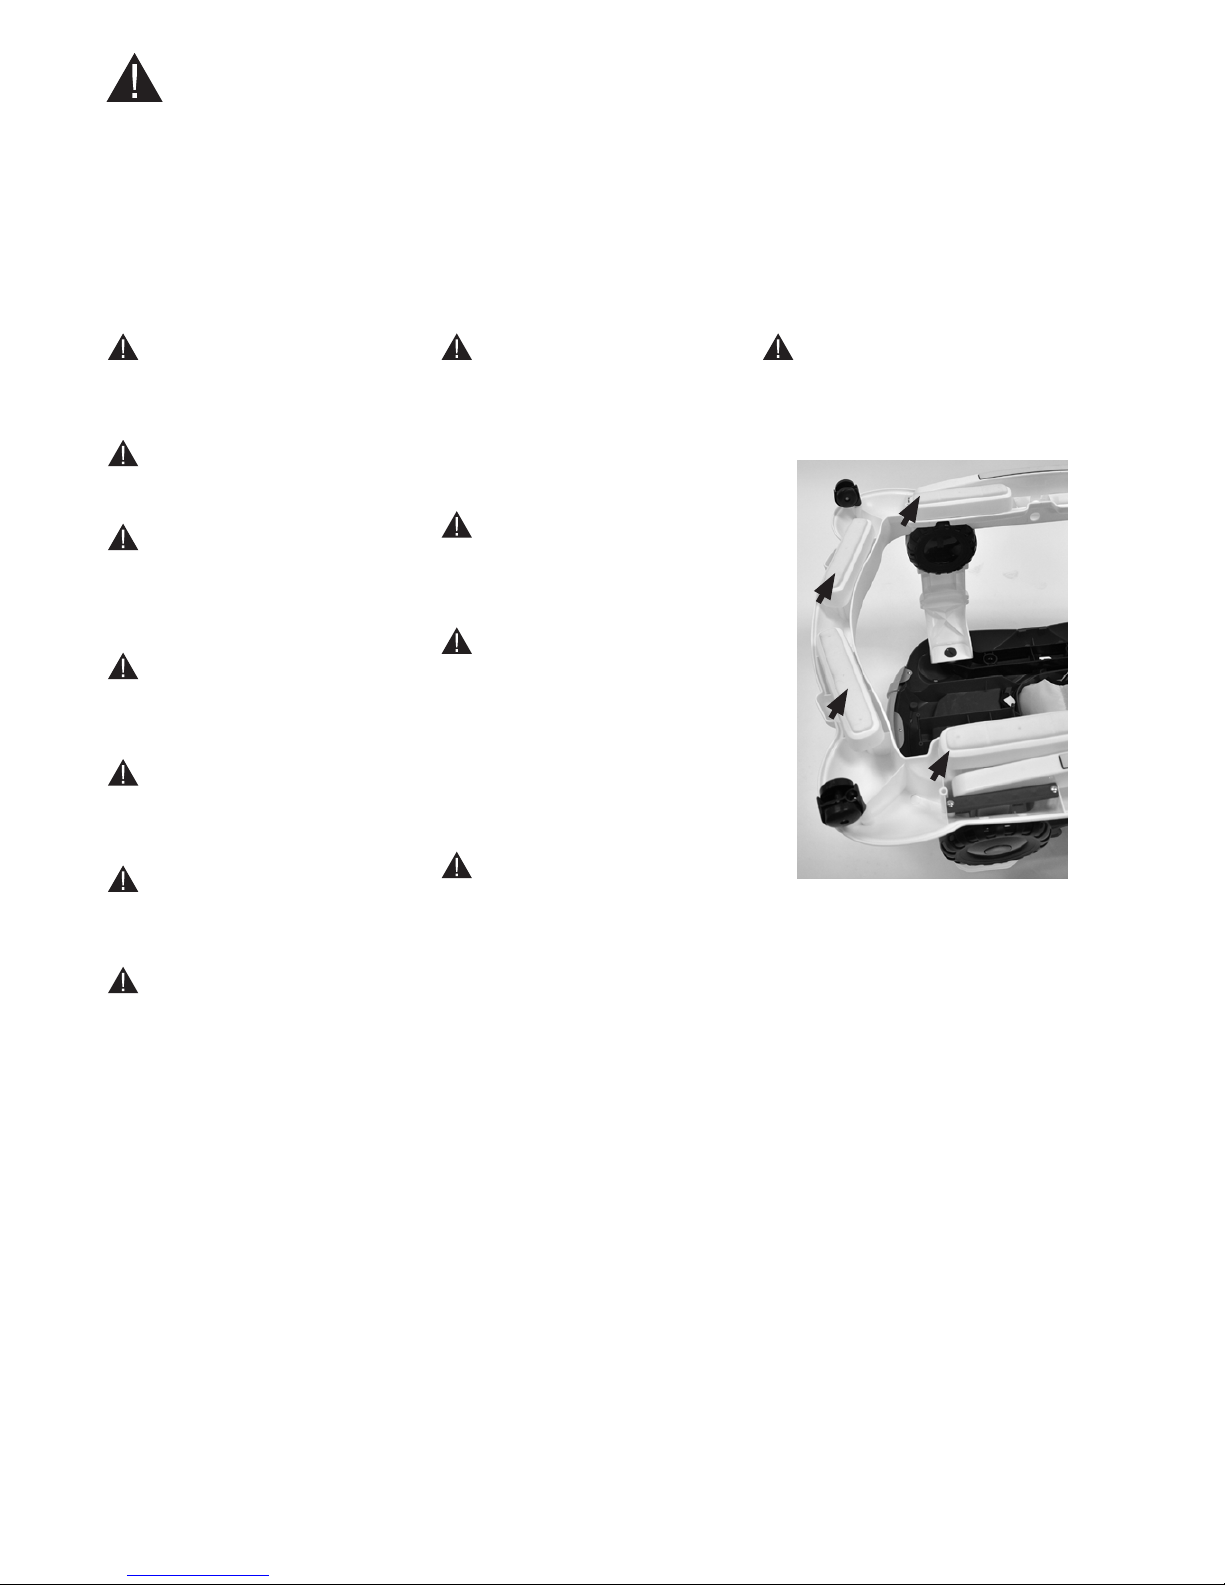
1. Place Upper Tray on a flat surface. Attach
seat back by inserting front tabs on seat
back into slots on upper tray (figure 1).
2. Lower seat back to insert rear tabs into
rear slots on upper tray (figure 2). Push
seat back down firmly to fully attach seat
back.
- 3 -
3. Loosely place seat cover over the seat
back. (figure 3)
4. Attach seat cover front by inserting the
two front tabs into the slots at the front of
the seat area. Pull from the bottom, then
flip tab over slot to secure. (figure 4)
Assembly Instructions
gure 1
gure 2
gure 3
gure 4

- 4 -
Assembly Instructions (continued)
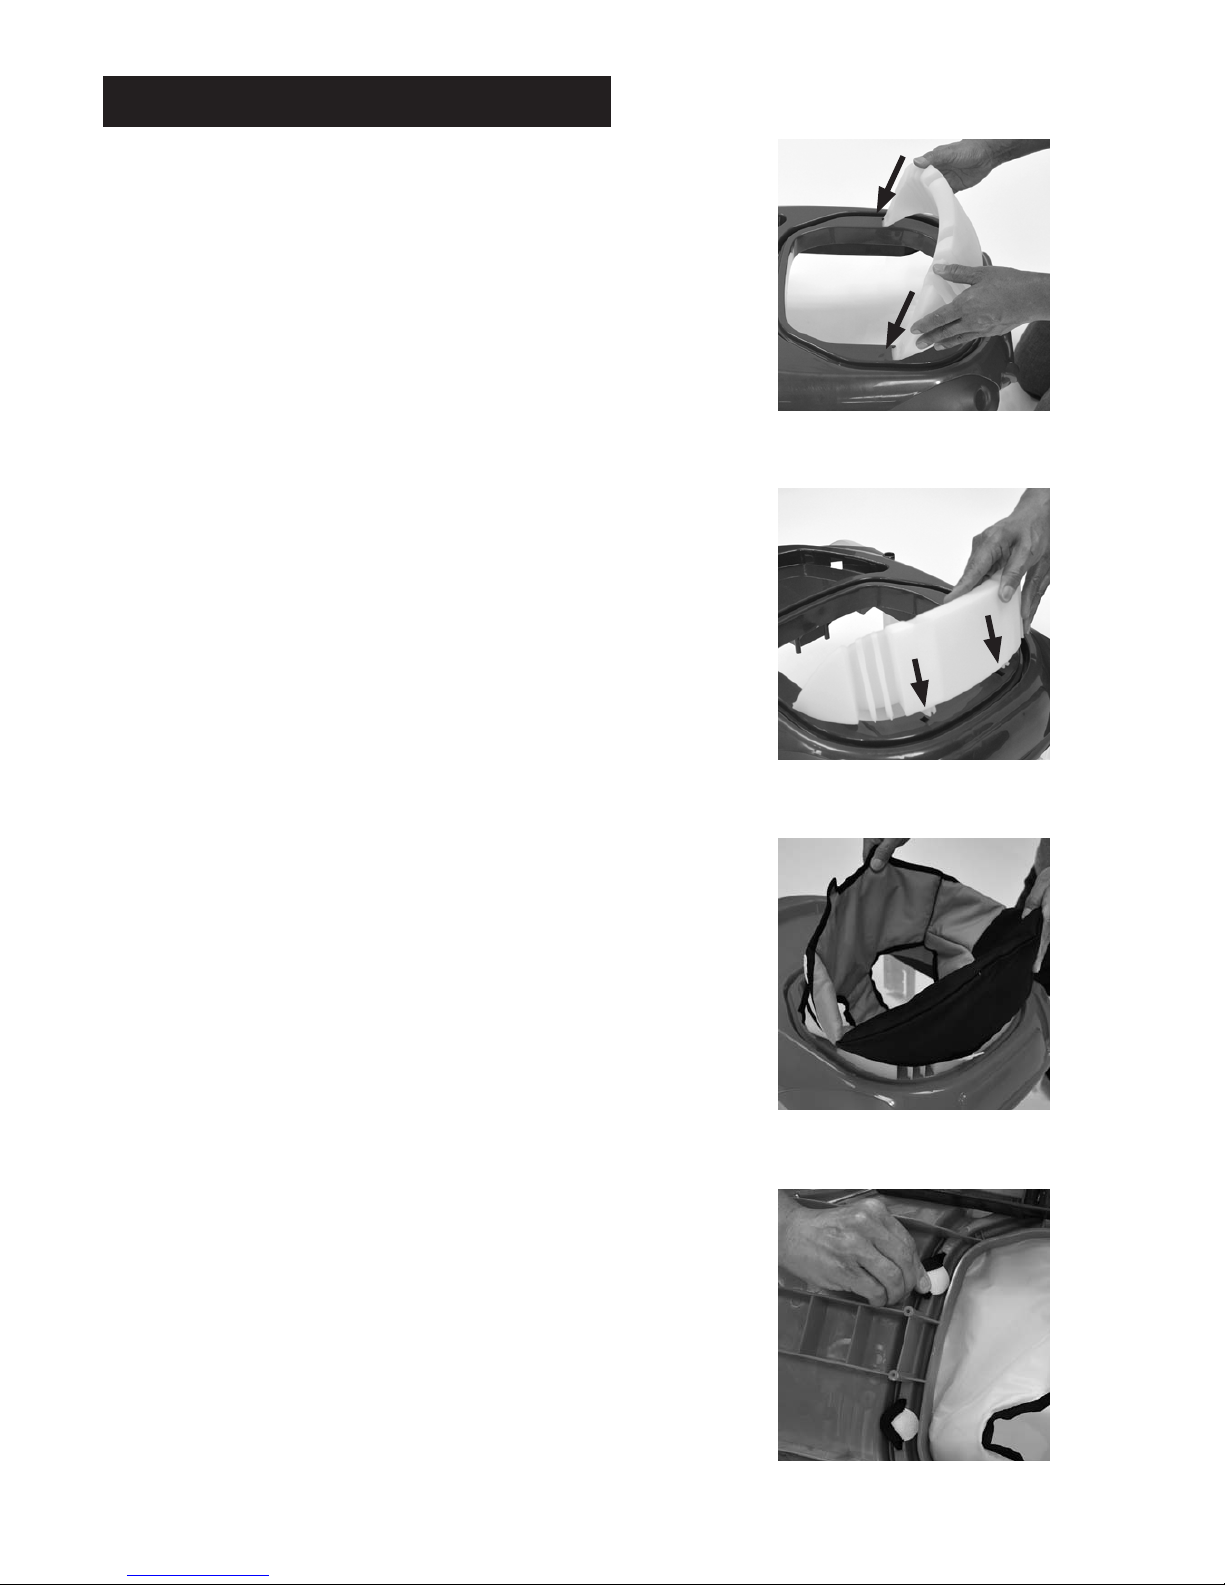
5. Attach seat cover sides by inserting each
of the six (6) attachment tabs into the
slots on the side of the seat area (figure
5). Push tab into slot, then pull from the
bottom and flip tab to secure.
6. Place upper tray assembly upside down
on a flat surface.
7. Insert round end of each leg (4) into
round hole on underside of the upper
tray (figure 6).
gure 5
gure 6
8. Insert nut onto screw attachment by hand
to attach each leg.
9. Ensure that each leg is aligned with the
side of the upper tray, then use a coin to
tighten each attachment nut (figure 7).
10. Turn assembled parts upright.
11. Place base on a flat surface with smooth
side up.
gure 7
12. Align the rear of the upper tray
assembly with the rear of the base.
IMPORTANT: The rear of the upper
tray must be aligned with the rear of
the base before attaching the two
pieces in the steps below. The rear
of the upper tray is where the seat
is located; the rear of the base has a
large round hole. (figure 8)
13. Loosely attach the upper tray
assembly to the base by inserting
the square ends of the legs into the
square holes on the sides of the
base, just over the tires. (figure 9)
gure 9gure 8
back
front

- 5 -
Assembly Instructions (continued)
14. To securely attach each leg to the base,
press the button in the center of the tire,
while pushing down firmly on the leg
(figure 10). The leg will click into position.
Repeat for all four (4) legs.
15. Turn the assembled parts over so you
can easily access the bottom of the base.
16. Attach the rear wheels into the larger
round holes by aligning the notch on the
hole with the raised bar on the wheel.
Push firmly to securely attach each rear
wheel. (figure 11)
17. Attach the front swivel wheels to the
base by pushing each firmly into the
small round holes. (figure 12)
18. Push down firmly on the walker
stabilizer to attach it to the base.
19. Turn assembled base and upper tray
upright.
gure 10
1
2
gure 11
gure 12

Assembly Instructions (continued)
20. Turn toy tray over to access bottom side.
Unscrew and remove the battery cover (figure
14). Insert two (2) "AA" batteries (figure 15).
Replace battery cover and tighten the screw to
secure the cover.
To turn toy unit on, switch the On/Off switch
to "On" (figure 16).
21. Attach toy tray to the upper tray (figure 17).
NOTE: To remove toy tray, press tabs (x2)
located under the upper tray.
22. Attach the traffic signal toy to the toy tray
(figure 18).
23. Attach each mirror to the toy tray (figure 19).
gure 14
gure 15
- 6 -
gure 16
gure 17
gure 19
gure 18

3-in-1 Activity Center
1. To engage the stabilizer pad, turn stabilizer
knob clockwise until it stops (figure 1).
2. Lift wheel stabilizer on rear wheels upward to
secure the wheels. (figure 2).
NOTE: To remove from Stationary Activity Center
stage, reverse the instructions above.
Stage 2: Rocker
Lower rocker by pressing tab at inside center of
base while pulling rocker downward (figure 3).
Repeat for other side. Ensure that the rocker is
secured in position before using.
To remove from Rocker stage, press tabs (x2)
under tires on the inside of the walker while
pushing upward on rocker (figure 4). Repeat
for other side. Ensure that the rocker is
completely stored before using in other stages.
Stage 3: Walker
To use in walker stage, ensure that the rocker is
properly stored, rear wheel stabilizer switches
are in the down position, and the stabilizer
pad is in the up position.
Stage 1: Stationary Activity Center
- 7 -
gure 1
gure 2
gure 3
gure 4

Height Adjustment
The legs can be adjusted to three different heights to
accommodate the growth of your child.
To adjust height:
1. Press the button in the center of the tire, while pushing
down firmly on the leg (figure 9). The leg will click into
position.
2. Repeat for all four (4) legs.
gure 1
1
2
MUSIC AND SOUND EFFECTS ARE NOT WORKING
- Check that the battery is in the correct position as indicated inside the unit.
- Replace with a new battery, if necessary.
Routine Maintenance
Trouble Shooting
Combi USA, Inc. • 3520 Westinghouse Blvd., Suite B • Charlotte, NC 28273 • CombiUSA.com
Customer Service 1-800-992-6624
2012-05-02
STORE IN A COOL AND DRY AREA, especially in the summer. Do not store the Rock N Roll Walker in the trunk
of a vehicle.
ALWAYS MAKE SURE FRICTION PADS ARE KEPT CLEAN , CLEAN WITH WATER ONLY.
 Loading...