

Page 1
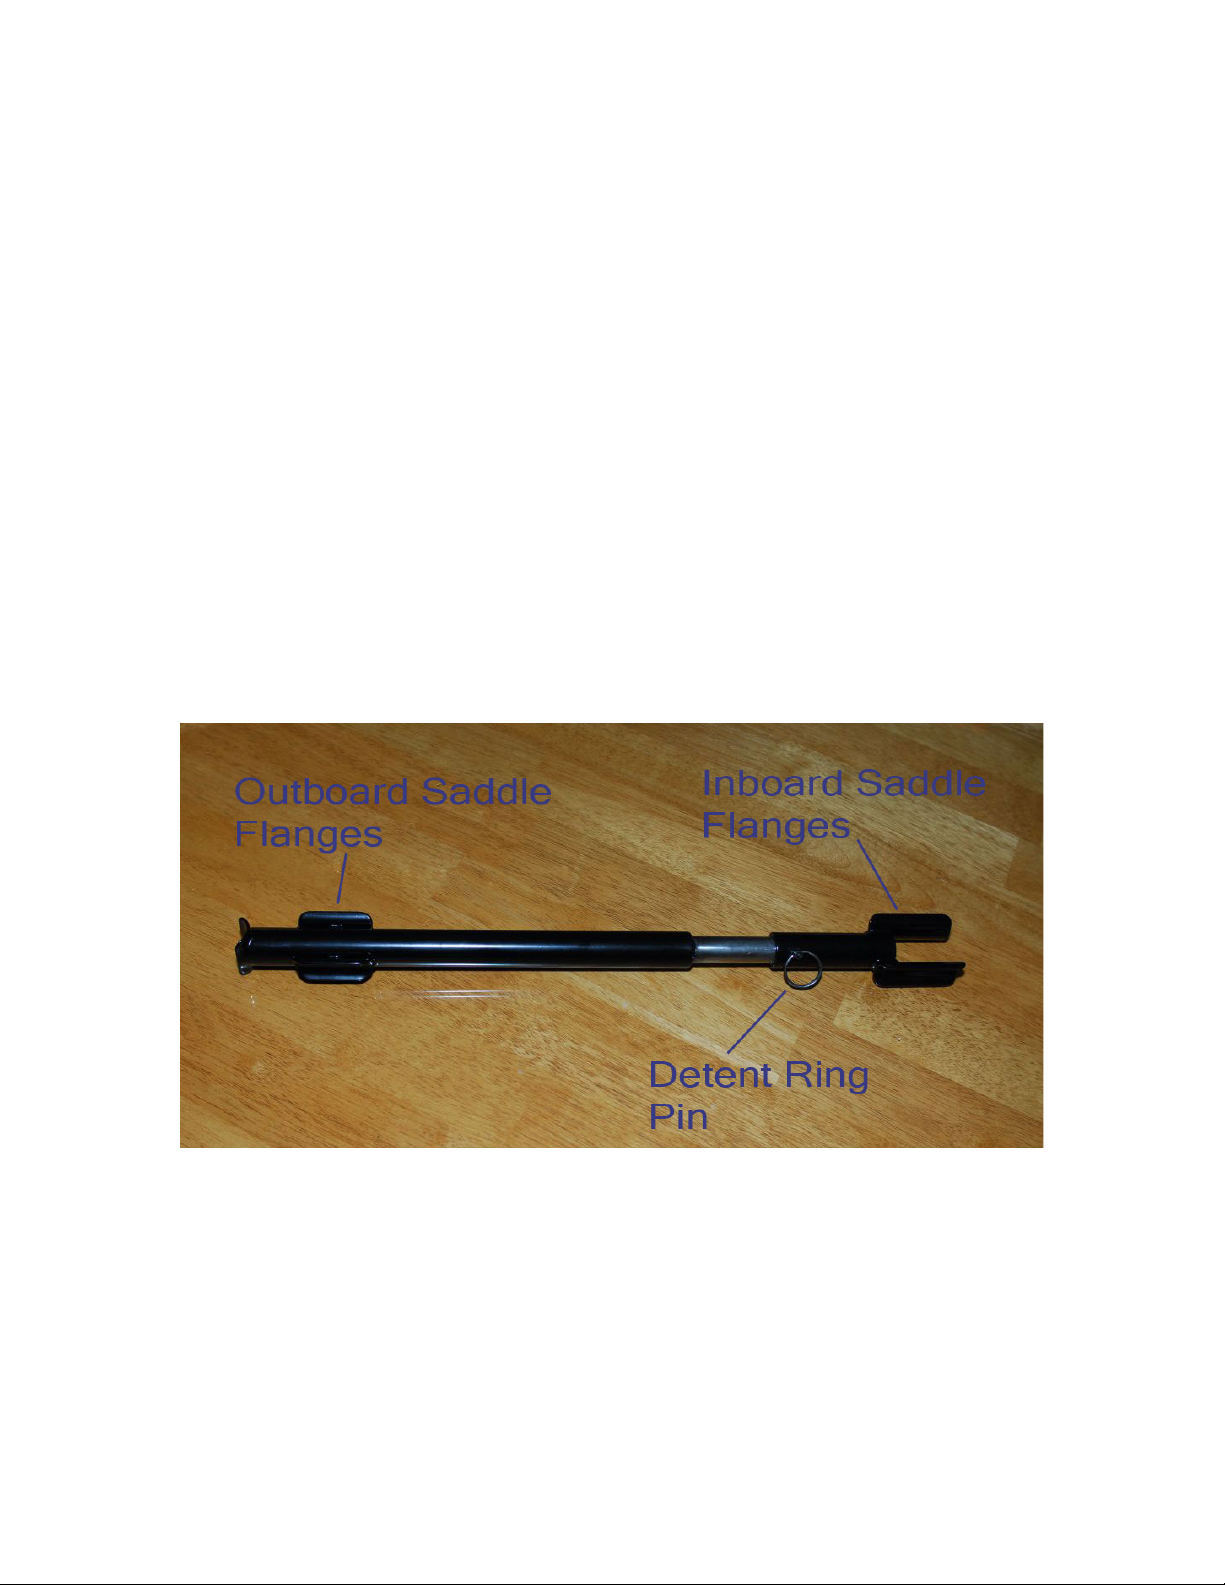
Bungee Installation Tool System (BITS) Instructions
Congratulations, you have purchased the best Comanche
bungee tool available. For those aircraft mechanics who
have struggled with earlier tools, rest assured that from now
on changing bungees is going to be easier, quicker, and
safer.
Note- when removing the old bungees it is not
recommended to cut them or to use a pry bay in order to
remove them. The easiest and safest manner to remove the
old bungees is to use the installer tool.
Installer Tool
To remove the old bungees:
1. Put the plane on jacks and secure the tail in a suitable
manner.
Page 2

2. Remove the bungee access inspection panel behind
and slightly outboard of the main landing gear wheel
well. The landing gear bungee arm, pulley, and the
inboard portion of the bungee are now in plain view.
3. Either with an assistant in the cockpit or by reaching
through the storm window raise the landing gear
slightly by putting the gear switch in the up position
and intermittently bumping the master switch. Raise
the gear just enough so that the bungee arm is lined up
with the bungee cord and bringing it to its full
extension.
4. Remove the detent ring pin on the bungee installer
tool and collapse the tool to its shortest length. Insert
the outboard end of the tool between the bungee cord
halves and push it toward the outboard pulley. The
saddle flanges will guide it toward the outboard
pulley.
5. Turn the inboard end of the tool sideways to get the
top flange to engage the top bungee half and then
rotate the lower flange in to engage the lower cord.
The tool should now be suspended between the
bungee halves.
6. Push the two parts of the installer tool apart until the
detent ring pin holes line up so you can re-insert the
detent ring pin. It may be helpful to use a number 2
Phillips screwdriver or suitably sized drift to
accomplish this.
7. Raise the landing gear the rest of the way to the full up
position.
Page 3
8. Pull the inboard part of the tool toward you. The
bungee is now engaged on the tool and free of the
inboard pulley on the landing gear bungee arm.
9. Grasp the bungee tool and the bungee and turn them
counterclockwise (as viewed from the inboard end of
the tool) until the bolt on the outboard pulley bracket
is unscrewed from the nut plate.
10. Remove the bungee tool and the bungee from the
plane.
Stretcher Tool
Replacing the bungee on the installer tool:
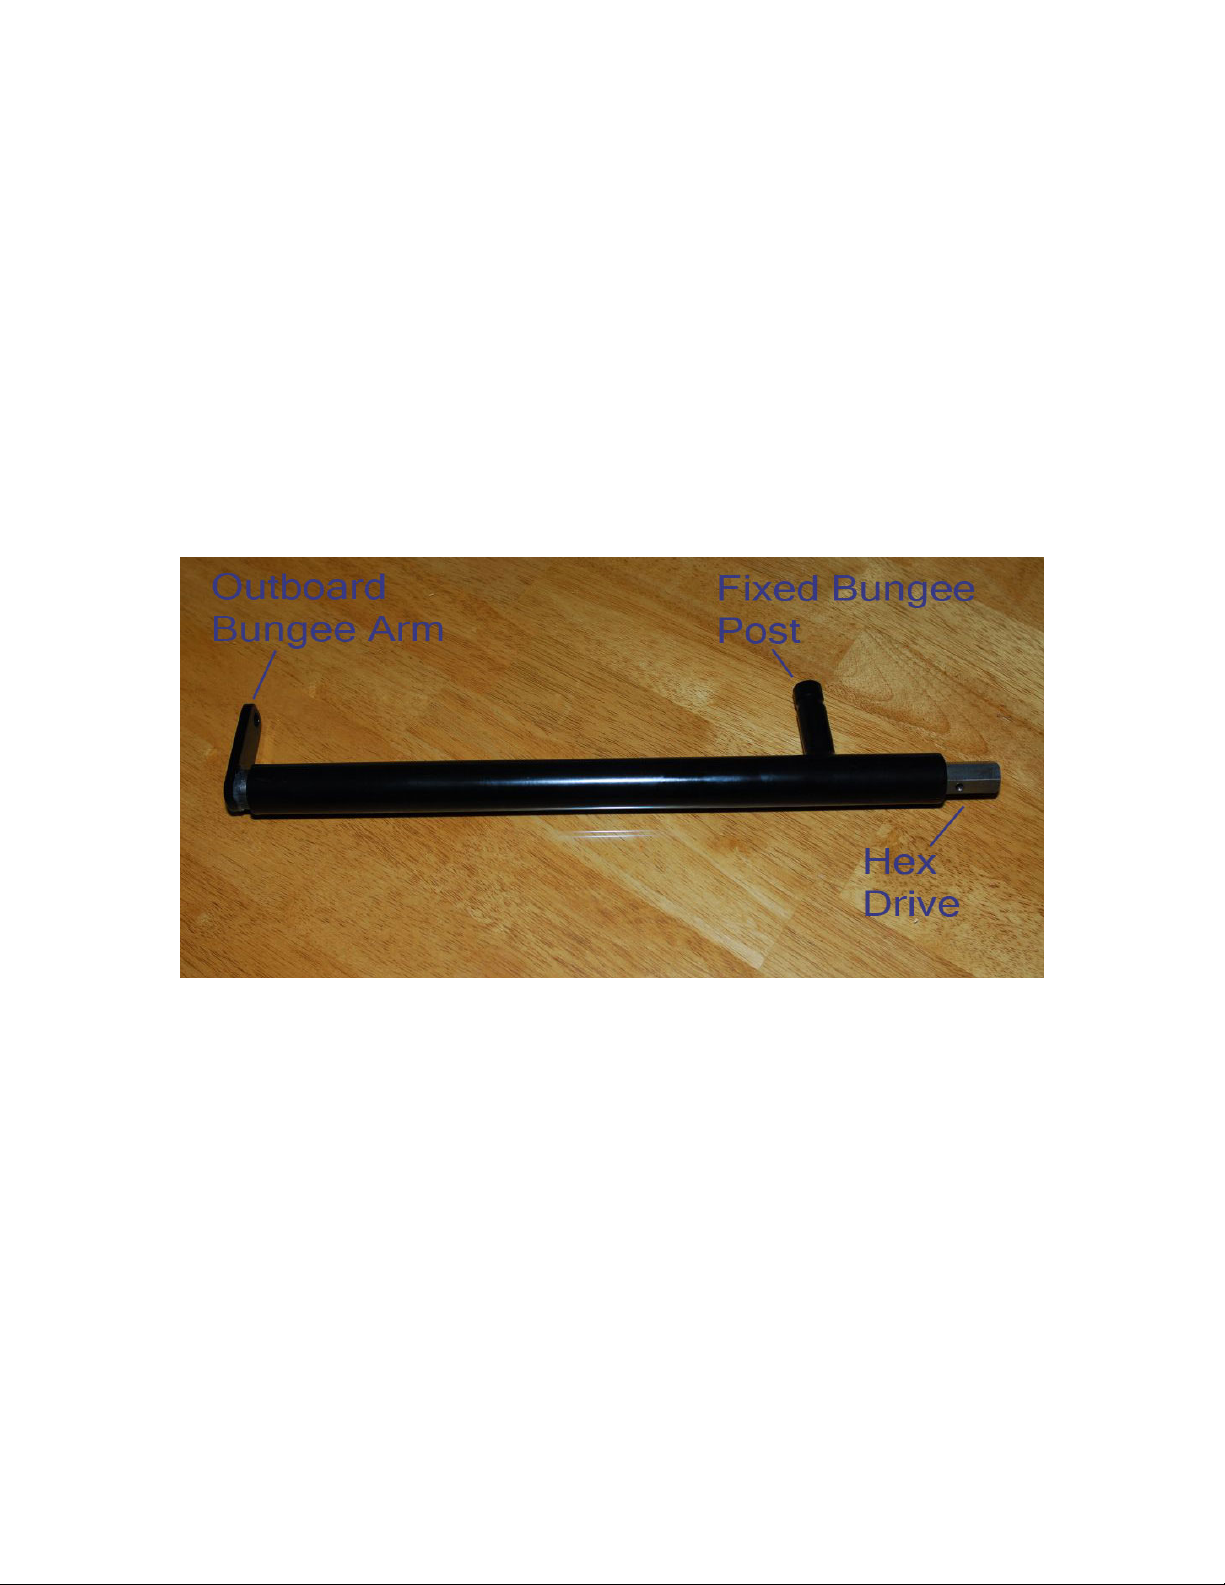
1. Place the bungee stretcher tool in a vise using the tool
holding bracket provided.
2. Insert the bolt in the outboard pulley bracket through
the 3/8” hole in the outboard tool arm and secure it
with the nut provided, screwing the nut well onto the
bolt.
Page 4

3. Place the inboard end of the bungee over the fixed
bungee post of the stretching tool, seating the bungee
into the groove on the post as you expand the stretcher
tool. See next step.
4. Using a suitable tool (a socket wrench, an electric
drill, an impact wrench with a ¾” adaptor, or an open
end/box end wrench, etc), screw the hex drive counterclockwise (as viewed from the hex nut end) until the
bungee is stretched about 1½ to 2 inches past the
inboard saddle flanges. Don’t extend the tool any
more than necessary. Now you can easily remove the
detent ring pin and collapse the installer tool. This will
make it easy to remove the tool itself from between
the bungee halves.
5. Screw the hex drive clockwise to retract the outboard
tool arm until the bungee is loose on the fixed bungee
post.
6. While leaving the pulley bracket bolted in the
outboard arm, remove the cotter key from the pulley
clevis pin and pull out the clevis pin that will free the
pulley from the bracket. Remove the old bungee cord
and replace it with a new one. Assemble the pulley
and clevis pin back into the bracket in reverse order
and insert a new cotter key into the clevis pin.
7. Place the other end of the bungee cord over the tool’s
fixed post and screw the hex drive counterclockwise
until the bungee is stretched enough to insert the
installer tool. Insert the installer tool between the
bungee cord halves in the same manner as you did in
the plane, i.e., by removing the detent ring pin,
collapsing the installer tool, and inserting it between
Page 5

the stretched bungee. Extend the installer tool to align
the ring pin holes and re-insert the ring pin.
8. Screw the hex drive clockwise to retract the outboard
arm, which will engage the bungee cord onto the
installer tool. You can now unfasten the bolt from the
outboard bungee arm. The installer tool is now
“loaded” with a new bungee and ready to install in the
wing.
Installing the New Bungee
1. Place the loaded installer tool into the bungee access
opening with the bolt pointing outboard and visually
line it up with the nut plate hole. Screw the bolt into
the nut plate as far as it will go. You may have to back
off one-quarter turn to align the bungee parallel to the
inboard pulley.
2. Place the inboard end of the installer tool over the
bungee arm pulley.
3. Slowly lower the landing gear until the landing gear
bungee arm is extended straight out and lined up with
the bungee cord itself. The bungee cord will now be
engaged on the inboard pulley.
4. Pull the detent ring pin and collapse the installer tool.
Remove the installer tool from between the bungee
halves.
5. Repeat the process on the other wing.
6. Perform a gear retraction/extension test and verify the
gear and gear indicating systems both function
normally. Be certain the landing gear is down and
locked before removing the plane from jacks.
Page 6

Experience has shown it often takes longer to remove and
replace the bungee access panels (with its 17 screws) than
to replace the bungees themselves. These two tools should
make changing the bungees on a Comanche virtually a
pleasure. There is no step in this process that will require
any real upper body strength as with some previous tools,
and safety and ease of use have been greatly improved.
These tools should save you hours of work.
Maintenance of the stretcher tool: In order to lubricate
the thrust bearing you should periodically add a drop of
lubricating oil to the hole located between the fixed bungee
post and the hex drive.
 Loading...