

Page 1
Coloronix
SCC3
Coloronix, Inc.
5461 West Jefferson Boulevard
Los Angeles, California 90016
(323) 677-4242
http://www.rgbw.com
Manual
Page 2

Coloronix, Inc.
© 2011 Coloronix, Inc. All rights reserved.
According to copyright laws, this manual may not be copied—partially, or wholly—
without the written consent of Coloronix, Inc.
Despite full effort to avoid any clerical or printing inaccuracies, Coloronix, inc. accepts
no responsibility for any such inaccuracies to be found in this manual.
Coloronix, Inc.
5461 West Jefferson Boulevard
Los Angeles, California 90016
Tech Support: (909) RGBW-555
http://www.rgbw.com
Coloronix and the Coloronix logo are brands of Coloronix, Inc.
Any non-Coloronix brands or products found in this manual are not endorsed, branded,
or recommended for use by Coloronix, Inc.; rather, they are only references for
informational purposes. Coloronix has no responsibility for these products in regards
to either performance or use.
Page 2 of 6 – Coloronix SCC3 Manual V.1.0
Page 3

FEATURES:
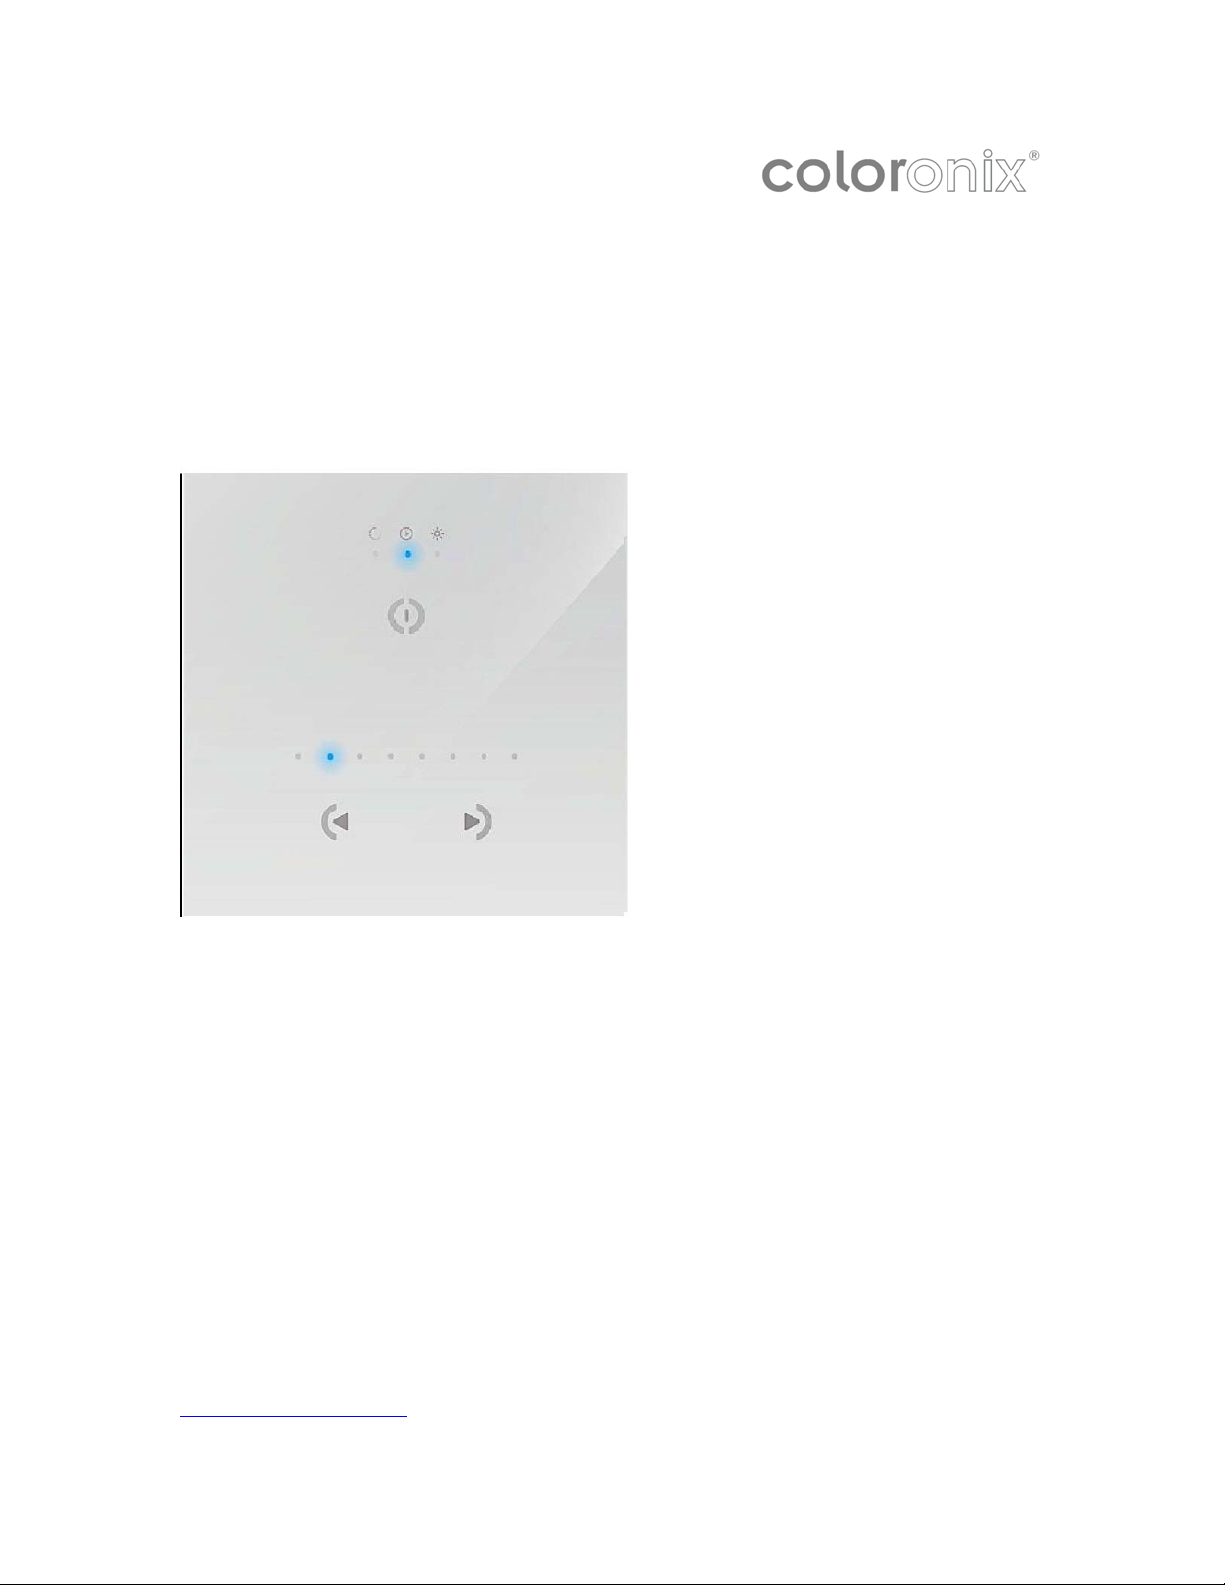
• DMX512 Stand Alone Controller with a glass face
• 3 touch sensitive buttons (on/off/mode, previous, next)
• Up to 24 dynamic or static scenes (8 first visualized by a led)
• Live setting of the intensity and color of a scene
• Programmable through the included USB cable and control software
• Compatible with any DMX fixture or DMX LED driver.
• Ready to use (pre-loaded with 8 scenes and 42 RGB fixtures)
• 32-bit ARM technology
• Wall mountable
Page 3 of 6 – Coloronix SCC3 Manual V.1.0
Page 4

SPECIFICATIONS
Package
PC Requirement
Software
Connections
Power
Certifications
Use
CHANNELS STEPS
Controller, cdrom,
usb cable,
connector block,
120VAC power
Windows
XP/VISTA/SEVEN
32/64 bits and
USB 2.0 (MAC OSx
soon)
Easy Stand Alone,
(ESA2 mac/pc
scheduled for
September 2011)
Power (2pins) DMX
(3pins) Port (2 pins)
Micro-usb
from 5.5V to 18V
DC (AC/DC
adapter included)
EC, EMC, ROHS,
ETL, UL (some are
in process)
Environment IP20
Temperature 0ºC
to 50ºC
AVAILABLE MEMORY
8 326
16 192
32 102
48 68
64 50
80 38
96 31
112 25
128 21
Page 4 of 6 – Coloronix SCC3 Manual V.1.0
Page 5

EASY INSTALLATION
1. Mount a miniature electrical box inside the wall
The SCC3 controller can be installed in a standard compact 2.36 inch electrical
backbox.
You can insert the AC/DC adapter inside or outside the backbox.
2. Connect the wires
DMX: Connect the DMX cable to the lighting receivers (Leds, Dimmers, Fixtures..)
(For XLR: 1=ground 2=dmx- 3=dmx+)
POWER: Connect the AC/DC adapter.
Make sure to not invert the + and the ground.
3. Mount the interface on the wall
First, plug the 2 connectors (green connector block)
Secondly, mount the back side of the interface on the wall with 2 or more screws
Then, close the unit by clipping the front panel onto the back plate
Page 5 of 6 – Coloronix SCC3 Manual V.1.0
Page 6

SOFTWARE
1. TOOLS.EXE to set parameters
2. EASY STAND ALONE to program the memory
Page 6 of 6 – Coloronix SCC3 Manual V.1.0
 Loading...