

Colonial Label Thermal System Manual


THE NEW STATIC CLING PLUS SYSTEM INCLUDES:
• Thermal Printer (1)
• Keypad (1)
• Ribbon (1) with Cardboard Ribbon Core
(Retain for continuous use)
(Both installed in printer)
• Power Supply & Cord
• Cleaning Pen
• Instructions
•Maintenance & Troubleshooting CD
**NEW PROGRAMMING FORMS # 1-66**
1
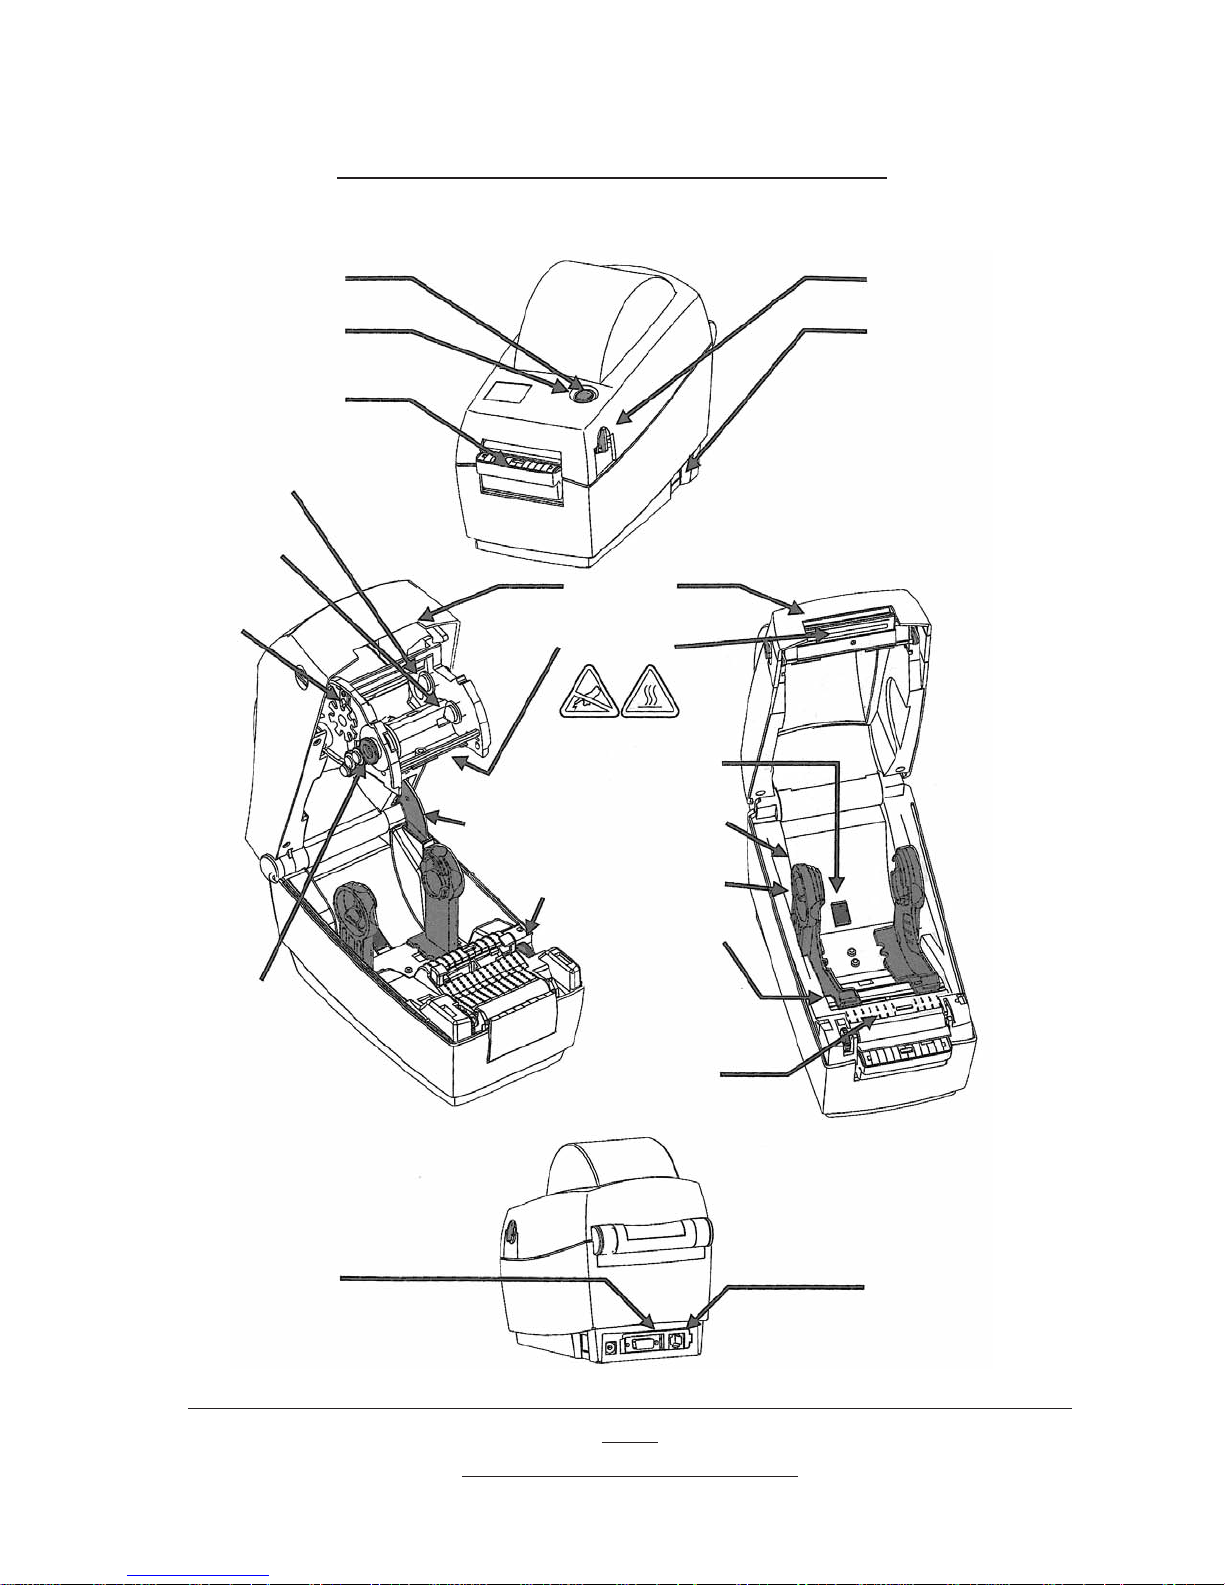
Feed
Button
Indicator
Dispenser
Door
(Optional)
Ribbon Supply
Spindle
Ribbon
Take-Up
Spindle
Ribbon
Sensor
Getting To Know Your Printer
Light
Tear Bar
Print Head
Cover
Release
Power
Switch
Ribbon
Take-Up
Gear
Connection
Power
Top Cover
Lock
Media Guide
Adjuster Knob
Holder Lock
Media Holder
Core Size
Selectors
Media Guides
(Label)
Gap Sensor
Interface
Connectors
** Always power printer off by the switch on the bottom right
2
side
NOT by unplugging it **
How to set up the new system:
1.
Plug power supply into power cord then into back of printer and into power
outlet.
2.
Plug keypad into back of printer and tighten screws securely.
3.
Power on/off switch is located on right side of printer toward the back. Green
light will appear when printer is on.
4.
Load Labels.
5.
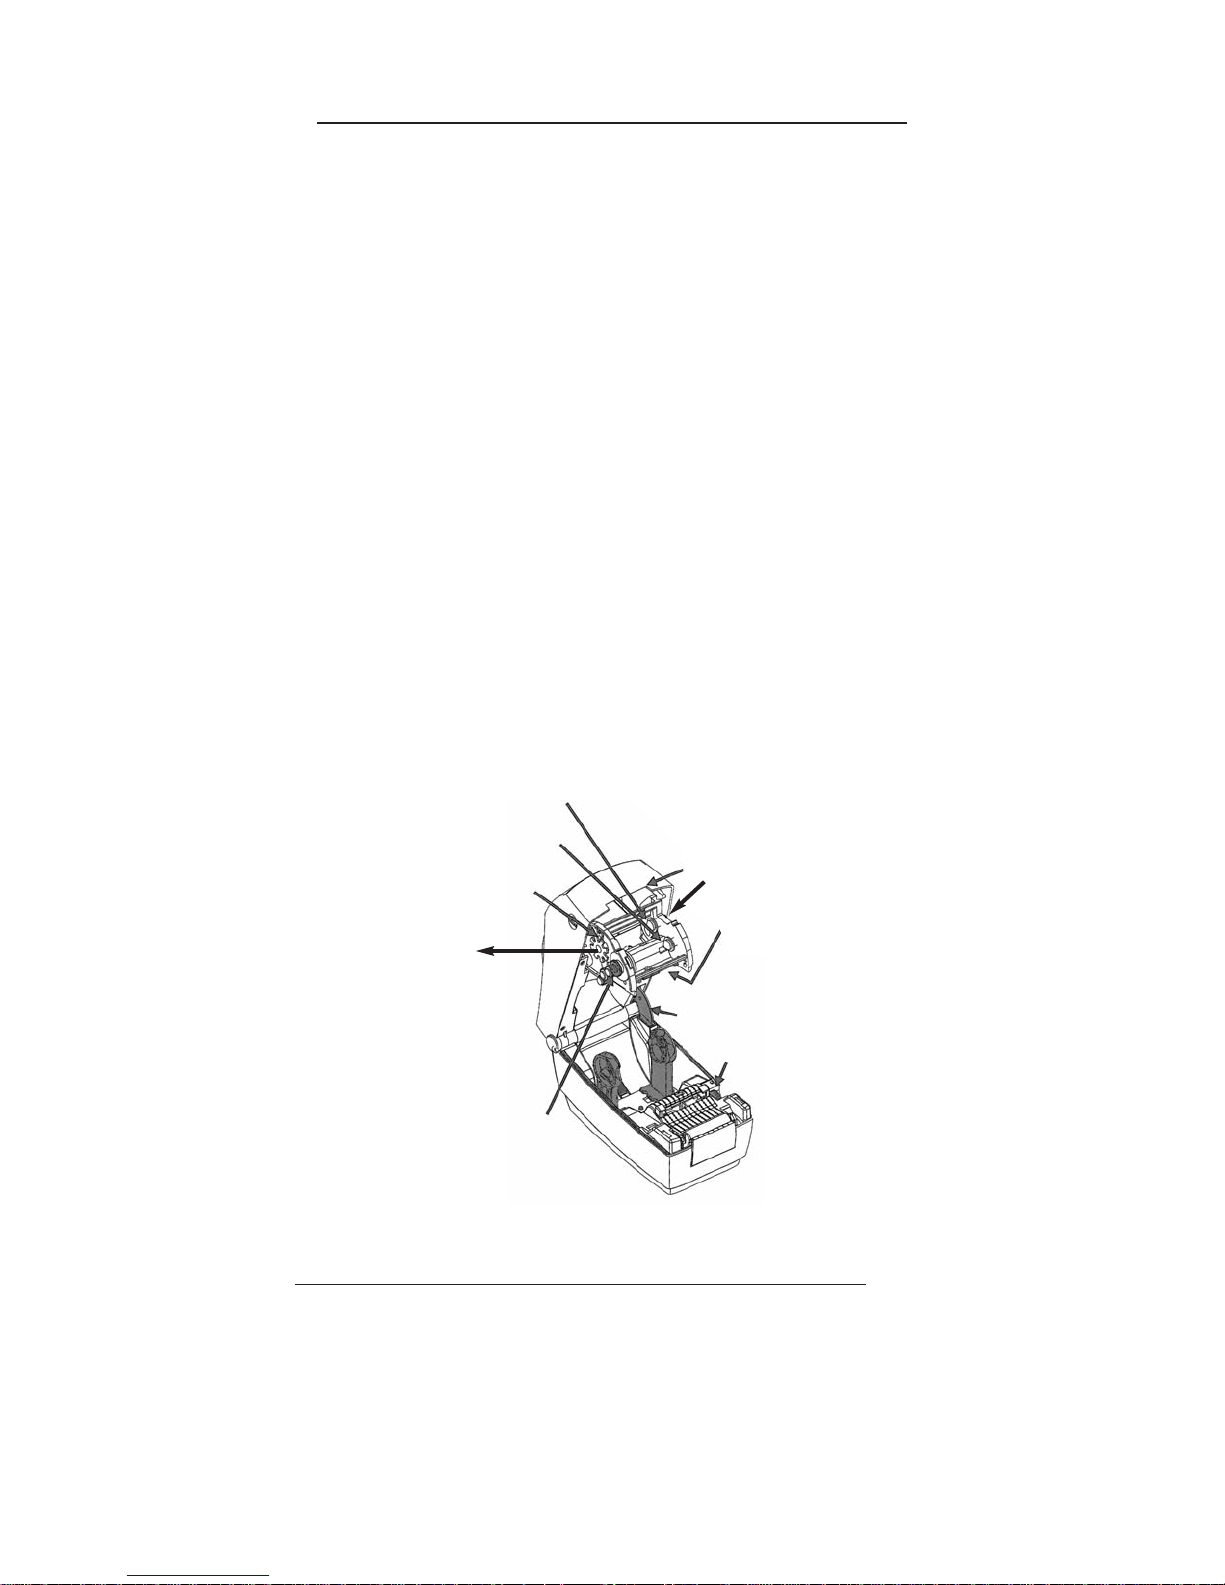
Check to make sure ribbon is in tight. It could loosen during
shipping.
One way to make sure the ribbon is in tight is to open machine and pull the ribbon
carriage down. On the left hand side there is a white wheel, put one finger on the
white wheel and one finger on the opposite side and squeeze it together as hard as
you can - close machine.
Ribbon Supply
Spindle
Ribbon
Take-Up
Spindle
Ribbon
Sensor
Opposite
Side
White
Wheel
Top Cover
Lock
Media Guide
Adjuster Knob
Ribbon
Take-Up
Gear
Power on unit (on/off) switch is located on the right side of the printer at the
6.
bottom. Never power the unit off by just unplugging it.
The green light will appear around the green feed button on the top.
Do a test print. The first one or two labels print off line. The third label should
7.
print like the sample labels you were sent.
3
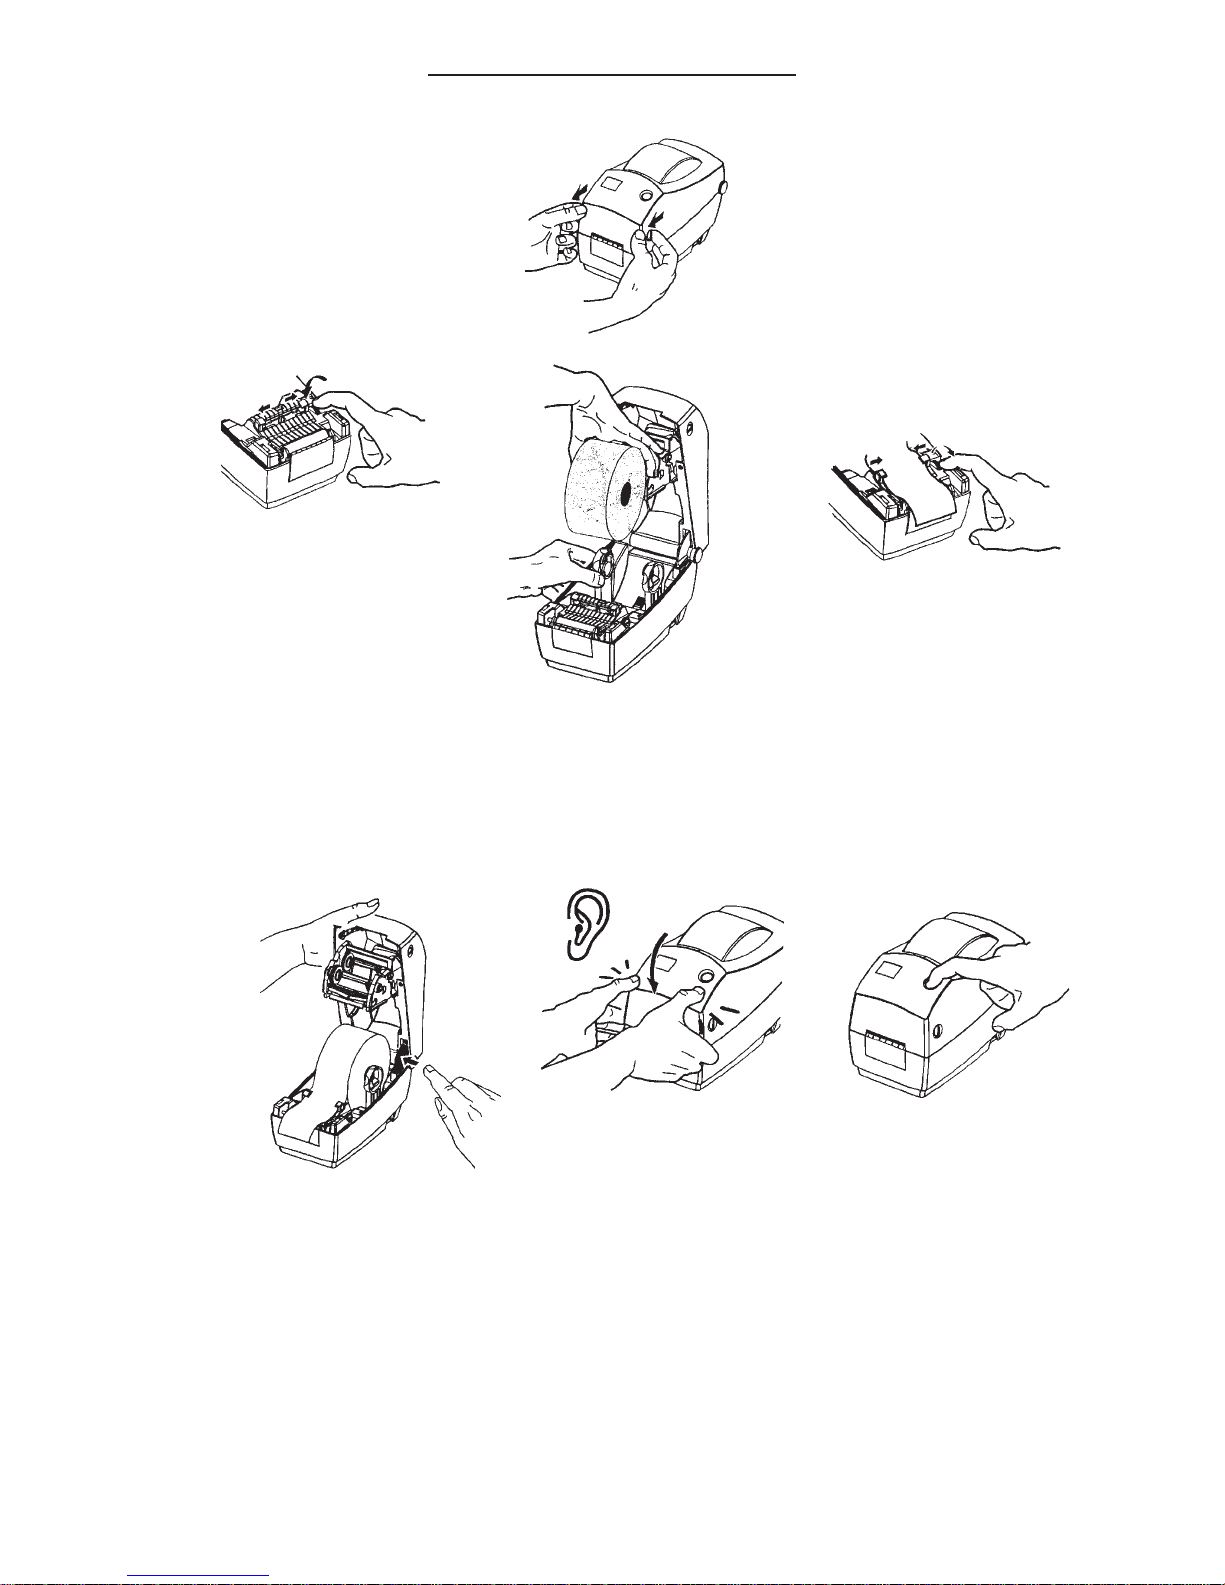
•
Open printer cover.
LOADING LABELS:
•
Load labels face up into holder and thread through the black label
guides. Adjust label guide by using the green control wheel (on
right). Do not over tighten or the labels will not feed freely and
properly.
•
Once tightened, release cover and shut. Press the feed button on
top of machine.
•
Perform the AutoSense adjustment when loading a new roll of
labels. (See next page for instructions)
4

Perform AutoSense adjustment when loading
a new roll of Labels or Ribbon
With the Power off
Hold Feed Button
And Switch
Power On.
When Indicator
Flashes Red, Release
Feed Button.
Printer Advances Labels
or Ribbon and Prints
Status Summary.
Note: Printer prints
“out of DUMP”
Power Unit Off
and Back On. Then
Press Green Button
One Time.
UKQ2933H U V4.28.19
Serial port : 96,N,8,1
\\\\\\\\\\\\\\\\\\\\\\\\\\\\\\\\\\\\\\\\\
Image buffer size : 1032K
Fmem: 000,0K,060.9K avl
Gmem:000K,0331K avl
Emem:000K,0331K avl
I8,0,001 rY JF WY
S2 D07 Ro24,000 ZT U
q1200 Q1500,036
Option:
oR0
06 10 16
now in DUMP
**NOTE: Performing AutoSense May Push Out
As Many As 20 Labels.**
5
 Loading...