

Page 1
Multi-Width Bunk Bed Assembly Instructions
Assembly instructions for Twin/Twin-XL over Full, Twin/Twin-XL over Queen and Full/Full-XL over
Queen bunk bed.
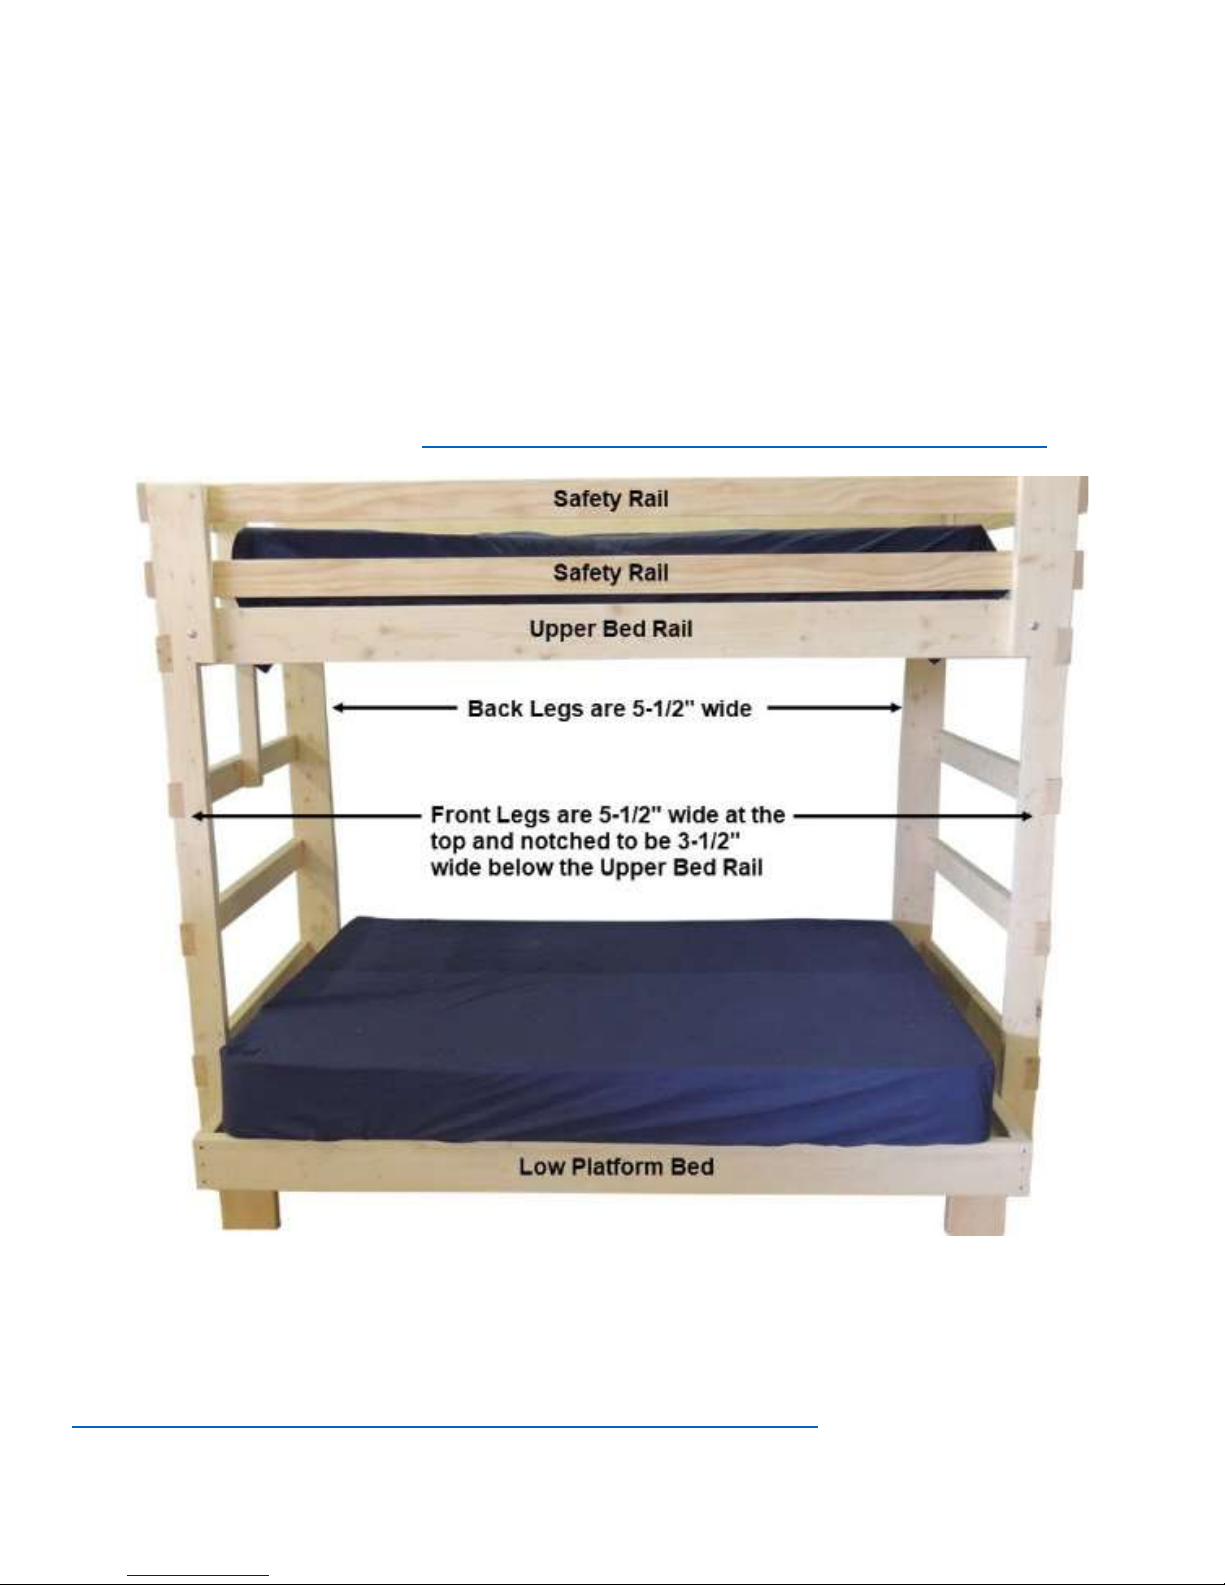
Basically the upper bunk is a Loft Bed with custom notched front legs. Follow the Loft Bed Assembly
Instructions to assemble the upper bunk. Please note the Back Legs are 5-1/2” wide. The Front
Legs are 5-1/2” wide at the top and notched to be 3-1/2” wide below the Upper Bed Rail. The
notched front legs will allow the Low Platform Bed to be placed in-between the inside of the legs.
Please make sure when assembling the upper bunk that you place the notched legs on the front.
Loft Bed Assembly Instructions: https://www.collegebedlofts.com/assembly_instructions.pdf
The bottom bunk is a Low Platform Bed. Follow the Low Platform Bed Assembly Instructions. The
Lower Bunk is a standalone bed that is not attached to the upper bunk. This allows you to be able to
pull out the lower bunk for cleaning underneath.
Low Platform Assembly Instructions:
https://www.collegebedlofts.com/bedsetup/low_platform_assembly.pdf
Page 1 of 2
Page 2
Optional Angled Front Ladder
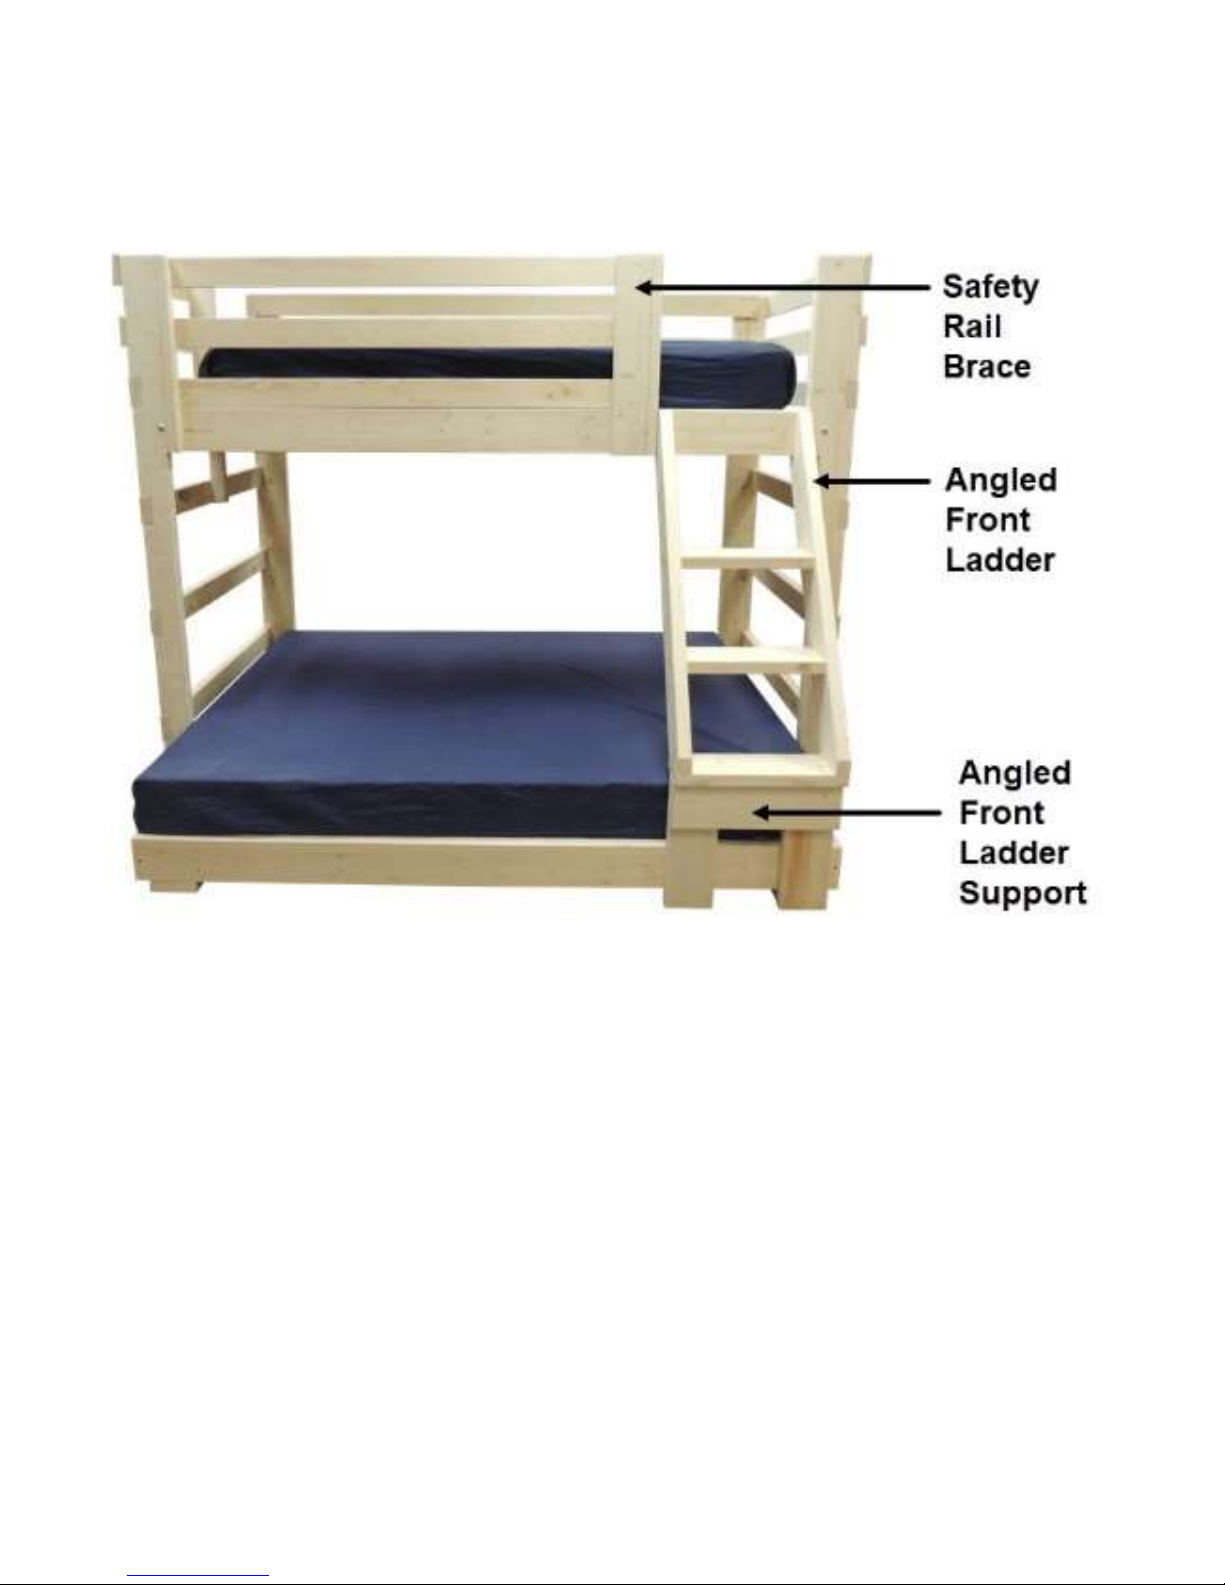
If you ordered the optional Angled Front Ladder it attached to the bottom bunk with an Angled Front
Ladder Support. It may be installed either on the left or right end.
Position the Angled Front Ladder up against the leg. The Angled Front Ladder Support attaches to
the front of the lower bed. Line up the Angled Front Ladder Support with the Angled Front Ladder.
From behind the bottom rail attach the Angled Front Ladder Support to the rail with 2-1/2” screws
through the back of the rail into the support wherever there is a pilot hole. If you installed the bed
slats you will need to remove them to be able to get to the pilot holes then re-install them.
Attach the bottom of the Angled Front Ladder with 2-1/2” screws into the Angled Front Ladder
Support into the pilot holes.
The top front rail has pilot holes drilled into the back side which allows you to install the front angled
ladder. Attach the front ladder to the loft with 2-1/2" screws from the back of the front rail into the 2x4
across the top of the ladder. Attach the Safety Rail Brace to the front rail with 2-1/2" screws from the
back side.
Page 2 of 2
 Loading...