

Manufactured by ISO 9001/
14001 certified plant.

Index
Chapter 1 Safety and Compliance 03
Chapter 2 Specification 04
Chapter 3 Print Principle 05
Chapter 4 Accessory Checklist 06
Chapter 5 Electrical Connection 07
Chapter 6 Install and Setup Repetier-Host
6.1
Install Repetier-Host
6.2
Setup Repetier-Host 09
08
Chapter 7 DIY 3D Printer Calibration and Print
7.1
Calibration
7.2
Filament Test
7.3
Print with Repetier-Host
10 -13
Chapter 8 Troubleshoot
14 -15
16 - 18
19
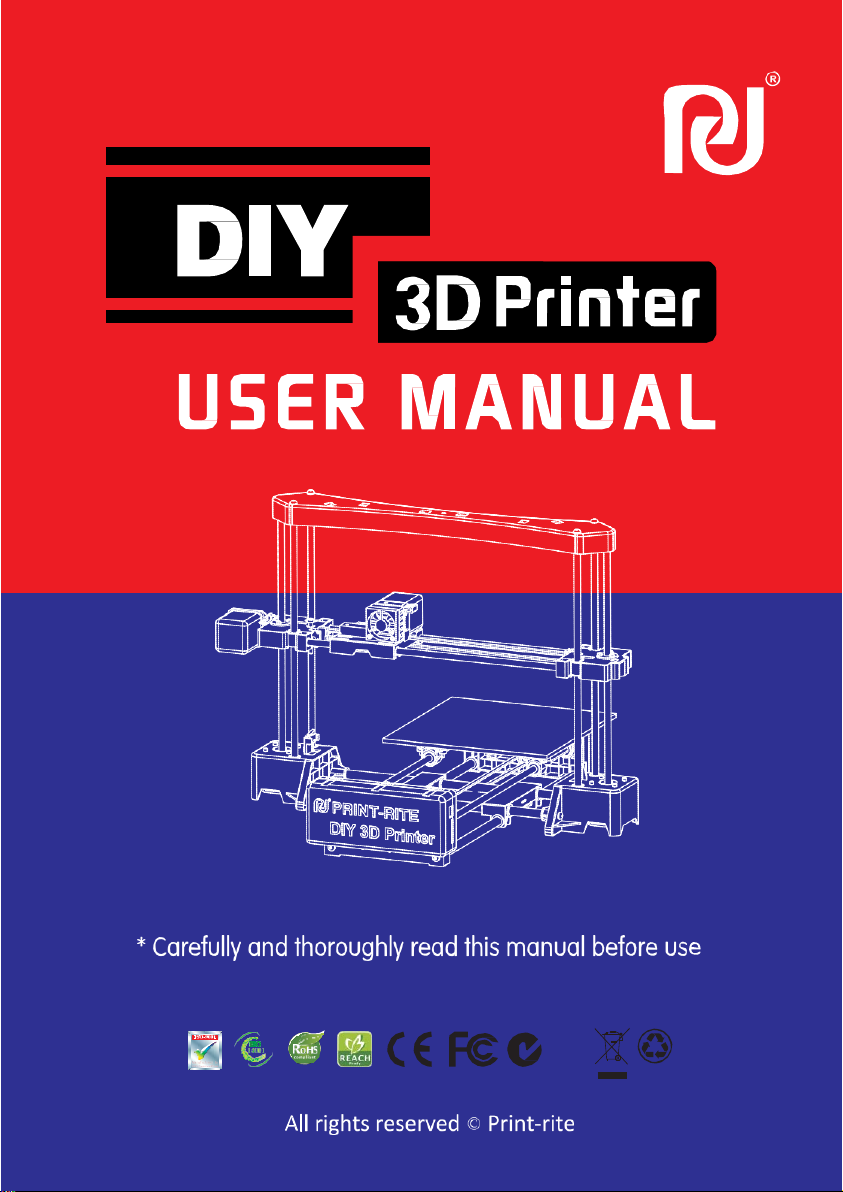
This User Manual is designed to start your journey with the DIY 3D
Printer.
Welcome to the world of DIY 3D Printing!
Following this manual will help you make amazing products.
2
Chapter 1 Safety and Compliance
In this manual, Safety Alert Symbols will be marked at the start of all safety messages. The Safety Alert Symbol means potential safety hazards, which may possibly harm you or others and potentially cause product or property loss.
Safety Alert Symbol
WARNING: HOT SURFACE - DO NOT TOUCH
Desktop 3D Printers reach high temperatures when printing.
Make sure the Desktop 3D Printer is given time to cool down before
touching printer parts.
WARNING: HAZARDOUS MOVING PARTS - KEEP FINGERS AND
OTHER BODY PARTS AWAY
The moving parts of the Desktop 3D Printer will po ssibly cause harm. Do
not touch the Desktop 3D Printer when the printer is r unni ng.
WARNING: Make sure you do not stand too close to the Desktop 3D
Printer when it is running.
CAUTION: Be careful when using unapproved m at erials, these may
damage your Printer and significantly impact on the print quality.
CAUTION: In an emergency, disconnect the power plug from the power
socket.
CAUTION: Ensure that the power socket is located n ear the Printer and
within reach in case of an emergency.
CAUTION: Place the Desktop 3D Printer in a well-ventilated area as the
melted plastic may emit plastic odor when printing.
3

Chapter 2 Specification
Printing Mechanical
Print Technology: Fused Deposition Modeling
Construction Dimension: 200 x 200 x 170mm
Layer Resolution Setting: 0.1 - 0.4mm
Positional Accuracy: XY: 0.011mm
Z: 0.00 25mm
Filament: PLA only
Filament Diameter: 1.75mm
Nozzle Diameter: 0.4mm
Frame: Steel + Engineering Plastic
Platform: Engineering Plastic
XYZ Bearing: Steel
Stepper Motors:
1.8° step angle,
1/16 micro-stepping
Electrical
Storage Temperature: 0
Operating Temperature: 15
Power: 60W
Input Voltage: 110V - 240V 50/60HZ
o
C - 32 oC [32 oF - 90 oF]
o
C - 32 oC [60 oF - 90 oF]
Dimension
Printer Size: 502 x 536 x 382MM
Package Size: 565 x 290 x 285MM
Software
Software package: REPETIER-HOST 0.95F
File Type: .STL,.GCO
Operating System: WINDOWS 7, MAC OS,
LINUX Connection: USB
4
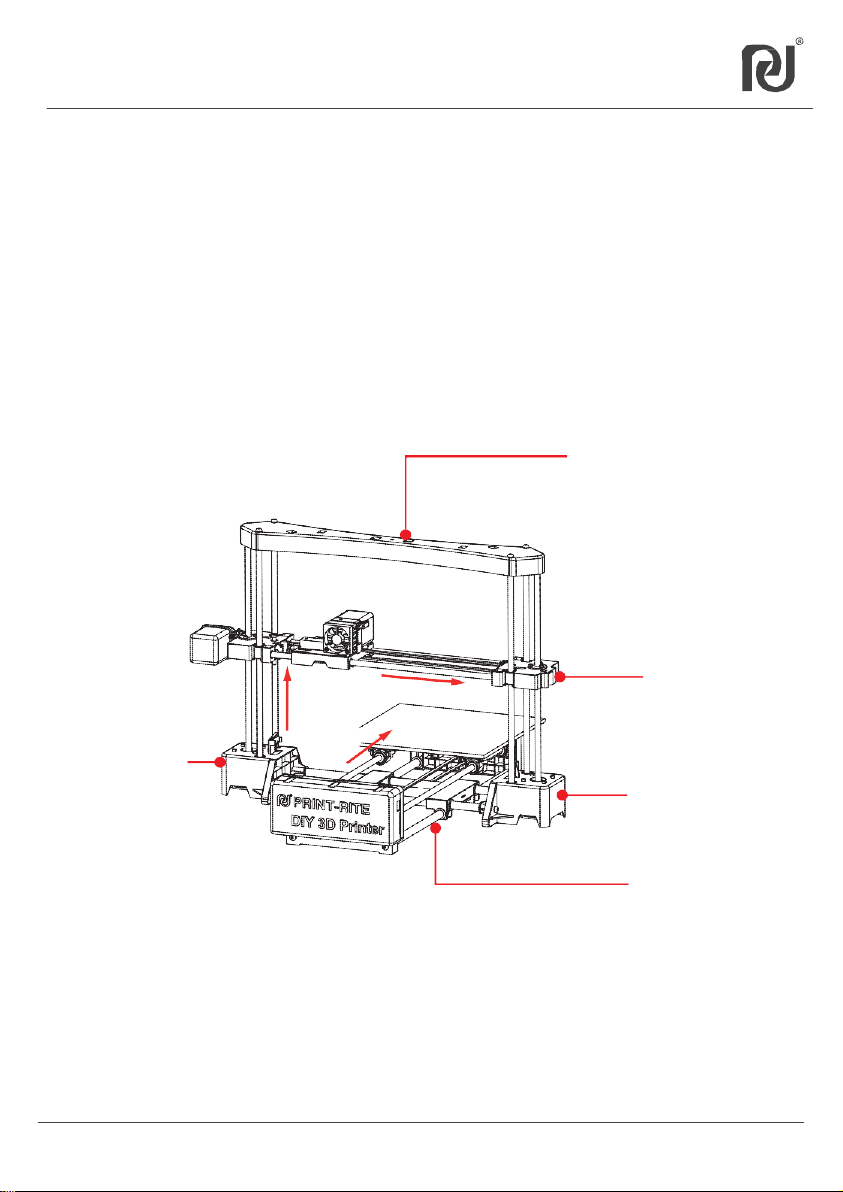
Chapter 3 Print Principle
The DIY 3D Printer makes solid, three-dimensional objects by melting PRINT-RITE PLA filament. The designed 3D files are converted into DIY 3D Printer command through computer software called “Repetier-Host” this is then sent to the printer via a USB Cable. Then, the printer will heat up and melt PRINT-RITE PLA filament and extrude it from the nozzle to make a solid object layer by layer. This method is called Fused Deposition Modeling or FDM.
Filament Insertion
Hole
Left Z Module
Z
Y
X
Back
Y Module
Left
Right Z Module
Right
Front
5
X Module

Chapter 4 Accessory Checklist
1 x 0.5kg PLA Filament
Spool Holder
Flash Drive
Power Cable
USB Cable
Screw Drivers
Test Sheet
6

using the USB cable.
Power
Connection
USB
Connection
Chapter 5 Electrical Connection
5.1 Connect the wires to the Mainboard as show below.
(Each wire is uniquely labelled)
3 4 5 6 7 8
2
1
1. X-MOTOR
2. Y-MOTOR
3.
Z-MOTOR
4. E-MOTOR
3R. connect to Z-Motor
3L. connect to Z-Motor
2A connect to Y-Motor
5.2
DIY Printer is now ready.
Connect the printer using the power cable. Connect the printer to the computer
5.
6.
7.
8.
12
FAN
XSTOP
YSTOP
ZSTOP
9.
10.
11.
12.
NOTE: Make sure the
USB Cable Port
ETEMP
HOTEND
POWER INPUT
Z Limit Switch
Z Limit Switch on
the Left Z Module
is assembled.
7
11 10
2A
3L
Reminder during Electrical Connection
1. Connect the wire to the mainboard base
using the label on each wire.
2. Do not connect to the power supply
during electrical set up.
3. Harness the wire cable after connection.
Avoid wire entangelement as this can
cause a connection problem.
9
3R

1 2
3
4
Chapter 6 Install and Setup REPETIER-HOST Software
6.1 Install REPETIER-HOST
REPETIER-HOST is a software which is used to slice the 3D
models (.GCO .STL) and commands the DIY Printer to print.
Computer Operation System:WINDOWS 7, MAC OS, LINUX
Find“setup-RepetierHost_0_95F.exe”in t he Fl ash Drive provided and double click
to start the set-up. You can also download the software from below link.
http://3dclub.przhfanling.com/file/setupPrint-Rite-RepetierHost_0_95F.zip
Start to install the software. (The computer will a sk “Do you want to allow the
following program to make changes to this compute r?”,please click “Yes” to continue
with the software installation.
Repetier-Host is now installed on the computer. See below. Tick “Install driver”
and “Launch Print-Rite Repetier-Host” and then click “Finish” to continue.
The driver is now installed on the computer, click “Fi nish”.
8

-20
200
170
20
15
Printer Settings
4
1
2
3
6.2 Setup REPETIER-HOST
Double click ,to go into "Repetier-Host”software
”
Click "Printer Settings
Set printer settings as below, select the corresponding port (COMx),
Baud rate:115200. Click “Refresh the port” and then select the correct COMx.
NOTE: COMx depends on the
computer or 3D printer you are using.
Also, the COMx can be seen and
matched with COMx in Device
Manager as below when the computer
connects to the printer.
Click “Printer Shape” and set the parameters as shown below. Click “Apply” and then “OK”. Repetier-Host Setup is now complete.
-15
200
200
200
9

Test S
heet
Test S
heet
Chapter 7 DIY 3D Printer Calibration and Print
7.1 Calibration
The printer head and the platform calibration is very important. Incorrect calibration will
severely impact on the printing qua l ity.
7.1.1 “Manual Control”introduction
The DIY Printer calibration and pr inting is controlled by the “Manual Control” menu.
X/Y/Z moving direction
X/Y/Z Home
Printer Head moving rate
Filament flowing rate
Z Home
Returns to initial
position.
Lock/Unlock Motor
Filament flow rate
Filament Retract
7.1.2 Turn off the printer. Rotate the two Z screw rods at the same time until the distance
between the Y Module and Z Module is equal to the test sheet width. This is to ensure the Y
module is level.
Left Y Base
Right Y Base
Nozzle, Platform and Fan
status
Cancel print queue
10

7.1
Calibration
7.1.3 Move the platform away from the nozzle tip before calibration. This is to avoid a ny nozzle
and platform damage.
7.1.4 Turn ON the printer. Click “Connect” to have DIY 3D printer connect to the computer.
7.1.5 Click “Z HOME”in “Manual Control” m enu to go to Z Home position.
11

Z Limit
Switch
Z Limit
Screw
7.1 Calibration
7.1.6 Use the test sheet to check the gap between the nozzle tip and the platform. They
must meet the “Calibration Standard Conditions” as shown below.
Calibration Standard Condition:
The test sheet must be laying
completely flat on the platform,
and the test sheet must be just
touching the nozzle tip.
If the calibration standard condition is not met, the platform level must be adjusted
by adjusting the Z Limit Screw.
Condition 1: There is a gap between the noz zle tip and the test sheet
Adjustment 1: Rotate the Z Limit Screw anti-clockwise by using a screw driver
to move the Z Limit Screw a little closer to the Z Limit Switch as shown
below. Click “Z HOME” to check the calibration condition until the nozzle tip
touches the test sheet.
Test Sheet
Platform
c
Nozzle Tip
12

.
Z Limit
Switch
Z Limit
Screw
7.1 Calibration
Condition 2: The test sheet is over the nozzle tip.
Adjustment 2: Click “+Z” to move up th e nozzle approximately 5mm, rotate the Z Limit
Screw in a clockwise direction using the screwdriver to move the Z Limit Screw
closer to the Z Limit Switch as sho wn bel ow.
Click “Z HOME” to check the calibration condition until the nozzle tip just touches
the test sheet.
555
13

7.2
Filament Test
7.2.1 Load Filament
7.2.1.1 Cut the filament tip using sc issors, Ensure that the end of the filament is flat.
7.2.1.2 Push down the Printer Hea d arm. Insert the filament into the hole located on the top
of the the Printer Head. Push the fil am ent until the tip of the filament is inserted into the
nozzle receiving port. Then release the Printer Head arm.
Printer Head arm
Receiving Port
7.2.2 Filament Test
7.2.2.1 Click “Heat Extrude” to heat up the nozzle to the setting temperature. Once the actual
temperature reaches the setting temperature, click “
”
to extrude the melted filament.
Note: Setup the nozzle setting temperature
base on the filament material you
are using (190 - 210 ℃ for PLA) .
Nozzle Actual Temp
Nozzle Setting Temp
14

Good
Bad
7.2 Filament Test
7.2.2.2 Check the melted filament condition flowing out from t he nozzle.
Good condition:
The melted filament flows out smoothly and continuously from the nozzle.
Bad condition:
The melted filament does not flow out smoothly and continuously from the nozzle.
Note: If the flow of filament is not constant,
check the following.
a. Nozzle Temperature - must be equal to the setting
temperature and according to the filament
material melting temperature.
b. Nozzle Cleanliness - No Clogging
c. Filament Insertion on the receiving port
7.3 Print with Repetier-Host
7.3.1 Click “Load” to select the fi le that you want to print.
Note: The load file should be .STL format. If want to load .GCO file, the .GCO file should be converted from .STL file firstly through following steps, then refer to 7.3.6 to print.
15

“
Click "
" of Bed Temperature “First layer” and “Other layer” and change to “0”.
0 0
c. Click “
”
to save the file and amend the settings name if desired.
0
0
DIY PLA
7.3 Print with Repetier-Host
7.3.2 Setup the platform temperature to “0”.
a.
Click “Configure” to go into “Slic3r” menu.
b.
Click “Filament Settings”, select “printrite PLA”and “Filament”.
7.3.3 Setup the platfom printing size.
Click “Printer Settings” and “General”, revise the “Size”and “Printer Center”as below.
Click " ”to save and name the printer setting.
16

7.3 Print with Repetier-Host
7.3.4 Select “Print Setting”base on the model/effect you want to print, Select “Printer
Settings”and “Filament settings”, then select “Slice with Slic3r” to generate the G-code file.
Print Settings: Select the model that you want to print
Printer Settings: Select “printrite PLA DIY”
Filament settings: Select “DIY PLA”
7.3.5 Click “Run Job”, to start the pr int.
NOTE: Once the nozzle actual temperature reaches the setting temperature, the
printer will start to print.
Slice to generate G-code
Estimated filament usage
17
Estimated filament usage
Estimated printing time

7.3 Print with Repetier-Host
7.3.6 If want to save the file directly after slicing and generating the G-code file (7.3.4), click
“Save Job” to save the G-code file on to the computer. Then refer to 6.3.1 to load the GCO
file and directly click “Run Job” to print .
7.3.7
Additional Information
1. Printed objects must be closed drawings based on the FDM process.
After loading the STL file in Repetier software. It can be moving, scaled down/up, rotated or duplicated.
By clicking “Put Down”, you can place the model on the platform by cl icking “Put In Center”. The m odel
will be placed in the middle of the printing area as shown below. Then slice the revised STL file to print.
2. For 3D printing with the FDM process, we suggest printing the model with OA structure. If
printing the model with OB or OC structure (called Suspended Printing), the parallel or downward layers
will fall down on the model or on the platform due to the lack of supporting layers. You will need to add
support where needed.
18
Remark:
OA– the structure is upward to stretch
OB– the structure is parallel to stretch
OC– the structure is downward to stretch

1.
2.
3.
1.
2.
Chapter 8 Troubleshoot
Question
The filament does not flow
out smoothly or continuously?
What to do when the nozzle
is clogged?
The printed object does not
stick on the platform?
The filament cannot be
pulled out from the printer
head?
The printer does not work after
sending a file to the printer?
The computer cannot
connect to the printer
although Repetier software is
installed?
Need stop during printing ,
what to do?
How long and how much
filament will it take to
print one sample?
The printed sample stick to
the platform and cannot be
removed?
Check if the filament is loaded into the print head properly.
Check if the filament roll can rotate continuously
Check if the nozzle temperature is reaching the correct setting temperature.
1. Heating up the nozzle to the higher temperature (over 20
2. Push down the printer head arm and gently push the thinnest Alan Key into the print
head. This should remove any blockage. Try to re-load filament.
1. Re-calibrate the printer.
2. Check if the temperature setting is correct and matches the filament material you are
using.
3. Check if there is any dust or oil on the heat table. If so, remove with a soft cloth. DO
NOT wash the table.
Check if the nozzle temperature reaches the setting temperature;
When the nozzle temperature reaches the setting temperature, push down the
printer head arm and push a bit filament into the nozzle, then pull the filament out.
.
1. Check the connection between the printer and the computer.
2. Check if there are files in the print queue. Click “OK” in the manual control menu to
cancel the print queue.
3. Power OFF the printer and Power ON to re-start.
1. Check if the printer is connected to the computer with the USB cable and turned on.
2. Check if the selection of COM port in the printer setting is right by referring to 6.2
3. Un-install the Repetier software and re-install.
1. If you need to pause printing temporarily, click “Pause Job” in the Repetier software
2. If need stop printing, click “Kill Job”in the Repetier software.
The filament usage and printing time is based on the sample size and simple/complex
shape, the filling density (the higher the filling density, the more filament usage and lower
printing time), the printing setting (Best, Standard, Draft in Print Rite Repetier).
Refer to 7.3.5, after selected the printing setting to slice, the software will show the estimated
filament usage and printing time.
Using a thin metal sheet to remove the printed sample from the platform carefully.
If you need more assistance, please feel free to contact us:
Email: 3Dsupport@utec.com.mo
DIY
Printer
19
Solution
℃
than setting temperature).
 Loading...