

Cole-Parmer LT-4502.C, LT-363, LT-6002.C, LT-4502.N, LT-4502 Data Sheet
...
Start up Guide
LA and LT
Balance Series

1. CONTENT
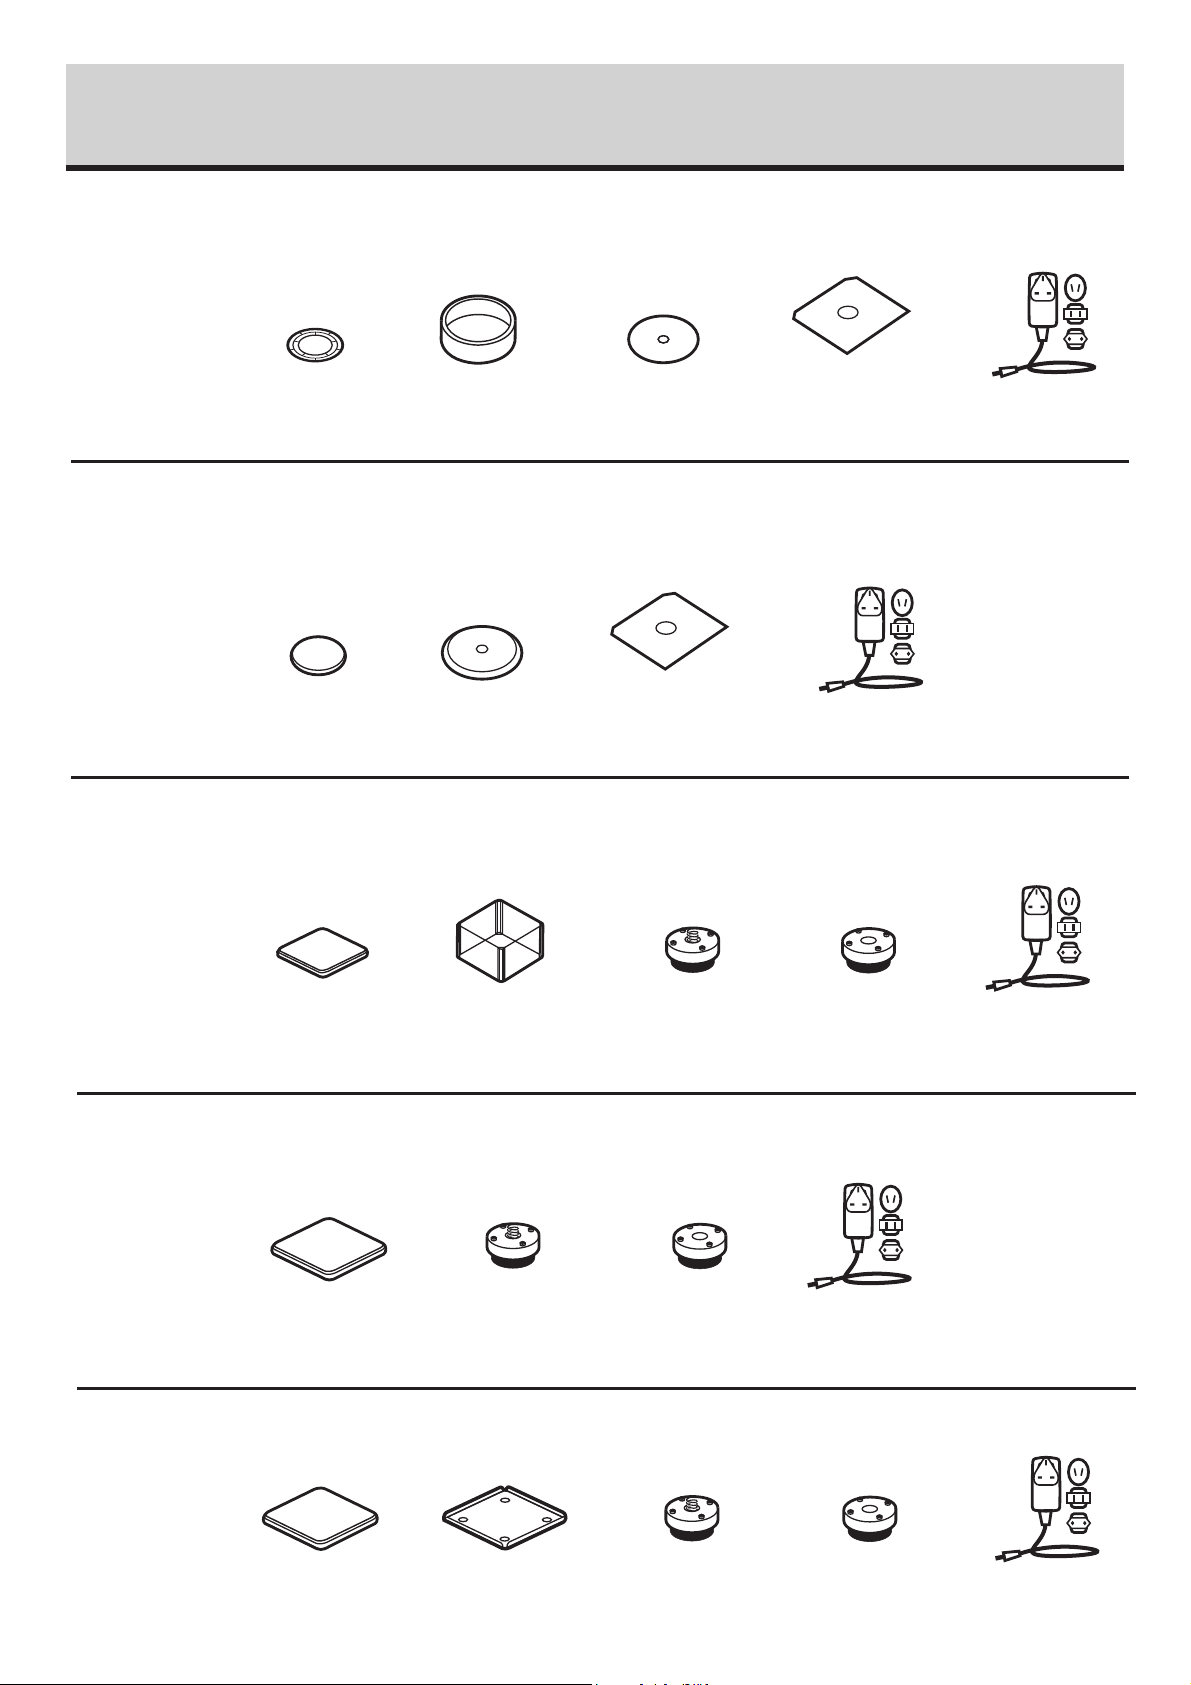
Models: LA-225.C
Balance
x 1
Models: LA-164.C | LA-224.C | LA-314.C | LA-64 | LA-164 | LA-224 | LA-314 | LA-224.N | LA-314.N
Balance
x 1
Models: LT-363.C | LT-603.C | LT-363 | LT-603 | LT-363.N | LT-1003.N
Weighing pan
x 1
Weighing pan
x 1
Draft shield
x 1
Draft shield
x 1
Centring ring
x 1
Bottom insert
x 1
Bottom insert
x 1
Power adapter
x 1
Power adapter
x 1
Balance
x 1
Models: LT-1202.C | LT-2102.C | LT-4502.C | LT-1202 | LT-2102 | LT-4502 | LT-2102.N | LT-4502.N
Balance
x 1
Models: LT-6002.C | LT-6002
Balance
x 1
Weighing pan
x 1
Weighing pan
x 1
Weighing pan
x 1
Draft shield
x 1
Grounding foot
x 1
Draft shield
x 1
Grounding foot
x 1
Foot
x 3
Grounding foot
x 1
Foot
x 3
Power adapter
x 1
Foot
x 1
Power adapter
x 1
Power adapter
x 1
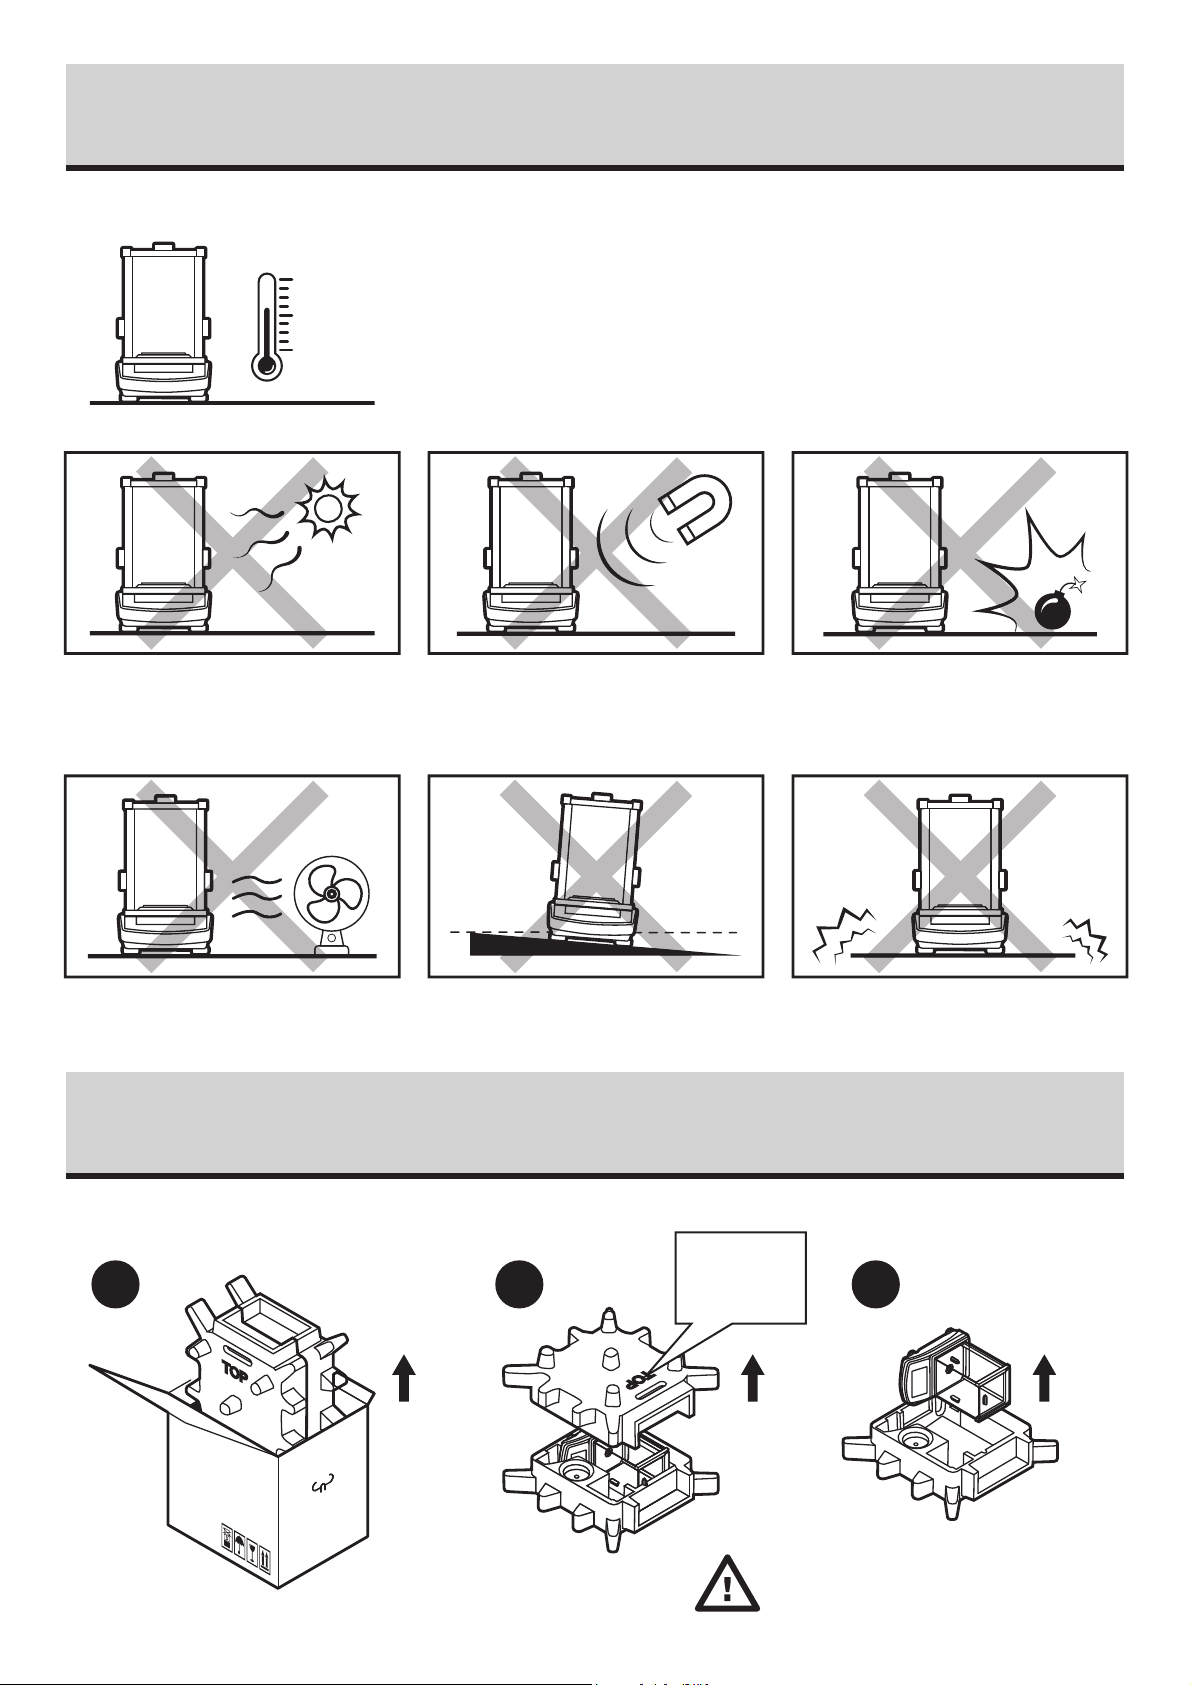
2. WORKROOM AND BASIC OPERATION GUIDELINES
o
C
+40
+104oF
o
+10
C
o
F
+50
Place the balance away from heat
sources. Avoid exposing the balance
to the sunlight.
Operate the device in a room where the temperature ranges between 10–40 °C
(50–104 °F) and where the relative humidity is below 80%.
Place the balance on a solid surface to ensure stability. To obtain stable and
repeatable weighing results, an anti-vibration table is recommended.
Avoid exposing the balance to a
magnetic field. Do not weigh
magnetic substances.
Do not place the balance in a hazardous
area. Do not weigh explosive materials.
Avoid air drafts and air movements
at the workstation.
Make sure that the balance is placed
on an even surface.
3. UNPACKING
1 2 3
TOP
Keep the packaging should a warranty
claim or service be required.
Do not place the balance on an unstable
ground exposed to shocks and vibrations.
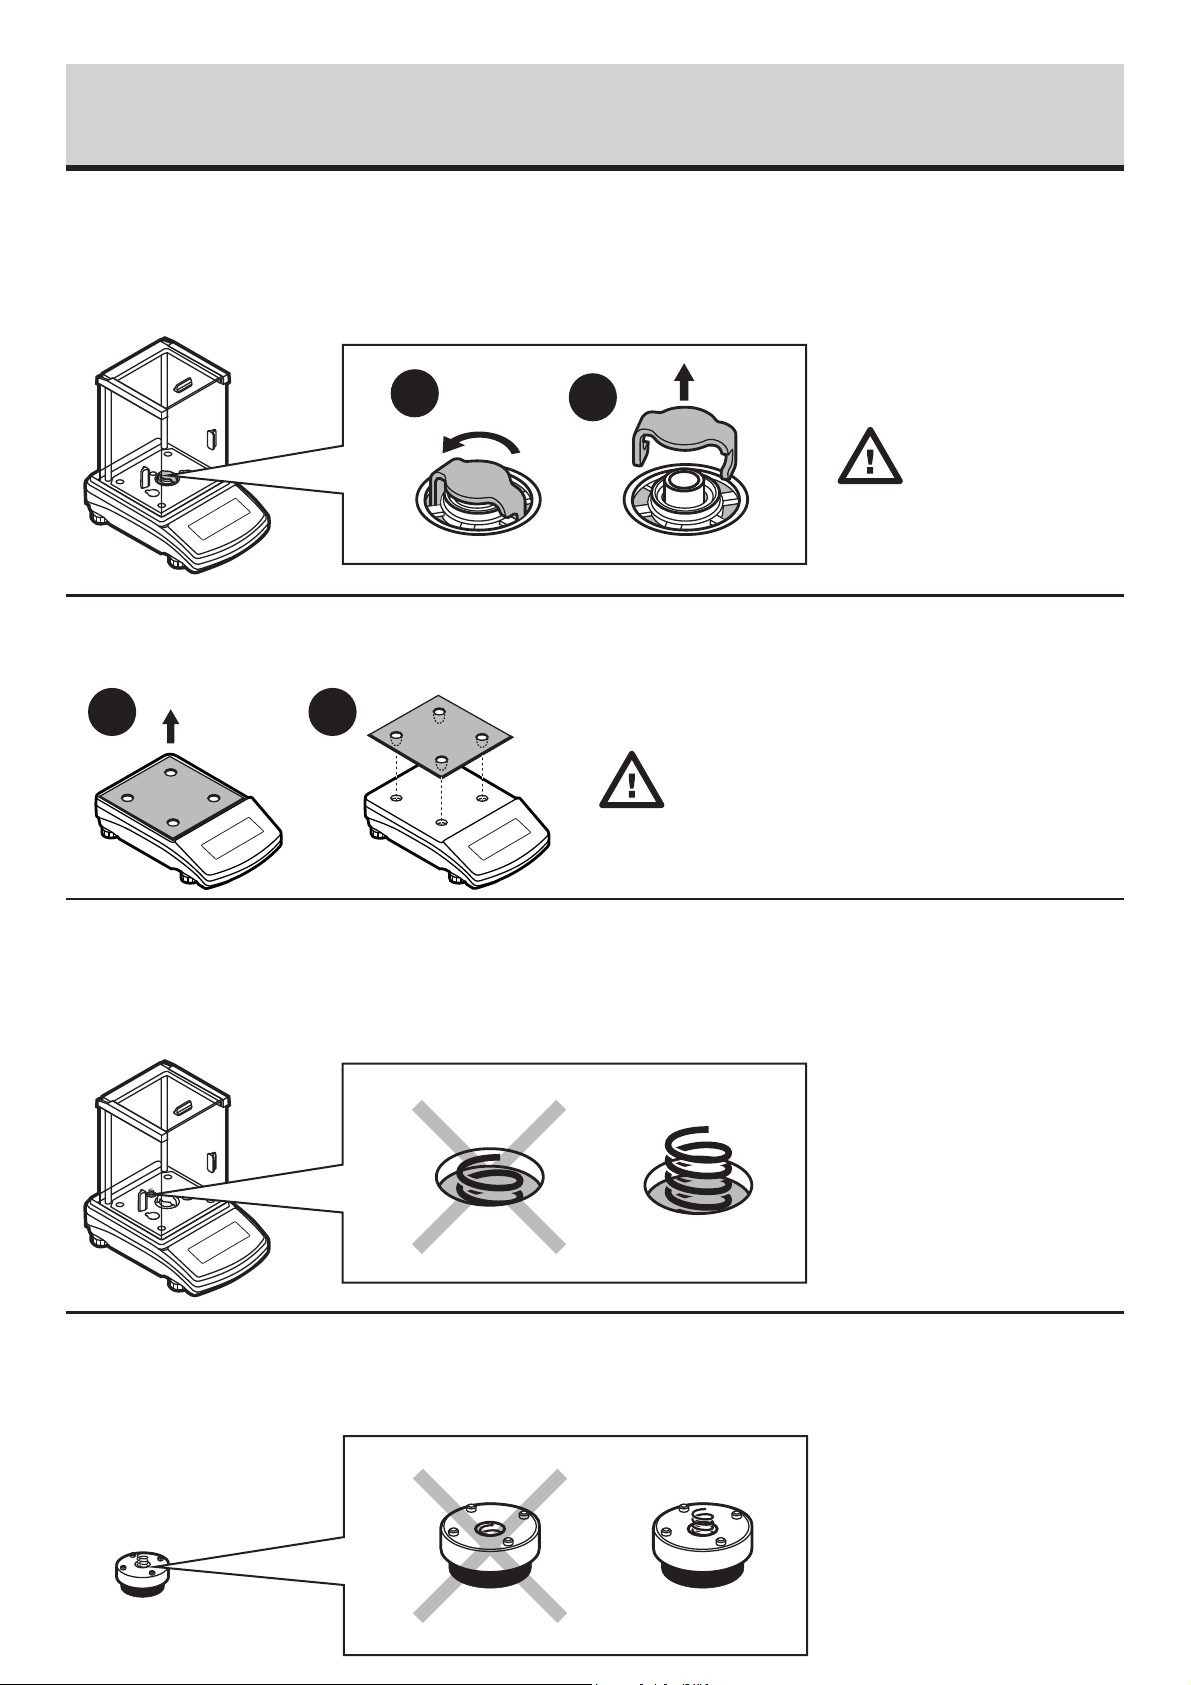
4. ACTIVITIES TO BE DONE PRIOR TO OPERATION
4.1. Remove transport lock
Models: LA-225.C | LA-164.C | LA-224.C | LA-314.C | LA-64 | LA-164 | LA-224 | LA-314 | LA-224.N
| LA-314.N
1
Models: LT-363.C | LT-603.C | LT-1202.C | LT-2102.C | LT-4502.C | LT-6002.C | LT-363 | LT-603 | LT-2102
| LT-4502 | LT-6002 | LT-2102.N | LT-4502.N
2
Keep the transport
lock should a
warranty claim or
service be required.
1 2
Keep the transport
lock should a
warranty claim or
service be required.
4.2. Grounding spring check
Models: LA-225.C | LA-164.C | LA-224.C | LA-314.C | LA-64 | LA-164 | LA-224 | LA-314 | LA-224.N
| LA-314.N
Check the grounding spring.
Make sure that the grounding
spring juts slightly out of the
hole.
Models: LT-363.C | LT-603.C | LT-1202.C | LT-2102.C | LT-4502.C | LT-6002.C | LT-363 | LT-603 | LT-2102
| LT-4502 | LT-6002 | LT-2102.N | LT-4502.N
Check the grounding spring.
Make sure that the grounding
spring juts slightly out of the
hole.
Grounding foot

5. COMPONENTS ASSEMBLY
Models: LA-225.C
1
Models: LA-164.C | LA-224.C | LA-314.C | LA-64 | LA-164 | LA-224 | LA-314 | LA-224.N | LA-314.N
2
3
4
1 2 3
Models: LT-363.C | LT-603.C | LT-363 | LT-603 | LT-363.N | LT-1003.N
1 2 3
Install the
grounding foot
in a freely
selected
opening.
Models: LT-1202.C | LT-2102.C | LT-4502.C | LT-1202 | LT-2102 | LT-4502 | LT-2102.N | LT-4502.N
1 2
Models: LT-6002.C | LT-6002
Install the
grounding foot
in a freely
selected
opening.
1 2
Install the
grounding foot
in a freely
selected
opening.
3
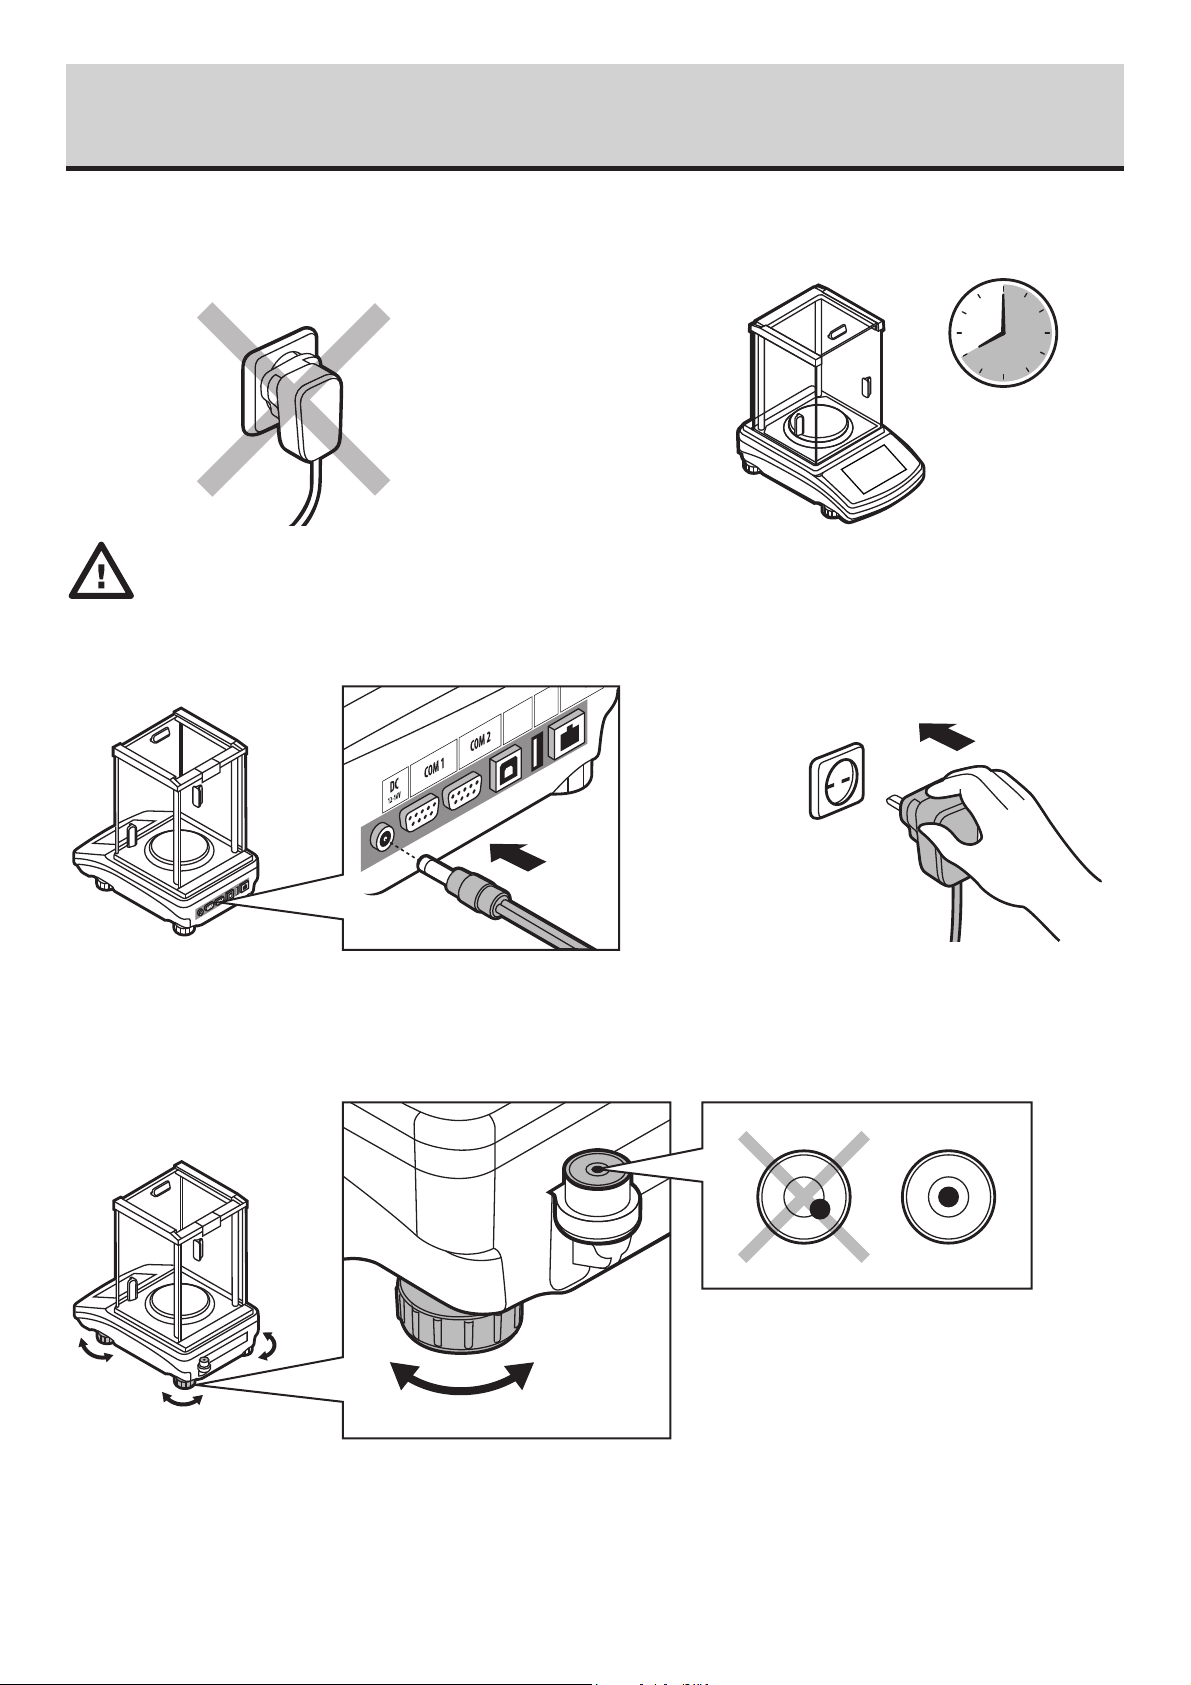
6. PREPARING FOR WORK
Ethern
6.1. Balance temperature stabilization time
Prior to switching the device on it is necessary
to ensure that it has reached a temperature
equal to room temperature.
USB 2
BUS 1
Connect the power adapter to DC connector. Connect the power adapter to the mains.
Balance temperature stabilization time ranges
between 1 - 8 hours.
To level the balance, turn its feet and keep
turning the feet until the air bubble takes
the central position.
 Loading...