

ISW SERIES
PN: 3036613481 Rev. A – October 2017


CONTENTS
1.0 INTRODUCTION ....................................................................................................... 2
2.0 SPECIFICATIONS ..................................................................................................... 3
3.0 INSTALLATION ......................................................................................................... 4
3.1 UNPACKING .......................................................................................................... 4
3.2 LOCATING ............................................................................................................. 4
3.3 SETTING UP .......................................................................................................... 5
4.0 KEYPAD .................................................................................................................... 6
4.1 NUMERIC ENTRY METHOD ................................................................................. 6
5.0 DISPLAY .................................................................................................................... 7
6.0 SYMBOLS AND INDICATORS .................................................................................. 7
7.0 BATTERY OPERATION ............................................................................................ 8
8.0 BACKLIGHT ............................................................................................................... 8
9.0 AUTO POWER OFF .................................................................................................. 8
10.0 OPERATIONS ....................................................................................................... 9
10.1 ZEROING ............................................................................................................ 9
10.2 TARING ............................................................................................................... 9
10.3 WEIGHING ........................................................................................................ 10
10.4 CHECK-WEIGHING .......................................................................................... 10
10.5 LIMITS STORED IN MEMORY ......................................................................... 11
11.0 CALIBRATION ...................................................................................................... 12
12.0 PARAMETER SETTING ....................................................................................... 13
12.1 CHECK WEIGHING PARAMETERS ................................................................. 13
12.2 SCALE PARAMETERS ..................................................................................... 14
13.0 ERROR CODES ................................................................................................... 15
14.0 REPLACEMENT PARTS AND ACCESSORIES................................................... 16
15.0 WARRANTY INFORMATION ............................................................................... 16
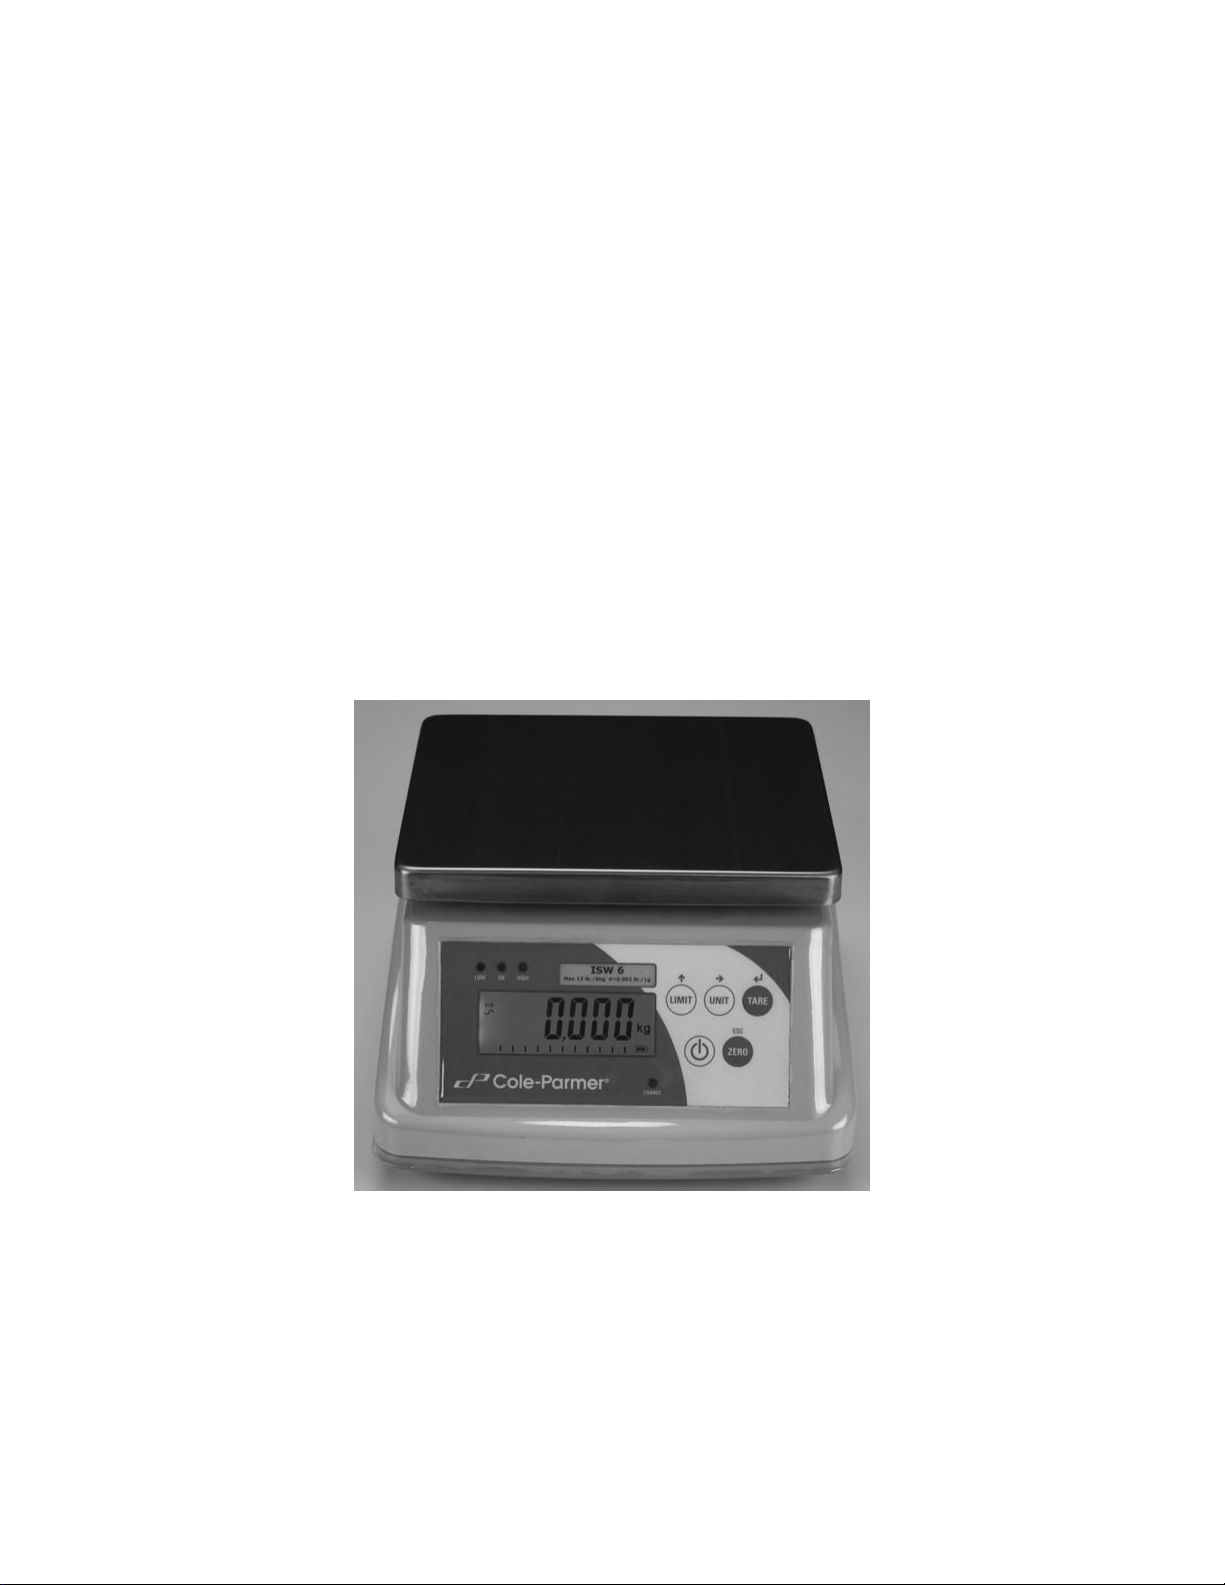
1.0 INTRODUCTION
The ISW range provides accurate, fast and versatile general purpose
weighing scales with check-weighing functions.
All have stainless steel weighing platforms on an ABS plastic base
assembly which is sealed to IP 66, making it water-proof.
All scales have sealed keypads with color coded membrane switches
and the displays are large easy to read liquid crystal type displays
(LCD) supplied with a backlight.
The scales include automatic zero tracking, audible alarm for pre-set
weights and semi-automatic tare.
Model
ISW 3
ISW 6
ISW 12
Capacity
3kg/7lb
6kg/13lb
12kg/26lb
Readability
0.0005kg/0.001lb
0.001kg/0.002lb
0.002kg/0.005lb
Repeatability
0.0005kg/0.001lb
0.001kg/0.002lb
0.002kg/0.005lb
Linearity (±)
0.001kg/0.002lb
0.002kg/0.004lb
0.004kg/0.01lb
Units of measure
kg, g, lb, oz, lb:oz
Functions
Weighing, Checkweighing
Stablization Time
2 seconds typical
Operating Temp.
-10° to 40°C / 14° to 104°F
Power Supply
12 VDC, 800 mA AC adapter
Internal rechargeable battery ((~50 hours operation)
Calibration
Automatic with external calibration weight
Display
Backlit 6-digit LCD with 0.8"/ 20mm -high digits
Housing
IP 66 sealed ABS plastic with stainless steel pan
Pan Size
8.3" x 6.8"/210 x 173mm
Overall Dimensions
9.1" x 10.4" x 6"/231 x 265 x 153mm (w x d x h)
Net Weight
3.3kg/7.3lb
2.0 SPECIFICATIONS
Pre-assembled scale
Stainless steel top pan
Power adapter
Operators Manual
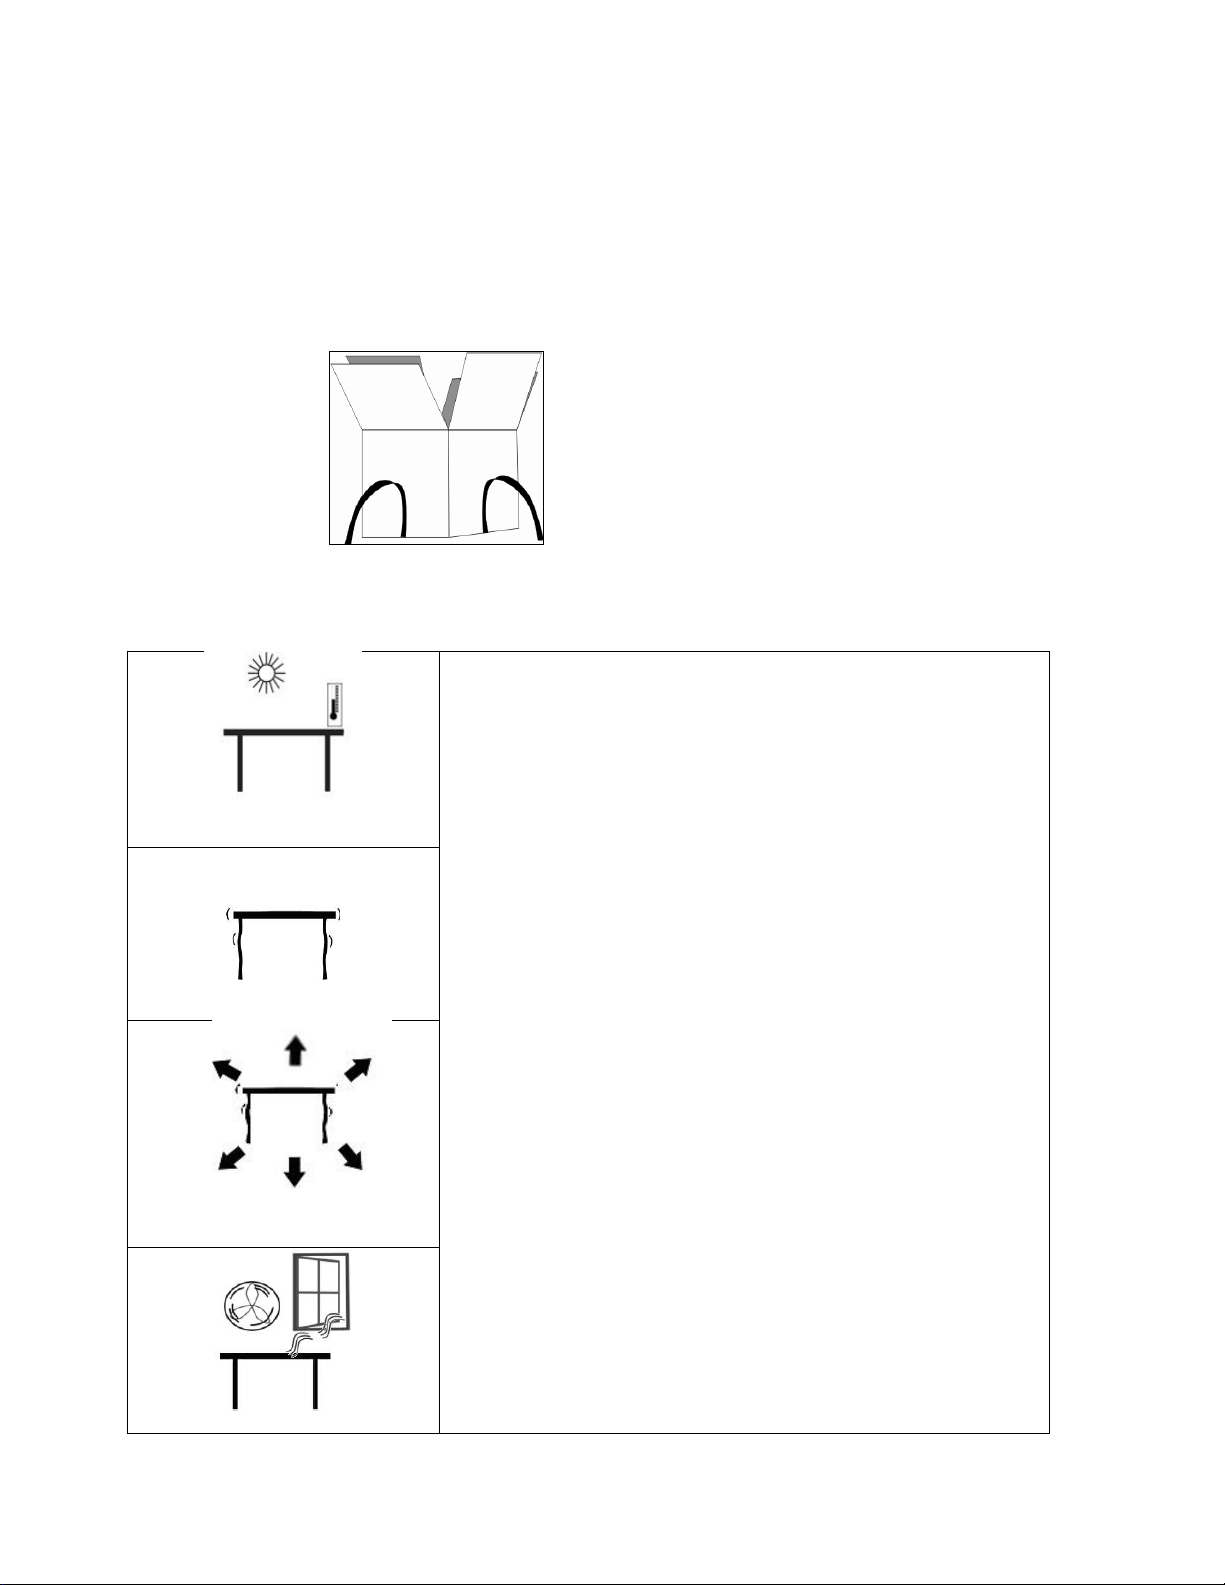
The scales should not be placed in a location
that will reduce the accuracy.
Avoid extremes of temperature. Do not place
in direct sunlight or near air conditioning
vents.
Avoid unsuitable tables. The table or floor
must be rigid and not vibrate.
Avoid unstable power sources. Do not use
near large users of electricity such as
welding equipment or large motors.
Do not place near vibrating machinery.
Avoid air movement such as from fans or
opening doors. Do not place near open
windows or air-conditioning vents.
Keep the scales clean. Do not stack material
on the scales when they are not in use.
3.0 INSTALLATION
3.1 UNPACKING
Remove the scale from the packing carefully. Inside the box you will find
everything needed to start using the scale.
3.2 LOCATING

Attach Power adapter here
3.3 SETTING UP
The scale comes with a stainless steel pan. Place it on the top if not
already installed.
Do not press with excessive force as this could damage the load cell
inside.
Level the scale by adjusting the four feet. The scale should be
adjusted such that the bubble in the spirit level is in the center of the
level and the scale is supported by all four feet.
Attach the power adapter to the bottom of the scale and plug into an
electrical outlet.
Press the [O/I] key to start. The scale will first display the software
At the end of the self-test it will display zero weight and the last used
revision, followed by a self-test.
weighing unit. The stable and zero 0 symbol indicators are
also displayed.

KEYS
PRIMARY FUNCTION
SECONDARY FUNCTION
[O/I]
Switches the scale on or off
[Zero]
Sets the zero point for all
subsequent weighing. The
display shows zero.
Escapes from a parameter or an
option without changing the
value.
[Tare]
Tares the scale and stores the
current weight in memory as a
tare value, subtracts the tare
value from the total weight and
shows the results. This is the
net weight.
Enters the selected parameter or
value for setting.
[Unit]
Selects the weighing units from
a preset list of available units.
Shifts the flashing digit to the
next digit when entering a value.
[Limit]
Sets the limits for check
weighing and allows setting of
either the low limit or the high
limit or both.
Increments the flashing digit or
moves to the next option during
setting.
4.0 KEYPAD
4.1 NUMERIC ENTRY METHOD
To set a value when required, use the keys as given below:
- [Limit] key to increase the flashing digit,
- [Unit] key to move to the next digit and
- [Tare] key to accept the value

0
The display is at Zero
The scale is Stable
Net
Net weight- The scale has been tared
kg / g / lb / oz / lb:oz
Symbols shown for the weighing units
Capacity Tracker- A bar graph indicating the
proportion of the scale capacity being used by
the weight on the pan
bAt LO
Low battery
Indicates full battery strength. Will show less
number of bars for weaker strength.
HI, OK, LO
The scale is in Check weighing mode
:
The colons “:” are used to separate pounds
from ounces
Weight
LED
LCD
Below the low limit
Red
LO
Within the limits
Green
OK
Above the high limit
Amber
HI
5.0 DISPLAY
6.0 SYMBOLS AND INDICATORS
The LCD has unique symbols to indicate the following:
Above the LCD to the left, there are three LED’s that indicate when the weight is
below, within or over the pre-set limits during check weighing.

7.0 BATTERY OPERATION
The scale can be operated from the battery, if desired. The battery
life is approximately 50 hours.
When the battery needs charging a symbol on the display will turn
on. The battery should be charged when the symbol is on. The scale
will still operate for about 20 minutes after which it will automatically
switch off to protect the battery.
To charge the battery, simply attach the power adapter to the scale
and plug in. The scale does not need to be turned on.
The battery should be charged for 12 hours for full capacity.
Below the display is an LED to indicate the status of battery
charging. When the scale is plugged into the power outlet the
internal battery will be charged. If the LED is green the battery is
being charged. If it is red it is nearly discharged and yellow indicates
the battery is increasing the charge level. Continue to charge
overnight for a complete re-charge.
8.0 BACKLIGHT
The backlight for the LCD can be set by the user to always off, always on or
automatic (on only when the scale is in use or a key is pressed). See setting of
the parameter “S2 bL” in section 12.2.
9.0 AUTO POWER OFF
The auto power off can be set by the user to disable the feature or to a pre-set
time interval. See setting of the parameter “S3 AoF “ in section 12.2.

10.0 OPERATIONS
10.1 ZEROING
You can press the [Zero] key at any time to set the zero point from
which all other weighing and counting is measured. This will usually
be necessary when the platform is empty. When the zero point is
obtained the display will show the zero indicator.
The scale has an automatic re-zeroing function to account for minor
drifting or accumulation of material on the platform. However you
may need to press [Zero] to re-zero the scale if small amount of
weight is still shown when the platform is empty.
10.2 TARING
Zero the scale by pressing [Zero]. The zero indicator will be on.
Place a container on the pan and its weight will be displayed.
Press [Tare] when the reading is stable. The weight that was
displayed is stored as the tare value and it is subtracted from the
display, leaving zero on the display. The stable and Net indicator will
be on.
As a product is added only the weight of the product will be shown.
The scale can be tared a second time if another type of product was
to be added to the first one. Again only the weight that is added after
taring will be displayed.

Weight on the scale is above the high limit
Weight is between the limits
Weight is below the low limit
NOTE:
When the container is removed a negative value will be shown. If the scale
was tared just before removing the container, this value is the gross weight
of the container plus all products which were removed. The zero indicator
will also be on as the platform is back to the same condition it was when
[Zero] was pressed last.
Press [Tare] or [Zero] to remove the tare value and display zero. The Net
indicator will disappear.
10.3 WEIGHING
To determine the weight of a sample, first tare an empty container if used,
then place the sample in the container. The display will show the weight
and the unit of weight currently in use.
To change the weighing unit press the [Unit] key. The available weighing
units are the ones enabled in the parameters section. See section 12.2.
10.4 CHECK-WEIGHING
Check-weighing is a procedure to show a display or cause a beeper to
sound when the weight on the scale meets or exceeds weight limit values
stored in memory. The memory holds values for a high limit and a low
limit. Either or both of the limits can be used.
NOTE:
1. The beeper and the LEDs can each be set to OFF (See section 12.1).
The LCD display will indicate whenever the weight is within or exceeds
the limits by showing ‘OK’, ‘HI’ or ‘LO’.

2. The limits can be locked for security. A Limit Password must be used to
change the limits or recall other limits from memory.
3. If a Limit Password is enabled then enter the password which will allow
access to the limits or operation of the beeper or bargraph.
Setting up Check-weighing
Press the [Limit] key. It will show the last used high limit.
The user will be asked for the password if the current check-weighing
password is anything other than “0000”. See the parameter “F4 PS” in
section 12.1. Enter the correct password using the numeric entry
method as mentioned in section 4.1. If the password is “0000” it will
display the last used high limit. The “HI” symbol will appear on the
display.
Press [Tare] to accept the displayed high limit or enter the new high
limit using the numeric entry method (see section 4.1). When the
desired value is entered press [Tare] to accept the value. The “LO”
symbol will be on. Display will show the last used low limit. Set the low
limit in the same way the high limit was set.
Pressing the [Tare] key will return the scale to weighing, with the
Check-weighing function enabled.
NOTE: The limits are displayed in the weighing unit in use. The decimal
point is fixed at the position that is used for the current weighing unit. If the
weighing unit is pounds:ounces, the limits are entered in pounds and
decimal parts of pounds. i.e. 6.0125 lb.
10.5 LIMITS STORED IN MEMORY
If the scale is turned off it stores the last high and low limits in the memory along
with information about the weighing unit in use when the limits were stored. The
limits and weighing unit will be active when the scale is turned on.

11.0 CALIBRATION
The scales are calibrated using metric weights when the weighing unit selected
is either kilograms or grams and using pound weights when the weighing unit
selected is either pounds, ounces or pounds:ounces.
To start calibration turn the scale off and then turn it on again. Press [Tare]
during the self-test. The scale will show “P- - - - “. Enter code number “0000”
using the numeric entry method (see section 4.1) and press [Tare]. This will
take you directly to the calibration section.
Display will show "UnLoAd".
Remove all weight from the pan and then press the [Tare] key when the
scale is stable.
After the Zero point is set, the display will show “Ld xx”. Place the suggested
calibration weight on the pan. It is best to use a weight close to the full
capacity of the scale. If the weight is different from the displayed value, enter
the value of the weight in whole numbers using the numeric entry method
(see section 4.1). The kg or the lb symbol will be on to show the active unit.
Press the [Tare] key when the stable indicator is on.
The scale will calibrate to the weight and then return to weighing.
Remove the calibration weight as soon as calibration is complete.
NOTE: If an error message “FAIL H” or “FAIL L” is shown during calibration, re-
check the calibration and repeat, if necessary. If the error cannot be corrected
contact your supplier for advice.

Parameter
Description
Options
Factory Setting
F1 LLk
Limit Lock will prevent changing the check
weighing limits. To change the limits, this
parameter must be disabled by setting it to
off or entering the password.
on
oFF
oFF
F2 LEd
Setting the LED
on
oFF
on
F3 bEP
This parameter sets the Beeper to off or
on. If set to on, the beeper can further be
set to sound when the weighing result is
within or outside the check-weighing limits.
bP oFF - Off
bP inL -
Within limits
bP otL -
Outside limits
(>20d)
bP inL
F4 PS
This parameter allows setting of a new
check weighing password,
If the old parameter is “0000” enter the
new password twice when “P1 _ _ _“ & “P2 _
_ _ _” are displayed. When complete, it will
display “donE”. If the old parameter is
other than “0000”, enter the old one when
“P _ _ _ _” is displayed and then enter the
new password twice when asked. When
complete, it will display “donE”.
To be
entered
manually.
0000
12.0 PARAMETER SETTING
This section allows the user to access the parameters for customizing the scale.
The parameters are split into 2 groups: Check weighing parameters and Scale
parameters
In the following sections use the [Limit] key to scroll through the options, the
[Tare] key to accept the option and the [Zero] key to return to weighing.
Wherever numeric values are required to be entered, use the [Limit] and [Unit]
keys to increment the flashing digits as explained in section 4.1.
12.1 CHECK WEIGHING PARAMETERS
To enter this section press and hold the [Limit] key for 4 seconds. You will be
asked for the password if the current check-weighing password is anything other
than “0000”. See the parameter “F4 PS” in this section. Enter the correct
password using the numeric entry method as mentioned in section 4.1. If the
password is “0000” it will go directly to “F1 LLK”.

Parameter
Description
Options
Factory Setting
S1 Un
Enable or disable weighing units, will
not allow to disable all units, at least
one has to be enabled.
kg
g
lb
oz
lb:oz
kg
S2 bL
Backlight set to always on, always
off or automatic on whenever a
weight is placed or a key is pressed.
EL oFF
EL on
EL AU
EL AU
S3 AoF
Auto Off- Disable or set time
increment to turn off scale.
SLP 0
SLP 1
SLP 5
SLP 10
SLP 0
S4 diS
Display all weights or only when
stable
ALL
StAb
ALL
S5 Fi
Filter setting to slow, normal or fast
SLow
nor
FASt
nor
S6 AZr
Auto Zero range
0.5d
1.0d
1.5d
0.5d
12.2 SCALE PARAMETERS
To enter this section press and hold the [Unit] key for 4 seconds. The display
will go directly to “S1 Un”.
These parameters are used to control the operation of the scale.

ERROR
CODE
DESCRIPTION
POSSIBLE CAUSES
Err 4
Initial Zero is greater than
allowed (4% of maximum
capacity) when power is
turned on or when [Zero] is
pressed.
Weight on the pan when turning the scale
on.
Excessive weight on the pan when zeroing
the scale.
Platform is not installed.
Improper calibration of the scale.
Damaged load cell.
Damaged electronics.
Err 6
Internal weight signal is not
correct when turning the
scale on.
Load cell is damaged.
Electronics is damaged.
Err 8
High limit input error
Low limit is set first, then the high limit is set
lower than the low limit and high limit not
equal to zero.
Err 9
Low limit input error
High limit is set first, then the low limit is set
higher than the high limit and low limit not
equal to zero.
FAIL H or
FAIL L
Calibration error
Improper calibration (should be within +10%
of the factory calibration). The old calibration
data will be retained until the calibration
process is complete.
13.0 ERROR CODES
During the initial power-on testing or during operation, the scale may show an
error message. The meaning of the error messages are described below.
If an error message is shown, repeat the step that caused the message. If the
error message is still shown then contact your supplier for support.

Power Supply Module
Replacement Battery
Stainless Steel Pan
14.0 REPLACEMENT PARTS AND ACCESSORIES
If you need to order any spare parts and accessories, contact your supplier. A
partial list of such items is as follows:
15.0 WARRANTY INFORMATION
The scale is covered by a Limited Warranty (Parts and Labor) for any components that
fail due to defects in materials or workmanship. Warranty starts from the date of
delivery.
During the warranty period, should any repairs be necessary, the purchaser must inform
its supplier. The company or its authorized Technician reserves the right to repair or
replace the components at any of its workshops at no additional cost, depending on the
severity of the problems.
The warranty will cease to operate if the equipment is not returned in the original
packaging and with correct documentation for a claim to be processed.
This warranty does not cover equipment where defects or poor performance is due to
misuse, accidental damage, exposure to radioactive or corrosive materials, negligence,
faulty installation, unauthorized modifications or attempted repair, or failure to observe
the requirements and recommendations as given in this User Manual.
This product may include a rechargeable battery that is designed to be removed and
replaced by the user. The supplier will provide a replacement battery if the battery
manifests a defect in materials or workmanship during the initial period of use of the
product in which the battery is installed.
As with all batteries, the maximum capacity of any battery included in the product will
decrease with time or use, and battery cycle life will vary depending on product model,
configuration, features, use, and power management settings. A decrease in maximum
battery capacity or battery cycle life is not a defect in materials or workmanship, and is
not covered by this Limited Warranty.
Repairs carried out under the warranty do not extend the warranty period. Components
removed during warranty repairs become company property.
The statutory rights of the purchaser are not affected by this warranty.

Manufacturer’s Declaration of Conformity
This product has been manufactured in accordance with the harmonized European standards,
following the provisions of the below stated directives:
Electro Magnetic Compatibility Directive 2004/108/EC
Low Voltage Directive 2006/95/EC
WEEE 2012/19/EU
This device may not be disposed of in domestic waste. This also applies to countries
outside the EU, per their specific requirements. Disposal of batteries (if fitted) must
conform to local laws and restrictions.
Cet appareil ne peut être éliminé avec les déchets ménagers. L’élimination de la batterie
doit être effectuée conformément aux lois et restrictions locales.
Dieses Gerät nicht mit dem Hausmüll entsorgt.
Dispositivo no puede ser desechado junto con los residuos domésticos
Dispositivo non può essere smaltito nei rifiuti domestici.
FCC / IC CLASS A DIGITAL DEVICE EMC VERIFICATION STATEMENT
NOTE: This equipment has been tested and found to comply with the limits for a Class A
digital device, pursuant to Part 15 of the FCC rules and Canadian ICES-003/NMB-003
regulation. These limits are designed to provide reasonable protection against harmful
interference when the equipment is operated in a commercial environment. This
equipment generates, uses and can radiate radio frequency energy and, if not installed
and used in accordance with the instruction manual, may cause harmful interference to
radio communications. Operation of this equipment in a residential area is likely to cause
harmful interference in which case the user will be required to correct the interference at
his/her own expense.

This product has been tested with, and is supplied with power adaptors which
meet all legal requirements for the intended country or region of operation,
including electrical safety, interference and energy efficiency. As we often
update adaptor products to meet changing legislation it is not possible to refer to
the exact model in this manual. Please contact us if you need specifications or
safety information for your particular item. Do not attempt to connect or use an
adaptor not supplied by us.
CALIFORNIA PROPOSITION 65 - MANDATORY STATEMENT
WARNING: This product includes a sealed lead-acid battery which contains chemicals
known to the State of California to cause cancer and birth defects or other reproductive
harm.
 Loading...