

Coleman Hanna 93000, 94000 Installation & Operation Manual

93000 & 94000 Super Vac
Installation/Operations Manual
5842 W 34th St • Houston, TX 77092
1.800.999.9878 1.713.683.9878
www.colemanhanna.com
Find us on Facebook:
/ColemanHannaCarwash

World Class Manufacturing in Car Wash Equipment
SUPER VAC 3 Installation/Operation Manual
COPYRIGHTS AND DISCLAIMERS
The 93000 and 94000 Vacuums are completely developed and designed by the Coleman Hanna
Carwash Systems. Any un-authorized use of it is strictly forbidden without written permission
from the Coleman Hanna Carwash Systems. No alteration of their systems or operating
procedures is allowed. For more information concerning this system contact:
Coleman Hanna Carwash Systems
5842 West 34th
Houston, Texas 77092
Tel: (713) 683-9878
Toll Free: (800) 999-9878
Fax: (713) 683-9624
E-Mail:info@jcolemanco.com
Website: www.colemanhanna.com
Coleman Hanna Carwash Systems 93000/94000 Super Vac
Page 2 of 38 Rev. 2 7/12/10

World Class Manufacturing in Car Wash Equipment
SUPER VAC 3 Installation/Operation Manual
TABLE OF CONTENTS
1. EQUIPMENT PLANNING AND ARRANGEMENT ................................................................. 4
2. SAFETY INSTRUCTIONS .................................................................................................... 5
3. INSTALLATION GUIDELINES ............................................................................................... 6
4. THEORY OF OPERATION .................................................................................................... 6
5. MAINTENANCE ..................................................................................................................... 7
6. EQUIPMENT PROGRAMMING ............................................................................................. 8
6.1 Initial Setup of New Timers ............................................................................................... 8
6.2 Menus ............................................................................................................................... 8
6.3 Programming the Timer .................................................................................................... 9
6.4 Accessing Timer Functions ............................................................................................ 10
6.5 Programming Via the hand-held Remote Controller ....................................................... 11
Example of Typical Set-up .................................................................................................... 11
7. TROUBLESHOOTING ......................................................................................................... 17
8. DIAGRAMS/TECHNICAL INFORMATION ........................................................................... 19
9. PARTS LIST ........................................................................................................................ 24
Coleman Hanna Carwash Systems 93000/94000 Super Vac
Page 3 of 38 Rev. 2 7/12/10
World Class Manufacturing in Car Wash Equipment
NOTE: Carefully inspect and evaluate the freight
upon arrival. If there is damage to any boxes or crates
immediately report it to the freight carrier.
The installation of this equipment
involves high and low voltage electrical
connections. Only qualified and trained
personnel should be used in it’s hook-up.
This equipment’s circuit protection is
located in the main electrical panel of the
building supplying power to this device.
Insure that this protection is in place and
rated according to the guidelines set forth
on the equipment not to exceed 15 amps.
1. EQUIPMENT PLANNING AND ARRANGEMENT
SUPER VAC 3 Installation/Operation Manual
1.1 Unpacking The Equipment
Before any operation can be carried out there must be a time of planning. This is no different for
the installation of the 93000/94000. Carefully plan the 93000/94000 layout and setup before
starting the installation process.
Thoroughly inspect each component for visible damage. Uncrate the equipment only if there is
no damage.
1.2 Using Suggested Installation Procedures
This manual contains suggested installation guidelines. (Section 3)
Completely read through this manual prior to beginning installation. This will ensure a proper
understanding of the system and its installation procedures.
Coleman Hanna Carwash Systems 93000/94000 Super Vac
Page 4 of 38 Rev. 2 7/12/10
World Class Manufacturing in Car Wash Equipment
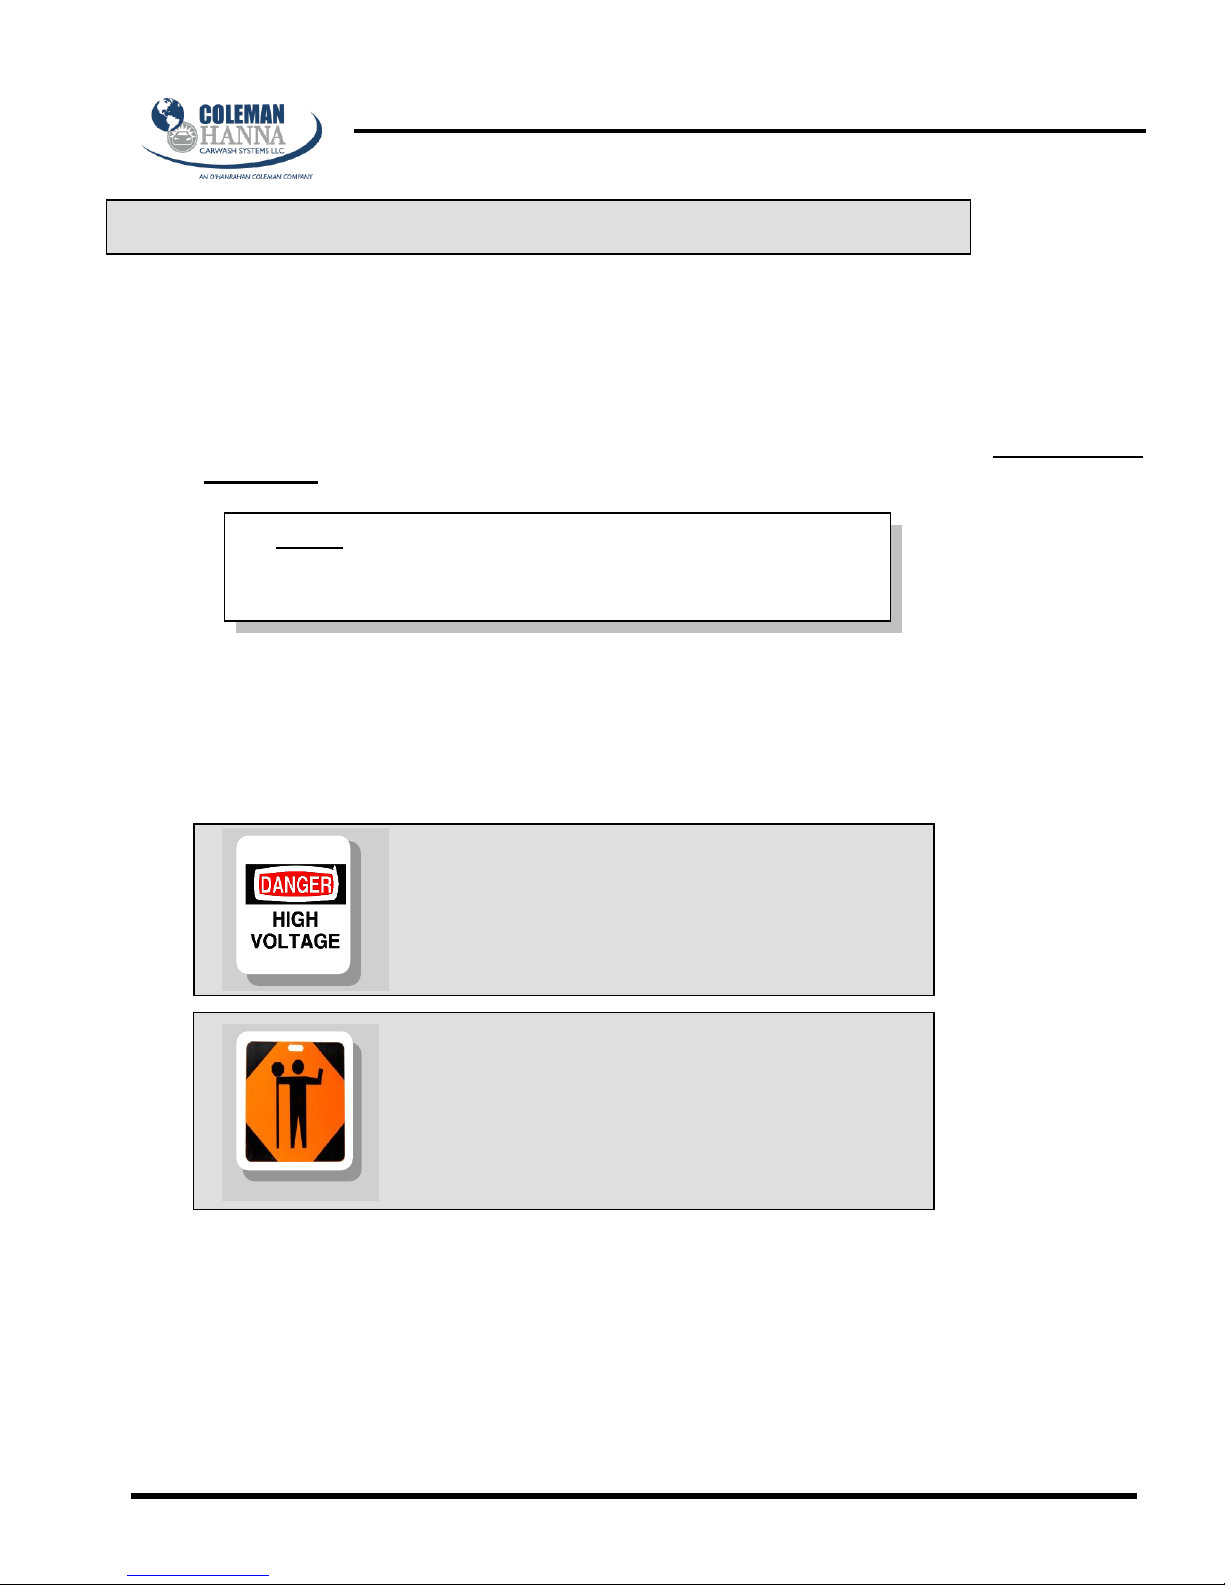
Extreme caution should be exercised
when working with high voltage and the
operation of this equipment.
2. SAFETY INSTRUCTIONS
SUPER VAC 3 Installation/Operation Manual
Do not throw away these important safety instructions. The instructions pertain to risk of fire,
electrical shock, and/or injury to persons.
Read all instructions before using this product.
STAY ALERT- Always give complete attention to your actions.
Do not operate this product when fatigued or under the influence of alcohol or drugs.
Keep operation area clear of all persons.
Do not attempt to reach over equipment or stand on any unstable support. Keep good
footing and balance at all times.
Disconnect all power before installing or servicing this equipment. If the power disconnects
are out of sight, lock it in the open position and tag it to prevent unexpected application of
power. Failure to do so could result in fatal electrical shock.
A qualified electrician should install all wiring according to local, state, and federal electrical
codes.
Coleman Hanna Carwash Systems 93000/94000 Super Vac
Page 5 of 38 Rev. 2 7/12/10
World Class Manufacturing in Car Wash Equipment
3. INSTALLATION GUIDELINES
4. THEORY OF OPERATION
SUPER VAC 3 Installation/Operation Manual
Remove hoses and Owners Manual from Dirt Receptacle.
Remove stainless steel shroud from under meter to expose 110V cord.
Unbolt vacuum from wooden crate (save rubber washers on 93000 unit).
Set vacuum cleaner on cardboard and make a template or pattern by cutting out cardboard
in shape of vacuum cleaner.
Take template and set on vacuum base and mark holes for bolts.
Drill holes in concrete using an 1/2 drill bit.
Blow out all concrete dust from holes.
Set vacuum cleaner over holes and hammer in Anchor Bolts. Use ½” x 5½” for 93000 Oval
Vacuum and ½” x 3¾” for 94000 Round Vacuum.
Make sure you install rubber washer between metal washer and vacuum canister to provide
air-tight seal on 93000 unit.
Plug vacuum in to the cord under the shroud.
Install stainless steel shroud back in place.
Open up Vacuum Cabinet with keys provided with Owner's Manual.
Turn on the power to the vacuum cleaner and install a sample coin in the Sensortron.
Refer to Price and Time Setting Sheet to properly set price and time on timer. Unit is preset
to price on decals and normal time.
Drop coins into coin acceptor, check vacuum for proper suction and install vacuum hose.
Coins are deposited into coin acceptor.
Coin acceptor sends out a 24V pulse to the timer.
The timer reads the 24V pulse and compares that to the turn on price programmed into it.
Once the proper amount of coins are deposited the timer turns on the 24V Mercury Relay.
The Mercury Relay sends power to the vacuum motors.
The vacuum motors start to run which draws air through the filter bags and vacuum hose.
Coleman Hanna Carwash Systems 93000/94000 Super Vac
Page 6 of 38 Rev. 2 7/12/10
World Class Manufacturing in Car Wash Equipment
Weekly
Clean out plastic dirt canister.
Clean vacuum bags with brush.
Clean stainless steel door, and check gasket for leaks.
Wash vacuum hose inside and out.
Wipe down outside of vacuum canister with damp cloth.
Every Six Months
Remove vacuum dome and wash thoroughly.
Clean fluorescent lamps with damp towel.
Check brushes in vacuum motor for wear, and replace as needed.
Wash filter bags.
Wash out bottom dirt canister and dirt funnel.
5. MAINTENANCE
SUPER VAC 3 Installation/Operation Manual
Coleman Hanna Carwash Systems 93000/94000 Super Vac
Page 7 of 38 Rev. 2 7/12/10
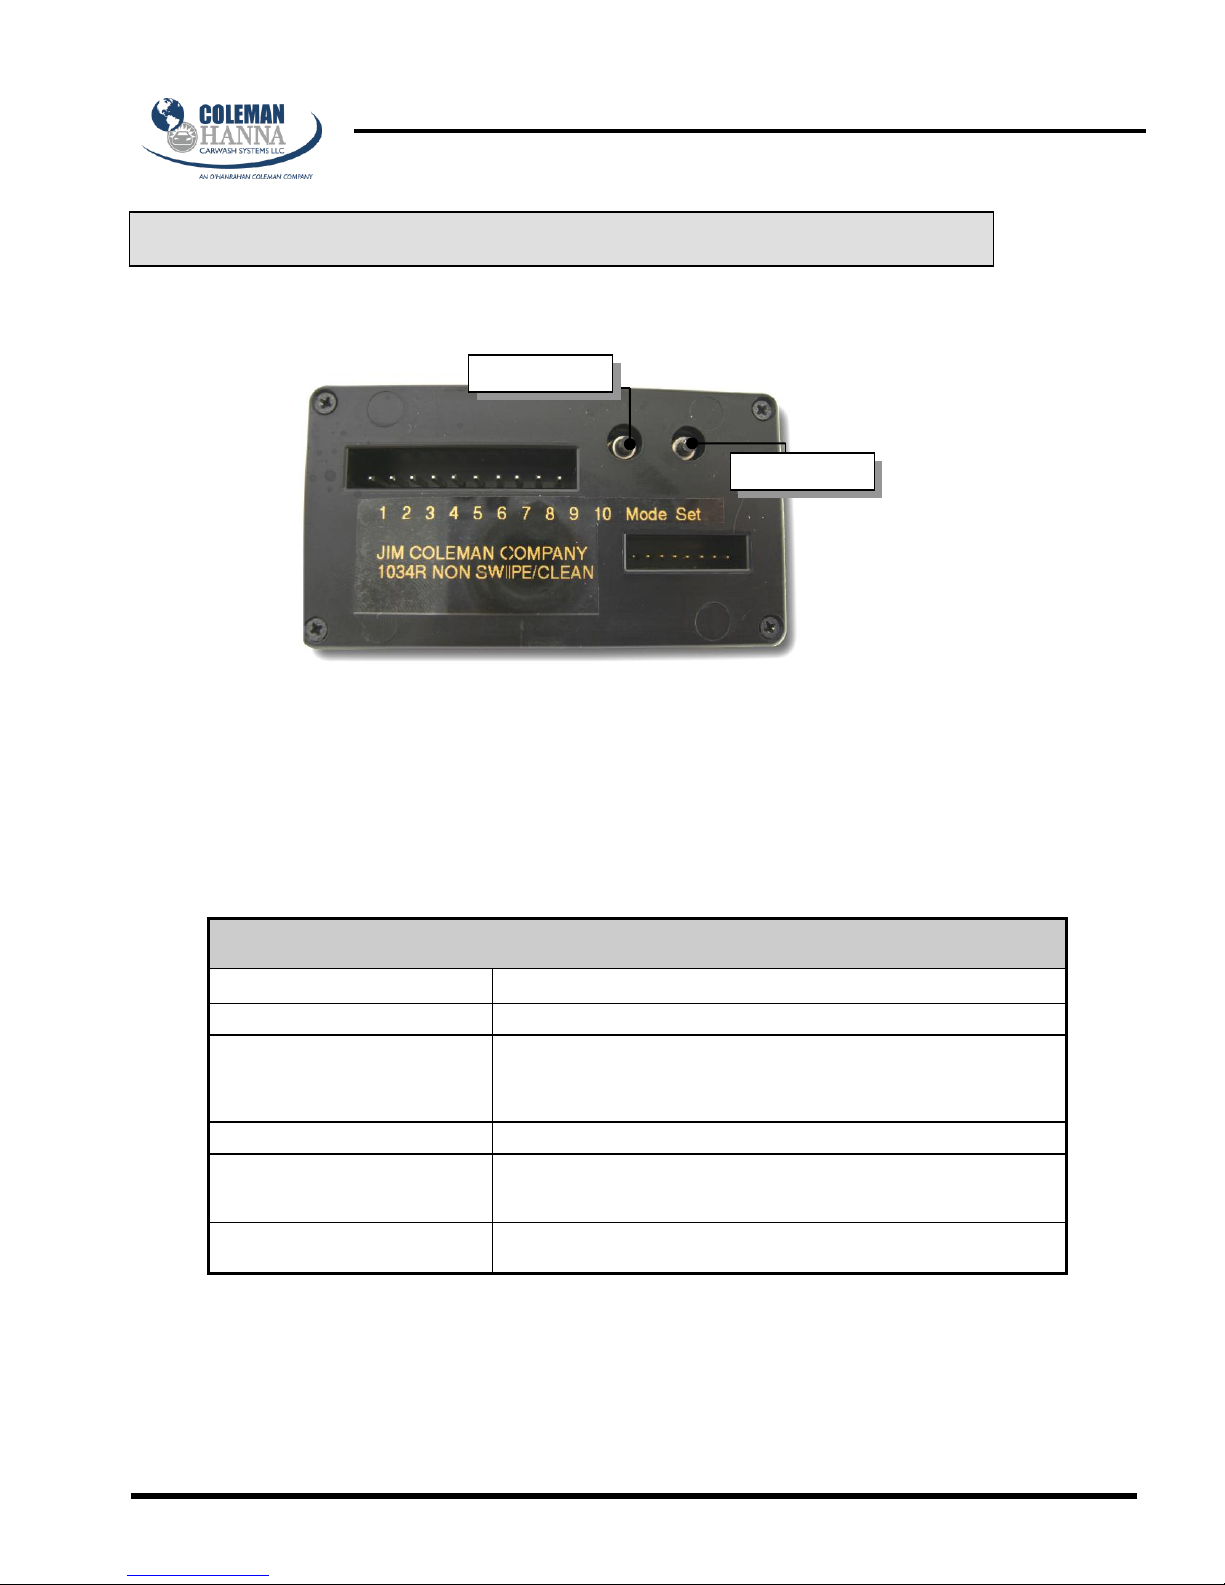
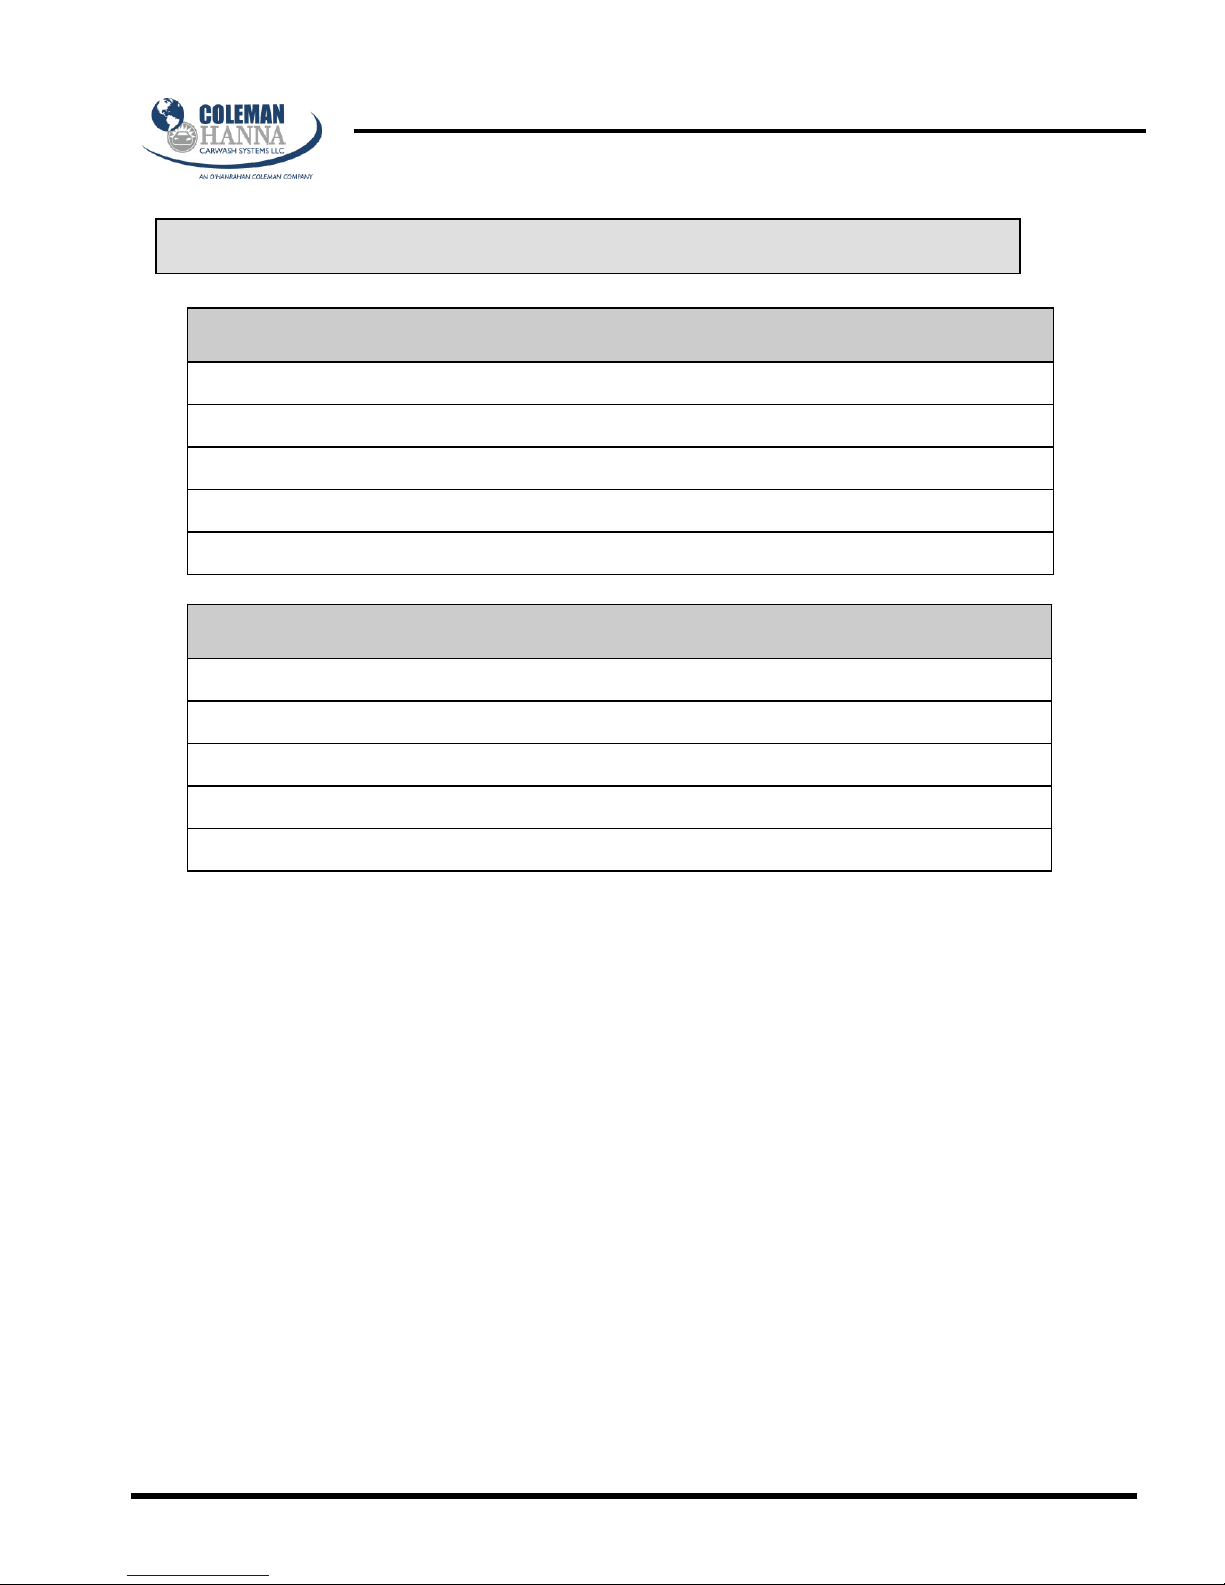
MENUS FOR VACUUM
Menu
Valid Entries
A. Number of Coins to Start Vacuum
Valid entries are from 1 to 20 coins to start the vacuum
B. Number of Seconds per Vacuum
This menu creates some confusion for customers. TYPICALLY THIS
NUMBER IS LEFT AT ZERO. The menu is in place for those customers who
have a wash that starts at 3:30, for example. In this case, you would enter the
:30 at this point. Valid entries are from :00 to :59.
C. Number of Minutes Per Vacuum
Valid entries are from 0 to 9.
D. Number of Times Warning Horn
Beeps
This is the number of times the user would like the warning horn to sound at
the one-minute mark. Valid entries are from :00 to :59. If the menu is left at
:00, the warning horn is disabled.
H. Amount of Time per Coin After
the Start-Up Price is Satisfied.
This is the amount of time that the customer will receive for each additional
coin deposited after the initial turn-on price is deposited.
6.1 Initial Setup of New Timers
6.2 Menus
Mode
Set
6. EQUIPMENT PROGRAMMING
World Class Manufacturing in Car Wash Equipment
SUPER VAC 3 Installation/Operation Manual
There are two buttons located on the back of the timer that are used for setting the price and time, as
well as retrieving information.
When you first receive your timer and power it up, the display will be flashing zeros. This indicates that
the timer needs to be programmed to function properly. The following menus indicate the information
that will need to be input to make the timer function properly.
Let’s start by explaining the purpose of each menu.
Coleman Hanna Carwash Systems 93000/94000 Super Vac
Page 8 of 38 Rev. 2 7/12/10
MENUS FOR FRAGRANCE (Not Used)
Menu
Valid Entries
When the “H” menu is complete, press the mode switch.
Menus “A” - “H” will repeat, allowing you to enter the fragrance information.
A. Number of Coins to Start Fragrance
Valid entries are from 1 to 20 coins to start the vacuum/fragrance machine
B. Number of Seconds per Fragrance
This menu creates some confusion for customers. TYPICALLY THIS NUMBER
IS LEFT AT ZERO. The menu is in place for those customers who have a wash
that starts at 3:30, for example. In this case, you would enter the :30 at this
point. Valid entries are from :00 to :59.
C. Number of Minutes Per Fragrance
Valid entries are from 0 to 9.
D. Number of Times Warning Horn
Beeps
This is the number of times the user would like the warning horn to sound at
the one-minute mark. Valid entries are from :00 to :59. If the menu is left at
:00, the warning horn is disabled.
H. Amount of Time per Coin After
the Start-Up Price is Satisfied.
This is the amount of time that the customer will receive for each additional
coin deposited after the initial turn-on price is deposited.
E. Four-digit PIN Code
This menu is used to input the Personal Identification Number. This number
is used to access the timer via the hand-held remote control.
F: Vacuum Test Time
This function sets the amount of time the user can test the vacuum by using
the “TEST” feature on the remote control. Valid entries are from 0:00 to 9:00.
If the unit is set to 0:00, this feature is disabled.
6.3 Programming the Timer
NOTE: The Vacuum/Fragrance Timer is used in a vacuum
only to reduce the amount of spare parts that are needed by
the operator. Therefore, a vacuum/fragrance timer will work
in all regular vacuums as well as the fragrance vacuums.
World Class Manufacturing in Car Wash Equipment
SUPER VAC 3 Installation/Operation Manual
Let’s walk through the programming of the timer, step by step.
Begin by pressing the mode switch and holding down for five (5) seconds. The display will
now show the “A” menu.
Now press the set switch until you reach the number of coins it takes to start your vacuum.
(Don’t worry if you accidentally go past your number; the timer “wraps around” when you
exceed 20.) Also, note that anytime you press and hold the set switch, the display
increments at 1/2 second increments.
6.3.1 Vacuum
Once you have the proper number displayed on the “A” menu press the mode switch and
release it. This display will now show the “B” menu.
Now, using the set switch input the number of seconds, if any, that you have in your initial
vacuum cycle.
Press the mode switch and the display will show the “C” menu. Using the set switch, enter
the number of minutes you have in your initial vacuum cycle.
Press the mode switch and the “D” menu appears. Using the set switch, enter the number of
seconds that you want the warning horn to sound at the one-minute mark when a customer
is using the vacuum.
Coleman Hanna Carwash Systems 93000/94000 Super Vac
Page 9 of 38 Rev. 2 7/12/10

6.4 Accessing Timer Functions
Congratulations! You’re finished programming!
World Class Manufacturing in Car Wash Equipment
SUPER VAC 3 Installation/Operation Manual
Press the mode switch and the “H” menu appears. Using the set switch, enter the amount of
time that the customer should receive upon depositing additional coins after the vacuum
turn-on price has been satisfied.
6.3.2 Fragrance (Not Used)
At this point, menus “A” - “H”, above, will repeat, allowing you to input the correct fragrance
information.
Press the mode switch and the “A” menu appears, again. This time, use the set switch to
input the number of coins it takes to start your fragrance machine.
Press the mode switch and the “B” menu appears. Now, using the set switch, input the
number of seconds, if any, that you have in your initial fragrance cycle.
Press the mode switch and the display will show the “C” menu. Using the set switch, enter
the number of minutes you have in your initial fragrance cycle.
Press the mode switch and the “D” menu appears. Using the set switch, enter the number of
seconds that you want the warning horn to sound at the one-minute mark when a customer
is using the fragrance machine.
Press the mode switch and the “H” menu appears. Using the set switch, enter the amount of
time that the customer should receive upon depositing additional coins after the fragrance
turn-on price has been satisfied.
Press the mode switch and the “E” menu appears. Press the switch until the first digit of the
PIN code you have selected appears. Continue pressing the mode and set switches to enter
each individual digit of the four-digit PIN code you have selected.
Press the mode switch and the “F” menu appears. Using the set switch, enter the number of
minutes that the timer will run while testing the vacuum, using the hand-held remote control.
Now, press the mode switch one final time and the timer will display the $.00 and add up as
coins are deposited.
6.4.1 Resettable Coin Counter
Once the timer is set up you can access the coin-count function via the set switch. By
pressing and releasing the set switch, the timer will display the number of coins that have
been input for two seconds. Next, the timer will display the number of vacuum cycles for two
seconds, then the number of fragrance cycles for two seconds. If you hold the set switch
engaged for five seconds, the timer will zero this amount.
6.4.2 Modifying Existing Programs
To modify existing programs, press and hold the mode switch until the timer begins flashing
zeros. Now release the mode switch and the timer will return to the “A” Menu for set up.
The timer “remembers” the previously programmed values. This is helpful if you are only
changing one portion of the program. By repeatedly pressing the mode switch, you are able
to step through the menus until you reach the item you wish to modify.
Coleman Hanna Carwash Systems 93000/94000 Super Vac
Page 10 of 38 Rev. 2 7/12/10
World Class Manufacturing in Car Wash Equipment
6.5 Programming Via the hand-held Remote Controller
Example of Typical Set-up
NOTE: The timer must be set up using the mode and set
switches on the back of the timer before the remote control
will function.
SUPER VAC 3 Installation/Operation Manual
6.5.1 Modifying Existing Programs
To use the remote control, point the remote directly at the front of the timer within a two-foot
range.
Slowly input the Pin code by pressing the appropriate number on the key pad.
After the proper code has been set into the timer the warning horn will beep for a half-
second. This indicates that the proper code has been input and the time is waiting for
further instructions.
Three important items need to be addressed at this point:
Once the four-digit Pin has been entered and the timer beeps, if no further command is
received for seven seconds, the timer automatically reverts back to normal operation. You
will now have to input your Pin code once again to access your timer. This prevents you
from inputting your code and inadvertently walking away, leaving the timer disabled.
While the timer is being accessed by remote control it will not accept coins or tokens.
Only “A”, “B”, “C”, “D” and “H” may be accessed using the remote control. This gives the
owner more security over improper use of the remote control by an attendant.
Once the Pin code has been entered, and before seven seconds has elapsed, you can do any of the
following:
Modify Setup Parameters: Access the feature by pressing the mode switch on the remote.
Now the setup is similar to the setup using the mode and set switches during initial
programming. The difference is the remote control has an up/down feature for the set
switch. This allows you to rapidly increment or decrement a setting.
Obtain Quarter Count: Press the Coin button to obtain a coin readout of the number that has
been dropped. If you hold this button for five (5) seconds the number will zero.
Obtain Test Count: Press the Test Cycles button to obtain the number of times an attendant
has used the test feature. This feature is non-resettable.
Use Test Feature: Press the Test button and the timed output from the timer turns on the
vacuum. The display indicates “Test” to remind you that the timer is in the test mode. You
may press Cncl to cancel this time if you are finished early. Otherwise, the timer will “time
out” after the amount of time you have set in the “F” menu during the initial programming.
I have a vacuum/fragrance machine that requires $1.00 to start the vacuum and $1.00 to
start the fragrance machine.
The vacuum cycle lasts for a period of four minutes, while the fragrance cycle lasts for forty-
five seconds.
Coleman Hanna Carwash Systems 93000/94000 Super Vac
Page 11 of 38 Rev. 2 7/12/10
World Class Manufacturing in Car Wash Equipment
Menu Entry
Description
A:04
Coins Required to Turn on Vacuum
B :00
Seconds Vacuum Cycle will Run
C4:00
Minutes Vacuum Cycle will Run
D :05
Number of Times Warning Horn will Sound.
H1:00
Amount of Time Earned by Depositing Additional Coins
A:04
Coins Required to Turn on Fragrance Machine
B:45
Seconds Fragrance Cycle will Run
C:00
Minutes Fragrance Cycle will Run
D:05
Number of Times Warning Horn will Sound
H:11
Amount of Time Earned by Depositing Additional Coins
3EEE 34EE 345E 3459
Personal Identification Number (PIN#)
F3:00
Time the Test Function Runs for.
Congratulations! Your timer is now set up and ready
for operation.
SUPER VAC 3 Installation/Operation Manual
At the one-minute mark I want to alert my customer, with five (5) beeps, that time is about to
run out.
A customer depositing additional coins while using the vacuum will receive one minute of
time for each coin deposited.
A customer depositing additional coins while using the fragrance machine will receive eleven
seconds for each coin deposited.
I have chosen 3459 as my Personal Identification Number (Pin).
I know that it takes me about three minutes to test my vacuum fragrance machine.
The following is how I would set up my timer based on the previous information:
6.5.2 Bay Programming
Depress mode button until the following words appear: BAY, VAC, FRAG, SHAM, FVAC,
SVAC. Use the set button to select BAY for desired function programming.
If you intend to use the timer in a bay press the mode again and you will see the word DOM
(Domestic-US) or INTR (International). Press set to select nationality.
Press mode again. “T” will appear allowing you to program “Token” setting.
o If you are using a separate coin acceptor for tokens only use set to program token value.
o If you are not using a separate coin acceptor for tokens disregard this setting.
Coleman Hanna Carwash Systems 93000/94000 Super Vac
Page 12 of 38 Rev. 2 7/12/10
 Loading...