

Page 1
Assemble Frame
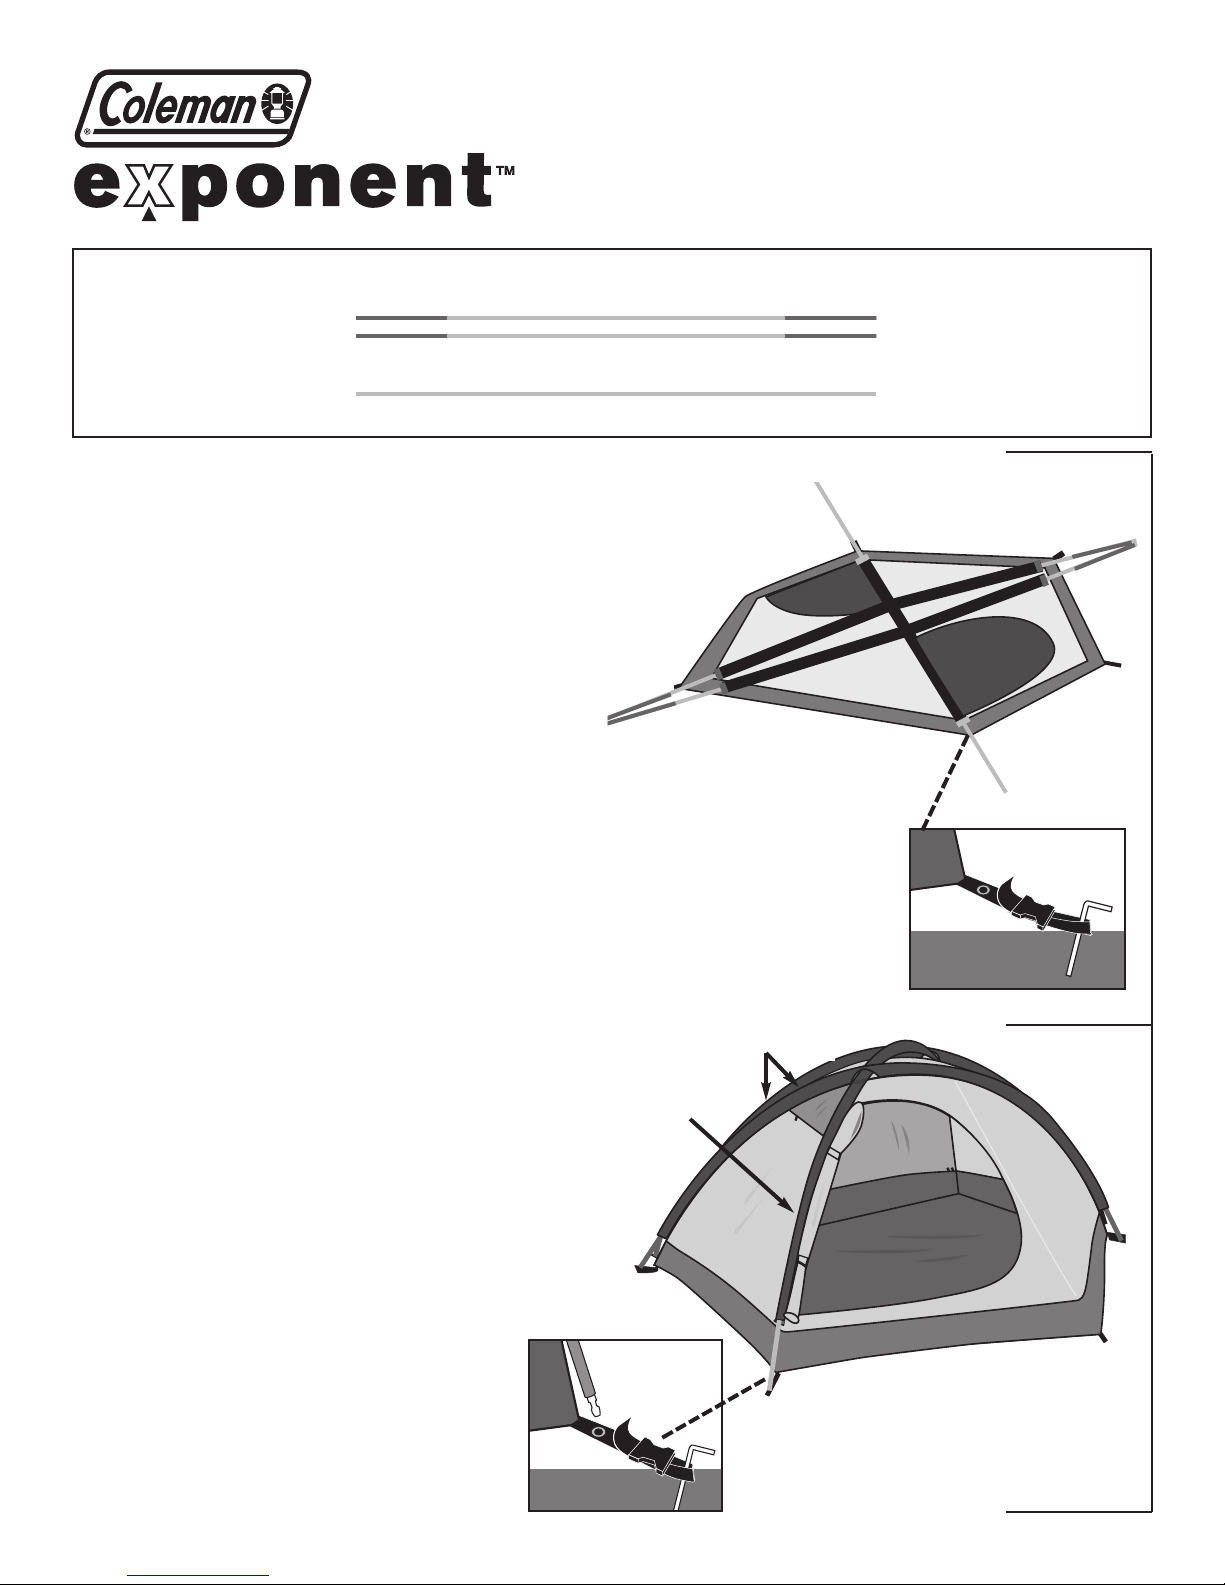
– Insert one end of the Main Tent Pole tips into
the grommet on the same webbing located at
the corner of the tent. (illus. 3), (illus. 4)
– Go to opposite end of the Main Tent Poles and
gradually apply pressure to the poles, forming
an arch, until you are able to insert the pole tips
into the grommet. This is easiest if you insert
them in the same order back to front. (illus. 4)
– Insert end of Cross Pole into grommet at the
corner of tent and go to opposite end
of the Cross Pole and gradually apply
pressure to the pole, forming an arch,
until you are able to insert the pole
tips into the grommet. (illus. 4)
ascend
™
2
part number 9840-230
1
2
Layout & Positioning
of Tent, Pole Assembly
– Layout and position tent with doors facing
desired direction. (illus. 1) Unzip doors.
– For best results in windy conditions, position
door or back of tent into the wind.
– Stake down tent corners. Keep the floor
taut. (illus. 2)
– Assemble Frame Poles by interlocking the
shock-corded sections. This will make two
long red tipped Main Tent Poles and one long
silver Cross Pole.
– Insert the two Main tent Poles through the pole
sleeves with the red trim.
– Insert the silver Cross Pole through the pole
sleeve with the silver trim.
Main Tent Poles (Red Tip)
Part No. 9840-101
Cross Pole (Silver)
Part No. 9840-102
Rainfly
Part No. 9840-110
illus. 1
illus. 2
Tent stake
through Loop
illus. 3
Insert Pole Tip on
stake loop into pole.
illus. 4 Tent frame up
POLE ASSEMBLY PARTS
Main Tent Poles
Cross Pole
Page 2
Pro-Tips
• Under certain conditions (cold weather, high humidity, etc.) condensation will form on the inside surfaces of your tent.
Condensation is caused by water vapor from your breath, perspiration, or any wet clothing inside your tent. It is NOT LEAKAGE
through the tent fabric. Opening the interior access zippers and adjusting the vents on the rainfly, allowing good ventilation
through the tent, can minimize condensation.
• Never store tent, even for a short period of time, without
drying it thoroughly and brushing off caked dirt. Do not pack
stakes or poles inside your tent. Use separate storage bag.
• STAKES SHOULD BE REMOVED BY PULLING ON THE STAKE
ITSELF. NEVER PULL ON THE TENT FABRIC OR TENT STAKE
LOOP TO REMOVE STAKE.
• TENT POLES SHOULD NOT BE LEFT TELESCOPED TOGETHER
DURING STORAGE.
3600 N. Hydraulic • Wichita, Kansas 67219
1-800-835-3278 • www.coleman.com
3
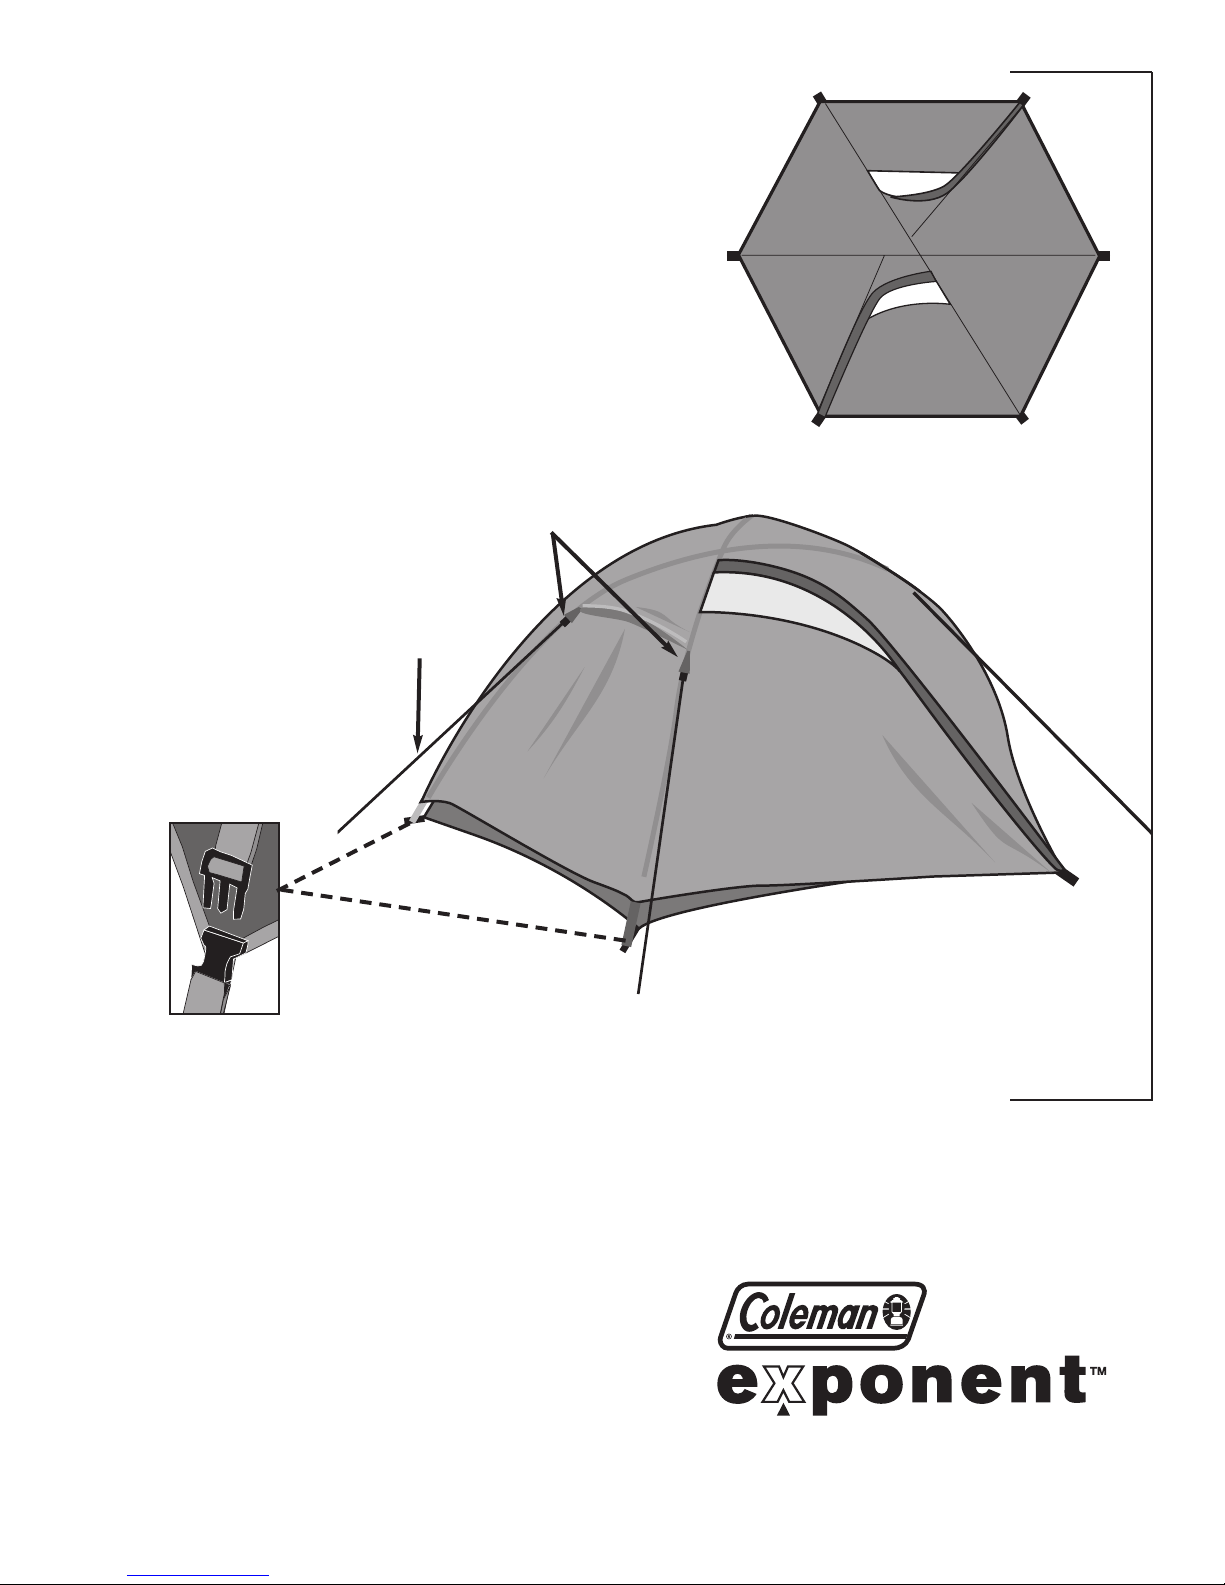
Attach Rainfly
– Drape Rainfly over tent frame, with
rainfly doors lining up over tent doors.
(illus. 8)
– Connect the four clips (found at the
Rainfly corners) to the clips located at
the corners of the tent. (illus. 9)
– Stake out rainfly doors, keep rainfly taut.
(illus. 7)
– Attach Guy Lines to Guy Wings on
the sides of the Rainfly and stake out
(illus.10).
illus. 5
Rainfly
illus. 7
Completed tent
with Rainfly.
Guy Line
Guy Wings
illus. 6
Rainfly clips
onto pole
stake loop
PRINTED IN CHINA
© 2005 The Coleman Company, Inc. All Rights Reserved.
 Loading...