

Coleman CT200U, CT100U Assembly/pre-ride Inspection Instructions
WARNING
Never attempt to start this Mini Bike without reading and
understanding the Owner’s/Operator’s manual. The Owner’s/
Operator’s manual provides information on safety, parts,
functions, pre-ride inspection, starting and maintenance.
!
For questions about these Assembly Instructions, call Coleman
Powersports toll free 888-405-8725
ASSEMBLY/PRE-RIDE INSPECTION
INSTRUCTIONS
11132012
Mini bike may have oil
in it when shipped from
the factory. However, it
is a good idea to drain
this oil and replace with
new SAE 10W-30 Motor
Oil before starting the
engine for the rst time.
CT200U
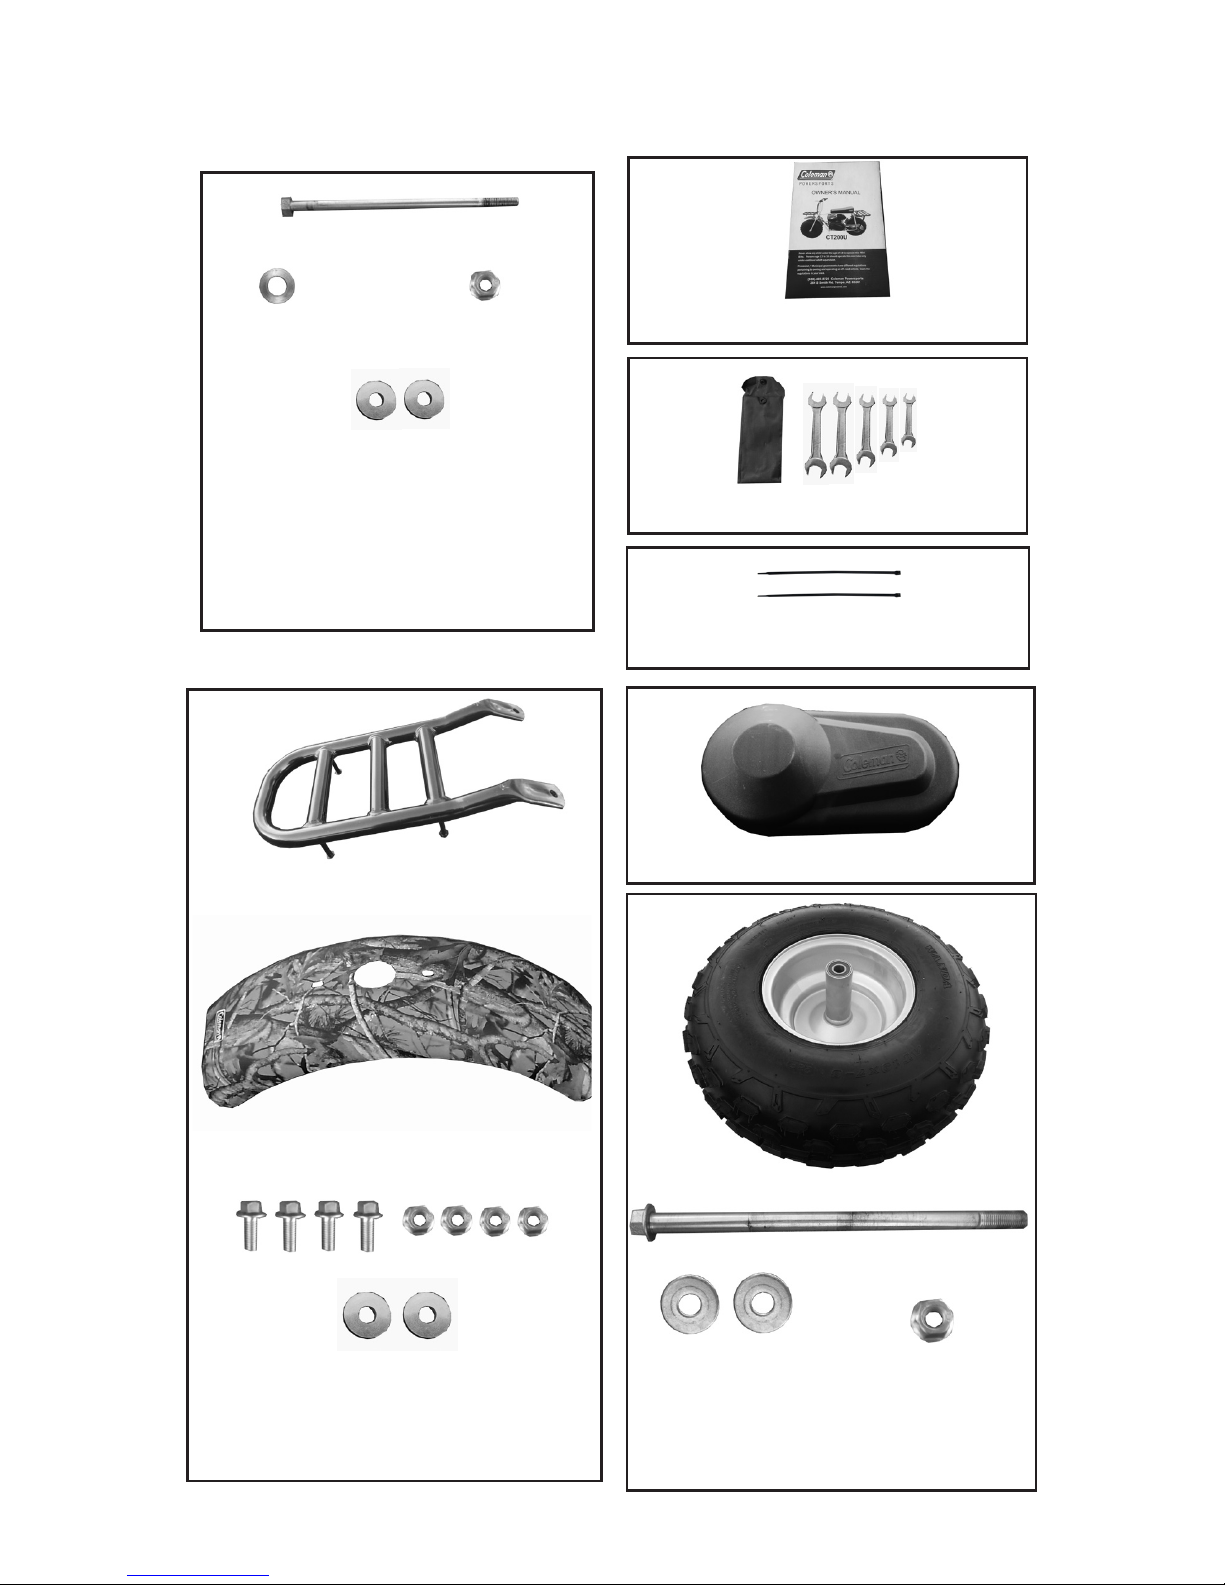
REMOVAL FROM CRATE
1
Owner’s/Operator’s Manual
Tool Kit
Zip Ties
Front Fender
Front Rack
and Fender
Assembly
Front Fork
Assembly
Hardware
10mm Large Washers
10mm Lock Nut
10mm Small
Washer
10mm Steering Bolt
Front Rack
8mm Large Washers
8mm Nuts
8mm x 20mm Bolts
Wheel Assembly
Front wheel
14mm Lock Nut
14mm Washers
14mm Axle Bolt
Clutch Cover
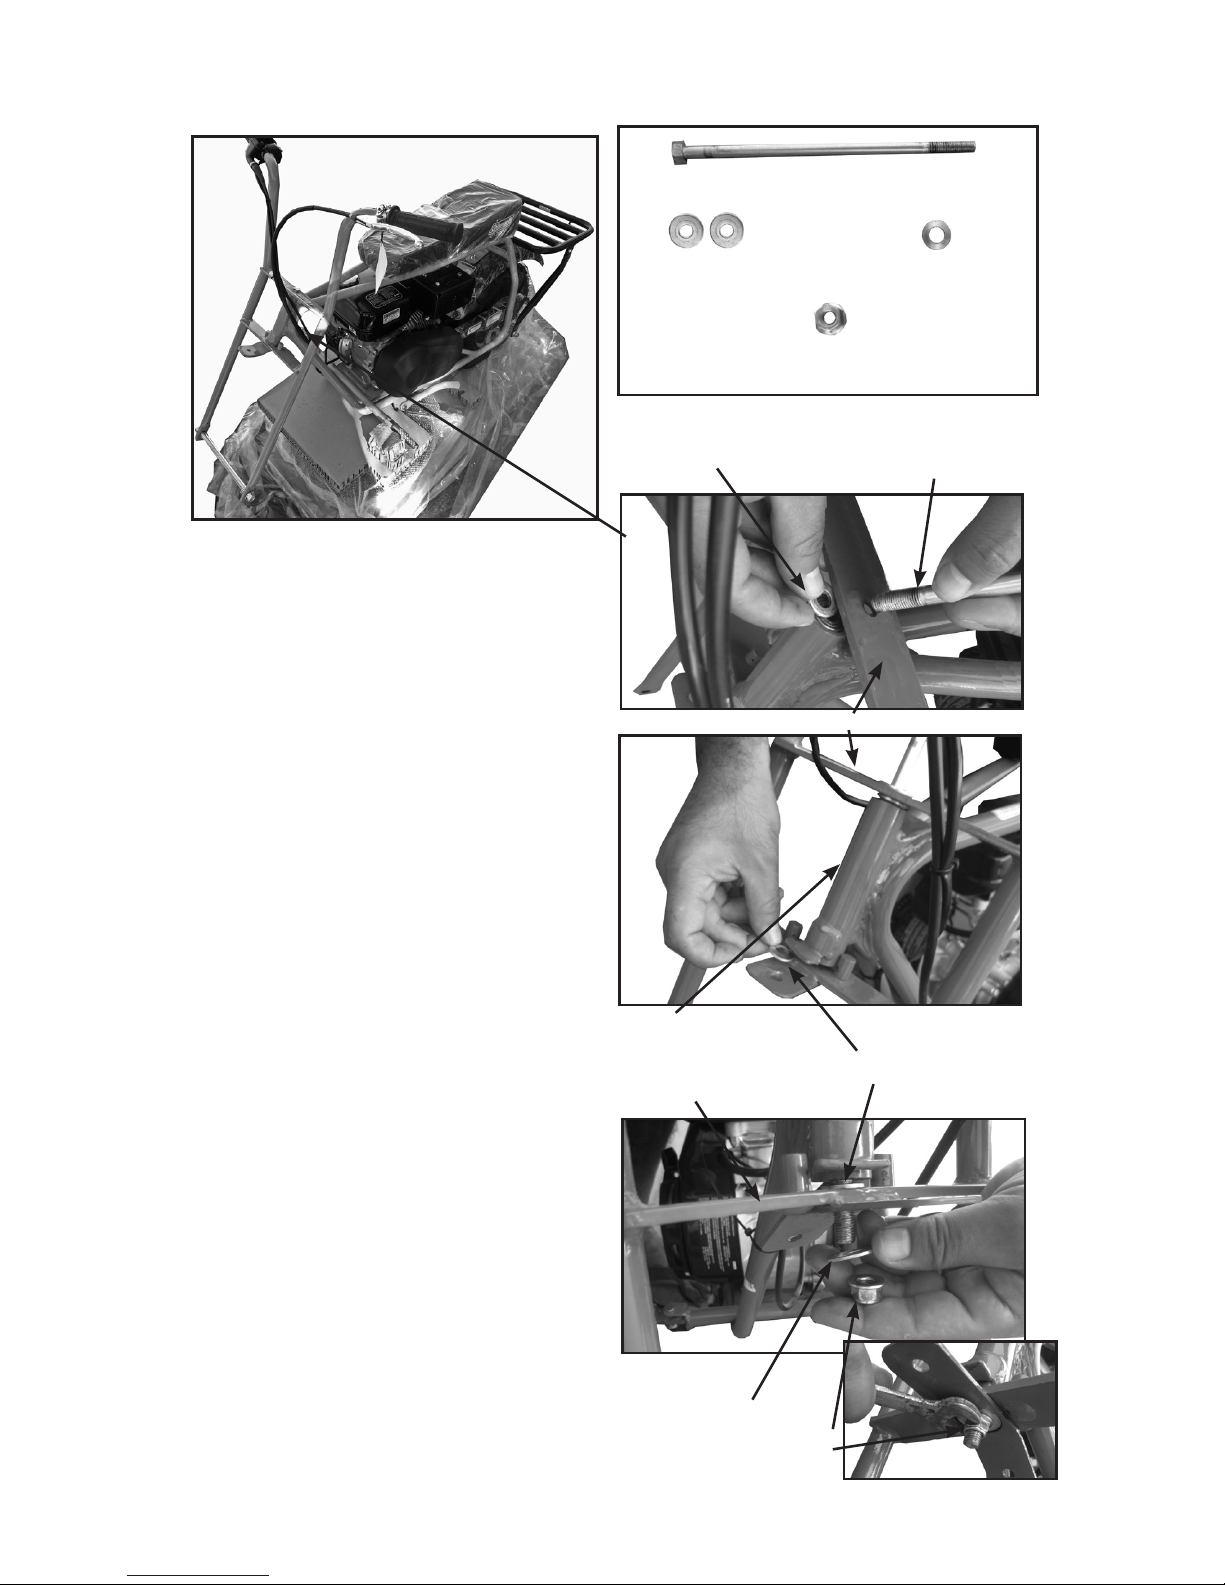
1. Install front Fork Assembly by
inserting the 10mm steering bolt
through the assembly in the
following order:
Top bracket, Small 10mm
Washer, Steering Neck, Large
10mm Washer, Bottom Bracket,
Large 10mm Washer, Lock Nut
FRONT FORK INSTALLATION
2
Large Washer
2. Tighten nut
Torque nut to 30 ft .lbs. ( 41Nm)
Small Washer
Steering Bolt
Large Washer
Lock Nut
10mm Steering Bolt
10mm Large Washers
10mm Small Washer
10mm Lock Nut
Top Bracket
Steering Neck
Bottom Bracket
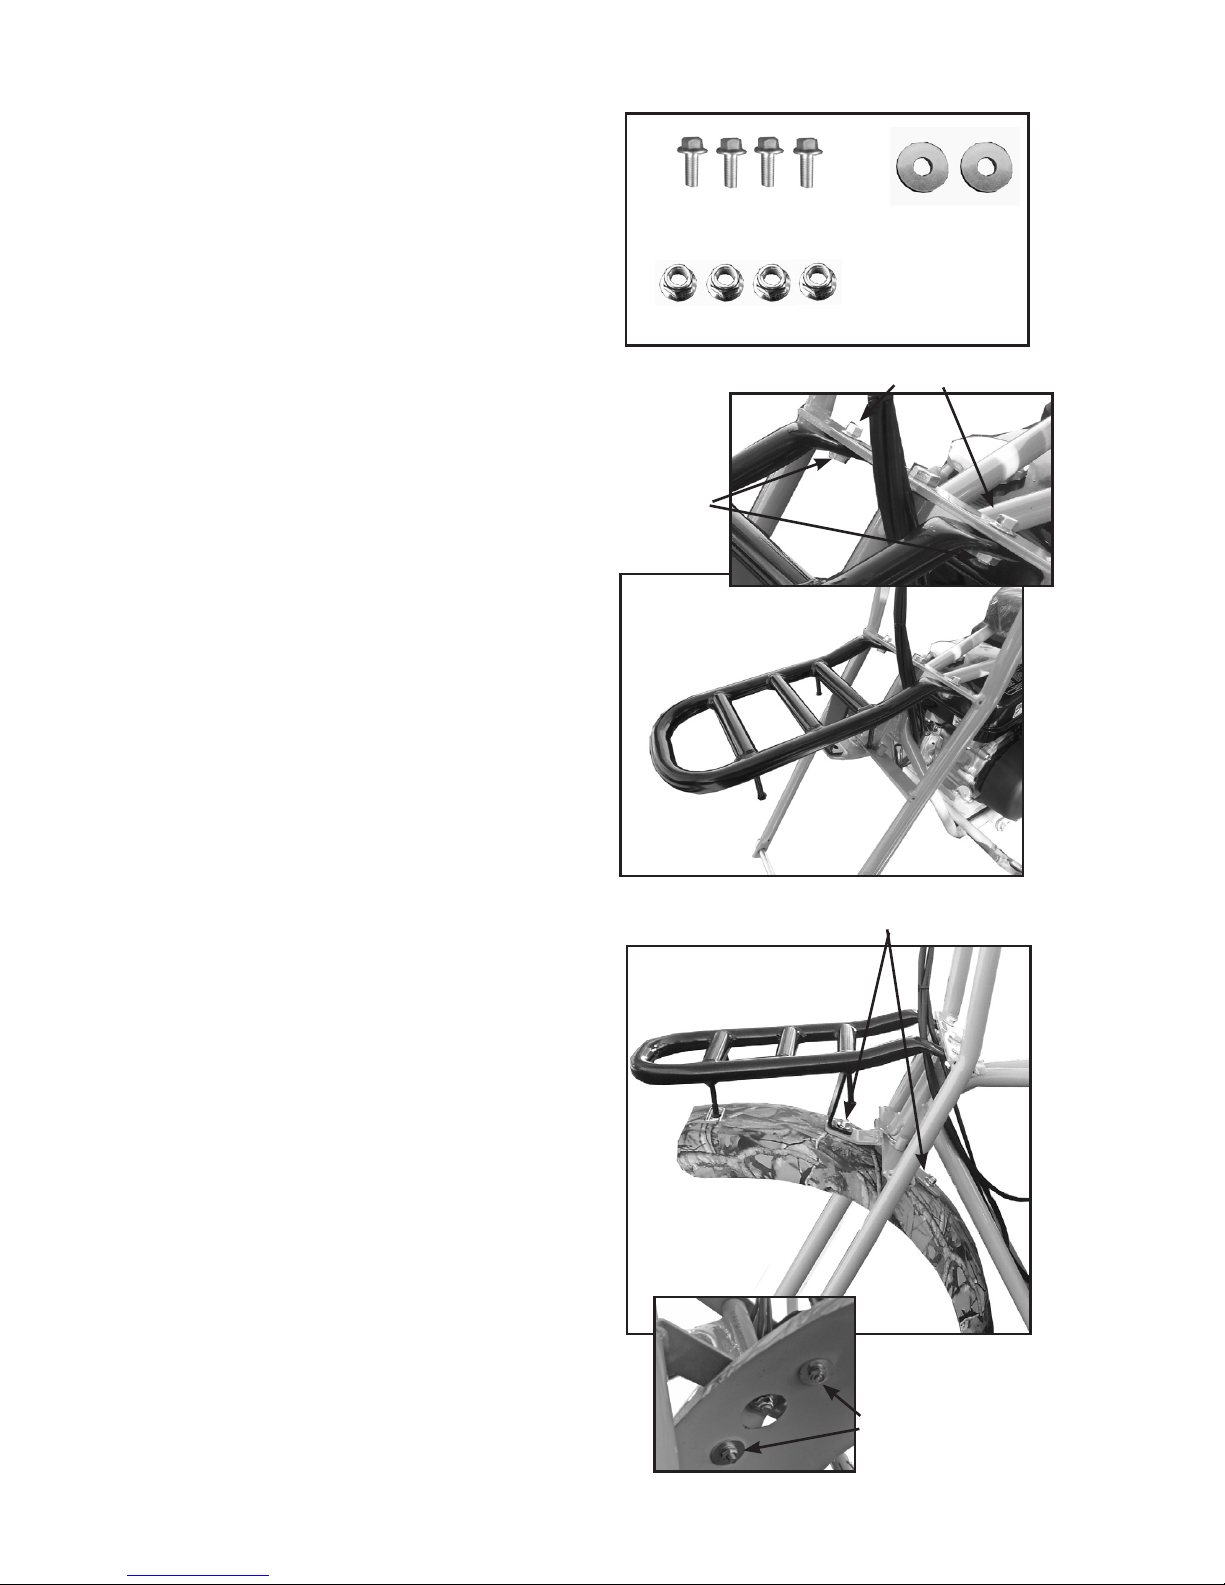
3
2. Attach front fender with 8mm x
20mm bolts, large 8mm washers
and 8mm nuts.
Note: Small portion of fender faces
foreward
FRONT RACK AND FENDER INSTALLATION
Large 8mm Washers
8mm Nuts
8mm x 20mm Bolts
8mm x 20mm Bolts
8mm x 20mm Bolts
Large 8mm
Washers
8mm Nuts
8mm Nuts
1. Attach the Front Rack to the
Steering Column Assembly using
8mm x 20mm bolts, and 8mm nuts
 Loading...