

Page 1
CWS 32003
MiG-29 9.12 Cockpit Set Assembly Instructions
Note: This set is for experienced modelers.
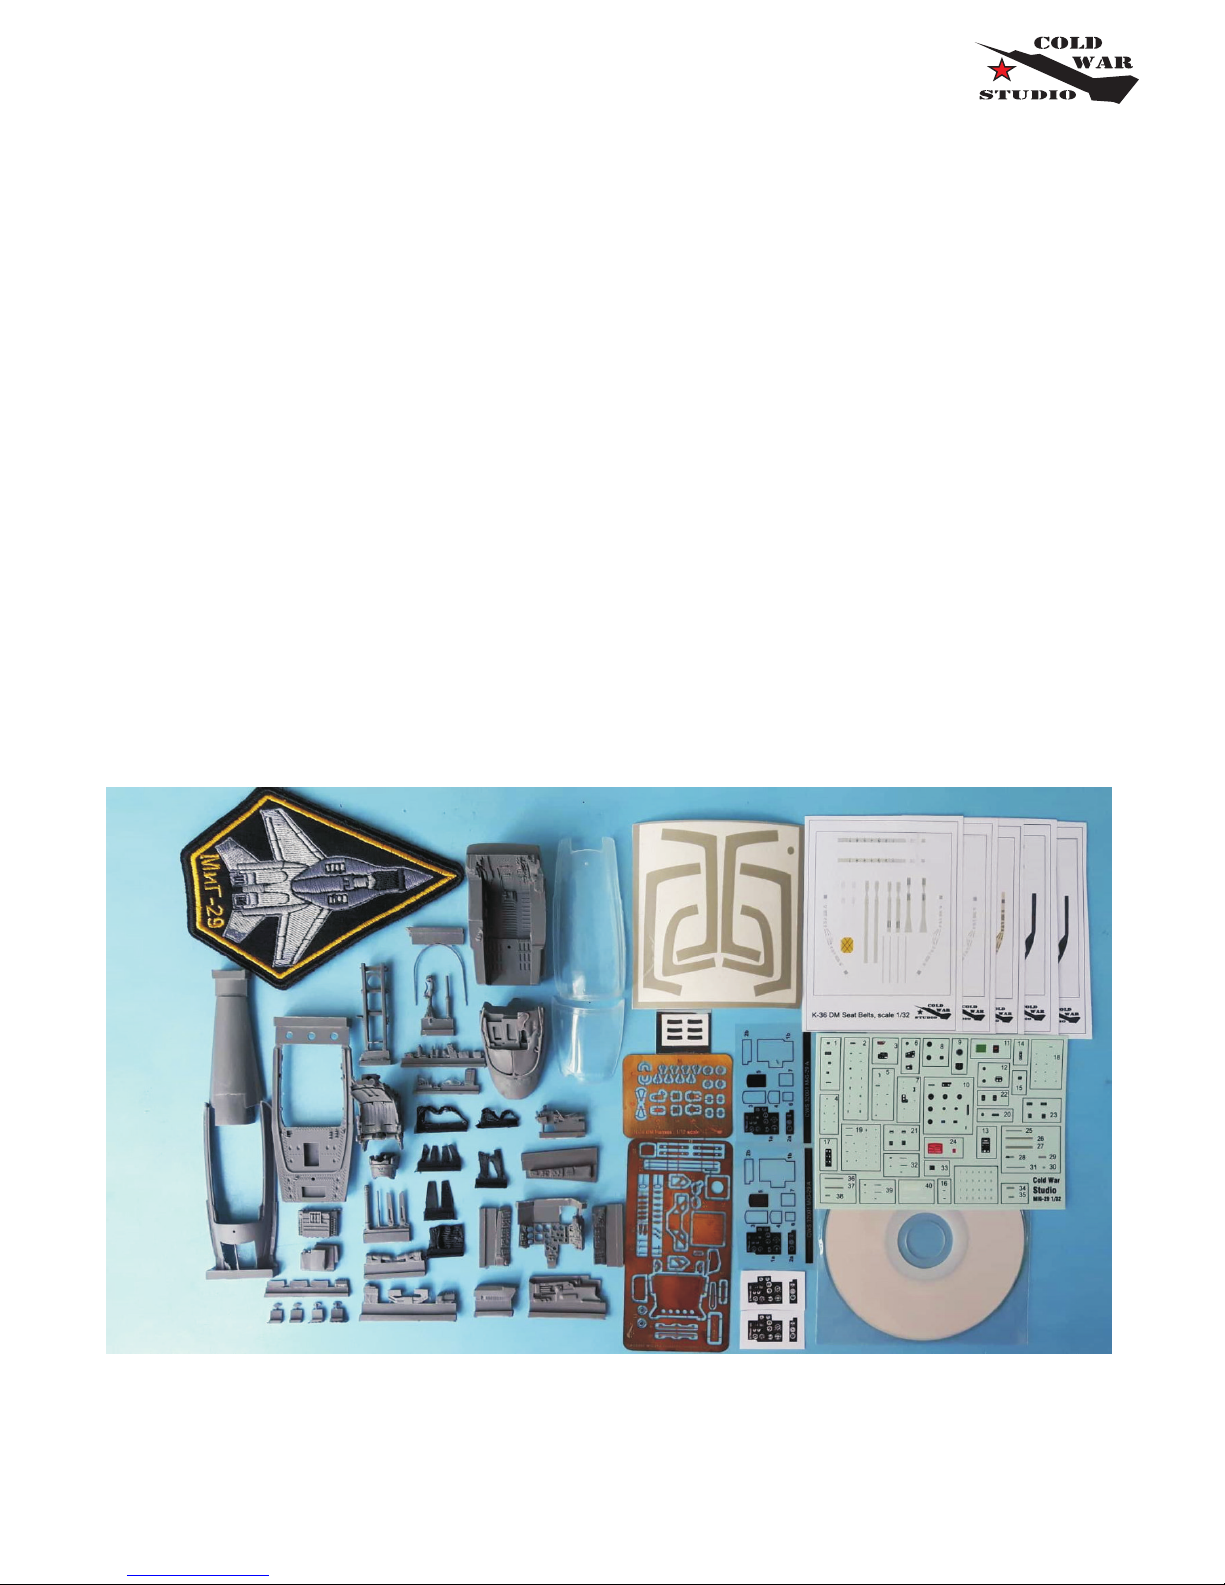
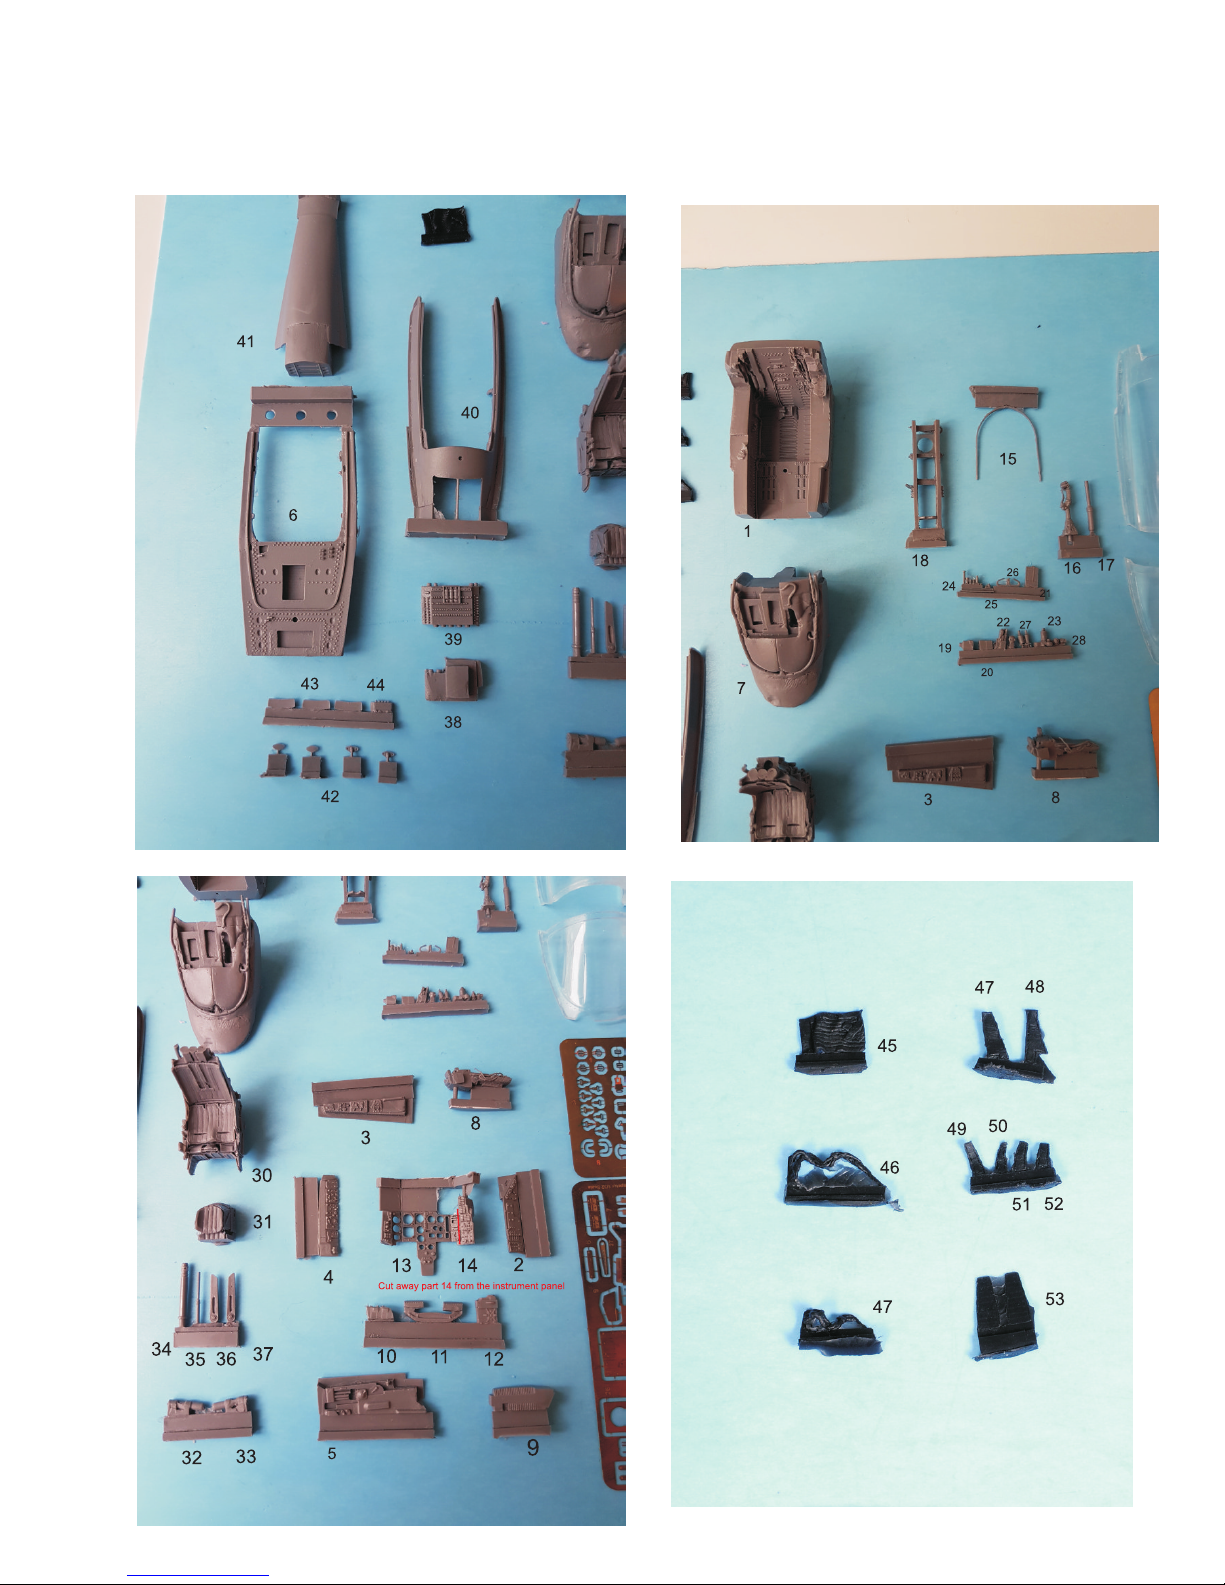
What You get in the box:
For the Trumpeter kit in 1/32 scale
The clear resin parts can be heated in hot water and bent
multiple times if needed. They can also be sanded and polished.
Color Prints
PE
PH
Vinyl Masks
Clear Film Parts
Page 1
Page 2
Page 2
29
Page 3
55
PH
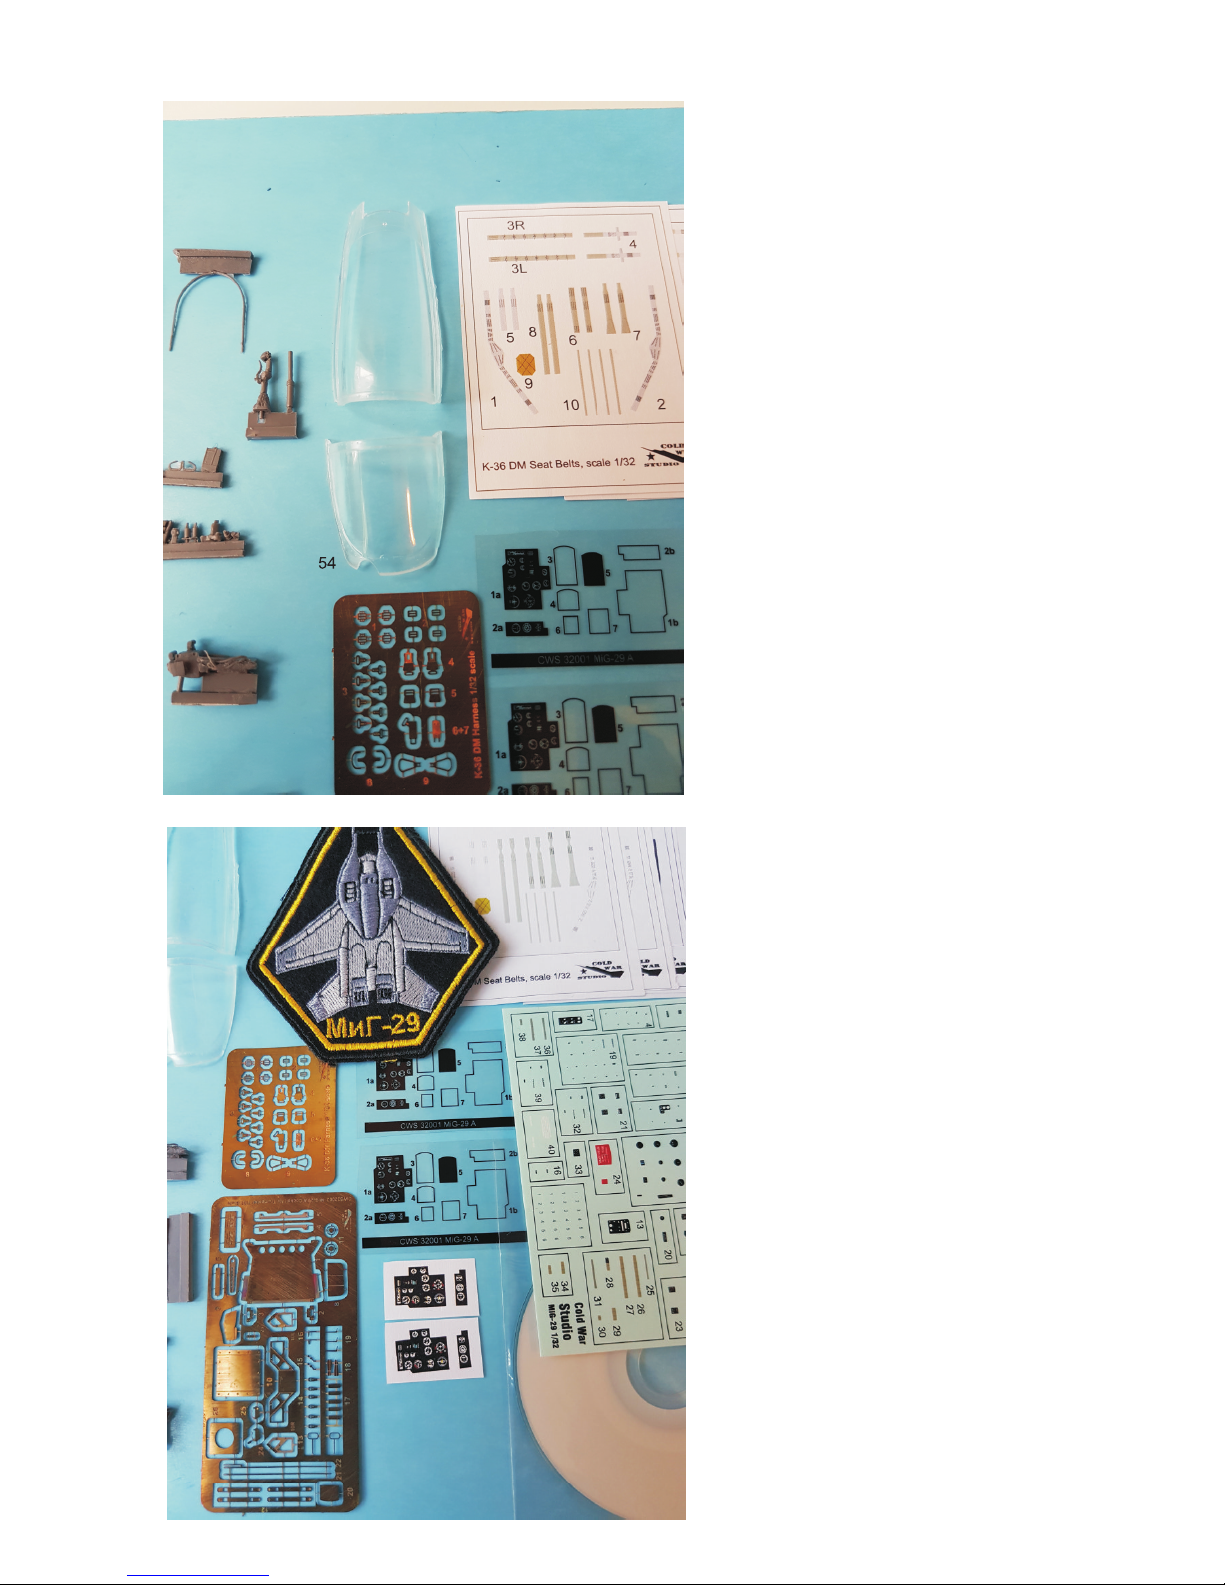
Paper printed belts in
different possible shades
Clear films
PE
PH
Color prints
Decals
Instructions
and walkaround
pictures
PE 28
Page 3
Page 4
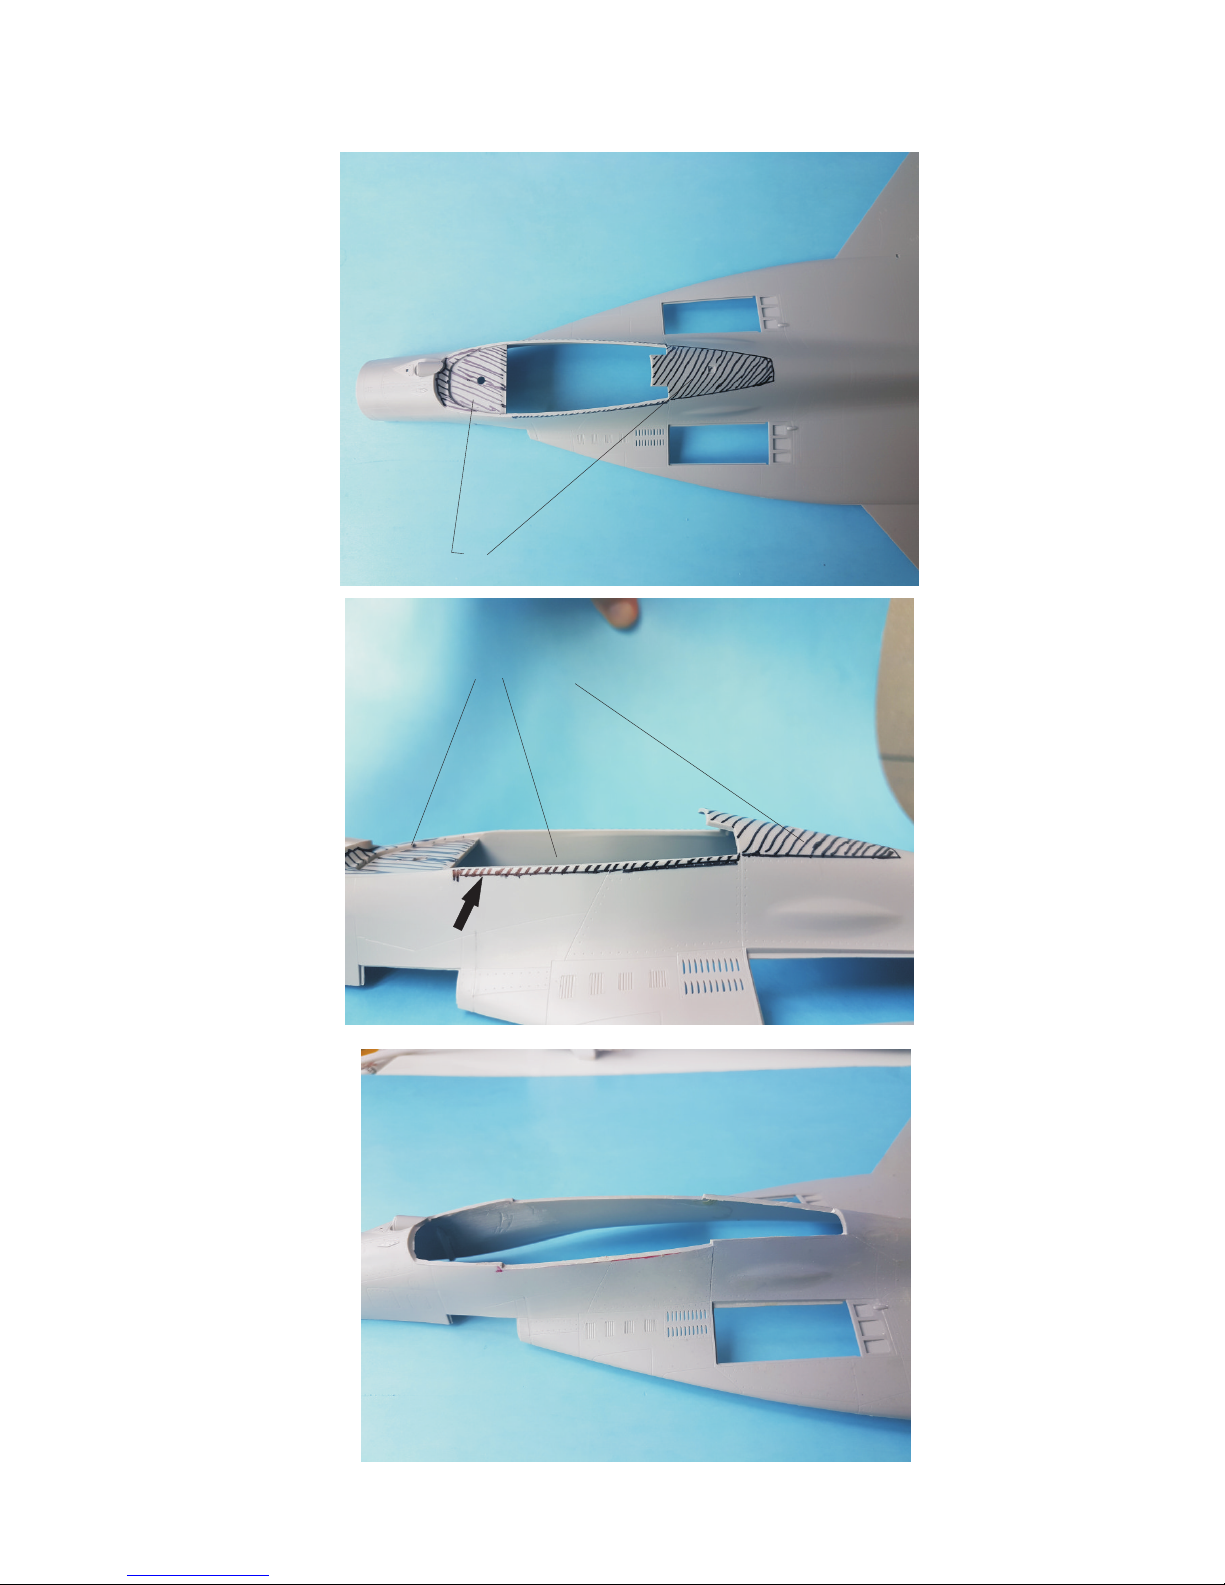
FIRST THINGS TO DO
Page 4
Cut off the marked area
Cut off the marked area
1.5 mm
Page 5
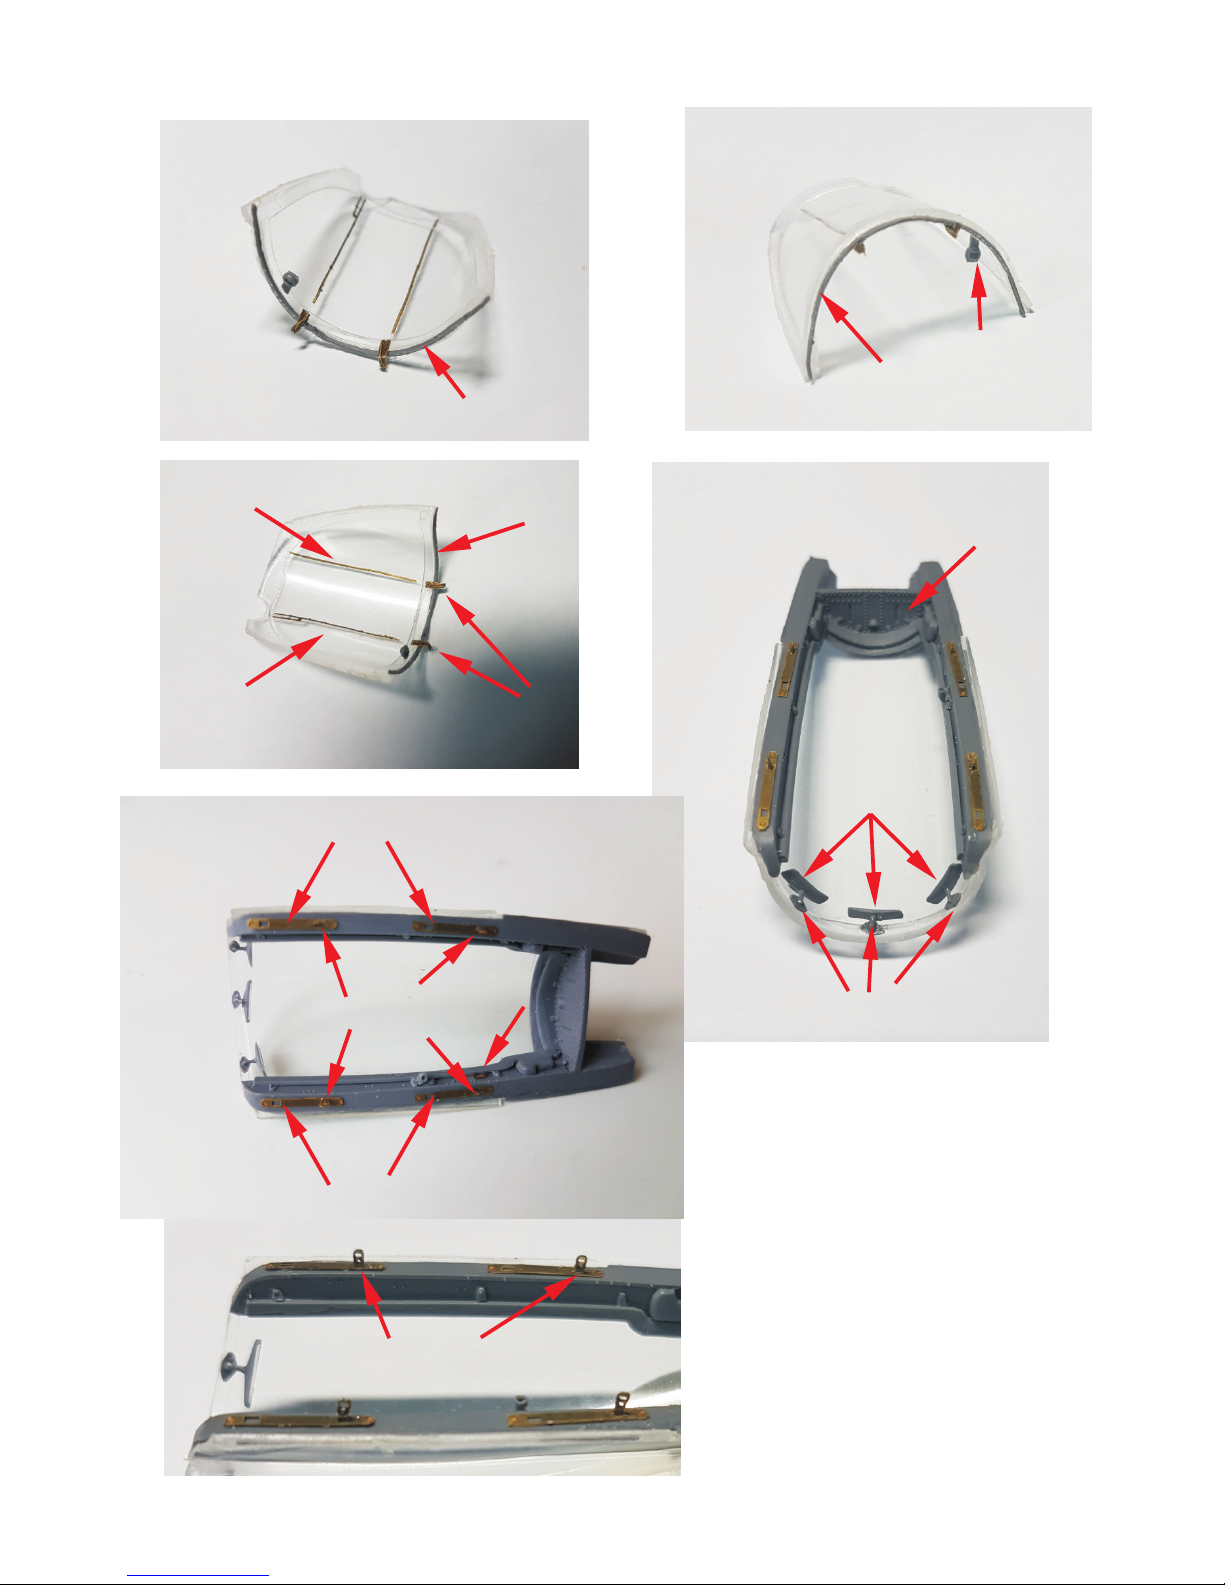
CANOPY ASSEMBLY
Page 5
PE 21
PE 22
29
15
15
15
PE 18+19
PE 18+19
54
55
40
40
PE 12
PE 12
PE 14
42
43
PE 14
Use the provided masks to paint the canopy. There is a mask
for the inside and a mask for the outside of the canopy.
Don’t forget tp make the pink sealant
on the outside of the canopy hood.
I personally prefer to paint it with acrylic
pink paint on some spare decal paper
and then cut thin strips of it and applying
it as a regular decal.
PE 23
Page 6
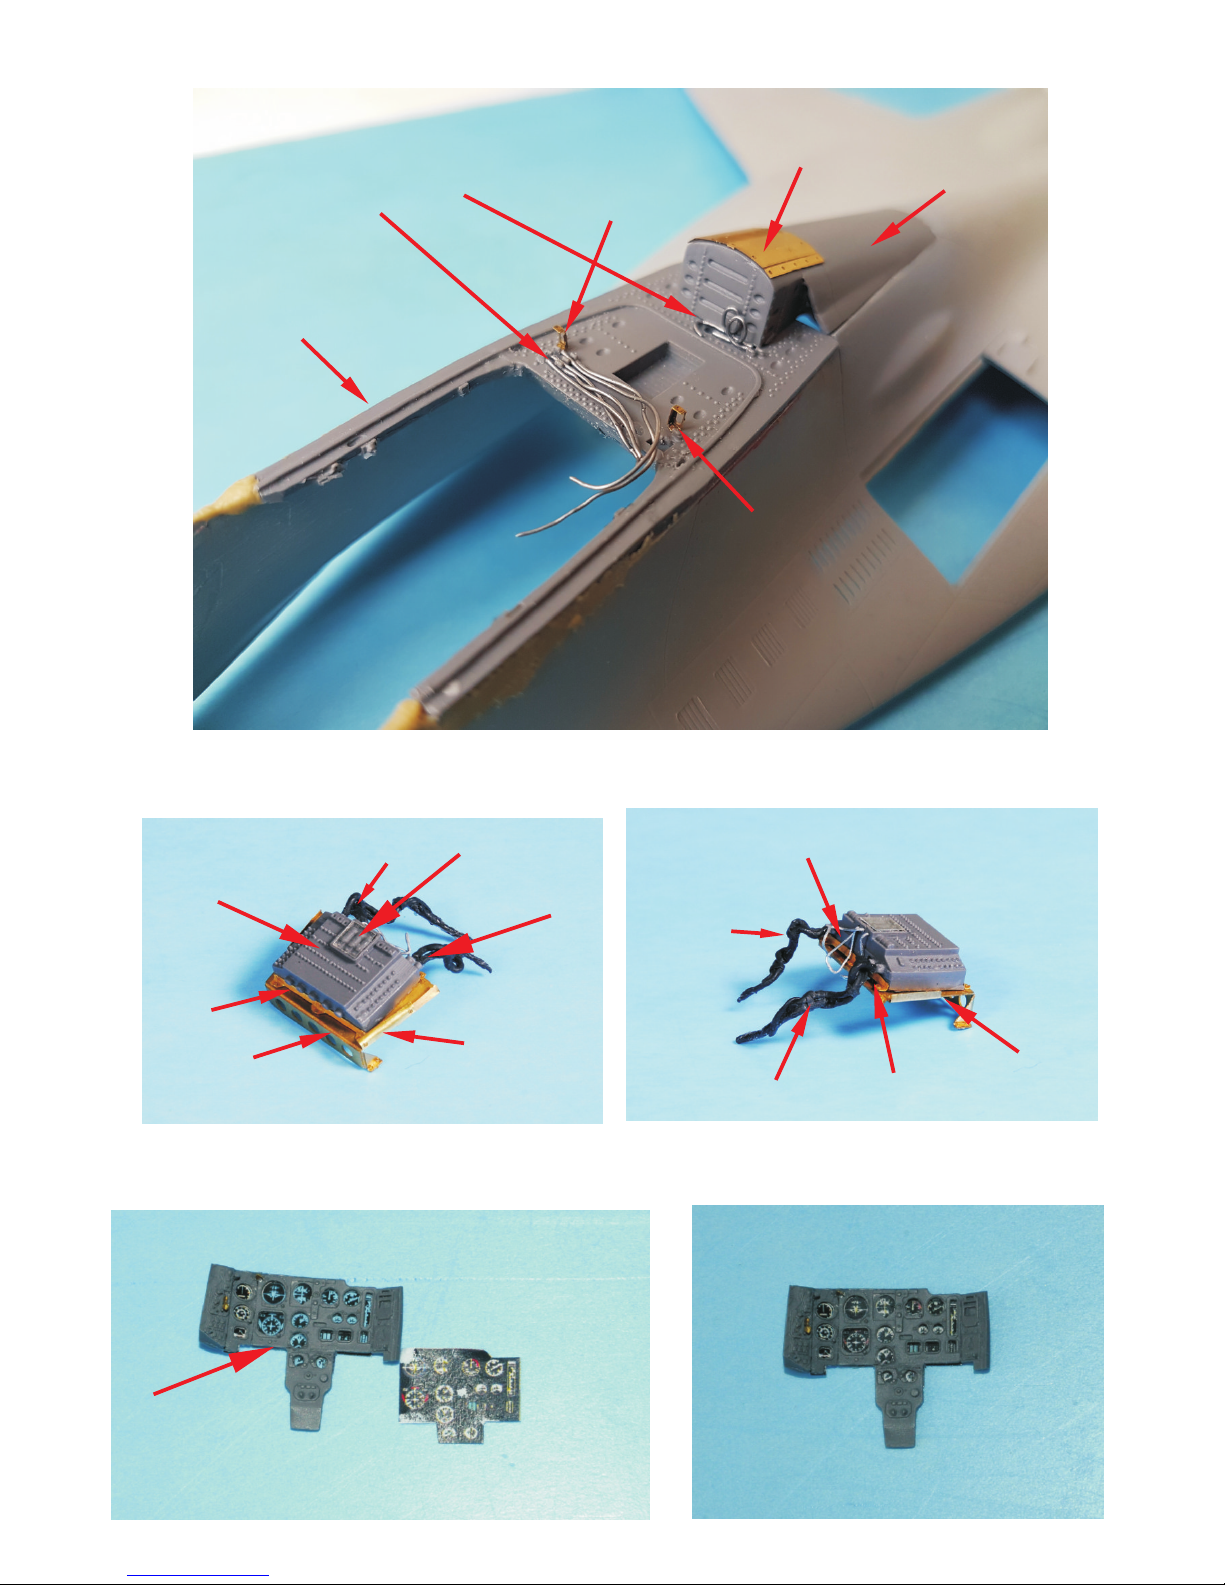
Fuse Box Assembly
39
46
47
Clear film part 7
PE 1
PE 6
PE 4
PE 5
46
47
PE 1
Add 3 wires
Instrument Panel and Coaming Assembly
13
For the instrument dials use clear film part 1a, 2a or parts 1b and 2b
to simulate the glass of the instruments. Then glue the paper color print
or paint the instrument read outs.
This is how it looks with the 1a, 2a and the color print
Page 6
Add wires
PE 2
PE 3
PE 28
41
6
Page 7
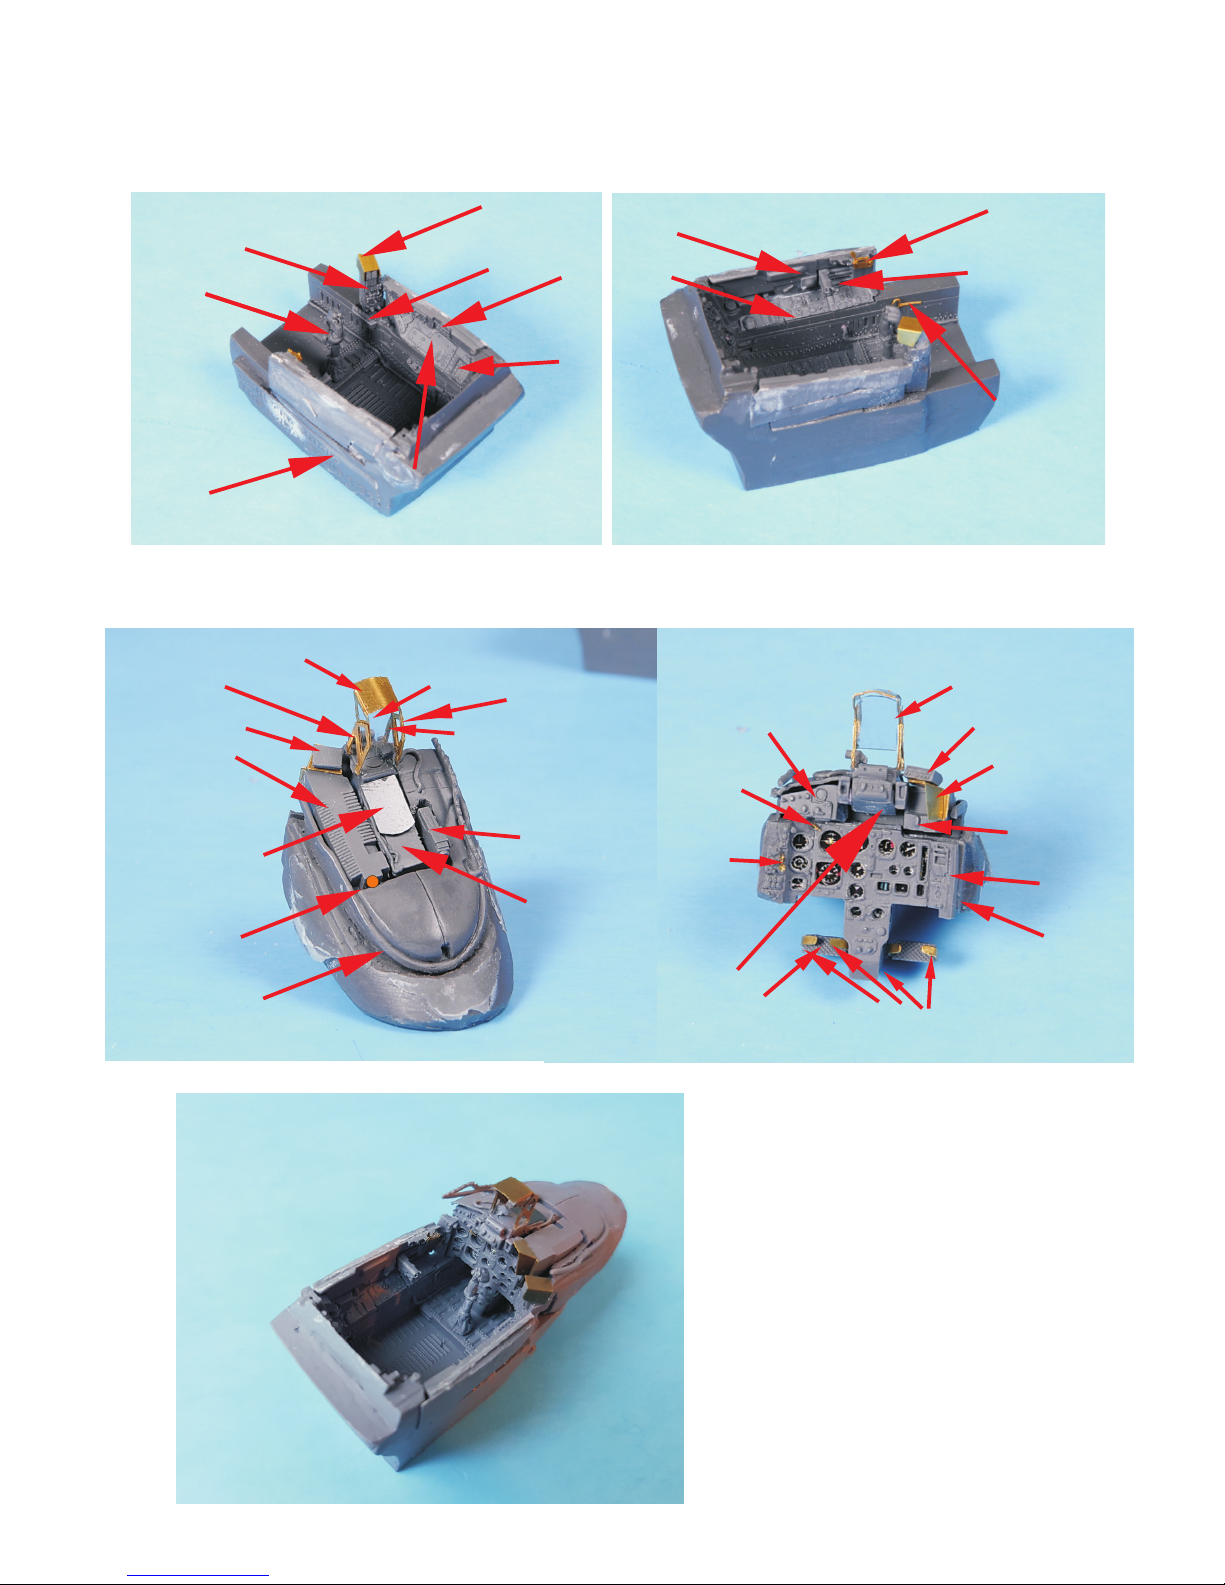
Cockpit Tub Assembly
1
2
3
PE 8
Clear film part 6
14
44
16
4
5
22
PE 13
PE 24+25
PE 15
PE 16
PE 9
PE 10
Clear film part 3
Clear film part 4
Clear film part 5
PE 17
11
10
13
20 (optional)
PE 10
12
9
20(optional)
Page 7
8
8
9
7
7
PE 11 cooling fan
PE 10R
PE 10L
Glue together the two sub assemblies
Instruments panel and coaming assembly
Page 8
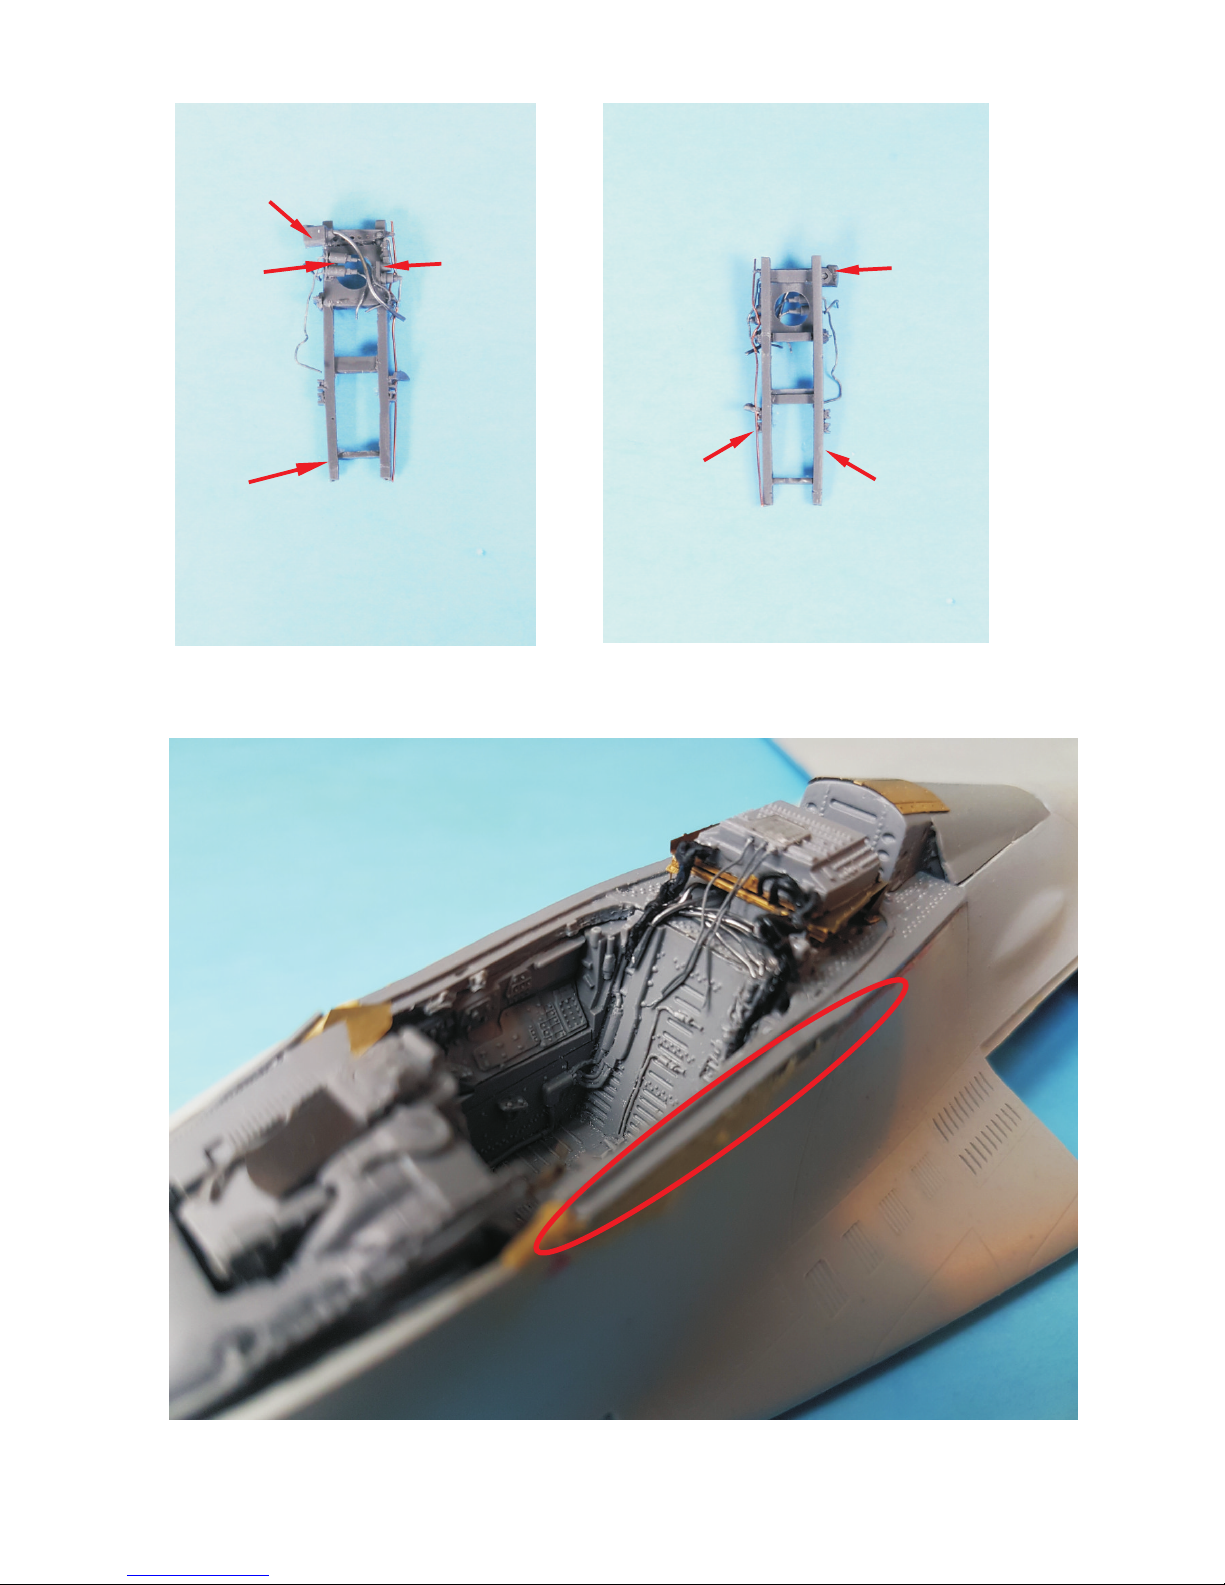
Rail Assembly
18
19
19
18
27
28
Add wire
Add wires as shown
Page 8
Use PE parts 27 and 28 to repair the rail if needed
Glue the cockpit tub and coaming in the fuselage.
Then glue in place the fuse box assembly.
Sand smooth and shape
according to your reference
photos
Page 9
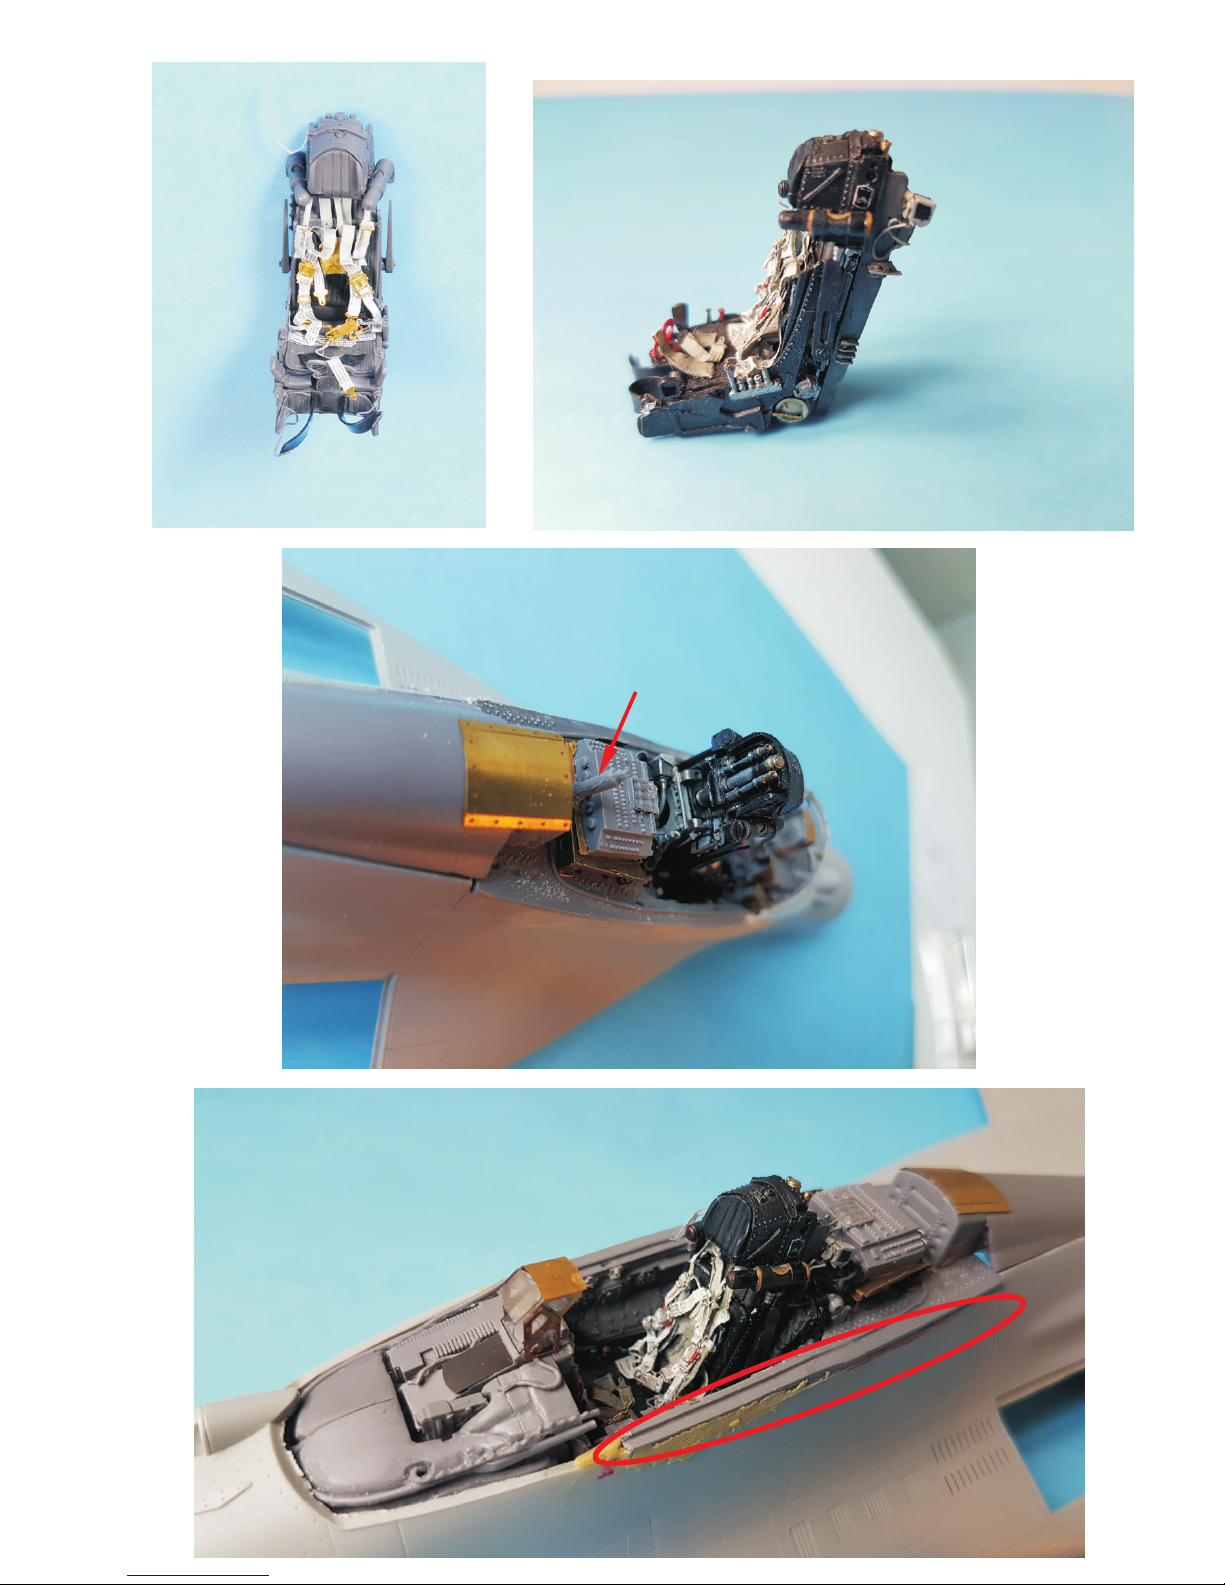
Take the K-36 DM seat.
Its assembly instructions are in
a separate document.
Sand smooth and shape
according to your reference
photos
Slide the seat in the rail.
Note. The seat here is already painted.
Slide the seat and the rail in
the cockpit tub and glue the
rail to the back wall.
17
Page 9
Page 10
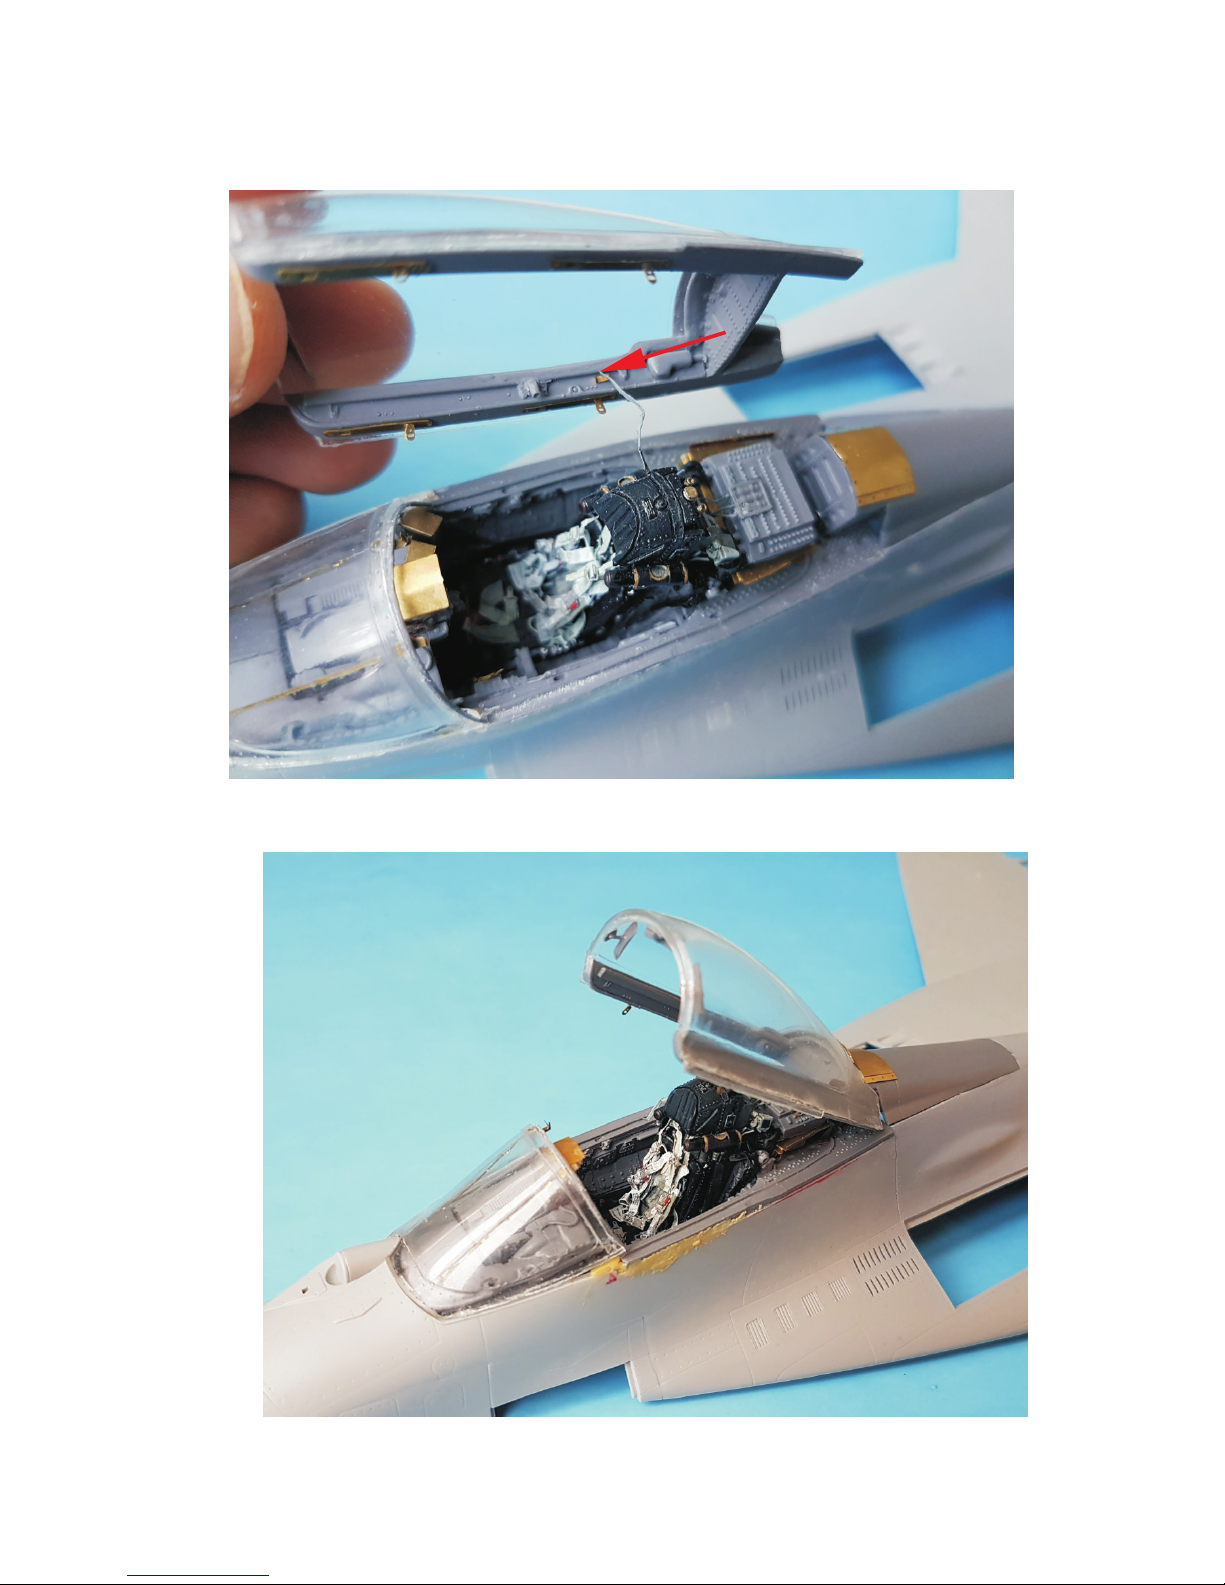
Final Assembly
Glue the paper line to the canopy frame part PE 23
Install the canopy and windshield in place and you are done!
Happy modeling!
Use PE 20 placards for the safety pins rope you can install in your cockpit according to your references.
You can use the decals to further detail your cockpit and use the provided walk around pictures for that.
Page 10
For information on future products and releases, please visit www.coldwarstudio.com
Page 11
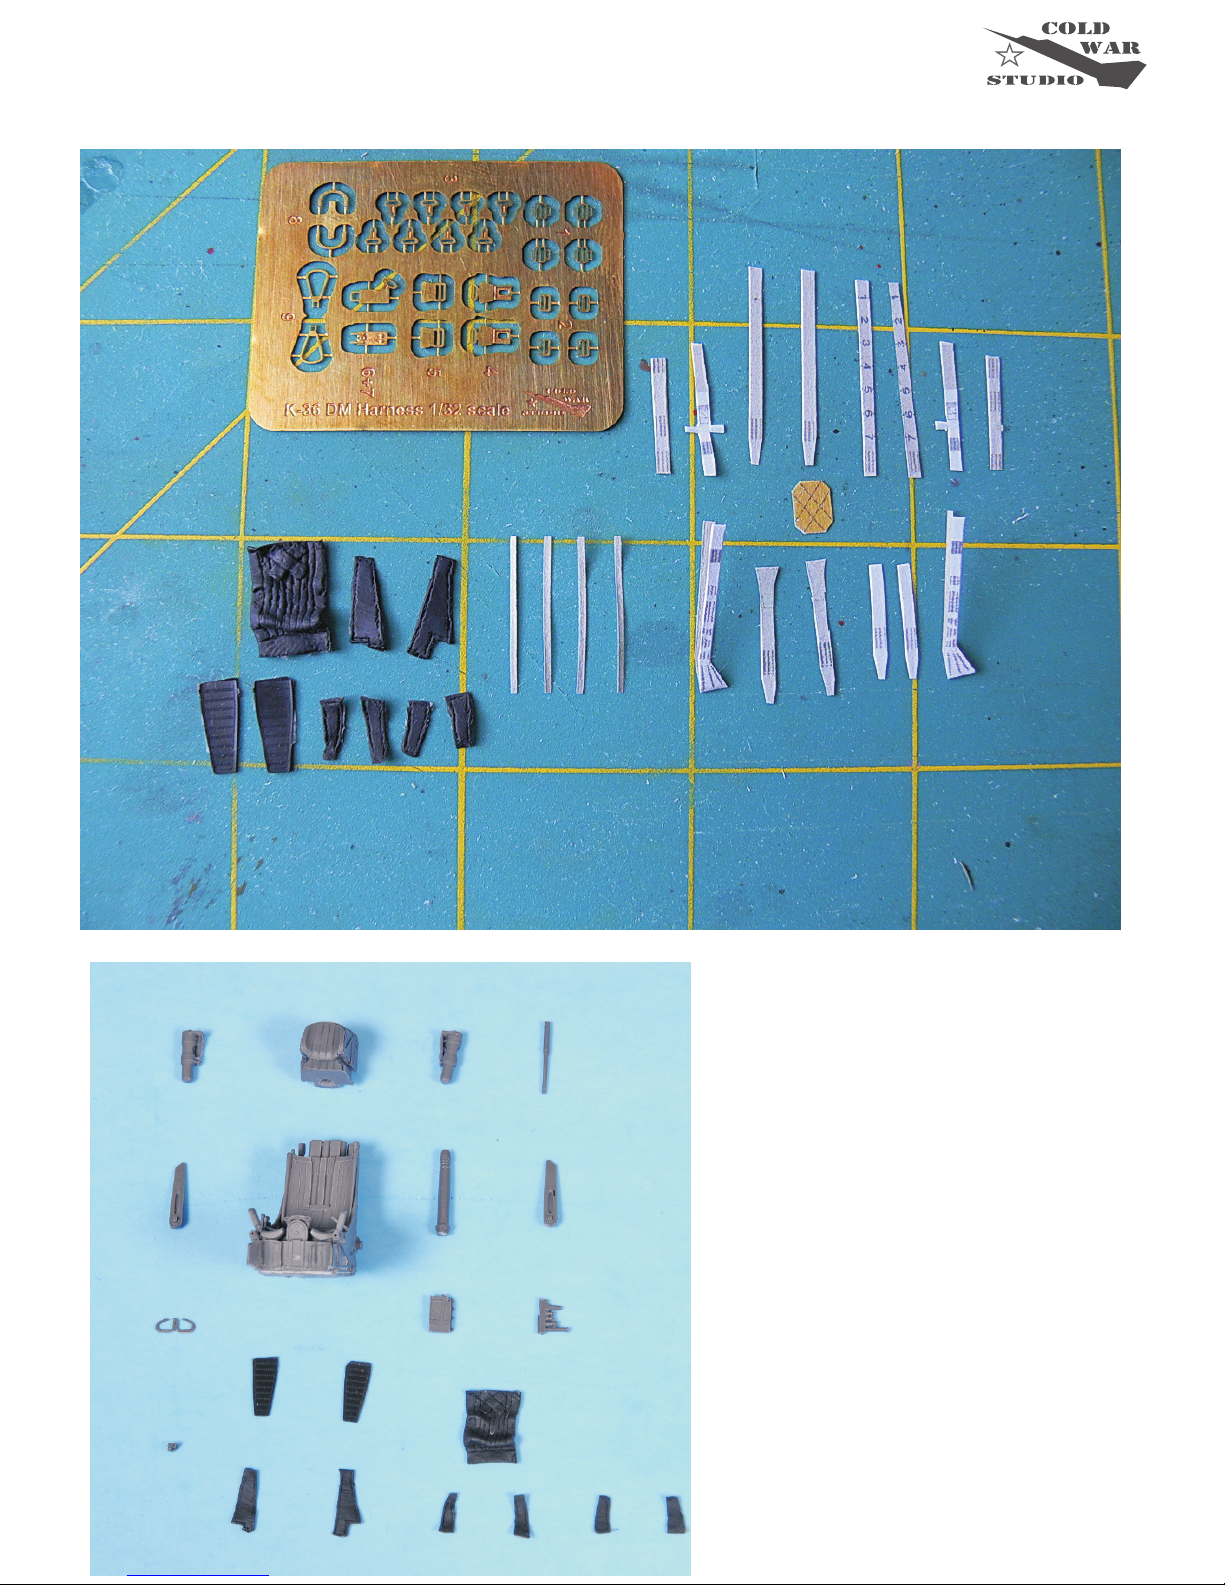
K-36 DM Ejection Seat 1/32 scale
Assembly Instructions
30
31
34
35
37
36
32
33
24
25
26
21
53
45
47
48
50
49
51
52
1
2
9
5
7
6
6
8
10
4
4
3L
3R
PH
45
53
47
48
50
49
52
51
Page 1
Page 12
30
35
34
36
37
21
24
34
35
36
53
31
25
26
53
31
36
37
24
32
33
34
32
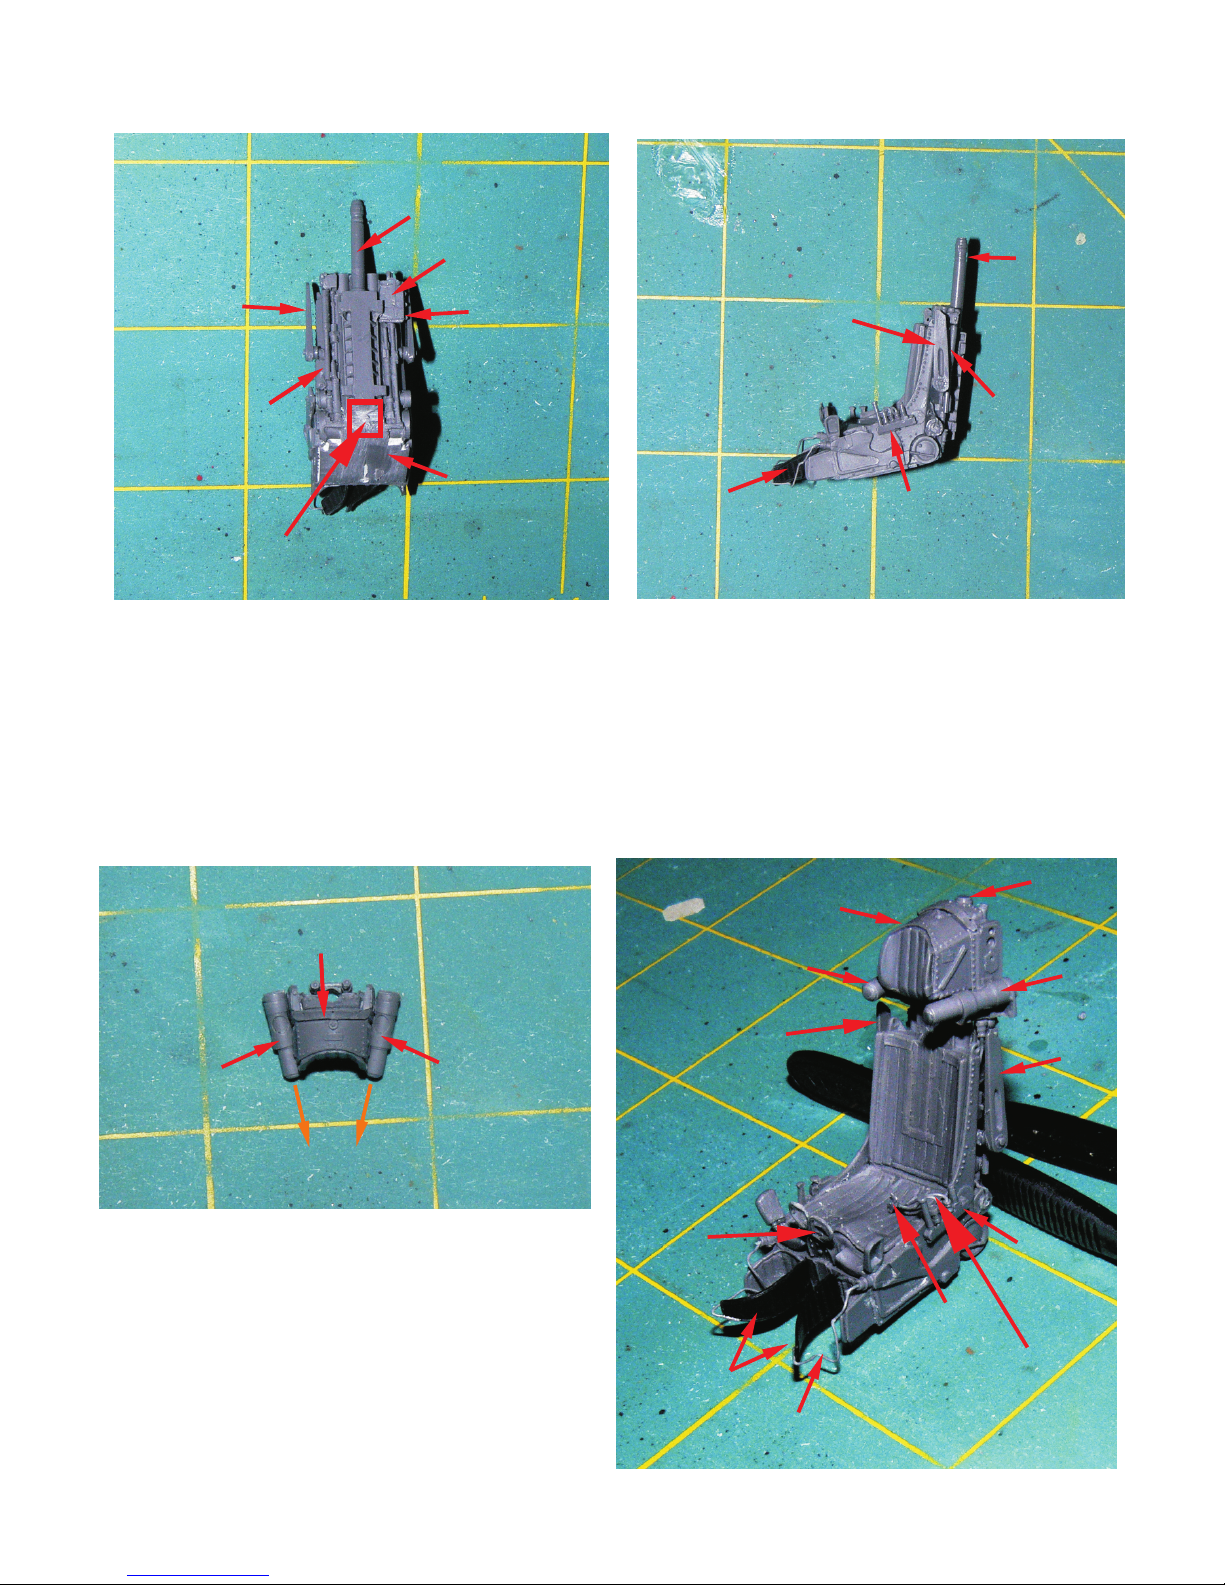
Trim this part of the seat to make possible the installment of
the seat in the rail.
Pay attention to the angle
Add wire
Add wire
33
Page 2
Page 13
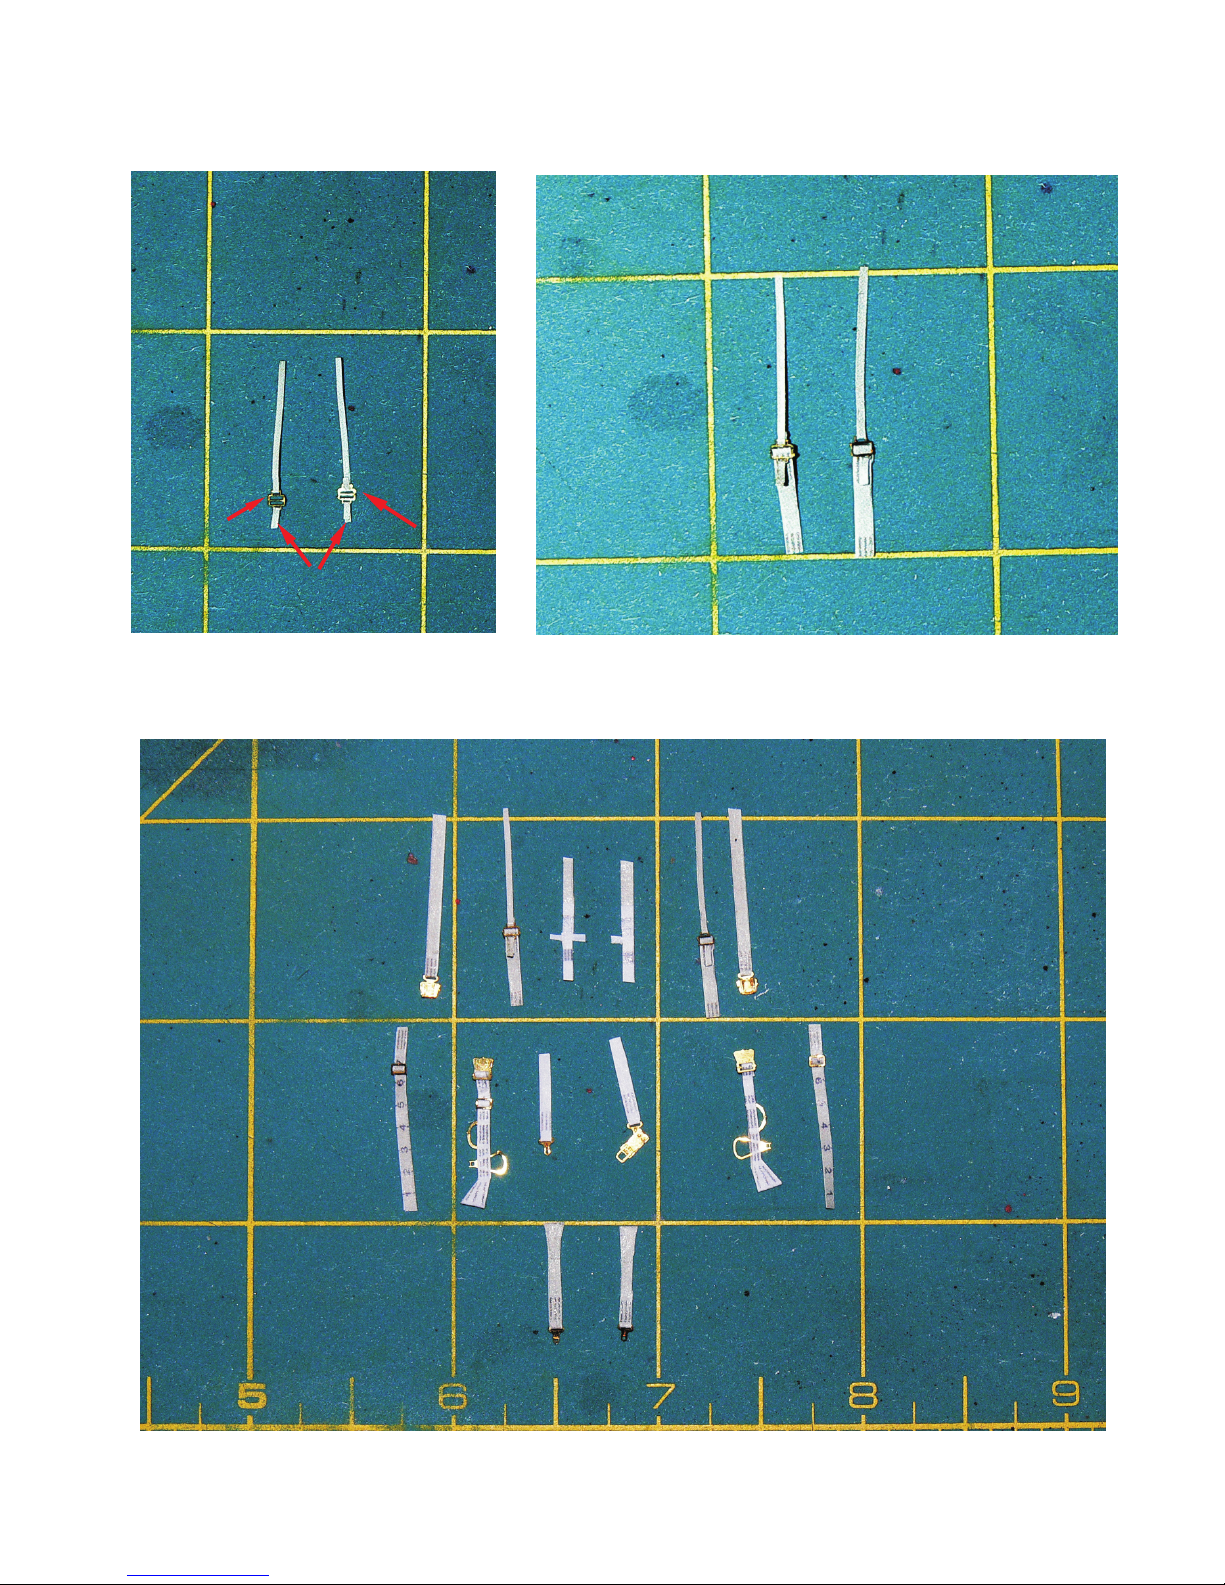
10
PH 1
10
PH 1
6
A.
B.
To step A. add part 6
4
1
PH 8
PH 9
PH 5
2
3L
3R
PH 2
PH 3
PH 4
7
5
PH 3
PH 6 + PH 7
8
PH 2
PH 2
5
PH 8
PH 9
PH 5
PH 3
A
B
C
D
E
G
H
J
L
M
J
L
6
10
PH 1
6
PH 1
10
8
E
Page 3
Page 14
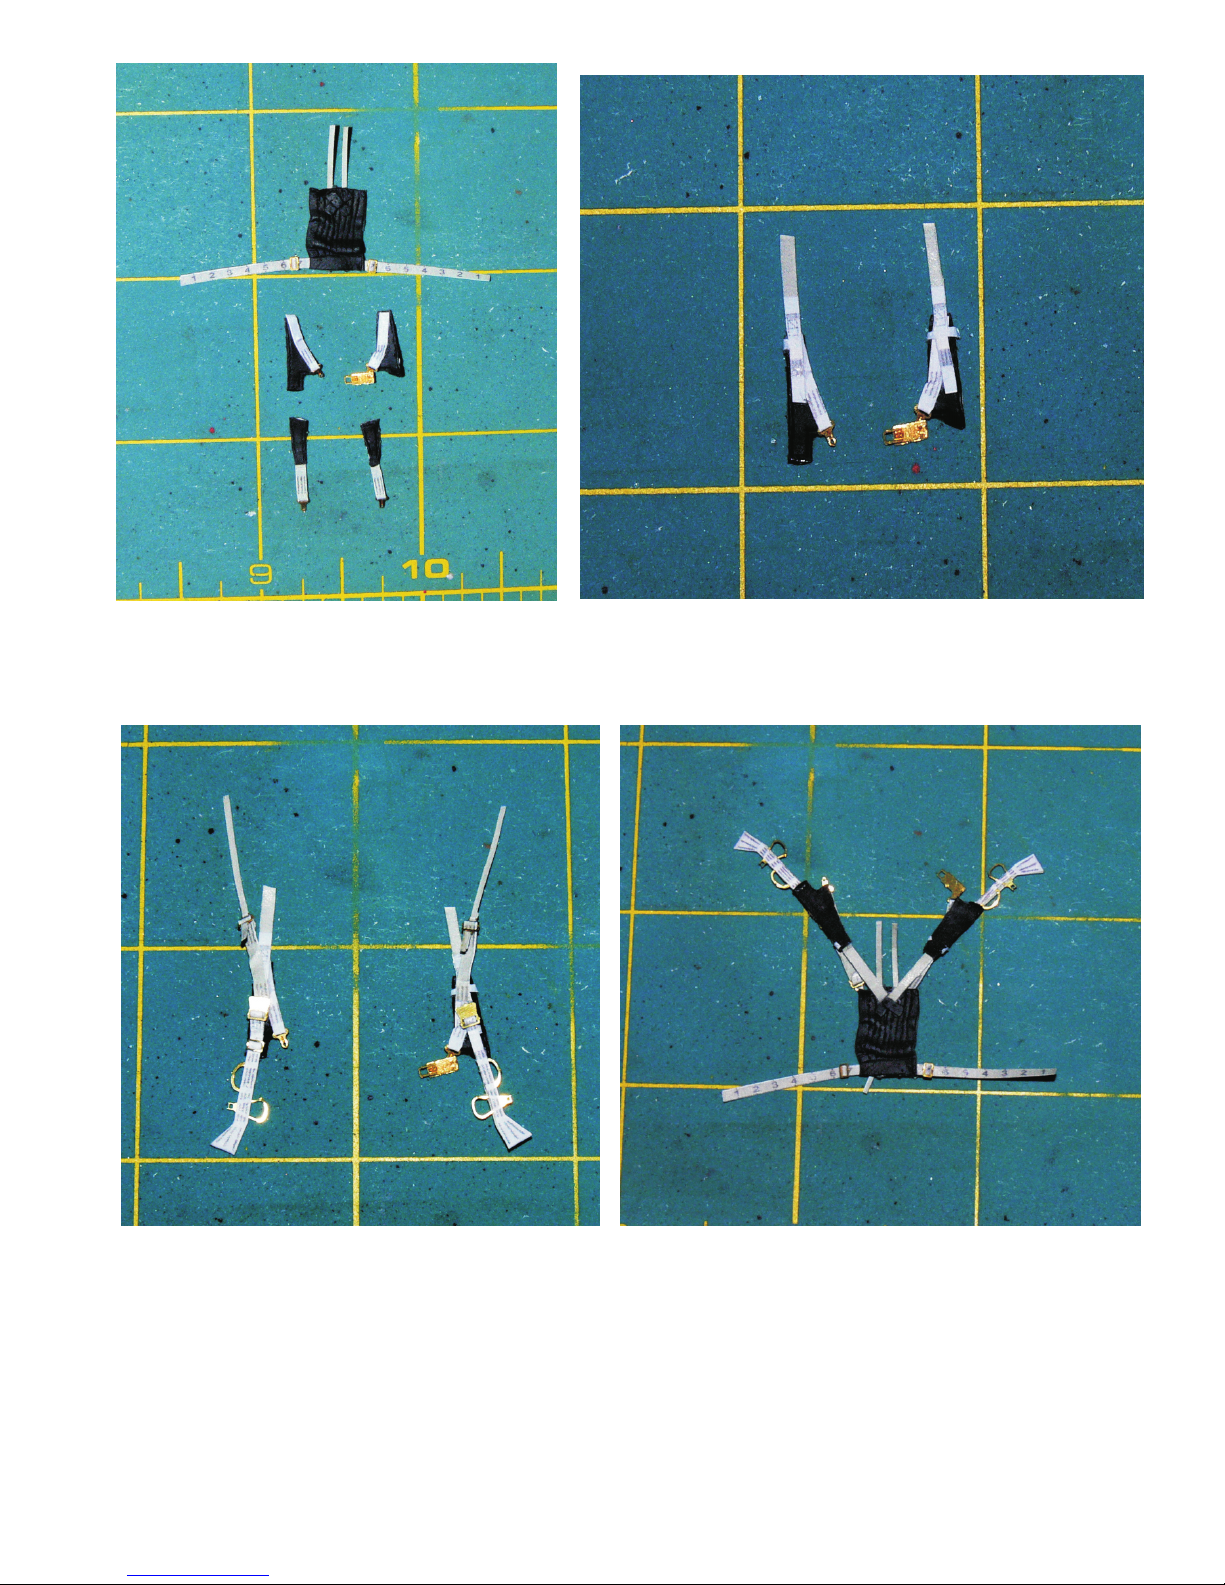
47
48
50 or
49 or
52
51
M
M
45
10
G
H
C
D
C
D
E
E
47
48
CEC
E
D
A
B
J
J
G
H
45
B+D+E+J
B+C+E+J
Page 4
Page 15
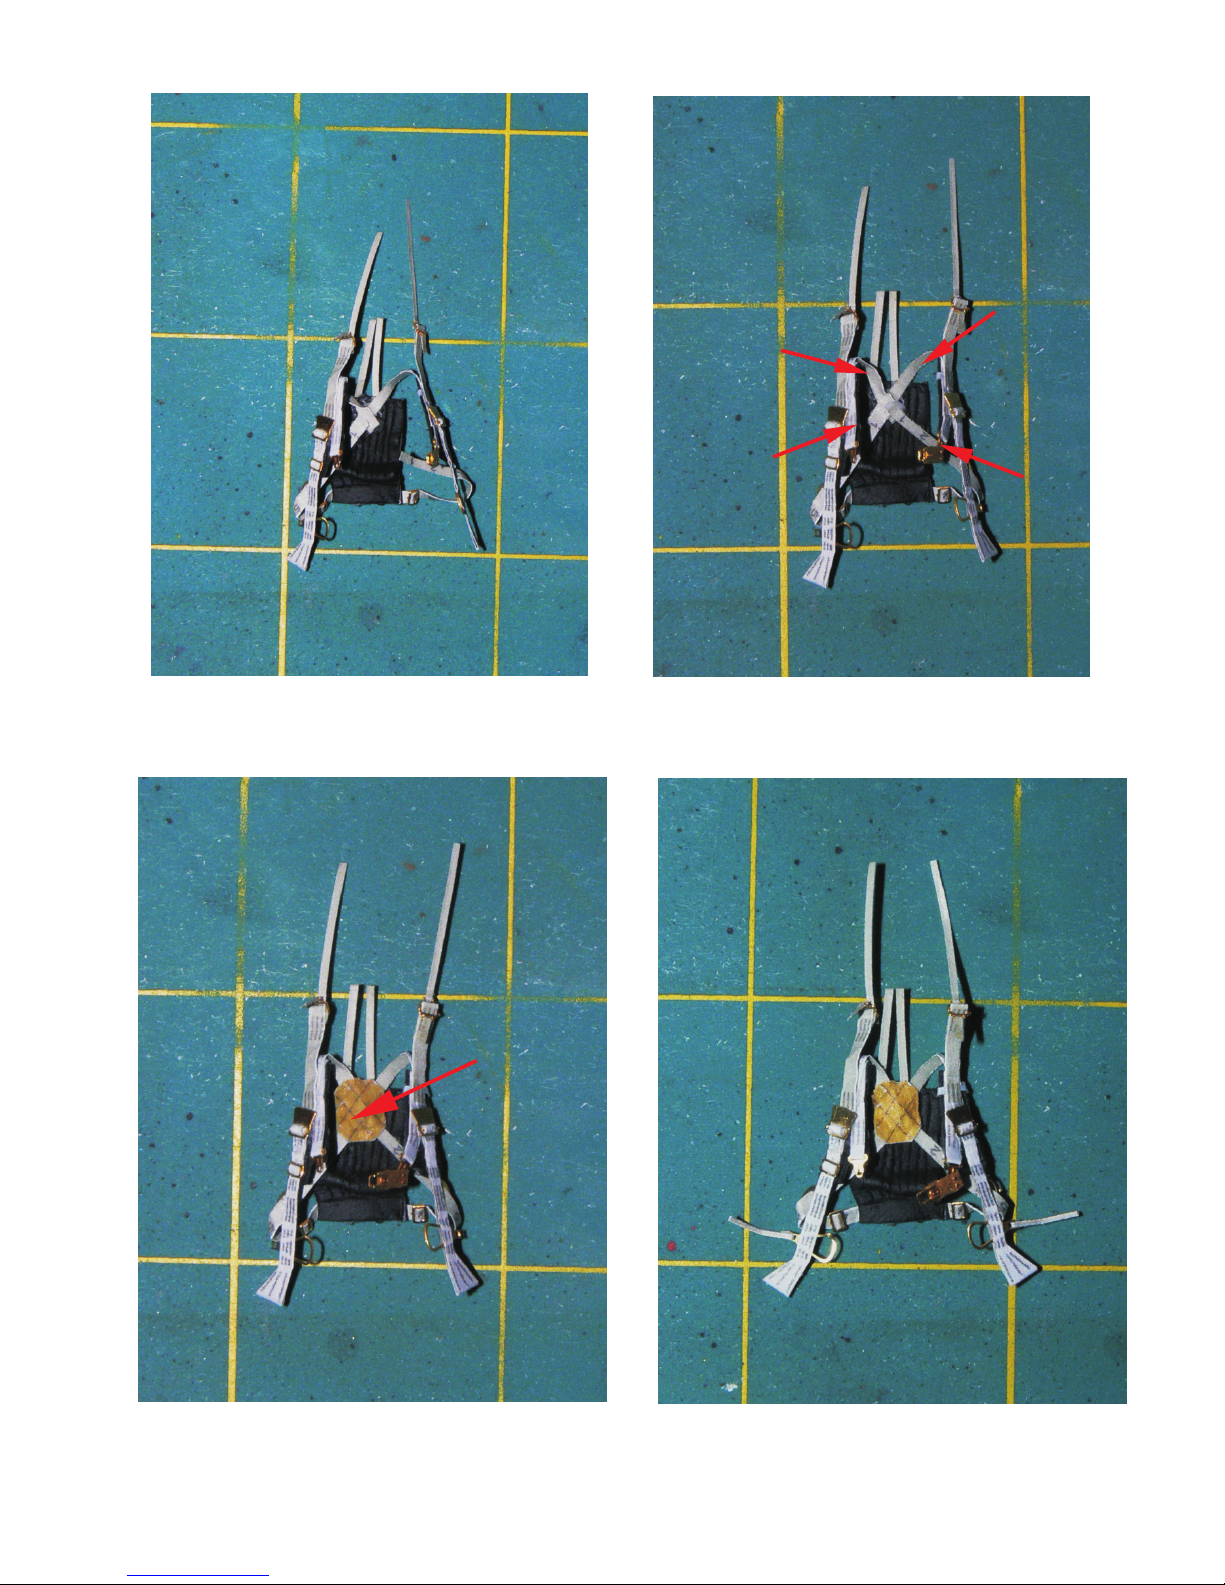
10
10
9
Page 5
E
C
A
J
E
J
B
D
Page 16
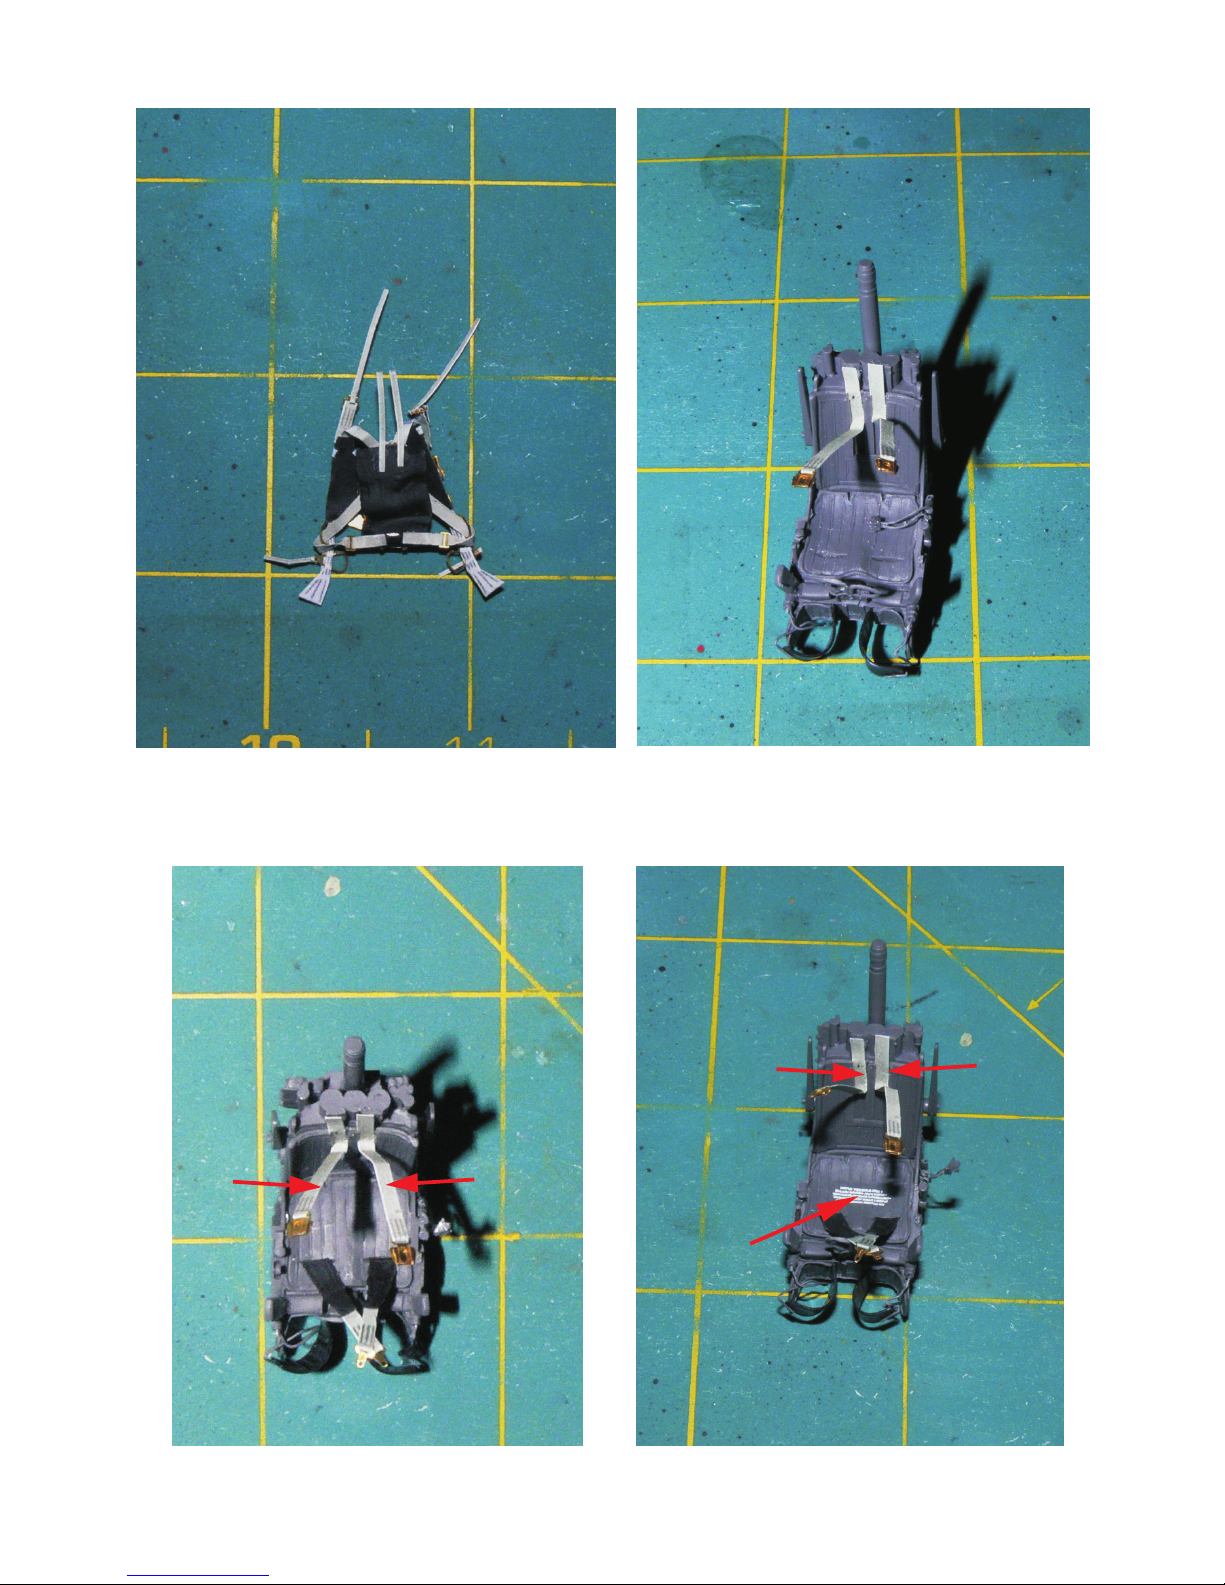
L
L
L
L
M
M
Decal 40
Page 6
Page 17
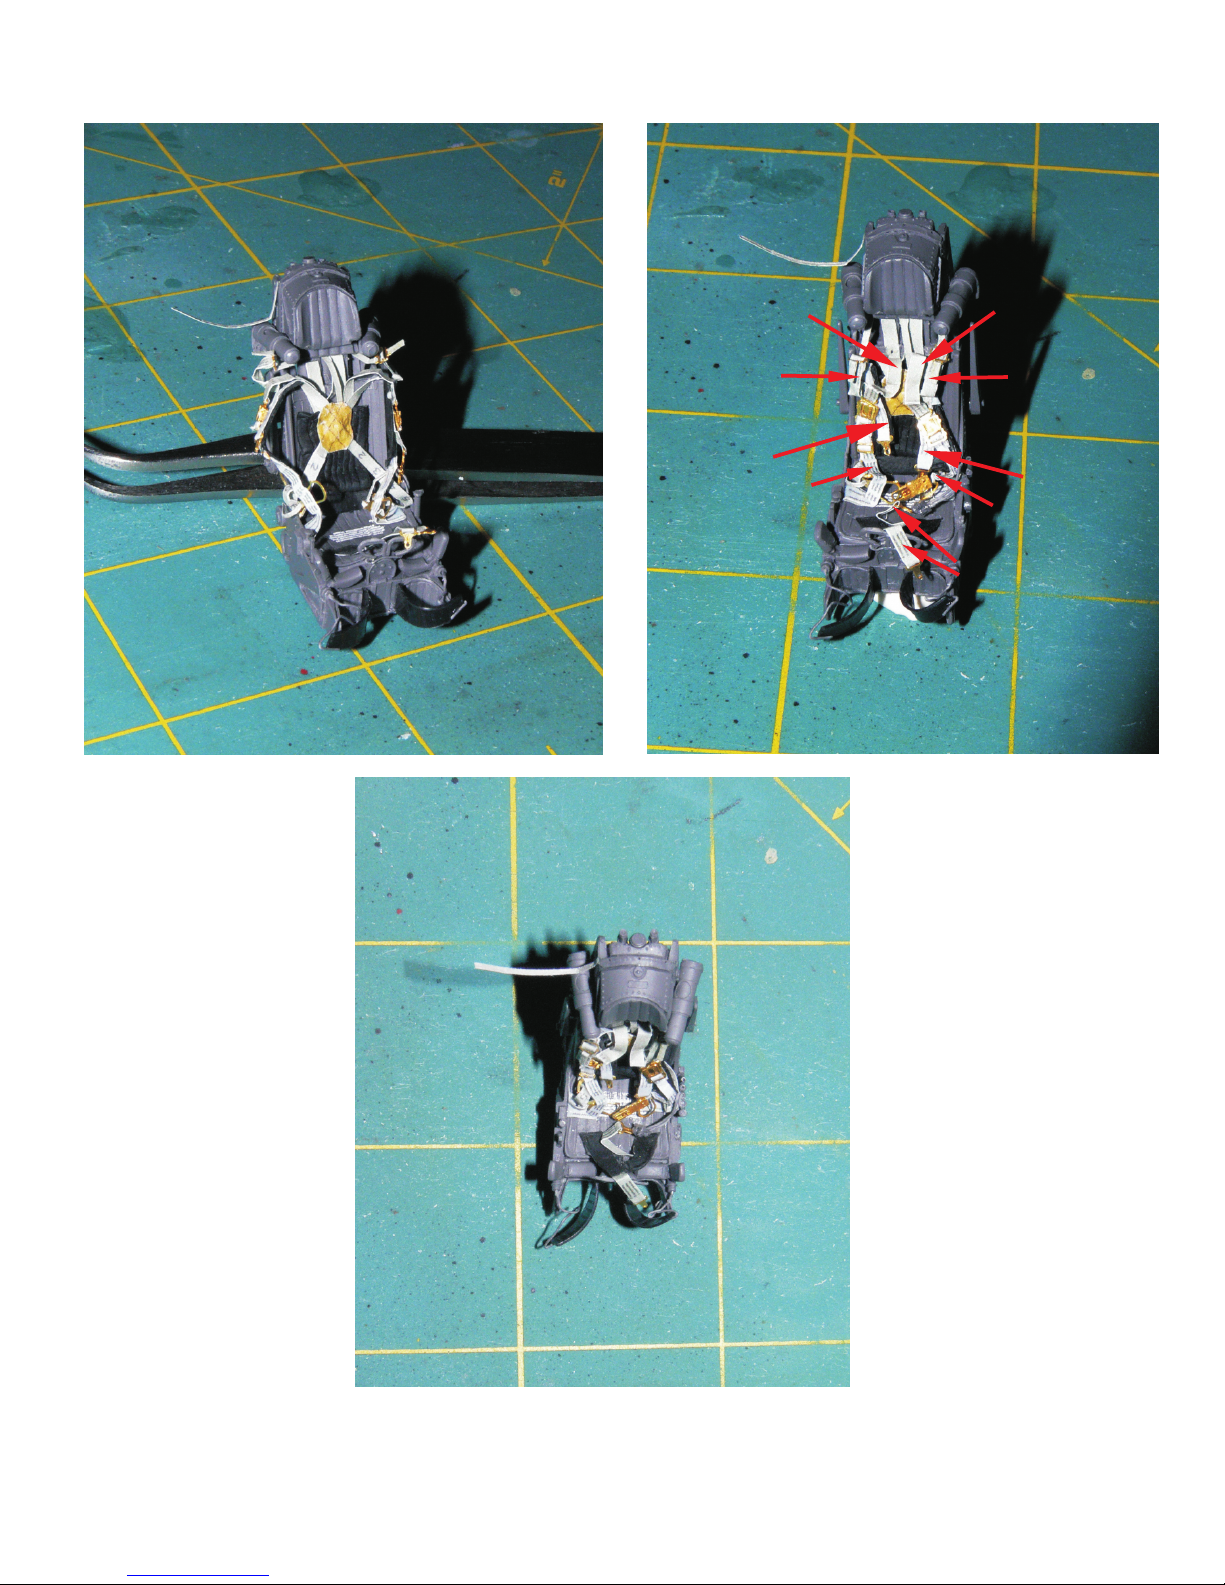
10
You can carefully position the seat belts the way you want them according to your reference.
Page 7
For information on future products and releases, please visit www.coldwarstudio.com
C
A
J
L
J
B
D
M
L
 Loading...