

Coldex CC61EP250, CC61EP220, CC91EP250 Instruction Manual
Instructions Manual
Manual de instrucciones
CC61EP250 - CC61EP220 – CC91EP250

2
2
INDEX
RECOMMENDATIONS AND SUGGESTIONS.....................................................................................................................3
GENERAL INFORMATION - SAFETY WARNINGS.............................................................................................................4
INSTALLATION...................................................................................................................................................................... 5
USE........................................................................................................................................................................................6
MAINTENANCE.....................................................................................................................................................................7
INDICE
CONSEJOS Y SUGERENCIAS............................................................................................................................................. 8
GENERALIDADES - NORMAS DE SEGURIDAD................................................................................................................. 9
INSTALACIÓN..................................................................................................................................................................... 10
USO......................................................................................................................................................................................11
MANTENIMIENTO...............................................................................................................................................................12
EN
ES
EN
3
3
RECOMMENDATIONS AND SUGGESTIONS
The Instructions for Use apply to several ve rsions of this appliance. Accordingl y, you may find
descriptions of individual features that do not apply to your specific appliance.
INSTALLATION
• The manufacturer will not be held liable for any dama ges resulting from incorrect or improper
installation.
• The minimum safety distance between the cooker top and the extractor hood is 650 mm (some
models can be installed at a lower height, please refer to the paragraphs on working dimensions
and installation).
• Check that the mains voltage corresponds to that indicated on the rating plate fixed to the inside of
the hood.
• For Class I appliances, check that the domestic power supply guarantees adequate earthing.
Connect the extractor to the exhaust flue through a pipe of minimum diameter 120 mm. The route
of the flue must be as short as possible.
• Do not connect the extractor hood to exhaust ducts carrying combustion fumes (boilers, fireplaces,
etc.).
• If the extractor is used in conjunction with non-electrical appliances (e.g. gas burning appliances), a
sufficient degree of aeration must b e gua rant eed in the roo m in o rder to p reve nt the b ackflow of
exhaust gas. The kitchen must have an opening communicating directly with the open air in order
to guarantee the entry of clean air. When the cooker hood is used in conjunction with appliances
supplied with energy other than electric, the negative pressure in the room must not exceed 0,04
mbar to prevent fumes being drawn back into the room by the cooker hood.
• In the event of da mage to the power cable, it must be r eplaced by the manufacturer or by the
technical service department, in order to prevent any risks.
• If the instructions for installation for the gas hob specify a greater distance specified above, this has
to be taken into account. Regulations concerning the discharge of air have to be fulfilled.
USE
• The extractor hood has been designed exclusively for domestic use to eliminate kitchen smells.
• Never use the hood for purposes other than for which it has been designed.
• Never leave high naked flames under the hood when it is in operation.
• Adjust the flame intensity to direct it onto the bottom of the pan only, making sure that it does not
engulf the sides.
• Deep fat fryers must be continuously monitored during use: overheated oil can burst into flames.
• Do not flambè under the range hood; risk of fire
• This appliance is not intended for use by persons (including children) with reduced physical, sensory or mental capabilities, or lack of experience and knowledge, unless they have been given supervision or instruction concerning use of the appliance by a person responsible for their safety.
• Children should be supervised to ensure that they do not play with the appliance.
• “ CAUTION: Accessible parts may become hot when used with cooking appliances.”.
MAINTENANCE
• Switch off or unpl ug the appliance from the mai ns supply before carryin g out any maintenance
work.
• Clean and/or replace the Filters after the specified time period (Fire hazard).
• Clean the hood using a damp cloth and a neutral liquid detergent.
The symbol on the product or on its packaging indic ate s tha t this pro duc t may n ot be treat ed as h ouseho ld was te. I ns tea d it sh al l be han d ed o ver to the
applicable collection point for the recycling of electrical and electronic equipment. By ensuring this product is disposed of correctly, you will help prevent potential negative
consequences for the environment and human health, which could otherwise be caused by inappropriate waste handling of this product. For more detailed information
about recycling of this product, please contact your local city office, your household waste disposal service or the shop where you purchased the product
.
2°

EN
4
4
GENERAL INFORMATION - SAFETY WARNINGS
GENERAL INFORMATION
This canopy hood is designed to be fixed to any rigid vertical surface, over a gas or electric hotplate and
can be used either in the extraction mode (ducted to the outside) or in the recirculation mode (internal
recycling). All cookers hood perform better when used in extraction mode. During winter time it may be
convenient to use the hood in the recycling mode to avoid heat loss from the kitchen.
Before starting the installation, consideration should be given to the difficulties that can be
found during installation. The installation work must be undertaken by a qualified and competent
person in conformity to the rules concerning the evacuation of contaminated air.
The manufacturer disclaims all liability for any damage or injury caused as a result of not following the instructions for installation contained in the following text.
1 - SAFETY WARNINGS
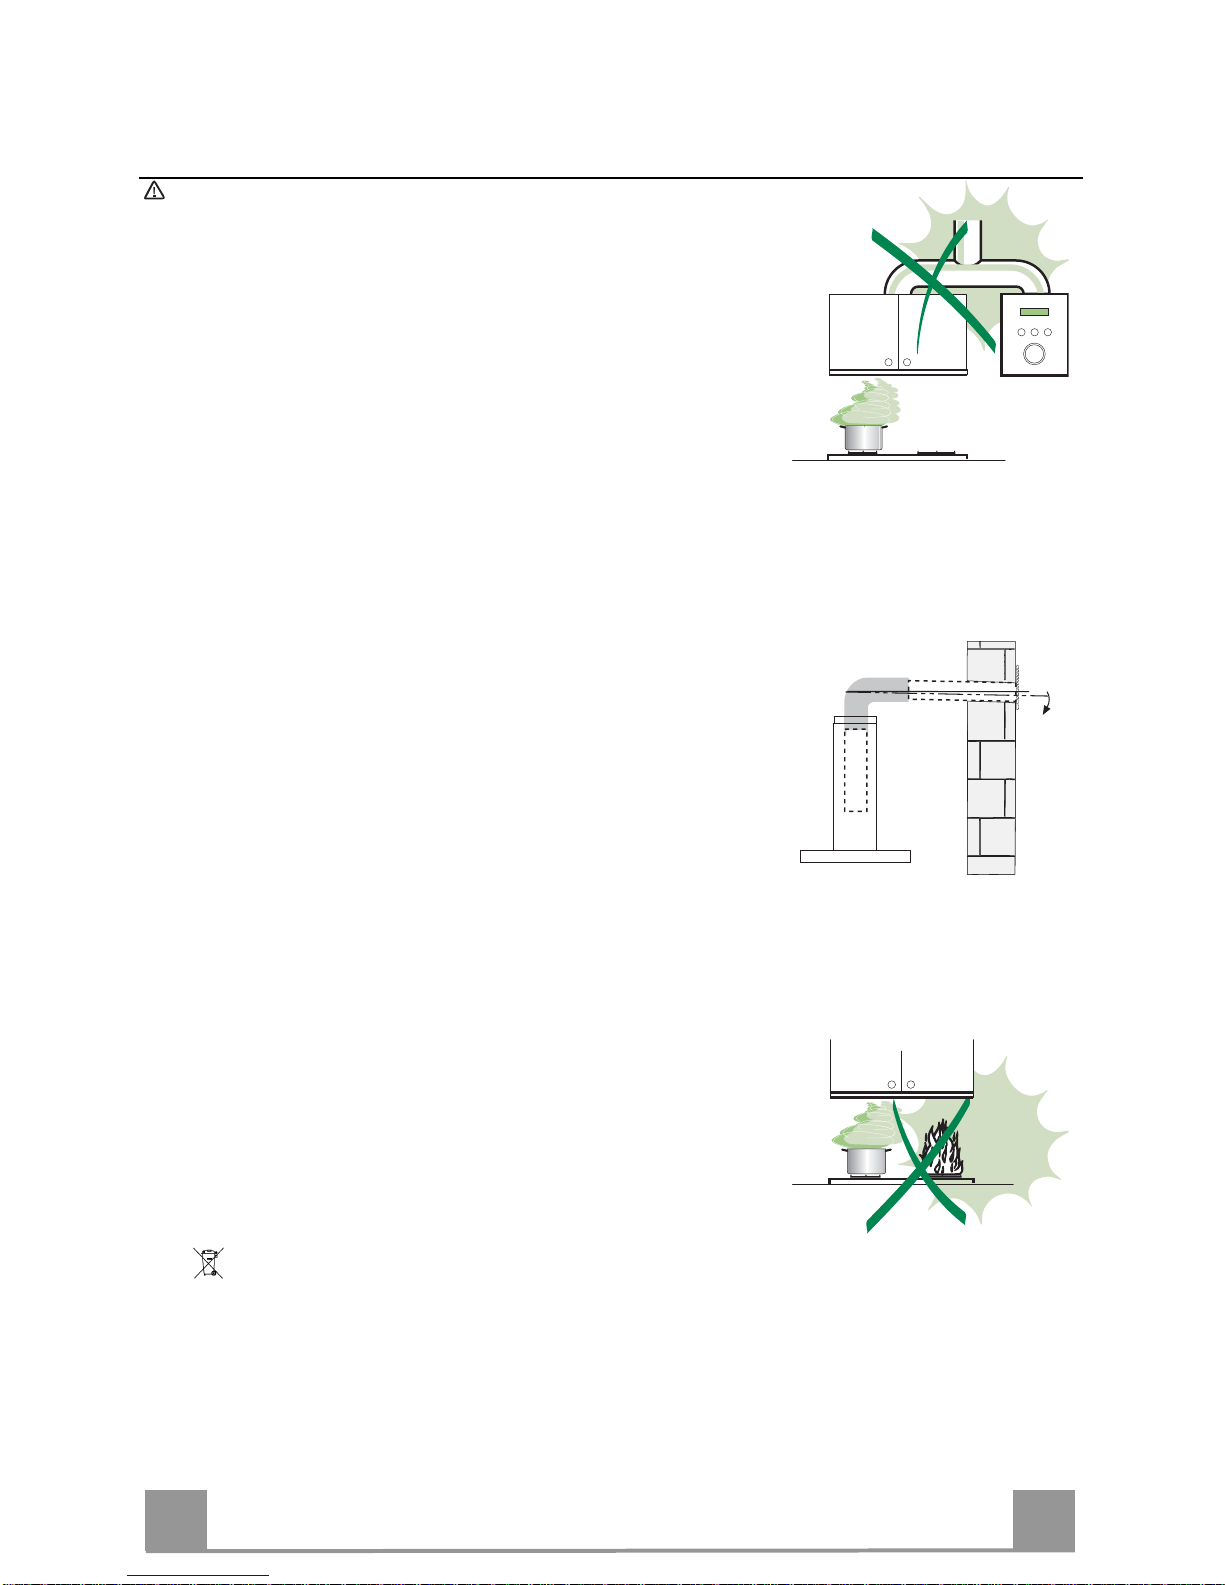
1.1 - When used in the extraction mode, the cooker hood ducting must not be connected to a flue
which is used for exhausting fumes from appliances supplied with energy other than electric,
such as a central heating flue or water heating flue.
1.2 - Before connecting to the mains supply ensure that the mains voltage corresponds with the volt-
age on the rating plate inside the hood.
1.3 - Connect the cooker
hood to the mains via a double poled switch which has 3mm clearance be-
tween the contacts.
1.4 - For cooker hoods featuring an earth cable, make sure the electric plant of your house is cor-
rectly earthed.
1.5 - Appliance in class II are provided with a double insulation; therefore do not connect them
through earthed plugs but through a double poled plugs.
1.6 - When installed, the hood must be positioned at least 70cm above the hotplate.
1.7 - Never do flambé cooking under this cooker hood.
1.8 - Never leave frying pans unattended during use as overheated fat and oil may catch fire.
1.9 - Before carrying out any kind of maintenance or cleaning, disconnect the hood from the mains
supply.
1.10- If the room where the cooker hood is to be used contains a fuel burning appliance such as a cen-
tral heating boiler then this must be of the room sealed or balanced flue type. If other types of
flue or appliance are fitted, ensure that there is an adequate supply of air into the room. When
the cooker hood is used in conjunction with appliances supplied with energy other than electric,
the negative pressure in the room must not exceed 0,04 mbar to prevent fumes being drawn
back into the room by the cooker hood.
1.11- The appliance must be positioned so that the plug is accessible.
1.12- If the supply cord is damaged, it must be replaced by a special cord or assembly available from
the manufacturer or its service agent.
1.13- This appliance is not intended for use by persons (including children) with reduced physical,
sensory or mental capabilities, or lack of experience and knowledge, unless they have been
given supervision or instruction concerning use of the appliance by a person responsible for
their safety.
1.14- Children should be supervised to ensure that they do not play with the appliance.

EN
5
5
INSTALLATION
2 - INSTALLATION INSTRUCTIONS
Some installation systems require the opening and removal of the metal grille panel.
2.1 - Instructions for opening and removing the metal grille panel
To open the grille panel, press inwardly on the two slider catches at each side of the grille panel and the
grille will pivot down.
To remove the metal grille, pull forward on the right hand side so that the hinge pin on the back of the
grille will be released from the slot in the side of the casing.
2.2 - Wall cabinet fixing
a - Predrilled wall cabinet: fix the hood onto the wall cabinet base panel using the four screws 4.2 x 45 mm
(supplied with the fixing kit).
It is not necessary to open the metal grille.
b - No predrilled wall cabinet:
b.1 - If the hood is provided with a paper fixing template, follow the instructions.
b.2 - If the hood is not provided with a paper fixing template, position the hood on the wall cabinet base
panel and pilot drill the 3.5 x 16 mm screws (not supplied with the fixing kit) from the inside onto the
wood.
2.3 - Wall mounting
a - Drill two Ø 8 mm holes on the wall using the paper template, insert two rawl plugs and two 4.2 x 44,4
mm screws leaving 5 mm untightened. Open the metal grille panel, hook the hood on and fully tighten
the screws.
b - If the hood is not provided with a paper fixing template, drill two Ø 8 mm holes (see draw.), insert the
plugs and screws, proceeding as directed under para graph a.
c - For wall mounting using wallbrackets (optio nal), follow the instructions of the fixing template.
d - Pay attention to the safety regulation of point 1.6.
2.4 - Choice of operating mode
a - Evacuation mode
To check that the hood is set up for evacuation, open the grille panel and make sure that the conversion
lever or the change-over knob on the centrifugal unit is in the DUCTING position. The charcoal filter is
not required.
For ducting to the outside, the hood is supplied with a rear and top outlet. A flange spigot of 100 mm di-
ameter (120 mm in certain models) is usually fitted on the top outlet and a blanking plug on the rear out-
let. If you choose to duct the hood from the rear of the casing, you should invert the position of the flan-
ge and of the blanking plug. Pay attention to the safety regulation 1.1.
b - Internal recirculation mode
To check that the hood is set up for recycling, open the grille panel and make sure that the conversion
lever or the change-over knob on the centrifugal unit is in the RECYCLING position.
The charcoal filter is to be fitted. To fit the charcoal filter, support the filter with one hand and turn the
thumb screw through the centre of the charcoal filter. If the filter is of the interlocking type, turn the filter
clockwise. The hood can remain connected to the outside.
2.5 - Electrical connection and working test
1 - The safety measures 1.2, 1.3, 1.4 and 1.5 of paragraph 1 are to be strictly observed.
2 - Once the electrical connection has been completed, check that the worktop illumination, motor and
speeds work properly.
 Loading...