

Page 1
TM
Vortex Coin Changer
Installation & Operation Guide
Multi-Drop Bus
COINCO’S VTX1 COIN CHANGER
The Vortex Coin Changer is the result of extensive
research and development in increasing coin capacity.
This greatly simplified unit provides many important
features never before available in any coin changer.
6. Operate the vending machine coin return lever to ensure
proper operation.
7. Load coins into the hoppers.
FEATURES
• MDB (Multi-Drop Bus) Interface
•
Accepts US 5¢, 10¢, 25¢ and $1 coins
• Dispenses US 5¢, 10¢ and 25¢ coins from self-
loading, high-capacity hoppers
• Field proven validation technology
• Tilt-out coin hopper for easy loading
• Payout sensors ensure coin delivery
• Programmable coin capacity levels (Float Mode)
• Flash programmable memory
• Rugged design withstands harsh environments
UNPACKING
After unpacking the unit, inspect for any possible
shipping damage. If damaged, notify the shipping
company immediately. Keep the carton and packing
material to reuse if you need to transport or ship the
changer in the future. A label indicating the model and
serial number is on the side of the changer. Refer to
these numbers when calling upon your Coinco Service
Center representative for information or service.
8. Connect the changer MDB harness to the vending
machine and apply power.
NOTE: When power is first applied, the Vortex changer
will cycle all three payout rings twice to establish the
presence of coins.
9. Pay out a few coins from each hopper.
10. Test the changer with a variety of coins to ensure proper
operation.
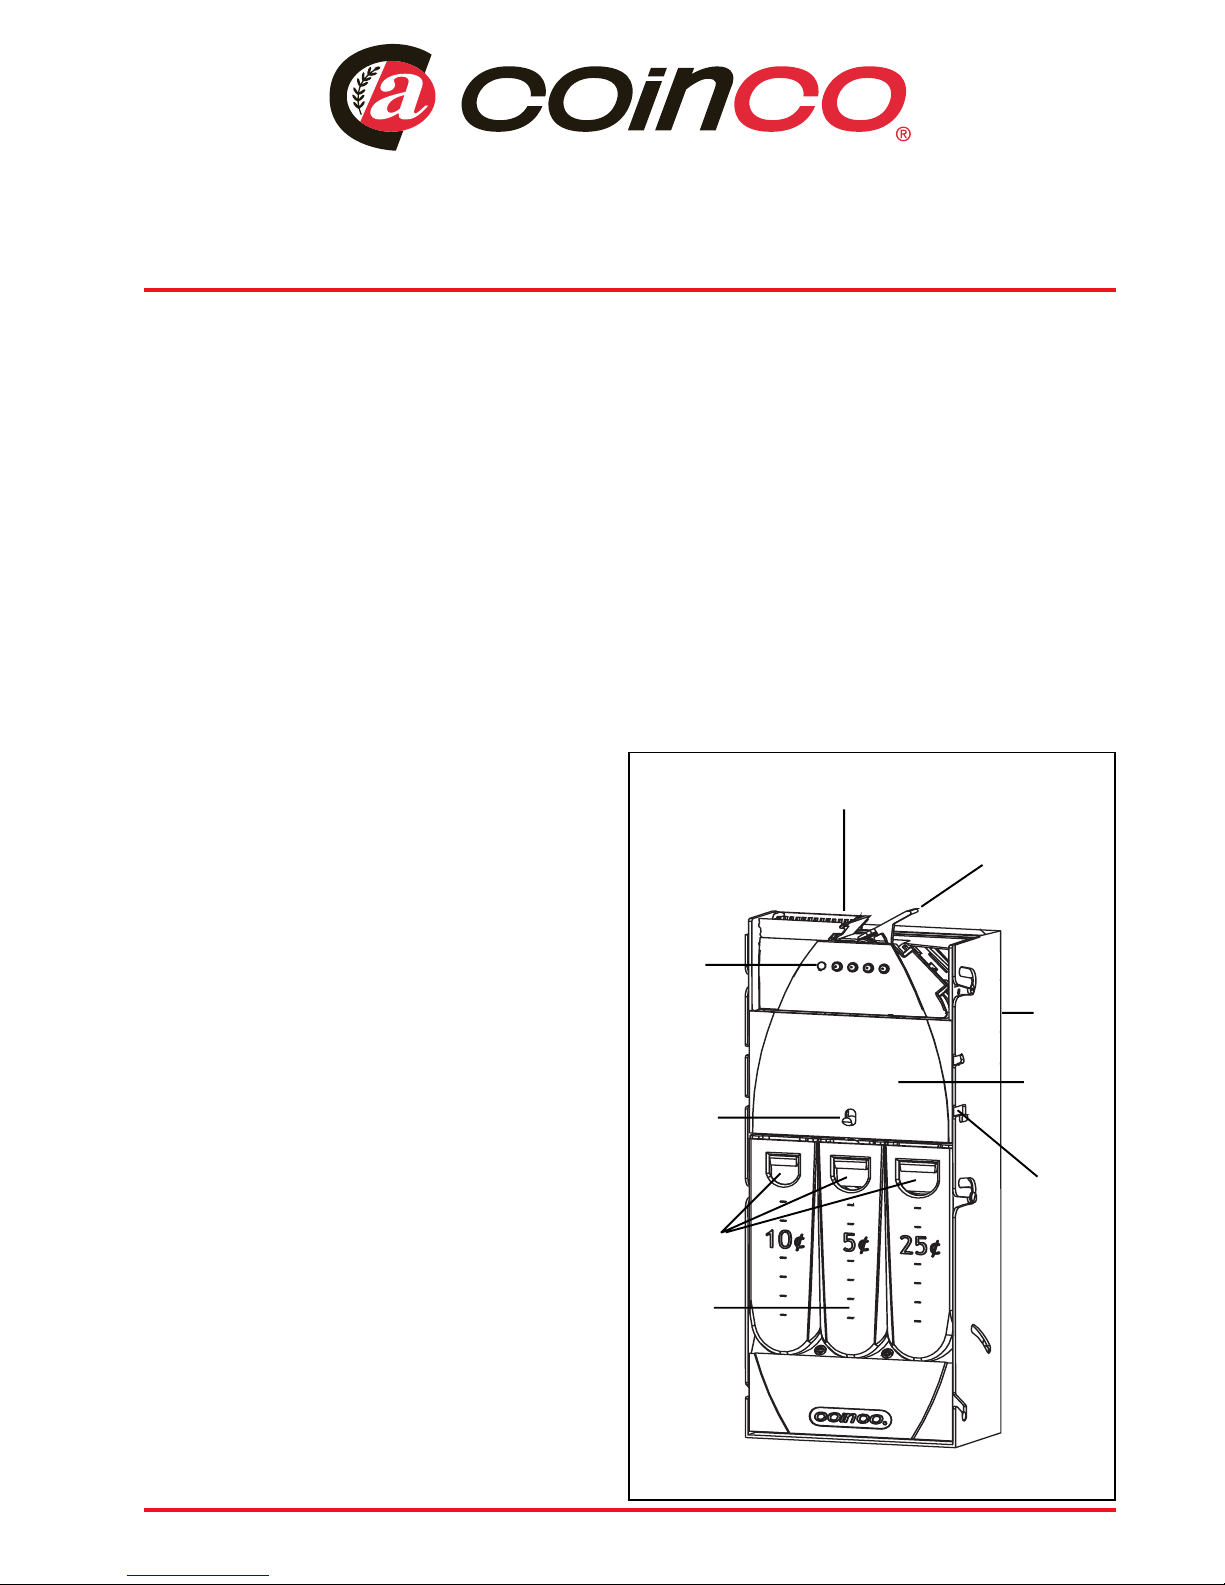
Figure 1
Acceptor Funnel
Coin Return
Lever
!
Changer
!
Housing
LED
!
!
INSTALLATION AND OPERATION
(see Figure 1)
1. Remove the power from the vending machine.
2. Remove the acceptor from the changer by lifting
the hopper release lever and pulling the acceptor
funnel forward.
3. Unplug the acceptor harness from the changer.
4. Mount the changer on the vendor’s mounting
screws and tighten.
5. Install the acceptor by inserting the bottom
acceptor studs into the changer housing guides.
Plug the acceptor harness into the changer. Press
the top of the acceptor into the changer housing.
Slide the hopper release lever down to the locked
position.
Hopper
Release
Lever
Front Load
Coins Here
Hoppers
!
!
!
!
!
!
Acceptor
Acceptor
Stud
!
Model VTX1
Page 2
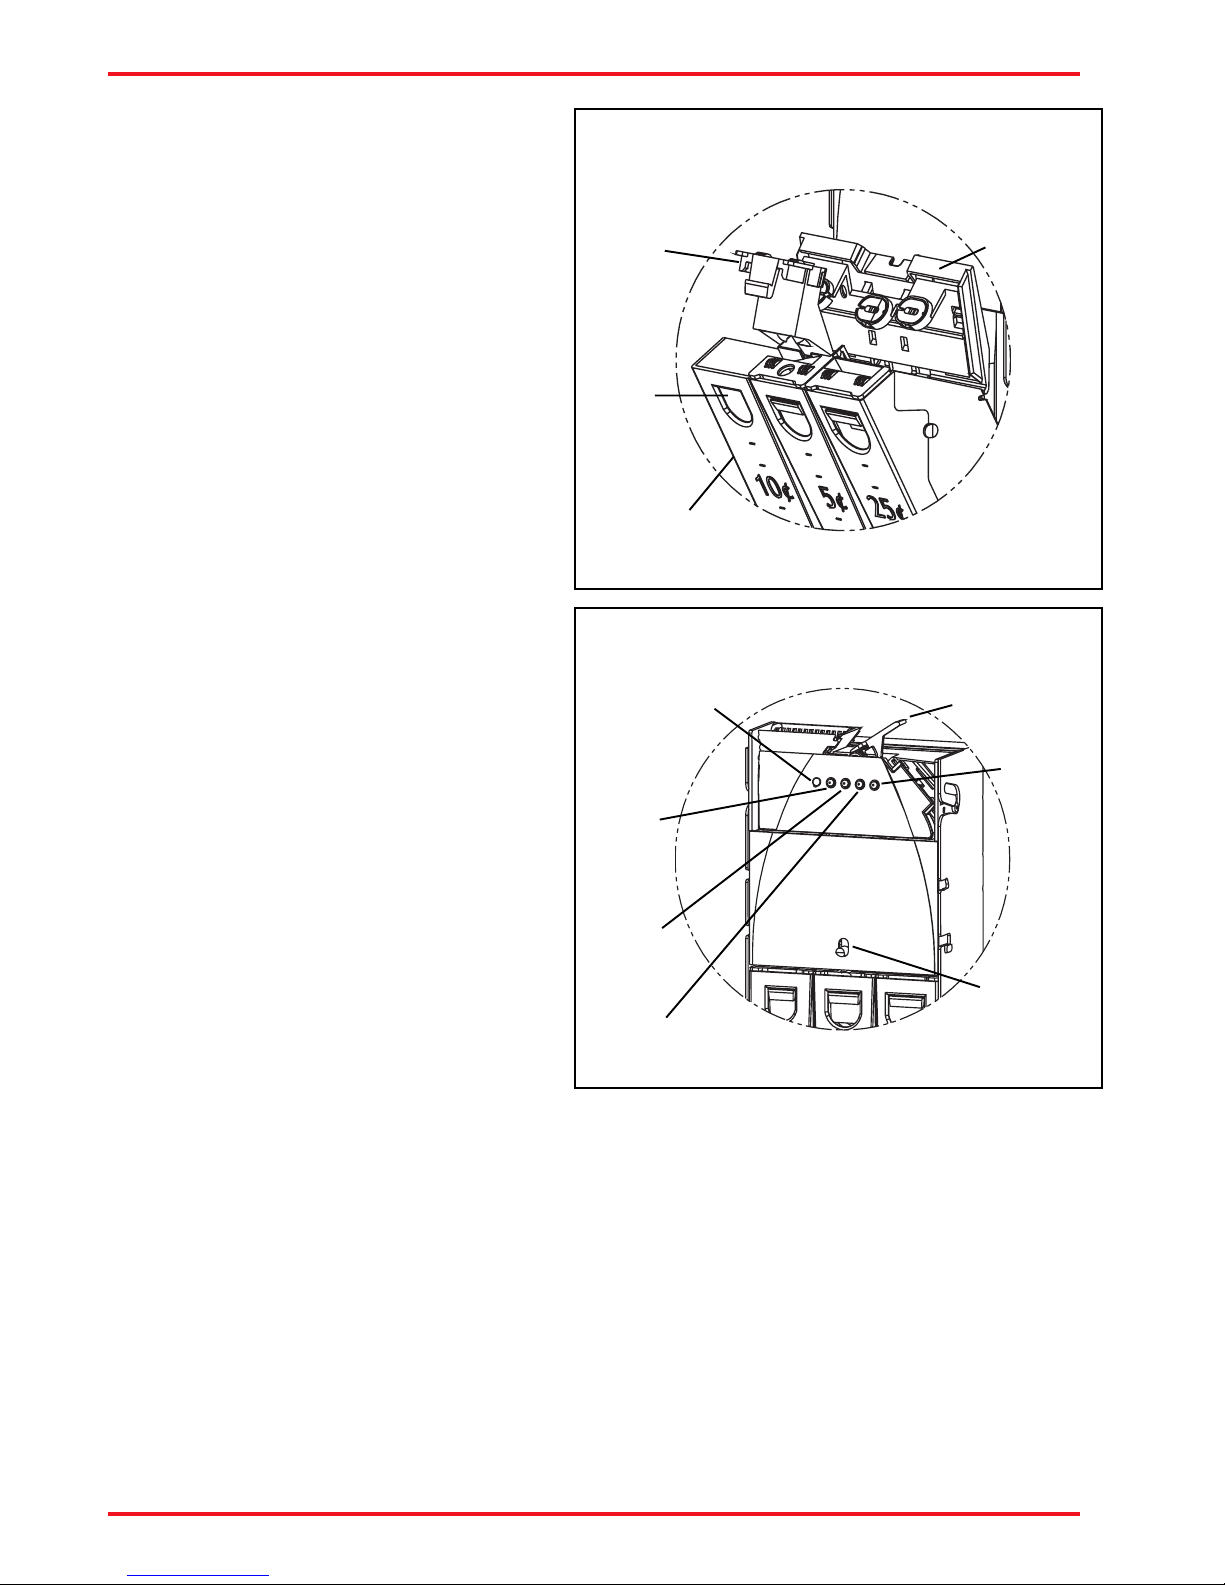
COIN LOADING PROCEDURES
(see Figure 2)
Top Load:
Lift the hopper release lever and pull the hopper
forward. Open a single hopper lid by releasing the
black snap, located at the front of each hopper.
NOTE: This operation opens both the sensor cover
and the hopper lid. To minimize misloading, do not
open more than one hopper lid at a time.
Fill the hopper to the desired level, snap the lid closed
and repeat the process for each coin type. When
finished filling all of the hoppers, secure the sensor
cover (over the hopper lids) and close.
Bench Top Load:
The hopper assembly may be removed by lifting the
hopper release lever and pulling the hopper assembly
forward to the stops. Disconnect the hopper harness
and lift the hopper assembly up and out. Continue by
following the Top Load instructions above.
Figure 2
Hopper Lid
Press snap
to
open
hopper lid
forward to open
!
Pull hopper
Sensor Cover
!
!
!
Front Load:
Each hopper can be loaded by inserting coins
through the openings, in the front of the hopper.
Acceptor Load:
Coins can be loaded through the acceptor to fill the
hoppers when the Manual Fill Mode is selected. No
credit is established in Manual Fill Mode. To enter
the Manual Fill Mode, press the 25¢ inventory switch
and the blue Mode switch at the same time. The
acceptor LED will flash an equal pattern of ON and
OFF to indicate that this mode is activated. Coins
inserted through the acceptor will be routed to the
appropriate hopper. To exit the Manual Fill Mode,
press the blue Mode switch or coin return lever.
PAYING OUT COINS
(see Figure 3)
Coins can be emptied from the hoppers by pressing
the appropriate Inventory Switch. Holding the switch
in until 5 coins are dispensed starts the autopaydown mode. To STOP the payout cycle, either
press the blue Mode switch or hold the coin return
lever down.
OPTION SETTING
(see Figure 3)
Float Mode:
Float Mode allows the operator to limit the amount of
coins stored in the hopper between the low and high
sensors. Accepted coins go to the cashbox when the
level of coins in the hopper reach the float level. The
float level of all the coin hoppers can be set to any
level above the low coin sensors, by using the
acceptor’s four inventory/mode switches.
Figure 3
LED
Coin Return Lever
!
10¢
Inventory
Switch
5¢
Inventory
Switch
!
!
!
!
!
!
25¢
Inventory
Switch
1. Use one of the loading methods described and fill the
hoppers to the float level you want the coin changer
to maintain.
2. Press and hold the two outside inventory switches
(10¢ and Mode) on the acceptor until the acceptor’s
LED flashes with a 90% On and 10% OFF cycle.
3. Immediately press the two inside inventory switches
(5¢ and 25¢) on the acceptor to store the levels. The
LED will flash a 10% ON and 90% OFF cycle to
indicate the float levels are set.
To turn off the Float Mode, repeat steps 2-3. Once Float
Mode is OFF, the LED will remain ON constantly and all
hoppers will fill to the high sensor.
Coinco Publication No. 925550
8/03 Printed in the U.S.A.
Hopper Release
Mode Switch
Lever
 Loading...