

Coffee Queen SLIM LINE Service Manual
Rev. 090914
S / EN
Slim Line Service Manual
SLIM LINE
Juice Machine
Din återförsäljare / Your retail dealer
...............................................................................
...............................................................................

List of contents page 2
General description page 3
Dispenser description of parts page 4-7
Installation and users instruction page 8-11
Maintenance and cleaning page 12
Handling and cleaning instructions page 13
Maintenance and cleaning page 14
Trouble shooting page 15-16
Technical Data and Notes
Electrical Schematics
Exploded View page 19-20
Spare parts list page 21
List Of Contents
Index
Main Index
page 17
page 18
2
General!
Read the instructions carefully before you start working with this equipment.
The equipment should be installed and serviced by trained staff
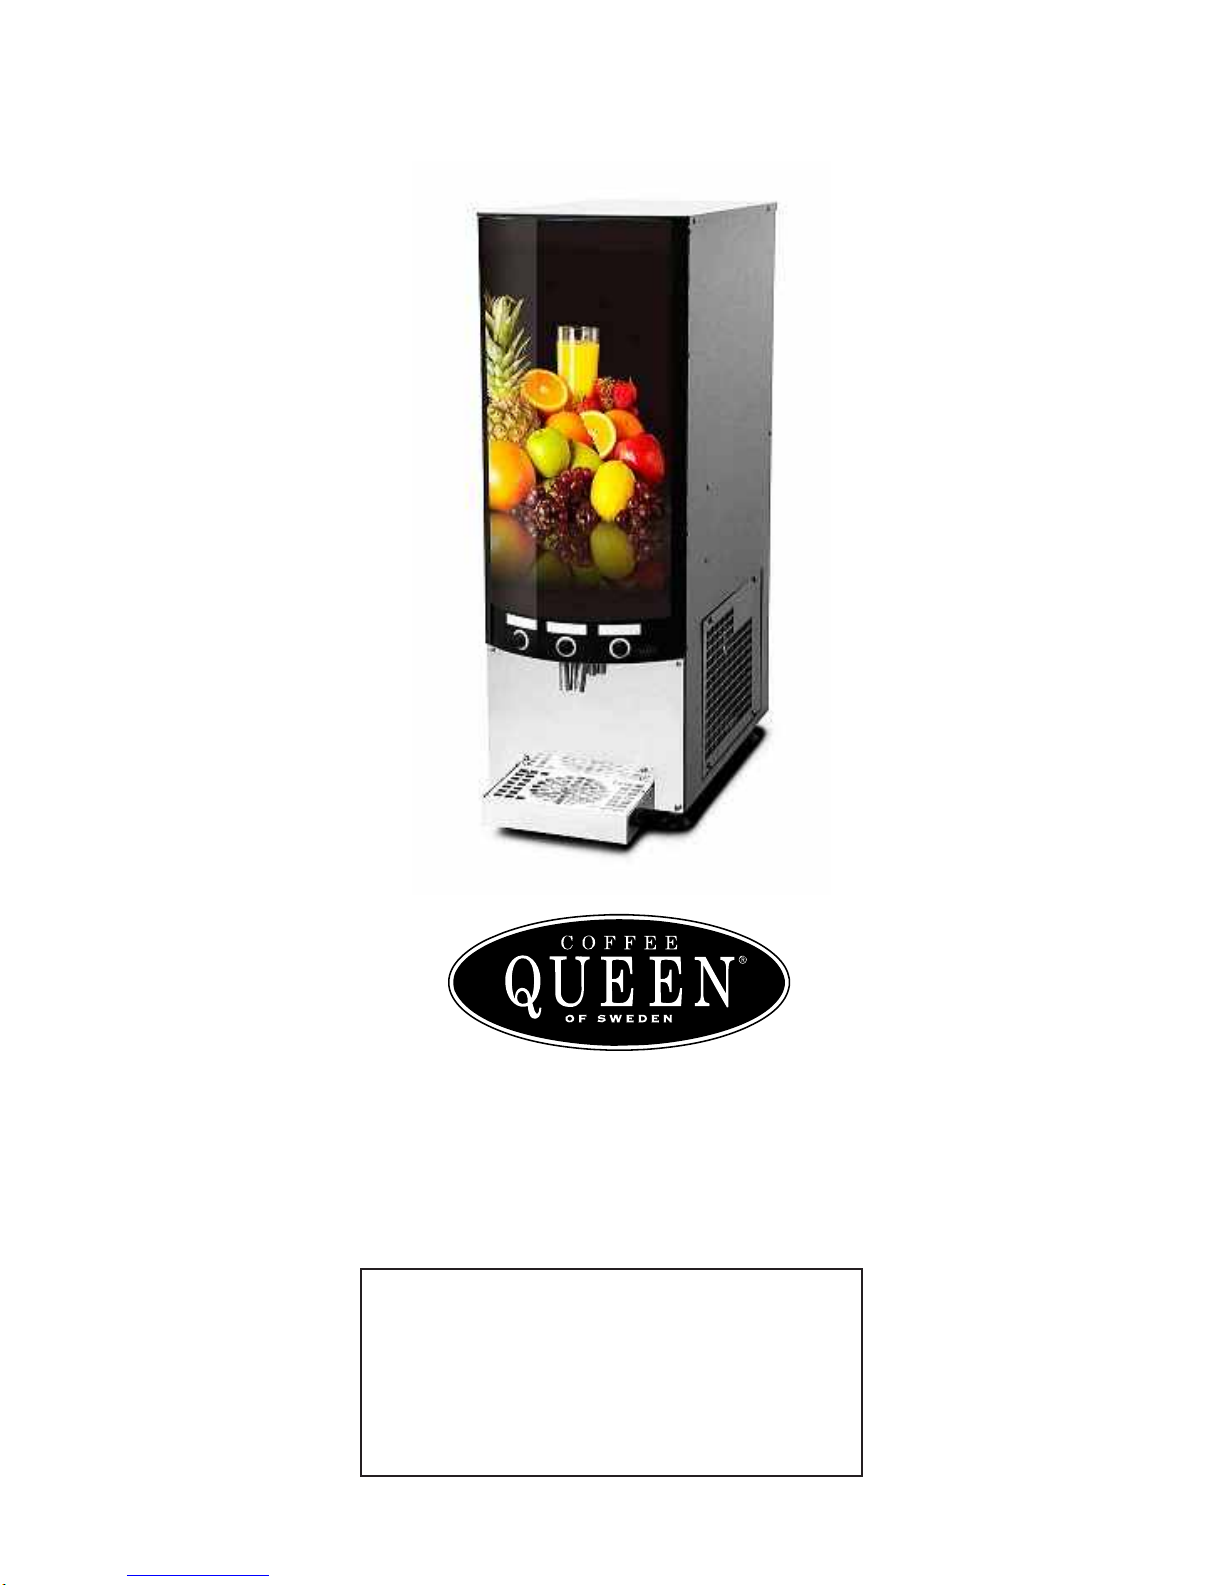
Dispenser description for Slim line
Slim Line is a dispenser for cooling water and mixing juice concentrate
to a ready to drink product. The dispenser is for
two non-carbonated
drinks and chilled water.
The dispenser is connected to the water mains by a pressurized tube and to
an electric wall socket by a power plug.
The water-pressure is adjusted with the water-regulator and the pressure is
displayed on the manometer.
The water is chilled by the cooling-block, which in its turn is chilled by the aircooled compressor.
The water-temperature is adjustable with a thermostat.
The mixing ratio product/water is adjusted with the ejectors.
Pushing one of the four buttons on the front panel dispenses the mixed
product or water.
3
General
Page 3
General Operating Outline
Where fitted the decanter function is operated via the 3 buttons located on
top of the front door.
Picture description
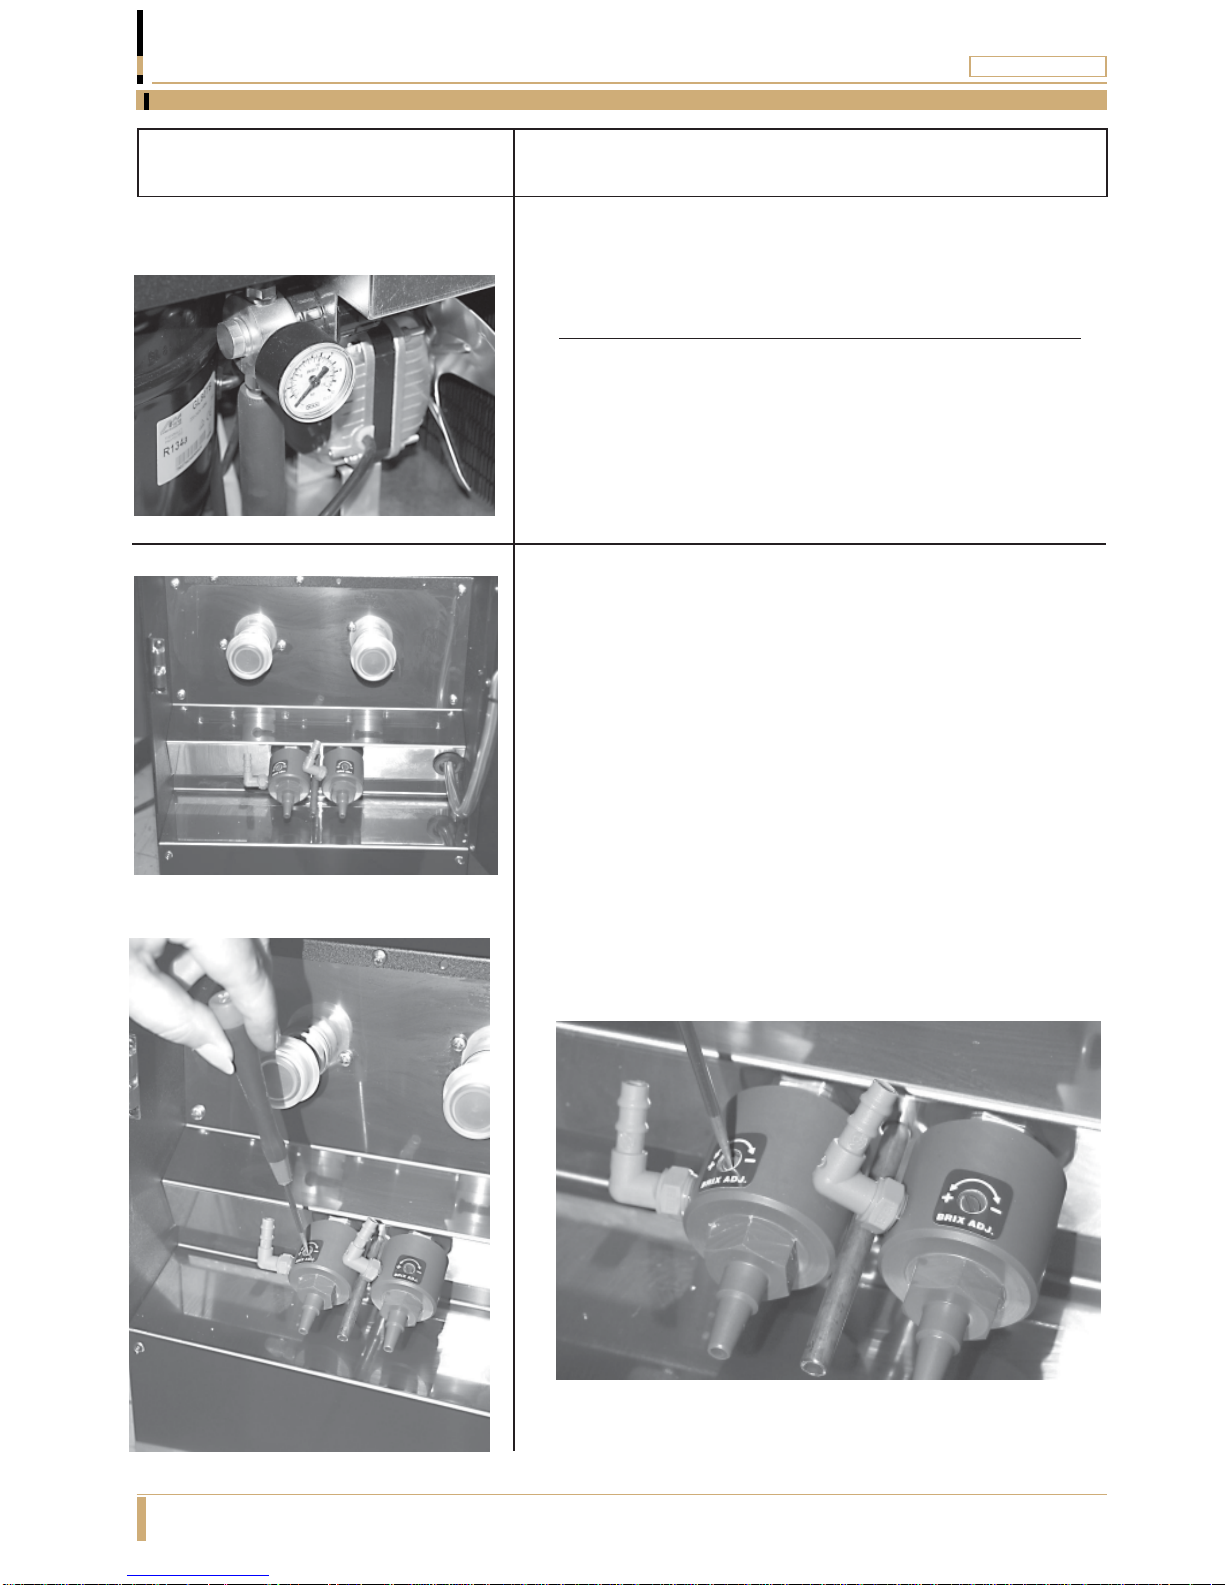
Water-regulator with manometer
The water-regulator can be adjusted up to 6 bar.
The minimum pressure is 2,2 bar.
Note! When adjusting the pressure, dispense product.
Venturi ejector
The mixing ratio is adjusted on the ejectors. When water
flows through the ejector, the concentrate mixes with the
water.
The mixing ratio is regulated on the ejector. There are
two kinds, one for products with cells, and one for
products without cells.
Turn the adjustment screws according to the label on the
ejector in order to increase or decrease the amount of
concentrate.
4
Description Dispenser Parts
Page 4
Picture description
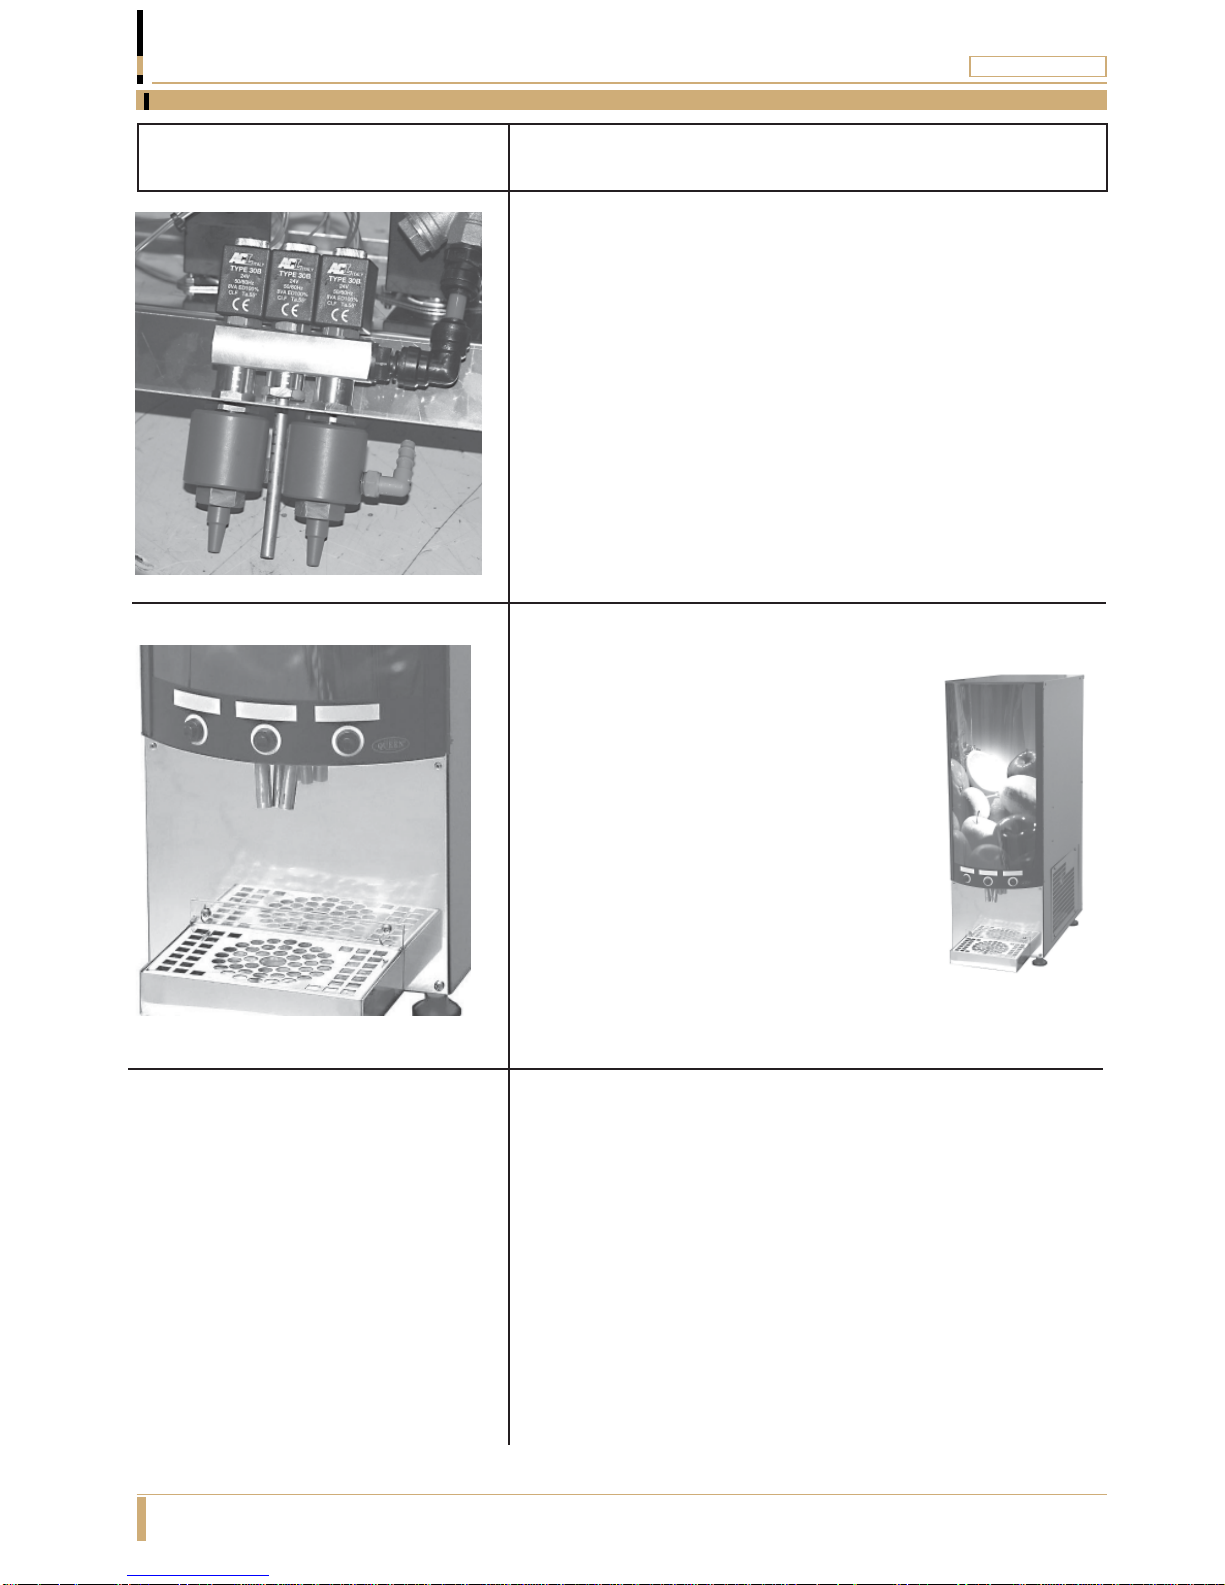
Water valve
The Water valve is connected to the ejector and
opens the water-flow.
Push-button
The push buttons on the front panel
controls the water valves.
Use only one button at a time.
5
Description Dispenser Parts
Page 5

Picture description
Transformer
The transformer is a 230 / 24 V (55VA).
The transformer supplies 24 V to the magnetic-valves.
Thermostat
The thermostat keeps the temperature within correct
range. Factory adjusted do not adjust, this may cause
damage and water leakage in the dispenser.
Illumination
Behind the front panel there is a low-energy fluorescent
lamp with the effect off 24 W.
The fluorescent lamp is a PL-lamp.
Description Dispenser Parts
Page 6
6

Dispenser description of parts
Picture description
Front panel
The front panel is divided in three parts.
Two plastic sheets (made off acrylic and opaque) and in
between these a film.
All parts are removable.
Drip-tray
The drip-tray is made of stainless steel with steel bars.
It is possible to connect drainage to the drip-tray.
Large particle-filter
A large particle-filter is fitted between the cooling block
and the water valves.
It is possible to rinse the filter if needed.
Description Dispenser Parts
Page 7
7
Removal of the front panel is necessary when setting the
timers when the machine is fitted with decanter function.
 Loading...