

Rev . 091115
U / GB
User manual
A TASTE OF THE FUTURE
Residence
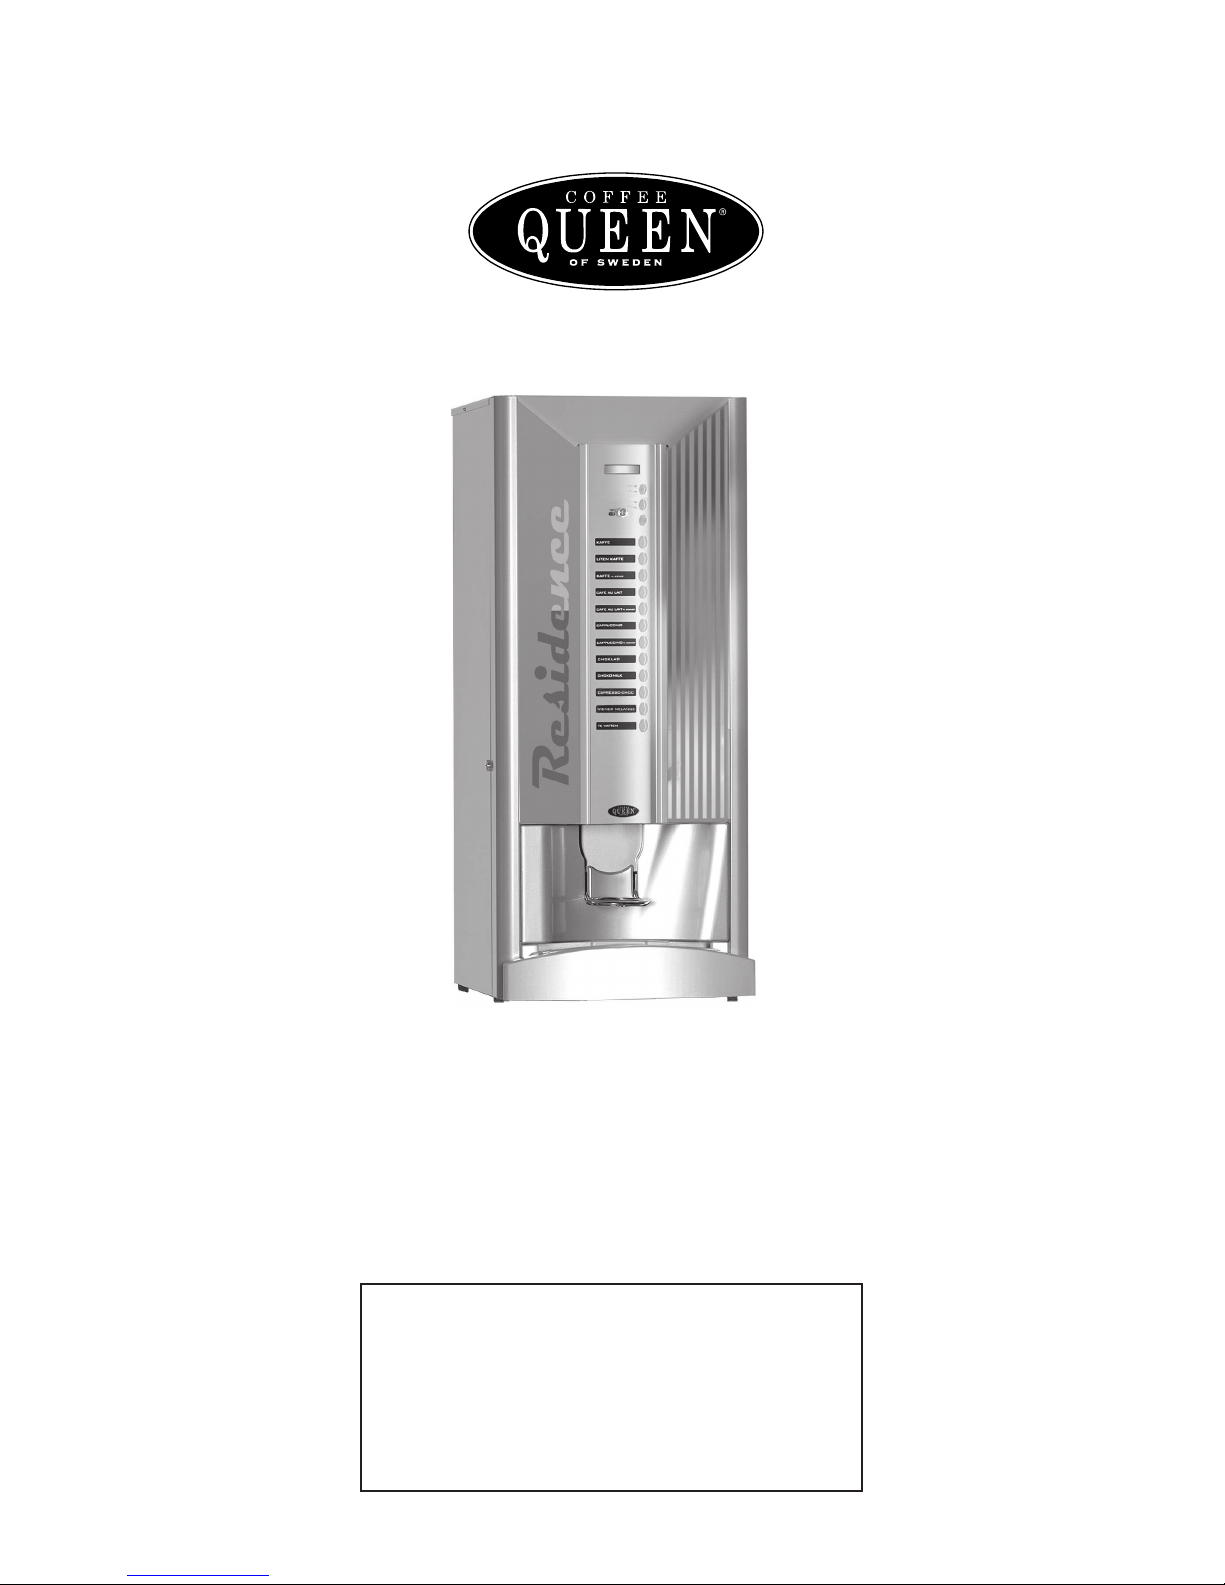
COFFEE QUEEN
Your retail dealer
...............................................................................
...............................................................................

2.
1. Table (list) of contents.
OPERATING INSTRUCTIONS:
1. Table of contents sid. 2
2. General 3
3. Overview of components front 4
3. Overview of components mixing system 5
4. SERVICE: Installation and start
Place the brewer 6
Connectings: Electricity/Water 6
Starting up machine 6
Fill canisters 7
5. Operation
Brewing of coffee in cup, chocolate,, 8
Brewing of jug 9
6. Cleaning program
Automatic cleaning of brew mechanism, mixing bowl 10-11
Cleaning of brew house, dismantling of brew house 10-11
Automatic cleaning of mixing bowl 12
Automatic cleaning of In/Outlet valves 13
Rotate brew mechanism without water or ingredients 14
7. Weekly cleaning
dismantle mixer system 15
wash these parts 15
assemble mixer system 16
8. Cleaning and maintenance
dismantling exchange and cleaning of coffee filter 17
outward cleaning 18
9. Cup counter and Easy access 19
10. Safety functions 20
11. Failure messages 20
12. Storage / Transport. 20
13. Installation of coin mechanism 21
14. Dimension sketch 22
15. Circuit diagram. 23

2. General. Residence
We congratulate to your choice of a Coffee Queen Freshbrew machine.
Please read this manual before you take the machine into operation
for the first time.
The manual contains important instructions for a safe and proper use of the machine.
Always keep this manual within reach for the user!
Coffee Queen Residence
- Making coffee cup by cup, jug by jug
- Jug facility with key switch
- 10 choices of drinks
- 4 ingredients canisters
- Brewing mechanism with coffee filter
- Electronically temperature controlled
- Adjustable coffee strenght
- Illuminated cup while brewing
- Clock functions (Built-in)
- Base cabinet with storage and large waste bin (optional)
- Manufactured in stainless steel
Facts:
Height 995 mm (1795mm with base cabinet)
Width 420 mm
Depth 580 mm
Weight 41kg (+ base cabinet 25kg) packing 5kg
Water tank 2.4 litre
Electricity 230V/2200W
Water connection ½” outside thread
Capacity:
Approx cups of coffee 350 a (per) filling
Ingredients canisters 4 st.(variable contents)
3.
User manual only valid these model.
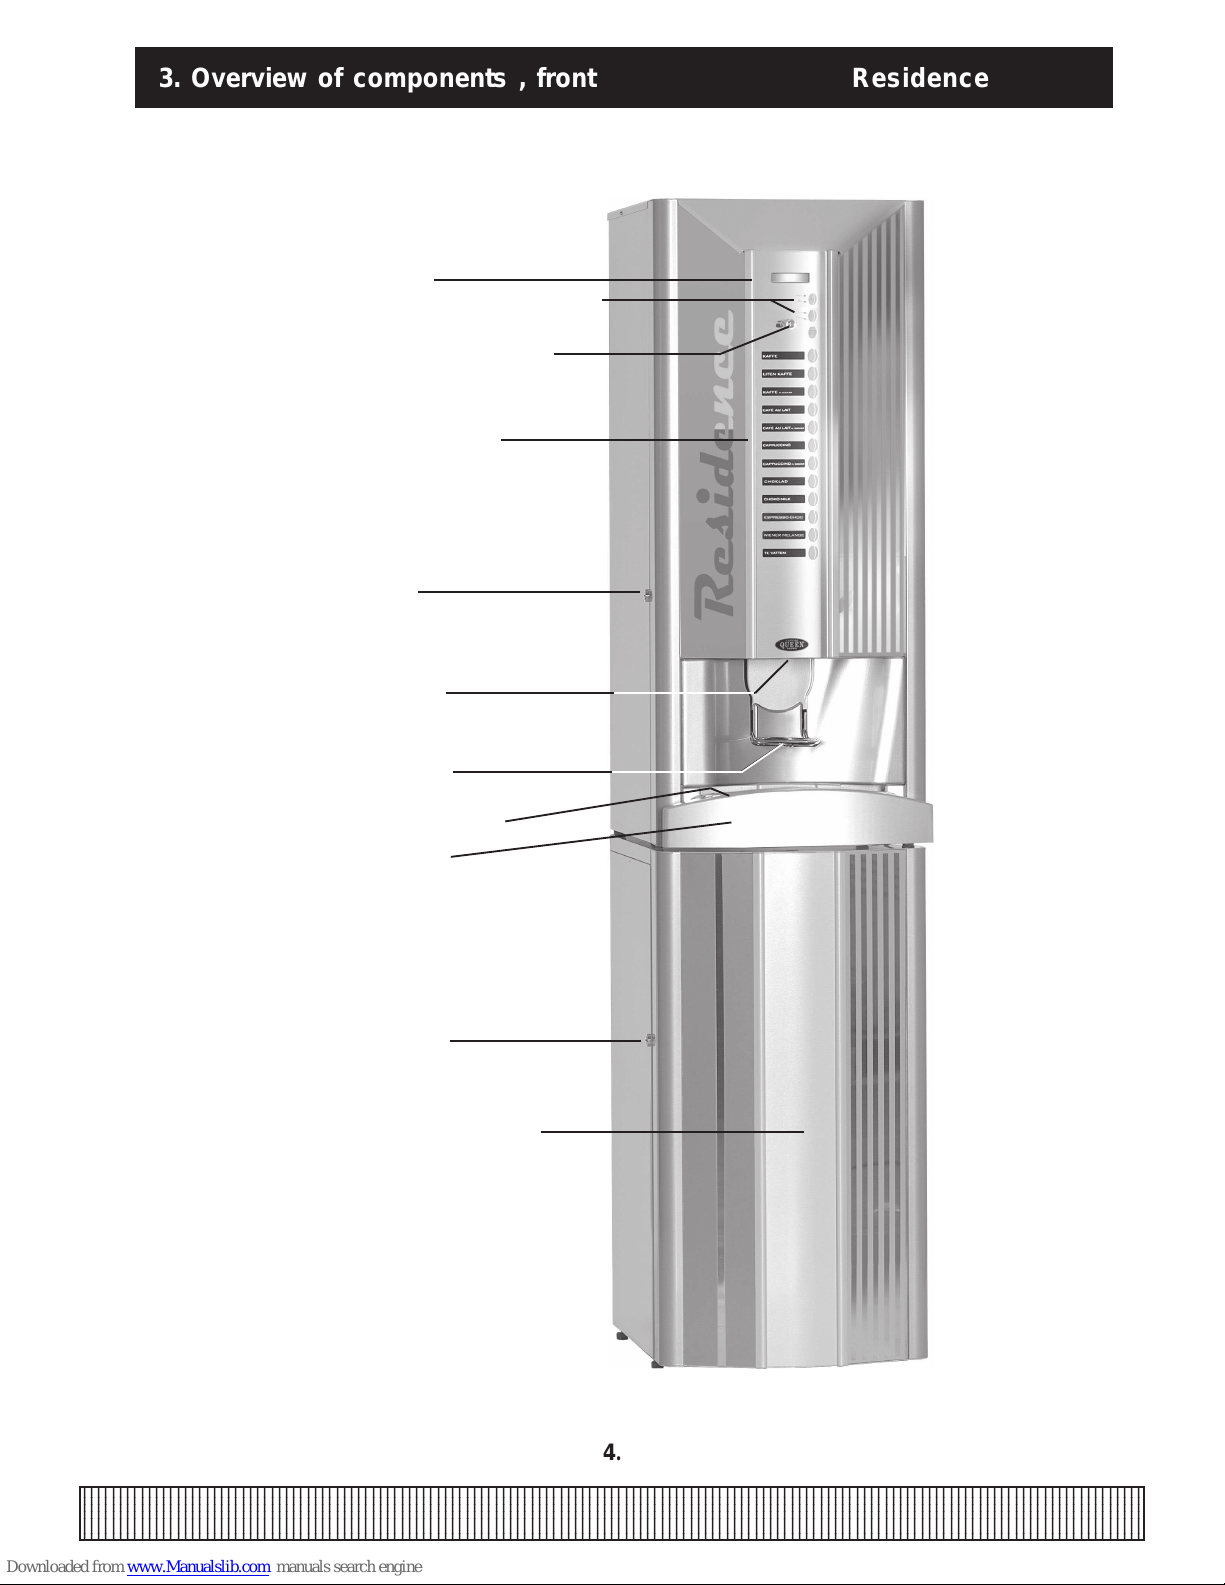
Display
Strenght of drinks ++ / - -
Key switch
(cup and jug choice)
10 choices of
drinks
Door lock
Door lock
Base cabinet with
waste box(choice)
Outlet
(drinks)
Cupholder
Drip tray insert
Drip tray
4.
3. Overview of components , front Residence
Ingredientscanister
(I)
Ingredientscanister
(II)
Ingredientscanister
(III)
Ingredientscanister
(IV)
Brew
mechanism
3.Overview of components, mixersystem Residence
5.
FUSE holder
ON/OFFswitch
Chute
Mixer bowls
COFFEE
CHOCOLATE
TOPPING
INSTANT
Detail; Ingredients; Width; Height; Volum/litre; Amount/unit
Canister; coffee 160 400 9,3 1
Canister; instant 67 400 3,5 1
Canister; chocolate 67 400 3,5 1
Canister; topping 67 400 3,5 1
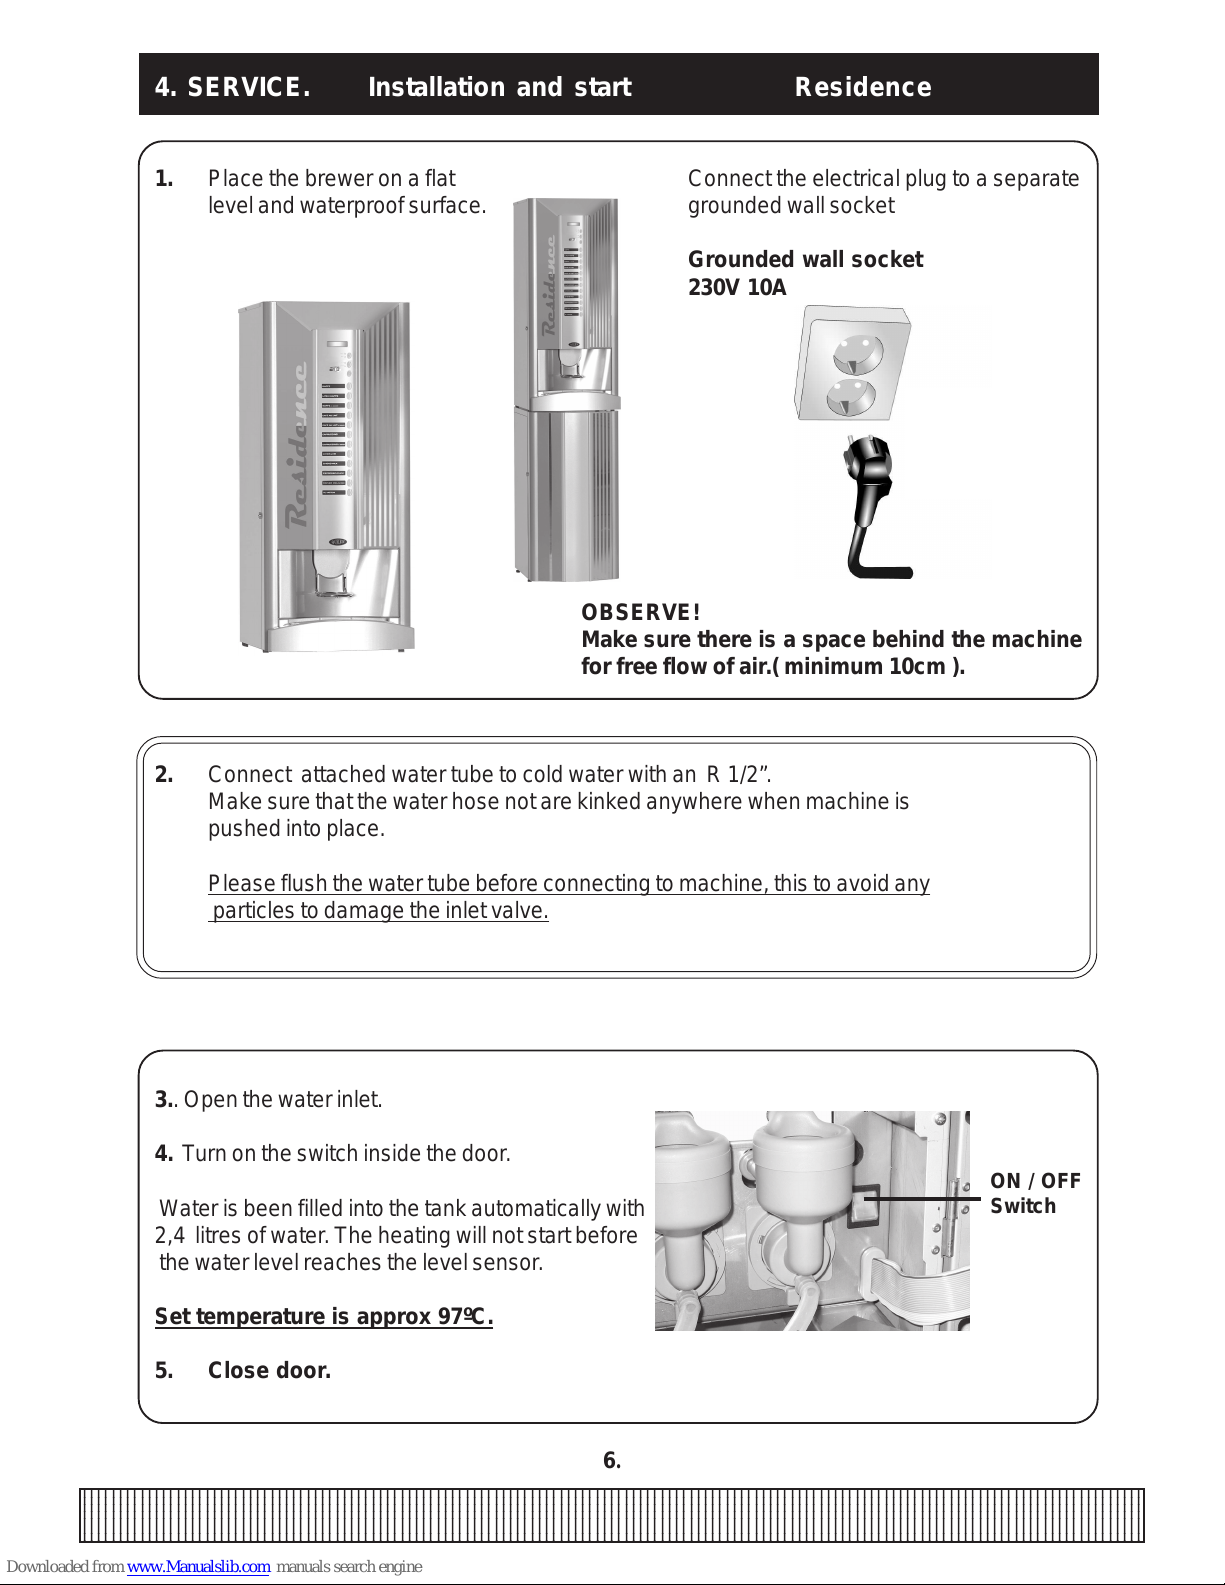
4. SERVICE. Installation and start Residence
1. Place the brewer on a flat Connect the electrical plug to a separate
level and waterproof surface. grounded wall socket
Grounded wall socket
230V 10A
OBSERVE!
Make sure there is a space behind the machine
for free flow of air.( minimum 10cm ).
2. Connect attached water tube to cold water with an R 1/2”.
Make sure that the water hose not are kinked anywhere when machine is
pushed into place.
Please flush the water tube before connecting to machine, this to avoid any
particles to damage the inlet valve.
3.. Open the water inlet.
4. Turn on the switch inside the door .
Water is been filled into the tank automatically with
2,4 litres of water. The heating will not start before
the water level reaches the level sensor.
Set temperature is approx 97ºC.
5. Close door.
6.
ON / OFF
Switch
7.
COFFEE
4. SERVICE: Installation and start Residence
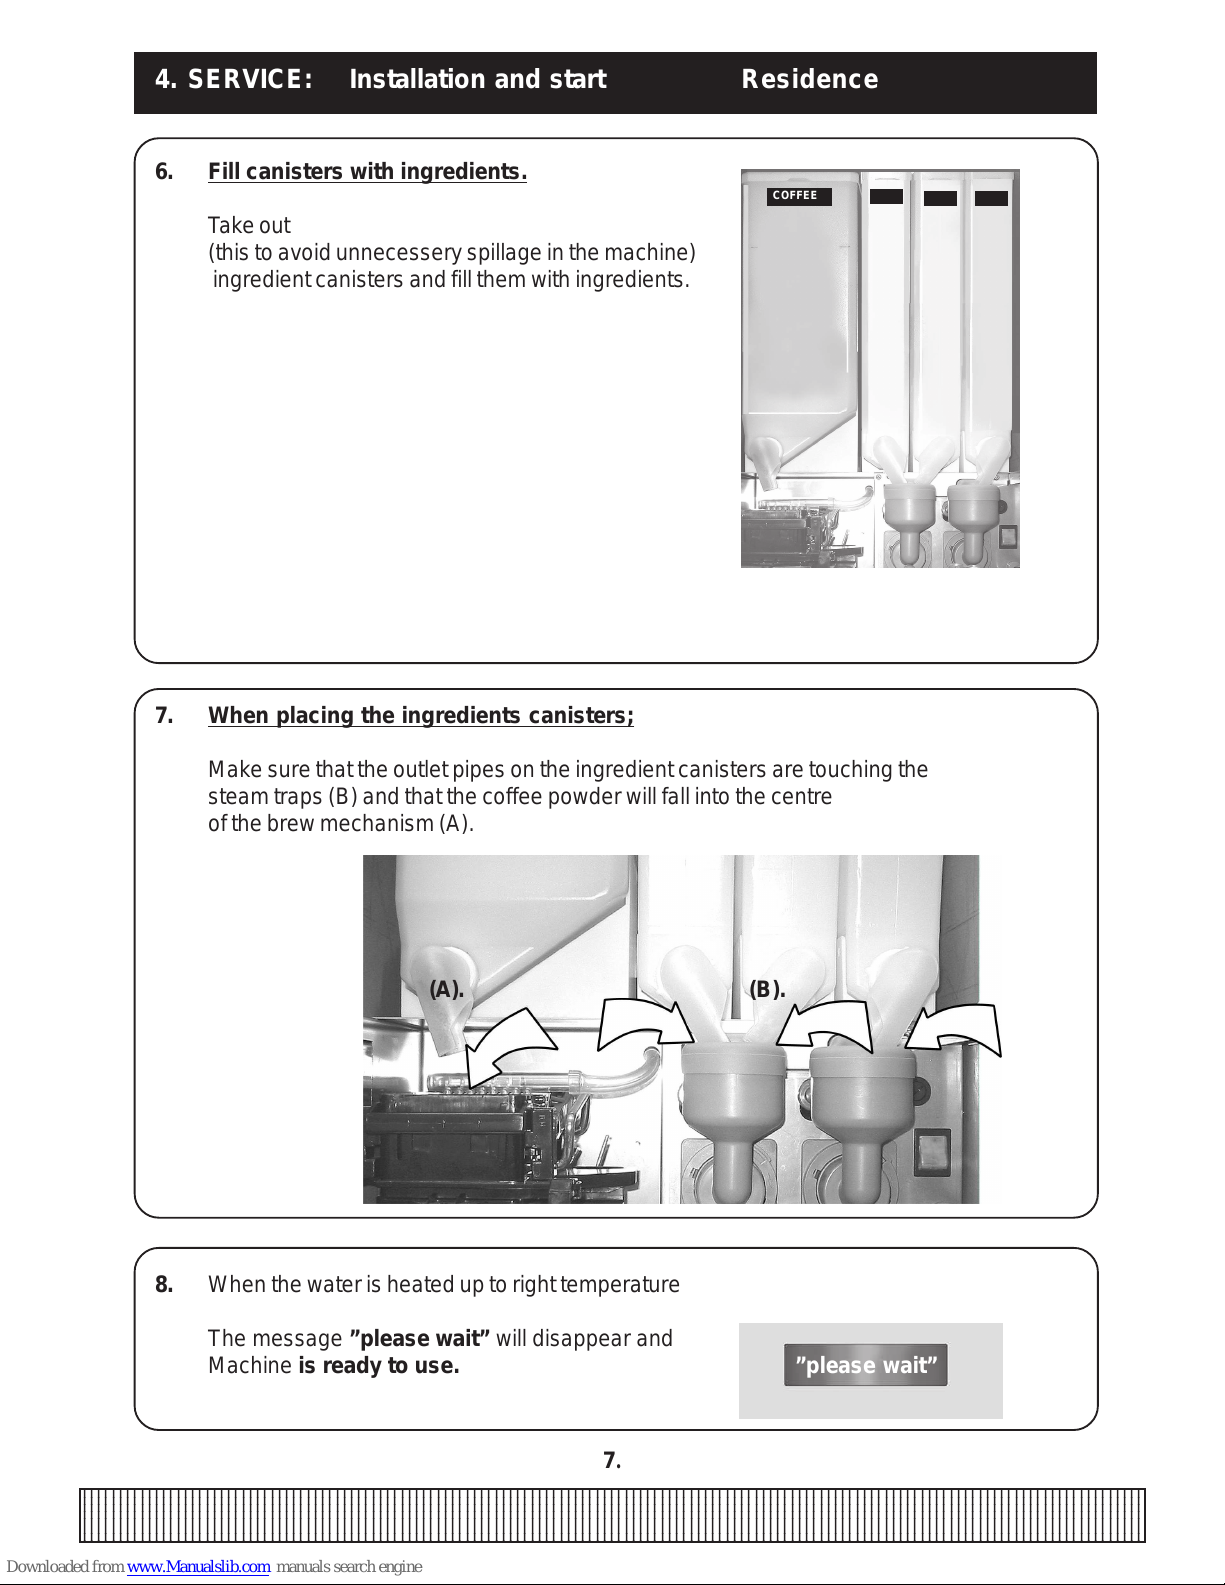
6. Fill canisters with ingredients.
Take out
(this to avoid unnecessery spillage in the machine)
ingredient canisters and fill them with ingredients.
7. When placing the ingredients canisters;
Make sure that the outlet pipes on the ingredient canisters are touching the
steam traps (B) and that the coffee powder will fall into the centre
of the brew mechanism (A).
8. When the water is heated up to right temperature
The message ”please wait” will disappear and
Machine is ready to use. ”please wait”
(B).(A).
1
2
3
4
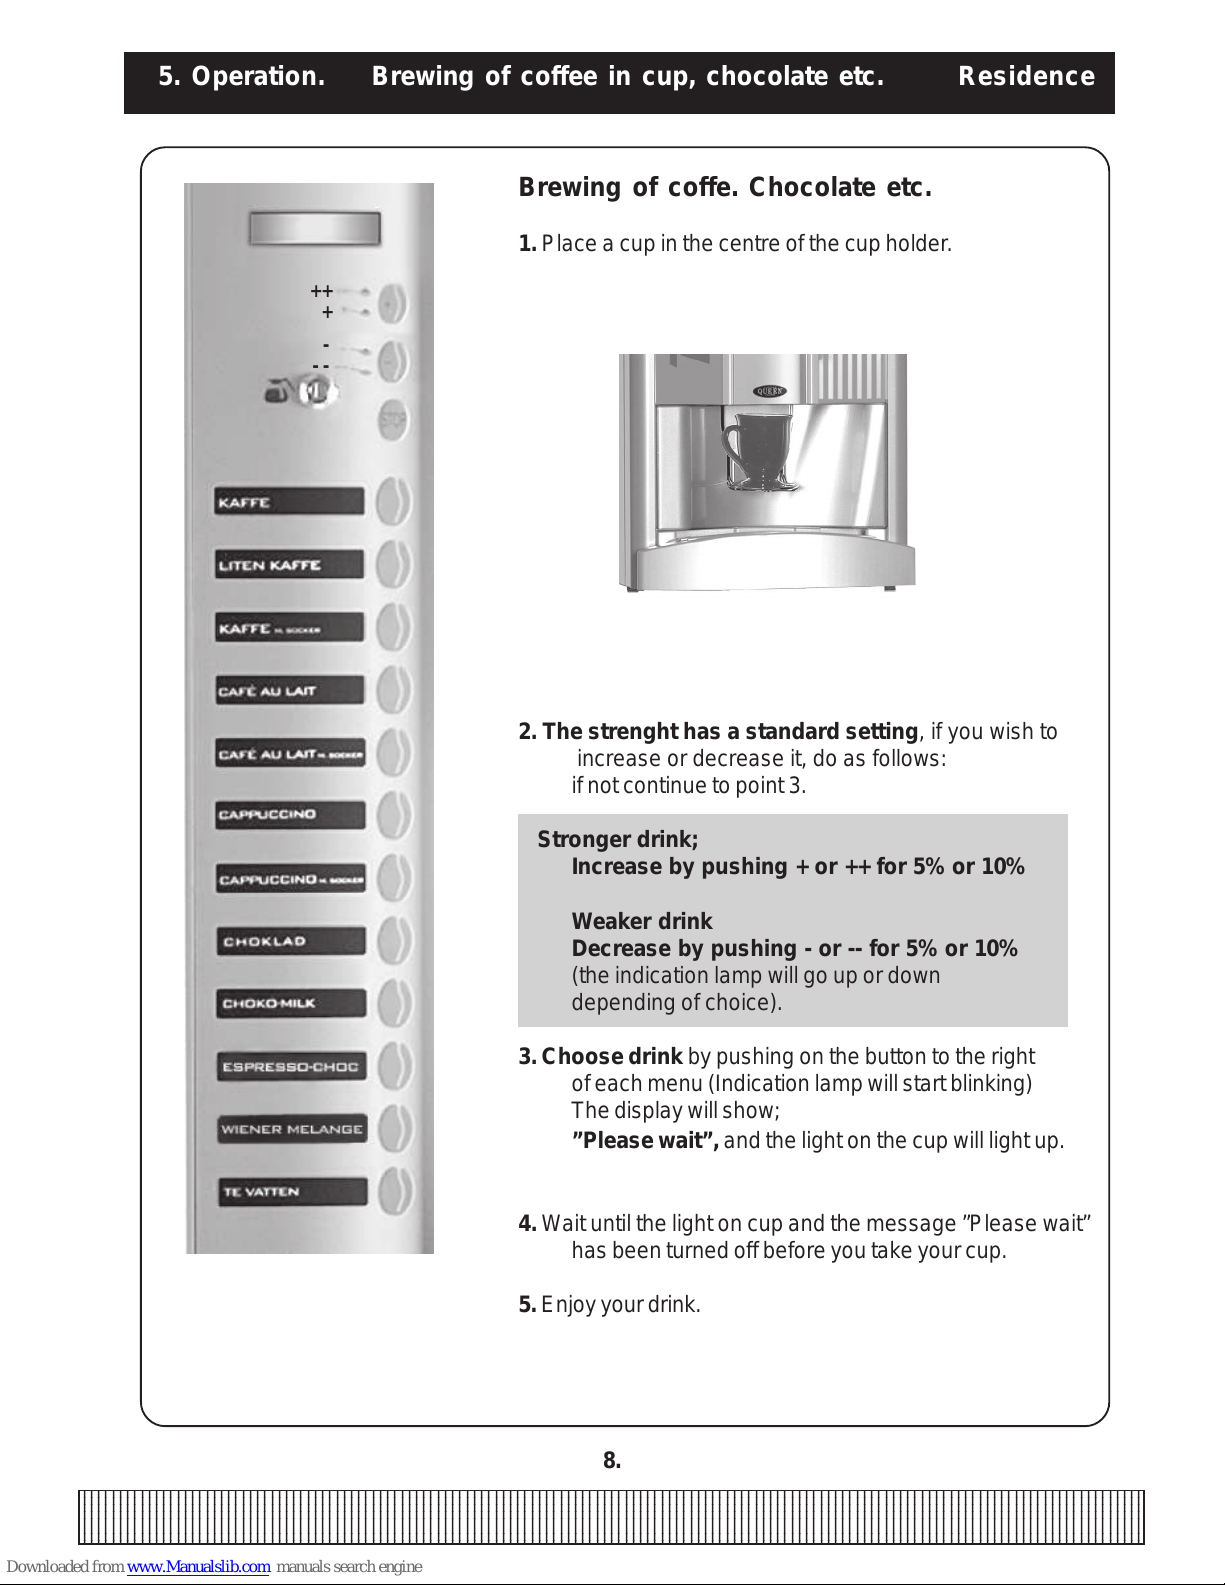
Brewing of coffe. Chocolate etc.
1. Place a cup in the centre of the cup holder.
2. The strenght has a standard setting, if you wish to
increase or decrease it, do as follows:
if not continue to point 3.
Stronger drink;
Increase by pushing + or ++ for 5% or 10%
Weaker drink
Decrease by pushing - or -- for 5% or 10%
(the indication lamp will go up or down
depending of choice).
3. Choose drink by pushing on the button to the right
of each menu (Indication lamp will start blinking)
The display will show;
”Please wait”, and the light on the cup will light up.
4. Wait until the light on cup and the message ”Please wait”
has been turned off before you take your cup.
5. Enjoy your drink.
8.
5. Operation. Brewing of coffee in cup, chocolate etc. Residence
++
+
-
- -

5. Operation. Brewing of jug. Residence
(Brewing of jug).
1. Place a jug in the centre of drip tray .
2. Turn on the key with jug symbole clockwise.
3. 6 cups of brewing is standard settings,
Change amount of cups by pushing + or - button.
Optional up to 12 cups or down to 1 cup brewing.
4. Push the button to the right of menu ”Coffee”
( The indication lamp starts blinking)
5. Wait until the light and message ”Please wait” has been
turned off before you take out the jug.
6. Serve a jug with good coffee.
9.
++
+
-
- -

10.
Automatic cleaning of brew mechanism, mixing bowl:
Shall been done every week.
The brewmechanism can easily be cleaned with the key switch in ”cup” (normal) position.
6. Cleaning program CLEANING
To stop cleaning process: push ”Stop” button.
The brew mechanism will go back to start position.
NOTE! Dont stop the process when detergent has
been loaded.
Then the cleaning must be finished.
IMPORT ANT! Cleaning of brew house.
After the automatic cleaning program is finished. Clean brew house! This must be done, to make sure
that you will remove residual detergents and coffee remains!
Dismantling and cleaning/washing brew house:
Do as follow in paragraph 10- 19.
1. Turn the key slowly ninety degress and back again.
Push button for drink 1 for 6 seconds. A
2. After 4 seconds the signal will go faster.
3. After 6 seconds The display shows; ”Open door”
”load detergent”.
4. Fill 25gr detergent (one portion bag) in to the brew
mechanism. (Detergent will be supplied from your dealer)
5. The display shows; ”Close door”
6. The display shows; ” When ready press key”
Place a jug into the drip tray and push button for drink 1
7. The display shows; ”Cleaning mixer” (2....)
8. The display shows: ”Rinsing coffee” ”Soak time:”
The machine start to count down from 300 seconds.
9. The display shows. ”Brewer cycle” the machine is counting down.
Fig.B
10. Push ”+” button for 6 seconds
11. The display shows: ”Change paper/Rotate” ”Push E/ +”
12. Push” E” button.
13. The display shows; ”Preparing paperload”.
14. The machine will rotate in position.
15. The display shows,”Change paper”
16. Open door, dismantle, clean and reassemble brew house.
page 1 1.
17. Close door.
18. Machine is ready to use again.
19. Take out a cup of coffee and pour out
just to make sure that there is nothing left of detergent.
If machine not will go
back in start position.
Restart machine.
1.
1.
12.
10.

11.
6. Cleaning program CLEANING
Dismantling and cleaning/washing brew house:
Dismantle brew house:
1. 2.
4.
Reassemble brew house.
NOTE! When reassemble brew house
make sure that (B) wiper are
between (A) arms.
3. Flush brew house!
To remove detergent and coffee remnants.

1234567890123456789012345678901212345678901234567890123456789012123456789012345678901234567890121234567890123456789012345678901212345678901234567890
1234567890123456789012345678901212345678901234567890123456789012123456789012345678901234567890121234567890123456789012345678901212345678901234567890
1234567890123456789012345678901212345678901234567890123456789012123456789012345678901234567890121234567890123456789012345678901212345678901234567890
1234567890123456789012345678901212345678901234567890123456789012123456789012345678901234567890121234567890123456789012345678901212345678901234567890
1234567890123456789012345678901212345678901234567890123456789012123456789012345678901234567890121234567890123456789012345678901212345678901234567890
1234567890123456789012345678901212345678901234567890123456789012123456789012345678901234567890121234567890123456789012345678901212345678901234567890
1234567890123456789012345678901212345678901234567890123456789012123456789012345678901234567890121234567890123456789012345678901212345678901234567890
1234567890123456789012345678901212345678901234567890123456789012123456789012345678901234567890121234567890123456789012345678901212345678901234567890
1234567890123456789012345678901212345678901234567890123456789012123456789012345678901234567890121234567890123456789012345678901212345678901234567890
12.
1.
1.
6. Cleaning program. CLEANING Residence
Weekly cleaning! Automatic cleaning of mixing bowl 2 or 3.
If you only wish to clean the mixer bowl and whipper house; Follow these
instructions:
The mixer bowls can easily be cleaned with the key switch
in ”cup” (normal) position.
Automatik cleaning of mixer bowl No:2
1. Place a jug in the drip tray .
2. Turn the key (1) slowly ninety degrees and back again.
Push button (3) for 6 seconds.
3. After 4 seconds the signal will go faster .
4. After 6 seconds the mixer bowl and the whipper house no.2
starts to be cleaned in 5 seconds.
The display shows: ”Cleaning 2”.
Automatik cleaning of mixer bowl No:3
1. Place a jug in the drip tray .
2. Turn the key slowly ninety degrees and back again.
Push button (4) for 6 seconds.
3. After 4 seconds the signal will go faster .
4. After 6 seconds the mixer bowl and the whipper house no.3
starts to be cleaned in 5 seconds.
The display shows: ”Cleaning 3”.
By cleaning means that water is flushed and
whipper motor rotates.
++
+
-
- -
3.
4.

13.
6. Cleaning program. CLEANING. Residence
Automatic cleaning of In/Outlet valves:
The In/Outlet valves can easily be cleaned with the key switch in
”cup” (normal) position.
1. Place a jug in the drip tray .
2. Turn the key slowly ninety degrees and back again.
Push button ”E” and ” ”at the same time for
6 seconds. Keep buttons down.
3. All In/Outlet valves will now start to open and close
with 2 pulses/second in 10 seconds or so long you
pushed the buttons.
4. The display shows: ”Cleaning valves”.
5. Push ”E” button for making a brew cycle and to rinse
system from remains and lime deposit.
By cleaning is meant that valves ”knocks” away
eventual scale and other particles which has been
attached in the cylinders and that they are flushed
away with the water.
2.
1.
2.
2.
5.

14.
6. Cleaning program. CLEANING. Residence
1. Push ”+” button for 6 seconds.
2. After 4 seconds the signal will go faster.
3. The display shows: ”Change paper/Rotate”
”Push E/ +”
4. Push + button.
5. The display shows:”Rotate cycle without water”.
6. Push ”E” button.
7. The display shows: ”Rotate”
The brew mechanism rotate one turn without water and
ingredients and the mechanism falls into position if it
has been dismounted.
Observe! The push rod shall be in position
”8 o clock”
If not take out again and repeat the procedure.
Eight (8) o clock.
Rotate brew mechanism without water or ingredients:
The brew mechanism can be rotatedwithout water and ingredients with the key
switch in ”cup” (normal) position.
To be used when brew mechanism has been dismounted for washing and shall be
remounted.
++
+
-
- -
6.
1.
4.

15.
7. CLEANING: Weekly cleaning Residence
(D)
Dismantle : Mixer system
1.
Loosen outlet hose (A) and
turn lock knob (B)
anti-clockwise.
3.
Loosen whipper (D) pull
whipper straight out from the
machine.
(E)
(A)
(B)
(C)
Cleaning
Wash these parts:
.6.
A. Mixer bowl
B. Steam trap
C. Whipper
D. Assembly plate
Make sure this parts are dry
before use
2.
Loosen mixer bowl.
Pull apart (C).
4.
Turn lock knob anticlockwise.(E) until it stops
5. Clean with a wet rag and
drought drily .

16.
7. CLEANING: Weekly cleaning Residence
REASSEMBLE: Mixer system
7.
Reassemble the assembly plate by turning
lock knob (F) clockwise. INSPECT gaskets.
pil (G).
9.
Assemble whipper , pull until
you hear a clicking noise. (H).
10.
Assemble mixer bowl and steam
trap (J) see picture.
1 1.
Easily push the mixer bowl
towards, according to(K) and lock
with lock knob (L).Connect outlet
hose (M).
(NOTE! make sure that all water
hose are connected at right place
(H)
(J)
(J)
(J)
(K)
(M)
(L)
(G)
F F
F
8.
Make sure that the motor whippers plane side
will be in accordance with the whippers plane
side. see next (G) and picture (H).
INSPECT
INSPECT

17.
8. Cleaning and maintenance. CLEANING Residence
Dismantling and cleaning coffee filter.
A tool for dismantling coffee filter, comes with machine.
Prolonged contact with bleach may damage the screen assembly . Once this is done, the
screen should then be thoroughly rinsed with dish soap and warm water to remove any leftover
residue
8. Remount the screen assembly and close the door. Then the machine will return to start
position and the machine is ready for use.
If machine not will go back in start position. Restart machine!
1. Push ”+ button” for 6 seconds.
2. After 6 seconds the display shows; ”Change paper/ Rotate”
”Push E/+”.
3. Push ”E” button.
4. The display shows; ”Preparing paperload”.
5. The machine will rotate in position.
6. When the display shows,”Change paper” open the door
and insert the extractor tool through the brewer spout all the
way to the back of the cylinder, then slide it up until contact is
made with the screen assembly .
Push up on the rear of the screen assembly until it pops out
of the cylinder.
7. Soak the screen assembly in a solution of 25gr. bleach in
3dl water for a maximum of 10 minutes.
.10 minutes
.3 dl water
97º Celsius
Fig. 2. Fig. 1.
A
Fig. 3.
(Cleaning agent receives from your retail dealer)
Cleaning agent: (brew mechanism) Coffee Queen article no 1104161
Filter: (brew mechanism) Coffee Queen article no 47200213
Tool: (dismantling filter) Coffee Queen article no 4720090
3.
1.

Outside cleaning; use a
soft rag and liquid cleaning agent
to prevent scratches.
18.
8. Cleaning and maintenance CLEANING Residence
Outside cleaning;

19.
9. Cup counter -Easy Access Residence
1. Push ”-” button for 6 seconds.
2. After 4 seconds the signal will go faster..
The display shows: ”T otal xxx cup s”
3. Push ”E” button.
The display shows: ”Choice 1 free xxx cups”
4. Push ”E” button.
The display shows ”Choice 1 coin xxx cups”
5. Push ”E” button.
The display shows ”Choice 1 xxx cups in can”
6. Push ”+” button to reach to ”choice 2” etc.
7. Push choice 3 to reset the counter.
8. Push ”Stop” button to go back to user mode.
Easy Access:
Volume and strength can be adjusted ±15% with the key switch
in ”cup” (normal) position.
1. Push ”+” and ”-” button at the same time.
2. After 4 seconds the signal will go faster.
3. The display shows: ”Easy access” ”strength 1 100%”
4. Choose the drink you want to change by pushing
”+” or ”-” button.
5. Push ”E” button.
6. The display shows: for example. Volume 4 and”
Blinking 100%”
7. Change by pushing ”+” or ”-” button.
8. Push ”E” button to confirm the change.
Press ”stop” to go back to user mode.
Cup counter:
The machine has an in built cup counter which is available to
see and reset with the key switch in ”cup” (normal) position.
8.
1.
3.
4.
6.
7.
5.
++
+
-
- -
1.
5.
8.
++
+
-
- -

Failure messages which can mostly be
corrected without any help from
service company
1. The display shows; ” Blocked” ”W ater level low”
Please check incoming water connection
Turn off the machine with the main switch
wait for 10 sec. and turn on again.
2. The display shows normal: but no drink is coming.
Possible cause of failure:
Mechanical stop in the ingredients canisters or whipper .
Measure: Try to find the cause of failure. Clean the mixer system
and try again.
20.
10. Safety functions. Residence
The machine is equipped with following
safety functions
1. Indication of door
Door not closed
The display shows; ”Door open”
2. When machine is not in use:
The valves are blocked.
11. Failure messages.
Transport and no use in long time.
1. T urn off the switch, pull out the plug and close incoming water tube.
2. Empty the water tanks.
3. Keep machine free from frosts.
Long machine stoppages at temperatures as below 0ºC (zero degrees celsius) can cause
damage of the machine. Total emptying of water is recommended.
12. Storage / Transport.
”Dörr öppen”
”Blockerat”
++
+
-
- -
++
+
-
- -

21.
13. Installation of coin mec.
Installation of coin mec for Freshbrew machines CQ.
IMPORTANT: Installation must been done of an authorized technician.
1. Assemble coin mec and connect to
display-card, placed inside door.
(see fig. 10).
( Connect with the enclosed fig.(10)
cable (A). Make sure that
power is off.
(A)
Connection placement; Version 212
Connection

14. Dimension sketch Residence
22.

15. Circuit diagram. Residence
23.

Residence
COFFEE QUEEN
Art. nr/Art. no. 1704304
FÖR SERVICE
Please contact
Your retail dealer
...............................................................................
...............................................................................
...............................................................................
COFFEE QUEEN AB, Box 960, 671 29 ARVIKA, besöksadress; Korpralsv 1B,
Tel vxl; +46 (0)570-47700, service +46 (0)570-47730, lager +46 (0)570-47720, Fax; +46 (0)570-47719
E-mail: info@coffeequeen.se www.cof feequeen.se
 Loading...