

Coffee Queen Empire Cold Service Manual
Service manual
A TASTE OF THE FUTURE
Rev . 090914
S / EN
Empire Cold
COFFEE QUEEN
Din återförsäljare / Your retail dealer
...............................................................................
...............................................................................

1. Table (list) of contents.
1. Table of contents sid. 2
2. Generally 3
3. Overview of components front 4
3. Overview of components mixing system 5
3. Overview of components cooling water 6
4. SERVICE; Installation and start
Place the brewer 7
Connectings: Electricity/Water 7
Starting up machine 7
Fill canister with ingredients 8
5. OPERATION
Making drinks in cup or glass 9
6. CLEANING
Weekly cleaning
Dismantle mixing system 1 0
Washing parts 10
Reassemble mixing system 11
7. CLEANING PROGRAMS:
Automatic cleaning of mixing bowls 1 2
Automatic cleaning of mixing bowl 1 or 2 1 3
8. Cleaning and maintenance 1 4
outside cleaning
cleaning condenser
9. Cup counter and Easy access 1 5
10. Safety functions 16
11. Failure messages 16
12. Storage / Transport. 16
13. Dimension sketch 17
14. Circuit diagram. 18
15. Spare parts list 19-21
16. Exploded View 22-28
2.
3.
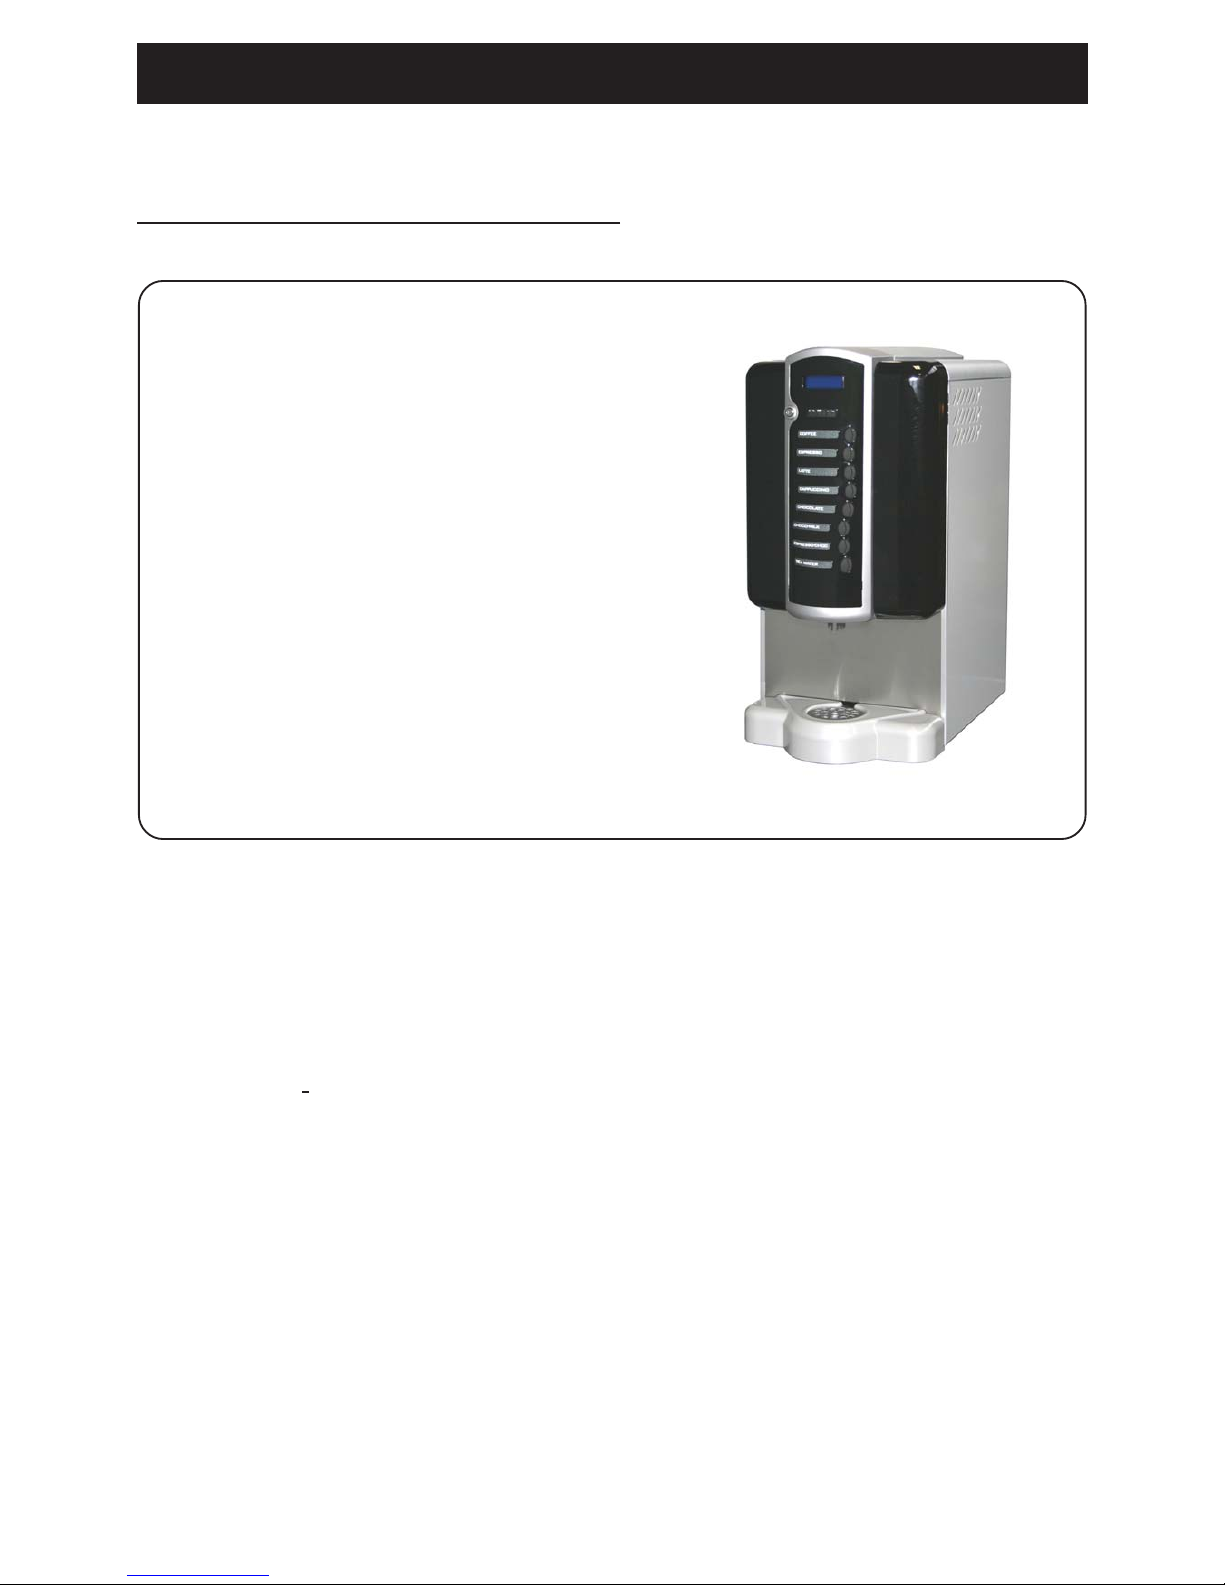
2. Generally. Empire Cold
We congratulate to your choice of a Coffee Queen coffee machine.
Please read this manual before you take the machine into operation for the first time.
Always keep this manual within reach for the user!
Empire cold
- making drinks cup by cup
- 4 choices of drinks + cold water
- 2 - 4 ingredients canisters,
- electronically temperature controlled
- adjustable drink strenght
- clock functions
Facts:
Height 620 mm
Width 310mm
Depth 490mm
Electricity 230V / 170 W Chiller unit
Refrigerator HFC-134a
Water connection ½”outside thread
4.
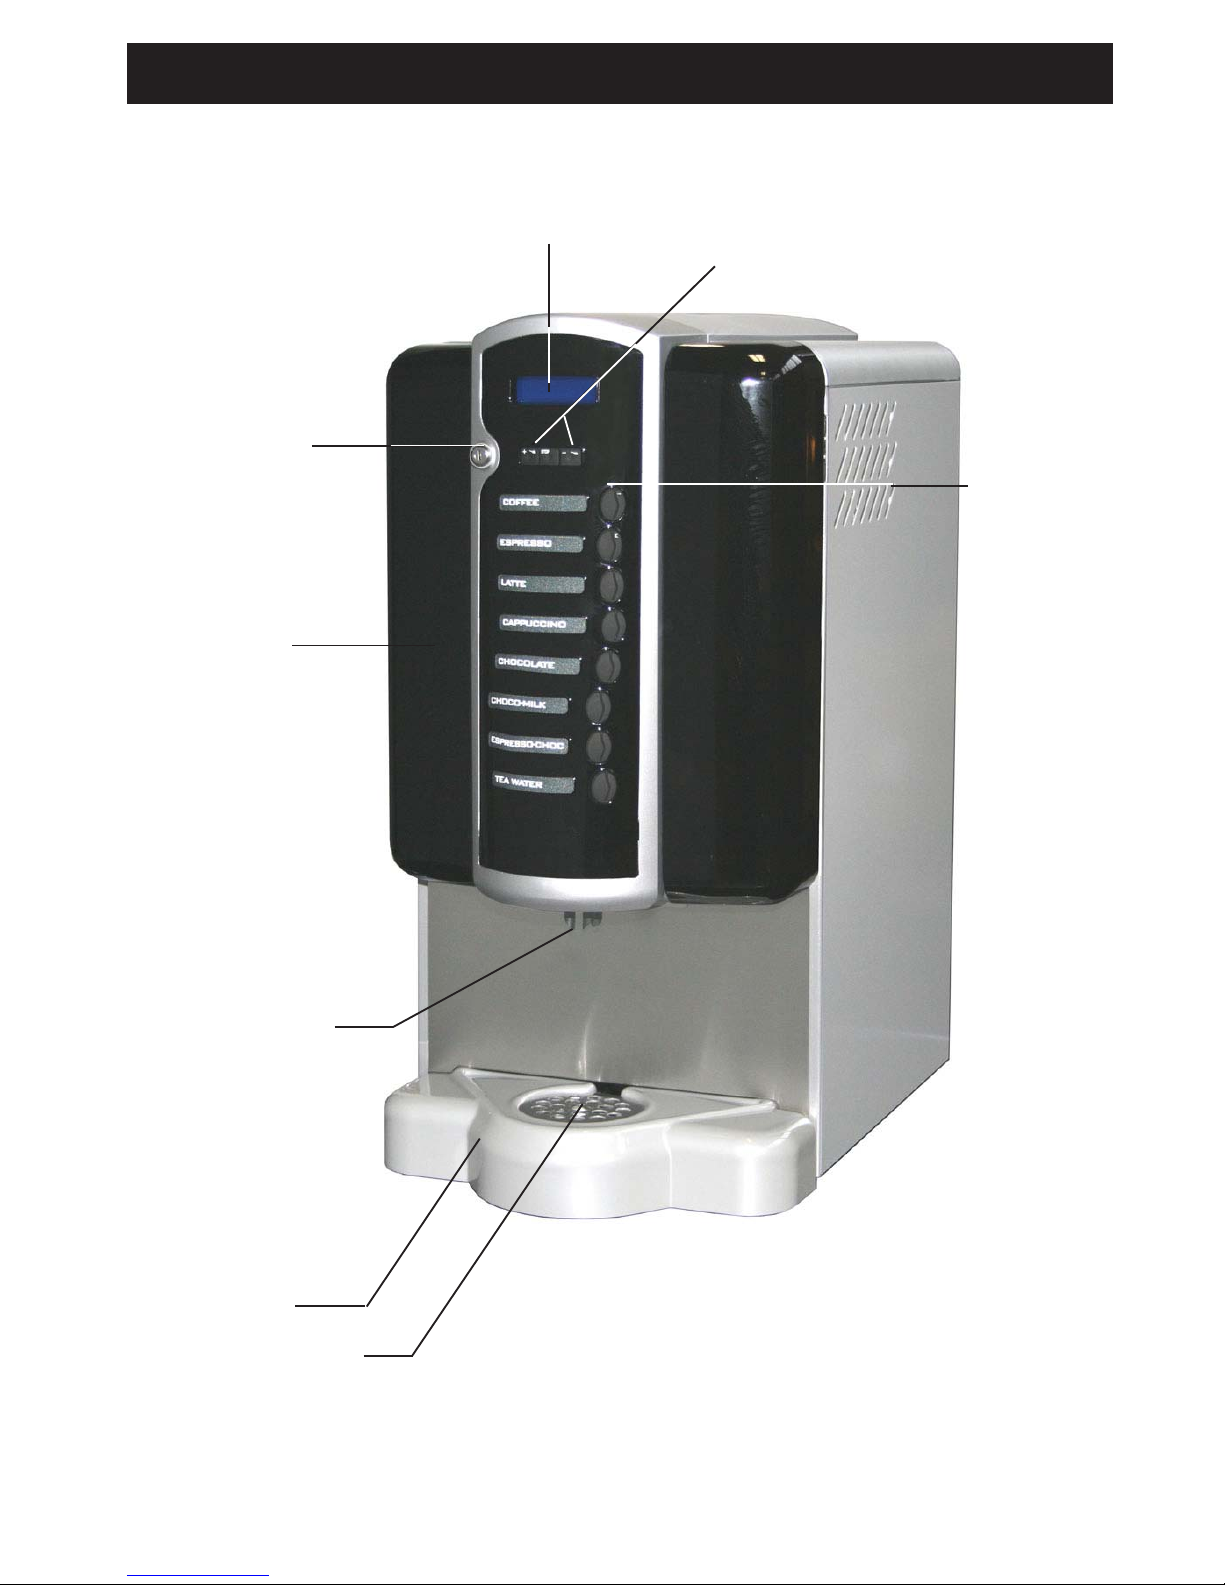
3. Overview of components , front Empire Cold
Outlet/ drinks
Strenght of drinks
++ or - -
Choices
of drinks
Drip tray
Drip tray insert
Key switch
(cup and jug
choice)
Display
Door lock

Chute
Ingredients
canister
3. Overview of components , mixer system Empire Cold
5.
ON/OFFswitch
Steam trap
Mixing bowl
Outlet pipe
Empire cold: 4 canisters.
Canister: Width Depth Height Volume/litre; Cups/filling
Ice coffee 67 225 200 1,15 45
Ice chocolate 67 225 200 1,15 32
Ice lemon 67 225 200 1,15 83
Ice peach 67 225 200 1,15
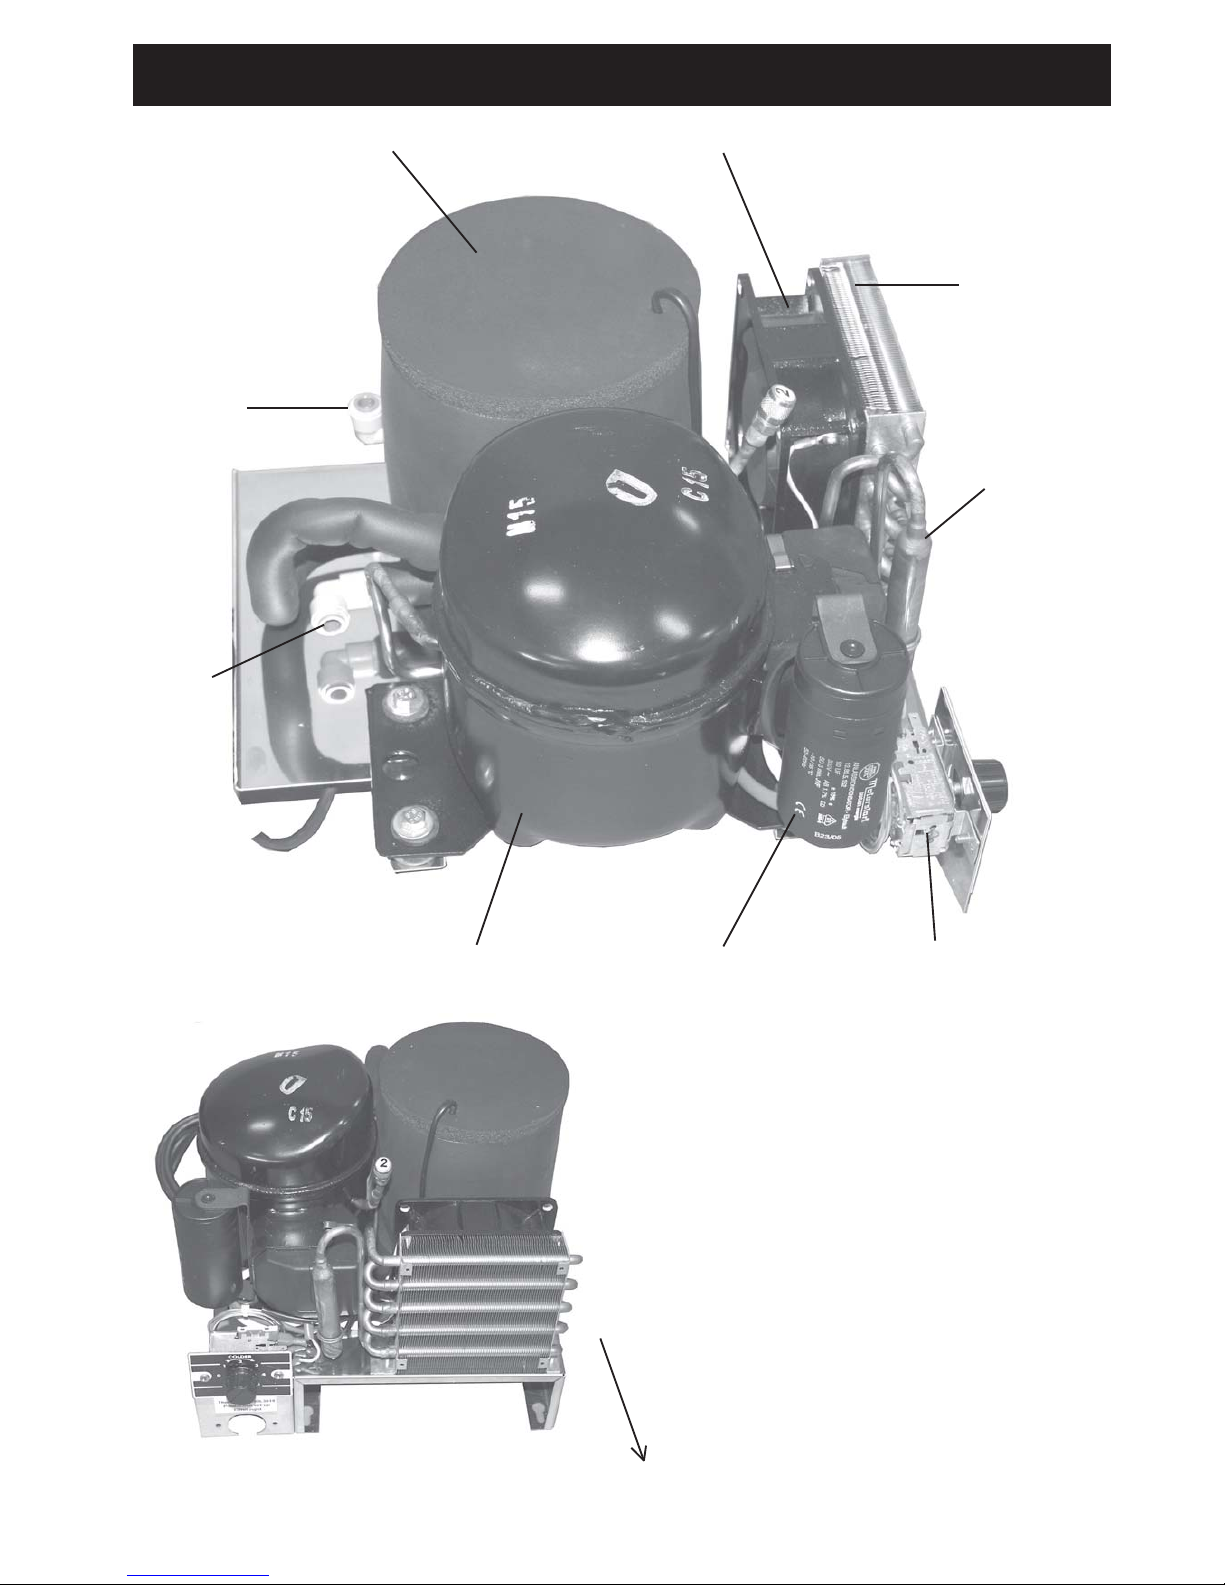
3. Overview of components , cooling water Empire Cold
6.
Fan
Cooling unit
Compressor Starting capacitor Thermostat
Condencer
Dryer
Water IN
Water
OUT
Pull out unit
7.
ON / OFF
switch
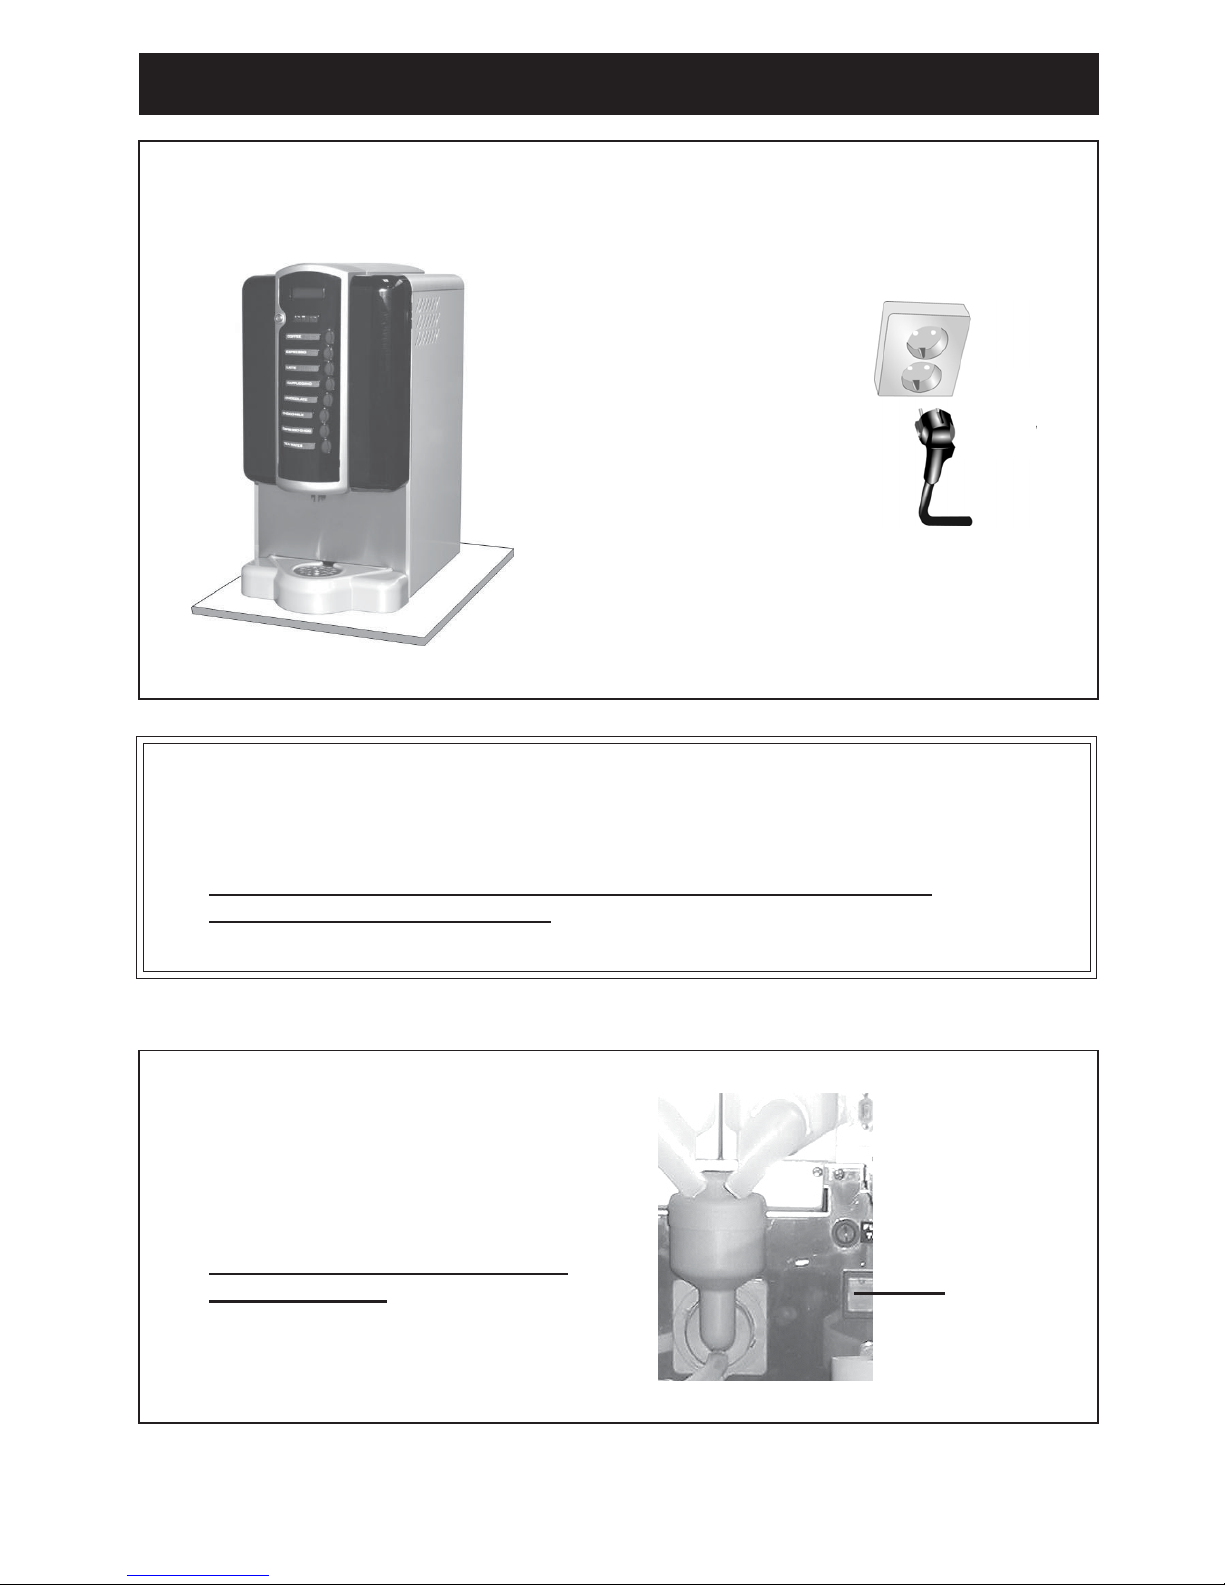
4. Service. Installation and start Empire Cold
1. Locate the brewer on a flat Connect the electrical plug to a separate
level and waterproof surface. grounded wall socket
Grounded wall socket
230V 10A
OBSERVE!
Make sure there is a space behind the machine
for free flow of air.
( minimum 10cm ).
2. Connect attached water tube to cold water with an R 1/2”.
Make sure that the water hose not are kinked anywhere when machine is
pushed into place.
Please flush the water tube before connecting to machine, this to avoid any
particles to damage the inlet valve.
3. Open the water inlet.
4. Turn on the ON-OFF switch inside the door .
Now the cooler will starting up.
After approx. 15 minutes machine
are ready to use.
5. Close door.
8.
(A).
4. Service. Installation and start Empire Cold
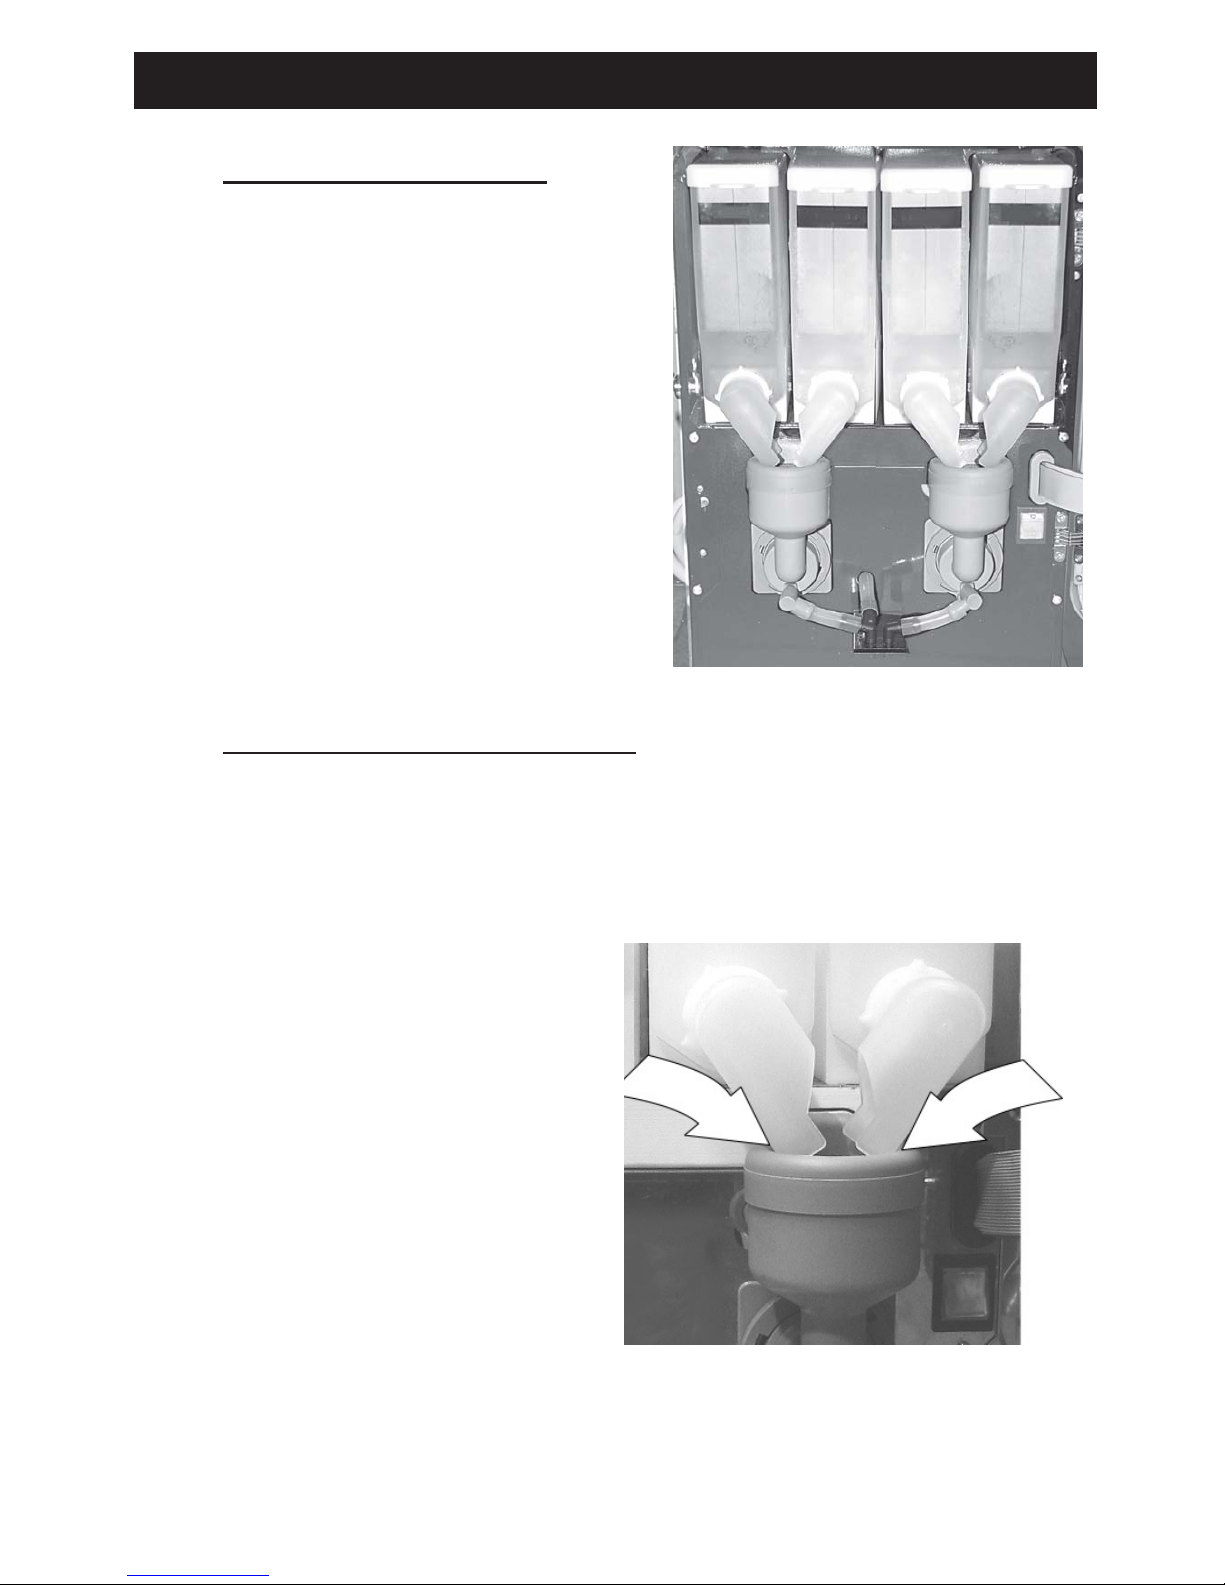
6. Fill canisters with ingredients.
T ake out (this to avoid unnecessery spillage
in the machine) ingredient canisters and fill
them with ingredients.
1. Turn up chute.
2. Lift up canister and pull out.
3. Lift off lid and fill canister with
ingredients.
7. When placing the ingredient canisters;
Make sure that the outlet pipes on the ingredient canisters are touching the
steam traps (A).
9.
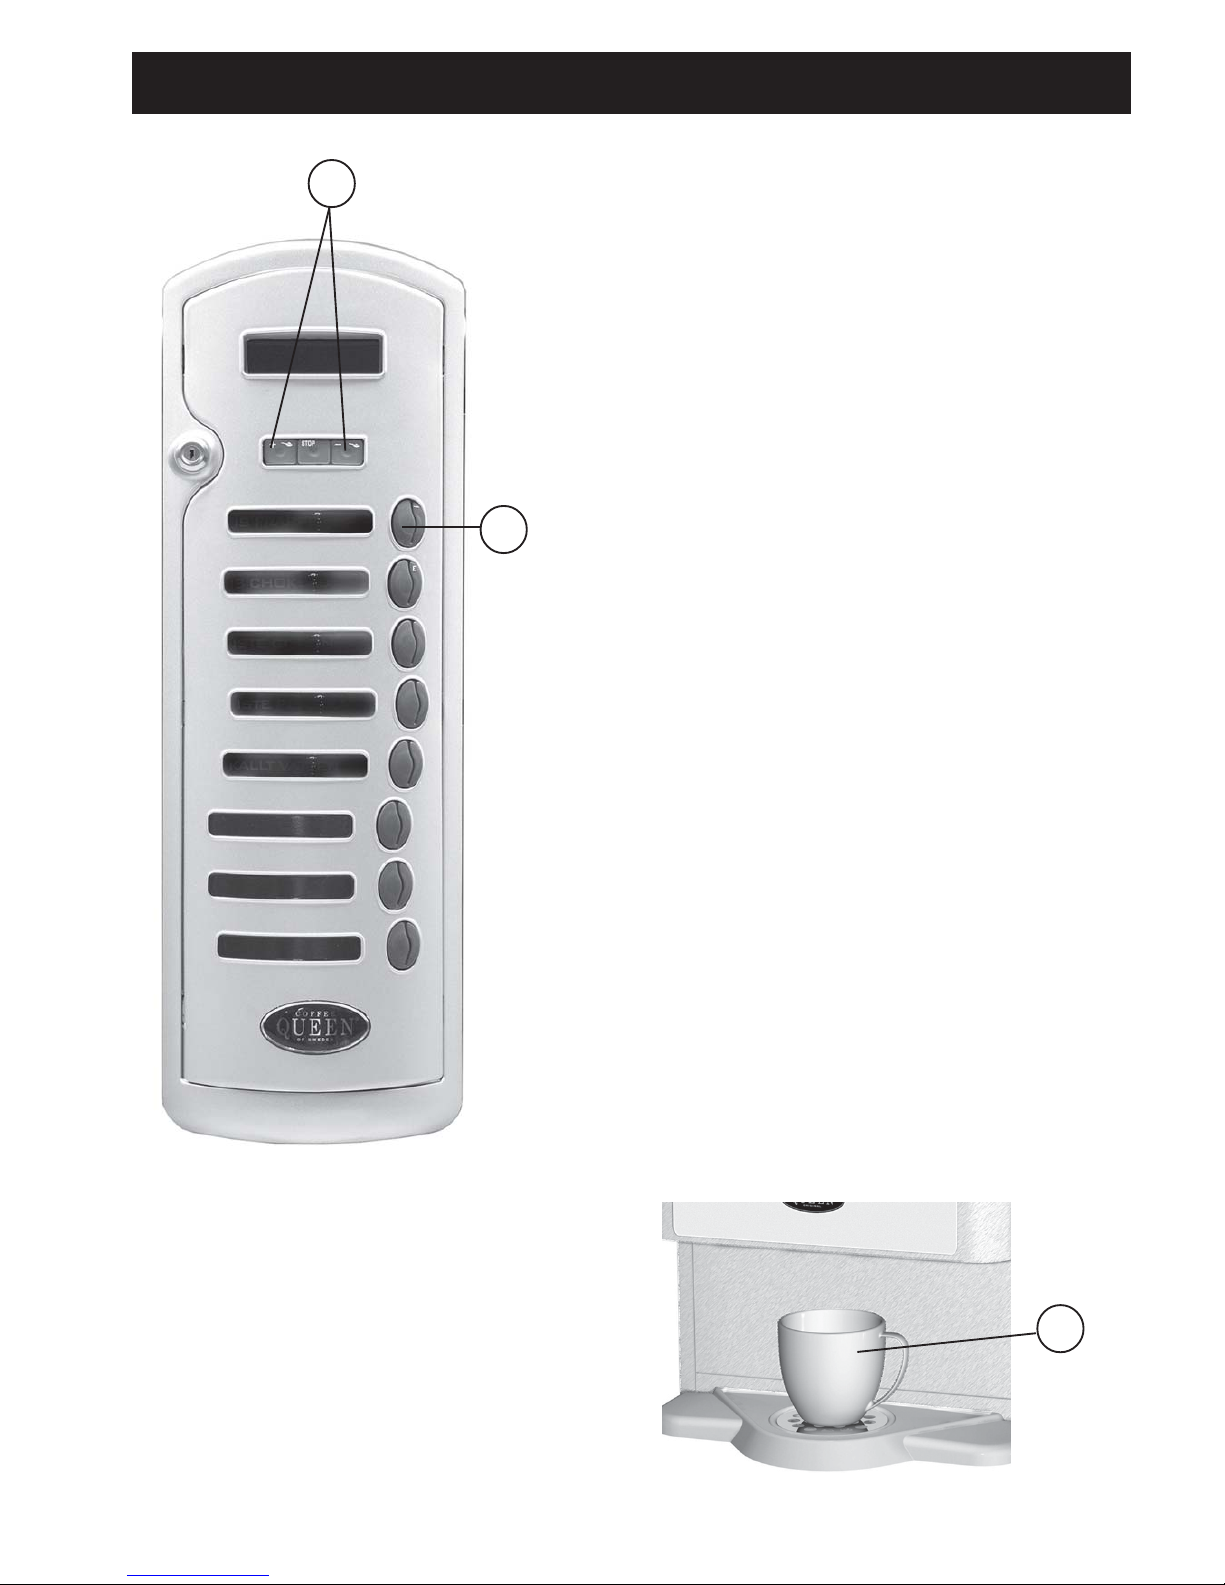
5. Operat ion; Making a drink in a glass or mug Empire Cold
1.
1. Place a glass or a mug in the centre of the cup holder.
2. The strenght has a standard setting,
if you wish to increase or decrease it,
do as follows. if not continue to point 3.
Stronger drink;
Increase by pushing + or ++ for 5% or 10%
alternative
Weaker drink;
Decrease by pushing - or -- for 5% or 10%
(the indication lamp will go up or down
depending of choice).
3. Choose amount of drink.
The display will show; ”Please wait”.
4. Wait until the light on cup and the text
”Please wait” has been turned off before you take
the cup.
6. Enjoy your drink.
2.
3.
 Loading...