

Page 1
User’s Guide
Portable bar code printer
Models PW422003
PT422003
P/N 10-00-0076
REV. F
February 22, 1999
Cognitive
An Axiohm Company
TM
Page 2

Code Courier printers are manufactured by
Cognitive, an Axiohm Company
691 Corporate Circle • Golden, Colorado 80401
TEL: (303) 273-1400 • FAX: (303) 273-1414
Copyright © 1999 by Axiohm, Inc.
Code Courier® is a registered trademark of Axiohm, Inc. Microsoft® and Windows™ are
trademarks of Microsoft Corporation. Other product and corporate names used in this
publication may be trademarks or registered trademarks of other companies, and are used
only for explanation and to their owner’s benefit, without intent to infringe.
All information in this manual is subject to change without notice, and does not represent
a commitment on the part of Axiohm, Inc. No part of this manual may be reproduced for any
purpose or in any form, including electronic storage and retrieval, without the express
permission of Axiohm, Inc.
FCC Notice
This equipment has been tested and been found to comply with the limits for a Class A
digital device, pursuant to Part 15 of the FCC Rules. These limits are designed to provide
reasonable protection against harmful interference when the equipment is operated in a
commercial environment. This equipment generates, uses, and can radiate radio frequency
energy and, if not installed and used in accordance with the instruction manual, may cause
harmful interference to radio communications. Operation of this equipment in a residential area is likely to cause harmful interference in which case the user will be required to
correct the interference at his own expense.
CE Notice
Warning
This is a Class A product. In a domestic environment this product may cause radio
interference in which case the user may be required to take adequate measures.
Note:
This manual does not contain printer programming
information. Printer drivers for Microsoft Windows 95, NT,
or 3.1/3.11 are supplied with every Code Courier printer.
The supplied drivers lets users print labels from within their
favorite Windows applications, without programming.
Further information on this software is on page 23.
For those who want to control their printer directly, a file
called PROGGDE.HLP on the drivers disk contains printer
programming information in Windows Help format. You can
load and read this file using WINHELP.EXE provided with
Microsoft Windows 3.1 or above. Please refer to your
Windows documentation if you do not know how to do this.
If you need programming information and are not using
Windows (or cannot read the Help file for any other reason),
contact our Technical Support Services Organization for
assistance. Contact information is on page 22.
Page 3

1
Contents
PRINTER SPECIFICATIONS .......................................................................... 2
SUPPLIED AND OPTIONAL ACCESSORIES ................................................ 3
CONTROLS, INDICATORS, AND CONNECTIONS ..................................... 5
COMMUNICATION PORT .......................................................................... 6
SETUP.......................................................................................................... 7
Opening and closing the printer ...................................................7
Installing the battery .................................................................... 7
Charging the battery .....................................................................8
Loading labels or tags ...................................................................8
Installing thermal transfer ribbon .............................................10
Selecting the print mode and index method .............................. 10
Printing a self-test label .............................................................. 11
USING THE PRINTER ................................................................................. 12
Turning the printer on and off .................................................... 12
Feeding blank labels ................................................................... 12
Sending data to the printer ........................................................ 12
Automatic power management features ....................................13
ROUTINE MAINTENANCE ........................................................................ 15
WHAT TO DO IF... ..................................................................................... 17
Printer will not turn on ...............................................................18
Printer will not turn off ...............................................................18
Printer shuts off by itself ............................................................ 18
Printing stops ...............................................................................18
Printer will not feed a label ........................................................ 19
Printer feeds too many labels ..................................................... 19
Host stops responding
or displays “printer not ready” message .............................. 19
Poor print quality ........................................................................20
Labels do not peel from backing in peel back mode .................. 20
Low battery indicator flashes continuously during charging ..20
Battery does not charge properly or will not hold a charge .....20
Printer prints an error label .......................................................21
Printer speaker beeps continuously ...........................................21
TECHNICAL SUPPORT .............................................................................. 22
APPENDIX A: SUPPLIED SOFTWARE ......................................................... 23
APPENDIX B: RECOMMENDED PRINT MEDIA ......................................... 24
Page 4

2
Print method: PW422003:
Direct thermal
PT422003:
Thermal Transfer
Print pitch: 203 or 101 DPI,
programmable
Print speed: 1, 1.5, or 2.5 IPS,
programmable
Max. media width: 4.25" 108mm
Min. media width: 2.4" 61mm
Max. media roll
diameter: PW422003:
2.15" 55mm
PT422003:
1.9" 48mm
Max. print width: 4.1" 104mm
Max. print length*: 6" 152mm
Min. form length: 0.25" 6.35mm
Min. label repeat
distance: 0.375" 9.5mm
Installed RAM: 122 kB image buffer
4 kB (default) text
buffer
Communications: RS232 serial
Indexing method: PW422003:
black bar or gap
PT422003:
black bar in DT mode;
black bar or gap in TT
mode
Text fonts: 3X5, 5X7, 8X8, 9X12,
12X16, 18X23, 24X31,
UltraFont A, B, and C
Text rotation: 0o, 90o, 180o, 270
o
Graphics: Raster
Bar codes: UPCA/E/E1, ADD2/5,
EAN8/13/128, Code39,
I2OF5, Code128A/B/C,
CODABAR, Plessey,
MSI, MSI1, PDF417,
MaxiCode
Bar code rotation: 0o and 90o clockwise
Power: Internal 14.4 VDC
nicad battery except
fork lift models, which
require external 24 to
36 VDC
Battery capacity: 0.850 amp-hours @ 5
hour rate
Battery weight: 0.64 lbs. 0.29 kg.
Self discharge: Typically retains a
charge for 6 months
Battery protection: Continuous battery
monitor with automatic
low power shutoff to
prevent deep discharge
Labels per charge: 250 4.25" x 3" labels at
30% density in
standard conditions;
more than 500 in many
applications
Battery charger: Input: 120 VAC or 90 to
230 VAC (as ordered),
60 Hz 15 W
Output: 18 VDC 500
mA
Environmental: Operating: -20o to 50oC
5-85% non-condensing
relative humidity
Storage: -25o to 60o C
0-85% non-condensing
relative humidity
Size: PW422003:
8.4" H x 4.75" W x 2.75" D
213 x 121 x 70 mm
PT422003:
8.4" H x 4.75" W x 4" D
213 x 121 x 102 mm
Weight: PW422003:
3.0 lbs. 1.36 kg
PT422003:
3.3 lbs. 1.5 kg
(with battery, without
media)
*Maximum print length is at maximum width and pitch with default memory settings.
PRINTER SPECIFICATIONS
Page 5

3
SUPPLIED AND OPTIONAL ACCESSORIES
Supplied accessories
Software: Intellidriver printer
drivers for Windows 95,
NT, and 3.1/3.11
Miscellaneous: Shoulder strap
Battery*: 14.4 VDC, 850 mAh,
P/N 90-12-0011
Battery charger*: 120 VAC input,
P/N 71-12-0051
or
90 to 240 VAC input,
P/N 90-12-0070-01
Power adapter* 24 to 36 VDC input
* The spare battery holder and spare paper
holder are for use with the all weather
holster.
Optional accessories
Cables:
DB9 to DB9: P/N 90-88-0079
DB9 to DB25: P/N 90-88-0078
RJ45 to RJ45: P/N 61-00-0026
Adapters:
RJ45 to DB25f: P/N 90-12-0017
RJ45 to DB25m: P/N 90-12-0018
RJ45 to DB9f: P/N 90-12-0016
Extra battery: P/N 90-12-0011
Universal carrying case: P/N 90-12-0031
Carrying handle: P/N 71-12-0003
Carrying strap: P/N 71-12-0050
All weather holster: P/N 71-12-0032
Spare battery holder*: P/N 71-12-0059
Spare paper holder*: P/N 71-12-0060
Fork lift mount kit: P/N 98-12-0000
Five slot drop-in
battery charger: Model SC5000
Other: Annual service contract
* Battery and power supply are not included
with fork lift printers. The power adapter is
supplied only with fork lift printers.
Page 6

4
Figure 1. Code Courier front view
Figure 2. Code Courier rear view
ON/OFF button
FEED button
LOW BATTERY
indicator
CHARGING
indicator
READY
indicator
Charge jackCover clip Cover clip
Serial port
Page 7
5
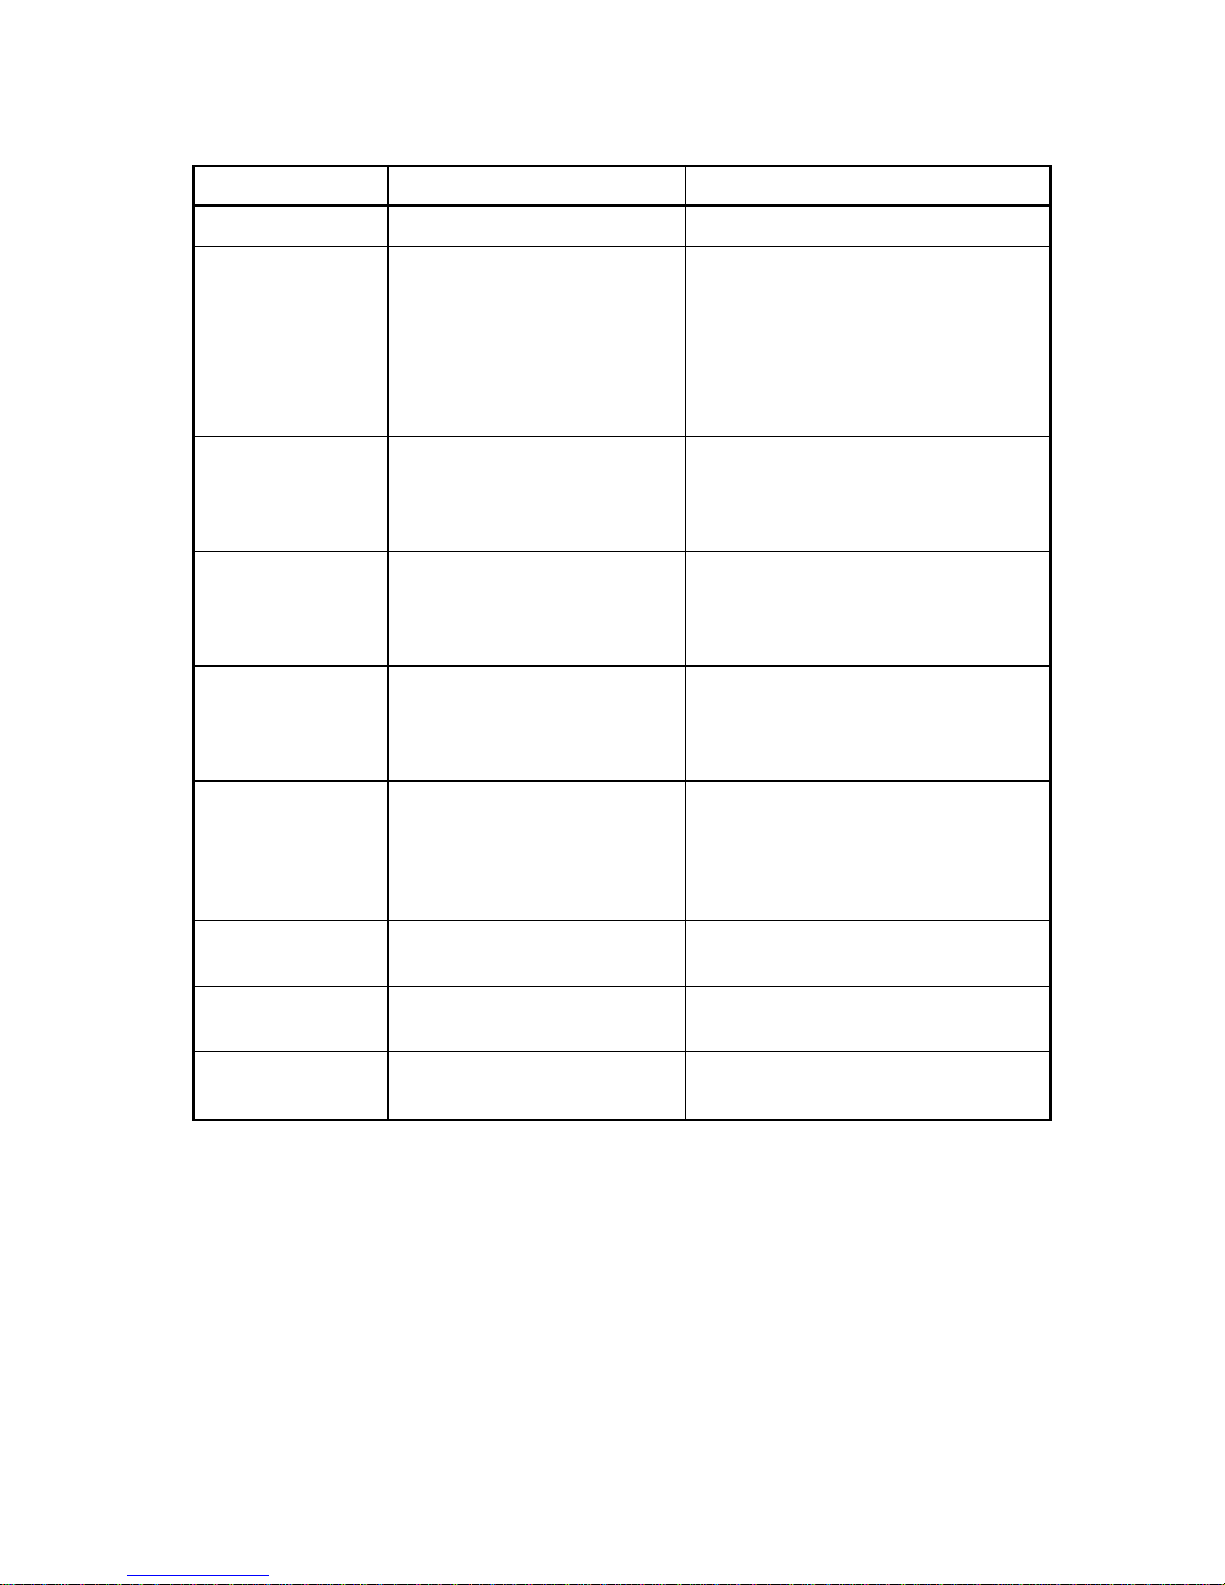
CONTROLS, INDICATORS, AND CONNECTIONS
Device name Primary function Use
ON/OFF button Controls printer power PRESS - turns printer ON/OFF
FEED button Advances print media PRESS - to advance media
PRESS and HOLD while turning unit
ON - prints test label and activates
hex dump mode - cycle power to
resume normal printing
PRESS - to pause or resume batch
mode printing
LOW BATTERY Shows battery status OFF - normal condition, battery
indicator adequately charged for use
RED - battery needs recharging;
printer will shut off in 30 seconds
CHARGING Shows battery is charging OFF - normal status - no charger
indicator connected or battery fully charged
YELLOW - charger connected and
battery charging
READY indicator Indicates printer is ready to GREEN flashing - printer on and
print labels ready
OFF - low battery, battery charging,
or printer turned off
Speaker (internal) Signals printer status 1 BEEP - power on/battery OK
2 BEEPS - power off
3 BEEPS - out of paper
7 BEEPS - low battery
LONG or LOW TONE - error
Charge jack Connects to battery charger Connect to battery charger supplied
with printer
Serial port (RS232) Data input DB9 or RJ45 female connector for
connection to host controller
Cover clips Hold printer cover closed PULL bottom of clips away from
printer body to release cover
Page 8

6
COMMUNICATION PORT
Code Courier printer has an RS232 serial communication port, wired
as shown below. (The RJ45 connector is standard; DB9 connectors are
installed on some custom printers.)
Serial input connector (DB9S)
Serial input connector (RJ45)
Serial port parameters
Code Courier printers are configured as DTE equipment, and use RTS/
CTS handshaking or XON/XOFF protocol (control characters are DC1 and
DC3). The serial port supports the following parameters:
Speed: 600, 1200, 2400, 4800, 9600, 14400, 19200, 38400, 57600
Parity: Odd, Even, or None
Word length: 7 or 8 bits
Stop bits: 1 or 2 bits
Default parameters: 9600 baud, no parity, 8 data bits, 1 stop bit
Note:
Code Courier printers require a “null modem” when
connected to another DTE device (i.e., a personal computer).
The serial cables listed as accessories on page 3 are wired
in a null modem configuration. Other cables may require an
external null modem adapter.
Pin # Description
2 RXD (printer data input)
3 TXD (printer data output)
4, 6 Connected internally
5 Ground (-)
7 R TS (printer busy)
8 CTS
1, 9 No connection
See “Optional Accessories” on page 3 for standard cable part numbers
and descriptions.
Pin # Description
1 CTS
2 RXD (printer data input)
3 TXD (printer data output)
4, 6 Connected internally
5 Ground (-)
7 R TS (printer busy)
8 Shield
Page 9

7
SETUP
Opening and closing the printer
You must open the printer to change the battery or media. Two cover
clips hold the cover closed. To open the printer:
1. Place the printer on a flat surface, with the top cover facing up.
2. While holding the printer, pull the bottom of each cover clip away
from the printer body and upward.
3. Pull the top of each clip clear of the printer cover.
4. Swing the printer cover all the way open.
To close the printer:
1. Place the printer on a flat surface, with the open cover facing up.
2. Position the label stock over the paper door edge.
Note:
If you are using the optional peel-back accessory, thread
the label stock through the printer as shown in Figure 5 on
page 9.
3. Lower the printer cover and hold it closed.
4. Engage the top of each cover clip on the mating lips on the printer
cover, then press the bottom of each clip against the printer body.
The clips will snap into position.
Installing the battery
(Not applicable to externally-powered printers)
Code Courier uses an internal rechargeable battery, and is shipped
with the battery discharged and uninstalled. To install the battery:
1. Open the printer.
2. The battery tray is located to the
left of the paper holder. Place
the battery in the tray with the
battery contacts down and
toward the back of the tray.
3. If you need to load label media,
do that now. Otherwise, close
the printer.
Figure 3. Battery installation
Battery
Battery
contacts
Page 10

8
Charging the battery
(Not applicable to externally powered printers)
The low battery indicator glows red when the battery needs
recharging. The printer automatically shuts off 30 seconds after the
low battery indication. To recharge the battery:
1. Confirm that the battery is installed in the printer.
2. Plug the charge adapter output connector into the printer charge
jack located next to the serial input connector.
3. Plug the charge adapter AC input into a live AC outlet. Connecting
the charger automatically turns the printer on. The CHARGING
indicator glows yellow during battery charging.
Note:
Labels can print during charging, provided the battery does
not become completely discharged. The printer will not
accept data if the battery is too depleted to print labels.
4. Charge the battery for 2 to 6 hours. The CHARGING indicator will go
dark and the READY light will begin flashing when charging is done.
Battery charging will stop automatically after six hours. If the battery
has not achieved an adequate charge after six hours, the CHARGING
indicator will shut off and the LOW BATTERY indicator will begin
flashing. This indicates that the battery is probably defective.
Loading labels or tags
Media is supplied on rolls having an outside diameter of about 2". Two
support arms hold the label roll in place. One arm is spring loaded to
allow the use of different roll widths. To load label stock:
1. Confirm that the printer is off.
Note:
This is a safety measure, to assure that the printer will not
print while it is open. You may leave the printer on during
loading, but take care that you do not touch the printhead.
It may get hot if printing begins.
2. Open the printer.
3. Unwrap the new label roll.
4. Push the spring loaded support arm all the way to the left and
hold it there.
Page 11

9
5. Position the label roll between the
support arms. Load the labels with
their imaging surface facing the
printhead.
6. Allow the spring loaded support arm
to slide back against the label roll.
The roll will turn on the supports
with slight resistance when the paper
is loaded correctly.
7. Pull the free end of the label stock
until a few inches of stock extend
from the roll.
Figure 4. Loading label stock
8. The labels feed through the printer differently, depending on the
label presentation mode. Thread the label stock through the
printer as follows:
• For batch mode presentation: Position the label stock over the
paper door. Close the printer while pulling the free end of the
stock. Turn the printer on and press the FEED button to index
the first label.
• For peel-back mode presentation
(requires optional peel-back
attachment): Raise the peel-back
locking bar until it is horizontal.
Pass the label stock over the drive
roller, then down and behind the
white peel-back roller. The label
stock should extend about ½"
beyond the peel-back roller. Tear
off any excess. Snap the locking
bar down tight against the printer
body, then close the printer. Turn
the printer on and press the FEED
button a few times to confirm that
labels feed properly.
Figure 5. Peel-back mode label
feed path
Note:
If you do not feed one blank label after loading new media,
the first label may not print completely. After the printer has
indexed the paper once it will print the first label again.
Spring
loaded arm
Non-
moveable
arm
Peel-back
locking bar
Drive
roller
Media
Label
backing
Peel-back
roller
Page 12

10
Installing thermal transfer ribbon
(PT422003 only)
The PT422003 must have a ribbon installed when printing thermal
transfer labels or tags. To install or replace the ribbon:
1. Confirm that the printer is off.
2. Press down on the ribbon door’s
back edge and pull it forward, then
swing the door open to expose the
ribbon take-up roll.
3. Open the printer.
4. Remove any exhausted ribbon by
pressing each roll to the left to
release it and then lifting it out.
5. Unwrap the new ribbon roll. The
ribbon is attached to the new ribbon
take-up roll. Do not detach it from the take-up roll.
6. Position the new ribbon supply roll in the printer such that the
ribbon unwinds from the bottom of the roll towards the front of the
printer. Snap the new ribbon roll into place by pressing it to the
left as you push it onto the ribbon hubs.
7. Pull the ribbon over the printhead. Notice that the ribbon’s shiny
side faces the printhead and the dull side faces the drive roller.
8. Position the new ribbon take-up roll under the ribbon door. Snap
the ribbon take-up roll into place by pressing it to the left and
pushing it onto the take-up roll hubs.
9. Turn the ribbon take-up roll until the ribbon slack is taken up.
10. Close the ribbon door and the printer.
Selecting the print mode and index method
The printer supports both black bar and gap indexing. The PT422003
can print in direct thermal or thermal transfer mode. If you are using
label printing software, it should provide a means to set the print
mode and index method.
If you are writing your own software or controlling the printer using
direct commands, you must use printer commands to set the print
mode and index method. Refer to the programming information in the
PROGGDE.HLP file for more information.
Figure 6. Thermal transfer
ribbon path
Ribbon take-up
roll
Ribbon
supply
Finished
label
Drive
roller
Label supply
Page 13

11
Note:
The PT422003 cannot use gap indexing in direct thermal
mode. Only use gap indexing when using thermal transfer
mode.
Printing a self-test label
Printing a self-test label checks the printer’s overall operability. To run
a self-test, verify that the printer is ready to print labels (label media
installed, and battery installed and charged). Then:
1. Confirm that the printer is off.
2. Press and hold in the FEED button, then turn the printer on.
Release the FEED button after the printer begins printing.
3. After a few seconds the printer will print a self-test label. Printing
a self-test label places the printer in hex dump mode. Turn the
printer off and back on again to return it to normal operation.
Important!
Printing a self-test label places the printer in hex dump mode.
The printer will not print labels while in hex dump mode.
Turn the printer off and back on again to resume normal
label printing.
Page 14

12
USING THE PRINTER
Note:
New batteries are delivered uncharged. Install and charge
the battery for 6 to 8 hours before using the printer for the
first time.
Turning the printer on and off
The printer uses a pushbutton switch for manual power control. Press
and release the ON/OFF button to turn the printer on or off.
The internal speaker will beep once when the printer is turned on and
twice when the printer is turned off. The READY light flashes
continuously about once per second while the printer is on, unless the
battery is charging.
The printer is automatically on if the battery charger is connected. The
READY light is off during charging, and the CHARGING indicator is on.
Feeding blank labels
To feed blank labels:
1. Confirm that the READY indicator is flashing green.
2. Press the FEED button to feed a blank label. Each time you press
the FEED button, the printer will feed an additional label.
Sending data to the printer
To print labels using data sent from a host computer or terminal,
perform the following steps:
1. Connect the host and printer serial ports together.
2. Confirm that the host and printer are using the same
communications parameters.
3. Confirm that the printer READY indicator is flashing green.
4. Send your data to the printer.
Note:
Transient noise or incorrect serial port parameters can cause
a data transmission error. If an error occurs, the printer will
emit one long beep. Re-send your data to resume normal
printing.
Page 15

13
Automatic power management features
Timed power shutoff
Code Courier features a power shutoff timer to save battery power
when it is idle. When running on battery power and inactive for longer
than a specified period, the printer automatically turns itself off.
Pressing the ON/OFF button will turn the printer on again.
Any printer activity that occurs before the specified time period has
elapsed will reset the power shutoff timer. The timer restarts when the
printer finishes the activity. The timer will not run while the printer is
processing labels, even if printing is paused. This avoids data loss if
you manually pause the printer during a batch mode operation. The
timer is also disabled whenever the battery charger is connected.
This is a programmable feature, and is not activated when the printer
is first shipped. Your printer software may provide control over this
feature, or you can activate it using direct commands. Refer to the
PROGGDE.HLP file for more information.
Low battery power shutoff
Code Courier continuously checks its battery. When the battery is
almost completely discharged, the low battery indicator glows red and
the READY light shuts off. The printer will beep seven times and turn
itself off 30 seconds later. It will not turn on if the battery is completely discharged or not connected. Replace or recharge the battery if
the printer delivers a low battery warning or refuses to turn on.
Automatic speed control
You can control Code Courier’s print speed via software, but under
some conditions the printer may limit the print speed to maintain good
print quality. The printer will automatically reduce speed if the
battery becomes too depleted to print good labels at the selected speed.
Printhead temperature also affects the print speed. Code Courier
automatically adjusts print speed to maintain high-quality printing
over its specified operating temperature range.
Low speed (1 inch per second) provides satisfactory printing at any
ambient temperature within the printer’s operating range. If you have
selected low speed, the print speed will not change in response to
temperature or battery condition.
Normal speed (1.5 inches per second) provides satisfactory printing
down to about 5o C. If the printhead temperature falls below 5o C, the
printer automatically switches to low speed to maintain print quality.
Page 16

14
High speed (2.5 inches per second) provides satisfactory printing in
most applications at temperatures above 15o C. The printer will switch
to normal speed below this temperature.
Print speed may increase with increasing ambient temperature.
Normal print speed resumes if the printhead temperature reaches 5o C
and battery condition permits. High speed resumes if the printhead
temperature reaches 15o C and battery condition permits. However,
automatic speed switching will never raise the print speed over that
set by your label printing software.
Automatic speed control does not require any special operator action.
Be aware, though, that a reduction in printer speed may indicate that
the battery needs recharging.
Sleep mode power saver
Sleep mode conserves power by turning off some printer circuitry when
there is no incoming data and no labels are in process. The printer
goes to sleep automatically when inactive and “wakes up” (reactivates
all of its internal circuitry) automatically when there is incoming data
or whenever the FEED button is pressed. It goes to sleep again right
after finishing the requested operation. You do not have to perform
any manual operations to control the sleep mode.
If you are programming the printer or controlling it using direct
commands, you will need to wake the printer up when sending data.
Refer to the PROGGDE.HLP file for more information.
Buffer reset timer
Unforeseen events, such as a break in communications between the
host and printer, can leave the printer in an indeterminate state. Code
Courier uses a memory reset timer to avoid this problem.
The reset timer resets the printer if it starts an operation and does not
receive expected data for a preset period of time. Resetting the printer
allows the printer to go to sleep and clears any graphics data or label
format in process.
The reset timer is an automatic feature and does not require any
special attention from the user. If you use the printer in an RF linked
data transmission system, however, you may want to change the timer
duration. This is a software controlled feature. Please refer to the
PROGGDE.HLP file for more information.
Page 17

15
ROUTINE MAINTENANCE
Cognitive printers need very little maintenance other than occasional
cleaning. Clean the outside of the printer as required, using a soft
cloth dampened with a mild detergent cleaner.
Clean the printhead if it appears dirty or if print quality is poor.
Printhead cleaning is easy and fast:
1. Confirm that the printer is off.
2. Open the printer.
3. PT422003: Remove any installed
ribbon.
4. If label media is installed, pull it
clear of the drive roller.
5. Using a cloth moistened with
alcohol 99% pure isopropyl
alcohol, clean all dirt and label
residue from the printhead,
paying particular attention to the
“burn line” (this is the thin black
line near the front edge of the printhead.
CAUTION
Do not use any type of abrasive or metallic objects on the
printhead as this may seriously damage it.
6. Wipe the drive roller with the cleaning cloth. You can reach all
portions of the drive roller by turning the printer on, tapping the
FEED button, and turning the printer off before continuing cleaning.
CAUTION
Keep all objects clear of the printhead and drive roller any
time the printer is turned on.
7. Confirm that the slotted index detector hole (located just behind
and to the right of the drive roller) is unobstructed. Clean away
any obstruction with a soft brush if necessary.
8. PT422003: Install the thermal transfer ribbon.
9. Close the printer and resume normal operation.
Figure 7. Printer opened for cleaning
Printhead
Drive roller
Index
detector
Page 18

16
Extending the life of the battery
The battery supplied with your printer should charge and discharge
satisfactorily many times. Observe the following guidelines to obtain
the best performance from your rechargeable battery:
• Only charge the battery using the charge adapter supplied with
your Code Courier, or use the optional SC5000 drop-in battery
charger.
• If you must store the battery for an extended period, discharge and
recharge it every six months or so. The battery can lose some of its
capacity if it is not exercised periodically.
• Do not recharge the battery prematurely. If you plan to print
several small batches of labels, it is best to print all the labels and
then recharge the battery, rather than to recharge it between
batches.
• Recharge or replace the battery after the first indication of a low
battery condition.
Users who rely heavily on rechargeable batteries should consider
purchasing the model SC5000 drop-in battery charger. The SC5000 is
designed especially for use with Code Courier, and can simultaneously
charge up to five battery packs. It also features a battery conditioning
function to help maintain peak battery performance.
Page 19

17
WHAT TO DO IF...
Cognitive printers are very reliable, so printing problems are unlikely.
If you do think you have a printer problem, proceed as follows:
1. Confirm that the printer is turned off.
2. Confirm that the printer is connected directly to the host computer.
If there are any switches or other devices between the host and
printer, remove them for troubleshooting purposes. You can
reconnect them later after you resolve the problem.
3. Open the printer. Confirm that it has the right media installed,
and that it is loaded correctly. See page 8 for media loading
instructions.
4. Confirm that the printer has a battery installed and that the
battery is fully charged. If its condition is questionable, recharge it
or replace it with a fully charged, known good battery.
5. Inspect the media path. Remove any obstructions and clean the
printhead, index detector, and drive roller according to the
instructions on page 15.
6. Close the printer, taking care that the media threads through the
printer according to the media loading instructions on page 9.
7. Turn the printer on. Confirm that the printer READY indicator
flashes green.
8. Print a self-test label as described on page 11. The test label will
report important printer setup parameters, such as serial port
settings and the current index setting and print mode. Keep the
test label for future reference.
9. Turn the printer off and then back on again. Confirm that the
READY indicator flashes green.
10. Press FEED to confirm that the printer will feed a label.
11. Review the common problems described in the following section.
12. If these steps do not correct the problem, contact your Cognitive
dealer or our Technical Services Department. You will find
Technical support contact information on page 22.
Note:
The information here assumes you are using label printing
software. If you are programming the printer, please review
the troubleshooting information in the PROGGDE.HLP file.
Page 20

18
Common problems and their solutions
Printer will not turn on
Pressing the ON/OFF switch once or plugging in the battery charger
should turn the printer on. The printer READY light will flash about
once per second while the printer is on, unless the battery is charging,
in which case the CHARGING indicator should be lit. If the printer does
not seem to power up properly:
1. Check the battery connections for dirt or corrosion. Clean them if
necessary.
2. Check that the printer’s battery connector is plugged into the main
circuit board.
3. If the printer emits a low frequency tone when you try to turn it
on, a memory checksum error has occurred. Contact our Technical
Support Services Department for assistance.
Printer will not turn off
1. You cannot turn the printer off if the battery charger is connected.
Disconnect the battery charger if you must turn the printer off.
2. If you try to turn the printer off and the READY indicator does not
stop flashing and the charger is not connected, the battery is
probably very depleted. The printer may make a ticking sound for
a short while. Recharge or replace the battery immediately.
Printer shuts off by itself
1. If the printer beeps seven times and then shuts itself off, the
battery is exhausted. Recharge the battery or replace it with a
fully charged one.
2. If the printer beeps twice and shuts itself off, it is probably
shutting down in response to the “timed power shutoff” feature.
See page 13 for further information.
Printing stops
If the printer stops printing in the middle of a batch and it has not
indicated a low battery condition, the printhead may have overheated.
This is uncommon, but can occur in extreme conditions. Printing will
resume after the printhead has cooled sufficiently (typically within
about five minutes). This is normal printer behavior and does not
indicate a printer malfunction.
Page 21

19
Printer will not feed a label
The printer should feed a label when the FEED button is pressed. If the
printer does not respond properly to the feed button:
1. Confirm that the print media is loaded correctly.
2. Reset the printer by turning it off, waiting a few seconds, then
turning it then back on. Press the FEED button.
3. Turn the printer off, remove the communications cable, then turn
the printer back on. Press the FEED button. If the printer will feed
labels with the communication cable removed, suspect a problem
with the cable or the host system.
4. If the printer begins to feed a label and then stops when the feed
button is released, the index detector may have been disabled. This
is a software controlled feature. Check your software setup. If you
are programming the printer yourself, refer to the PROGGDE.HLP file
for more information.
Printer feeds too many labels
1. Verify correct label loading (index bars, if any, facing down,
imaging surface facing the printhead).
2. Confirm that the index setting (black bar or gap) in your software
setup matches the print media. The self-test label reports the
current index setting.
Host stops responding or displays “printer not ready” message
1. Review your software setup, following the instructions provided
with the software.
2. Confirm that the communications cable between the host and the
printer has the correct pinout and is undamaged. If the printer is
connected to a personal computer or other DTE device, confirm that
you are using a null modem cable or adapter.
3. Confirm that the printer and host computer are using the same
serial port parameters.
4. Reset the printer by turning it off and back on again and pressing
the FEED button once. Then reset the host computer, and resume
normal operation.
Page 22

20
Poor print quality
1. Examine the printhead and drive roller for physical damage.
2. Check your software’s print darkness and speed settings. These
settings may need adjustment for optimum results. Also, confirm
that the label stock has adequate sensitivity. Ricoh 120, 130, and
140 sensitivities are recommended. Refer to Appendix B for media
recommendations.
3. Check your label stock. If the label stock is old, dirty, or pitted, its
condition can adversely affect print quality.
Labels do not peel from backing in peel back mode
1. Confirm that the label peel back attachment is installed. Peel back
capability is an option.
2. Confirm that the label stock is loaded properly for peel back
operation, following the instructions on page 9.
3. Some label adhesives adhere too tightly to their backing to work
reliably in peel back mode. When ordering label stock, inform your
Cognitive dealer that you are planning to use peel back mode. If
you use another manufacturer’s label stock, check with your dealer
to confirm that the stock you plan to use will work properly in peel
back mode.
Low battery indicator flashes continuously during charging
The LOW BATTERY indicator should be dark during battery charging. A
flashing low battery indicator indicates that the battery is probably
defective. Replace it with a known good one.
Battery does not charge properly or will not hold a charge
Check your label design. Label designs that turn on more than 80% of
the printhead elements at once place a heavy load on the battery and
will substantially reduce the number of labels per charge. For
optimum battery life, try to use less than half of the printhead dots in
each dot row. If you are certain that the battery performance has
degraded, check the following:
1. Confirm that the battery is fully discharged (printer beeps seven
times and shuts itself off when you try to turn it on).
2. Confirm that you are using the proper battery charger for your line
voltage. For 110 VAC service, use P/N 71-12-0051. For 220 VAC
service, use P/N 90-12-0070-01.
Page 23

21
3. Remove the battery from the printer. While the battery is removed,
check the battery contacts (on the battery and in the printer) for
dirt or corrosion.
4. Reinstall the battery and set the printer up for battery charging as
described on page 8. Confirm that the CHARGING indicator glows
yellow while the battery is charging.
5. Allow the battery to charge completely. If the LOW BATTERY indicator
flashes continuously at the end of the charge cycle, the battery is
probably defective. Replace it with a known good one.
6. Test the battery again when charging is finished. If the problem
persists, the battery and/or charger may need replacement.
Note:
If you have access to a model SC5000 drop-in battery
charger, use its battery test and conditioning function to test
your Code Courier battery pack. The SC5000 can often
improve the performance of a marginal battery. Refer to the
SC5000 operating instructions for more information.
Printer prints an error label
If the printer encounters an unrecoverable error, it will shut itself off
and print an error label. This should rarely happen, but if the printer
does print an error label:
1. Unplug the battery charger if it is connected.
2. Turn the printer off.
3. Reset the host computer.
4. Check your software setup. In particular, confirm that the host and
printer are using the same serial port parameters.
5. Reconnect the battery charger if necessary, turn the printer on,
and resume normal operation.
Contact our Technical Support Services Department for assistance if
the problem persists.
Printer speaker beeps continuously
If the printer beeps continuously, there may be an EEROM failure. Try
turning the printer off and back on again to clear the error. If the error
reoccurs, contact your Cognitive dealer or the factory for assistance.
This problem may indicate a need for factory service.
Page 24

22
TECHNICAL SUPPORT
Please contact your local dealer first for technical support. Your dealer
is knowledgeable about Cognitive printers, printing software, and your
unique system. Contact our Technical Support Services Department if
you still need technical assistance after talking to your dealer.
If you must return any products to the factory, first obtain a returned
material authorization number (RMA) from our Technical Support
Services Department. When calling, please have your printer model
number and serial number handy.
Contact information
General
If you aren’t sure which department you
need, contact us by mail or through one of
our general numbers:
Mailing address Cognitive
691 Corporate Circle
Golden, CO 80401
USA
Telephone (303) 273-1400
Toll free (800) 525-2785
Fax (303) 273-1414
E-mail Info@cogsol.com
You can get immediate information on
Cognitive products via the Internet:
Internet URL: www.cogsol.com
Sales Department
Toll free (800) 525-2785
Fax (303) 278-9487
E-mail Sales@cogsol.com
Technical Support Services Department
Toll free (888) 715-7190
Fax (303) 590-0518
E-mail: techsup@cogsol.com
Hours of operation
We are open from 8 AM to 5 PM Mountain
Time, Monday through Friday. Our Technical
Support Services and Sales departments are
open from 7 AM to 5 PM. For the fastest
response, contact us during our normal
working hours.
Page 25

23
APPENDIX A: SUPPLIED SOFTWARE
Software is included with every Code Courier printer for use with
Microsoft Windows 95, Windows NT, Windows for Workgroups, or
Windows 3.1/3.11. Two basic packages are provided:
• The Cognitive Intellidriver™ lets you print labels with your printer
using virtually any Windows application.
• LabelMagic™ is a full-featured WYSIWYG label layout and
printing package specifically designed for use with Cognitive
printers.
These software packages and a Cognitive printer give Windows users
an easy to use label printing solution with nothing else to buy.
Intellidriver installation and use
An automatic setup program, SETUP.EXE, is provided with the
Intellidriver. Install the desired printer drivers by running SETUP.EXE
from within Windows and following the displayed instructions. Restart
your system after installing the Intellidriver.
After the drivers are installed, you can send data to your label printer
just like any other printer on your system: simply specify Code Courier
in the print dialog box of your Windows application. To print bar codes,
enter bar code data using any text font, then highlight the information
you want to print as a bar code and select the desired bar code font
from your application’s font menu. The driver will convert the text to
an on-screen representation of a generic bar code.
On-line help for the Intellidriver is available from the printer setup
window, which is accessible from the print dialog box of most Windows
applications. Please refer to the on-line help and the README.TXT file on
the Intellidriver disk for detailed operating instructions.
LabelMagic installation and use
An automatic installation program, SETUP.EXE, is provided on the
LabelMagic installation disk. Install LabelMagic by running SETUP.EXE
and following the displayed instructions. The installation program will
copy the program files to your system and install program icons on
your desktop and/or system Start Menu.
LabelMagic has a complete context-sensitive help system that
describes all aspects of the program’s use. You can access the help
system by selecting Help from the program’s main menu. Please refer
to the help system and the README.TXT file on the LabelMagic
installation disk for detailed operating instructions.
Page 26

24
APPENDIX B: RECOMMENDED PRINT MEDIA
Media for your Code Courier printer is available from many sources;
however, you can expect the most reliable performance and highest
quality printing when you use labels and tags manufactured by
Cognitive.
The print media listed below was designed especially for use with
Code Courier printers and is in stock for immediate delivery. We also
have other media for specialized applications and can manufacture
custom media as well. Contact your Cognitive dealer or our Sales
Department for complete media information, or to find the perfect
media for your unique application.
Direct thermal media
Part number Dimensions Material/description units/roll
03-02-1890 2.4 x 1 Paper gap-cut labels, permanent adhesive 400
03-02-1391 4.25 x 1 Paper gap-cut labels, permanent adhesive 400
03-02-1392 4.25 x 3 Paper gap-cut labels, permanent adhesive 150
03-02-1393 4.25 x 6 Paper gap-cut labels, permanent adhesive 75
03-02-1394 4.25 x 6.5 Vinyl receipts, edge perforation 115
03-02-1891 4.25 x 6.5 Paper receipts, edge perforation 115
Thermal transfer media
Part number Dimensions Material/description units/roll
03-02-1892 2.4 x 1 Paper gap-cut labels, permanent adhesive 352
03-02-1494 4.25 x 1 Paper gap-cut labels, permanent adhesive 352
03-02-1495 4.25 x 3 Paper gap-cut labels, permanent adhesive 130
03-02-1496 4.25 x 6 Paper gap-cut labels, permanent adhesive 68
03-02-1894 4.25 x 6.5 Vinyl receipts, edge perforation 115
03-02-1893 4.25 x 6.5 Paper receipts, edge perforation 115
04-00-0029-01 4.25 x 1000 Black thermal transfer ribbon n/a
Notes:
1. All dimensions are in inches.
2. Receipts have square corners and index bars printed on the back of the label liner. Gapcut labels have rounded corners and do not have index bars.
Page 27

LIMITED WARRANTY
Cognitive will repair Code Courier® printers free of charge if found
defective in material or workmanship within one year of date of purchase. This limited warranty does not include cleaning, or any damage
caused by accident, neglect, or misuse.
The printhead is also covered under this limited warranty; however,
the printhead warranty extends to electrical failure only. Code Courier
®
printheads are warranted for six months or 500,000 inches of printing,
whichever comes first. Physical damage (scratches or abrasion) is not
covered under this warranty.
A return merchandise authorization number (RMA#) must be obtained from Cognitive before any merchandise can be accepted for
repair. An RMA# must be visibly displayed on all merchandise returned. Cognitive always maintains the right to repair or replace any
component at its option. The printer must be delivered or shipped
freight prepaid with your copy of the warranty and/or proof of purchase
in the form of a sales slip.
This warranty gives you specific legal rights, and you may also have
other rights that vary from state to state.
Page 28

Asia-Pacific
P.O. Box 677
Level 3, 39 Leighton Place
Hornsby NSW 2077 Australia
TEL: (61) (0) 2 9477 1999
FAX: (61) (0) 2 9477 1453
USA
691 Corporate Circle
Golden, CO 80401 USA
TEL: (303) 273-1400 or (800) 525-2785
FAX: (303) 273-1414
United Kingdom
Atlantic Street
Altrincham, Cheshire
WA14 5QJ England
TEL: (44) (0) 161 929 9933
FAX: (44) (0) 161 927 7664
France
1-9, rue d’Arcueil
BP 675
92542 Montrouge Cedex
TEL: (33) 1 47 46 78 11
FAX: (33) 1 47 46 78 76
Cognitive
An Axiohm Company
TM
 Loading...