

Page 1
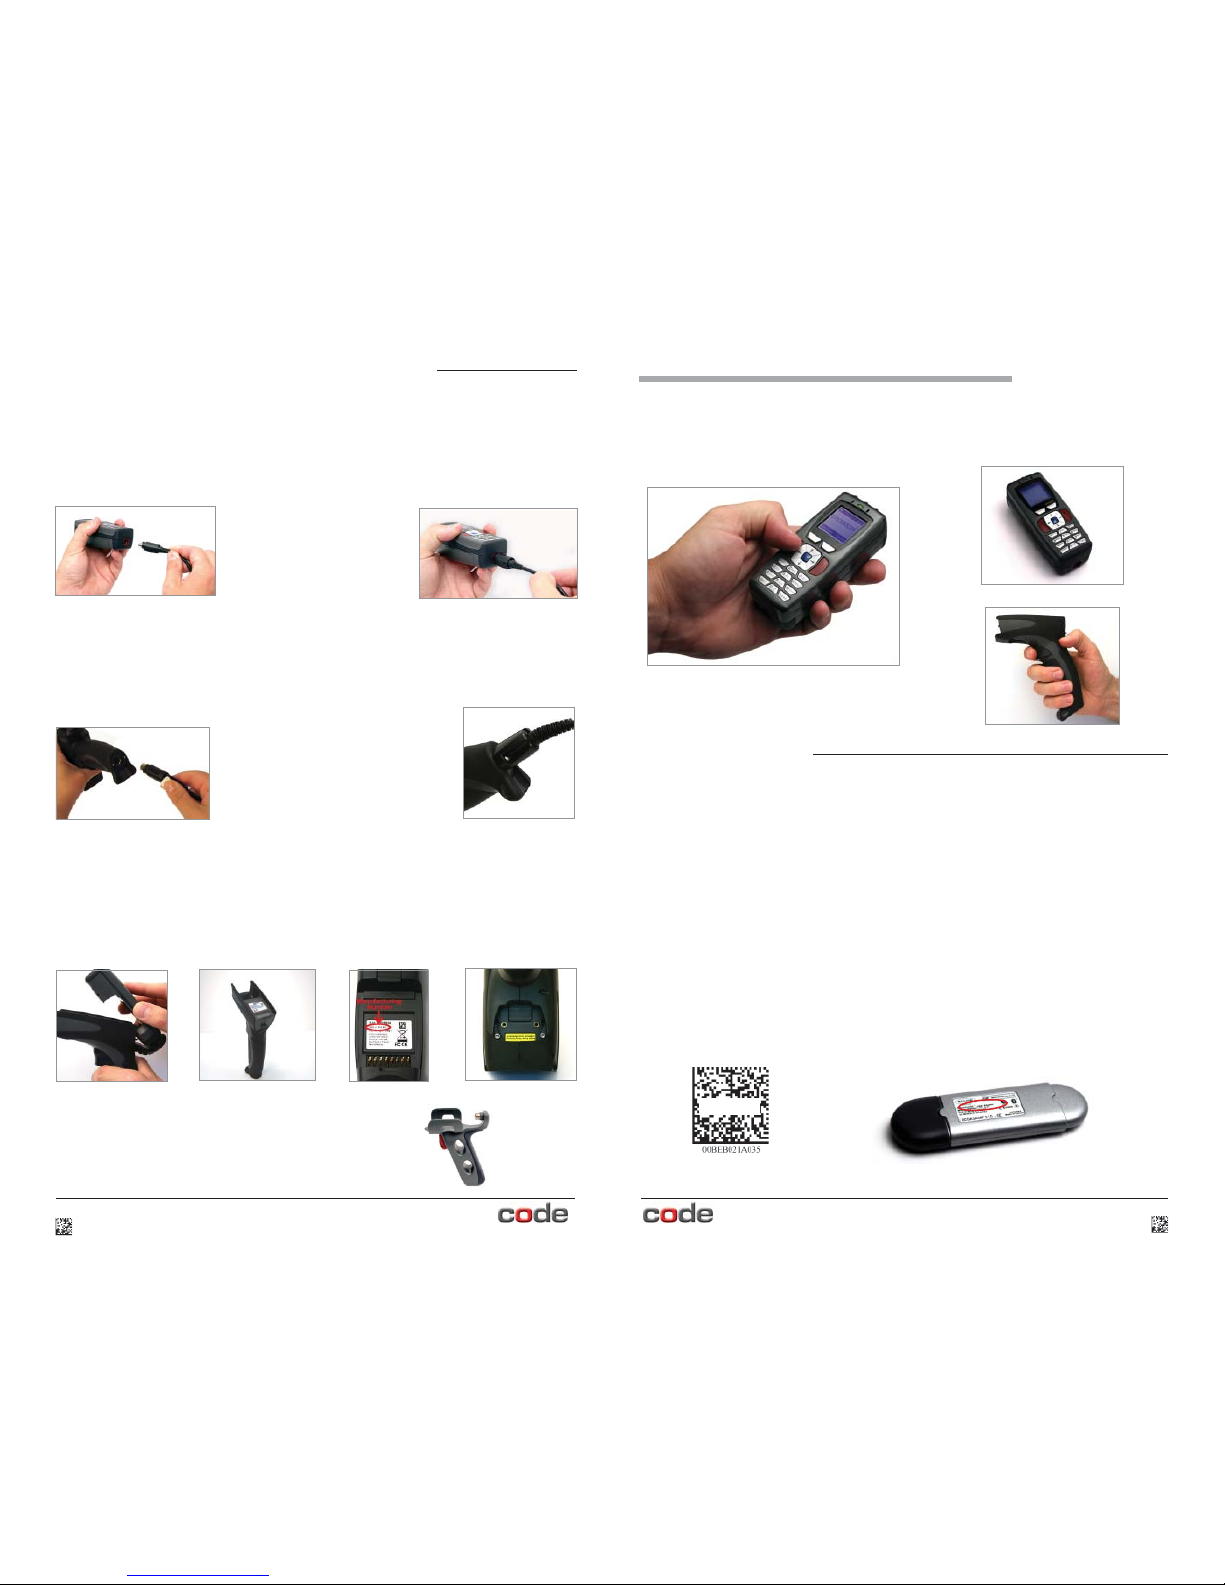
The CR3 is available with USB (6 ft. and 12 ft.), RS232 and PS2 cables. All of the cables
are connected to the CR3 with a 8-pin DIN connector.
Install a Cable Directly to the CR3
Line up the 8-pin DIN connector into the back end of the unit. The arrows on the connector
should be facing down (Figure 1). When the two items are aligned, fi rmly push the cable
into the reader.
Install a Cable to a Handle
If you purchased a cabled handle for use with the CR3, the 8-pin DIN connector is at the
bottom of the handle (Figure 3). Line up the cable’s 8-pin DIN connector with the handle’s
connector and fi rmly push the cable into the handle. The cable has a locking mechanism
that will fi rmly hold the cable in place. To detach the cable from the reader, pinch the plastic
on the 8-pin DIN and pull back to disengage the connector.
Reader & H2, BH1/BH2 Handle Assembly
The CR3 utilizes the battery compartment to ‘snap’ the reader to the H2, BH1 and BH2
handles. For the H2 (only), push the 8-pin DIN connector at the end of the reader into the
fl exible connector at the end of the handle. For all three handles, snap the reader onto the
handle (Figure 5) matching the battery compartment of the reader to the battery connectors, visible inside the handle (Figure 6). Newer readers (MFG # 012_05- see Figure 7)
can be secured further with threaded screws on the under side of the handle (Figure 8).
This CR3 features a Bluetooth® wireless radio. The radio allows for point to point wireless
communication with other Bluetooth devices that support serial port protocol (SPP). If keyboard entry is necessary, Code XML Router will need to be installed. The following guide
will give you general instructions on connecting your CR3 to a desktop or laptop computer
with a Bluetooth radio.
Connecting With A QuickConnect Code
The easiest way to connect to a Bluetooth device is to visit the Code website and create a
QuickConnect Code that is specifi c to your device (Figure 1). This code will link your CR3
directly to the desired Bluetooth device. To create a QuickConnect Code, you will need
to know the Bluetooth address (often referred to as the BD_ADDR) of that device. You
can usually fi nd the 12-character Bluetooth address somewhere on the device near the
device’s serial number (see Figure 2).
Code Reader 3.0 - Wireless
4 C002525_04_CR3 Quickstart_Wireless
CR3 Wireless Setup
Figure 1
Figure 2
Quickstart Guide
C002525_04_CR3 Quickstart_Wireless 1
Sample
CR3 (Batch Mode) Cable & Handle Installation
Figure 3
Figure 4
Figure 1
Figure 2
For additional stability, if using the H2
cabled handle, there is an optional cable
attachment clip that can secure the cable
to the handle with two threaded screws
(Figure 4).
Reader & H1 Handle Assembly
Slide the CR3 into the handle, aligning the 8-pin DIN
connector to the stationary connector pin on the handle
(Figure 9). Push reader and handle together fi rmly until
you feel the reader ‘click’ in place.
The cable has a locking
mechanism that will fi rmly hold
the cable in place (Figure 2).
To detach the cable, pinch the
plastic on the 8-pin DIN and pull
back to disengage the connector.
Figure 5
Figure 6
Figure 7
Figure 8
Figure 9
Page 2
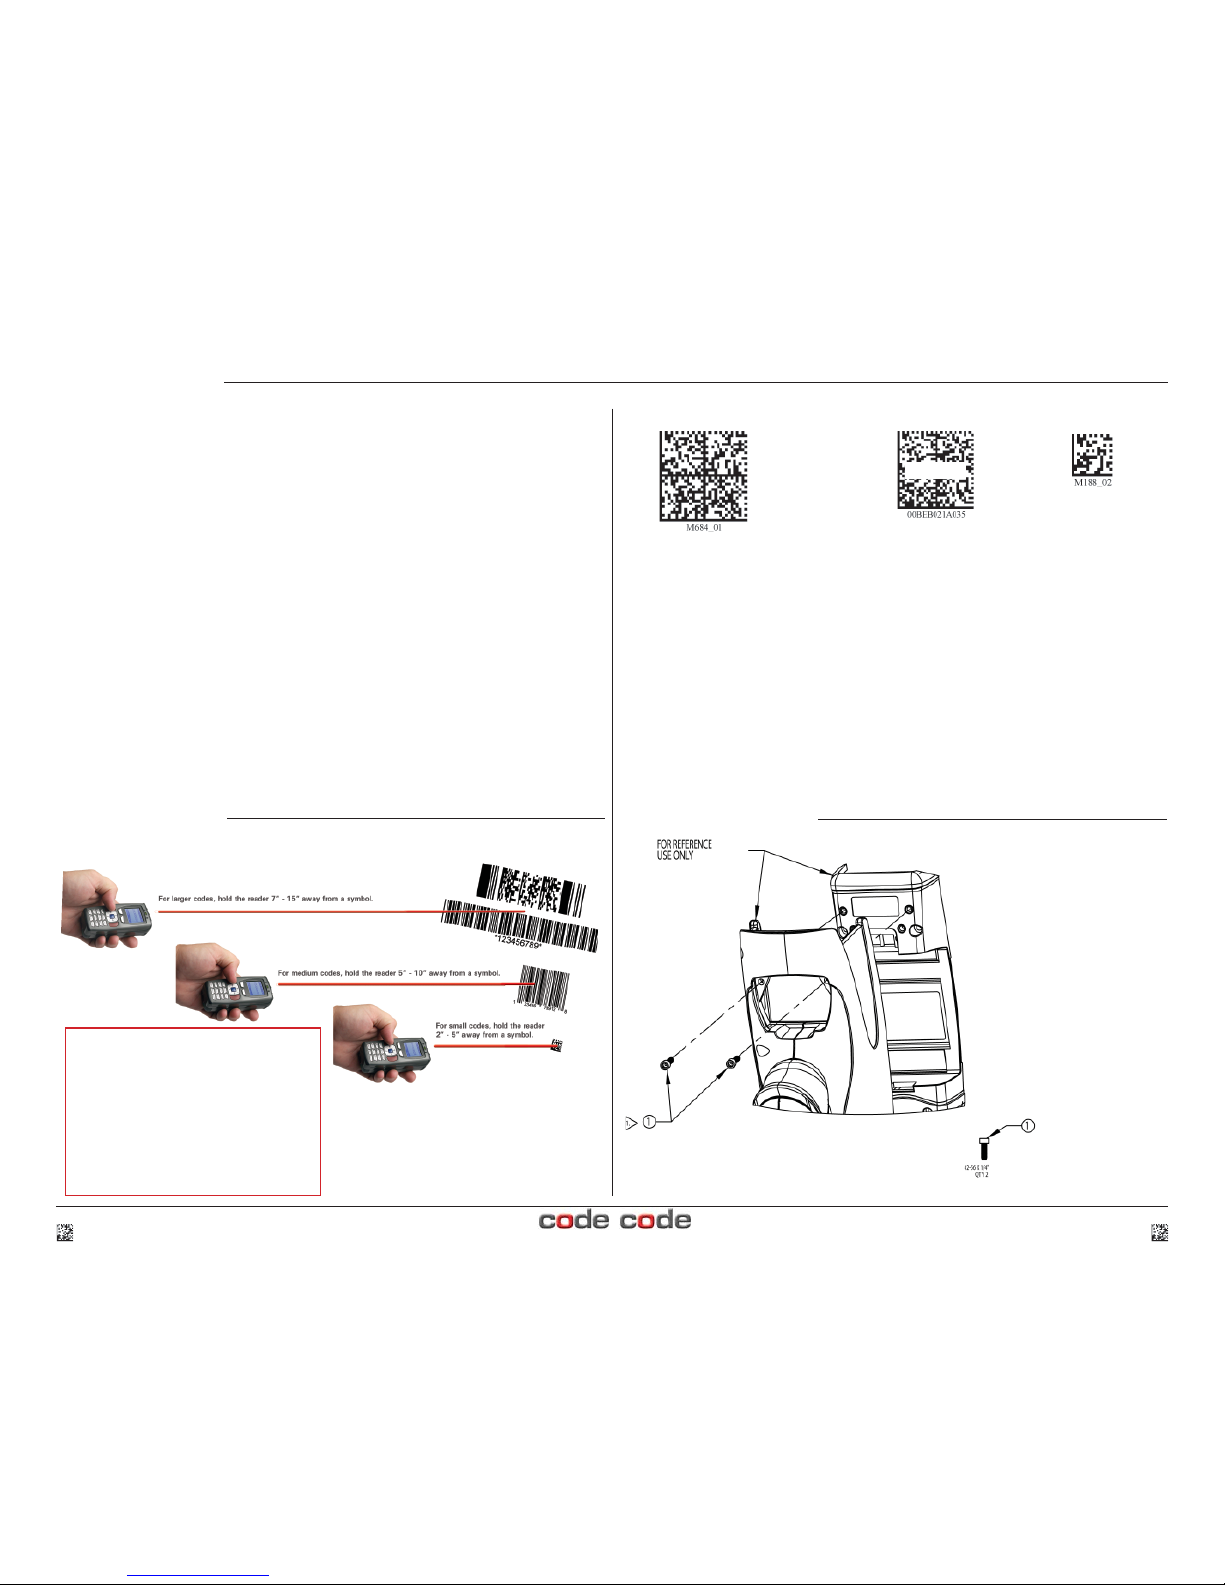
Reading Tips
CR3 Wireless Setup
Reset to RF Factory Defaults QuickConnect Save Settings
Radio Range and Transferring Data
The CR3 radio is a Class 1 device. If connected to another Class 1 device the unit has
roughly a 300 foot line-of-sight operating range. If connecting to a Class 2 or Class 3
device, the operating range will drop to match the lower range. Once a unit is connected,
a serial application must be opened (HyperTerminal) unless CodeXML Router is installed.
When the CR3 detects the radio is out of range, the CR3 will store data on the reader’s
non-volatile memory.
For more information about setting up and using the CR3 with a wireless Bluetooth
confi guration, please visit www.codecorp.com/manuals.html and download the latest
version of the CR3 User Manual.
2 C002525_04_CR3 Quickstart_Wireless C002525_04_CR3 Quickstart_Wireless 3
If you purchased a CodeXML Bluetooth Modem or a Belkin® Bluetooth adapter from Code or from
an authorized distributor, a QuickConnect Code was included. If you bought a Bluetooth adapter
separately and wish to create a QuickConnect Code, please visit Code’s web site at:
http://www.codecorp.com/support/bdaddr.php.
To connect your reader, use the following steps:
1. Power on the CR3 reader by pressing one of the red buttons for one second to power on the
reader.
2. Scan the Reset to RF Factory Defaults code on Page 3 (M684_01).
3. Scan the QuickConnect Code you received or created from Code’s website (see Sample on
Page 3).
4. The CR3 will automatically connect to the computer. By default, the CR3 will beep once after it
connects and beep four times in a row if it did not connect.
5. Scan the Save Settings code on Page 3 (M188_02) if you want to save the wireless
connection settings to the CR3 so that the CR3 will automatically try to connect wirelessly
the next time it is powered on.
Important Note: You
will need to locate the Communications (COM) Port assigned to the Blue-
tooth serial port protocol. While installing the Bluetooth Confi guration Manager software that was
included with your Bluetooth adapter, make sure to note the Communications (COM) Port number
the software assigned for the adapter (e.g., COM 10). This is the COM Port through which the CR3
will connect.
Scan the QuickConnect code that
matches the Bluetooth address of
your device.
Sample
CR3 Accessories:
Handles•
Battery Handles•
Battery Chargers (single/two-bay)•
Lanyard Hook Attachment•
Reader Stand•
Visit www.codecorp.com for information
on all Code readers and accessories.
Handle Kit Instructions
Route item 1 (x2) as shown mate 1.
with corresponding inserts in
CR3 reader
Slowly thread both screws 2.
half-way down
Continue to tighten screws in 3.
small increments, alternating
between the right and left screw
until fully seated
Screws shall be tightened to a 4.
torque setting of 2 inch-lbs
 Loading...