

Cocraft DJC159SZ-180-UK, DJC159SZ-180, PRO DH18-BL, CDI218LB1.1 Original Instructions Manual
18-3580 ∙ 40-9504
DRILL DRIVER
18 V
LXC DD18-2
18 V LITHIUM SERIES
SKRUVDRAGARE DRILL
RUUVINVÄÄNNIN SCHRAUBER
Cocraft LXC is a tool system incorporating
lithium-ion technology for an entire series
of Cocraft power tools. A single universal
battery and charger is all that is needed to
power the entire series.
Important!
Read the entire instruction manual
carefully and make sure that you fully
understand it before you use the
equipment. Keep the manual for future
reference.
Viktig information:
Läs hela bruksanvisningen noggrant och
försäkra dig om att du har förstått den
innan du använder utrustningen. Spara
bruksanvisningen för framtida bruk.
Viktig informasjon:
Les disse anvisningene nøye og forsikre
deg om at du forstår dem, før du tar
produktet i bruk.Ta vare på anvisningene
for seinere bruk.
Tärkeää tietoa:
Lue nämä ohjeet huolellisesti ja varmista
että olet ymmärtänyt ne, ennen kuin
alat käyttää laitetta. Säilytä ohjeet
myöhempää tarvetta varten.
Wichtiger Hinweis:
Vor Inbetriebnahme die komplette
Bedienungsanleitung sorgfältig
durchlesen und aufbewahren.
ENGLISHSVENSKANORSKSUOMIDEUTSCH
Art.no Model
18-3580 DJC159SZ-180-UK
40-9504 DJC159SZ-180
Ver. 20160204
Original instructions
Bruksanvisning i original
Originalbruksanvisning
Alkuperäinen käyttöohje
Original Bedienungsanleitung

SVERIGE
Kundtjänst tel: 0247/445 00
fax: 0247/445 09
e-post: kundservice@clasohlson.se
Internet www.clasohlson.se
Post Clas Ohlson AB, 793 85 INSJÖN
NORGE
Kundesenter tlf.: 23 21 40 00
faks: 23 21 40 80
e-post: kundesenter@clasohlson.no
Internett www.clasohlson.no
Post Clas Ohlson AS, Postboks 485 Sentrum, 0105 OSLO
SUOMI
Asiakaspalvelu puh.: 020 111 2222
sähköposti: info@clasohlson.fi
Internet www.clasohlson.fi
Osoite Clas Ohlson Oy, Maistraatinportti 4 A, 00240 HELSINKI
UNITED KINGDOM
Customer Service contact number: 020 8247 9300
e-mail: customerservice@clasohlson.co.uk
Internet www.clasohlson.co.uk
Postal 10 – 13 Market Place
Kingston Upon Thames
Surrey
KT1 1JZ
DEUTSCHLAND
Kundeservice Unsere Homepage www.clasohlson.de besuchen
und auf Kundenservice klicken.
2

Drill/Driver
Art.no 18-3580 Model DJC159SZ-180-UK
40-9504 DJC159SZ-180
Please read theentire instruction manual before using theproduct and then save
it for future reference. We reserve theright for any errors in text or images and any
necessary changes made to technical data. If you have any questions concerning
technical problems please contact our Customer Services.
Safety
General Power Tool Safety Warnings – Personal Safety
WARNING! Read all safety warnings and all instructions. Failure to follow thewarnings
and instructions may result in electric shock, fire and/or serious injury.
SAVE ALL WARNINGS AND INSTRUCTIONS FOR FUTURE REFERENCE.
Theterm ”power tool” in thewarnings refers to your mains-operated (corded) power
tool or battery-operated (cordless) power tool.
1) Work area safety
a) Keep work area clean and well lit. Cluttered or dark areas invite accidents.
b) Do not operate power tools in explosive atmospheres, such as in
thepresence of flammable liquids, gases or dust. Power tools create sparks
which may ignite thedust or fumes.
c) Keep children and bystanders away while operating apower tool.
Distractions can cause you to lose control.
ENGLISH
2) Electrical safety
a) Power tool plugs must match theoutlet. Never modify theplug in any
way. Do not use any adapter plugs with earthed (grounded) power tools.
Unmodified plugs and matching outlets will reduce risk of electric shock.
b) Avoid body contact with earthed or grounded surfaces, such as pipes,
radiators, ranges and refrigerators. There is anincreased risk of electric shock if
your body is earthed or grounded.
c) Do not expose power tools to rain or wet conditions. Water entering apower
tool will increase therisk of electric shock.
d) Do not abuse thecord. Never use thecord for carrying, pulling or unplugging
thepower tool. Keep cord away from heat, oil, sharp edges or moving parts.
Damaged or entangled cords increase therisk of electric shock.
e) When operating apower tool outdoors, use anextension cord suitable for
outdoor use. Use of acord suitable for outdoor use reduces therisk of electric shock.
f) If operating apower tool in adamp location is unavoidable, use aresidual
current device (RCD) protected supply. Use of anRCD reduces therisk of
electric shock.
3

3) Personal safety
a) Stay alert, watch what you are doing and use common sense when
operating apower tool. Do not use apower tool while you are tired or under
ENGLISH
theinfluence of drugs, alcohol or medication. Amoment of inattention while
operating power tools may result in serious personal injury.
b) Use personal protective equipment. Always wear eye protection. Protective
equipment such as dust mask, non-skid safety shoes, hard hat, or hearing
protection used for appropriate conditions will reduce personal injuries.
c) Prevent unintentional starting. Ensure theswitch is in theoff-position before
connecting to power source and/or battery pack, picking up or carrying
thetool. Carrying power tools with your finger on theswitch or energising power
tools that have theswitch on invites accidents.
d) Remove any adjusting key or wrench before turning thepower tool on.
Awrench or akey left attached to arotating part of thepower tool may result in
personal injury.
e) Do not overreach. Keep proper footing and balance at all times. This enables
better control of thepower tool in unexpected situations.
f) Dress properly. Do not wear loose clothing or jewellery. Keep your hair,
clothing and gloves away from moving parts. Loose clothes, jewellery or long
hair can be caught in moving parts.
g) If devices are provided for theconnection of dust extraction and collection
facilities, ensure these are connected and properly used. Use of dust
collection can reduce dust related hazards.
4) Power tool use and care
a) Do not force thepower tool. Use thecorrect power tool for your application.
Thecorrect power tool will do thejob better and safer at therate for which it was designed.
b) Do not use thepower tool if theswitch does not turn it on and off. Any power
tool that cannot be controlled with theswitch is dangerous and must be repaired.
c) Disconnect theplug from thepower source and/or thebattery pack from
thepower tool before making any adjustments, changing accessories,
or storing power tools. Such preventive safety measures reduce therisk of
starting thepower tool accidentally.
d) Store idle power tools out of thereach of children and do not allow persons
unfamiliar with thepower tool or these instructions to operate thepower tool.
Power tools are dangerous in thehands of untrained users.
e) Maintain power tools. Check for misalignment or binding of moving parts,
breakage of parts and any other condition that may affect thepower tool’s
operation. If damaged, have thepower tool repaired before use.
Many accidents are caused by poorly maintained power tools.
f) Keep cutting tools sharp and clean. Properly maintained cutting tools with sharp
cutting edges are less likely to bind and are easier to control.
g) Use thepower tool, accessories and tool bits, etc. in accordance with these
instructions, taking into account theworking conditions and thework to be
performed. Use of thepower tool for operations different from those intended
could result in ahazardous situation.
4

5) Battery tool use and care
a) Recharge only with thecharger specified by themanufacturer. Acharger that
is suitable for one type of battery pack may create arisk of fire when used with
another battery pack.
b) Use power tools only with specifically designated battery packs. Use of any
other battery packs may create arisk of injury and fire.
c) When battery pack is not in use, keep it away from other metal objects, like
paper clips, coins, keys, nails, screws or other small metal objects, that can
make aconnection from one terminal to another. Shorting thebattery terminals
together may cause burns or afire.
d) Under abusive conditions, liquid may be ejected from thebattery; avoid contact.
If contact accidentally occurs, flush with water. If liquid contacts eyes,
additionally seek medical help. Liquid ejected from thebattery may cause
irritation or burns.
6) Service
a) Have your power tool serviced by aqualified repair person using only identical
replacement parts. This will ensure that thesafety of thepower tool is maintained.
Drill Safety Warnings
a) Use auxiliary handle(s), if supplied with thetool. Loss of control can cause
personal injury.
b) Hold power tool by insulated gripping surfaces, when performing
anoperation where thecutting accessory may contact hidden wiring.
Cutting accessory contacting a ”live” wire may make exposed metal parts of
thepower tool ”live” and could give theoperator anelectric shock.
ENGLISH
5

Safety Warnings for battery pack
a) Do not dismantle, open or shred cells or battery pack.
b) Do not short-circuit abattery pack. Do not store battery packs haphazardly
ENGLISH
in abox or drawer where they may short-circuit each other or be shortcircuited by conductive materials. When battery pack is not in use, keep it away
from other metal objects, like paper clips, coins, keys, nails, screws or other small
metal objects, that can make aconnection from one terminal to another. Shorting
thebattery terminals together may cause burns or afire.
c) Do not expose battery pack to heat or fire. Avoid storage in direct sunlight.
d) Do not subject battery pack to mechanical shock.
e) In theevent of battery leaking, do not allow theliquid to come into contact
with theskin or eyes. If contact has been made, wash theaffected area with
copious amounts of water and seek medical advice.
f) Seek medical advice immediately if acell or battery pack has been swallowed.
g) Keep battery pack clean and dry.
h) Wipe thebattery pack terminals with aclean dry cloth if they become dirty.
i) Battery pack needs to be charged before use. Always refer to this instruction
and use thecorrect charging procedure.
j) Do not maintain battery pack on charge when not in use.
k) After extended periods of storage, it may be necessary to charge and
discharge thebattery pack several times to obtain maximum performance.
l) Battery pack gives its best performance when it is operated at normal room
temperature (20 ± 5 °C).
m) When disposing of battery packs, keep battery packs of different
electrochemical systems separate from each other.
n) Recharge only with thespecified charger. Do not use any charger other than
that specifically provided for use with theequipment.
Acharger that is suitable for one type of battery pack may create arisk of fire
when used with another battery pack.
o) Do not use any battery pack which is not designed for use with theequipment.
p) Keep battery pack out of thereach of children.
q) Retain theoriginal product literature for future reference.
r) Remove thebattery from theequipment when not in use.
s) Dispose of properly.
General safety instructions for batteries and chargers
• Never attempt to dismantle abattery.
• Never store abattery in direct sunlight or at temperatures above 40 °C.
• Only charge thebattery when theambient temperature is between +5 and 40 °C.
• Never expose thebattery or charger towater.
6
Vibration
• The measurement of the vibration emission level declared in this instruction manual
has been carried out in accordance with a standardised test method described in
EN 60745 and can be used for comparing one power tool with another.
• The measurement method may also be used for a preliminary assessment of
vibration exposure.
• The declared vibration emission level applies when the power tool is used in
accordance with this instruction manual. If however, the power tool is used for
other purposes and with other accessories or has not been properly maintained,
the vibration emission level could increase significantly over the total working period.
• For an exact assessment of the vibration exposure, the times when the tool is
switched off or running idle should also be taken into account. This significantly
reduces the vibration exposure over the total working period. Decideupon safety
measures to protect the operator from the effects of vibration during all types of use.
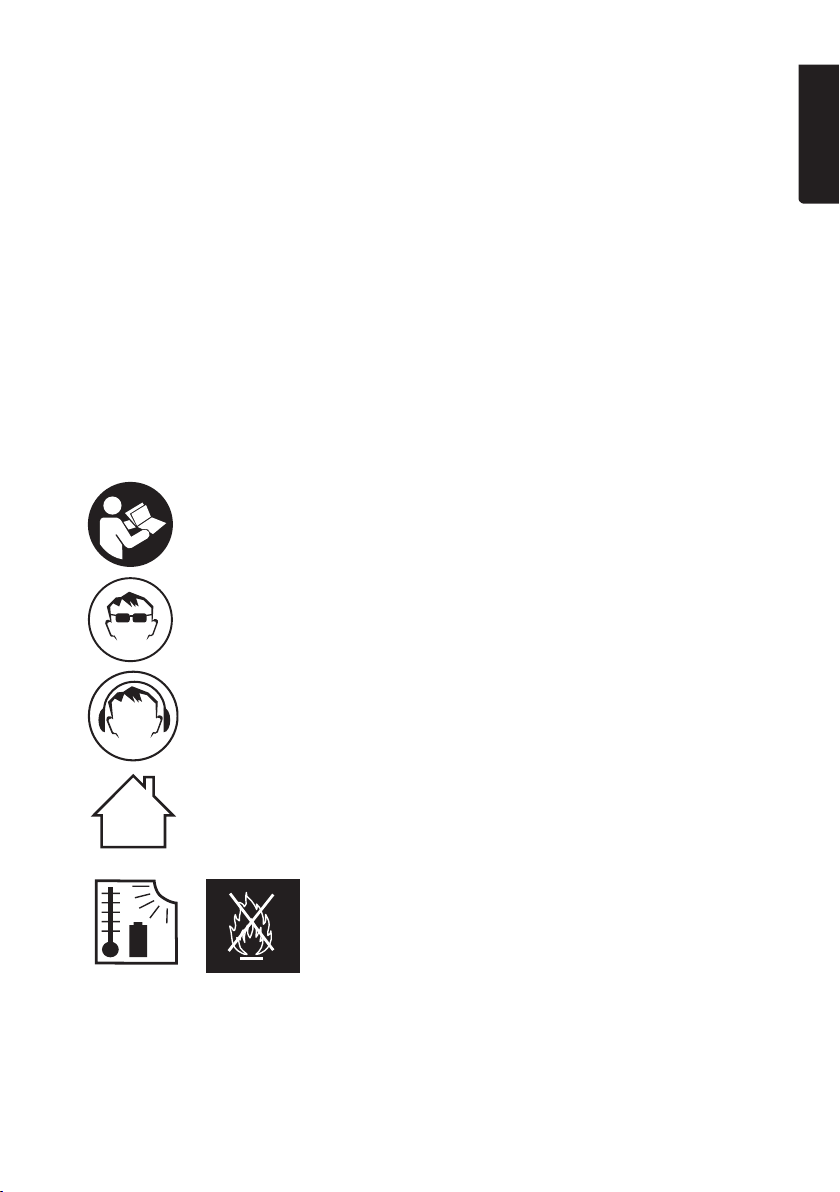
Product safety symbols
Read theentire instruction manual.
Always use safety glasses.
ENGLISH
max 50ºC
Always use ear protection.
For indoor useonly.
Protect the battery against heat, e. g., against
continuous intense sunlight, fire, water, and moisture.
Danger of explosion.
7
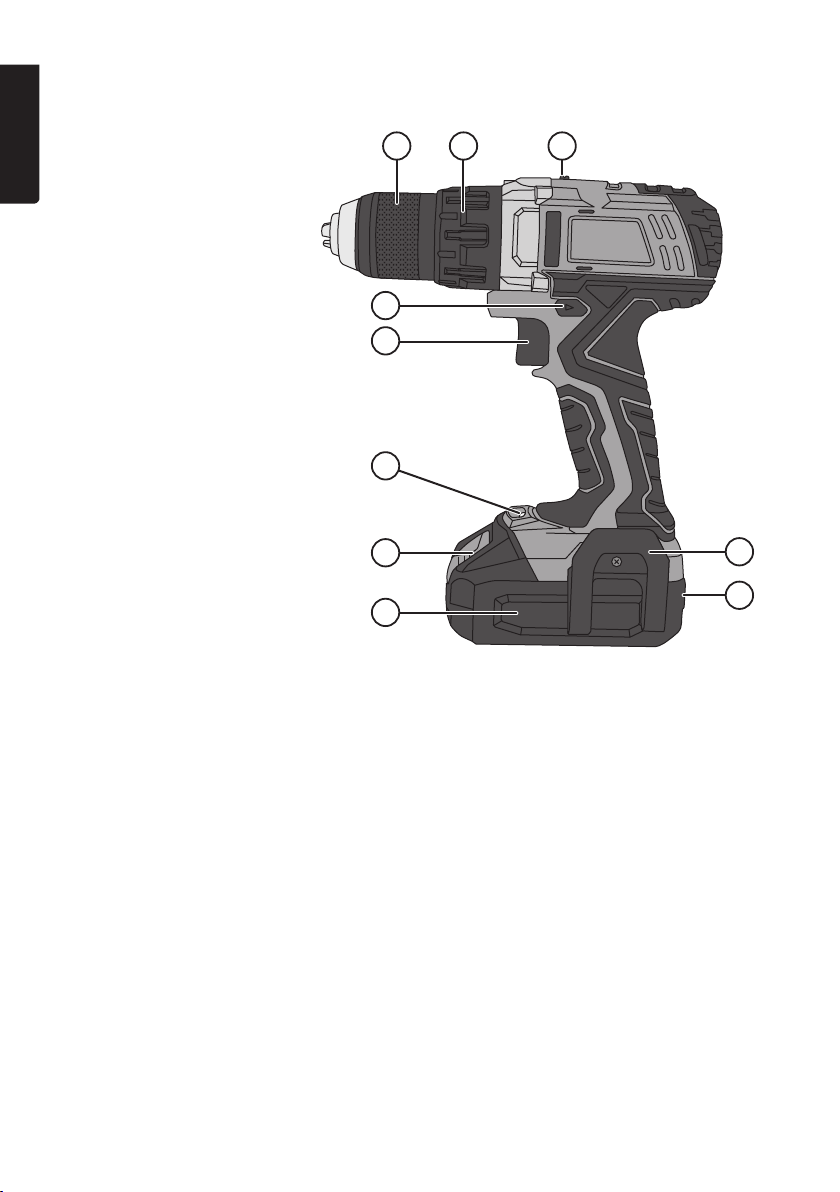
Product description
ENGLISH
1. 18 V 2 Ah battery
2. Battery release button
3. Light
4. Power trigger (variable speed)
5. Forward/reverse selector
6. Keyless chuck
7. Torque adjustment ring
8. Gear selector
9. Belt clip
10. Battery charge status indicator
6 7 8
5
4
3
2
1
Functions
Power trigger
Select forward or reverse using therotation selector (5). Therotation selector also
has amiddle setting which locks thepower trigger. If theselector is set to this middle
position, thedrill will not start. Thedrill/driver is started and stopped by squeezing or
releasing thepower trigger (4).
Thedrill/driver is equipped with avariable speed control, which makes it extremely
practical for driving screws. Themore thepower trigger is squeezed, thehigher
thespeed of thechuck.
9
10
Light
Thedrill/driver is equipped with alight (3) which is positioned close to thebattery so that
it can light up thework area without being obscured by thechuck. Thelight comes on
when thepower trigger is squeezed and goes off when thepower trigger is released.
8

Battery charge status indicator
Thebattery has acharge status indicator (10) consisting of 3 LEDs and which is
activated by pressing abutton.
When thebattery is fully charged to 100 %, all three LEDs, green, yellow and red will
shine. At 80 % capacity thegreen LED will go out. When only 20 % of thebattery
capacity remains theyellow LED will go out and only thered LED will shine.
If none of theLEDs shines, thebattery is completely discharged and needs charging.
Screwdriver mode
Use thetorque adjustment ring (7) to set asuitable torque setting. Thecorrect torque
setting will disengage thedrive at thepreset torque to prevent screws from being
over-tightened or driven in too far. Thesetting should be based on thetype and size
of screw and thematerial being screwed into. Always start at thelowest setting and
increased in increments to find thecorrect setting.
Drill mode
Set thering (7) to drill mode.
High / Low gear
Thegear selector (8) has two settings: Position 1: 0–400 rpm, position 2: 0–1500 rpm.
Charging
Note: Thebattery needs to be charged fully before initial use.
1. Remove thebattery from thedrill/driver by pressing thebattery release button (2)
and pulling out thebattery. If thebattery feels hot after heavy use, allow it to cool
properly before charging it.
2. Connect thecharger to awall socket. Thegreen LED will come on.
3. Insert thebattery into thecharger. Whilst thebattery is charging, thegreen LED will
shine steadily and thered LED will flash once per second. (Should thebattery be
fully charged when it is put into thecharger, nothing will happen i.e. thegreen LED
will keep shining steadily and thered LED will remain off).
4. Once charging is complete, press thebattery release catch and remove it from
thecharger.
ENGLISH
The charger indicates the charging status as follows
- Steady green light and red light off: Thecharger is connected to themains.
- Red light flashing once per second and steady green light: Charging is in progress.
- Steady green and red light: Thebattery has been fully charged.
- Red light flashing three times per second and steady green light: Faulty battery.
• Thecharging time for a2.0 Ah battery is approx. 55min, and for a4.0 Ah battery
approx. 105min.
• Thebattery may become warm during charging. This is completely normal.
9

• Thebattery and charger function best at normal room temperature. Do not charge
thebattery in direct sunlight or in temperatures below 5 °C. Thetemperature range
for charging is 5–40°C.
• When thebattery becomes discharged, theelectronics of thebattery will turn
ENGLISH
thedrill off automatically.
• For long-term storage (months) thebattery should first be fully charged.
Overload protection and other safety features
The drill/driver and its battery have anumber of safety features that prevent damage to
themachine and battery during use.
• During short high-load situations theoverload protection may turn off thedrill/driver
and battery. Thisprotection resets automatically. Release thetrigger, wait afew
seconds, ensure that there is no-load and restart thedrill. Thedrill/driver should
now function normally again.
• During high-load situations for anextended period of time theoverheating protection
will turn off thedrill/driver and battery. Self-resetting once thedrill/driver returns to
normal operating temperature. Letthemachine cool properly before trying to restart it.
Adverse temperatures can occur in direct sunlight and should therefore be avoided.
• The battery has low-voltage protection which comes into effect when thebattery
becomes discharged. Thelow-voltage protection turns off themachine
automatically and thebattery should then be recharged.
Changing drill and screwdriver bits
The drill/driver has akeyless chuck which enables drill or screwdriver bits to be
changed with one hand. Twistthechuck to theleft to tighten, to theright to untighten.
Makesure that thebit sits centred and secured in thechuck.
Drilling tips and advice
• When drilling into slippery materials, like tiles, you should place astrong piece of
tape on thearea in which you wish to drill to prevent thebit from wandering.
• When drilling into metal you should first use acentre punch to make asmall
indentation at thespot where you wish to drill. Thisindentation will help hold
thebit in place and prevents it from wandering when youdrill.
• When drilling into metal you should also use cutting oil to assist in drilling and to
preserve themachine and drillbit.
• Always use aclamp or vice to hold theworkpiece.
• When drilling into walls, make sure not to damage water pipes, electricity cables
or gaspipes.
Care and maintenance
• Always keep themotor ventilation openings free from dust and debris.
• Clean theproduct using alightly moistened cloth. Onlyuse mild cleaning agents,
never solvents or corrosive chemicals.
• For long-term storage (months) thebattery should first be fully charged.
10
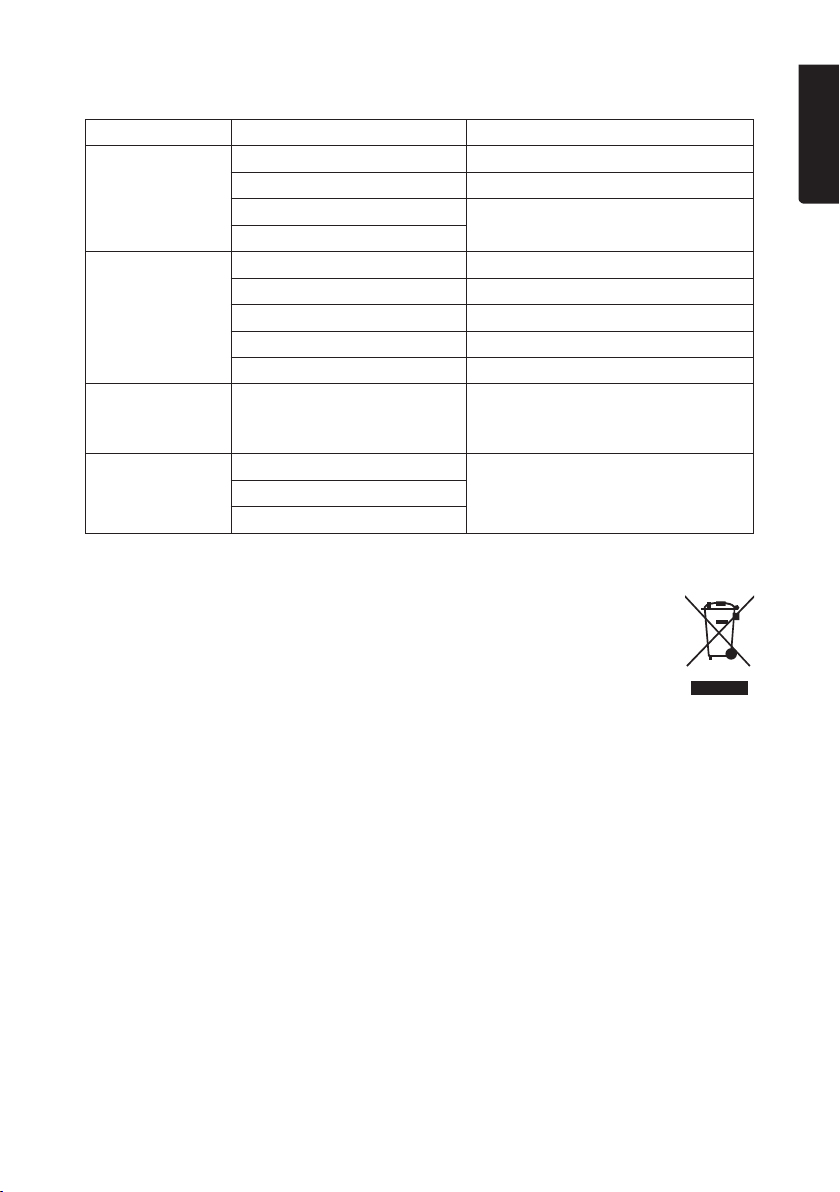
Troubleshooting guide
Problem Possible cause Solution
The machine
does notstart.
The machine
is slow and/or
shutsoff.
Unusual sounds
and/or strong
vibrations.
Sparks in
themotor.
Flat/discharged battery. Recharge thebattery.
The battery is overheated. Let thebattery cooldown.
Worn brushes. Contact our Customer Services.
Faulty power trigger.
Blunt or damaged drillbit. Replace drillbit.
Too much pressure applied. Decrease applied pressure.
Flat/discharged battery. Recharge thebattery.
The battery is overheated. Let thebattery cooldown.
The motor is overheated. Let themachine cooldown.
The drill/screwdriver bit is
not centred or incorrectly
fitted.
Faulty brushes. Contact our Customer Services.
Winding short circuited.
Dirty commutator.
Make sure that thedrill/screwdriver
bit is centred, correctly inserted
and securely fixed.
Responsible disposal
This symbol indicates that this product should not be disposed of with
general household waste. This applies throughout the entire EU. In order
to prevent any harm to the environment or health hazards caused by
incorrect waste disposal, the product must be handed in for recycling
so that the material can be disposed of in a responsible manner. When
recycling your product, take it to your local collection facility or contact the
place of purchase. They will ensure that the product is disposed of in an
environmentally sound manner.
ENGLISH
Specications
No-load speed 0–400/1500 rpm
Battery 18 V 2.0 Ah lithium-ion LXC series
(4.0 Ah battery available as anaccessory)
Torque settings 15 plus adrill setting, max 45Nm
Charging time approx. 55 mins for 2.0 Ah battery / 105 mins for 4.0 Ah battery
Sound level LpA: 70.7 dB(A), uncertainty KpA: 3 dB(A)
LwA: 81.7 dB(A), uncertainty KwA: 3 dB(A)
Vibration value ah 0.896 m/s², K: 1.5 m/s²
a
Weight 1.6kg with 2.0 Ah battery or 1.9kg with 4.0 Ah battery
1.393 m/s², K: 1.5 m/s² (Drilling in metal)
h,D
11

Skruvdragare
Art.nr 18-3580 Modell DJC159SZ-180-UK
40-9504 DJC159SZ-180
Läs igenom hela bruksanvisningen före användning och spara den sedan för framtidabruk.
Vireserverar oss för ev. text- och bildfel samt ändringar av tekniska data.
Vid tekniska problem eller andra frågor, kontakta vår kundtjänst.
Säkerhet
SVENSKA
Generella säkerhetsinstruktioner för laddbara handverktyg
Varning! Läsalla instruktioner. Omnedanstående instruktioner inte följs kan detta leda
till elektrisk stöt, brand eller allvarlig skada. Termen”elektriskt handverktyg” ivarningstexten nedan refererar till ditt nätanslutna eller batteridrivna handverktyg.
SPARA DESSA INSTRUKTIONER!
1) Arbetsutrymmet
a) Håll arbetsutrymmet rent och väl upplyst. Belamrade och mörka utrymmen
inbjuder till olyckor.
b) Använd inte elektriska handverktyg iexplosiva miljöer, som inärheten av
lättantändliga vätskor, gaser eller damm. Elektriska handverktyg genererar
gnistor som kan antända damm ochångor.
c) Håll barn och åskådare på avstånd när du använder det elektriska handverktyget.
Störningsmoment kan göra att du tappar kontrollen över verktyget.
2) Elektrisk säkerhet
a) Det elektriska handverktygets stickpropp måste passa ivägguttaget.
Modifieraaldrig stickproppen på något vis. Användaldrig adapter
tillsammans med jordade elektriska handverktyg. Omodifierade stickproppar
och passande vägguttag minskar risken för elektrisk stöt.
b) Undvik kroppskontakt med jordade föremål, som rör, element, köksspis eller
kylskåp. Detinnebär ökad risk för elektrisk stöt om din kropp är jordad.
c) Utsätt inte det elektriska handverktyget för regn eller våta förhållanden.
Omvatten tränger in iett elektriskt handverktyg ökar det risken för elektrisk stöt.
d) Misshandla inte nätsladden. Användaldrig nätsladden för att bära eller dra
handverktyget eller för att rycka stickproppen ur vägguttaget. Hållundan
nätsladden från värme, olja, vassa kanter och rörliga delar. Skadade eller
trassliga nätsladdar ökar risken för elektrisk stöt.
e) När du använder ettelektriskt handverktyg utomhus, använd enskarvsladd
anpassad för detta ändamål. Användning av enskarvsladd för utomhusbruk
minskar risken för elektrisk stöt.
f) Om du måste använda ettelektriskt handverktyg på enfuktig plats, anslut
verktyget till elnätet via enjordfelsbrytare. Användning av jordfelsbrytare
minskar risken för elektrisk stöt.
12

3) Personlig säkerhet
a) Var uppmärksam på vad du gör och använd sunt förnuft när du använder
ettelektriskt handverktyg. Användinte ettelektriskt handverktyg om du är trött
eller påverkad av droger, alkohol eller medicinering. Ettögonblicks ouppmärksamhet
när du använder ettelektriskt handverktyg kan resultera iallvarlig personskada.
b) Använd skyddsutrustning. Bäralltid skyddsglasögon. Användning av skydds-
utrustning som andningsskydd, halksäkra skyddsskor, hjälm och hörselskydd vid
behov minskar risken för personskada.
c) Undvik oavsiktlig start. Setill att strömbrytaren är iläge OFF innan du
ansluter stickproppen till vägguttaget. Attbära ettelektriskt handverktyg med
ettfinger på strömbrytaren/avtryckaren eller att ansluta ettelektriskt handverktyg till
elnätet när strömbrytaren är iläge ON inbjuder till olyckor.
d) Ta bort alla serviceverktyg/nycklar innan du slår på det elektriska handverktyget.
Ettkvarglömt serviceverktyg på enroterande del av det elektriska handverktyget
kan resultera ipersonskada.
e) Sträck dig inte för långt. Setill att du står stadigt med god balans hela tiden.
Dettamöjliggör bättre kontroll ioväntade situationer.
f) Bär lämplig klädsel. Bärinte löst sittande kläder eller smycken. Hållundan
hår, kläder och handskar undan från rörliga delar. Lösakläder, smycken eller
långt hår kan fastna irörliga delar.
g) Om utrustning för utsugning och uppsamling av damm finns tillgänglig,
se till att denna är ansluten och används. Användning av dessa hjälpmedel
kan minska dammrelaterade faror.
4) Användning och underhåll av det elektriska handverktyget
a) Pressa inte det elektriska handverktyget. Användettelektriskt handverktyg
som är avsett för det arbetsmoment du utför. Korrekt elektriskt handverktyg gör
jobbet bättre och säkrare med avsedd matningshastighet.
b) Använd inte det elektriska handverktyget om strömbrytaren inte slår på och
stänger av verktyget. Allaelektriska handverktyg som inte kan kontrolleras med
strömbrytaren är farliga och måste repareras.
c) Ta stickproppen ur vägguttaget innan du utför några justeringar, byter tillbehör
eller lägger undan det elektriska handverktyget för förvaring. Dessaåtgärder
iförebyggande syfte minskar risken för att starta det elektriska handverktyget
oavsiktligt.
d) Förvara elektriska handverktyg som inte används utom räckhåll för barn och
låt inte personer som inte är förtrogna med det elektriska handverktyget eller
dessa instruktioner använda det. Elektriska handverktyg är farliga om de kommer
ihänderna på ovana användare.
e) Underhåll elektriska handverktyg. Kontrollera om något är felinställt, om rörliga
delar kärvar, om delar har gått sönder eller om något annat inträffat som kan
påverka funktionen hos det elektriska handverktyget. Omnågot är skadat
måste det repareras före användning. Mångaolyckor beror på dåligt underhållna
elektriska handverktyg.
SVENSKA
13

f) Håll verktygen vassa och rena. Ordentligt underhållna skärverktyg med vassa
eggar är mindre benägna att kärva och lättare att kontrollera.
g) Använd det elektriska handverktyget, tillbehör och liknande enligt instruktionerna
och på det sätt som är ämnat för just den typen av elektriskt handverktyg,
och ta även hänsyn till arbetsförhållandena och den typ av arbete som ska
utföras. Användning av det elektriska handverktyget för andra arbeten än vad det
är ämnat för kan resultera ien farlig situation.
5) Användning och service av det laddbara handverktyget
a) Se till att strömbrytaren är iavstängt läge innan du monterar batteriet.
SVENSKA
Attmontera batteriet på ettelektriskt handverktyg som har strömbrytaren ipåslaget
läge inbjuder till olyckor.
b) Ladda batteriet endast med enladdare som är utvald av tillverkaren. Enladdare
som passar till entyp av batteri kan orsaka brandrisk om den används till enannan
typ av batteri.
c) Använd laddbara handverktyg endast tillsammans med därför ämnade batterier.
Användning av andra batterier kan orsaka skade- och brandrisk.
d) När batteriet inte används, förvara det på avstånd från andra metallföremål
som gem, mynt, nycklar, spikar, skruvar eller andra små metallföremål som
kan skapa kontakt från den ena batteripolen till den andra. Kortslutning av
batteripolerna kan orsaka brännskador ellerbrand.
e) Om batteriet misshandlas kan syra läcka ut. Undvikkontakt med syran.
Omdu av misstag kommer ikontakt med syran, spola med vatten. Omsyran
kommer ikontakt med ögonen, uppsök läkare. Syrasom kommer från batteriet
kan orsaka irritation och brännskador.
6) Service
a) Låt behörig personal utföra service och reparationer, och endast med
originalreservdelar. Dettagaranterar att säkerheten hos det elektriska
handverktygetbehålls.
Särskilda säkerhetsföreskrifter för borrning
a) Använd extrahandtag om sådant medföljer verktyget. Om du förlorar kontrollen
över verktyget kan detta leda till personskada.
b) Håll endast i verktygets isolerade handtag när du arbetar i miljöer där skär-
verktyget kan komma i kontakt med strömförande elledningar.
Om skärverktyget kommer i kontakt med strömförande elledningar kan detta leda
till att verktygets metalldelar blir strömförande, vilket kan leda till elektrisk stöt.
14

Särskilda säkerhetsföreskrifter för batterier/batteripack
a) Försök aldrig öppna, ta isär eller på något annat sätt skada eller göra åverkan
på batteriet.
b) Kortslut inte batteriet. Förvara inte batteriet på sådant sätt att det kan
komma i kontakt med andra batterier eller med andra strömledande föremål.
När batteriet inte används, håll det på avstånd från alla metallföremål, t.ex. gem, mynt,
nycklar, spikar och skruvar. Dessa föremål kan skapa kontakt mellan batteriets
terminaler och kortsluta batteriet, vilket kan leda till brännskador eller brand.
c) Utsätt inte batteriet för värme eller öppen eld. Förvara inte batteriet
i ihållande solljus.
d) Utsätt inte batteriet för slag och stötar.
e) Om batteriet läcker, låt inte vätskan komma i kontakt med hud eller ögon.
Om så har skett, skölj omedelbart det utsatta området med rikligt med vatten
och ta kontakt med läkare.
f) Om batteriet eller delar av det har svalts, sök omedelbart kontakt med läkare.
g) Håll batteriet rent och torrt.
h) Rengör batteriet med en ren, torr trasa.
i) Batteriet måste laddas innan det används. Följ alltid anvisningarna i den här
bruksanvisningen och använd rätt laddmetod.
j) Låt inte batteriet stå på laddning under längre perioder när det inte används.
k) Om batteriet har lagrats under en längre period kan det behöva laddas och
urladdas ett flertal gånger innan det uppnår sin fulla kapacitet.
l) Batteriet har bäst kapacitet när det används i rumstemperatur (20 ± 5 °C).
m) När batteriet ska lämnas till återvinning, håll batterier med olika elektrokemisk
uppbyggnad separerade från varandra.
n) Ladda batteriet endast med den medföljande laddaren. Använd ingen annan
laddare än den som är speciellt utformad och avsedd för det aktuella batteriet.
En laddare som är avsedd för en viss typ av batterier kan, om den används till
andra batterier, leda till brand.
o) Använd inte ett batteri som är avsett för annat verktyg än det som beskrivs
i den här bruksanvisningen.
p) Håll batteriet utom räckhåll för barn.
q) Spara alla originaldokument som medföljer verktyget, för framtida bruk.
r) Ta ut batteriet ur verktyget när det inte används.
s) När du ska göra dig av med produkten ska detta ske enligt lokala föreskrifter.
SVENSKA
Säkerhetsinstruktioner för batterier och laddare
• Försök aldrig att öppna batteriet.
• Förvara aldrig batteriet idirekt solljus eller vid temperaturer över 40 °C.
• Ladda batteriet endast itemperaturer mellan 5 och 40 °C.
• Utsätt aldrig batteriet eller laddaren för vatten.
15
Vibration
• Mätningen av den vibrationsnivå som anges i denna bruksanvisning har utförts
enligt en mätmetod som är standardiserad i EN 60745 och kan användas vid jäm-
förelse av olika elektriska handverktyg.
• Mätmetoden är även lämplig för preliminär bedömning av vibrationsbelastningen.
• Den angivna vibrationsnivån gäller när det elektriska handverktyget används på
det sätt som beskrivs i den här bruksanvisningen. Om däremot det elektriska
handverktyget används för andra ändamål och med andra tillbehör eller inte har
underhållits ordentligt kan vibrationsnivån under arbetsperioden öka betydligt.
• För en exakt bedömning av vibrationsbelastningen bör även de tider beaktas när
SVENSKA
det elektriska handverktyget är frånkopplat eller är igång utan att det används.
Detta reducerar vibrationsbelastningen betydligt för den totala arbetsperioden.
Bestäm säkerhetsåtgärder för att skydda operatören mot vibrationernas inverkan
vid alla typer av användning.
Produktmärkning med säkerhetssymboler
Läs hela bruksanvisningen.
Använd alltid skyddsglasögon.
max 50ºC
Använd alltid hörselskydd.
Endast för inomhusbruk.
Håll batteriet på avstånd från värme, t.ex. ihållande
solljus eller öppen eld, vatten och fukt.
Risk för explosion.
16
 Loading...