

Cochlear Nucleus CP800 Series Manual
How to fit Micro Receiver DT20 to Cochlear Nucleus CP800 Series
❶
❷ ❸
Cochlear Nucleus® CP810 is built in three different versions: A, B and C.
Only Cochlear Nucleus® CP810 Version C supports the use of Micro Receiver DT20.
The version of the CP810 is identified is by the last letter in the serial number
on the sound processor. The serial number is located in the curved inside
edge of the CP810. See the pictures to the right.
Notice: In order to ensure that the sound processor is configured in accordance to the guide lines
in Step 2 (Preparing the Sound processor) in this guide, please contact the
responsible personnel at the CI center, before you visit the CI user.
Required parts
1. Micro Receiver DT20
2. Programmer DT20
3. Euro Accessory Adaptor
4. Monitor Headphones for Cochlear Nucleus® series
Before fitting Micro Receiver DT20 to Cochlear Nucleus® ver. C
Please ensure that each step below is carefully followed before making any attempt to connect Micro Receiver DT20 to the sound processor.
1. Preparing Micro Receiver DT20
In this step you will use Programmer DT20 to configure Micro Receiver DT20 for optimal performance when being used with
Cochlear Nucleus CP810.
a. Start Programmer DT20 and attach the Micro Receiver DT20 into its Europlug.
b. Select the Step-by-Step Guide and press .
c. Skip the Scan instruction animation and scroll to
the next step by pressing .
d. Check that Comfort Digisystem Michrophone
is turned off.
On Programmer DT20 select and
press .
e. In this step the radio environment will
Automatically be scanned by the DT20
Programmer´s built-in spectrum analyser
and the value of the radio interferences
will be presented on the screen.
Ensure that there are no radio interferences
in your radio environment, before you go to the next step.
Green colour indicates acceptable radio interference level.
If any radio interferences higher than -91 dBm is indicated in your radio environment,
you need to find the interference sources and eliminate them.
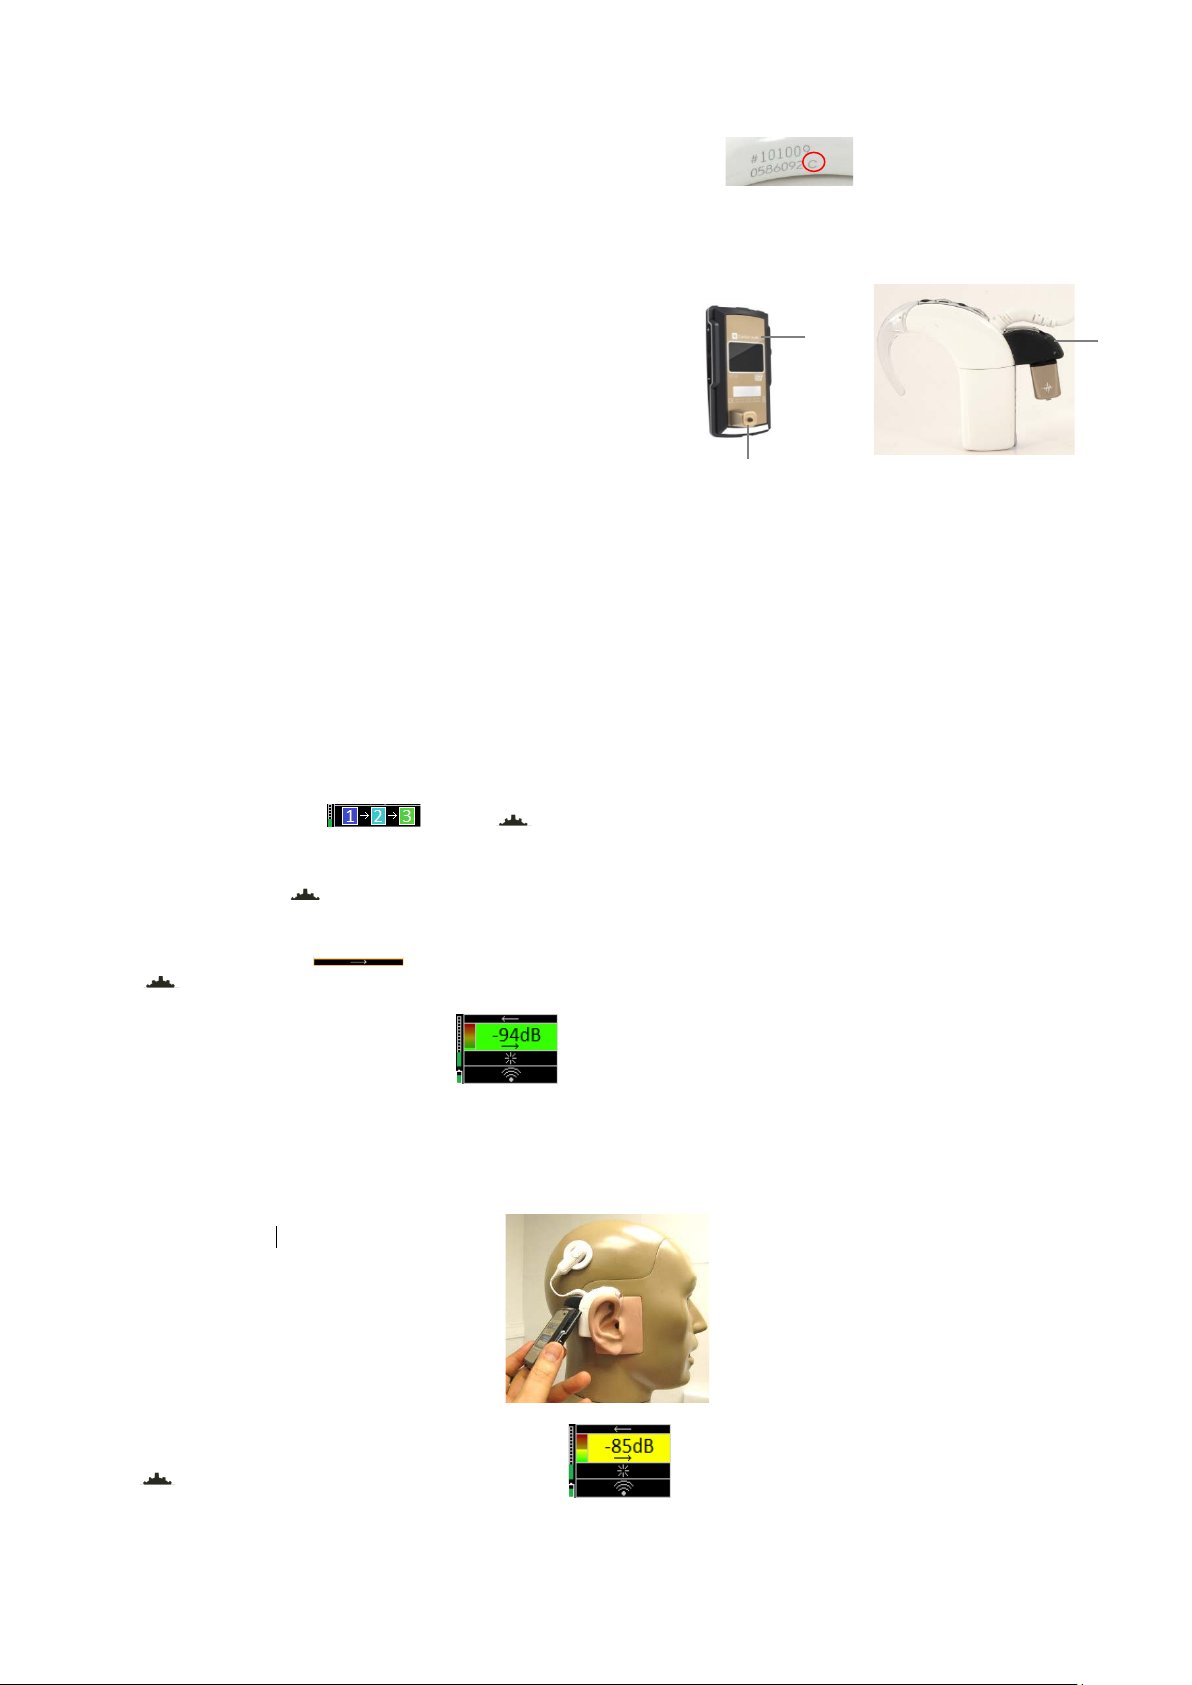
f. Scan the CI processor: see the picture.
g. A typical interference level about -85 dBm will usually be
indicated and the background colour turns orange/ yellow.
Press to go to the next step.
❶
❷
h. The picture shows that a moderate
interference level has been indicated.
Select Press to go to
the next step.
i. In this step a selection of those most
appropriate radio channels is shown.
Use to select one channel and then
press it to go to the next step.
Notice: The greener channel, the less interference.
j. Enable Micro Receiver DT20´s Push Button.
k. Turn on your Comfort Digisystem microphone and
configure it with a channel from the recommended
channel list in step i .
On Programmer DT20 select and press .
l. Press DT20´s Push button and hold it down
for more than 2 sec in order to set Micro Receiver
DT20 in pairing mode. You will then automatically
be guided to the next step.
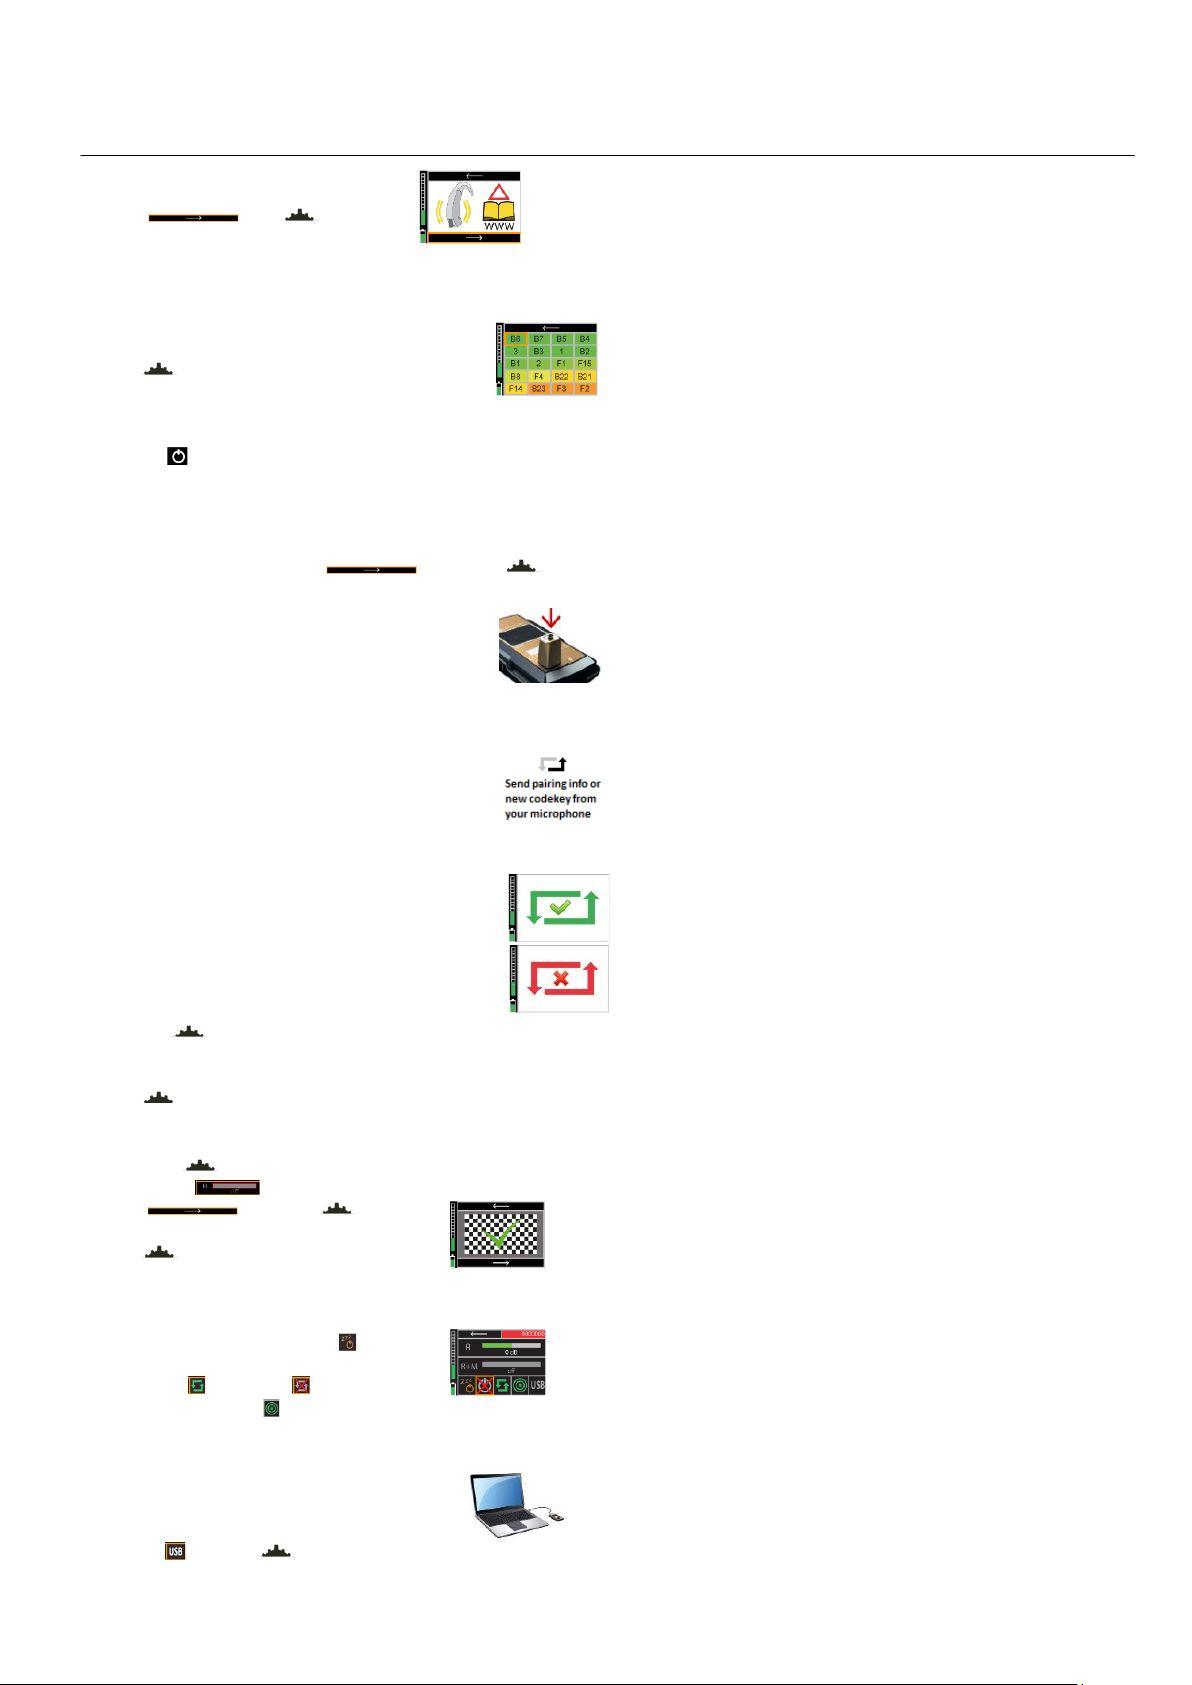
m. Send the pairing information from
Comfort Digisystem Microphone
to Micro Receiver DT20.
n. Depending on whether the pairing procedure
has been successful ❶ or not ❷, one of
the symbols shown in the pictures to the right
will appear and you will be guided to:
i. The Step o if the pairing has been successful.
ii. The Step l if the pairing has not been successful.
Press to go to the next step.
o. Press to skip the Volume Adjustment Animation.
p. Flick down until the volume of R-mode
is turned off .
Select and press ..
You will now be presented a chequered flag.
Press to go to the next step.
You will then be guided to the Main menu.
q. In the Main menu adjust the volume of
R+M = +2 dB. Enable Auto Sleep .
Choose if “Pairing by push button” may
be enabled or disabled .
Select High sensitivity .
r. The settings can be transferred and
saved in any computer via USB.
Connect Programmer DT20 to the computer.
Select and press .
 Loading...