

Page 1
Nucleus® CP900 Series
Sound Processors
User Guide
Page 2

Symbols
Note
Important information or advice. Can save
inconvenience.
Tip
Time saving hint or saves inconvenience.
Caution (no harm)
Special care to be taken to ensure safety and
effectiveness.
Could cause damage to equipment.
Warning (harmful)
Potential safety hazards and serious adverse
reactions.
Could cause harm to person.
Contents
About ...............................................................................................................................4
Turn on.............................................................................................................................6
Wear ...............................................................................................................................10
Store ...............................................................................................................................31
Charge ............................................................................................................................32
Care ................................................................................................................................39
Lights, beeps and buttons ........................................................................................ 54
General warnings and cautions .............................................................................. 58
Other information ...................................................................................................... 60
Cochlear Limited 20112 323649 Iss 3 CP90 0 Series Sound Process ors | User guides CP90 0 Series Sound Pro cessors | User guides 3Coc hlear Limited 2011
Page 3
About
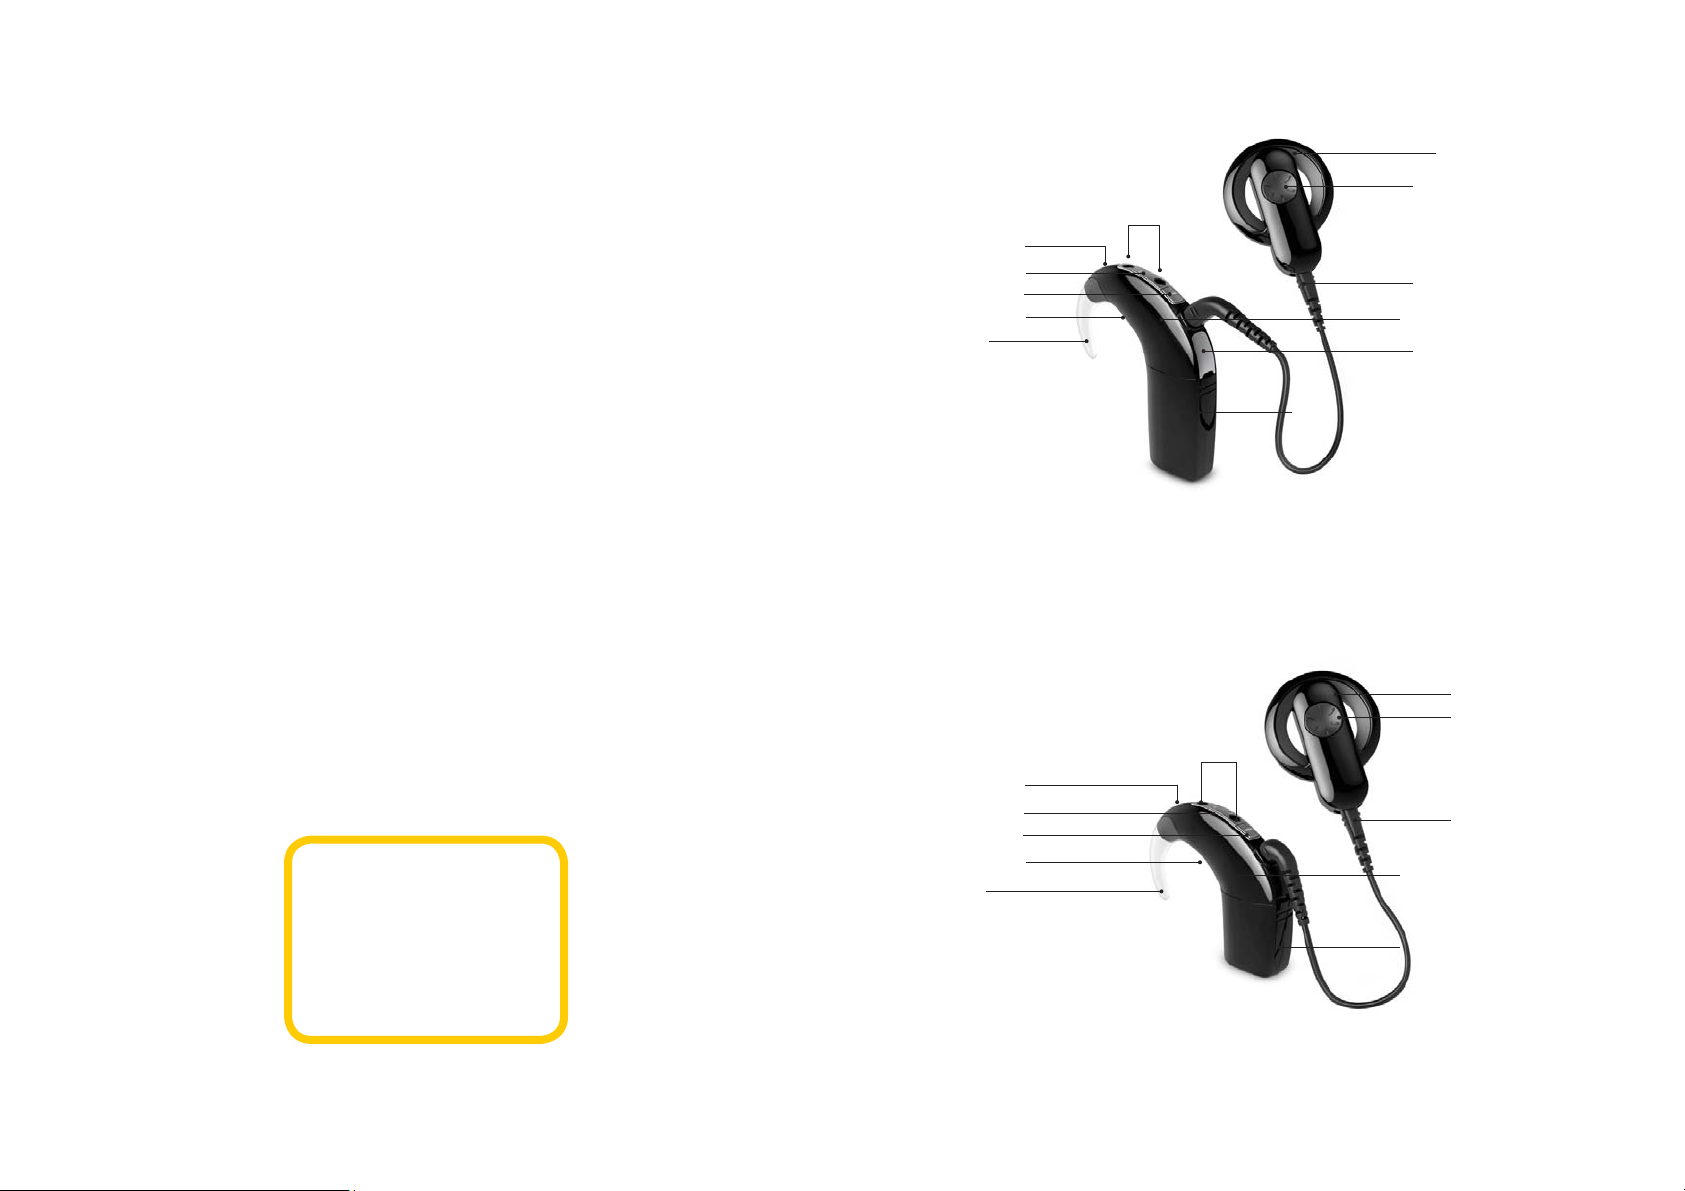
The Cochlear Nucleus CP900 Series Sound Processors works with your Cochlear
Implant to transfer sound to the ear. Your processor is made up of a processing
unit, earhook, coil, coil cable and a battery module.
You can choose either the CP910 or the CP920 processing unit. The CP920
processing unit is smaller than the CP910 and has no accessory port.
You can power your processing unit with a range of battery modules. The range
includes a tamper resistant battery module that uses disposable batteries, a
standard rechargeable and compact rechargeable battery module, and a LiteWear
cable that allows the battery to be worn on the body.
You can control your sound processor as a stand-alone device by pressing the
buttons on the processor. All stand-alone functions are covered in this guide.
You can also choose a Cochlear Nucleus CR210 Remote Control or CR230 Remote
Assistant to control your processor. The remotes let you control one or two
bilateral processors at a time and can provide extra troubleshooting functions. All
remote functions are covered in separate user guides.
People with certain types of hearing loss can wear the processor in Hybrid mode
by adding an accessory called the acoustic component. The acoustic component
sends extra acoustic sound into the ear canal. Hybrid mode must be set up by
your clinician.
A number of tools and accessories are supplied with your sound processor. The
most important of these are your drying pack, screwdriver, and microphone
protector applicator with removal tool.
Warning
Do not allow children under
three to play with the system.
Removable parts of the system
can be lost or may be a choking
hazard.
Microphones and protectors
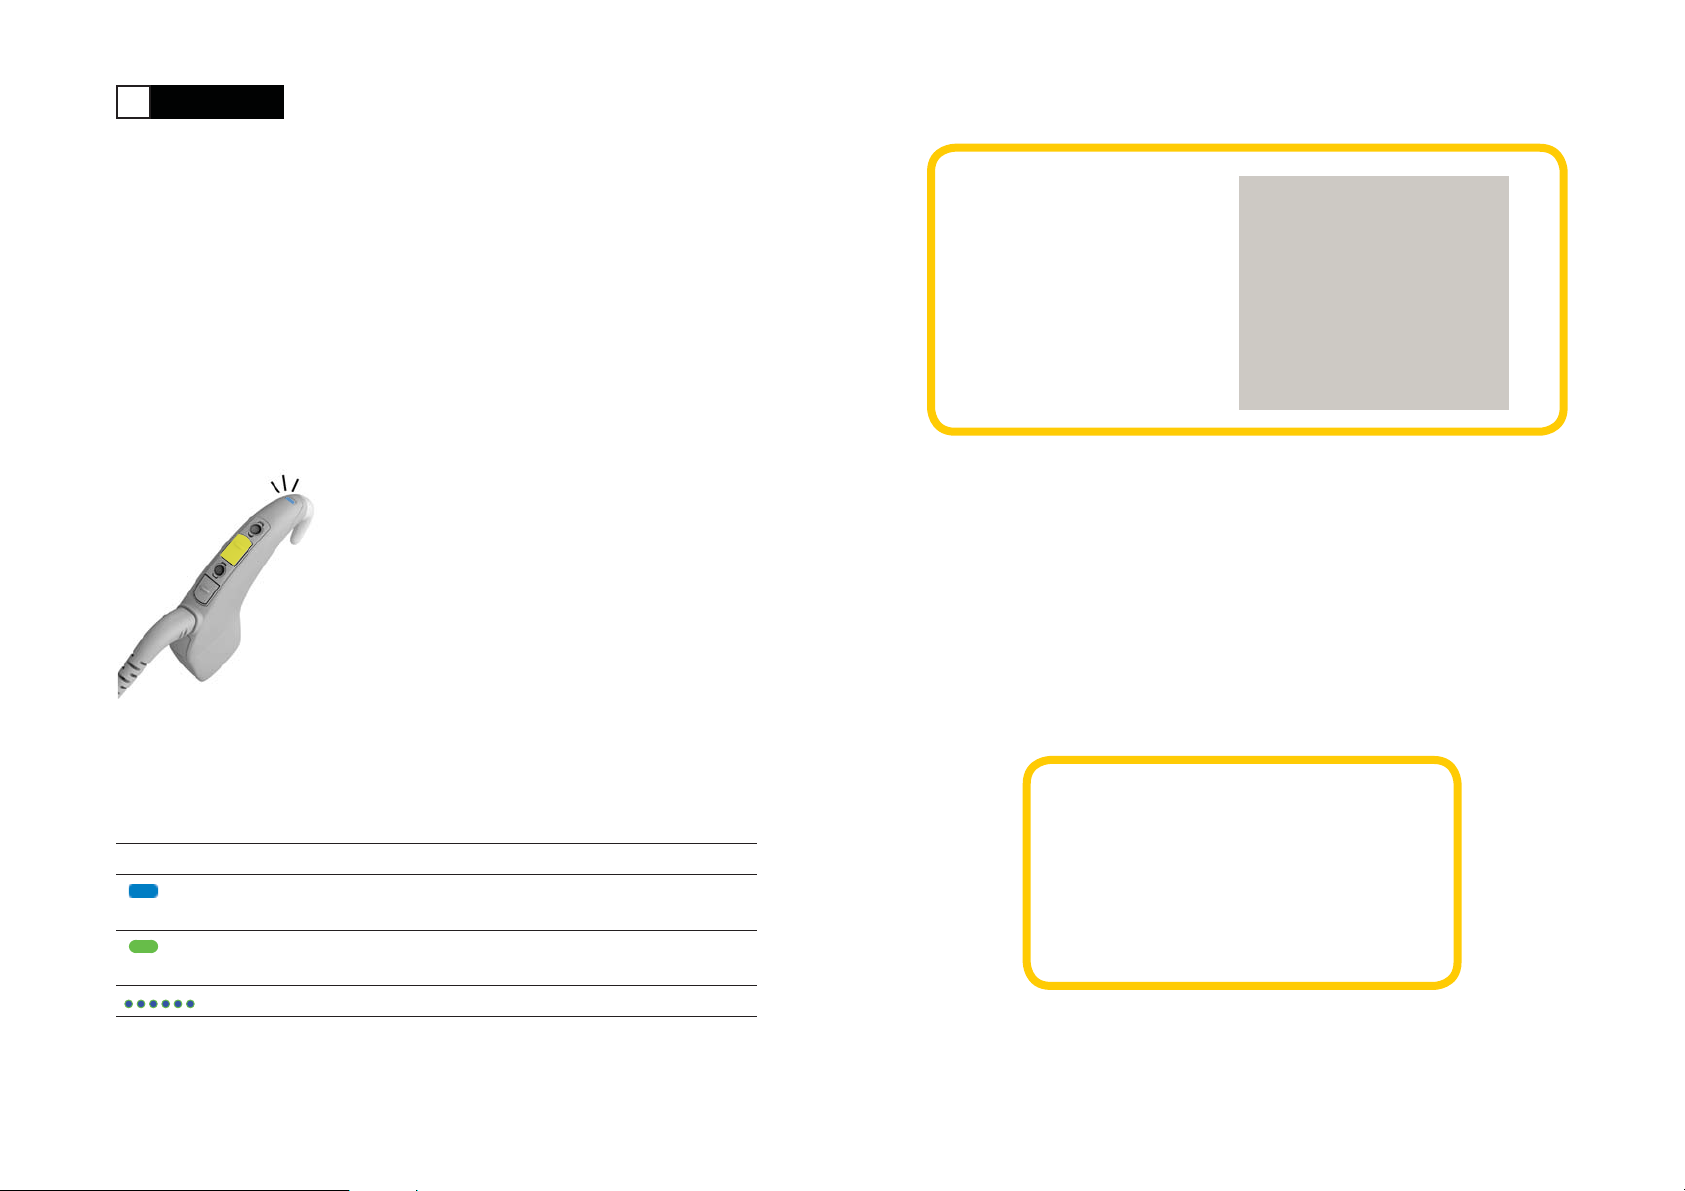
Indicator light
Upper button
Lower button
Serial number
Earhook
Microphones and protectors
Indicator light
Upper button
Lower button
Serial number
Earhook
CP910 processing unit
Standard rechargeable battery module
Behind the Ear (BTE) parts (standard)
Processing unit
BTE parts (mini)
CP920 processing unit
Compact rechargeable
battery module
Coil
Coil magnet
Coil cable
Accessory port
Coil
Coil magnet
Coil cable
Cochlear Limited 20114 323649 Iss 3 CP90 0 Series Sound Process ors | User guides
CP90 0 Series Sound Pro cessors | User guides 5Coc hlear Limited 2011
Page 4
Turn On
Turn on
Turn on and off ............................................................................................................. 7
Change programs ..........................................................................................................8
Lock and unlock buttons ............................................................................................. 9
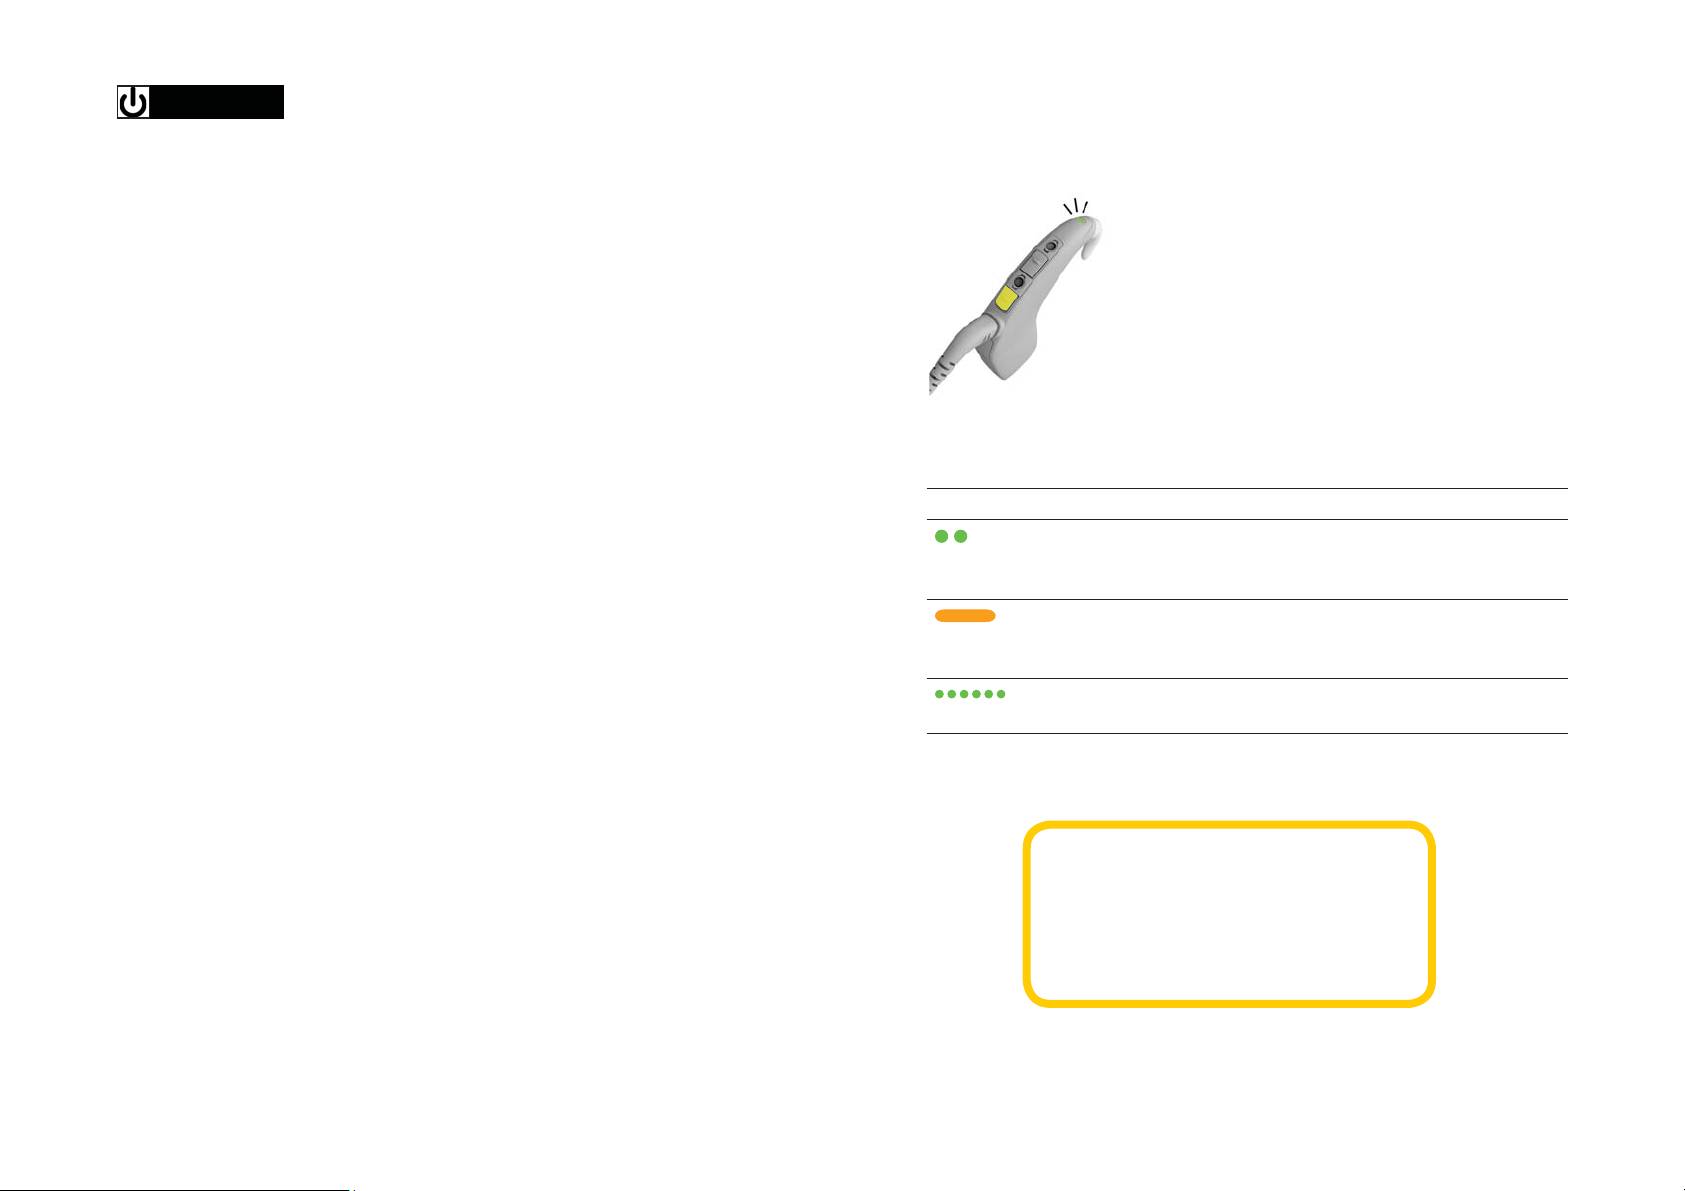
Turn on and off
Press and hold the lower button for two
seconds to turn on or off.
Indicator light What it means
Green fl ashes
Steady orange while
pressing the lower button
Quick green fl ashes
Turning on processor. The number of
fl ashes indicates the number of the
current program.
Turning off processor.
Microphones are receiving sound
6 323649 Iss 3 CP90 0 Series Sound Process ors | User guides
Cochlear Limited 2011
Note
Your clinician may set up your processor to turn
off automatically when it has not been used or
worn for more than two minutes. If this happens,
simply turn your processor back on.
CP90 0 Series Sound Pro cessors | User guides 7Coc hlear Limited 2011
Page 5

Turn On
Change programs
You can choose between programs to change the way your sound processor deals
with sound e.g. in windy, noisy or quiet places. Usually two programs are all you
need, but your clinician can give you up to four programs.
Quick-press and release the lower button to
switch between programs.
Indicator light What it means
Changing the program. The number of
fl ashes indicates the number of the selected
program.
Lock and unlock buttons
Quick-press and release both buttons at the
same time to lock and unlock the processor.
Indicator lights What it means
Green fl ash followed by orange Locking processor buttons.
Orange fl ash followed by green Unlocking processor buttons.
Orange fl ash when pressing buttons Processor buttons are locked.
Green fl ashes
Ask your clinician to write your programs below
8 323649 Iss 3 CP90 0 Series Sound Process ors | User guides
Cochlear Limited 2011
CP90 0 Series Sound Pro cessors | User guides 9Coc hlear Limited 2011
Page 6
Wear
Wear
Attach to your head ....................................................................................................11
Talk on the phone ........................................................................................................ 12
Water, sand and dirt ................................................................................................... 14
Sport and exercise ....................................................................................................... 16
Wear LiteWear .............................................................................................................22
Travel ..............................................................................................................................23
Audio accessories ........................................................................................................24
Turn audio accessories on and off ...........................................................................26
Personalise your processor ........................................................................................ 27
Wear an acoustic component ...................................................................................28
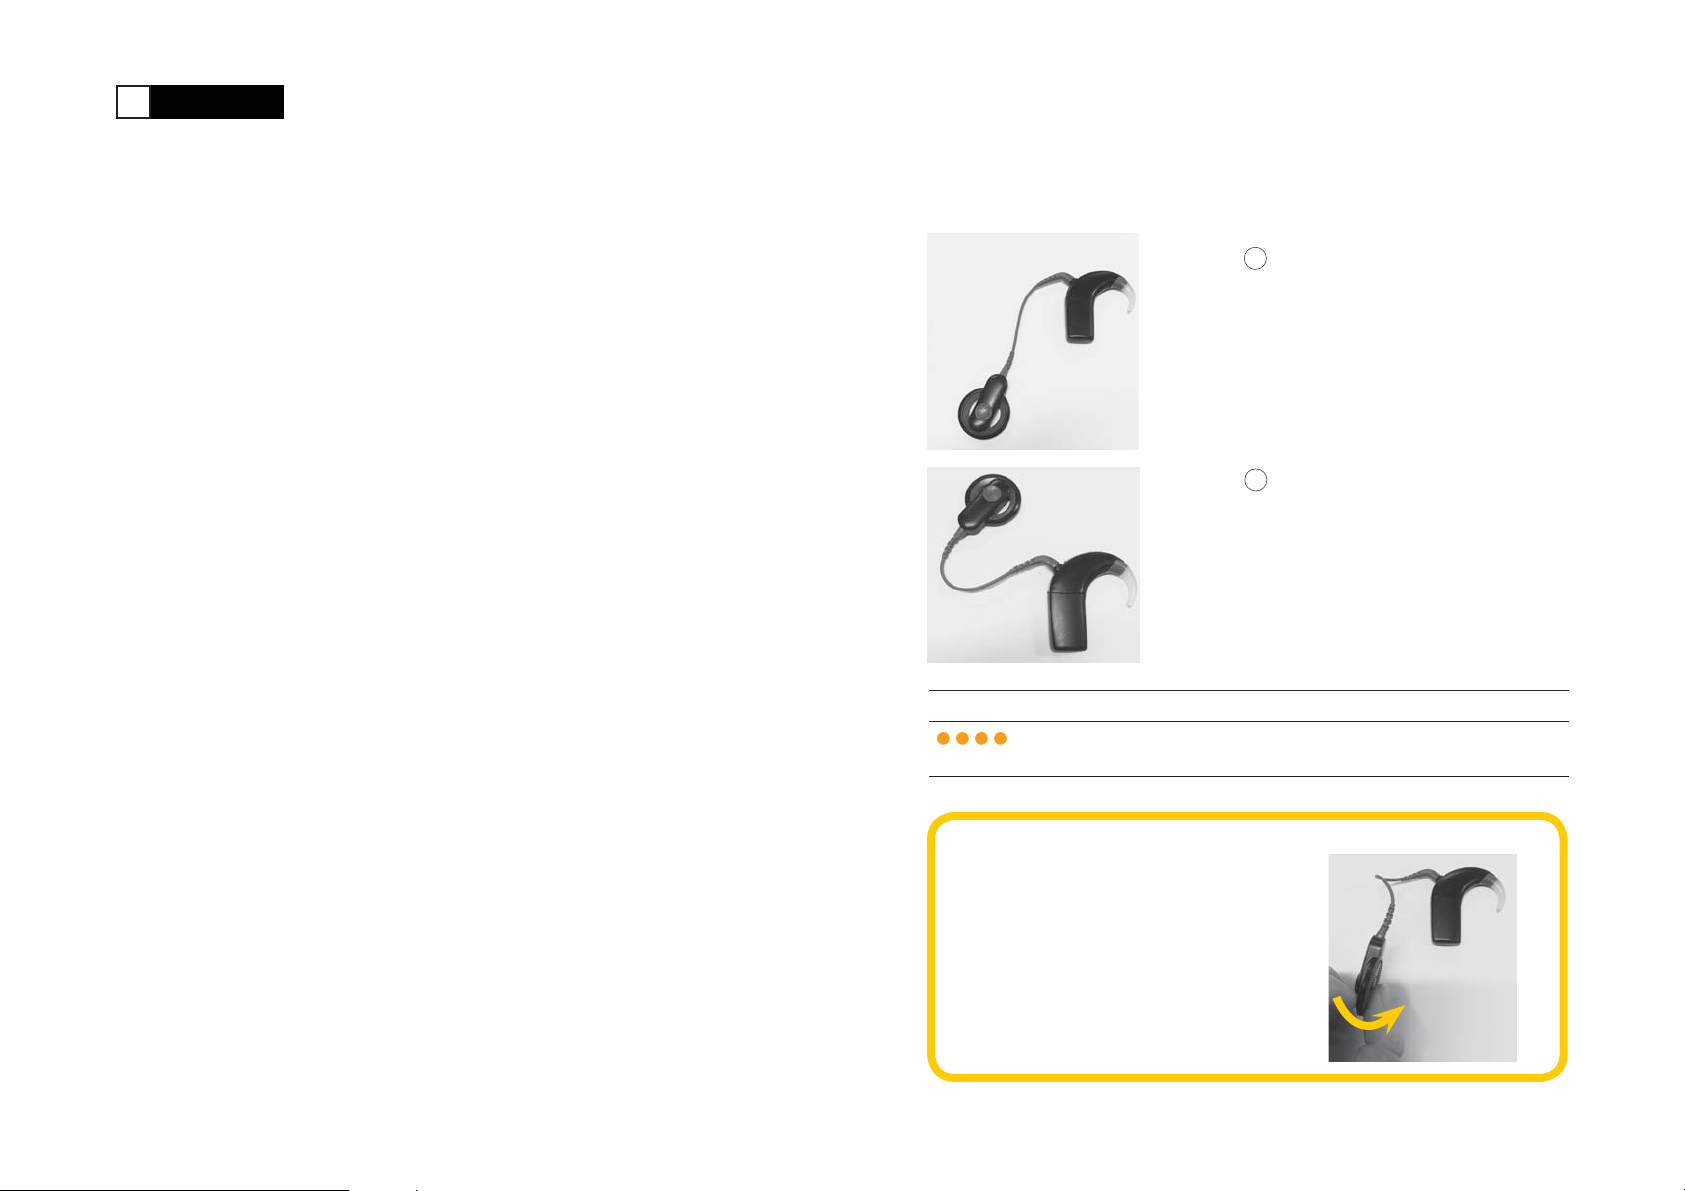
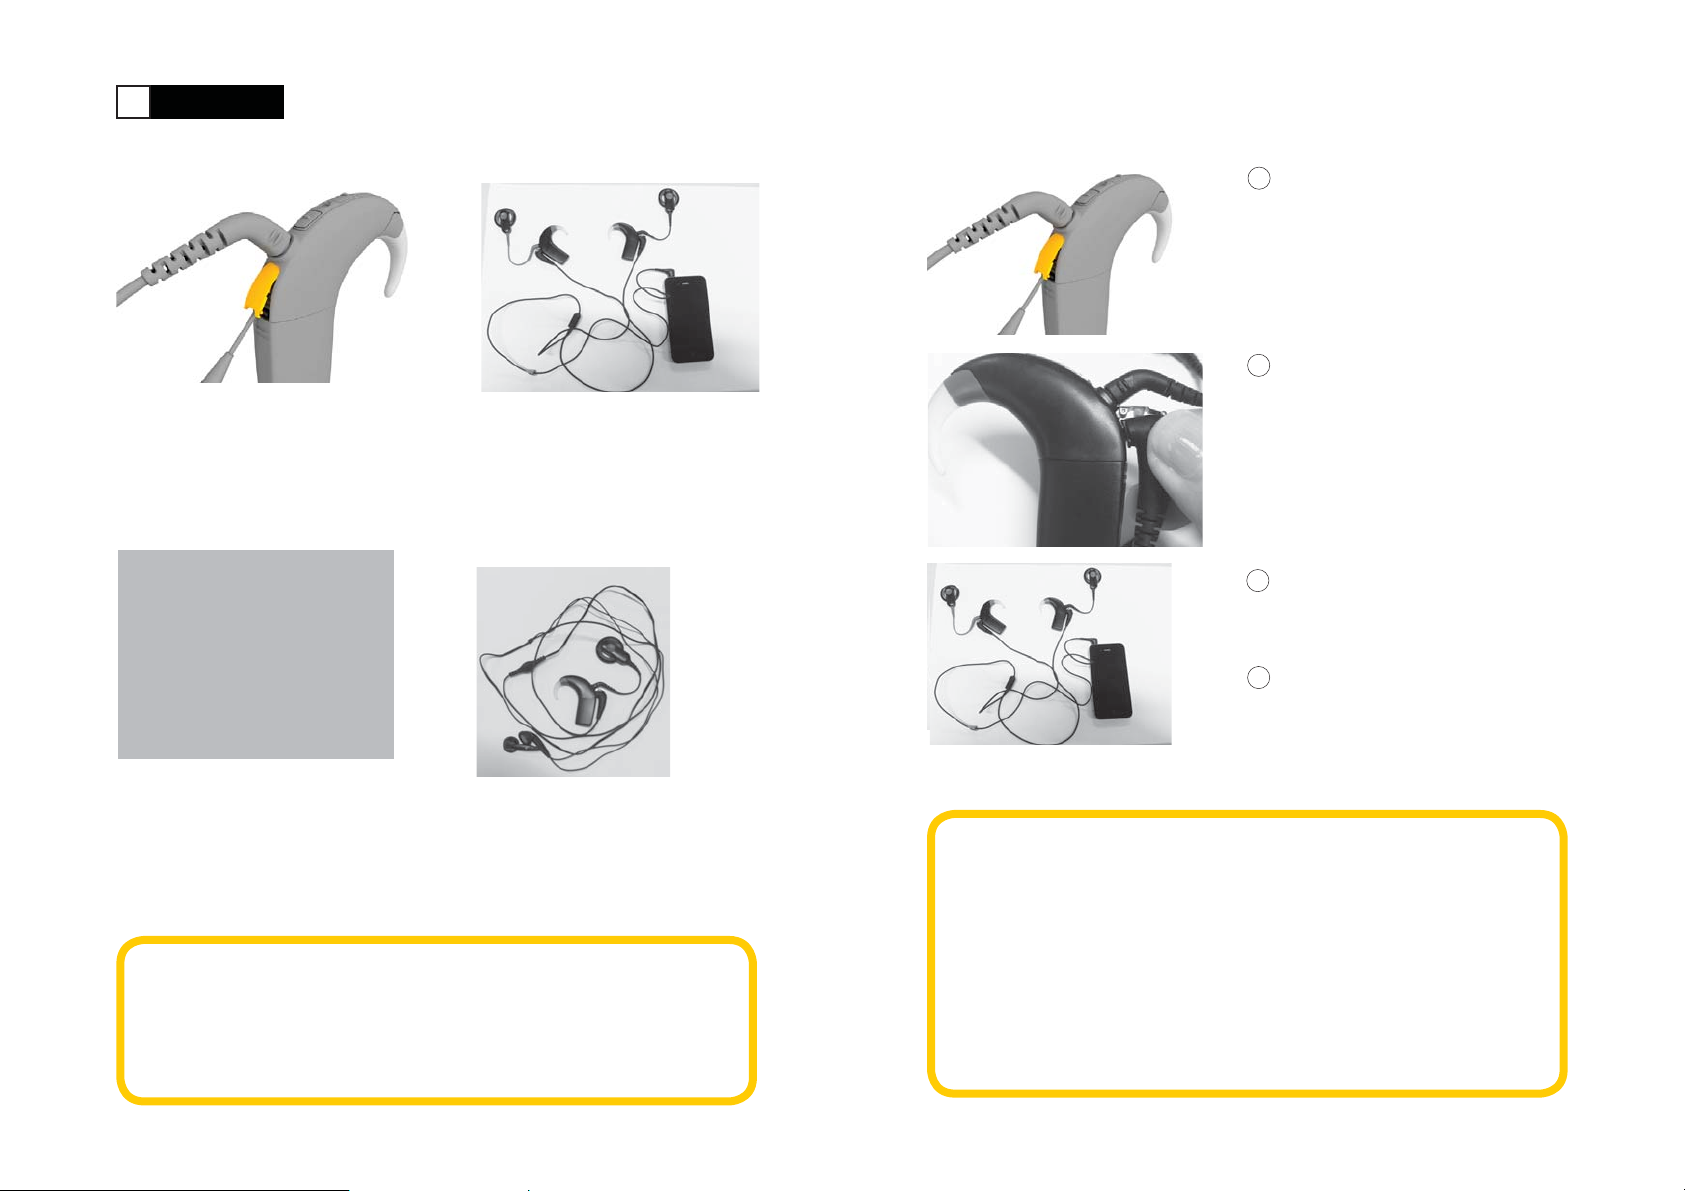
Attach to your head
Place the BTE on your ear, letting
1
the coil dangle.
Move the coil sideways and onto
2
your implant.
Indicator light What it means
Flash of orange every
second
Coil is off, or processor is not connected to
the correct implant.
10 323649 Iss 3 CP900 Seri es Sound Process ors | User guides
Cochlear Limited 2011
Tip
Twist the coil clockwise (right BTE) or
counter clockwise (left BTE) once ONLY
before placing it on the head. The twist
will help the coil stay in place.
CP900 Series Sound Pro cessors | User guides 11Cochlear Limited 2011
Page 7
Wear
Talk on the phone
Listen to hearing loops and hear voices on the telephone more clearly with the
telecoil (t-switch). Your processor can be set up with either manual or auto telecoil.
Auto telecoil turns the telecoil on and off whenever you use a phone or move in
and out of range of a hearing loop.
Whether you choose auto or manual telecoil, you can control the telecoil with
your remote or just turn it on and off with your processor.
Quick-press the top button to turn telecoil on
and off.
Tip
Slowly move the phone's sound
outlet over the microphones
on your processor to fi nd your
best position for talking on the
phone.
Phone being held over
microphones
Indicator light What it means
Long fl ash of blue Changing between microphones and
the telecoil or audio accessory.
Long fl ash of green Changing between the telecoil or audio
accessory and the microphones.
Constant quick blue fl ashes Processor is receiving sound
12 323649 Iss 3 CP90 0 Series Sound Process ors | User guides
Cochlear Limited 2011
Note
Certain electronic devices or machinery may
automatically turn on Auto Telecoil. If this
happens, move away from the device or machinery
and wait a few seconds for Auto Telecoil to turn
itself off, or turn it off manually.
CP900 Series Sound Pro cessors | User guides 13Cochlear Limited 2011
Page 8
Wear
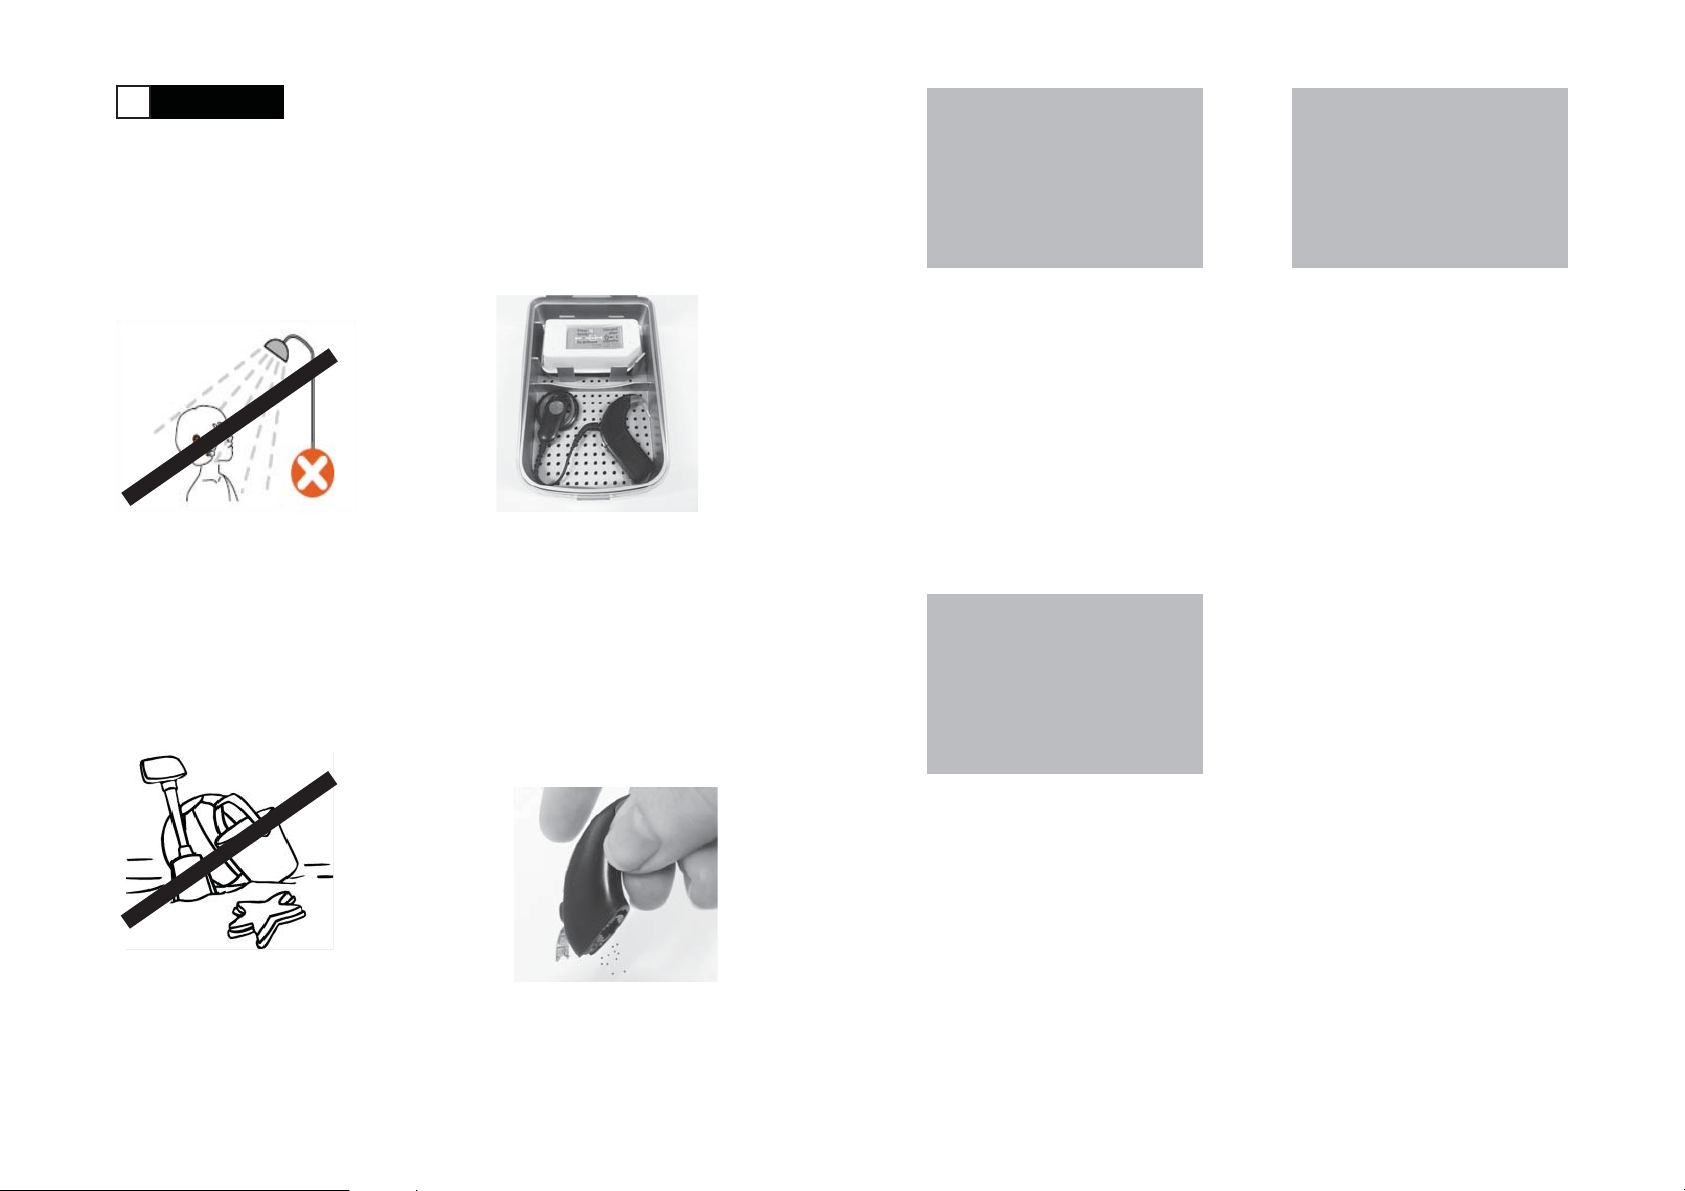
Water, sand and dirt
Your sound processor is resistant to water, sand and dust. However, it is still a
precision electronic device so the following precautions should be taken.
Your processor is water resistant
with rechargeable batteries
attached. But do not wear it while
bathing or swimming.
If your processor ever does get wet,
dry it with a soft cloth, change the
microphone protectors and place it
in a drying kit for 12 hours.
Fully assembled
as described
Your processor is protected against
failure from dust and temporary
immersion in water (IP57) when
you wear it with:
• a rechargeable battery module
• a coil and coil cable
• a closed accessory port
• no acoustic component
Aqua Accessory TBA
Fully assembled
as described
Your processor is protected against
failure from splashing water or
access of foreign objects 1.0 mm in
diameter or larger (IP44) when you
wear it with:
• a tamper resistant battery cover
• a coil and coil cable
• a closed accessory port
• an acoustic component worn in
the ear.
Your processor is dust resistant
with rechargeable batteries
attached. But do not get sand or
dirt into any part of your sound
processor.
14 323649 Iss 3 CP90 0 Series Sound Process ors | User guides
If sand or dirt ever do enter the
system, shake the components
carefully to remove it and change
the microphone protectors.
Cochlear Limited 2011
CP90 0 Series Sound Pro cessors | User guides 15Cochlear Limited 2011
Page 9
Wear
Sport and exercise
Use Cochlear CP900 series
accessories such as the Snugfi t or
Mic Lock to help hold your processor
in place when you play sport or
exercise.
Then check your microphone
protectors.
After exercise, wipe your processor
with a soft cloth to remove sweat or
grime.
Change them whenever you notice
signs of sweat or grime, or any
change in performance.
TBA
A thin sweatband or skullcap worn
over the sound processor can make
wearing a helmet easier.
Aqua Accessory TBA
TBA
Rechargeable batteries give you
the maximum water and sweat
resistance.
Childproofing Tip
Accessories like the Snugfi t or Mic Lock can help hold a processor on
a child's ear. Children under three years of age should only use tamper
resistant accessories such as the tamper resistant earhooks, tamper
resistant battery cover and tamper resistant Snugfi t. Always ensure these
are properly locked together before use.
16 323649 Iss 3 CP900 Series Sound Process ors | User guides
Cochlear Limited 2011
CP90 0 Series Sound Pro cessors | User guides 17Cochlear Limited 2011
Page 10
Wear
Wear a Snugfi t
The Cochlear Nucleus CP900 Series Snugfi t holds your sound processor more
securely in place than an earhook alone. It gives parents and carers easy access to
controls and accessories and is available in large, medium and tamper resistant
(small).
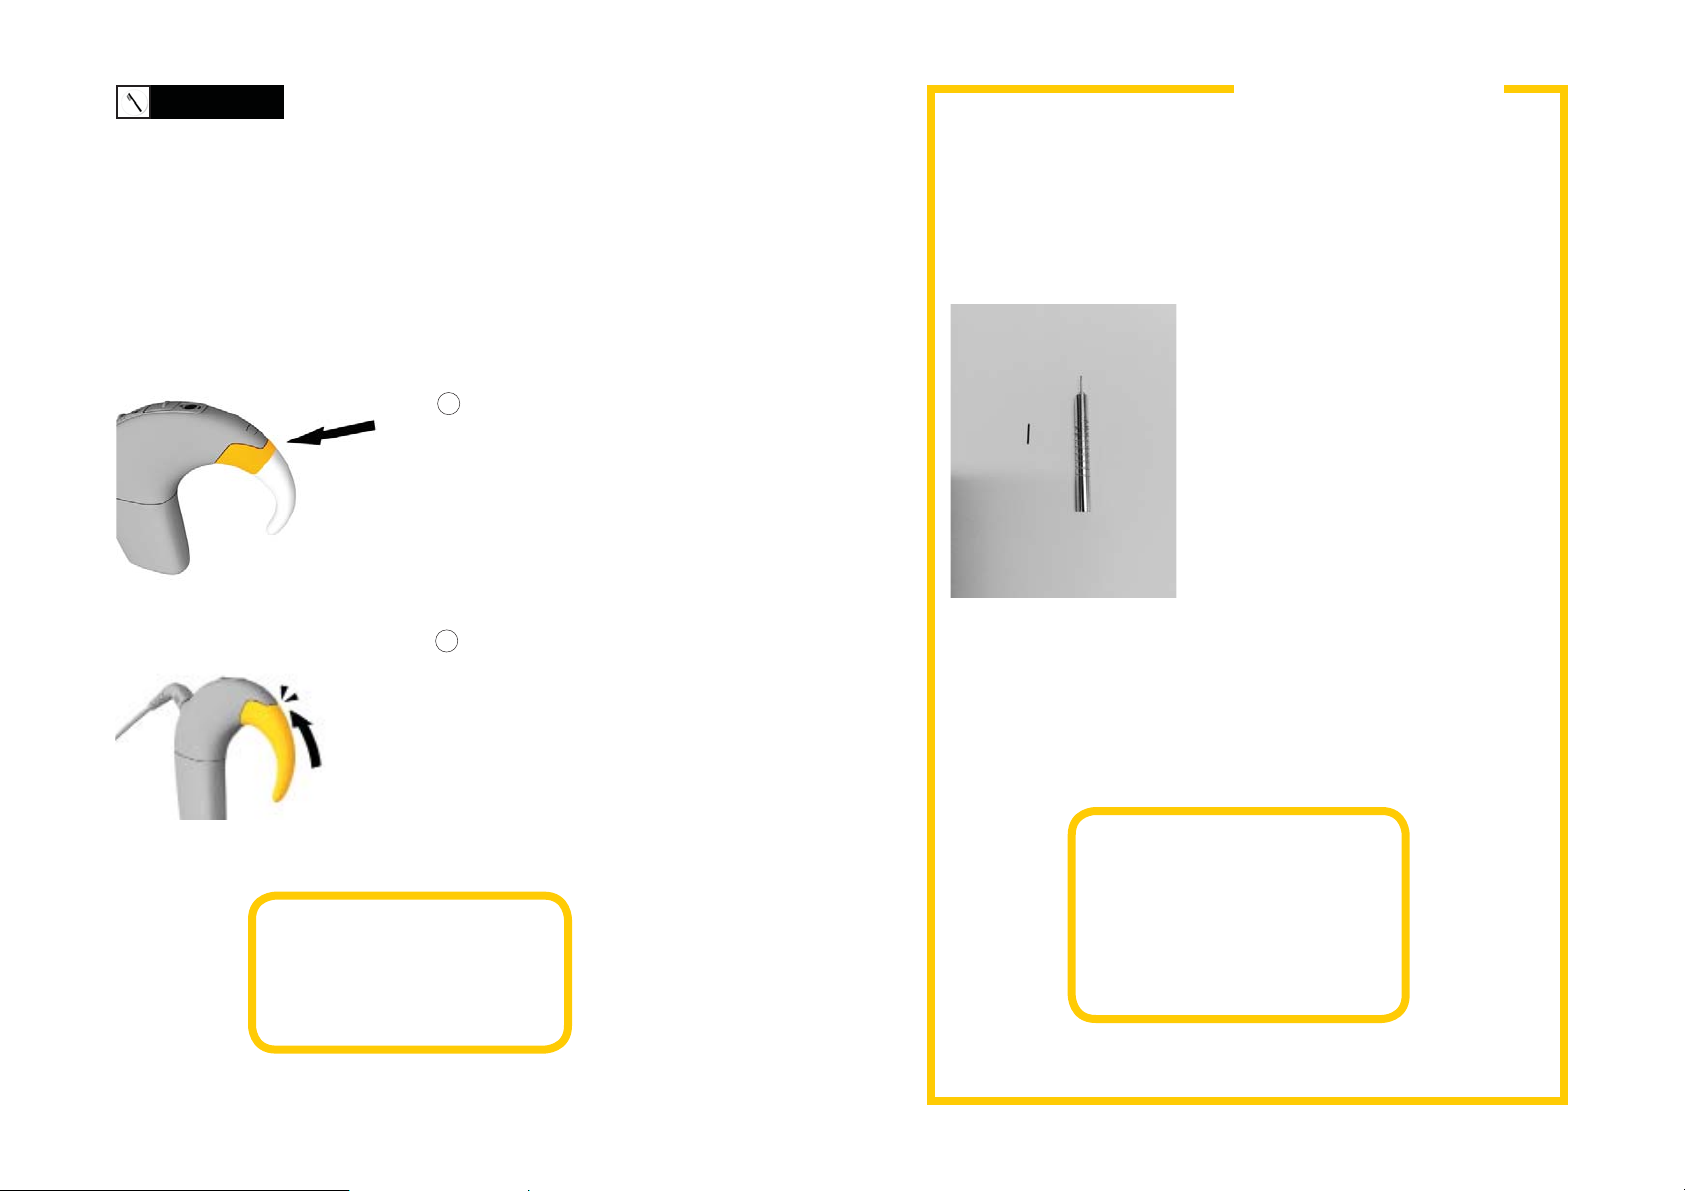
To attach a Snugfi t:
Press fi rmly on the top of the
1
earhook with your thumb to click it
off the sound processor.
To remove a Snugfi t:
Click your Snugfi t into place.
2
Carefully bend the lower part into
3
shape to suit your ear.
Remove your Snugfi t by clicking it
1
off the processor.
18 323649 Iss 3 CP900 Series Sound Process ors | User guides
Cochlear Limited 2011
CP90 0 Series Sound Pro cessors | User guides 19Cochlear Limited 2011
Page 11

Wear
To attach the Tamper Resistant Snugfi t:
1
2
3
Childproofing Tip
The smallest Snugfi t comes with
a Snugfi t band to fi x it more
securely to the processor.
Thread the Snugfi t band onto the
Snugfi t as shown.
Click the Snugfi t into place on the
processor and push the Snugfi t
band onto the battery module.
Wear a Mic Lock
The Cochlear Nucleus Mic Lock helps hold the processor securely on the ear.
To attach the Mic Lock the fi rst time:
Push the Mic Lock band onto the
1
processor with the tubing facing
forward.
Place the processor on your ear and
2
bring the tubing up to the earhook.
Trim the tubing to a length that will
3
hold the processor fi rmly in place
without discomfort. Do not cut it
too short.
20 323649 Iss 3 CP900 Series Sound Process ors | User guides
Push the band securely onto the
4
battery module.
Cochlear Limited 2011
Soften the end of the tubing in
4
warm water and push it onto your
earhook.
5
Let the tubing cool before wearing.
CP90 0 Series Sound Pro cessors | User guides 21Co chlear Limited 2011
Page 12

Wear
Travel
Wear LiteWear
The Cochlear Nucleus CP900 Series LiteWear Cable allows any standard (not
compact) battery module to be worn on the body - so only the processing unit is
worn on the ear. You can order LiteWear at <TBA> or talk to your clinician.
IMAGE SHOWING
LITEWEAR BEING WORN
BY A CHILD
LiteWear is made up of a LiteWear cable,
case and a choice of fi xing aids.
Note
You can wear a Snugfi t with
LiteWear to hold the processing
unit more securely on the ear.
You can travel with your sound processor with confi dence because Cochlear is
supported by clinics all over the world.
Take a printout of your most recent program in case you need help with your
processor.
If you have a back-up sound processor, check that it is programmed correctly
and take it with you.
It's okay to move through metal detectors and full body scanners with your
sound processor on. To avoid any possible buzzing sounds in your ear, turn
off the telecoil.
Ask your clinician for a Nucleus 6 ID card. In the unlikely event that your
implant sets off a metal detector the ID card will help you explain that you
have an implanted medical device.
Do not place sound processors directly onto conveyor belts as you move
through airports. Place them in a bag or plastic tray.
Your sound processor will not interfere with a plane's navigation system so
you won't need to turn it off during takeoff and landing.
Childproofing Tip
Attach the LiteWear case between the shoulder blades of very young children
to help prevent tampering.
22 323649 Iss 3 CP9 00 Series Sound Proces sors | User guides
Cochlear Limited 2011
Note
Visit www.cochlear.com/clinicfi nder to fi nd the nearest clinic in
the places you are travelling
CP90 0 Series Sound Pro cessors | User guides 23Co chlear Limited 2011
Page 13
Wear
Audio accessories
The accessory port on the CP910
processing unit lets you connect a
wide range of audio accessories.
For example, a Cochlear Nucleus
personal audio cable let you listen
to iphones, computers, TV sets
etc. Bilateral recipients can listen in
stereo.
Connect audio accessories
To connect an audio accessory to the processor:
1
2
3
Carefully lift open the accessory
cover with the screwdriver. Do not
twist the cover.
Hold the side grips on the
accessory connector and carefully
push it into the accessory port until
it clicks into place.
When you connect an audio
accessory, your processor
automatically detects it.
TBA
The Cochlear Nucleus Lapel
Microphone can make conversation
easier in noisy environments.
You can order audio accessories at <TBA> or talk to your clinician.
Note
The CP910 processing unit is compatible with the CP800 range of audio
accessories. You can order adaptors to make your CP910 processor
compatible with Freedom and Euro accessories. Your CP910 processor is
NOT compatible with the BAHA range of audio accessories.
24 323649 Iss 3 CP900 Series S ound Processors | User guides
Parents and carers can use
the Cochlear Nucleus Monitor
Earphones to check the processor
and audio accessories are working.
Cochlear Limited 2011
If applicable, insert the other end of
4
the audio accessory cable into the
compatible device e.g. Ipod.
Warning
Always use the Mains Isolation Cable when connecting any Personal Audio
Cable (including Bilateral) to:
• a mains powered device e.g. TV.
• a battery powered device that is connected to mains power (e.g. a
laptop connected to an electric outlet for charging).
Do not use excessive force, twist or pull on accessories when connecting
them to the processor or at any time while they are connected.
CP90 0 Series Sound Pro cessors | User guides 25Co chlear Limited 2011
Page 14

Wear
Personalise your processor
Turn audio accessories on and off
Audio accessories turn on automatically when you plug them into your processor.
You can turn them off and back on again as follows.
Quick-press the top button to switch between
microphones and the audio accessory.
Indicator light What it means
Long fl ash of blue Changing between microphones and the
telecoil or audio accessory.
Long fl ash of green Changing between the telecoil or audio
accessory and the microphones.
Constant quick blue fl ashes Processor is receiving sound from audio
accessory
You can order Cochlear Nucleus Sound Processor Covers and Coil Covers to
personalise your processor and protect it from scratches.
Attaching and removing processor covers:
To attach, slide the cover onto the
1
processor.
To remove, pull the cover away
2
from the processor.
Attaching and removing coil covers:
To attach, discard the clear plastic
1
protector on the cover and click the
cover into place on the coil.
To remove, lift the cover off the
2
coil.
Bilateral stickers
26 323649 Iss 3 CP900 Series Sound Processors | User guides
Cochlear Limited 2011
If you have two Cochlear implants, you must match the correct processor to the
correct implant. Ask your clinician to give you bilateral stickers (red for right, blue
for left) to make identifying left and right processors easier.
CP90 0 Series Sound Pro cessors | User guides 27Cochlear Limited 2011
Page 15

Wear
Wear an acoustic component
If your sound processor is set up for use in Hybrid mode, you can wear it with an
acoustic component.
Hold the coil in one hand and place
1
the processor on your ear with the
other.
Place the coil on your head.
2
Place your dome or earmould in
3
your ear as instructed by your
clinician.
Carefully push and twist the
3
screwdriver until the receiver cable
disconnects.
Re-attach the battery module.
4
Remove your acoustic component
Wear your processor without the acoustic component by replacing it with a
standard earhook:
Remove the battery module from
1
the processing unit by twisting the
two parts as shown.
Insert your Cochlear screwdriver
2
into the opening under the earhook
to unlatch the receiver cable.
28 323649 Iss 3 CP900 Series Sound Process ors | User guides
Cochlear Limited 2011
Press fi rmly on top of the earhook
5
with your thumb to click it off the
sound processor.
Click the standard earhook into
6
place.
Caution
Use only the Hybrid screwdriver – not the CP800 screwdriver – to
remove the acoustic component.
CP90 0 Series Sound Pro cessors | User guides 29Co chlear Limited 2011
Page 16

Wear
Attach your acoustic component
1
Store
Press fi rmly on the top of the
standard earhook with your thumb
to click it off the processor.
Click the Hybrid earhook into place.
2
Carefully slide the receiver cable
3
plug into the sound processor.
It should click securely into place.
4
If necessary, carefully twist it until
you feel the click.
Store your processor at night in a UV
protected dry aid kit or drying pack.
You can store the processor fully
assembled for short periods.
Storage cases are available from
Cochlear. Buy dry aid kits and drying
packs from Cochlear or pharmacies
and read the instructions for use.
For long term storage, remove the
batteries and store them separately
from each other to prevent shorting.
Storage cases are available from
Cochlear.
Warning
All drying chemicals must be
kept away from young children.
Swallowing this material can
cause serious internal injuries.
30 323649 Iss 3 CP9 00 Series Sound Processors | User guides
Cochlear Limited 2011
Cochlear Limited 2011
CP90 0 Series Sound Pro cessors | User guides 31
Page 17

Charge
Charge
Batteries ........................................................................................................................33
Battery life expectancy ..............................................................................................33
Replace the battery.................................................................................................... 34
Lock the battery to the processing unit .................................................................35
Lock and unlock the tamper resistant battery cover .......................................... 36
The standard battery has a tamper resistant lock
to help prevent children opening the battery cover. ......................................... 36
Charge rechargeable battery modules....................................................................37
Change disposable batteries .................................................................................... 38
Batteries
You have a choice of three battery types with the CP900 series system:
The Cochlear Nucleus CP900 Series
Standard Rechargeable Battery
module.
The Cochlear Nucleus CP900 Series
Compact Rechargeable Battery
module.
The Cochlear Nucleus CP900 Series
Standard Battery module, which uses
disposable batteries and has a tamper
resistant lock.
Battery life expectancy
Battery life varies according to the programs used each day, the thickness of skin
covering your implant, and the type of battery. Use 675 zinc/air batteries in the
standard battery module for longest battery life. To get the longest life from the
rechargeable batteries, always recharge before use. Rechargeable batteries may
take longer to fully recharge with age and should be replaced as needed.
Cochlear Limited 201132 323649 I ss 3 CP900 Series Sound Processors | User guides
CP900 Series Sound Pro cessors | User guides 33Cochlear Limited 2011
Page 18

Charge
Childproofing Tip
Replace the battery
To remove the battery:
To attach the battery:
Twist the battery module as shown
1
to remove it from the processing
unit.
Touch the battery module and
1
processing unit at an angle so their
parts fi t together.
Lock the battery to the processing unit
Caution
Always check this lock is unlocked before attaching or removing the
battery module.
Lock the CP910 Processing Unit:
Carefully lift open the accessory
1
port cover with your Cochlear
screwdriver. Do not twist the
cover.
Push the lock to the far left to
2
lock the battery module.
Twist the battery module as shown
2
to attach the two parts.
Cochlear Limited 201134 323649 Iss 3 CP900 Seri es Sound Process ors | User guides
Push the lock to the far right with
3
your Cochlear screwdriver to
unlock the battery module.
Carefully close the cover by
4
pushing in the top hinge fi rst.
CP90 0 Series Sound Pro cessors | User guides 35Coc hlear Limited 2011
Page 19

Charge
Charge rechargeable battery modules
Lock the CP920 processing unit
1
2
Childproofing Tip
Push the lock to the far left with
your Cochlear screwdriver to
lock the battery module.
Push the lock to the far right to
unlock the battery module.
This image will show lights.
Angle and fi t the rechargeable
1
battery into a socket on the
Cochlear Nucleus Battery Charger.
Twist clockwise to connect.
2
Connect the battery charger to the
3
power adaptor, plug it into mains
power and switch on.
Lock and unlock the tamper resistant
battery cover
The standard battery has a tamper resistant lock to help prevent children
opening the battery cover.
To lock, turn the locking screw
1
clockwise with the CP800
screwdriver until it is in a horizontal
position.
To unlock, turn the locking screw
2
anticlockwise until it is in a
vertical position.
Cochlear Limited 201136 323649 Iss 3 CP900 Series Sound Process ors | User guides
Battery wall power light What it means
Steady green
Does not light up Power is not plugged in or turned on at the
Battery module light What it means
Steady orange
Steady green
Flashing orange
Does not light up Battery module is not properly placed, or
Battery charger power is on
power socket, or there is no power.
Battery module is recharging.
Battery module is fully recharged.
There is a problem with the battery module.
there is no power.
CP90 0 Series Sound Pro cessors | User guides 37Cochlear Limited 2011
Page 20

Charge
Change disposable batteries
Care
The Cochlear Nucleus CP900 Series Tamper Resistant Battery Cover uses two
high power zinc/air disposable batteries. Cochlear recommends Power One p675
Implant plus zinc/air batteries. Do not use silver oxide or alkaline batteries.
Pull the battery cover away from
1
the battery holder.
Remove the batteries from the
2
battery holder.
Remove the new batteries from the
3
packet and let them stand for a few
seconds.
Care for your sound processor ................................................................................ 40
Replace microphone protectors ............................................................................... 41
Care for your battery charger ...................................................................................43
Change earhooks ........................................................................................................ 44
Change the coil cable ................................................................................................ 48
Change the coil magnet ............................................................................................ 49
Care for your acoustic component ......................................................................... 50
Insert the batteries into the holder
4
with the fl at side (positive terminal)
facing up.
Replace the battery cover by sliding
5
it up towards the processing unit.
Cochlear Limited 201138 323649 Iss 3 CP9 00 Series Sound Proces sors | User guides
CP90 0 Series Sound Pro cessors | User guides 39Cochlear Limited 2011
Page 21

Care
Care for your sound processor
Every day
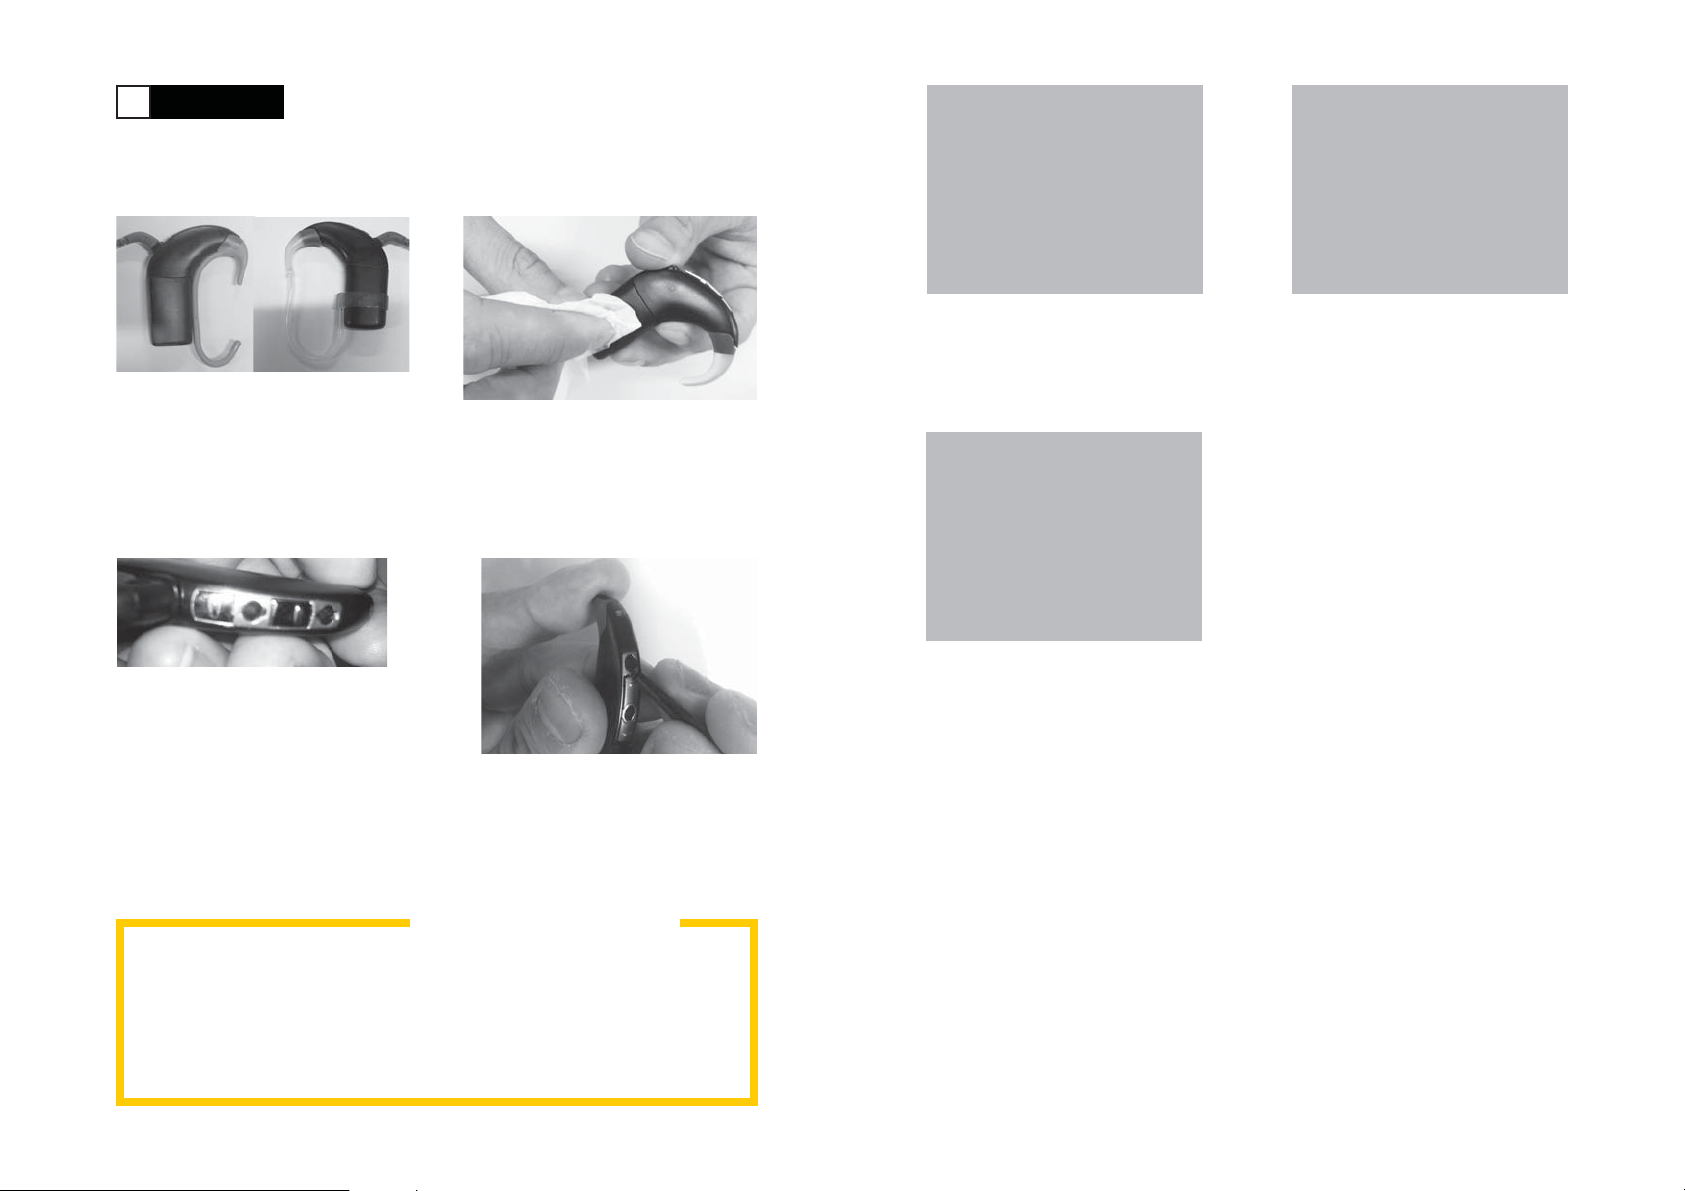
Check all parts for dirt and moisture. Wipe the processor, coil cable, earhook,
covers, Snugfi ts and Mic Lock cables with a soft dry cloth. (You can leave the
earhooks, Snugfi ts, Mic Locks or coil cables on the processor while cleaning.)
Keep your processor free from moisture by drying it every night in your
drying pack.
Remove the battery and make sure all the contacts are clean. Carefully tap
or blow on them to remove any dirt.
Replace microphone protectors
Replace your microphone protectors every three months, whenever they look dirty
or whenever you notice any loss in sound quality. Always replace both protectors
at the same time.
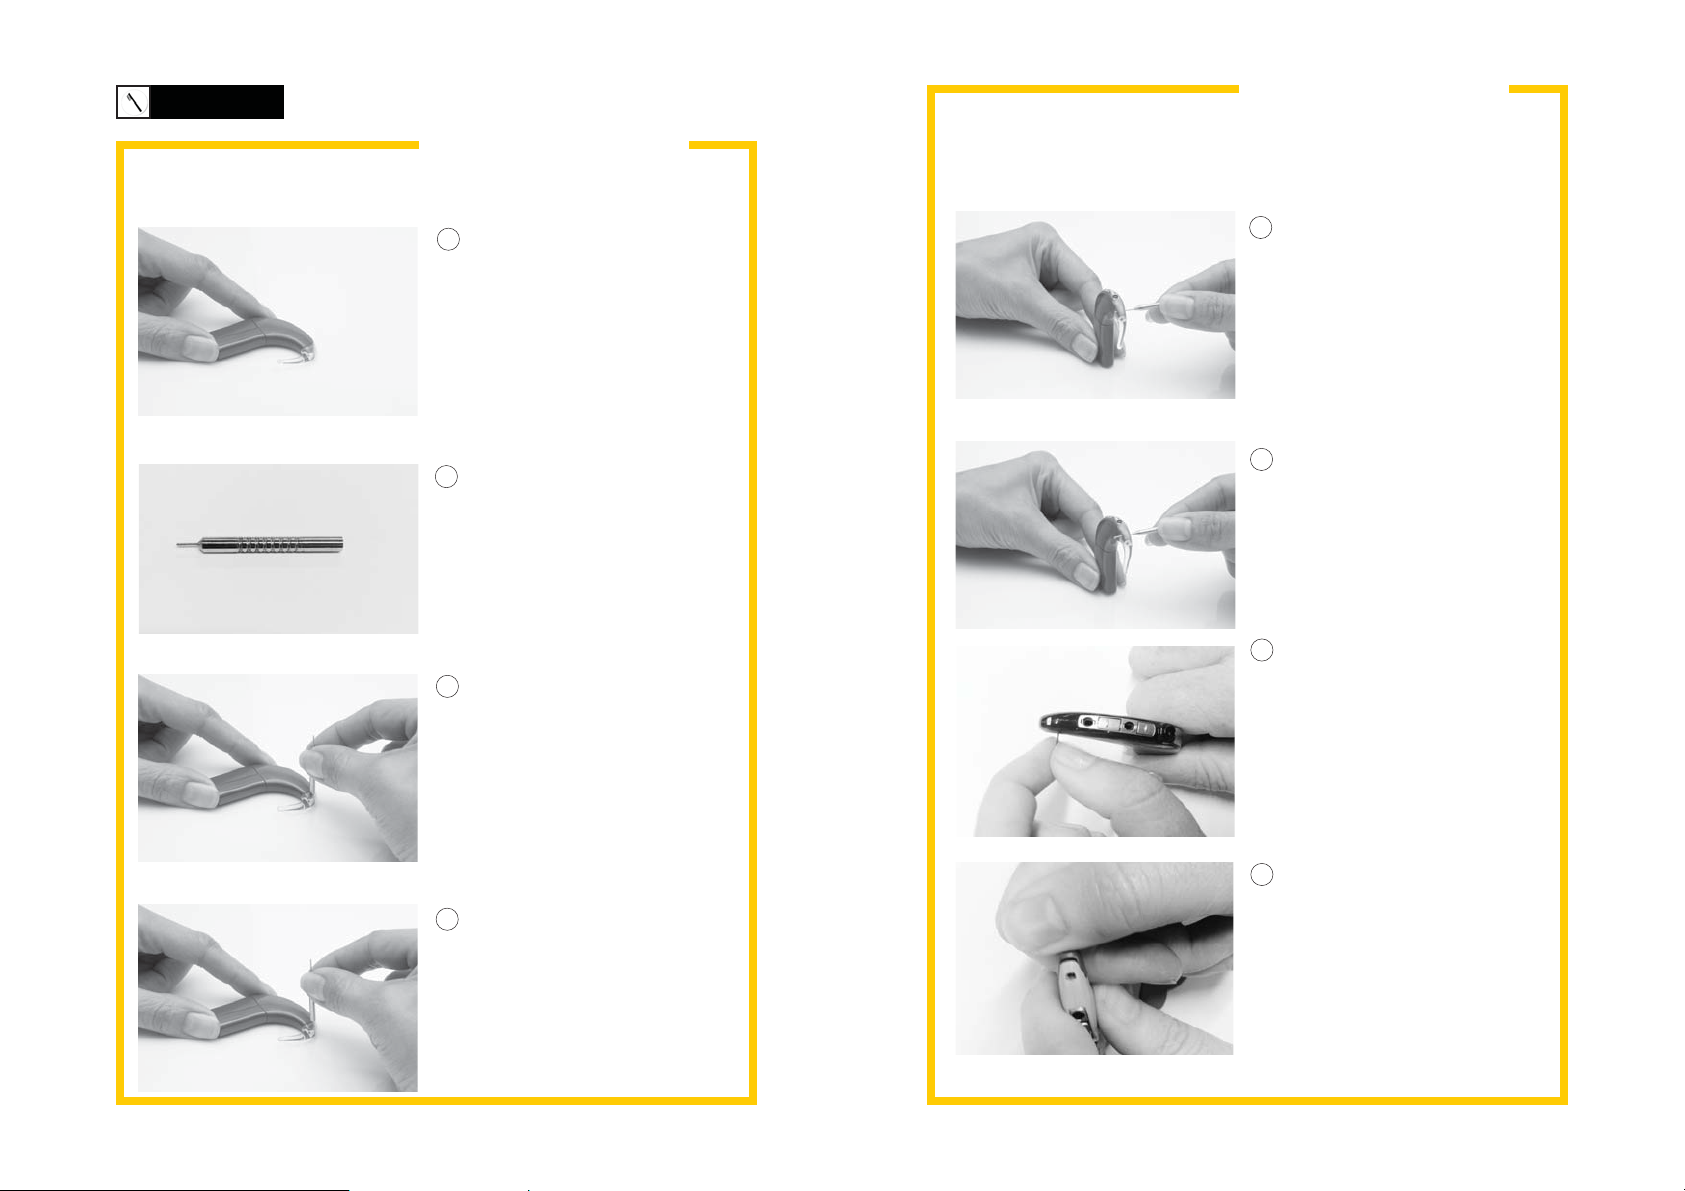
To remove microphone protectors:
Remove the protective cap from
1
the Cochlear Nucleus Microphone
Protector Removal Tool.
Make sure the accessory port and audio accessories are clean. Blow on the
accessory port to remove any dust and clean accessories with a soft dry
cloth.
Check the microphone protectors for signs of dirt or grime and replace if
needed.
Every month
Replace the dry brick in your drying pack.
Check if earhooks or Snugfi ts are becoming loose or showing signs of wear.
Replace as needed.
Every three months
Replace the microphone protectors.
Note
If your sound processor is subject
to extreme conditions, you should
clean and replace parts more often
to keep it working at its best.
Warning
The removal tool is a sharp
object. It is not recommended
for use by children under the age
of 12 years.
Push the tip of the removal tool
2
under the edge of the microphone
protector. Do not push the tool into
the middle of the protector as you
might damage the microphone.
Carefully lift out the microphone
3
protector and discard.
Cochlear Limited 201140 323649 Iss 3 CP9 00 Series Sound Processors | Us er guides
CP90 0 Series Sound Pro cessors | User guides 41Coc hlear Limited 2011
Page 22

Care
Care for your battery charger
To insert new microphone protectors:
Pull the Cochlear Nucleus
1
Microphone Protector Applicator
out of its sleeve.
The top end of the applicator is
2
marked with an arrow. Hook the
top end onto the earhook.
Hook the bottom end onto the coil
3
cable.
Align the microphone protectors
4
with the microphones.
Every day:
Check your battery charger is clean. If you notice any dust or dirt:
1. Unplug the power adaptor and remove any battery modules.
2. Hold the charger upside down and tap it to remove any dirt from the
battery charger sockets. Carefully blowing on the battery charger sockets
may also help remove dirt.
3. Wipe the battery charger sockets with a soft dry cloth.
Cycle batteries in different sockets when recharging for a more even wear of
the sockets.
If it gets wet:
If the battery charger ever gets splashed with liquid, carefully shake out the
liquid and dry the charger for 24 hours. Do not use the charger until it is dry.
Press the microphone protectors
5
into the microphone holes one at
a time.
Remove the applicator by carefully
6
peeling it upwards from the coil
cable end.
Cochlear Limited 201142 323649 Iss 3 CP9 00 Series Sound Processors | User guides
CP90 0 Series Sound Pro cessors | User guides 43Coc hlear Limited 2011
Page 23
Care
Change earhooks
Cochlear Nucleus CP900 Series Standard Earhooks come in large, medium
and small sizes. The smallest earhook can be made tamper resistant and is
recommended for children under three. The acoustic component is worn with a
Cochlear Hybrid Earhook. (To change the hybrid earhook, see "Wearing/Removing
your acoustic component".)
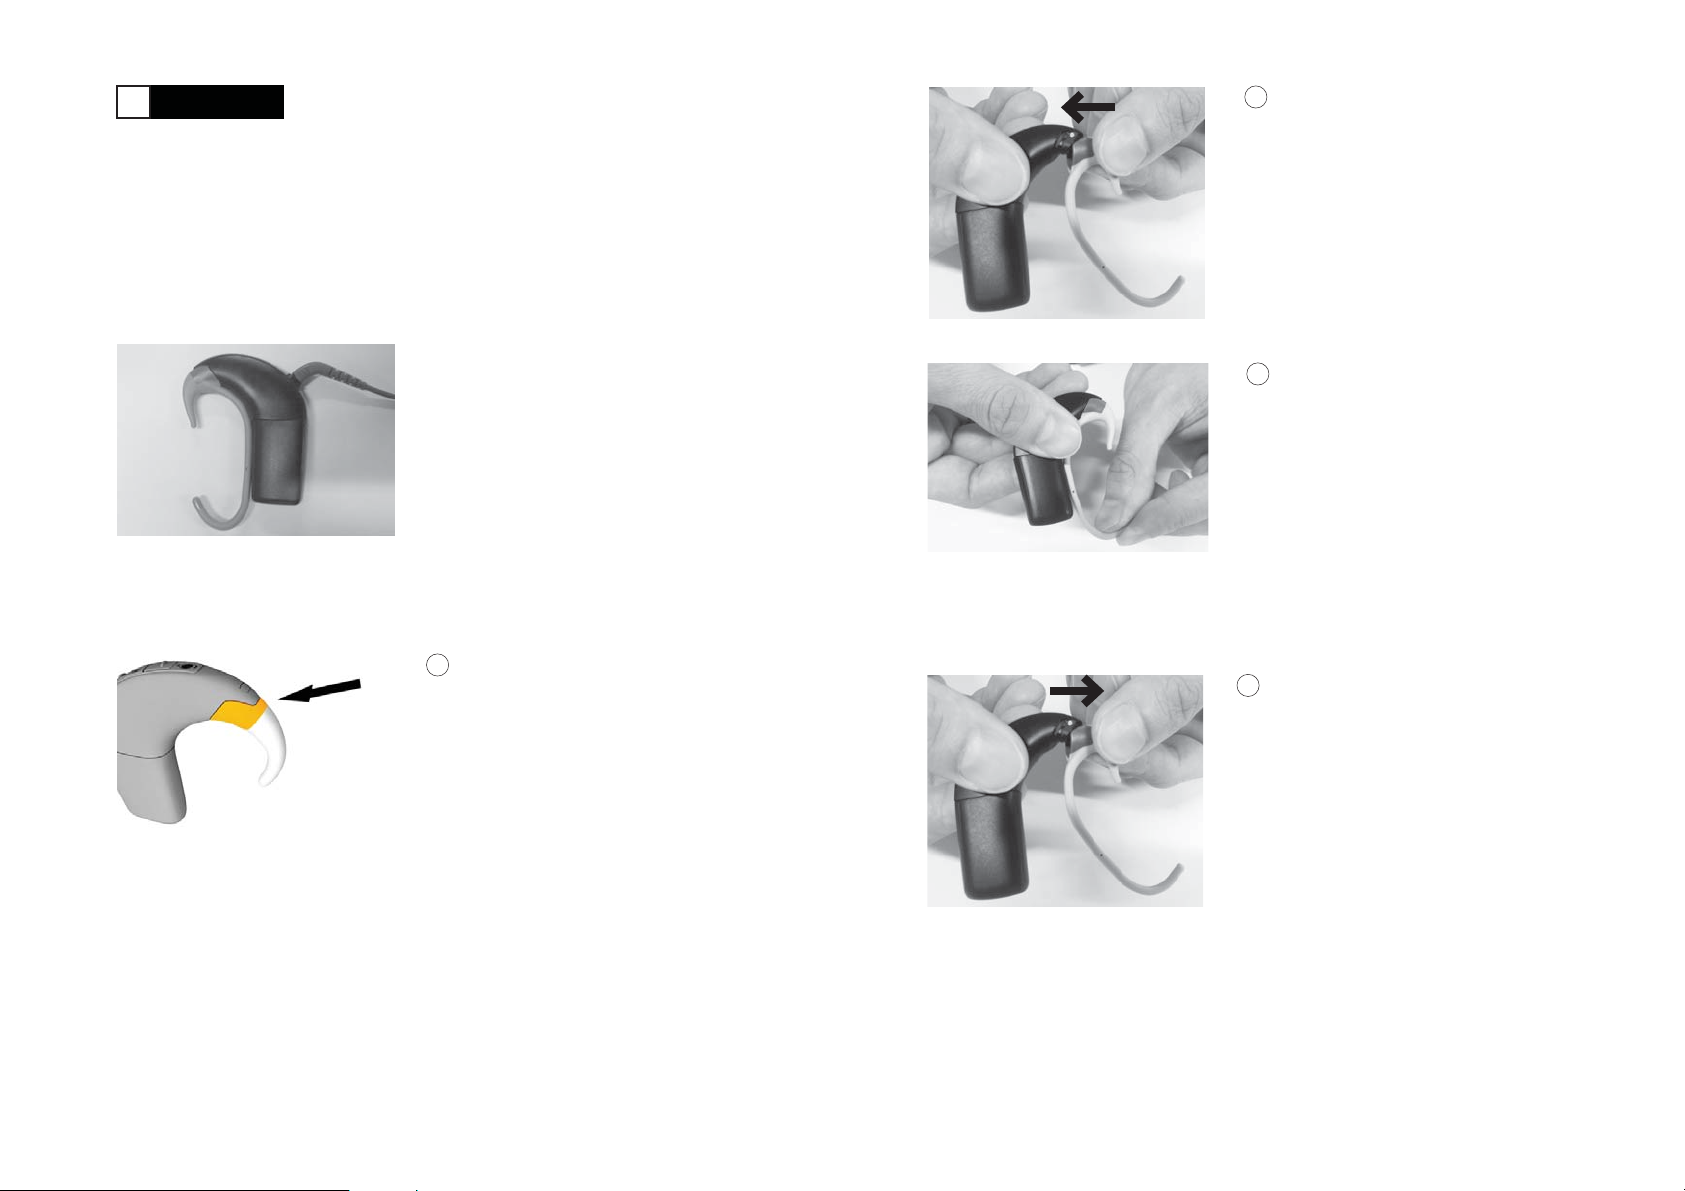
To change a standard earhook:
Press fi rmly on the top of the
1
earhook with your thumb and click
it off the sound processor.
Childproofing Tip
About the tamper resistant earhook:
The tamper resistant earhook can be locked to the processor with a pin to
reduce the risk of the earhook becoming a choking hazard for young children.
Older children and adults can wear it without the pin.
Click the standard earhook in place.
2
Note
Remove your earhook only when
necessary - it may become loose
if it is removed too often.
The tamper resistant earhook comes with a locking tool and fi tting pins.
Warning
The locking tool and pin is not
recommended for use by children
under 12. Do not let children attach
or remove the tamper resistant
earhook without adult supervision.
Cochlear Limited 201144 323649 Iss 3 CP9 00 Series Sound Processors | Us er guides
CP90 0 Series Sound Pro cessors | User guides 45Cochlear Limited 2011
Page 24
Care
Childproofing Tip
Attach the tamper resistant earhook
1
2
3
Childproofing Tip
Click the tamper resistant
earhook onto the processor.
Make sure the hole on the
earhook is aligned with the hole
on the processing unit.
Insert a fi tting pin into the hole
on the blunt end of the locking
tool.
Partly insert the fi tting pin into
the hole on the earhook.
Remove the tamper resistant earhook
1
2
3
Hold the processor as shown
and insert the pointed end of
the locking tool into the hole
on the earhook.
Push the tool into the hole to
partly remove the fi tting pin. Be
gentle as too much force may
damage the tool.
Lift out the earhook fi tting pin
with tweezers.
Flip the tool and use the pointed
4
end to push the pin fully into
the earhook. The pin should not
protrude from either side of
the earhook.
Press fi rmly on the top of the
4
earhook with your thumb and
click it off the sound processor
Cochlear Limited 201146 323649 Iss 3 CP9 00 Series Sou nd Processors | Us er guides
CP900 Series S ound Processors | User guides 47Cochlear Limited 2011
Page 25
Care
Change the coil magnet
Change the coil cable
The Cochlear Nucleus CP900 Series Coil Cable come in four lengths so you
can choose the most comfortable fi t. Only remove the coil cable when you are
changing it.
Hold the cable grip as shown
1
and fi rmly pull it straight out of
the processor. Do not tug on the
fl exible part of the cable.
Use your fi ngernails to hold the
2
cable grip as shown and pull the
cable fi rmly off the coil. Do not tug
on the fl exible part of the cable.
The strength of the Cochlear Nucleus CP900 Series Coil Magnet can be adjusted
by changing the magnet depth or by replacing with a magnet of a different
strength. If the magnet is too weak or strong the coil may fall off or cause
discomfort.
To change the strength of the magnet:
With fi nger grips facing up, turn the
1
magnet clockwise to increase the
magnet's strength.
Turn the magnet anticlockwise to
2
reduce its strength.
To change the coil magnet:
With fi nger grips facing up, unscrew
1
the magnet anticlockwise and
remove.
Push the new coil cable into the
3
processor until it clicks into place.
Push the new coil cable into the coil
4
until it clicks into place.
Cochlear Limited 201148 323649 Iss 3 CP9 00 Series Sou nd Processors | User guide s
Insert the new magnet into the coil
2
hole and turn it clockwise until it is
at a comfortable depth.
CP90 0 Series Sound Pro cessors | User guides 49Cochlear Limited 2011
Page 26

Care
Care for your acoustic component
Replace Power domes
The acoustic component accessory is used only by people who are set up to use
their processor in Hybrid mode.
Caution
Handle your sound processor and acoustic component with care
above fl at surfaces. Never drop them or twist the receiver cable.
If you use Power or Plus domes:
Every day:
Check the wax fi lter in the receiver and change it whenever it is clogged with
wax or the system does not sound normal.
Domes have an additional inbuilt fi lter. Check the inbuilt fi lter and change
the dome whenever it is clogged with wax, or whenever the dome is dirty,
discoloured or losing shape.
If you use Power or Micro moulds:
Every day:
Clean the earmould and receiver cable with the supplied brush, a soft dry
cloth or our recommended cleaning fl uids, Hadeo™ and Cedis® ONLY. Wipe
any traces of wax away from the opening of the vent.
Pull the dome off using your
1
fi ngernails if necessary and discard.
Push the new dome directly onto
2
the receiver.
Click it securely into place.
3
Check if the vent is clogged, and use the supplied vent cleaner to remove
wax as needed. Do NOT use the vent cleaner to clean any other part of the
system.
Check the wax fi lter and change whenever it is clogged with wax or the
system does not sound normal.
Note
Micro moulds can use WaxStop fi lters ONLY. Power moulds can use
either NoWax or WaxStop fi lters.
Cochlear Limited 201150 323649 Iss 3 CP900 Series Sound Process ors | User guides
Replace Plus domes
Follow the directions for replacing Power domes and add the following step:
When fi tting a Plus dome, the outer
4
sleeve should face down.
CP90 0 Series Sound Pro cessors | User guides 51Cochlear Limited 2011
Page 27

Care
Change wax fi lters
Caution
Wax fi lters must ALWAYS be used with the acoustic component
and replaced regularly.
Replace a NoWax fi lter
Power moulds (only) can use a NoWax fi lter in the sound outlet. Change the fi lter
whenever it is clogged with wax or whenever the system does not sound normal.
Remove a new NoWax tool from
1
its shell. One point on the tool has
a removal tool and the other point
has the new fi lter.
Insert the removal tool into the
2
existing wax fi lter and work it out
of the Power mould.
Replace a WaxStop fi lter
Micro moulds use a WaxStop fi lter in the sound outlet. Power moulds use either
a WaxStop fi lter or a NoWax fi lter. Power and Plus domes must be worn with a
WaxStop fi lter in the receiver.
Remove a WaxStop tool from
1
its shell. One end of the tool has
a new fi lter and the other has a
removal tool.
Insert the removal tool into the
2
existing wax fi lter.
Pull the used fi lter out slowly,
3
keeping the tool straight.
Push the new fi lter into the sound
3
outlet on the mould and dispose of
the tool and used fi lter.
Cochlear Limited 201152 323649 I ss 3 CP900 Series Sound Processors | User guides
Flip the tool and push the new fi lter
4
into the sound outlet. Carefully pull
the tool free and dispose of the
used tool and fi lter.
CP90 0 Series Sound Pro cessors | User guides 53Cochlear Limited 2011
Page 28
Lights, beeps and buttons
Lights, beeps and buttons
Lights
Your clinician can set up your processor to show some or all of the following light
indications.
Lights ..............................................................................................................................55
Beeps ..............................................................................................................................56
Button controls in advanced mode .........................................................................57
Light What it means
Short green fl ashes
Steady orange while
lower button is pressed
Short green fl ashes
Single green fl ash
Green followed by orange fl ash Locking processor buttons.
Orange followed by green fl ash Unlocking processor buttons.
Orange fl ash when pressing buttons Processor buttons are locked.
Long fl ash of blue Changing between microphones to
Long fl ash of green Changing between the telecoil or
Constant quick green fl ashes Processor is receiving sound from the
Turning on processor. The number of
fl ashes indicates the number of the
selected program.
Turning off processor.
Changing the program. The number
of fl ashes indicates the number of the
selected program e.g. 2 fl ashes for
program 2.
Changing volume or sensitivity level.
the telecoil or audio accessory
audio accessory to the microphones.
microphones
Constant quick blue fl ashes
Cochlear Limited 201154 323649 Iss 3 CP9 00 Series Sound Processors | User guides Cochlea r Limited 2011 CP90 0 Series Sound Pro cessors | User guides 55
Processor is receiving sound from
telecoil or audio accessory
Page 29

Lights, beeps and buttons
Button controls in advanced mode
Flash of orange every second Coil is off, or processor is not
connected to the correct implant.
Quick fl ashes of orange
Steady orange General fault:
Processor battery is empty.
• Fault with processor
• Corrupt program
• Fault and coil off error at the same
time
• Fault with acoustic component
while in Hybrid mode.
Beeps
Your clinician can set up your processor so you can hear the following beeps.
Beep What it means
Short high beeps
High beep
... Long high beep
... ... Long low beeps
Short low beep when you press a button
Short low beeps
Short low beeps
Changing the program. The
number of beeps indicates the
number of the selected program.
Changing volume or sensitivity
level.
Switching between using the
microphones and the telecoil or
audio accessory.
General fault.
Processor buttons are locked.
Processor battery is low.
Battery is empty and processor
is turning off.
Sound processors can be set up in Advanced mode by your clinician to give you
extra control over the volume and sensitivity of the sound you hear.
Turn processor on and off
Press and hold upper and lower buttons
at the same time. Pressing and holding
the lower button will only turn on the
processor.
Change program
Press and hold the lower button.
Turn telecoil/audio accessory on and off.
Press and hold the upper button to
switch between microphones and
telecoil/audio accessory.
Cochlear Limited 201156 323649 Iss 3 CP900 Series Sound Process ors | User guides Cochlear Limited 2011 CP90 0 Series Sound Processors | User guides 57
Page 30

Lights, beeps and buttons
Lock/unlock processor buttons
Quick-press both the upper and lower
buttons at the same time.
Change volume or sensitivity
In Advanced mode, you can choose to control volume and sensitivity with your
remote and the buttons on your processor. See the user guides for the CR210 and
CR230 remotes for more information.
Select "Volume" via your remote and use the buttons below to control the
loudness of sound.
General warnings and cautions
Processor and parts
• Do not push the master volume too high for comfort in case a loud noise occurs nearby.
• Do not place your processor or parts in nose or mouth or other body openings.
• Do not use your processor or parts in a way that will restrict your airways (e.g. when
using LiteWear or long coil cable).
• Do not let your processor or parts entangle with any jewellery (e.g. earhook and
earrings) or machinery.
• Do not apply continued pressure to the coil when in contact with the skin (e.g. sleeping
while lying on coil, or using tight-fi tting headwear).
• Remove the processor and coil immediately if there is any discomfort or pain (e.g. if
device becomes hot, or sound is uncomfortably loud) and inform clinician.
• Do not attach or wear a body-worn battery confi guration beneath layers of clothing in
direct contact with the skin (e.g. in pocket or under child's vest).
• Make sure all cables used by a child are securely attached to their clothing.
• Do not place processor or parts in any household devices (e.g. microwave oven, dryer).
• Do not modify your processor. Warranty will be void if modifi ed.
• Do not use a drying aid that has an Ultra Violet C (UVC) lamp (e.g. do not use the
Freedom Dry and Store).
• Store spare magnets safely and away from cards that may have a magnetic strip (e.g.
credit cards, bus tickets, etc).
Select "Sensitivity" via your remote and use the buttons below to control the
range of sounds picked up by the processor e.g. soft, background, close or far
away.
Press the upper button to
increase volume or sensitivity.
Press the lower button to
decrease volume or sensitivity.
Cochlear Limited 201158 323649 Iss 3 CP900 Seri es Sound Process ors | User guides
Cochlear Limited 2011
CP90 0 Series Sound Processors | User guides 59
Page 31

General Warnings
Other information
Batteries
• Dispose of used batteries promptly and carefully, in accordance with local regulations.
Keep away from children.
• Wash hands after handling disposable batteries.
• Do not recharge disposable batteries.
• Do not disassemble, deform, immerse in water or dispose of batteries in fi re.
• Do not mix old and new batteries or batteries of different types or brands.
• Replace disposable batteries with high power Cochlear supplied or recommended zinc
air batteries only. We recommend Power One p675 Implant Plus zinc/air batteries. We
do not recommend using silver oxide or alkaline batteries.
• Only use rechargeable batteries and battery chargers supplied or recommended by
Cochlear. Use of other batteries or battery chargers may result in harm or injury.
• Do not allow children to replace batteries without adult supervision.
• Do not touch the battery charger contacts or allow children to use the battery charger
without adult supervision.
• Do not short-circuit batteries (e.g. do not let terminals of batteries contact each other,
do not place batteries loose in pockets, etc.).
• Store unused batteries in original packaging, in a cool dry place. When processor is not
in use, remove the disposable or rechargeable batteries and store separately in a cool
dry place.
• Do not expose batteries to heat (e.g. never leave batteries in sunlight, behind a window
or in a car).
• Do not use damaged or deformed batteries. If skin or eyes come into contact with
battery fl uid or liquid, wash out with water and seek medical attention immediately.
• Never put batteries in mouth. If swallowed, contact your physician or local Poison
Information Centre.
• Please contact your clinician for battery service.
Acoustic Component
• Refi t and replace hard earmoulds regularly. Hard earmoulds can cause deformation
of the ear canal. Have them refi tted every two years for adults and more regularly for
children.
Product component dimensions (Typical values)
Component Length Width Depth External diameter
CP910 processing
51.3 mm 47.7 mm 9.0 mm NA
unit
CP920 processing
39.1 mm 47.7 mm 9.0 mm NA
unit
Standard battery
28.0 mm 9.0 mm 19.0 mm
NA
module
Compact
19.0 mm 9.0 mm 19.0 mm
NA
rechargeable
battery module
Standard
28.0 mm 9.0 mm 19.0 mm
NA
rechargeable
battery module
Coil 8.0 mm 32.0 mm
Weight (Typical values. All weights are measured with medium earhook)
Component Weight
CP910 processor (no battery) 5.7 g
CP920 processing unit (no battery) 5.0 g
CP910 processor with compact rechargeable battery 10.5 g
CP910 processor with standard
CP910 processor with Zinc/Air batteries 12.8 g
CP920 processor with compact rechargeable battery 9.8 g
CP920 processor with standard rechargeable battery
CP920 processor with Zinc/Air batteries
Coil (without coil magnet) 5.0 g
rechargeable
battery 13.0 g
12.4 g
12.1 g
Cochlear Limited 201160 323649 Iss 3 CP9 00 Series Sound Proces sors | User guide s
Cochlear Limited 2011
CP90 0 Series Sound Pro cessors | User guides 61
Page 32

Other information
Operating characteristics
Processing unit
Standard battery module
Check the battery manufacturer’s recommended operating conditions for
disposable batteries used in your processor.
Characteristic Value/range
Sound input frequency range 100 Hz to 8 kHz
Operating voltage 2.00 V to 4.25 V
Power consumption 20 mW to 100 mW
Push-button functions Turn processor on and off, turn
telecoil/audio accessory on and off,
change program, lock/unlock buttons,
change sensitivity or volume level.
Battery module
Type Capacity/voltage range
Standard battery module Two PR44 (Zinc/Air) button cell
batteries. 1.45 V (nominal) each.
Cochlear recommends Power One
p675 Implant Plus zinc/air batteries.
Compact rechargeable battery module 120 mAh / 3.0 V to 4.2 V
Standard rechargeable battery module 205 mAH / 3.0 V to 4.2 V
Coil
Characteristic Value/range
Operating voltage 2.0 V to 2.6 V
Operating frequency 5 MHz
Environmental conditions
Processing unit, coil, coil cable and accessories
Condition Minimum Maximum
Storage temperature -40 ºC +50 ºC
Storage relative humidity 0% RH 90% RH
Operating pressure 700 hPa 1030 hPA
Operating temperature +5 ºC +50 ºC
Operating relative humidity 0% RH 90% RH
The processing unit comprises:
• Two omni-directional microphones for receiving sound.
• An internal telecoil for receiving magnetic fi elds radiated by phones, neckloops
and roomloops.
• Custom analogue and digital integrated circuits with digital signal processing
(DSP) and bi-directional wireless communication capabilities.
• A tri-colour visual indication of processor function or problem.
• Two push-buttons to allow user control of key features.
• CP910 only – Custom 4-pin accessory connector for connection of audio
accessories.
• Custom 4-pin coil connector for connection of the coil cable.
• A range of earhooks.
The batteries provide power to the processor.
The coil acts as a transformer coupling that transfers energy and data to the
implant.
Materials
• Processing unit: copolyester
• Battery modules (all types) are made of copolyester
• Coil is made of polypropylene (PP), thermoplastic elastomer (TPE)
• Magnet casing is made of acrylonitrile butadiene styrene (ABS)
• Coil cable sheath is made of polyvinyl chloride (PVC)
• Coil cable plugs are made of PP & TPE
• LiteWear cable is of polyester, TPE & PVC (same construction as the coil cable)
sheath is PVC; plugs/strain relief are PP and TPE
• LiteWear connection boots are made of copolyester
• LiteWear retention case is made of polyamide
62 323649 Iss 3 CP9 00 Series Sound Proces sors | User guides
Cochlear Limited 2011
Cochlear Limited 2011
CP90 0 Series Sound Pro cessors | User guides 63
Page 33

Other information
FCC (Federal Communications Commission) and
• LiteWear Fixing Aids are made of polycarbonate
• Processor covers are made of polystyrene and polycarbonate
• Coil covers are made of polycarbonate
• Hybrid materials for outer sheathing of the housing adaptor and the outer cable
sheathing is made of polyamide
• Custom moulds are made of Stereo Lithography Acrylic covered with a UVcured lacquer
• Plus Domes are made of elastosil silicone polymer
• Power Domes are made of TPE
Certifi cation and applied standards
The CP900 series sound processors fulfi l the essential requirements listed in
Annex 1 of the EC directive 90/385/EEC on Active Implantable Medical Devices as
last amended by EC Directive 2007/47/EEC.
Equipment classifi cation
Your processor is internally powered equipment Type B as described in the
international standard IEC 60601-1:2005, Medical Electrical Equipment - Part 1:
Basic Safety and Essential Performance.
Canadian IC compliance
This device complies with part 15 of the FCC Rules and with RSS-210 of Industry
Canada. Operation is subject to the following two conditions:
• This device may not cause harmful interference.
• This device must accept any interference received, including interference that
may cause undesired operation.
Changes or modifi cations made to this equipment not expressly approved by
Cochlear Limited may void the FCC authorization to operate this equipment.
This equipment has been tested and found to comply with the limits for a Class
B digital device, pursuant to Part 15 of the FCC Rules. These limits are designed
to provide reasonable protection against harmful interference in a residential
installation. This equipment generates, uses and can radiate radio frequency
energy and, if not installed and used in accordance with the instructions, may
cause harmful interference to radio communications. However, there is no
guarantee that interference will not occur in a particular installation. If this
equipment does cause harmful interference to radio or television reception, which
can be determined by turning the equipment off and on, the user is encouraged to
try to correct the interference by one or more of the following measures:
• Reorient or relocate the receiving antenna.
• Increase the separation between the equipment and receiver.
• Consult the dealer or an experienced radio/TV technician for help.
FCC ID: WTOP900
IC ID: 8039A-P900
64 323649 Iss 3 CP9 00 Series Sound Processors | Us er guides
Cochlear Limited 2011
Cochlear Limited 2011
CP90 0 Series Sound Pro cessors | User guides 65
Page 34

Other information
0
Labelling symbols
The symbols below are found on your processor components and
packaging:
Consult instructions for use
Catalogue number
Batch code
Serial number
Temperature limitations
90
%
Relative humidity limitations
By prescription
Certifi cation Japan
Certifi cation Australia
Legal statement
The statements made in this guide are believed to be true and correct as of the
date of publication. However, specifi cations are subject to change without notice.
™
Nucleus® Cochlear
patents.
© Cochlear Limited 2012
implant systems are covered by one or more international
Certifi cation New Zealand
Type B applied part
Recyclable material
Segregate electronic waste
Do not dispose in fi re
CE Registration Mark
66 323649 Iss 3 CP9 00 Series Sound Processors | User guides
Cochlear Limited 2011
Cochlear Limited 2011
CP90 0 Series Sound Pro cessors | User guides 67
Page 35

Cochlear Ltd (ABN 96 002 618 073) 14 Mars Road, Lane Cove NSW 2066, Australia Tel: 61 2 9428 6555 Fax: 61 2 9428 6352
6
3
6
Cochlear Americas 13059 E Peakview Avenue, Centennial, CO 80111, USA Tel: 1 303 790 9010 Fax: 1 303 792 9025
Cochlear AG European Headquarters, Peter Merian-Weg 4, CH - 4052 Basel, Switzerland Tel: 41 61 205 0404 Fax: 41 61 205 0405
Cochlear Deutschland GmbH & Co. KG Karl-Wiechert-Allee 76A, D-30625 Hannover
Germany Tel: 49 511 542 770 Fax: 49 511 542 7770
Cochlear Europe Ltd
Nihon Cochlear Co Ltd
Cochlear (HK) Ltd
Cochlear Medical Device (Beijing) Co Ltd Unit 2208 Gemdale Tower B, 91 Jianguo Road, Chaoyang District, Beijing 100022
P.R. China Tel: 86 10 5909 7800 Fax: 86 10 5909 7900
Cochlear Ltd (Singapore Branch) 6 Sin Ming Road, #01-16 Sin Ming Plaza Tower 2, Singapore 575585 Tel: 65 6553 3814 Fax: 65 6451 4
Cochlear Korea Ltd 1st floor, Cheongwon building, 828-5, Yuksam dong, Kangnam gu, Seoul, Korea Tel: 82 2 533 4663 Fax: 82 2 533 8
Cochlear Benelux NV Schaliënhoevedreef 20i, B - 2800 Mechelen, Belgium Tel: 32 1579 5511 Fax: 32 1579 5500
Cochlear Italia S.r.l. Via Larga 33, 40138 Bologna, Italia Tel: 39 051 601 53 11 Fax: 39 051 39 20 62
Cochlear France S.A.S.
Cochlear Nordic AB Konstruktionsvägen 14, SE - 435 33 Mölnlycke, Sweden Tel: 46 31 335 14 61 Fax: 46 31 335 14 60
Cochlear Tıbbi Cihazlar ve Sağlık Hizmetleri Ltd. Sti. Cubuklu Mah. Bogazici Cad., Bogazici Plaza No: 6/1, Kavacik
TR - 34805 Beykoz-Istanbul, Turkey Tel: 90 216 538 5900 Fax: 90 216 538 5919
Cochlear Canada Inc 2500-120 Adelaide Street West, Toronto, ON M5H 1T1 Canada Tel: 1 416 972 5082 Fax: 1 416 972 5083
Cochlear Medical Device Company India Pvt Ltd Ground floor Platina Bldg, Plot no C 59, G Block, Bandra Kurla Complex,
Bandra East, Mumbai 400051, India Tel: 91 22 61121111 Fax: 91 22 61121100
Nucleu s is a registered tra demark of Cochlear Limite d.
Cochlea r and the elliptic al logo, Snugfi t, Mic Lock and Freedom are t rademarks of Cochlea r Limited.
Dry and Store is a regi stered tradem ark of Ear Technology Corp oration.
The statement s made in this guide a re believed to be tr ue and correct in every detail as of the date of pu blication. However,
specifi catio ns are subject to change wit hout notice.
6 Dashwood Lang Road, Bourne Business Park, Addlestone, Surrey KT15 2HJ, United Kingdom Tel: 44 1932 87 1500 Fax: 44 1932 87 152
Ochanomizu-Motomachi Bldg, 2-3-7 Hongo, Bunkyo-Ku, Tokyo 113-0033, Japan Tel: 81 3 3817 0241 Fax: 81 3 3817 024
Unit 1810, Hopewell Centre, 183 Queens Road East, Wan Chai, Hong Kong SAR Tel: 852 2530 5773 Fax: 852 2530 518
Route de l’Orme aux Merisiers, Z.I. Les Algorithmes - Bât. Homère, 91190 Saint Aubin, France Tel: 33 811 111 993 Fax: 33 160 19
Printed in Australia
323649 ISS3 A PR12
 Loading...