

Page 1
Cochlear
screen
decrease/
Accessories
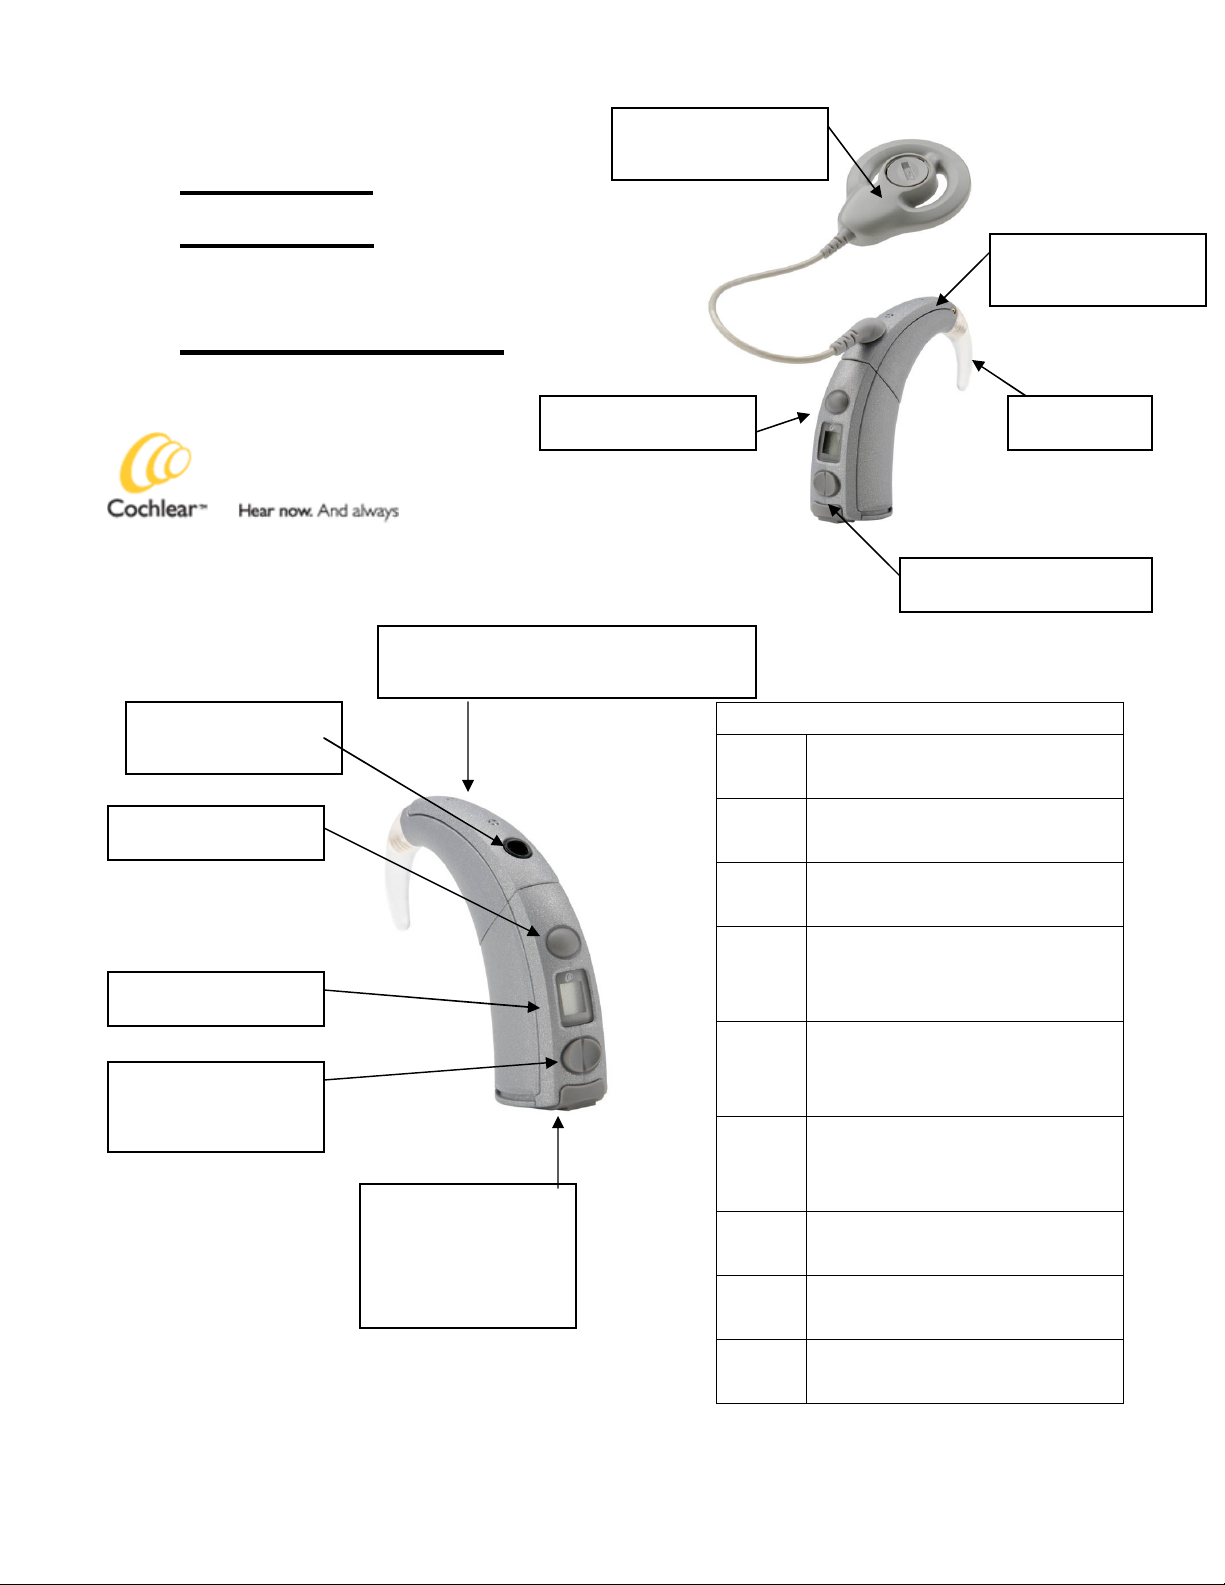
Two microphones are situated
on top of the processor
Transmitting coil
fits here.
BTE controller
Processor unit
Transmitting
cable and
coil
earhook
Acc
essories socket
Freedom
Behind the ear
selector button
increase buttons
socket is situated
on base of
controller
Key to screen messages
P1 Program 1 currently in
use
M Microphones are in
operation
T Sound is being heard
through telecoil only.
MT Sound is being heard
through microphone and
telecoil
S Sensitivity level currently
displayed (0-20,
recommended = 12)
V Volume level currently
displayed (0-9,
recommended = 9)
H Help message (See
troubleshooting)
L Button lock is in
operation
EA Indicates an accessory
has been connected
Page 2
Two parts
The system consists of two parts: the processor unit (top) and the
controller unit (bottom). To separate the two, in order to change the
controller unit, gently twist the processor and controller units in
opposite directions and pull apart.
To reassemble, hold the controller unit slightly to the left of the final
alignment and twist in a clockwise direction. It will click into place.
There is no need to apply any force to do this!
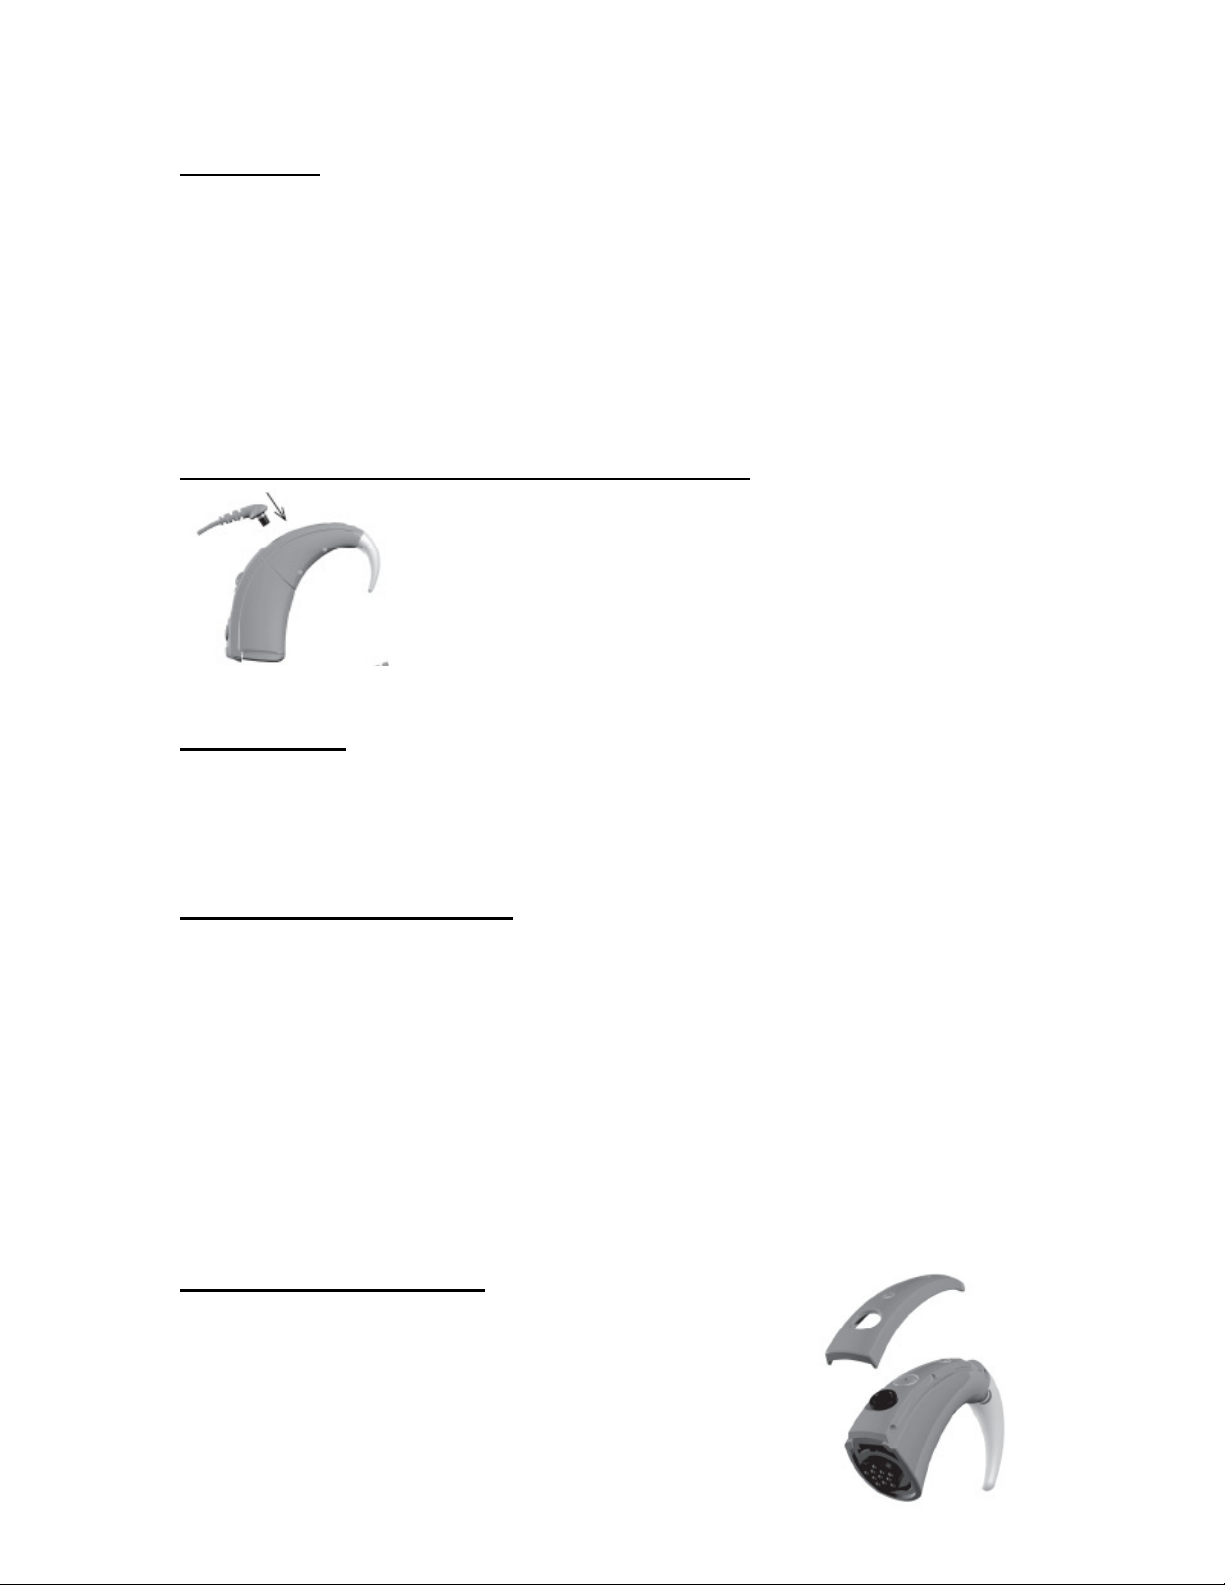
To attach the coil and transmitting cable
This needs to be pushed into the socket as shown.
Hold with two fingers when pulling it out.
The Magnet
To hold it less firmly against the head, turn it anti-clockwise.
To tighten the hold, turn it clockwise.
Do not change the magnet strength without consulting the clinic.
To change the batteries
Put finger nails in slots at base of the controller unit and pull down
the battery compartment.
After removing sticky label from the battery, leave for one minute
before placing the battery into unit.
Batteries only fit one way, there is no need to force them (top down,
opposite to 3G!). Replace all three at once.
Replace the battery compartment and make sure it clicks into place.
A rechargeable battery pack is also available from Cochlear which fits
into the same compartment.
Microphone Protector
To remove the cover: starting at the bottom,
slide your finger along the edge of the protector
until it comes off.
To replace it: simply click it back into place.
Page 3

How to:
Turn
on and off
Press and hold selector button for a
few
Change
program
Push the selector button briefly
, continuing
Change
sensitivity
Press increase or decrease button once. The
Change
volume
Press the increase or decrease button once
Switch
to Telecoil
Press the increase and decrease buttons at
Button lock feature
If this is activated, it will not be possible to
To return to default
To return to the default settings from the las
t
seconds until display shows current program.
until the correct P number is on screen
letter ‘S’ will appear on the screen. Now
press the increase/ decrease buttons until the
desired level is reached.
and then press it again for slightly longer.
You may hear a beep and you will see a ‘V’ on
the screen. Now use the increase/ decrease
buttons to find the right volume setting.
the same time. You will see ‘T’ on the screen.
The telecoil is now activated. To deactivate,
repeat the same procedure. The clinic will
decide if the Telecoil should be used in
conjunction with the microphones or not.
– for younger
children who may
‘accidentally’ change
the settings.
change the settings using the buttons. To
activate press the decrease and selector
buttons at the same time. You will see +L on
the screen. To deactivate, repeat the same
procedure and you will see -L on the screen.
settings
clinic appointment, press and hold all three
buttons at the same time for a few seconds.
You will hear a beep. The screen will go
blank and then return to normal.
Earhook
The ear hook can be remoulded to fit the ear better by immersing it
in hot water for a few minutes and then bending it to fit. To remove
the ear hook from the processor unit, pull firmly and twist.
Page 4

Accessories
These include:
• Lapel microphone
• Monitor earphones (for checking the processor)
• TV hi-fi cable (for listening to equipment which is powered by
mains electricity)
• Personal audio cable (for listening to equipment which is
battery powered eg. iPod)
• FM cables
These connect into the accessories socket at the base of the
Freedom Processor. Lift the flap with your fingernail and then plug
the accessory into the socket
You then need to press both the increase and decrease buttons at
the same time. Once a connection has been made the letters ‘EA’
will appear briefly on the screen. Alternatively, turn the processor off
and back on and it will then recognise the new input.
For more information:
For more detailed information go to: www.cochlear.com where the
Freedom user manual can be downloaded.
To contact Cochlear directly: UK 01932 871500
 Loading...