

Page 1
Manufacturer:
Cochlear Bone Anchored Solutions AB
Regional offices:
Cochlear Ltd (ABN 96 002 618 073) 1 University Avenue, Macquarie University NSW 2109, Australia Tel: +61 2 9428 6555 Fax: +61 2 9428 6352
Cochlear Americas 13059 E Peakview Avenue, Centennial, CO 80111, USA Tel: +1 303 790 9010 Fax: +1 303 792 9025
Cochlear AG EMEA Headquarters, Peter Merian-Weg 4, 4052 Basel, Switzerland Tel: +41 61 205 0404 Fax: +41 61 205 0405
Local offices:
Cochlear Deutschland GmbH & Co. KG Karl-Wiechert-Allee 76A, D-30625 Hannover, Germany Tel: +49 511 542 770 Fax: +49 511 542 7770
Cochlear Europe Ltd
Nihon Cochlear Co Ltd Ochanomizu-Motomachi Bldg, 2-3-7 Hongo, Bunkyo-Ku, Tokyo 113-0033, Japan Tel: +81 3 3817 0241 Fax: +81 3 3817 0245
Cochlear (HK) Limited Unit 1810, Hopewell Centre, 183 Queens Road East, Wan Chai, Hong Kong SAR Tel: +852 2530 5773 Fax: +852 2530 5183
Cochlear Medical Device (Beijing) Co LtdUnit 2208-2212, Tower B, No.9 Gemdale Building, No.91 Jianguo Road, Chaoyang District, Beijing, PR China 100022
P.R. CHINA Tel: +86 10 5909 7800 Fax: (+86 10) 5909 7900
Cochlear Limited (Singapore Branch) 6 Sin Ming Road, #01-16 Sin Ming Plaza Tower 2, Singapore 575585 Tel: +65 6553 3814 Fax: +65 6451 4105
Cochlear Korea Ltd 1st floor, Cheongwon building, 828-5, Yuksam dong, Kangnam gu, Seoul, Korea Tel: +82 2 533 4663 Fax: +82 2 533 8408
Cochlear Benelux NV Schaliënhoevedreef 20 1, B - 2800 Mechelen, Belgium Tel: +32 1579 5511 Fax: +32 1579 5500
Cochlear Medical Device Company India (P) Ltd Platina Building, Ground Floor, Plot No. C-59, G-Block, BKC, Bandra (E), Mumbai – 400 0051, India
Tel: +91 22 6112 1111 Fax: +91 22 61121100
Cochlear Italia S.r.l Via Larga n°33, 40138 Bologna, Italia Tel: +39 051 601 53 11 Fax: +39 051 39 20 62
Cochlear France S.A.S.
Cochlear Nordic AB Konstruktionsvägen 14, SE - 435 33 Mölnlycke, Sweden Tel: +46 31 335 14 61 Fax: +46 31 335 14 60
Cochlear Tıbbi Cihazlar ve Sağlık Hizmetleri Ltd. Sti. Cubuklu Mah. Bogazici Cad., Bogazici Plaza No: 6/1, Kavacik,TR - 34805 Beykoz-Istanbul, Turkey
Tel: +90 216 538 5900 Fax: +90 216 538 5919
Cochlear Canada Inc 2500-120 Adelaide Street West, Toronto, ON M5H 1T1 Canada Tel: +1 416 972 5082 Fax: +1 416 972 5083
6 Dashwood Lang Road, Bourne Business Park, Addlestone, Surrey KT15 2HJ, United Kingdom Tel: +44 1932 87 1500 Fax: +44 1932 87 1526
Route de l’Orme aux Merisiers, Z.I. Les Algorithmes - Bât. Homère, 91190 Saint Aubin, France Tel: +33 811 111 993 Fax: +33 160 196 499
Konstruktionsvägen 14, SE - 435 33 Mölnlycke, Sweden Tel: +46 31 792 44 00 Fax: +46 31 792 46 95
www.cochlear.com
Baha® Attract System
User manual part B
3 9
GB FR ES PT
English Français Español Português
15 21
ZONE 8
Baha, Baha Divino, Baha Intenso and Vistafix are registered trademarks of Cochlear Bone
Anchored Solutions AB. Cochlear, Hear now. And always and the elliptical logo are either
trademarks or registered trademarks of Cochlear Limited.
© Cochlear Bone Anchored Solutions AB 2013. All rights reserved. APR13. Printed in Sweden.
Page 2
1
1
2
1
3
4
2
2
21
3
3
4
4
5
1
2
Page 3

English
Welcome
This guide includes tips and advice on how to best use and care for your Cochlear™
Baha® sound processor when using a magnet to connect it to your implant. By reading
this manual and keeping it handy for future reference, you’ll ensure that you get the
most benefit out of your Baha sound processor.
NOTE: This manual is to be seen as a complement to the sound processor manual part
A and does not replace it.
Introduction
This guide includes instructions on:
• Placing the SP magnet and sound processor
• Care, cleaning and maintenance
• Using accessories
• Troubleshooting
Note on figures: The figures included on the
front and back covers correspond to sections of
information in this manual which are common
to all Baha sound processors. Please reference
the appropriate figure when reading. The sound
processor images shown are representative only
and not to scale. The appearance of the sound
processor included in your kit may vary.
Your kit includes
the following items:
• Cochlear Baha sound processor
• Pack of batteries
• Safety line
• Share the Experience test rod
• Document pack (user manual, warranty card,
registration card, MRI card)
• Abutment cleaning brush
(not to be used with magnetic retention system)
• Abutment cover
(not to be used with magnetic retention system)
The exact items depend on your specific type of
processor.
3
Page 4

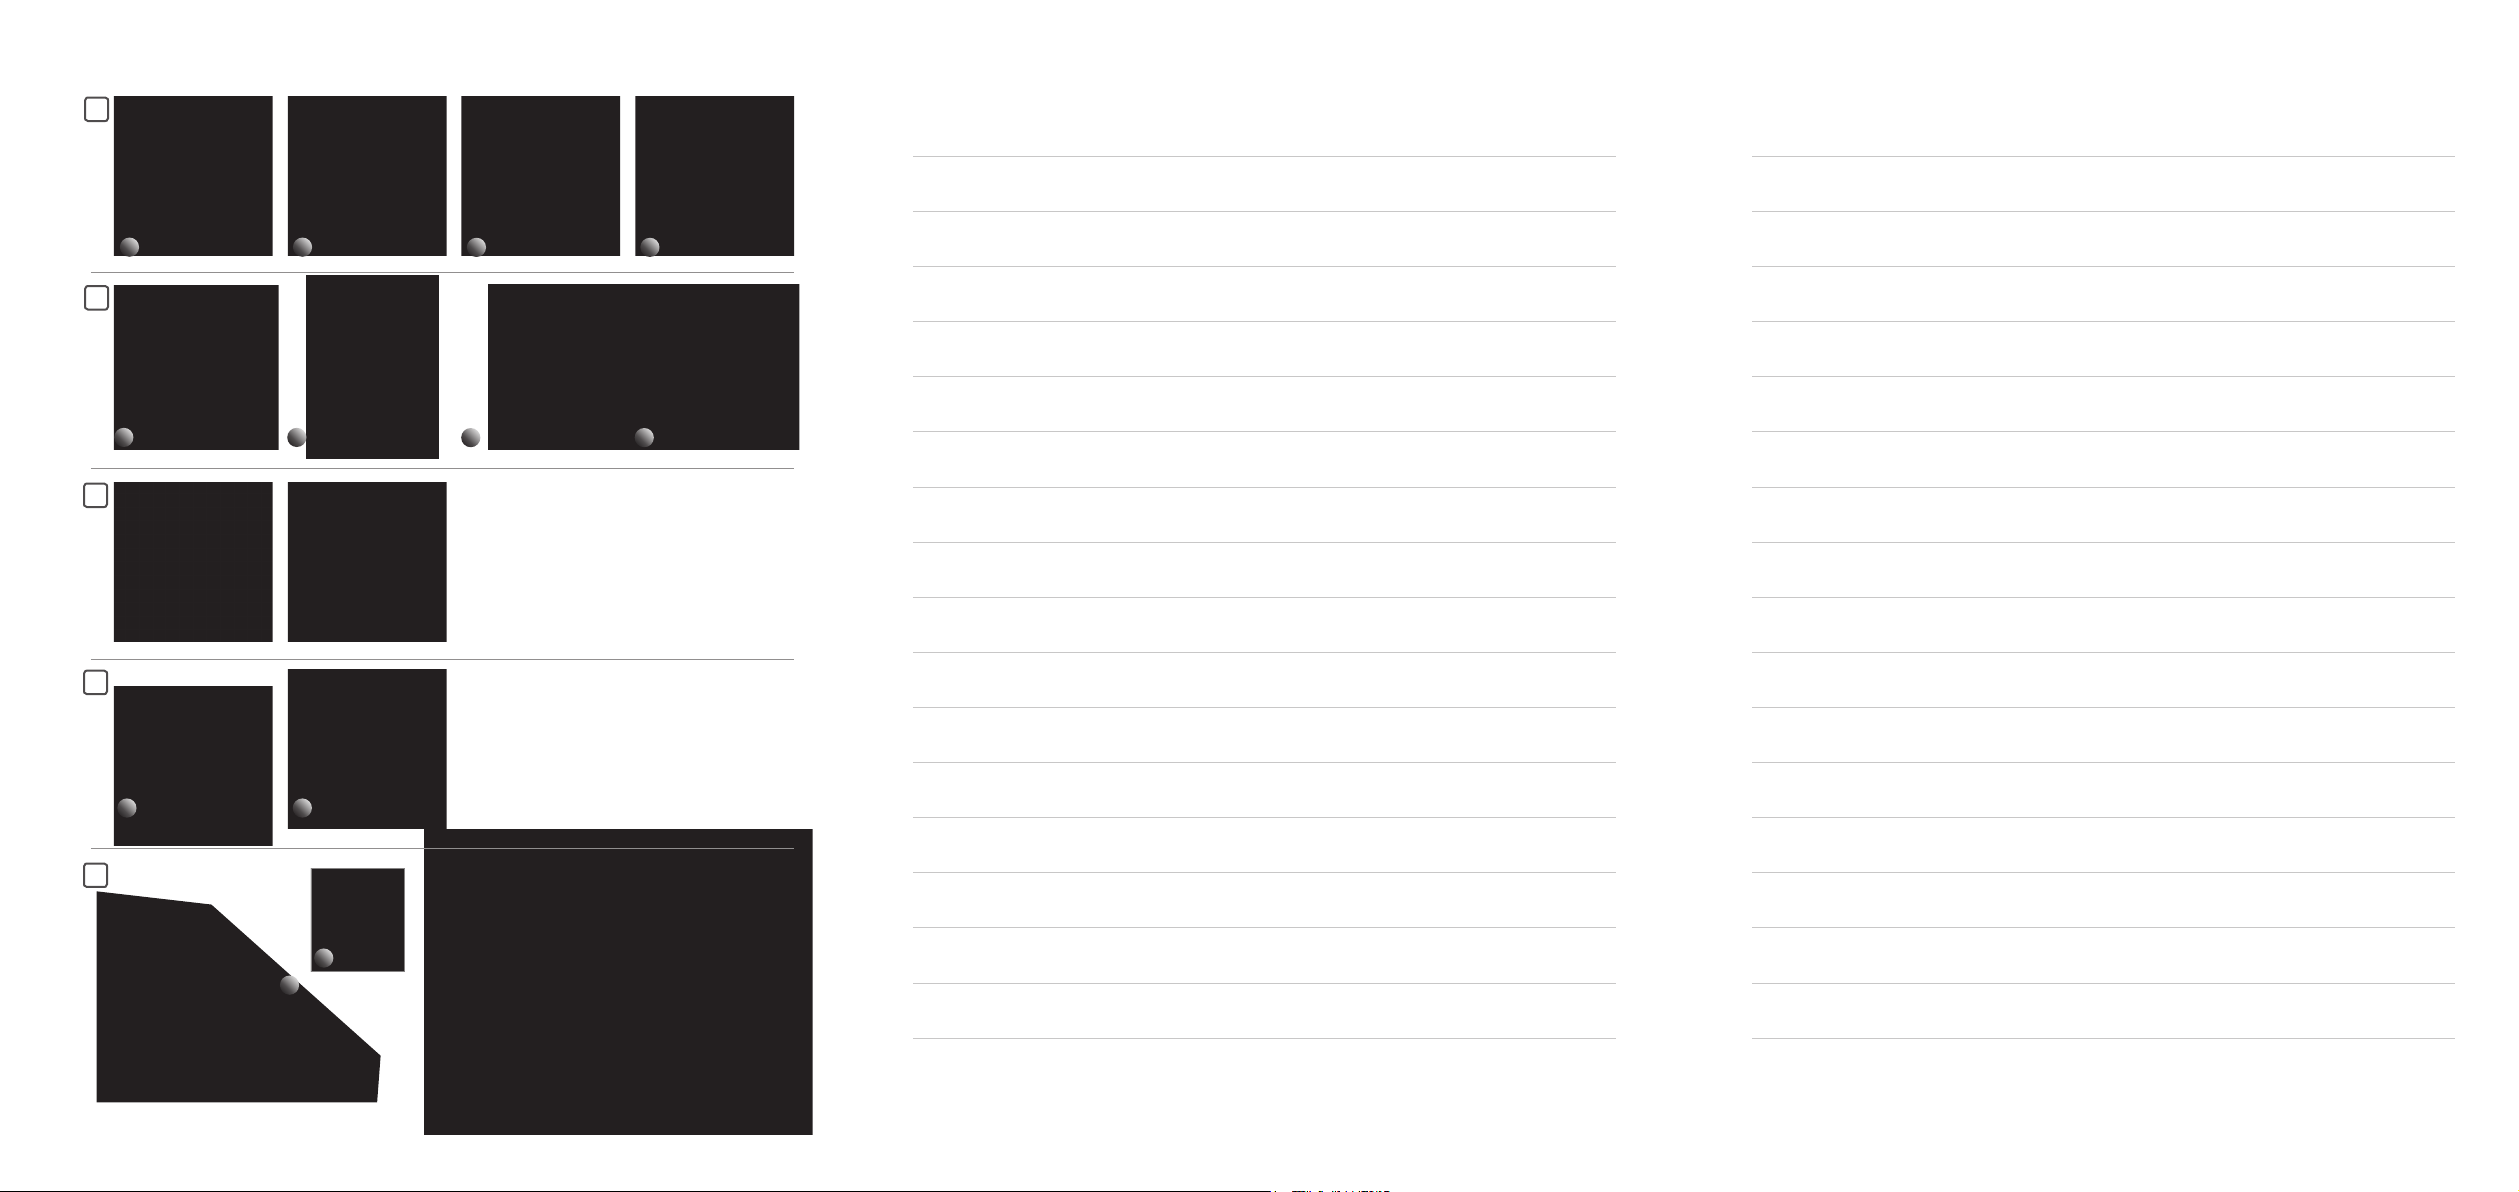
Placing the SP magnet and
the sound processor
See figure
The SP magnet is a round disk that is attached to
the sound processor to keep it in place over the
implant under your skin and to transfer sound
from the sound processor to the implant.
Use the tilt technique to safely and comfortably
connect and disconnect your sound processor to
the SP magnet, thereby reducing pressure on the
snap connector and SP magnet.
To connect your sound processor:
1
2
3
It may be easier to turn the processor on before
placing it behind your ear.
To remove it from your head, grasp the SP magnet
with the sound processor still attached.
4
1
Hold the SP magnet with one hand, or put it
on a flat surface.
Hold the sound processor with the buttons
positioned upwards, tilt it and gently snap it
into place on the SP magnet.
Make sure that the marking on the SP magnet
is facing upwards and place the SP magnet
and sound processor over the implant behind
your ear.
To remove the sound processor from the SP
magnet, place one finger under the sound
processor and gently tilt until it releases.
Note:
• During the initial period of use it is
recommended to gradually increase the time
of use of the SP magnet to allow the skin to
adapt to the pressure from the SP magnet.
If any irritation is noted the SP magnet
should be removed in order to let the skin
rest for a while. If discomfort and/or skin
irritation persist, contact your hearing care
professional.
• Make sure that the marking on the SP magnet
is always facing upwards to ensure good
retention.
See figure
• To avoid feedback (whistling), ensure that the
sound processor is not touching any other
items, such as glasses or a hat.
• It is recommended to wear a safety line
attached to the sound processor to reduce the
risk of loss or damage.
• For optimal retention, make sure that there is
not too much hair underneath the SP magnet
when placed over the implant.
1
image 3.
SP magnet care
It is recommended to wear the SP magnet with
the soft pad attached for maximum wearing
comfort.
Keep your SP magnet clean by wiping it with an
alcohol-free wipe. Do not use running water to
clean your SP magnet.
Brush the snap coupling part clean using a soft
brush.
4
Page 5
English
Changing soft pads
You should change the SP Magnet soft pad
regularly. You should replace the soft pad if you
observe the following:
• An accumulation of dirt or moisture on the soft
pad that cannot be wiped off
• The soft pad appears worn-out or damaged
• You experience a gradual deterioration in
wearing comfort (if changing the soft pad
does not help please contact your hearing care
professional)
Contact your hearing care professional to obtain
new soft pads.
See figure
Note:
2
1
Remove the soft pad from the SP magnet, by
lifting and gripping the unglued portion of the
soft material, and then slowly release the soft
pad from the SP magnet.
• Make sure that the adhesive remains are
completely removed from the SP magnet.
2
Select a new soft pad and remove the cover
sheet to expose the adhesive.
3
Attach the soft pad to the SP magnet. Make
sure that the soft pad is centralised and covers
the entire SP magnet surface.
4
Remove the remaining cover sheet from the
soft pad before you start wearing the SP
magnet.
• A small section on the edge of the soft pad
is not covered by adhesive for easier grip and
removal.
Supporting the processor
See figure
Once you are familiar with your processor, you can
change the program and the volume level while
the sound processor is attached to the SP magnet
placed on your head. Make sure you support the
processor from the bottom with your thumb as
you press the buttons with your index finger.
3
Sound processor care
Daily and weekly care is required to keep your
sound processor functioning properly.
Long-term care
You will have regular check-ups as determined by
your hearing care professional. These check-ups
help ensure that the processor works and that
your SP magnet fits properly.
Storing your processor
Store your sound processor in your storage box
when it is not in use. The sound processor can be
attached to the SP magnet and the safety line can
be attached to the sound processor.
Cleaning the sound processor
See figure
1
2
4
Clean the sound processor’s housing with an
alcohol-free wipe. Do not use water to clean
your sound processor.
Brush the snap coupling clean using the soft
brush. Avoid using excessive cleaning force on
the snap coupling as this could damage the
processor. Your hearing care professional can
provide you with a special aftercare kit to keep
your sound processor in good condition.
5
Page 6

Connecting accessories via
the Direct Audio Input (DAI)
See figure
Match the accessory connector with the sound
processor’s DAI connector. While holding the
sound processor gently at the corners, carefully
push the accessory connector into the DAI port.
Dedicated DAI program and
microphone mixing
An optional DAI program that is set by your
hearing care professional allows you to listen
exclusively to sounds through the DAI.
In all other programs, input from the DAI is
combined with input from the microphone.
Using the telecoil
The telecoil unit improves sound when using
some landline (fixed) and mobile telephones. It
also gives you access to loop facilities in homes
and public buildings. Attach the telecoil to the
DAI port.
Using the Audio adapter
The Audio adapter allows direct input from
computers, personal stereos, TVs, MP3 players
and other external audio equipment. One end
of the Audio adapter is connected to the sound
processor at the DAI. The other end is connected
to the audio device.
processor is extremely dangerous. Always use
the Audio adapter when connecting an external
audio source to your sound processor.
Cochlear is not liable for any damage arising as
a result of connecting unsuitable equipment or
incorrect use.
5
Caution: Connecting electrical
equipment directly to the sound
Using an FM receiver
An FM receiver enables the use of FM systems that
are commonly used in school classrooms.
Your hearing care professional can provide you
with a list of available FM receivers. Attach your
FM receiver to the DAI port. Keep extra batteries
available if using an FM receiver as they have high
energy consumption rates.
Warnings and precautions
Caution: If you are to undergo an MRI
(Magnetic Resonance Imaging) procedure,
refer to the MRI Reference Card included in the
document pack.
• If the SP magnet is too weak the sound processor
may fall off. If it is too strong you may feel
discomfort or experience soreness and irritation
of the skin. If you are unsure about the strength
of your SP magnet, contact your hearing care
professional.
• If you experience persistent irritation or soreness
of the skin, or if the SP magnet gives you any
discomfort, remove it and contact your hearing
care professional.
• If you wear hats, etc. be sure to avoid pressure
on your SP magnet as this may cause irritation to
the tissue under this magnet.
• Do not wear your sound processor and SP
magnet while sleeping as this may cause
irritation to the skin under the SP magnet.
• Keep the SP magnet in a safe place and keep it
away from magnetic cards (e.g. credit cards, bus
cards, etc.) as these may be damaged by the
magnet.
6
Page 7
English
• Remember that your implant contains a magnet,
so be aware that it may attract other metallic
objects that are held in close proximity (e.g.
hairdresser’s scissors, etc.).
• Do not wear any other magnets (e.g. fridge
magnets) over your implant than SP magnets
from Cochlear supplied to you by your hearing
care professional.
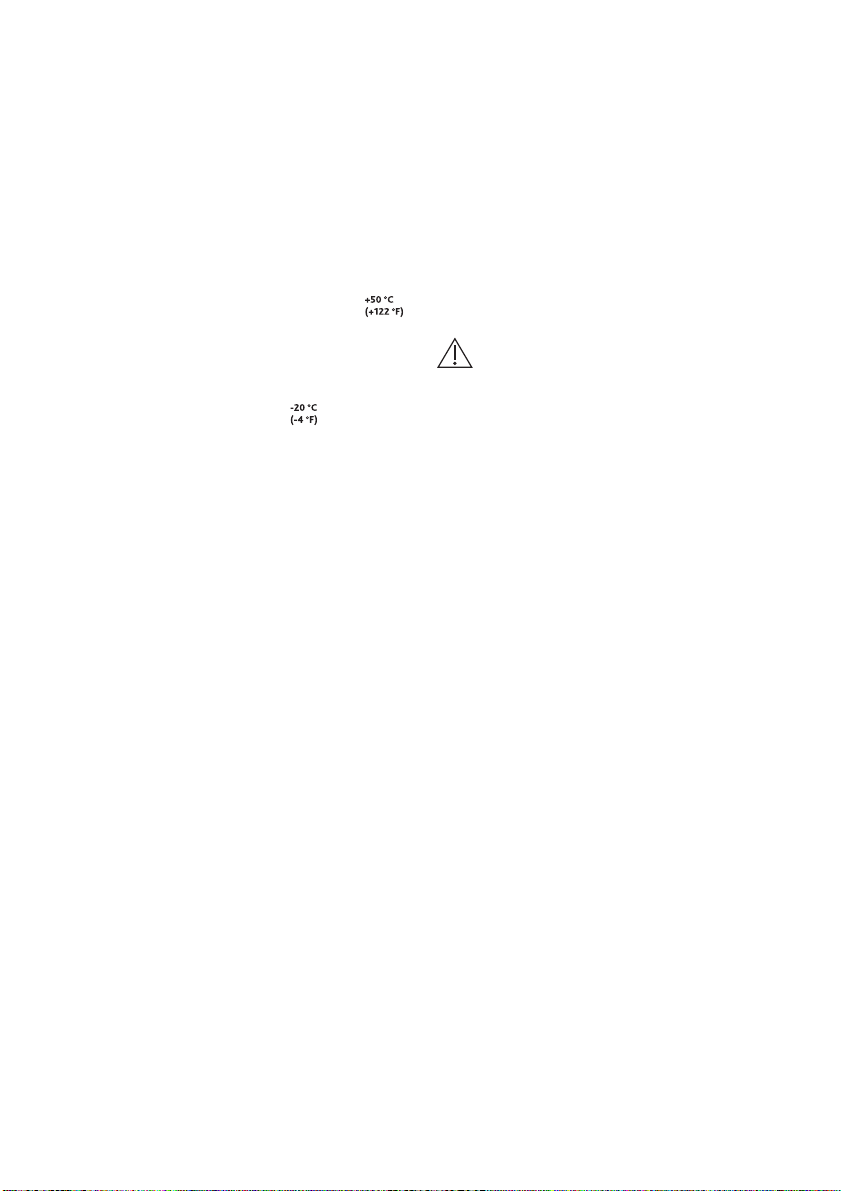
• Do not expose the SP magnet to
extreme temperatures. The
SP magnet is designed to
operate within the temperature
ranges +5°C (+41°F) to +40°C
(+104°F). The SP magnet
should not be subject, at any
time, to temperatures below -20°C (-4°F) or
above +50°C (+122°F).
• This product is not suitable for use in flammable
and/or explosive environments.
• If the SP magnet and soft material becomes
soaked with water: Put it in a container with
drying capsules such as a Dri-aid kit or similar.
Leave it to dry out overnight. Drying kits are
available from most hearing care professionals.
• For parents or caregivers: regularly check to
see if the user experiences persistent irritation or
soreness of the skin, or if the SP magnet causes
any discomfort. If so remove it and contact the
hearing care professional.
Caution: Batteries can be harmful if
swallowed. Be sure to keep your batteries
out of reach of small children, those with
mental challenges, and household pets. In the
event a battery is accidentally swallowed, seek
immediate medical attention at the nearest
emergency centre.
7
Page 8

Troubleshooting
Battery function can be related to a number of
problems, such as no sound, intermittent sound
and crackling/buzzing. A new battery is often the
solution.
Problem Cause Possible Solution
No sound/weak
sound
Weak or dead battery. Replace battery.
Volume too low. Turn up volume.
Magnet is too weak. Contact your hearing care
Feedback (whistling)
Hat, glasses or other object in
contact with sound processor.
Battery door in wrong position. Close battery door.
Sound is distorted or
intermittent
Sound processor
repeatedly
falls off
Persistent skin
irritation
Sound processor does
not work
Too high volume. Decrease volume.
Weak battery. Replace battery.
Magnet is too weak. Contact your hearing care
Magnet is too strong. Contact your hearing care
Sound processor not turned on. Turn on sound processor.
Battery door is not completely
closed.
Dead battery. Replace battery.
Battery inserted wrong way. Make sure battery is inserted
If the possible solutions in this chart do not
solve your problem, please see your hearing care
professional for further assistance.
professional.
Relocate or remove the object.
professional.
professional.
Gently close the battery door
completely.
correctly.
8
Page 9

Français
Bienvenue
Ce guide contient des conseils et des astuces sur la manière d’utiliser et d’entretenir
votre processeur Cochlear™ Baha® lorsque vous utilisez un aimant pour le connecter à
votre implant. En lisant ce manuel et en le conservant à portée de main, vous serez sûr
de tirer le meilleur parti de votre processeur Baha.
REMARQUE : ce manuel doit être considéré comme un complément à la partie A du
manuel du processeur et ne la remplace pas.
Introduction
Ce guide fournit des instructions relatives aux
procédures suivantes :
• Mise en place de l’aimant pour processeur et du
processeur
• Soins, nettoyage et maintenance
• Utilisation d’accessoires
• Guide de dépannage
Remarques concernant les illustrations :
les illustrations présentées sur la première et
la quatrième de couverture correspondent à
des sections d’informations du présent manuel
qui s’appliquent de manière générale à tous
les processeurs Baha. Veuillez vous reporter à
l’illustration adéquate lors de la lecture. Les images
des processeurs ne sont qu’indicatives et ne sont
pas à l’échelle. L’aspect du processeur inclus dans
votre boîte peut être différent.
Votre boîte comprend
les éléments suivants :
• Processeur Cochlear Baha
• Jeu de piles
• Cordon de sécurité
• Baguette de test (Test rod)
• Documentations (manuel de l’utilisateur, carte
de garantie, carte d’enregistrement, carte IRM)
• Brosse de nettoyage du pilier
(ne pas utiliser avec le système de fixation par
aimant)
• Couvre-pilier
(ne pas utiliser avec le système de fixation par
aimant)
Les éléments exacts dépendent de votre type de
processeur.
9
Page 10

Mise en place de l’aimant
pour processeur et du
processeur
Voir figure
L’aimant pour processeur est un disque qui est
fixé au processeur pour le maintenir en place sur
l’implant situé sous la peau et transmettre le son
du processeur à l’implant.
Utilisez la technique préconisée pour mettre
en place votre processeur sur l’aimant pour
processeur et le retirer confortablement et en
toute sécurité, afin de réduire la pression sur le
système de fixation type bouton-pression et sur
l’aimant pour processeur.
Pour adapter votre processeur :
1
Tenez l’aimant pour processeur dans une main,
2
Tenez le processeur externe pour rendre la
3
Positionnez le repère de l’aimant pour
Il peut être plus facile d’allumer le processeur
avant de le placer derrière l’oreille.
Pour le retirer, saisissez l’ensemble aimant pour
processeur et processeur.
Pour détacher le processeur de l’aimant pour
4
1
ou posez-le sur une surface plane.
fixation type bouton-pression accessible.
Mettez le système de fixation au contact
de l’aimant pour processeur en prenant un
angle puis remettez-le dans l’axe en poussant
doucement. Le processeur se fixera sur
l’aimant.
processeur vers le haut et placez l’aimant et le
processeur sur l’implant derrière votre oreille.
processeur, glissez un doigt sous le processeur
et faites-le pivoter délicatement jusqu’à ce qu’il
se détache.
Remarque :
• pendant la période initiale d’utilisation, il est
recommandé d’augmenter progressivement la
durée d’utilisation de l’aimant pour processeur
afin de permettre à la peau de s’adapter à
la pression exercée par l’aimant. Au premier
signe d’irritation, l’aimant sera enlevé pour
laisser la peau se reposer. Si la gêne et/ou
l’irritation cutanée persistent, adressez-vous à
votre centre d’implantation.
• Veillez à ce que le repère de l’aimant pour
processeur soit toujours orienté vers le haut
pour assurer une bonne fixation.
Voir figure
• Pour éviter tout larsen (sifflement), veillez à
ce que le processeur n’entre en contact avec
aucun autre objet tel que des lunettes ou un
chapeau.
• Il est recommandé de porter un cordon de
sécurité fixé au processeur pour réduire le
risque de perte ou d’endommagement.
• Pour une fixation optimale, veillez à ce qu’il
n’y ait pas trop de cheveux sous l’aimant pour
processeur lors de la pose sur l’implant.
1
image 3.
Entretien de l’aimant pour
processeur
Il est recommandé de porter l’aimant pour
processeur avec son coussinet, pour un confort
maximum.
Nettoyez votre aimant pour processeur à l’aide
d’une lingette sans alcool. N’utilisez pas d’eau
courante pour nettoyer l’aimant pour processeur.
Nettoyez le système de fixation type boutonpression à l’aide d’une brosse douce.
10
Page 11
Français
Remplacement des coussinets
Vous devez remplacer le coussinet de l’aimant
pour processeur à intervalles réguliers. Vous devez
remplacer le coussinet dans les cas suivants :
• vous observez sur le coussinet une accumulation
de saleté ou d’humidité qu’il est impossible
d’éliminer ;
• le coussinet est usé ou endommagé ;
• vous ressentez une détérioration progressive
du confort (si le remplacement du coussinet
n’a aucun effet, adressez-vous à votre centre
d’implantation).
Adressez-vous à votre audioprothésiste pour
obtenir de nouveaux coussinets.
Voir illustration
1
Retirez le coussinet de l’aimant pour processeur
en soulevant la partie sans colle du coussinet
puis détachez doucement ce dernier de
l’aimant pour processeur.
• Veillez toujours à éliminer complètement les
résidus de colle de l’aimant pour processeur.
2
Choisissez un nouveau coussinet et détachez le
film protecteur pour exposer l’adhésif.
3
Fixez le coussinet à l’aimant pour processeur.
Veillez à ce que le coussinet soit bien centré
et couvre toute la surface de l’aimant pour
processeur.
4
Retirez le reste du film protecteur du coussinet
avant de porter l’aimant pour processeur.
Remarque :
• une petite section du bord du coussinet n’est
pas recouverte d’adhésif pour en faciliter le
retrait.
2
Soutien du processeur
Voir illustration
Dès que vous vous êtes familiarisé avec la
manipulation de votre processeur, vous pouvez
changer de programme ou modifier le volume
tout en gardant le processeur fixé à l’aimant pour
processeur derrière l’oreille. Veillez à bien soutenir
le processeur par le bas, à l’aide du pouce, tout en
appuyant sur les boutons avec l’index.
3
Soins du processeur
Des soins quotidiens et hebdomadaires sont
indispensables au bon fonctionnement de votre
processeur.
Soins à long terme
Vous subirez des contrôles réguliers à une
fréquence déterminée par votre médecin Orl ou
votre audioprothésiste. Ces contrôles ont pour
but de vérifier que le processeur fonctionne
correctement et que l’aimant pour pilier est bien
en place.
Rangement du processeur
Conservez votre processeur dans sa boîte
de rangement lorsque vous ne l’utilisez pas.
Le processeur peut être fixé à l’aimant pour
processeur et le cordon de fixation au processeur.
Nettoyage du processeur
Voir illustration
1
Essuyez le boîtier du processeur à l’aide d’une
lingette sans alcool. N’utilisez pas d’eau pour
nettoyer le processeur.
2
Nettoyez le système de fixation type bouton-
pression à l’aide de la brosse douce. Évitez de
frotter trop fort car cela pourrait endommager
le processeur. Votre audioprothésiste peut vous
fournir un kit de soins spécial pour conserver
votre processeur en bon état.
4
11
Page 12

Connexion d’accessoires via
l’entrée audio directe (DAI)
Voir illustration
Branchez la prise de l’accessoire à l’entrée DAI
du processeur. Tout en tenant délicatement le
processeur par les angles, enfoncez doucement la
prise de l’accessoire dans le port DAI.
Programme DAI dédié et
combinaison avec le microphone
Un programme DAI, configuré par votre
audioprothésiste, vous permet d’écouter
exclusivement des sons provenant d’un accessoire
audio connecté à votre processeur.
Dans tous les autres programmes, les signaux du
DAI sont combinés à ceux du microphone.
Utilisation de la boucle à induction
La boucle à induction se connecte au port DAI de
votre processeur.
L’utilisation de ce dispositif consiste à transmettre
directement au processeur le son que vous
souhaitez écouter. Par exemple, certains
téléphones sont équipés d’une boucle à induction
sur le combiné, ce qui permet d’éliminer le
bruit extérieur et d’écouter directement son
interlocuteur. Certains bâtiments publics sont
équipés du même dispositif (cinéma, théâtre,
église...). Branchez la boucle à induction au port
DAI.
Utilisation de l’adaptateur audio
L’adaptateur audio permet une entrée directe à
partir d’ordinateurs, d’appareils stéréo portables,
de téléviseurs, de lecteurs MP3 et autres
appareils audio externes. La prise trois broches
de l’adaptateur audio se branche au port DAI du
processeur. La prise jack se connecte à l’appareil
audio.
Attention : il est extrêmement
dangereux de connecter un équipement
électrique directement au processeur. Toujours
utiliser l’adaptateur audio pour brancher une
source audio externe au processeur.
5
Cochlear n’est pas responsable des dommages
dus à la connexion d’un équipement inadéquat ou
d’une utilisation incorrecte.
Utilisation d’un récepteur FM
Un récepteur FM permet l’utilisation de systèmes
FM tels que ceux qui sont généralement utilisés
dans les classes d’écoles.
Votre centre d’implantation peut vous fournir
une liste des récepteurs FM disponibles. Branchez
votre récepteur FM au port DAI. Si vous utilisez un
récepteur FM, ayez une réserve de piles, car cet
appareil a une forte consommation.
Avertissements et
précautions
Attention : Avant tout examen par IRM
(imagerie par résonance magnétique),
reportez-vous à la carte de référence IRM
fournie dans la documentation.
• Si l’aimant pour processeur est trop faible,
le processeur risque de tomber. S’il est trop
puissant, vous risquez de ressentir une gêne ou
d’éprouver des douleurs et une irritation cutanée.
Si vous avez des doutes concernant la puissance
de votre aimant pour processeur, adressez-vous à
votre centre d’implantation.
• Si l’irritation ou les douleurs cutanées persistent,
ou si l’aimant pour processeur vous gêne d’une
quelconque façon, enlevez-le et adressez-vous à
votre centre d’implantation.
• Si vous portez des chapeaux, par exemple,
veillez à éviter toute pression sur l’aimant pour
processeur car cela peut provoquer une irritation
des tissus sous l’aimant.
• Ne portez pas le processeur et l’aimant pour
processeur pour dormir car cela peut provoquer
une irritation des tissus sous l’aimant.
• Conservez l’aimant pour processeur dans un
endroit sûr et maintenez-le éloigné des cartes
magnétiques (cartes de crédit, cartes de bus, etc.)
car ces dernières risquent d’être endommagées
par l’aimant.
12
Page 13

Français
• Rappelez-vous que votre implant contient un
aimant. Il risque donc d’attirer d’autres objets
métalliques situés à proximité (par exemple
ciseaux de coiffeur, etc.).
• Ne posez pas sur votre implant d’autres aimants
(par ex. aimants pour réfrigérateur) que les
aimants Cochlear fournis par votre centre
d’implantation.
• N’exposez pas l’aimant pour
processeur à une chaleur excessive.
L’aimant pour processeur a été
conçu pour fonctionner entre
+5 °C (+41 °F) et +40 °C
(+104 °F). L’aimant pour
processeur ne doit jamais être
exposé à des températures inférieures à -20°C
(-4°F) ou supérieures à +50°C (+122°F).
• Il convient de ne pas utiliser ce produit dans des
environnements inflammables et/ou explosifs.
• Si l’aimant pour processeur et le
coussinet sont mouillés : placez-les dans
un déshumidificateur avec des capsules de
dessiccation (kit Dri-aid ou similaire). Laissez-les
sécher toute la nuit. Des kits de déshydratation
sont disponibles auprès de la plupart des centres
d’implantation.
• Pour les parents ou les responsables :
vérifiez régulièrement si l’utilisateur éprouve une
irritation ou une douleur cutanée persistante,
ou si l’aimant pour processeur provoque une
gêne quelconque. Si c’est le cas, enlevez-le et
adressez-vous au centre d’implantation.
Attention : les piles peuvent être
dangereuses si elles sont avalées.
Conservez toujours les piles hors de portée des
enfants et des personnes de faible capacité
mentale, ainsi que des animaux domestiques.
Si une pile est avalée par accident, demandez
immédiatement une aide médicale auprès du
centre d’urgences le plus proche.
13
Page 14

Guide de dépannage
Une pile défectueuse peut générer un certains
nombre de dysfonctionnements tels qu’absence
de son, son intermittent, craquement/
bourdonnements. La solution consiste souvent
à remplacer la pile.
Problème Cause Solution possible
Pas de son/son faible
Pile faible ou déchargée. Remplacez la pile.
Volume trop faible. Augmentez le volume.
L'aimant est trop faible. Adressez-vous à votre centre
Effet larsen
(sifflement)
Chapeau, lunettes ou autre objet en
contact avec le processeur.
Couvercle du compartiment pile
mal positionné.
Le son présente une
distorsion ou est
intermittent
Le processeur tombe
à plusieurs reprises
Irritation cutanée
persistante
Le processeur ne
fonctionne pas
Volume trop élevé. Diminuez le volume.
Pile faible. Remplacez la pile.
L'aimant est trop faible. Adressez-vous à votre centre
L'aimant est trop puissant. Adressez-vous à votre centre
Le processeur n'est pas allumé. Allumez le processeur.
Le couvercle du compartiment pile
n'est pas complètement fermé.
Pile déchargée. Remplacez la pile.
Pile placée à l'envers. Assurez-vous que la pile est placée
Si les diverses solutions de ce tableau ne résolvent
pas votre problème, adressez-vous à votre centre
d’implantation ou audioprothésiste pour obtenir
de l’aide.
d'implantation.
Déplacez ou enlevez l'objet.
Refermez le couvercle.
d'implantation.
d'implantation.
Refermez délicatement le couvercle
à fond.
correctement.
14
Page 15

Español
Bienvenido
Esta guía incluye sugerencias y consejos sobre cómo puede usar y cuidar su procesador
de sonido Cochlear™ Baha® cuando está conectado al implante mediante un imán.
Si lee este manual y lo guarda en un lugar accesible para utilizarlo en el futuro, se asegurará de sacar máximo provecho de su procesador de sonido Baha.
NOTA: Este manual debe considerarse como un complemento de la parte A del manual
del procesador de sonido y no lo reemplaza.
Introducción
Esta guía incluye instrucciones sobre:
• La colocación del imán SP y del procesador de
sonido
• Cuidado, limpieza y mantenimiento
• Uso de accesorios
• Solución de problemas
Nota sobre las figuras: Las figuras que se
incluyen en la cubierta y contracubierta se refieren a partes de la información en este manual
que son comunes a todos los procesadores de
sonido Baha. Por favor, consulte la figura adecuada cuando lea el manual. Las imágenes del
procesador de sonido son sólo como referencia
y no están a escala. El aspecto del procesador de
sonido que se incluye en su kit puede variar.
Su kit incluye los siguientes
artículos:
• Procesador de sonido Cochlear Baha
• Paquete de pilas
• Cordel de seguridad
• Varilla de prueba Share the Experience
• Paquete de documentos (manual del usuario,
tarjeta de garantía, tarjeta de registro, tarjeta de
resonancia magnética)
• Cepillo de limpieza del pilar (no debe utilizarse
con el sistema de retención magnética)
• Tapa del pilar (no debe utilizarse con el sistema
de retención magnética)
Los artículos exactos dependen del tipo específico
de procesador que usted tiene.
15
Page 16

Colocación del imán SP y el
procesador de sonido
Véase la figura
El imán SP es un disco redondo que está conectado
al procesador de sonido para mantener éste en su
lugar encima del implante y debajo de la piel, y para
transferir el sonido del procesador al implante.
Use la técnica de inclinación para conectar y desconectar su procesador de sonido al imán SP de forma
segura y cómoda, reduciendo con ello una presión
excesiva en el conector a presión y el pilar.
Para conectar su procesador de sonido:
1
Sostenga el imán SP con una mano o
colóquelo sobre una superficie plana.
2
Sostenga el procesador de sonido con los
botones hacia arriba, inclínelo y presiónelo
suavemente en su lugar encima del imán SP.
3
Asegúrese de que las marcas en el imán SP
estén dirigidas hacia arriba y coloque el imán
SP y el procesador de sonido encima del
implante detrás de la oreja.
Puede ser más fácil si se enciende el procesador de
sonido antes de colocarlo detrás de la oreja.
Para retirarlo de la cabeza, sostenga el imán SP
con el procesador de sonido conectado.
4
Para desconectar el procesador de sonido del
imán SP, coloque un dedo debajo del procesador de sonido e inclínelo suavemente hasta
que se suelte.
1
Nota:
• Durante el período de uso inicial se recomienda
aumentar gradualmente el tiempo de uso del
imán SP para permitir que la piel se adapte a la
presión del mismo. Si se observa una irritación,
se debe retirar el imán SP para dejar que la piel
descanse un tiempo. Si la incomodidad y/o irritación en la piel persiste, póngase en contacto
con el profesional que le cuida la audición.
• Asegúrese de que la marca en el imán SP
siempre quede dirigida hacia arriba para
garantizar una buena retención.
Ver la figura
• Para evitar el feedback (pitidos), compruebe
que el procesador de sonido no toque ningún
otro objeto, por ejemplo unas gafas o un
sombrero.
• Se recomienda usar un cordel de seguridad
conectado al procesador de sonido para
reducir el riesgo de pérdida o daño.
• Para una retención óptima, asegúrese de que
no haya demasiado pelo debajo del imán SP
cuando éste sea colocado encima del implante.
imagen 3.
1
Cuidado del imán SP
Se recomienda usar el imán SP con una almohadilla de contacto para máximo confort de uso.
Mantenga limpio el imán SP repasándolo con
unas toallitas húmedas sin alcohol. No use agua
corriente para limpiar el imán SP.
Limpie la parte de la conexión a presión con un
cepillo suave hasta que quede limpia.
16
Page 17

Español
Cambio de las almohadillas de contacto
Usted debería cambiar regularmente la almohadilla de contacto del imán SP. Usted debería
reemplazar la almohadilla de contacto si observa
lo siguiente:
• Una acumulación de suciedad o humedad en la
almohadilla de contacto que no puede eliminarse con las toallitas de limpieza.
• La almohadilla de contacto tiene un aspecto
gastado o dañado.
• Usted advierte un deterioro gradual en el confort
de uso (si cambiar la almohadilla de contacto
no le sirve de ayuda, póngase en contacto con el
profesional que le cuida la audición).
Póngase en contacto con el profesional que
le cuida la audición para obtener nuevas
almohadillas de contacto.
Ver la figura
1
Retire la almohadilla de contacto del imán
SP, levantando y sosteniendo la parte sin
adhesivo del material suave, y después separe
cuidadosamente la almohadilla de contacto
del imán SP.
• Asegúrese de retirar totalmente los restos de
adhesivo del imán SP.
2
Seleccione una nueva almohadilla de contacto
y retire la cubierta para dejar al descubierto el
adhesivo.
3
Conecte la almohadilla de contacto al imán SP.
Asegúrese de que la almohadilla de contacto
esté centrada y cubra toda la superficie del
imán SP.
4
Retire la cubierta restante de la almohadilla de
contacto antes de empezar a usar el imán SP.
Nota:
• Una pequeña parte en el borde de la
almohadilla de contacto no está cubierta de
adhesivo para que sea más fácil sostener y
retirar la almohadilla.
2
Cómo sujetar el procesador
Ver la figura
Cuando esté familiarizado con el procesador,
puede cambiar el programa y el nivel de volumen
mientras el procesador de sonido está conectado
al imán SP colocado en su cabeza. Asegúrese de
sujetar el procesador desde abajo con el pulgar a
la vez que presiona los botones con el índice.
3
Cuidado del procesador de
sonido
Para que el procesador de sonido funcione correctamente es necesario limpiarlo de forma diaria y
semanal.
Cuidado a largo plazo
Deberá efectuar los controles regulares que determine el profesional que le cuida la audición.
Estos controles le ayudarán a comprobar que
el procesador funciona y que el imán SP está
colocado correctamente.
Almacenamiento del procesador
Guarde el procesador de sonido en la caja de
almacenamiento si no va a utilizarlo. El procesador de sonido puede estar conectado al
imán SP y el cordel de seguridad puede estar
conectado al procesador de sonido.
Conexión del procesador de sonido
Ver la figura
1
Limpie la carcasa del procesador de sonido con
unas toallitas húmedas sin alcohol. No use
agua para limpiar el procesador de sonido.
2
Limpie la conexión a presión con un cepillo
suave hasta que quede limpia. Durante la
limpieza, evite usar demasiada fuerza en la
conexión a presión porque esto puede dañar
el procesador. El profesional que le cuida la
audición puede proporcionarle un kit especial
de cuidados postquirúrgicos para mantener su
procesador de sonido en buenas condiciones.
4
17
Page 18

Conexión de accesorios a
través de la entrada directa
de audio (DAI)
Ver la figura
Haga coincidir el conector de accesorios con el
conector DAI del procesador de sonido. Sosteniendo suavemente el procesador de sonido por
las esquinas, introduzca el conector del accesorio
en el puerto de DAI.
5
Uso de un receptor FM
Un receptor FM permite el uso de sistemas FM que
habitualmente se usan en las aulas escolares.
El profesional que le cuida la audición le puede
proporcionar una lista de receptores FM disponibles. Conecte su receptor FM al puerto DAI. Tenga
disponibles pilas adicionales si usa un receptor
de FM dado que este dispositivo consume mucha
energía.
Programa DAI específico y combinado con el micrófono
Un programa DAI opcional que es programado
por el profesional que le cuida la audición le
permite escuchar exclusivamente los sonidos a
través del DAI.
En todos los demás programas, la entrada del DAI
se combina con la entrada del micrófono.
Uso del telecoil
La unidad telecoil mejora la calidad del sonido
cuando se utilizan algunos teléfonos de línea (fijos)
y móviles. La unidad telecoil también permite acceder a funciones de bucle magnético en el hogar y
edificios públicos. Conecte el telecoil al puerto DAI.
Uso del adaptador de audio
El adaptador de audio permite la entrada directa
desde ordenadores, equipos estéreo personales,
TV, reproductores de MP3 y otros equipos externos de audio. Un extremo del adaptador de audio
se conecta al procesador de sonido en el DAI. El
otro extremo se conecta al dispositivo de audio.
Aviso: Es sumamente peligroso conectar
aparatos eléctricos directamente al procesador de sonido. Use siempre el adaptador de
audio al conectar una fuente de audio externa
al procesador de sonido.
Cochlear no se hace responsable por los daños
causados como resultado de la conexión de equipos no adecuados o el uso incorrecto.
Advertencias y precauciones
Aviso: Si debe realizar un examen de RM
(Resonancia Magnética), consulte la Tarjeta de referencia que se incluye en el paquete de
documentación.
• Si el imán SP es demasiado débil el procesador
de sonido puede caerse. Si es demasiado fuerte,
puede producir molestias o irritación y dolor en
la piel. Si tiene dudas sobre la fuerza de su imán
SP póngase en contacto con el profesional que le
cuida la audición.
• Si siente irritación o dolor constante en la piel,
o si el imán SP le produce molestias, retírelo y
póngase en contacto con el profesional que le
cuida la audición.
• Si usa sombreros, etc. asegúrese de no ejercer
una presión sobre el imán SP porque esto puede
causar irritación al tejido debajo de este imán.
• No use el procesador de sonido y el imán SP
cuando duerma porque puede causar irritación a
la piel debajo del imán SP.
• Mantenga el imán SP en un lugar seguro y lejos
de tarjetas magnéticas (por ejemplo, las tarjetas
de crédito, tarjetas de autobús, etc.) porque el
imán puede dañarlas.
18
Page 19

Español
• Recuerde que su implante contiene un imán, por
eso sea consciente de que puede atraer otros
objetos metálicos que se encuentren muy cerca
(por ejemplo las tijeras del peluquero, etc.).
• No use otros imanes (por ejemplo, imanes de la
nevera) encima de su implante que no sean los
implantes SP de Cochlear que le suministró el
profesional que le cuida la audición.
• No exponga el imán SP a temperaturas
muy elevadas. El imán SP está
diseñado para funcionar dentro
de los rangos de temperatura
+5 °C (+41 °F) a +40 °C
(+104 °F). El imán SP no
debe someterse, en ningún
momento, a temperaturas inferiores a -20 °C
(-4 °F) o superiores a +50 °C (+122 °F).
• Este producto no es adecuado para usar en
entornos inflamables y/o explosivos.
• Si el imán SP y el material suave son
impregnados con agua: Colóquelos en un
recipiente con cápsulas deshumidificadoras, por
ejemplo un Dri-aid kit o algo similar. Deje que
se sequen durante una noche. La mayoría de los
profesionales de la audición tienen disponibles
sistemas de deshumidificación.
• A los padres o cuidadores: realicen un control
regular para ver si el usuario tiene irritación
o dolor persistente de la piel, o si el imán SP
provoca molestias. En ese caso, retiren el imán
y póngase en contacto con el profesional que le
cuida la audición.
Aviso: Las pilas pueden ser peligrosas si
son ingeridas. Cerciórese de mantener las
pilas lejos del alcance de los niños pequeños,
las personas con trastornos mentales y los
animales domésticos. Si por accidente una
pila es ingerida, solicite ayuda inmediata en el
centro médico más próximo.
19
Page 20

Solución de problemas
El funcionamiento de la pila estar vinculado con
una serie de problemas, como falta de sonido,
sonido intermitente y crujidos/zumbidos. Muchas
veces, una pila nueva es la solución.
Problema Causa Posible solución
Ningún sonido/sonido
débil
Pila poco cargada o descargada. Cambie la pila.
Volumen muy bajo. Suba el volumen.
El imán es demasiado débil. Póngase en contacto con el
Feedback (pitidos)
Hay un sombrero, gafas u
otro objeto en contacto con el
procesador de sonido.
Tapa de la pila en posición
incorrecta.
El sonido está
distorsionado o
es intermitente
El procesador
de sonido se cae
fácilmente
Irritación persistente
de la piel
El procesador de
sonido no funciona
Volumen muy alto. Baje el volumen.
Pila poco cargada. Cambie la pila.
El imán es demasiado débil. Póngase en contacto con el
El imán es demasiado fuerte. Póngase en contacto con el
El procesador de sonido no está
encendido.
La tapa de la pila no está
totalmente cerrada.
Pila descargada. Cambie la pila.
La pila está mal colocada. Asegúrese de que la pila esté bien
Si las soluciones indicadas en este diagrama no
solucionan su problema, solicite asistencia al
profesional que le cuida la audición.
profesional que le cuida la
audición.
Cambie de posición o retire el
objeto.
Cierre correctamente la tapa de la
pila.
profesional que le cuida la
audición.
profesional que le cuida la
audición.
Encienda el procesador de sonido.
Con cuidado, cierre totalmente la
tapa de la pila.
colocada.
20
Page 21

Português
Bem-vindo
Este guia inclui sugestões e conselhos para a melhor utilização e manutenção do seu
processador de som Cochlear™ Baha® ao utilizar um íman para fixá-lo ao implante. Ao
ler este manual e guardá-lo de forma a estar acessível para futura consulta, irá assegurar que tirará o máximo proveito do seu processador de som Baha.
NOTA: Este manual destina-se a ser um complemento à parte A do manual do proces-
sador de som e não o substitui.
Introdução
Este guia inclui instruções sobre:
• Colocação do íman SP e do processador de som
• Cuidado, limpeza e manutenção
• Utilização de acessórios
• Resolução de problemas
Nota sobre as figuras: As figuras incluídas na capa
e contracapa, correspondem a secções informativas
deste manual, que são comuns a todos os processadores de som Baha. Consulte a figura apropriada
durante a leitura. As imagens do processador de
som apresentadas são meramente representativas e
não são à escala real. O aspecto do processador de
som incluído no seu kit pode variar.
O kit inclui os seguintes
artigos:
• Processador de som Cochlear Baha
• Embalagem de pilhas
• Fio de segurança
• Pilar de teste - Partilhe a experiência
• Pacote de documentação (manual do
utilizador, cartão de garantia, cartão de
registo, cartão de IRM)
• Escova de limpeza do pilar
(não utilizar com sistema de retenção
magnético)
• Cobertura do pilar
(não utilizar com sistema de retenção
magnético)
Os artigos exactos dependem do seu tipo de
processador específico.
21
Page 22

Colocar o íman SP e o
processador de som
Consulte a figura
O íman SP é um disco circular que é fixo ao processador de som para mantê-lo no lugar sobre o
implante, por baixo da pele, e para transferir som
do processador de som para o implante.
Utilize a técnica de inclinação para colocar e retirar
de forma segura e confortável o processador de
som do íman SP, reduzindo assim a pressão no
dispositivo de encaixe e no íman SP.
Para colocar o processador de som:
1
Segure no íman SP com uma mão ou coloque-o
sobre uma superfície plana.
2
Segure no processador de som com os botões
orientados para cima, incline-o e fixe-o cuidadosamente no íman SP.
3
Certifique-se de que a marca no íman SP fica
voltada para cima e coloque o íman SP e o
processador de som sobre o implante por trás
do pavilhão auricular.
O procedimento poderá ser facilitado se ligar o
processador antes de colocá-lo atrás da orelha.
Para retirá-lo da cabeça, segure no íman SP com o
processador de som ainda fixo.
Para retirar o processador de som do íman SP,
4
coloque um dedo sob o processador de som e
incline-o cuidadosamente até o retirar.
1
Nota:
• Durante o período de utilização inicial,
recomenda-se que aumente gradualmente
o tempo de utilização do íman SP para permitir que a pele se adapte à pressão do íman
SP. Se notar alguma irritação, deve retirar o
íman SP para permitir que a pele descanse
durante algum tempo. Se o desconforto e/
ou a irritação cutânea persistirem, contacte
o profissional de audição que o acompanha.
• Certifique-se de que a marca no íman SP fica
sempre voltada para cima, a fim de assegurar
uma retenção adequada.
Consulte a figura
• Para evitar interferência (assobios), assegurese de que o processador de som não está a
tocar noutros objectos, como óculos ou um
chapéu.
• Recomenda-se a utilização de um fio de
segurança fixo ao processador de som para
reduzir o risco de perda ou danos.
• Para obter a melhor retenção, certifique-se de
que não ficam demasiados cabelos sob o íman
SP quando este é colocado sobre o implante.
1
imagem 3.
Manutenção do íman SP
Recomenda-se que use o íman SP com a almofada
suave fixa para o máximo conforto.
Mantenha o íman SP limpo com um toalhete sem
álcool. Não utilize água corrente para limpar o
íman S P.
Limpe o dispositivo de encaixe do processador
com uma escova macia.
22
Page 23

Português
Substituir as almofadas
A almofada do Íman SP deve ser substituída
regularmente. A almofada deve ser substituída se
detectar as seguintes condições:
• Uma acumulação de sujidade ou humidade que
não seja possível limpar da almofada
• A almofada parecer desgastada ou danificada
• Verificar uma deterioração gradual do conforto
na utilização (se a substituição da almofada não
for suficiente, contacte o profissional de audição
que o acompanha)
Para obter almofadas novas, contacte o profissional de audição que o acompanha.
Consulte a figura
1
Retire a almofada do íman SP, levantando e se-
gurando na parte não colada do material macio
e, em seguida, solte lentamente a almofada do
íman S P.
• Certifique-se de que retira completamente os
restos de cola do íman SP.
2
Seleccione uma almofada nova e retire a pelí-
cula de protecção para expor o adesivo.
3
Fixe a almofada ao íman SP. Certifique-se de
que a almofada fica centrada e cobre a totalidade da superfície do íman SP.
4
Retire o resto da película de protecção da
almofada antes de começar a usar o íman SP.
Nota:
• Uma pequena secção da extremidade da
almofada não está coberta de adesivo para
permitir uma aderência e remoção mais fáceis.
2
Segurar o processador de som
Consulte a figura
Assim que estiver familiarizado com o processador, pode mudar o programa e o nível de volume
com o processador de som fixo ao íman SP colocado na sua cabeça. Certifique-se de que segura
o processador pela parte inferior com o polegar
enquanto prime os botões com o dedo indicador.
3
Manutenção do processador
de som
Para manter o bom funcionamento do processador de som, é necessária manutenção diária e
semanal.
Cuidado a longo prazo
Terá exames de rotina regulares conforme determinado pelo profissional de audição que o acompanha. Estes exames de rotina ajudam a assegurar
que o processador funciona correctamente, bem
como que o íman SP encaixa devidamente.
Guardar o processador
Quando não estiver a usar o processador de som,
guarde-o na respectiva caixa. O processador de
som pode ser fixo ao íman SP e o fio de segurança
ao processador de som.
Limpar o processador de som
Consulte a figura
1
Limpe o processador com um toalhete sem
álcool. Não utilize água para limpar o processador de som.
2
Limpe o dispositivo de encaixe do processador
com a escova macia. Evite fazer uma força
excessiva ao limpar o dispositivo de encaixe
do processador, dado que pode danificar o
mesmo. O profissional de audição que o acompanha pode fornecer-lhe um conjunto especial
de cuidados de manutenção para manter o seu
processador de som em boas condições.
4
23
Page 24

Ligar acessórios através da Entrada de Áudio Directa (DAI)
Consulte a figura
Aproxime o conector do acessório ao conector
DAI do processador de som. Segurando ligeiramente o processador de som pelos cantos, pressione cuidadosamente o conector do acessório na
porta DAI.
Programa específico DAI em
combinação com o microfone
Um programa DAI opcional definido pelo profissional de audição que o acompanha permite-lhe
ouvir exclusivamente sons através da DAI.
Nos outros programas, a entrada da DAI é combinada com a entrada do microfone.
Utilizar a unidade telecoil
A unidade telecoil melhora o som ao utilizar
alguns telefones fixos e telemóveis. Também
permite aceder ao sistema de anel magnético
presente em alguns edifícios privados e públicos.
Ligue a unidade telecoil à porta DAI.
Utilização do Adaptador áudio
O Adaptador áudio permite ligar o processador
directamente a computadores, aparelhos estéreo,
televisores, leitores de MP3 e outros equipamentos de som externos. Uma extremidade do
Adaptador áudio é ligada ao processador de som
na DAI. A outra extremidade é ligada à saída do
equipamento áudio.
Aviso: É extremamente perigoso ligar
equipamento eléctrico directamente ao
processador de som. Utilize sempre o Adaptador áudio ao ligar uma fonte de áudio externa
ao processador de som.
A Cochlear não se responsabiliza por quaisquer
danos resultantes da ligação de equipamento não
adequado ou da sua utilização incorrecta.
5
Utilizar um receptor FM
Um receptor FM permite utilizar sistemas FM
normalmente utilizados em salas de aula.
O profissional de saúde que o acompanha poderá
fornecer-lhe uma lista de receptores FM disponíveis. Ligue o receptor FM à porta DAI. Se utilizar um
receptor FM, tenha disponíveis pilhas adicionais,
dado que estes receptores têm taxas de consumo
de energia elevadas.
Avisos e precauções
Aviso: Se fizer um teste IRM (Imagiologia
por Ressonância Magnética), consulte o
Cartão de Referência de IRM incluído no pacote
de documentos.
• Se o íman SP não tiver força suficiente, o proces-
sador de som pode cair. Se for demasiado forte,
poderá sentir desconforto ou dor e irritação da
pele. Se não tiver a certeza da força do seu íman
SP, contacte o profissional de audição que o
acompanha.
• Em caso de irritação ou dor persistente da pele,
ou se o íman SP provocar qualquer desconforto,
retire-o e contacte o profissional de audição que
o acompanha.
• Se usar chapéu ou outros acessórios, certifique-
-se de que evita qualquer pressão sobre o íman
SP, na medida em que poderá provocar a irritação do tecido sob este íman.
• Não use o processador de som e o íman SP
enquanto dorme, na medida em que poderá
provocar a irritação da pele sob o íman SP.
• Guarde o íman SP num local seguro e mantenha-o
afastado de cartões magnéticos (por exemplo,
cartões de crédito, cartões de viagem, etc.), na
medida em que o íman poderá danificá-los.
24
Page 25

Português
• Lembre-se de que o implante contém um íman,
assim, tenha presente que este poderá atrair outros objectos metálicos que se aproximem do mesmo (por exemplo, tesouras de cabeleireiro, etc.).
• Não use quaisquer outros ímanes (por exemplo,
ímanes de frigorífico) sobre o implante SP, que
não os ímanes SP da Cochlear fornecidos pelo
profissional de audição que o acompanha.
• Não exponha o íman SP a
temperaturas extremas.
O íman SP destina-se a funcionar
no intervalo de temperaturas
de +5°C (+41°F) a +40°C
(+104°F). O íman SP não
deve, em momento algum,
ser submetido a temperaturas inferiores a -20°C
(-4°F) ou superiores a +50°C (+122°F).
• Este produto não é adequado a ser utilizado em
ambientes inflamáveis e/ou explosivos.
• Se o íman SP e o material da almofada ficarem ensopados com água: Coloque-o num re-
cipiente com cápsulas desumidificadoras, como
um conjunto Dri-aid ou semelhante. Deixe-o a
secar durante a noite. Existem conjuntos desumidificadores disponíveis junto da maioria dos
profissionais de audição.
• Para pais ou prestadores de cuidados:
Verifique regularmente se o utilizador se queixa
de irritação persistente ou dor na pele, ou se o
íman SP provoca qualquer desconforto. Nesse
caso, retire-o e contacte o profissional de saúde
que o acompanha.
Aviso: As pilhas podem ser prejudiciais se
engolidas. Certifique-se de que mantém
as pilhas fora do alcance de crianças, pessoas
com deficiências mentais ou animais de estimação. No caso da pilha ser acidentalmente engolida, procurar de imediato assistência médica do
serviço de urgência mais próximo.
25
Page 26

Resolução de problemas
O funcionamento da pilha pode estar relacionado
com diversos problemas, como inexistência de
som, som intermitente e de crepitação/zumbido.
Muitas vezes, uma pilha nova é a solução.
Problema Causa Solução possível
Sem som/som fraco
Feedback (assobios)
Som distorcido ou
intermitente
O processador de som
cai repetidamente
Irritação cutânea
persistente
O processador de som
não funciona
Pilha fraca ou gasta. Substitua a pilha.
Volume demasiado baixo. Aumente o volume.
O íman não tem força suficiente. Contacte o profissional de audição
Chapéu, óculos ou outro objecto
em contacto com o processador de
som.
Tampa do compartimento da pilha
em posição errada.
Volume demasiado alto. Reduza o volume.
Pilha fraca. Substitua a pilha.
O íman não tem força suficiente. Contacte o profissional de audição
O íman é demasiado forte. Contacte o profissional de audição
O processador de som não está
ligado.
A tampa do compartimento da pilha
não está completamente fechada.
Pilha gasta. Substitua a pilha.
Pilha inserida ao contrário. Certifique-se de que a pilha está
Se as soluções possíveis incluídas nesta tabela não
resolverem o problema, consulte o profissional
de audição que o acompanha para obter mais
assistência.
que o acompanha.
Mude de posição ou retire o objecto.
Feche a tampa do compartimento
da pilha.
que o acompanha.
que o acompanha.
Ligue o processador de som.
Feche cuidadosa e completamente a
tampa do compartimento da pilha.
introduzida correctamente.
26
 Loading...