

Page 1
Setup Guide
Thank you for choosing a COBY MP3 player
!
COBY MPC
951
Page 2
~This guide will cover how to transfer your music CD’s into your COBY
MP3 player using Windows Media Player 11.
~This guide will also provide common troubleshooting solutions for you
r
COBY MP3 player.
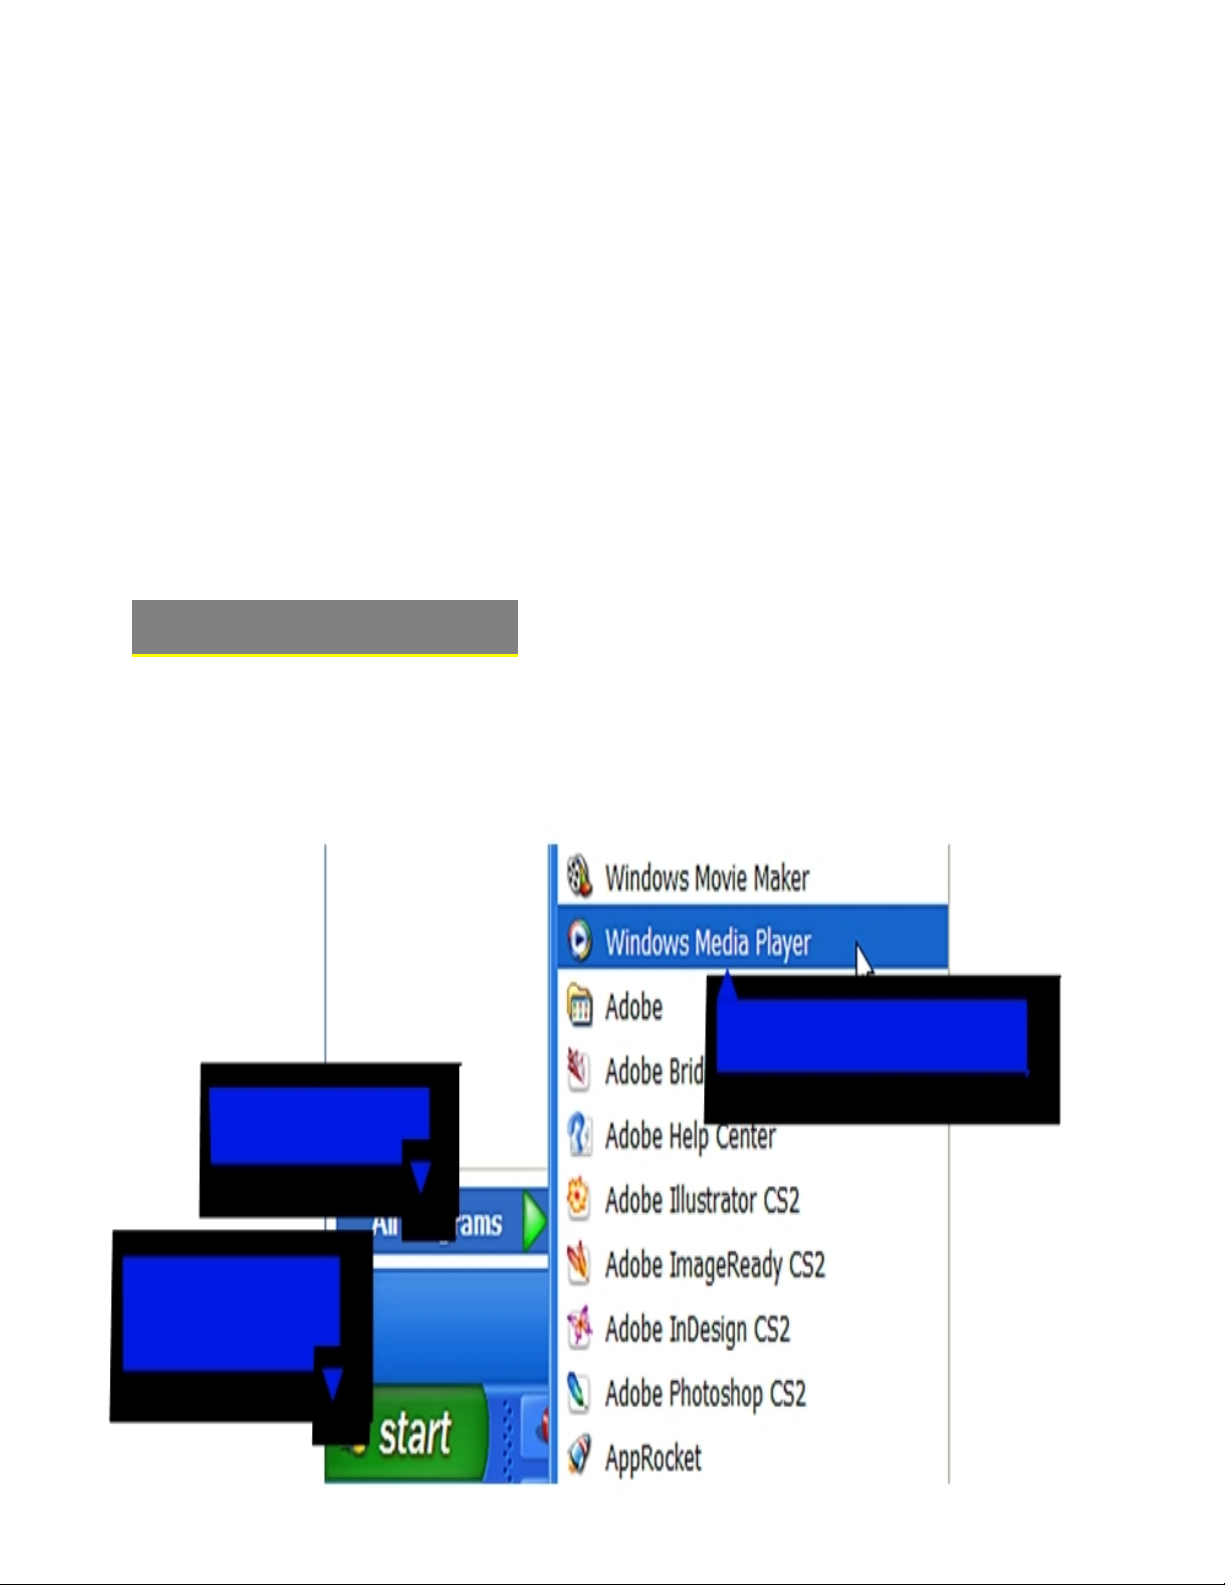
1b. Click
“
All Programs
”
1a. Click
“Start Menu”
button
1c. Click on
“
Windows Media Player”
AUDIO TRANSFER
–
Getting Started
Transfer your Music CD’s into your COBY MP3 player
1) Launch the WMP11 program.
Windows Media
Player 11 (WMP11)
The directions in this guide are given for Windows Media Player 11 (WMP11)
If your computer does not have Windows Media Player installed, please
download the latest version of Windows Media Player (WMP) from Microsoft’s
website
www.microsoft.com/windows/windowsmedia/player/download/download.aspx
Page 3
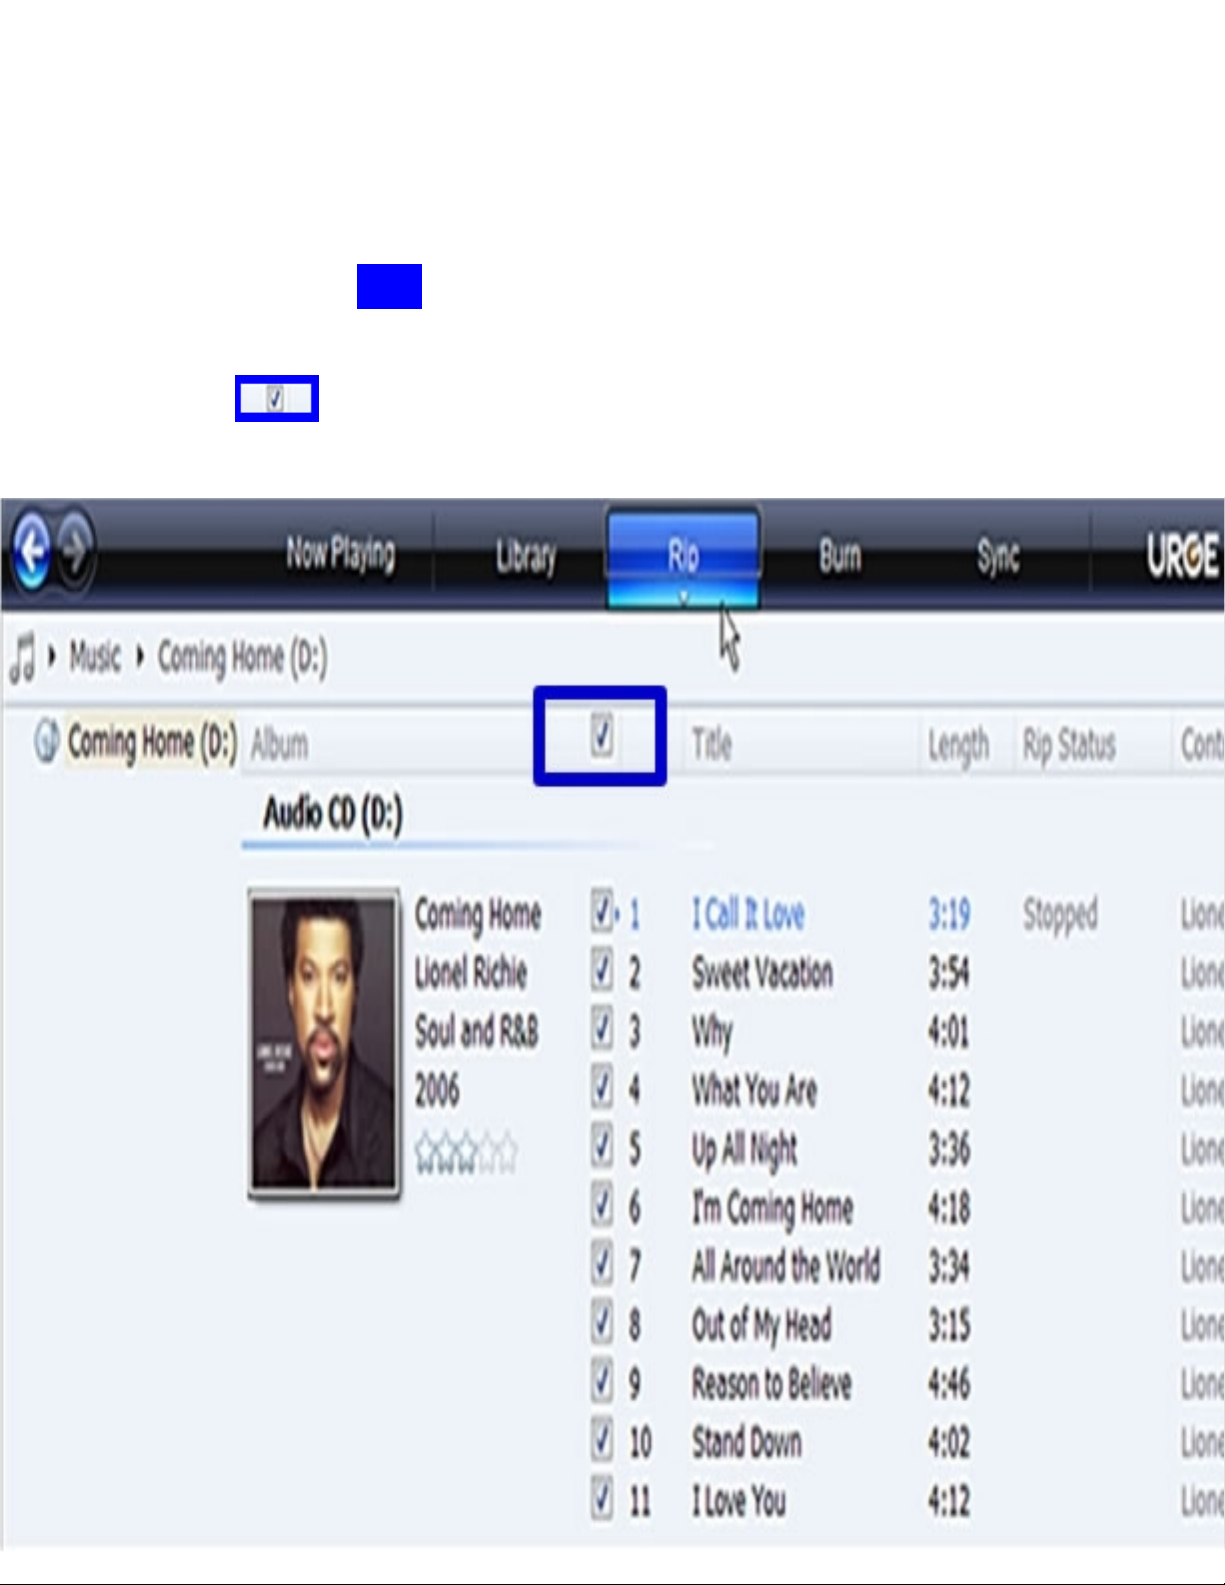
2) Put an audio CD into the CD-ROM drive of your computer.
If your computer has an internet connection,
WMP will automatically retrieve and display
the album information.
ª
Click the
“
Rip
”
tab and select which “Title” to rip.
T
o rip the entire album, check
the top check box.
Page 4

Click the
“
Rip
”
button to set the Rip options. Th
e recommended Rip settings are:
3) Set the Rip Options (optional).
ª ²
Select “Format > mp3”
²
Select “Bit Rate > 128 Kbps”
Select “More Options” to change the directory where WMP saves
you’re ripped music
files. WMP will save your music to your “My
Documents > My Music” default
folder.
Page 5

4) Start ripping the CD.
ª
Click the
“
Rip
”
button and select “Rip” to start converting the audio
CD to MP3/WMA
The ripping process will take a few minutes to complete. WMP will
save the converted
music files in your
“My Documents > My Music”
default
folder.
_
Page 6

5)
Transfer MP3/WMA Files to Your COBY Player
Once you have MP3 or WMA digital music files on
your computer, transfer them to your COBY player
in order to listen to music anywhere.
ª
Once you have MP3
or WMA digital music files on
your computer, transfer them to your COBY player
in order to listen to music anywhere.
Once you have MP3 or WMA digital music files on
your computer, transfer them to your COBY player
in order to listen to
music anywhere.
5)
Transfer MP3/WMA Files to Your COBY Player
* Connect
your MP3 player to the
computer.
* The MP3 player will appear
under “
MY Computer” as a
“
LOCAL DISK”.
*
To transfer your Ripped music,
go to the ripped folder “
My
Documents > M
y Music
” and
copy or paste or drag and drop
your selected files into the
LOCAL DISK
NOTE:
To access
Windows
Media Player
Default ripped
folder,
Click on your
button.
Select the
folder.
Page 7

VIDEO TRANSFER
–
Getting Started
Converting your
VIDEO
files and transferring it into your player.
Install the
Xvid
Encoder
1. Insert the driver CD
2. Go into the “Xvid” folder.
3. Double click on the “XviD-1.1.0-30122005” file.
4. This will install the Xvid encod
er.
Install the Audio Codec
1.
Go back into the root directory of the driver CD.
2.
Double click on the “
lame 3.96.1
” folder.
3.
Double click on the “ACM” folder
4.
Place your mouse pointer on top of the “
LameACM
” file and
LEFT click on your mouse once. (The file should be
highlighted).
5.
Once the file is highlighted, RIGHT click on your mouse and
select install.
Install the Conversion Software
1.
Go back into the root directory of the driver CD.
2.
Copy the “
Video Transcoder
” folder to your desktop.
Page 8

Run the conversation Utility
1.
Go to your desktop and double click the “V
ideo
Transcoder
” folder.
2.
Dou
ble click on the “
VirtualDub
” folder
.
3.
Dou
ble click on the “ VirtualDub.exe” file .
.
4.
On VirtualDub, select “FILE” and then “LOAD
PROCESS
ING SETTING.
5.
Select the “
QCIF-plus
” file, to Load the processing
setting.
6.
Insert your video file by selecting “FILE” and “OPEN
VIDEO FILE”.
7.
Locate
your Video File by using the pop browser.
8.
VirtuaDub will analyze the video file.
9.
Save
the converted file by
selecting “FILE” and “SAVE
AS AVI”.
10. Name the soon to be converted file and select where the
converted file should be saved.
When the conversion is completed,
Copy and Paste or Drag and Drop the converted files to your
MP3 player “MOVIE” folder.
Done!!
Page 9

Common Troubleshooting
Problems
Possible Solutions
No Power
*The Battery level may be too low. Charge the unit.
*Ensure that the HOLD button is turned off.
*Reset the unit.
Music Freezes
*The file(s) are corrupted or damaged.
*Make sure your WMA file(s) are not DRM protected.
*Unsupported file format (ACC, WAV, M4A…Etc.)
No sound after file transfer
*Make sure your WMA file(s) are not DRM protected.
*Ensure that the headphone is attached securely to the
p
layer.
*Unsupported file format (ACC, WAV, M4A…Etc.)
My computer does not recognized
by the MP3 Player
*Check the connections.
*Switch USB ports.
* Do Not use a USB extension cable
Video Conversion Error
*Ensure that the original file plays on your computer, If not,
then you will need to obtain the codec for that file.
*Unsupported format
Video Issue
*Re-encode the video.
*Play the video file on your computer to confirm that the file is
not corrupted.
*Re-encode the file using the Load Processing setting file
“QCIF” or “QCIF-plus”.
*Ensure that the original file plays on your computer, If not,
then you will need to obtain the codec for that file.
HDD Error
*Problem lies with the ribbon cable connected to the hard
drive. Ribbon cable is loose.
If
you are still having difficult
ies with
your MP3 player, please contact Customer
Care, Hours of operation, Monday-Friday 8:00 AM – 8:30:00 PM EST, Saturday and
Sunday 9:00 AM – 5:30 PM EST. You can also reach us online at
customerservice@cobyusa.com
or
techsupport@cobyusa.com
1-800-727- 3592
 Loading...