

Page 1

R
DTV-102
Table of Contents
Table Of Contents
1 Introduction.....................................................................................................................1
1.1 Safety and Product Information......................................................................................1
1.2 Important Safety Instruction............................................................................................2
1.3 Board Level Description.................................................................................................3
1.4 Remote Control Description...........................................................................................4
1.5 Unit Description..............................................................................................................6
2 Installation......................................................................................................................7
2.1 Setup Checklist..............................................................................................................7
2.2 Unpacking......................................................................................................................7
2.3 Cable Connections.........................................................................................................8
2.4 Remote Control Battery Installation..............................................................................10
2.5 Initial Setup...................................................................................................................10
3 Basic Operation............................................................................................................11
3.1 Initial Channel Scan......................................................................................................11
3.2 Changing Channels......................................................................................................12
3.3 Audio and Language Control........................................................................................13
3.4 Information Display.......................................................................................................14
4 Menu Operation............................................................................................................16
4.1 Channel Menu Features...............................................................................................16
4.2 Option Menu Features..................................................................................................19
4.3 Lock Menu Features. ..................................................................................................25
5 Reference.....................................................................................................................32
5.1 Troubleshooting Guide.................................................................................................32
5.2 Specifications ..............................................................................................................33
Please read this manual before connection and use.
Page 2
Introduction
This User Guide provides detailed information to correctly setup and evaluate the DTV-102 Converter Box.
A procedure is described to setup the converter box for normal operation using the provided GUI software, with
details for evaluation of the many provided features.
1.1 Safety and Product Information
Warning: Use only the provided AC100~240V, 50Hz/60Hz power supply.
Warning: To prevent damage which may result in fire or electric shock hazard, do not expose this module to rain
or moisture, or use it near water.
Caution: Outdoor Antenna Grounding - If an outside antenna is connected to the product, be sure the antenna
is grounded so as to provide some protection against voltage surges and built-up static charges. Article 810 of
the National Electric Code, ANSI/NFPA 70, provides information with regard to proper grounding of the mast and
supporting structure, grounding of the lead-in wire to antenna discharge unit, size of grounding conductors,
location of antenna-discharge unit, connection to grounding electrodes, and requirements for the grounding
electrode.
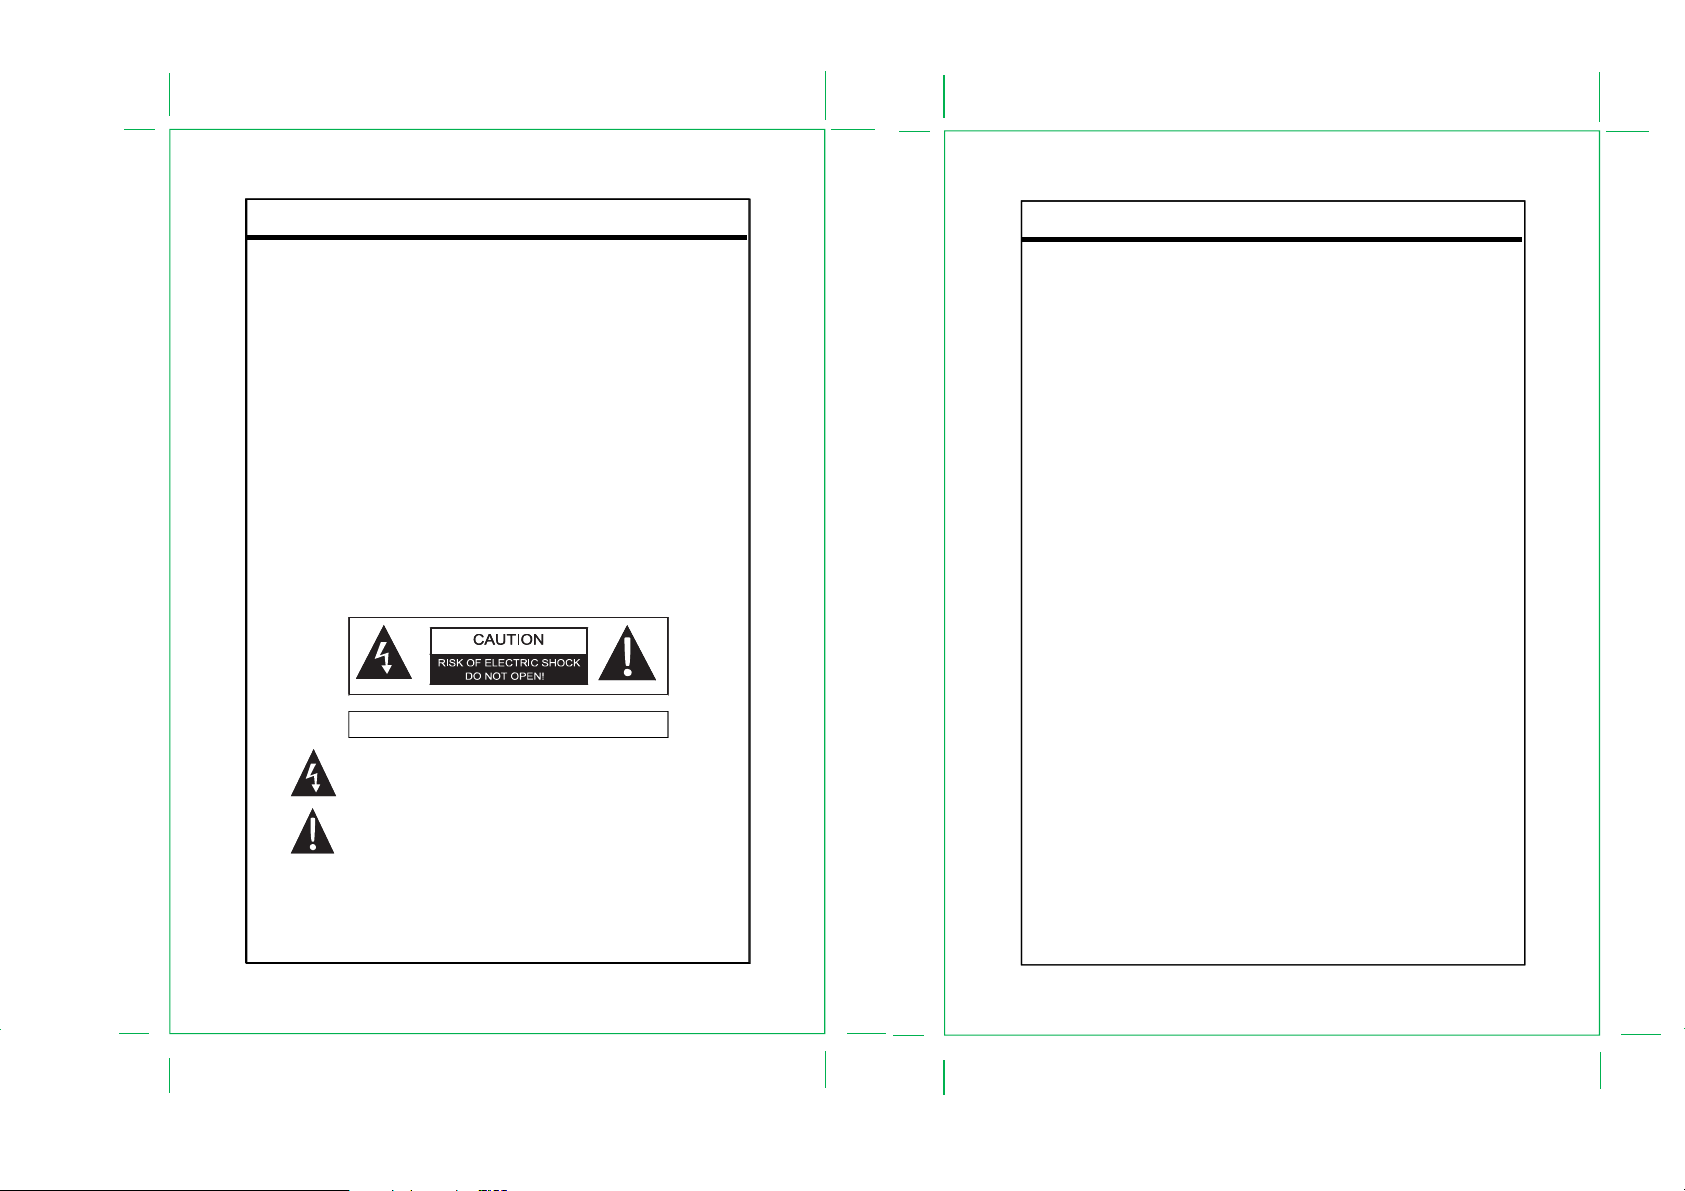
WARNING: TO REDUCE THE RISK OF FIRE OR ELECTRIC SHOCK, DO
NOT EXPOSE THIS APPLIANCE TO RAIN OR MOISTURE.
The lightning flash with arrowhead symbol, within an equilateral triangle, is intended
The lightning flash with arrowhead symbol, within an equilateral triangle, is intended
to alert the user to the presence of uninsulated “dangerous voltage” within the
to alert the user to the presence of uninsulated “dangerous voltage” within the
product’s enclosure that may be of sufficient magnitude to constitute a risk of
product’s enclosure that may be of sufficient magnitude to constitute a risk of
electric to persons.
electric to persons.
The exclamation point within an equilateral triangle is intended to alert the user to
The exclamation point within an equilateral triangle is intended to alert the user to
the presence of important operating and maintenance (servicing) instructions in the
the presence of important operating and maintenance (servicing) instructions in the
literature accompanying the appliance.
literature accompanying the appliance.
Introduction
1.2 Important Safety Instruction
• Read these instructions. Heed all warnings.
• Do not use near water.
• Clean only with dry cloth.
• Do not block any ventilation openings. Maintain well ventilated conditions around the roduct. Do not put
product on bed, sofa or anything that blocks ventilation. Install according to instructions.
• Do not install near any heat sources such as radiators, heat registers, stoves, or other apparatus
(including amplifiers) that produce heat.
• Do not defeat the safety purpose of the polarized or grounding-type plug. A polarized plug has two blades
with one wider than the other. If the provided plug does not fit into your
outlet, consult an electrician for replacement of the obsolete outlet.
• Only use attachments/accessories specified by the manufacturer.
• Use only with the cart, stand, tripod, bracket, or table specified by the manufacturer, or sold with the
apparatus. When a cart is used, use caution when moving the cart/apparatus combination to avoid injury
from tip-over.
• Unplug this apparatus during lightning storms or when unused for long periods of time.
• Refer all servicing to qualified service personnel. Servicing is required when the apparatus has been
damaged in any way, such as plug is damaged, liquid has been spilled or objects have fallen into the
apparatus, the apparatus has been exposed to rain or moisture, does not operate normally, or has
been dropped.
• Apparatus shall not be exposed to dripping or splashing and no objects filled with liquids, such as vases,
shall be placed on the apparatus.
• Do not perform any servicing other than that contained in the operating instructions unless you are qualified
to to so.
- 1 -
- 2 -
Page 3
Introduction
1.3 Board Level Description
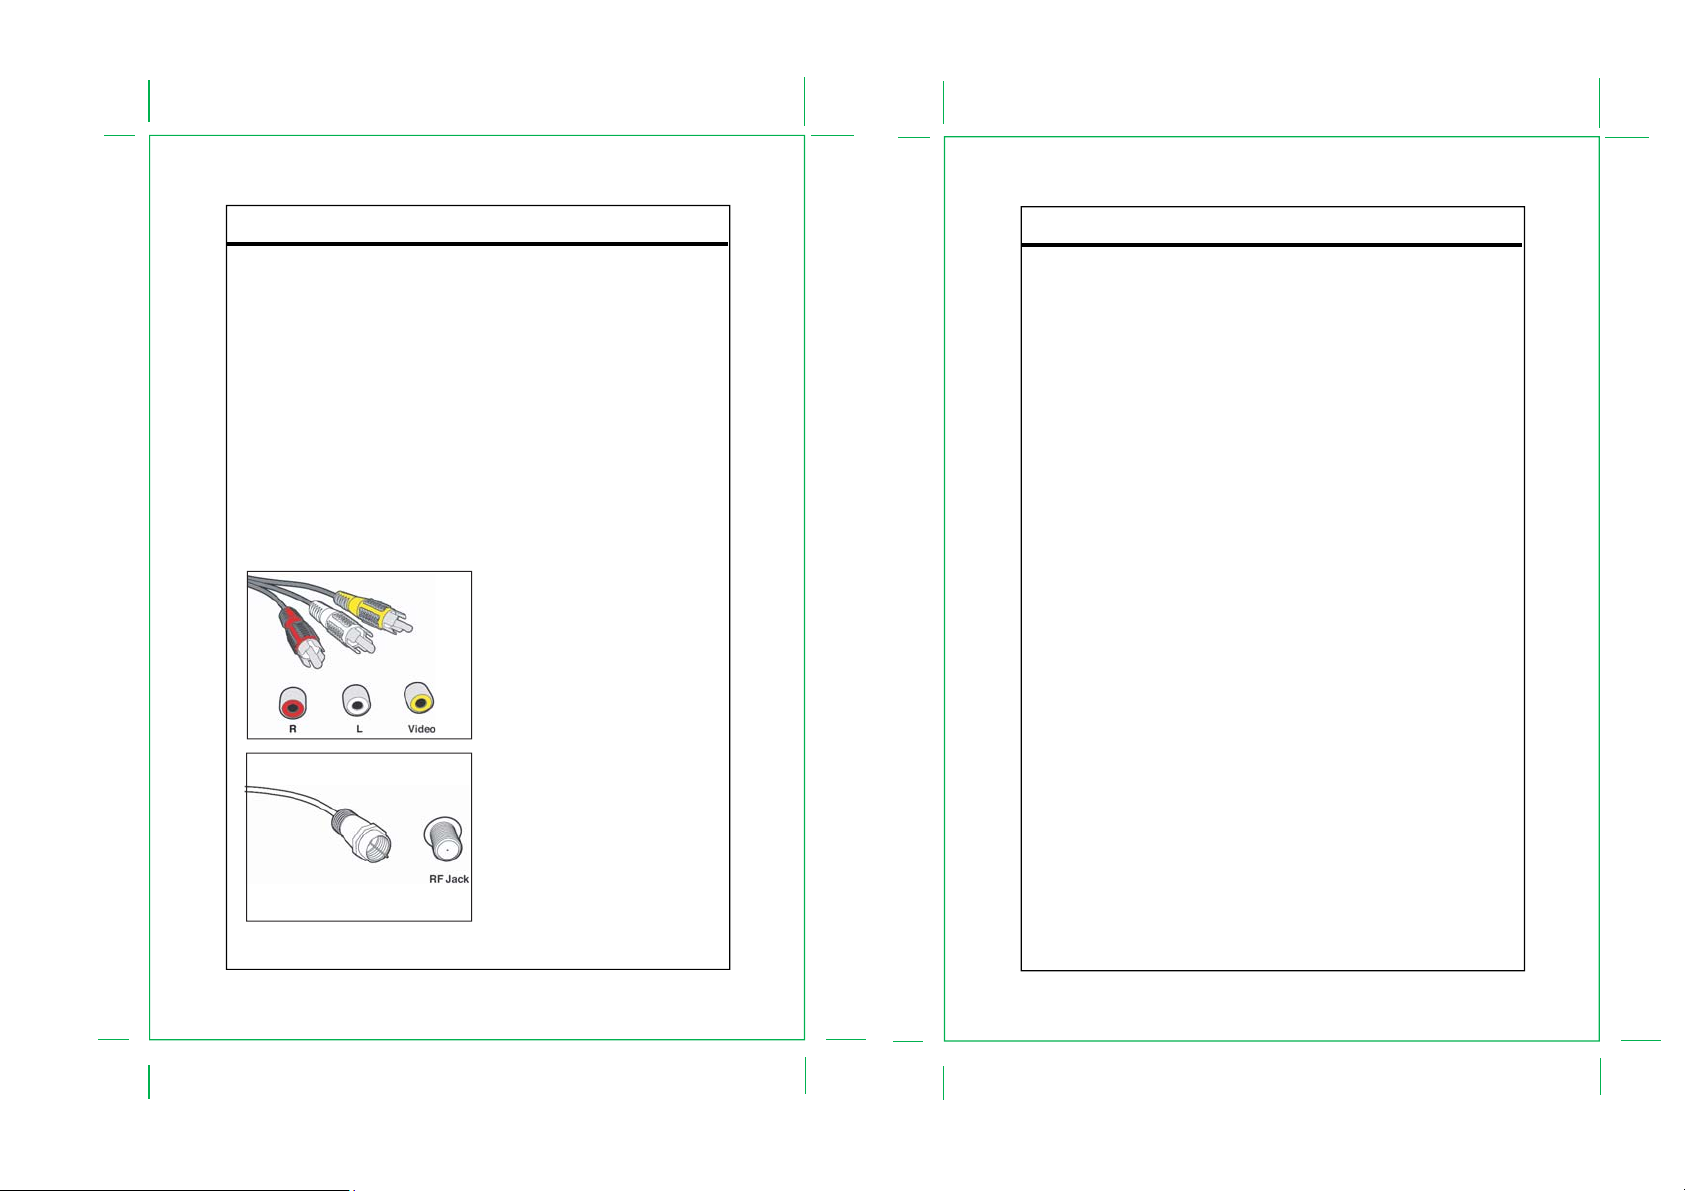
The DTV-102 supports one input and two outputs. The input is a standard RF connector, which can be
connected to an antenna with a coaxial cable. The outputs are standard NTSC composite video and left/right
audio outputs, with RCA jack connectors, and a standard RF output; both are provided to insure an easy
connection to any analog TV. The RF output provides video modulated on Channel 3 or Channel 4, as selected
by the on-board switch.
The Audio/Video (A/V) cables provide good picture quality and stereo sound, and should be used if available on
the TV. The A/V jacks are color coded (yellow for video, red for right audio and white for left audio). If the TV has
only one input for audio (mono), connect it to the left (white) audio jack on the converter box (CB) .
The RF jack and coaxial cable provide acceptable picture and mono sound quality. It should be used if A/V
connections are not available on the TV. RF jacks are typically used to connect your TV to terrestrial antenna
sources.
Note: Be sure to use RG-6 coaxial cable when connecting from the antenna to the CB module.
Introduction
The module also includes an infra-red (IR) receiver and three push buttons to provide front panel control for the
power on/off and channel up/down functions.
The only one LED indicates three possible power states for the converter box:
• Powered on and functional Bright Green LED is ON
• In stand-by mode Dim Red LED is ON
• Powered off Red LED is OFF.
Figure1. Connectors
- 3 -
- 4 -
Page 4
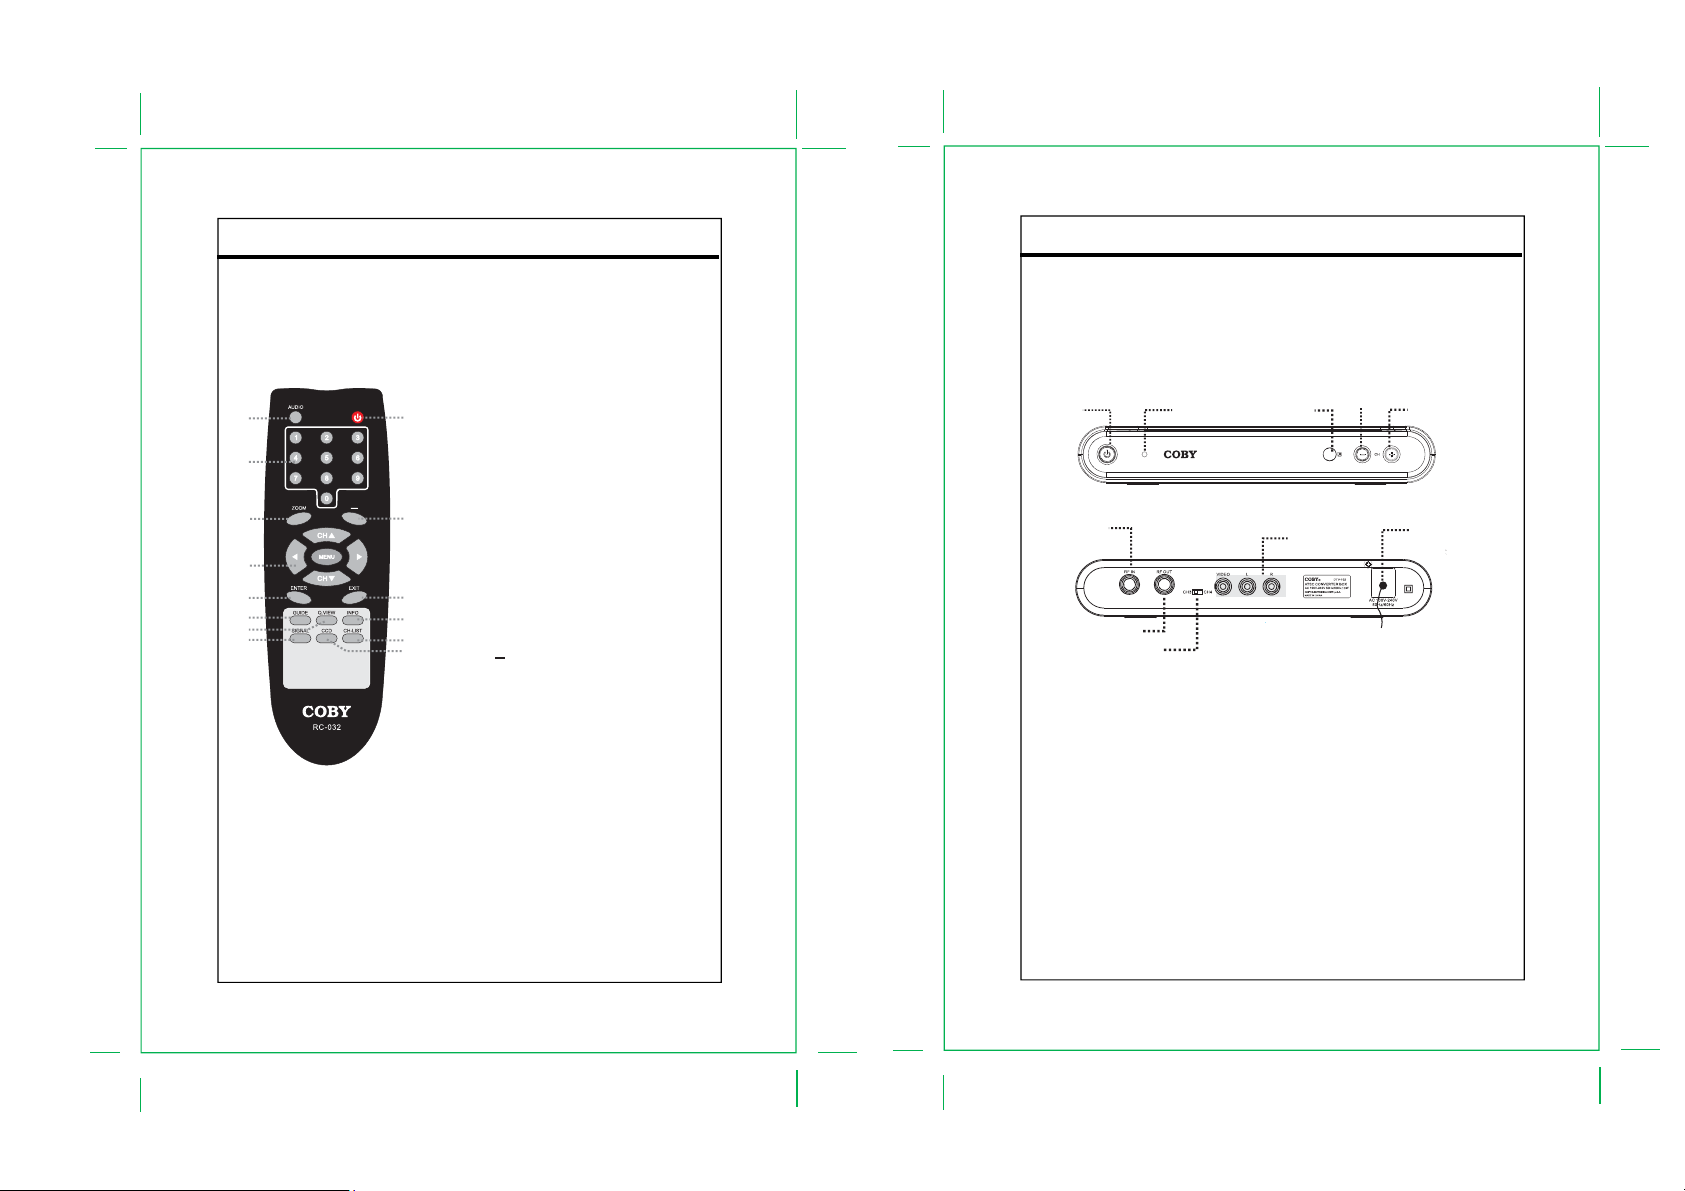
1.4 Remote Control Description
Key Description
A description of the remote control button functions is shown in Figure 2 below.
1. AUDIO
Press to set the audio mode.
2. Number keypad
Press to input data.
1
2
3
4
5
6
7
8
Figure 2. Remote Control
Button Functions
9
10
11
12
13
14
3. ZOOM
Press to zoom the image.
4. Direction Buttons & MENU
While working with the system menu, press the
direction buttons to move between the options.
The up/down direction button works also as the
channel+/- button.
Press MENU to display the menu.
5. ENTER
Press to confirm settings.
6. GUIDE
Press to show the program guide.
7. Q.VIEW
Press to view the previous channel.
8. SIGNAL
Press to display the signal quality information.
9. POWER
Press to turn on/off the player.
10. Button
Press to display the digital input field.
11. EXIT
Press to back up/exit the menu.
12. INFO
Press to show the current working status.
13. CH-LIST
Press to show the channel list.
14. CCD
Press to set the closed caption.
- 5 -
Introduction
Introduction
1.5 Unit Description
A description of the buttons and the connectors on the main unit is shown in Figure 3 below.
Figure 3. Buttons on the Main Unit
Power
RF Signal In
POWER
Press to turn the unit on/off.
CHANNEL +/-
Press to skip channels.
Power Indicator
Under the normal working mode, it lights green.
Under the standby mode, it lights red.
Remote Sensor
Sense the remote signal.
RF Signal In
RF IN connector
RF Signal Out
Channel Selector
Power Indicator CH -
Remote Sensor
RCA Output
RF Signal Out
RF OUT connector
Channel Selector
Switch between the channel 3 and the
channel 4
Power Cord
Plug into the power supply.
- 6 -
CH+
Power Cord
Page 5
Installation
2.1 Setup Checklist
The required hardware and equipment necessary to use the DTV-102 are:
- DTV-102 converter box
- Converter box remote control and 2 AAA batteries
- RF cable for output
- Composite video and audio cables, or RF cable, for output
- RF video source (terrestrial antenna)
- Analog TV with composite video/audio or RF input
2.2 Unpacking
The following items are included with your product. If any items are missing, contact your dealer.
Main Unit
RF Cable
- 7 -
Remote
RCA Cable
Installation
2.3 Cabel Connections
A
NOTE: Set the external receiver to the relative input mode to enable the signal pass.
When output signal, refer to the user’s manual of the external receiver as well.
Input the TV signal to your converter box
Connect the RF source to the RF IN connector located on the unit’s rear panel. To view television channels, a
signal must be received by the device from one of the following sources: The internal antenna/An outdoor aerial
antenna/A cable television network/A satellite network.
MONITOR WITH AV
/RF INPUT
B
RF IN
- 8 -
Figure 4. Cable Connections
To Wall Outlet
Page 6
Installation
Output the TV signal from your converter box to the external receiver
You can adopt either of the methods below to output the TV signal to the external monitor.
Refer to A,B in the Figure 4. for better understanding.
A. CVBS Output
Connect the video port (VIDEO) by the supplied RCA cable. (yellow plug).
Connect the audio port (L, R) by the supplied RCA cable (white&red plug).
B. RF Output
Connect the RF OUT port by the RF cable to output the TV signal.
NOTE: Only two channels are available if you chose to output the signal by the RF cable.
Slide the channel switch on the unit’s rear panel to select the channel 3 or the channel 4.
Left Position - - CH3 Right Position - - CH4
C. Analog pass-through Application
- Power On : User Setting the A/V and Modulator 3/4Ch Output
- Power Off : User Setting the analog pass-through Output
1) Power On Application
Analog Signal
Analog Signal
Digital Signal
Digital Signal
2) Power Off Application
Analog Signal
Digital Signal
Ant In
Ant In
Ant In
ANT IN ANT OUT
ANT IN ANT OUT
ANT IN ANT OUT
MD 3/4Ch
MD 3/4Ch
Audio-R
Audio-R
Audio-R
Loop-through
Signal
Composite Video Output
Composite Video Output
Audio L/R
Audio L/R
Audio-L
Audio-L
Audio-L
Video OUT
Video OUT
Video OUT
Receive the Analog Signal
Installation
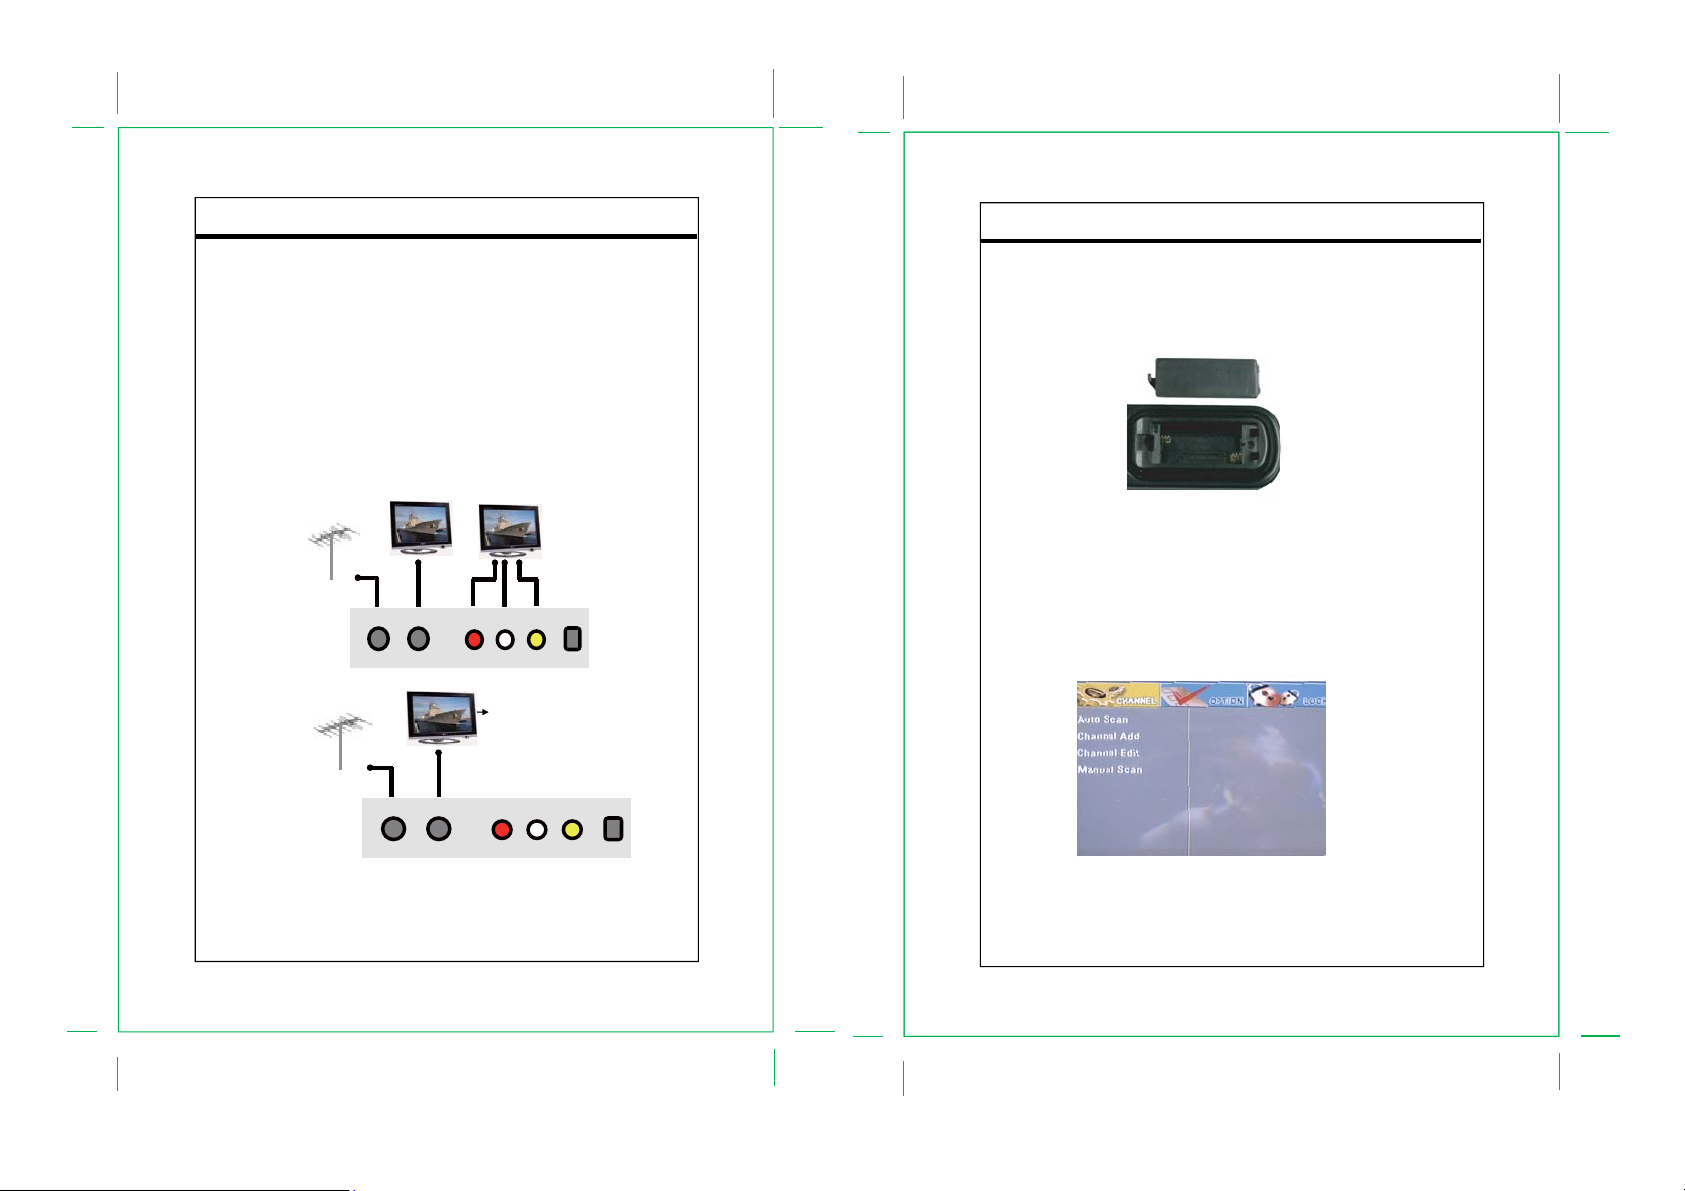
2.4 Remote Control Battery Installation
1. Unlatch the battery compartment cover on the back of the remote control.
2. Insert 2 AAA batteries into the battery compartment, making sure the + and – ends of each battery line up with
the corresponding marks in the battery compartment, as shown in Figure 5 below.
3. Snap the cover back on to the remote control.
2.5 Initial Setup
After the input/output connections have been made, and the DTV-102 has been powered up, a blue screen
should be seen on the TV screen. Pressing the MENU button on the remote control should display the main
menu on the screen, as shown in Figure 6 below. Chapter 3 in this User Guide describes the procedures for
basic TV operations such as scanning for channels, changing channels, language control, and information
display. Refer to Chapter 4 for more details about all of the Menu features and controls.
Figure 5. Install Remote Control Batteries
Power Connection
ANT IN ANT OUT
Audio-R
Audio-R
Audio-L
Audio-L
Video OUT
Video OUT
ANT IN ANT OUT
Insert the power plug into the wall outlet with AC100V-240V, 50Hz/60Hz.
NOTE: Be sure to have all necessary cable connections properly done before connect the power
source.
If the player will not be used for a long period of time, disconnect the power and remove the batteries
from the remote.
- 9 -
Figure 6. Main Menu
- 10 -
Page 7

Basic Operation
This chapter will describe the steps required for basic operation of the DTV-102 converter box (CB), including
performing the initial channel scan, changing channels, language control, and information display. Please refer
to Section 1.4 above for a description of the converter box remote control button functions as referenced in this
chapter.
3.1 Initial Channel Scan
1.To perform a channel scan when the input is from a terrestrial antenna, click the MENU button on the CB
remote control to display the setup menu, press the navigation buttons to highlight “CHANNEL”, press
the navigation button to select “Auto Scan”, press the direction button or the ENTER button to start
auto scan.
Figure 7. Auto Scan Sub-Menu
2. After pressing the navigation button or the ENTER button, the DTV-102 will scan the RF input for all DTV
channels, and add these channels to the list of available channels. The Auto Scan Status window, as
shown in Figure 8 below, shows the progress of the channel scan as well as the total number of digital
channels found, including major and minor channels.
The auto scan process can be cancelled at any time by pressing the ENTER button on the CB remote
control.
0
Basic Operation
3.2 Changing Channels
One advantage of digital television is the ability for a broadcaster to transmit more than one program
simultaneously on one channel. This is done by using major and minor channel numbers such as 4-1
(major channel) and 4-2, 4-3 and 4-4 (minor or sub-channels.) With digital television, a broadcaster on
channel 4 (the major number) may provide their usual programming on channel 4-1 but also provide
other programs on channel 4-2, 4-3, 4-4, etc. Note that some broadcasters only broadcast their usual
programming on one channel such as 4-1. Note that you can watch HDTV programs even if you do not
have an HDTV capable television. When the HDTV programs are received by the CB, the CB converts
the broadcaster’s signal so it can be viewed on any television in standard resolution.
After scanning, switching between channels can be easily done like changing channels on a regular
television, but there are several ways to do it:
• Use the Channel Up (Ch+) and Channel Down (Ch-) buttons on the CB remote control.
• Use the Channel Up (Ch+) and Channel Down (Ch-) buttons on the CB front panel.
• Use the number and dash (-) remote buttons to enter in the desired channel number.
Enter in the major number, then the “-“ button, then the minor number.
(e.g. Enter “1”, “3”, “-“, “2” to tune to channel 13-2.)
If the major channel is desired, it is only necessary to enter in the major channel number
(e.g. Entering “1”, “3” will tune to channel 13-1.)
• Use the Q.VIEW button to switch to the last channel viewed.
0
Figure 8. Auto Scan Status Window
3. After the channel scan is completed, the menu window will disappear, and the converter box will display the
first locked channel.
- 11 -
- 12 -
Page 8

Basic Operation
3.3 Audio and Language Control
This section discusses the methods to control the audio levels and channel.
Volume Control
Audio volume can be increased or decreased by pressing the Volume +/- buttons on the CB remote
control.
Audio Channel Information
Digital channels sometimes provide multiple audio tracks, often in a different language. If these
alternate audio tracks are available, you can cycle through them by repeatedly pressing the AUDIO
button on the CB remote control. If the language or audio track description is available, it will be
displayed briefly on screen. The audio channel number depends on the broadcasting program. So far,
only English, Spanish, French is supported in the box. Others will be considered as undefined.
Menu Language
The menu language can be changed by following these steps. See the Setup section in Chapter 4 for
additional details on this menu option.
1. Press the MENU button on the CB remote control to display the setup menu.
2. Use the navigation buttons to highlight “OPTION”, use the navigation buttons to
highlight “Language” sub-menu.
3. Press the navigation button or the ENTER button to enter the language sub-menu.
In this sub-menu, select the Language option.
4. In this window, as shown in Figure 9 below, it is possible to select three menu language
options: English, Spanish and French.
0
Basic Operation
5. Use the navigation buttons to highlight and select the desired language.
6. Press the navigation button or the MENU button on the CB remote control to exit out of this menu.
The Menu text will now be displayed in the selected language.
3.4 Information Display
The following text windows are used to display information with the DTV-102
• Channel Number – displayed briefly when changing channels.
• Volume Level – displayed when changing volume.
• Audio Information – displayed briefly when AUDIO button is pressed.
• Menu Windows – main menu and sub-menus are used to access setup and other features.
• Information Display – displays channel/program information when INFO button is pressed.
• Closed Caption – displays Closed Caption text when enabled.
• Guide Display – displays program information when GUIDE button is pressed.
The menu windows are discussed in Chapter 4. This section will discuss the Information, Guide and
Closed Caption information display windows.
Information Display
When the INFO button on the CB remote control is pressed, a text window will appear on the screen, as
shown in Figure 10 below.
YOKOHAMA
Fri. Dec31. 2004. 5:59pm - 8.59pm
LG 3808
Figure10. Information Display Window
This window displays information about the current channel and program being viewed.
The information includes the date, time, channel number and channel name. Information icons also
provide additional details about the channel and program.
0
Figure 9. Menu Language Window
- 13 -
- 14 -
Page 9

Basic Operation
Guide Display
When the GUIDE button on the CB remote control is pressed a text window will appear on the screen,
as shown in Figure 11 below.
Figure11. Guide Display Window
This window displays information about the current and future program being watched, if that
information is provided by the broadcaster. The information in this window includes the channel number
and name, the current time, and the program name, start time, and end time for the current program
and the next program. By repeatedly press the down navigation button, the information for additional
future program can be displayed.
Closed Caption
Closed Caption (CC) provides an on-screen text version of the audio content for the program being
broadcast. Not all programs support CC; if CC is supported for a given program, the “CC” icon will
appear in the Information Display that can be viewed while watching the program by pressing the INFO
button on the CB remote control.
Repeatedly press the CCD button on the CB remote to set the CC modes.
There are nine basic CC selection that can be cycled through by repeatedly pressing the CCD button.
The modes are: CC1, CC2, CC3, CC4, Text1, Text2, Text3, Text4, Off.
- 15 -
0
Page 10

Menu Operation
This chapter describes all of the Menu features and controls provided with the DTV-102.
These menu features are accessed by pressing the MENU button on the CB remote control, and the navigation
buttons ( ) are used to navigate within the sub-menus and to select the desired option. The left ( )
navigation button or the MENU button can be pressed to back up the menu. Pressing the EXIT button will exit
completely out of the menu system. The four sub-menus available are:
• Channel – Auto Scan, Channel Add, Channel Edit, Manual Scan.
• Option – Clock, Aspect Ratio, Language, Audio Language, Closed Caption, DCC View, Sleep Mode.
• Lock – Lock System, Change Password, Block Channel, TV Rating-Children, TV Rating-General, Movie
Rating, Downloadable RRT
4.1 Channel Menu Features
After pressing the MENU button on the CB remote control, use the navigation buttons to highlight
“CHANNEL” and press ENTER or the navigation button to enter.
Figure 12. Channel Sub-menu
Auto Scan
The Auto Scan option is used to automatically scan for available digital channels, and should be
used when powering on the CB for the first time. Refer to Section 3.1 for details on how to perform the
Auto Program procedure. If initiated again at a later time, this process will erase all of the previously
saved channels.
Menu Operation
Manual Scan
The Manual Scan option is used to manually scan for available digital channels and to add additional
channels to the list of available channels; it will not affect the previously saved channels. To use this
feature it is helpful to know the broadcast frequency of the channel to be added, which is different from
the channel number. For instance, your “local channel 4 news” may be on broadcast frequency 35. This
is only important to know when adding a channel that was not detected by the Auto Program function. If
you do not know the broadcast frequency number, see the web site antennaweb.org (for addresses in
the USA.)
Use the navigation buttons to highlight “CHANNEL”, press the navigation button to
select “Mannual Program”, press the navigation button or the ENTER button to access.
The Manual Program window will appear, as shown in Figure 14 below.
Figure 14. Manual Scan Window
Figure 13. Auto Scan Sub-menu
- 16 -
0
Use the navigation buttons to select the RF channel. Press ENTER to add it to the channel
collection. To erase, press ENTER agian.The signal strength information will be indicated by the bars in
the bottom of the manual program window.
0
- 17 -
Page 11

Menu Operation
Channel Add
The Channel Add option is used to automatically scan for available channels and to add additional
channels to the channel collections; It will not affect the previously saved channels.
Use the navigation buttons to select “CHANNEL”, press the navigation button to select
“Channel Add”, press the navigation button or the ENTER button to access Channel Add, press
the ENTER button to stop.
Figure15. Channel Add
Channel Edit
The Channel Edit sub-menu provides the option of adding or deleting channels in the channel list.
After accessing “CHANNEL”, press the navigation button to select “Channel Edit”, press the
navigation button or the ENTER button to access Channel Add.
Press the navigation buttons to select the channel, Press the ENTER button to add or delete.
Menu Operation
4.2 Option Menu Features
After pressing the MENU button on the CB remote control, use the navigation buttons to highlight
“OPTION” and press the navigation button or the OK button to access.
The Option sub-menu has eight options: Clock, Aspect Ratio, Language, Audio Language, Close
Capiton, DCC View, Sleep Mode as shown in Figure 17 below.
Figure17. Option Sub-Menu
Clock
The Clock sub-menu provides the option of selecting the desired Time Zone for North Ameica.
This is used to automatically program the correct local time. There are eight time zone options: Hawaii
(HA), New F.land, Atlantic (A), Eastern (E), Central (C), Mountain (M), Pacific (P) and Alaska (AK).
After accessing the OPTION menu, use the navigation button to hightlight “Clock” and press
the navigation button or the ENTER button to access “Clock”.
Use the navigation buttons to set the desired time zone. See Figure 18 below.
Figure16. Channel Edit
- 18 -
0
Figure18. Clock
0
- 19 -
Page 12

Menu Operation
Aspect Ratio
The Aspect Ratio sub-menu provides the option of setting the display aspect ratio. There are four
options: Set by program, Letter Box, Zoom, Full.
After accessing the OPTION menu, use the navigation button to hightlight “Aspect Ratio” and
press the right navigation button or the ENTER button to access “Aspect Ratio”.
Use the navigation buttons to set the desired aspect ratio.
Menu Operation
Audio Language
The Audio Language sub-menu provides the option of setting the audio language.
There are four options: English, Spanish, French.
After accessing the OPTION menu, use the navigation button to hightlight “Audio Language”
and press the navigation button or the ENTER button to access “Audio Language”.
Use the navigation buttons to set the desired audio language.
Figure19. Aspeck Ratio
Language
The Language sub-menu provides the option of setting the OSD(On-Screen-Display) language.
There are three options: English, Spanish, French.
After accessing the OPTION menu, use the navigation button to hightlight “Language” and press
the right navigation button or the ENTER button to access “Language”.
Use the navigation buttons to set the desired OSD language.
0
Figure20. Language
- 20 -
Figure21. Audio Language
Closed Caption
An estimated 28 million people, or approximately 10 percent of the population, of the US are dead or
hard of hearing. The FCC enforces broadcaster carriage of Closed Captioning (CC) information for deaf
and hard of hearing television viewers.
In old Analog TV, CC information is sent in four categories: CC1, CC2, CC3, and CC4. Generally, CC1
is used for English captions and CC3 is used for Spanish.
For digital TV, CC information is sent as Services. Your converter box supports six services, labeled
Service 1 to Service 6. Today, Service 1 is commonly used.
A new digital TV broadcast can contain both Analog TV CC as well as digital TV CC. You have two
choices in viewing Closed Caption information.
The first option is to allow the Converter Box to decode and display the analog or digital TV CC. The
second option allows the TV to decode and display the Analog CC passed along by the Converter Box.
Either one or the other should be used, but not both at the same time.
After accessing the “OPTION” menu, use the navigation buttons to hightlight “Closed Caption”,
press the navigation button or the ENTER button to access “Closed Caption”.
See the Figure 22
0
- 21 -
Page 13

Menu Operation
Figure22. Closed Caption
There are three options under the “Closed Caption” menu.
ACC - Set the analog closed caption service. There are nine options: CC1,CC2,CC3,CC4,Text1,
Text2, Text3,Text4, Off.
DCC - Set the digital closed caption mode as Off, Standard or Custom.
DCC Service - Set the digital closed caption service from service 1~ service 6.
ACC (Analog CC)
The ACC (Analog CC) sub-menu provides the option of selecting which CC service should be used for
the analog CC text display window. The default setting, CC1, is the correct service for almost all cases.
Press the navigation buttons to select “ACC” under the “Closed Caption” menu.
Press the navigation buttons to select the ACC service.
There are nine options: CC1,CC2,CC3,CC4,Text1, Text2, Text3,Text4, Off.
NOTE: The ACC option is available only when the “DCC” is set as “Off ”.
DCC(Digital CC)
The DCC (Digital CC) sub-menu provides the options of setting the DCC mode as Off, Custom or
Standard.
- Off - When “Off” is selected, the DCC text is never displayed.
- Standard - When “Standard” is selected, the screen will display the standard DCC service.
- Custom - When “Custom” is selected, the DCC View sub-menu will be available for digital CC
customer setting. See DCC View submenu for details
After accessing the “Closed Cation” menu, press the navigation buttons to select “DCC”
Press the navigation buttons to select the DCC mode.
0
Menu Operation
DCC Service
The DCC Service sub-menu provides the options for which service is going to be used in current digital
CC display. There are six options from service1~ service6.
After accessing the “Closed Cation” menu, press the navigation buttons to select “DCC Service”
Press the navigation buttons to select the DCC service.
Service #1 is designated as the Primary Caption Service. This service contains the verbatim, or
near-verbatim captions for the primary language being spoken in the accompanying program audio.
Service #2 is designated as the Secondary Language Service. This service contains captions in a
secondary language which are translations of the captions in the Primary Caption Service.
The other service sub-channels are not pre-assigned. It is up to the discretion of the individual caption
provider to utilize the remaining service channels.
0
- 22 -
- 23 -
Page 14

Menu Operation
DCC View
The DCC View sub-menu provides the option for digital CC customer setting
This sub-menu is available only when the DCC is set as “Custom”. Set the DCC as Custom under the
Close Caption sub-menu.
Figure23. DCC View
After accessing the OPTION menu, press the navigation buttons to select DCC View sub-menu,
press the navigation button or the ENTER button to access the DCC View sub-menu.
In the DCC View sub-menu, press the navigation buttons to select the option.
Sleep Mode
The Sleep sub-menu provides the option of selecting a set amount of time before the CB will
automatically switch to stand-by mode. There are five sleep time options: Off and 1, 2, 4,8 hours.
A warning popup window will appear on the screen 1 minute before the set time expires to let the user
know that the CB will soon enter stand-by mode. The user can then turn off this feature or set a new
sleep time amount by accessing this Sleep menu before the time expires.
After accessing the OPTION menu, use the navigation buttons to highlight the Sleep Mode
option, and press the navigation button or the ENTER button to access the Sleep Mode.
Use the navigation buttons to select the sleep time.
Menu Operation
4.3 Lock Menu Features
The DTV-102 converter box module incorporates V-Chip technology to block viewing of television
programs and movies according to their rating categories. V-Chip is included into TVs and other video
devices to work in conjunction with the TV Parental Guidelines. It electronically reads television
programming ratings and allows parents to block programs they believe are unsuitable for their children.
Non-rated movies can also be blocked. The rating categories in use include TV ratings for TV programs
and MPAA ratings for theatrical movies being broadcast. The Canadian English and Canadian French
rating categories are also available for programs broadcast in Canada.
After pressing the MENU button on the CB remote control, use the navigation buttons to highlight
the LOCK option and press the OK button. A password or PIN is needed to access and make changes
in this menu. Using the number buttons on the CB remote control, enter the 4-digit password in to the
Password window as shown in Figure 25 below. An “*” will appear for each digit entered.
NOTE: The factory default password is “0000” and can be changed using the Change Password
sub-menu. If the new password is forgotten, it can be reset to “0000” by unplugging power to the CB
module.
Figure 25. Password Window
The LOCK sub-menu has seven options: Lock System, Change Password, Block Channel, TV
Rating-Children, TV Rating-General, Movie Rating, Downloadable RRT.
Figure24. Sleep Mode
0
0
Figure 26. Lock Sub-menu
- 25 -
- 24 -
Page 15

Menu Operation
Lock System
The Lock System sub-menu provides the option of setting the lock function On or Off.
When On is selected, programs will be blocked based on the settings selected in the TV
Rating and Movie Rating sub-menus.
When Off is selected, no programs will be blocked.
After accessing the LOCK sub-menu, use the navigation buttons to highlight the Lock System,
and press the navigation button or the ENTER button to access.
Press the navigation buttons to set Lock System on or off.
Figure 27. Lock System
Change Password
The Change Password sub-menu allows the user to change the password used to access the LOCK
menu features.
After accessing the LOCK sub-menu, use the navigation buttons to highlight Change Password,
and press the navigation button or the ENTER button access Change Password.
Menu Operation
Block Channel
The Block Channel sub-menu provides the option of blocking the specified channel.
When the certain channel is blocked, it will never be viewed
After accessing the LOCK sub-menu, use the navigation buttons to highlight the Block Channel
and press the navigation button or the ENTER button to access Block Channel.
Press the navigation button to select the channel to be blocked, press the ENTER button to
block or unblock.
Figure 29. Block Channel
TV Rating - Children
The TV Rating-Children sub-menu allows the user to block programs for the young children based on
the age rating and the content rating. It is possible to block all programs with ratings at and above a
specified level, or to block programs with specified content within a selected level.
Figure 28. Change Password
A new 4 digit password can then be entered using the CB remote control number buttons, and then
entered again to confirm the new Password. If a new password was previously entered and has been
forgotten, it can be reset to “0000” by unplugging power to the CB module.
- 26 -
Figure 30. TV Rating-Children
The following are the descriptions for each rating:
Age Rating Des cription
All C hildren
TV-Y
De s igned to be appro priate fo r all c hildren.
Directed to Older Children
Designed for children age 7 and above.
TV-Y7
P os sible content rating: F V (Fantasy Violence)
- 27 -
Page 16

Menu Operation
After accessing the LOCK sub-menu, use the navigation buttons to select TV Rating-Children,
press the navigation button or the ENTER button to access TV Rating-Children.
There are two options: Age and Fantasy Violence.
Age - Block programs based on the age rating TV-Y or TV-Y7. When TV-Y is selected, the higher
program TV-Y7 will also be selected to be blocked.
Fantasy Violence - Block programs with the fantasy violence content.
Press the navigation button or the ENTER button to access the options, press the navigation
buttons select the rating. The block indicator will be added to the specific rating. To release all block,
select Blocking Off in the menu.
When the CB receives broadcasts of those locked programs, the CB will block both video and audio
signals to the output, and a suggestive message will appear on the screen. Entering in the password will
temporarily overide the block settings for this program so that it can be viewed.
TV Rating - General
The TV Rating-General sub-menu allows the user to block programs for general audience based on TV
ratings, including age-based ratings and content sub-ratings for violence, language, sexual
situations and suggestive dialog. It is possible to block all programs with ratings at and above a
specified level, or to block programs with specified content within a selected level.
Figure 31. TV Rating-General
The following are the descriptions for each rating:
Menu Operation
Age Rating Descr iption
General Audience
Most parents would find this program
TV-G
appropriate for all ages.
Parental Guidanc e Suggested
C onta ins m ater ial th at pa rents ma y find
TV-PG
unsu itable for younger childr en.
Possible content ratings: D, L, S, V
Parents Strongly Ca utioned
Contains some material that many parents
would find uns uitable for childre n under 14
TV-14
years of age.
P oss ible con tent ra tings : D , L , S , V
Mature A udienc e Only
S pecifica lly designe d to be viewed by adults
and therefore ma y be unsuitable for children
TV-MA
under age 17.
P oss ible con tent ra tings : L , S , V
Content Rating Description
NOTE: When a specific age or content rating is selected, all settings above that rating will also be
selected to be blocked.
After accessing the LOCK sub-menu, use the navigation buttons to select TV Rating-General,
press the navigation button or the ENTER button to access TV Rating-General.
There are five options: Age, Dialogue, Language, Sex, Violence.
Age - Block programs based on the age rating .
Dialogue, Language, Sex, Violence - Block programs based on the content rating.
Press the navigation buttons or the ENTER button to access the options, press the navigation
buttons to select the rating. The block indicator will be added to the specific rating. To release all block,
select Blocking Off in the menu.
When the CB receives broadcasts of those locked programs, the CB will block both video and audio
signals to the output, and a warning window will appear on the screen. Entering in the password will
temporarily overide the block settings for this program so that it can be viewed.
D
L
S
V
FV
Suggestive Dialogue
Coarse Language
Sexual Situations
Violence
Fantasy Violence
- 28 -
- 29 -
Page 17

Menu Operation
Movie Rating
The MPAA Rating sub-menu allows the user to block broadcast movies based on the MPAA (Motion
Picture Association of America) ratings, which are age ratings based on violence, language and sexual
content. It is possible to block all movies with ratings at and above a specified level. It is also possible
to block un-rated movies, such as MPAA Not Rated movies.
Figure 32. Movie Rating
The following are the descriptions for each rating:
Age Rating Description
NR Not Rated by MP AA
General Audience
G
S uitable for all a udience s.
Parental Guidance Suggested
S ome material ma y not be suitable for
PG
children .
Parents S trongly Cautioned
S ome material may be ina ppropriate for
PG-13
children under age 1 3.
Restricted
Under age 17 requires accompanying parent
R
or guardian.
No One 17 and U nder Admitted
S ome mate rial is in tende d to be view ed by
NC-17
adults only.
No One 17 and Under Admitted
S ome mater ial is e xplicitly se xual a nd is
X
NOTE: When a specific rating is selected, all settings above that rating will also be selected to be
blocked.
After accessing the LOCK sub-menu, use the navigation buttons to select Movie Rating, and
press the navigation button or the ENTER button to access Movie Rating.
inte nded to be v iewe d by a dults only .
Menu Operation
Use the navigation buttons to select the desired rating to be blocked. All ratings above this level
will also be marked to be blocked.
For example, if it is desired to block all PG-13 movies:
Select PG-13 using the navigation buttons. The lock indicator dots will be added to all PG-13 and
higher categories.
NOTE: All PG-13 and higher movies will be blocked. When the CB receives broadcasts of those
movies, the CB will block both video and audio signals to the output, and a suggestive message will
appear on the screen.
Entering in the password will temporarily override the block settings for this program so that it can be
viewed.
Downloadable RRT
The current V-Chip recognizes the current RRT, which is communicated as part of the Program and
System Information Protocol. It depends on broadcasts which could communicate a new rating system
via the PSIP that both the chip and a TV’s software can understand. With downloadable RRT, blocking
of program shall occur when a program rating is received that meets the pre-determined user
requirement. User could program the open V-Chip with numbers of filters that go beyond the general
descriptors.
- 30 -
- 31 -
Page 18

Reference
This chapter discusses ways to troubleshoot the DTV-102 converter box and provides the module specifications.
5.1 Troubleshooting Guide
If you are experiencing problems with the DTV-102, see Table 1 for available solutions.
Table 1. DTV-102 Module Troubleshooting
No power
CB is not responding to the
remote control
No picture
Picture is blocky or not clear
No sound
Symptom Solution
Make sure the power supply is securely plugged into a standard wall outlet and the
co rd is plugge d into th e powe r co nnec tor on th e C B m odule .
Make sure the CB module is turned on using the front panel power button or the
remote control power button.
Make sure to point the remote control directly at the remote control sensor on the
CB , with no obstacles in between them.
You may be too fa r from CB . T ry moving clos er.
Make sure that the remote control batteries are installed in the correct direction (+
and –).
The batteries may be depleted. Try replacing them with new ones.
Verify CB is operating correctly by pressing buttons on the front panel of CB.
Make sure that the antenna in cable is correctly connected to the CB.
Make sure that the video out cable is correctly connected to the CB a nd TV.
Make sure that the CB and TV are turned on.
Make sure that the TV is correctly set to the selected CB video output channel.
R efer to the TV owner’s manual for further information.
Check the antenna and the antenna cable. There may be damage or interference
sources.
Check the antenna and the antenna cable. There may be damage or interference
sources.
Reposition the antenna to improve signal strength. Signal strength can also be
affected by rain or snow. In the USA, the website www.a ntenna web.o rg
provide help in determin ing the best a ntenna orienta tion.
Make sure that the audio cables are correctly connected between the CB audio
outputs a nd the TV audio inputs.
Make sure that CB and TV are turned on.
Make sure the CB and TV volume settings are at a reasonable level.
Ma ke s ure that th e MU TE fun ction is no t activ ate d on the C B o r TV .
Ma ke s ure the T V is cor rec tly s et to the sel ecte d C B a udio o utput ch anne l.
When TV has only one audio input jack, use a standard audio cable (white) to
co nnec t the a udio ou tput jac k (w hite) on the CB to the aud io inpu t jack on the TV .
The red audio cable and the CB red audio output jack are not needed.
can
Ma ke s ure that the Auto Pro gram proce ss in the Ch anne l me nu has be en
comple ted. It will be require d when you s etup the CB for the firs t time or whe n the
CB is mo ved to a loca tion where othe r channels are br oadcas t.
All digital c hannels are not
received
CC display stays on or two
sets of captions are shown
Forgot the PIN for V-Chip
The selected channel does not exist at the time. There are not always
sub-cha nnels being broadc ast.
When the Auto Program proc ess is interrupted and not completed, s ome channe ls
will not be rec eived. Make sure to c omplete the Auto P rogram proces s in the
Channel menu.
Make sure the CB C C mode is set to Off.
Make sure that the TV’s CC display is turned off. Refer to the TV owner’s manual
for further information on how to turn off its C C feature.
Un plug the AC powe r cor d and wait fo r appr ox. 5 se con ds, then plug in the po wer
co rd. In th e V -Ch ip men u, e nter th e de fault n umbe r "00 00. "
5.2 Specifications
Product
Converter Box for ATSC to NTSC
Connecting Jacks
ANT IN
F connector (75 ohm)
ANT OUT
F connector (75 ohm)
Video Output
1-pin RCA jack, 1Vpp, 480i composite
Analog Audio Output
2-pin RCA jack (L, R), 450 mVrms (100k ohm)
RF Input
DTV standard ATSC
Channel Coverage
Terrestrial: 2-69
Power Source
Power Consumption
w/o smart antenna, 8W (Power on),
Operating Condition
41 F° (5 C°) - 104 F° (40 C°)
Board Dimensions
(241 mm x 168 mm x 43 mm)
Weight
425g
Accessories
Remote Control 1 (Provided)
Batteries (size AAA) 2 (Provided)
RF cable 1
RCA cable
(Video+Audio L/R) 1
100-240 VAC, 50/60 Hz +/-0.5 %
Designs and Specifications are subject to change without notice.
Reference
- 32 -
- 33 -
 Loading...