

Page 1

For series /
Para la serie /
Pour la série
For series /
Para la serie /
Pour la série
CAM4002
EN
Snapp™ Digital Camcorder
Instruction Manual ...........................................................................Page 2
ES
Snapp™ Videocámara Digital
Manual de Instrucciones ..........................................................Pagina 44
FR
Snapp™ Caméscope Numérique
Manuel D’instruction .................................................................... Page 90
Please read carefully before use • Léa el manual antes de usar • Veuillez lire ce livret avant utilisation
Page 2

Page 2 Table Of Contents
English
Package contents .................................... 4
camera at a glance ................................. 5
Front View .......................................................5
Front View .......................................................6
Left View ..........................................................7
Rear View ........................................................ 8
Bottom View ...................................................8
getting started ........................................... 9
Install the Batteries ......................................... 9
Insert a Memory Card ................................... 9
Turning the Camera On/Off .......................10
Changing Camera Modes ......................... 10
record mode (Photos & movies) ...........11
To Record a Movie ........................................11
To Take a Photo .............................................11
Movie and Photo Adjustments ....................11
Zoom ....................................................11
Using the Low-Light Assist Lamp .......12
Changing the Movie Size ..................12
Changing the Photo Size ...................13
Changing the Photo Quality.............13
Playback mode ..........................................14
Playback Controls .........................................14
To Browse Files .....................................14
To Browse Files as Thumbnails ...........14
Deleting Files ..................................................15
To delete the current le
(delete one): .......................................15
To delete all les (delete all): .............15
oPtions menu .............................................16
To adjust the Record options: ......................16
To adjust the Playback options: ................. 18
To adjust the System options: ......................20
table of contents
Â
Page 3

Table Of Contents Page 3
English
connecting to a tv ................................ 23
transferring files to a comPuter ....... 24
using the included software ................ 26
Installing muvee™ autoProducer ...............27
Using muvee™ autoProducer ......................31
Making a muvee™ ...........................32
sPecifications ........................................... 36
troubleshooting & suPPort ....................37
imPortant information ..........................39
FCC Statement ............................................. 40
Important Safety Instructions .......................41
Maintenance and Care ..............................43
Page 4

Page 4 Package Contents
English
Thank you for purchasing a Coby Snapp™ CAM
Digital Video Camera. Please read these instructions
before using your camcorder, and retain them for
future reference. This package includes:
CAM camera
A/V Cable
USB cable
Three “AAA” batteries
Installation CD
Pouch
Should any of the above items be missing, please
contact the dealer from whom you purchased this
product.
This package may contain plastic bags or
other materials that pose a hazard to children. Be sure to safely dispose of all packing
materials after opening.
Package contents
Â
Page 5

Camera At A Glance Page 5
English
Camera At A Glance Page 5
English
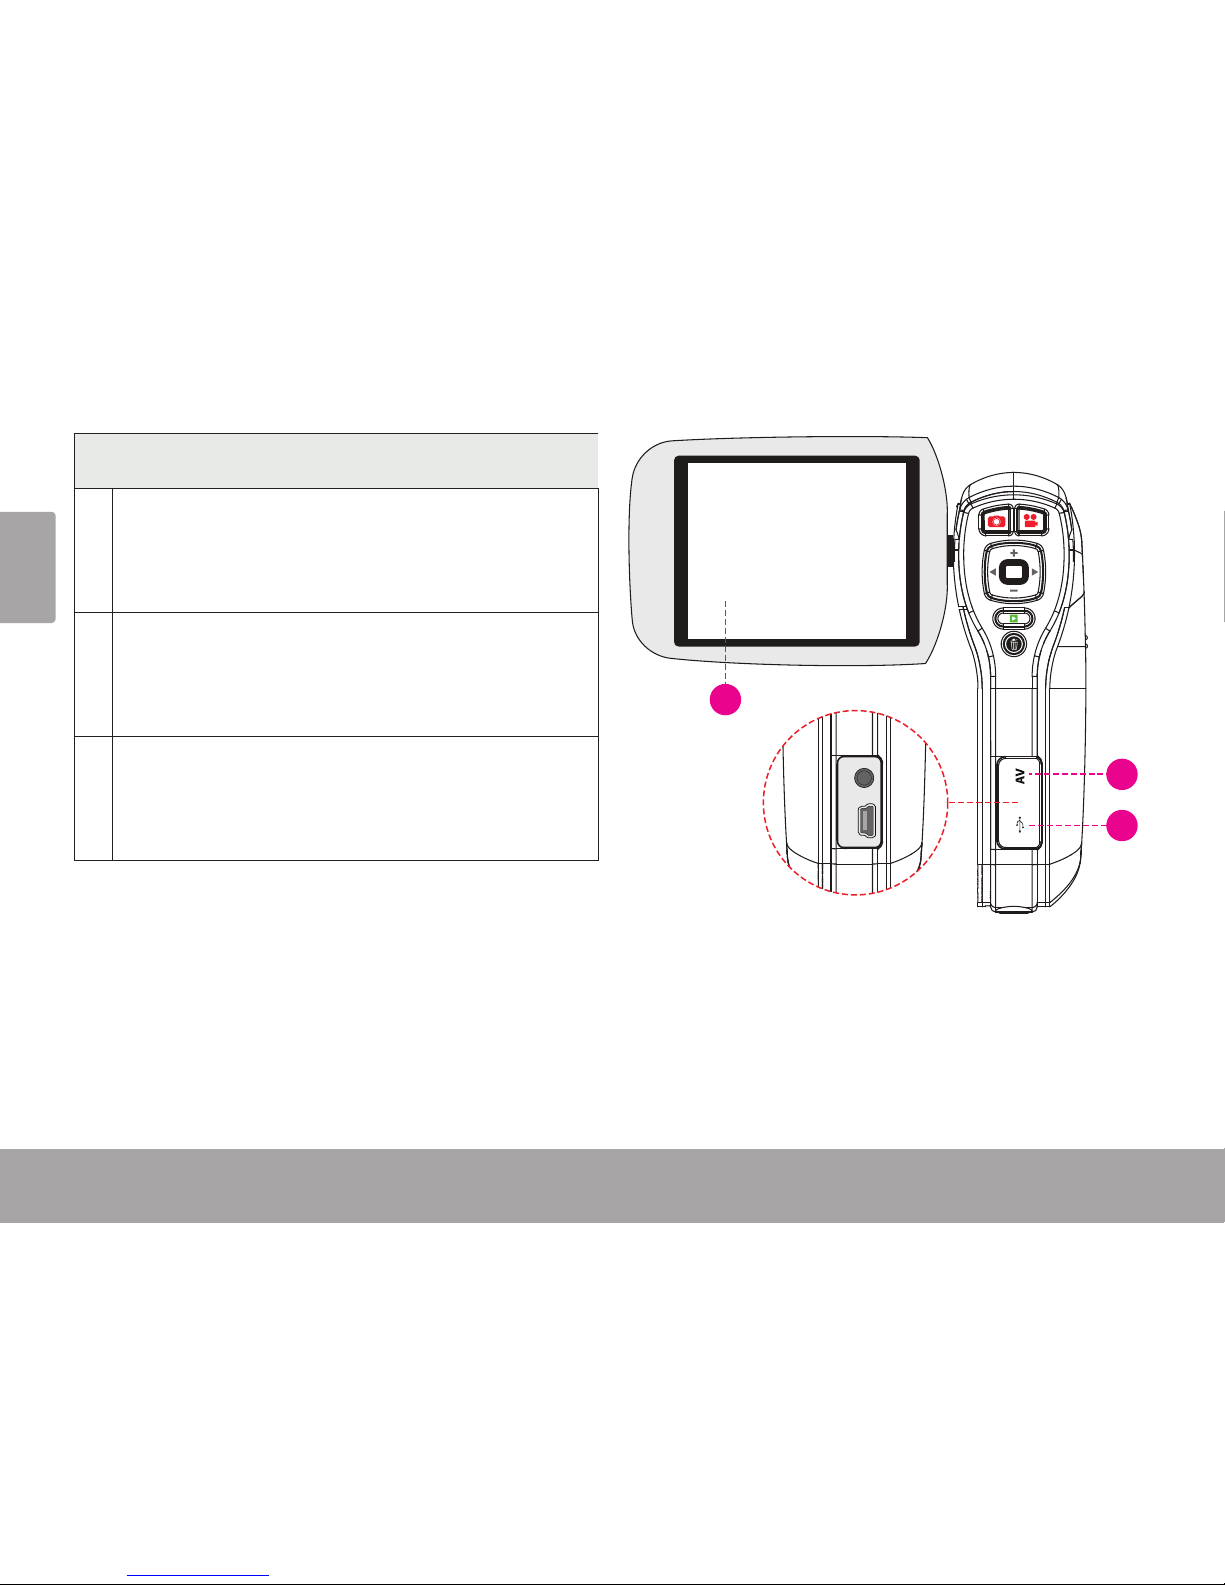
Front View
1
Press to take a photo when the camera is in Record
mode.
2
Press to shoot video when the camera is in Record
mode.
3
Press the joystick to enter a selected option (OK).
Push the joystick up, left, down, or right to trigger buttons
(4) to (8) below.
4 Push the joystick up to increase the zoom level.
5
Push the joystick left to change the photo resolution.
Higher resolution photos will use more memory.
6 Push the joystick down to decrease the zoom level.
7
Push the joystick right to toggle the low-light assist
lamp.
8
Press to change between Playback and Record
modes.
9 Press to delete a le.
1
3
2
7
9
4
6
5
8
camera at a glance
Â
Page 6
Page 6 Camera At A Glance
English
Front View
10
Display screen. Flip the screen up to open it, then rotate the
screen to face you.
(The POWER and MENU buttons are protected behind the
display screen when it is closed.)
11
A/V output jack. Use with the included A/V cable to connect
the camera to a TV or other display.
(The A/V output jack is protected by a rubber ap. Lift the ap
up to reveal the A/V output jack.)
12
USB port. Use with the included USB cable to connect the
camera to a computer.
(The USB port is protected by a rubber ap. Lift the ap up to
reveal the USB port.)
11
12
10
Page 7
Camera At A Glance Page 7
English
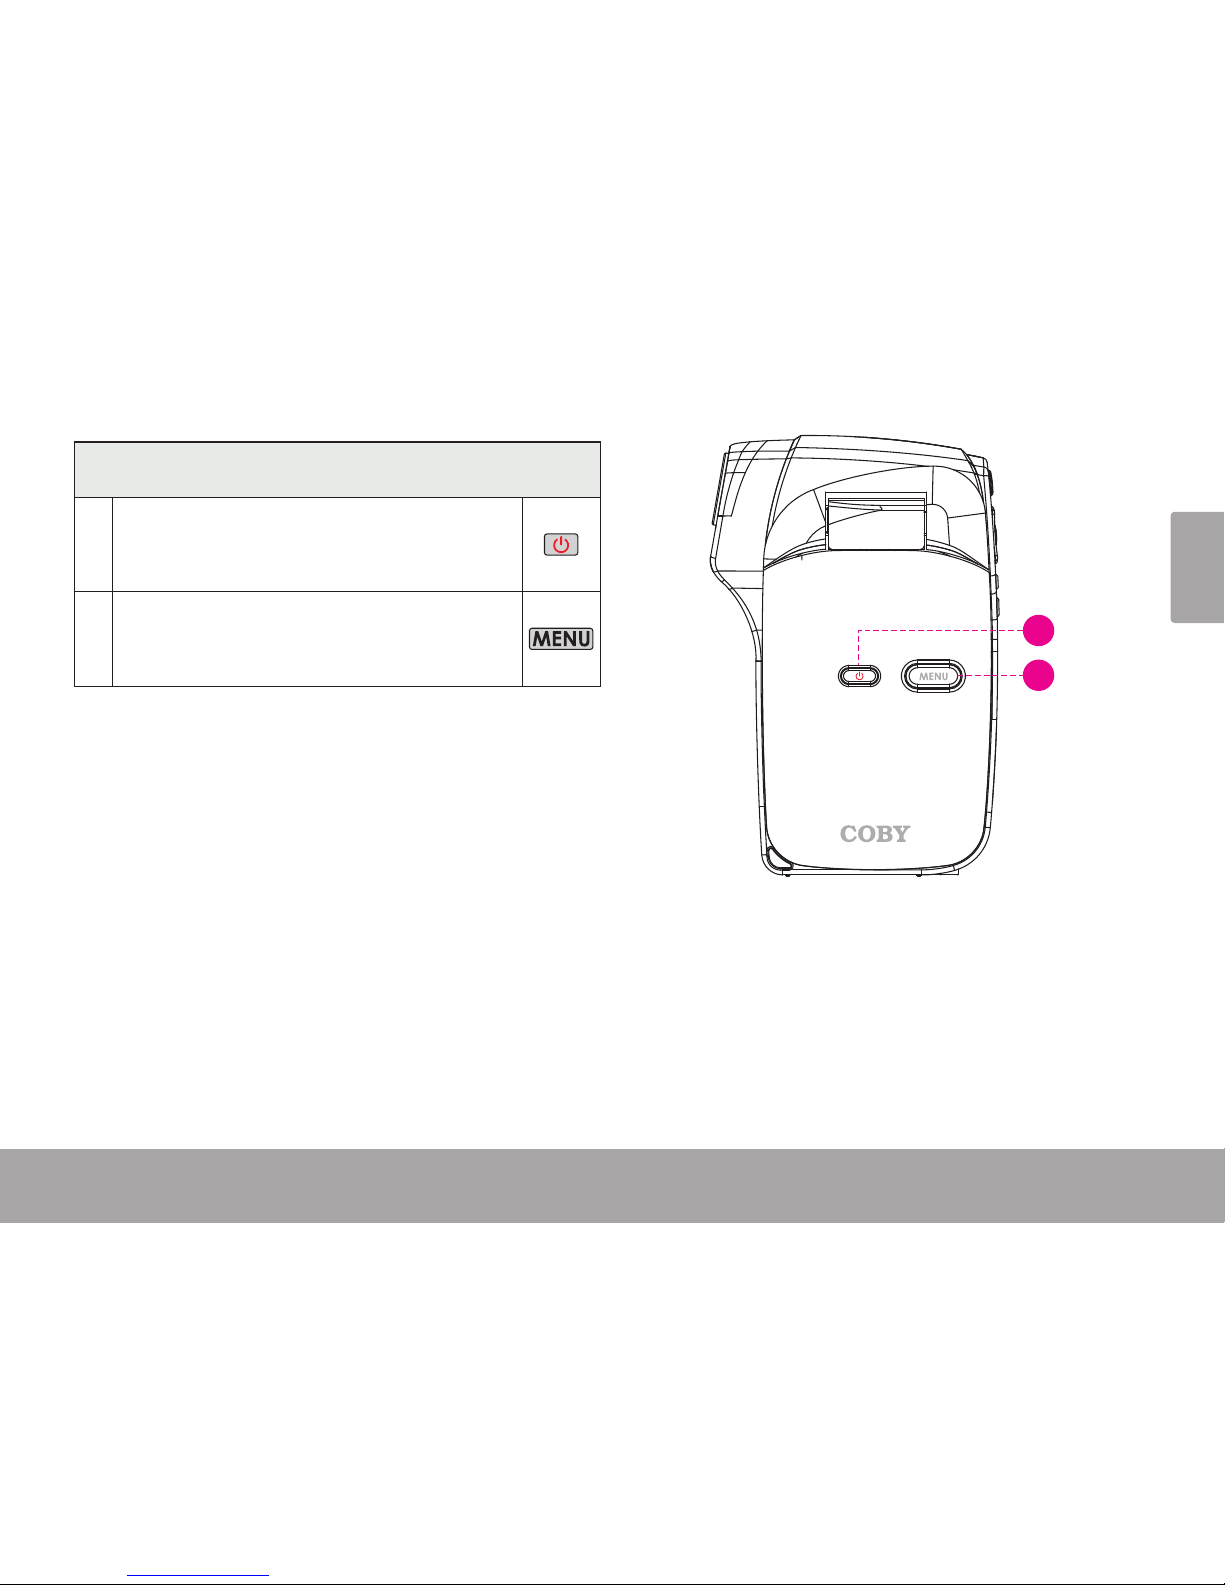
Left View
13
Press and hold to turn the camera on or o.
(The POWER button is protected behind the display
screen. Flip open the screen to access this button.)
14
Press to access the option menu.
(The MENU button is protected behind the display
screen. Flip open the screen to access this button.)
13
14
Page 8
Page 8 Camera At A Glance
English
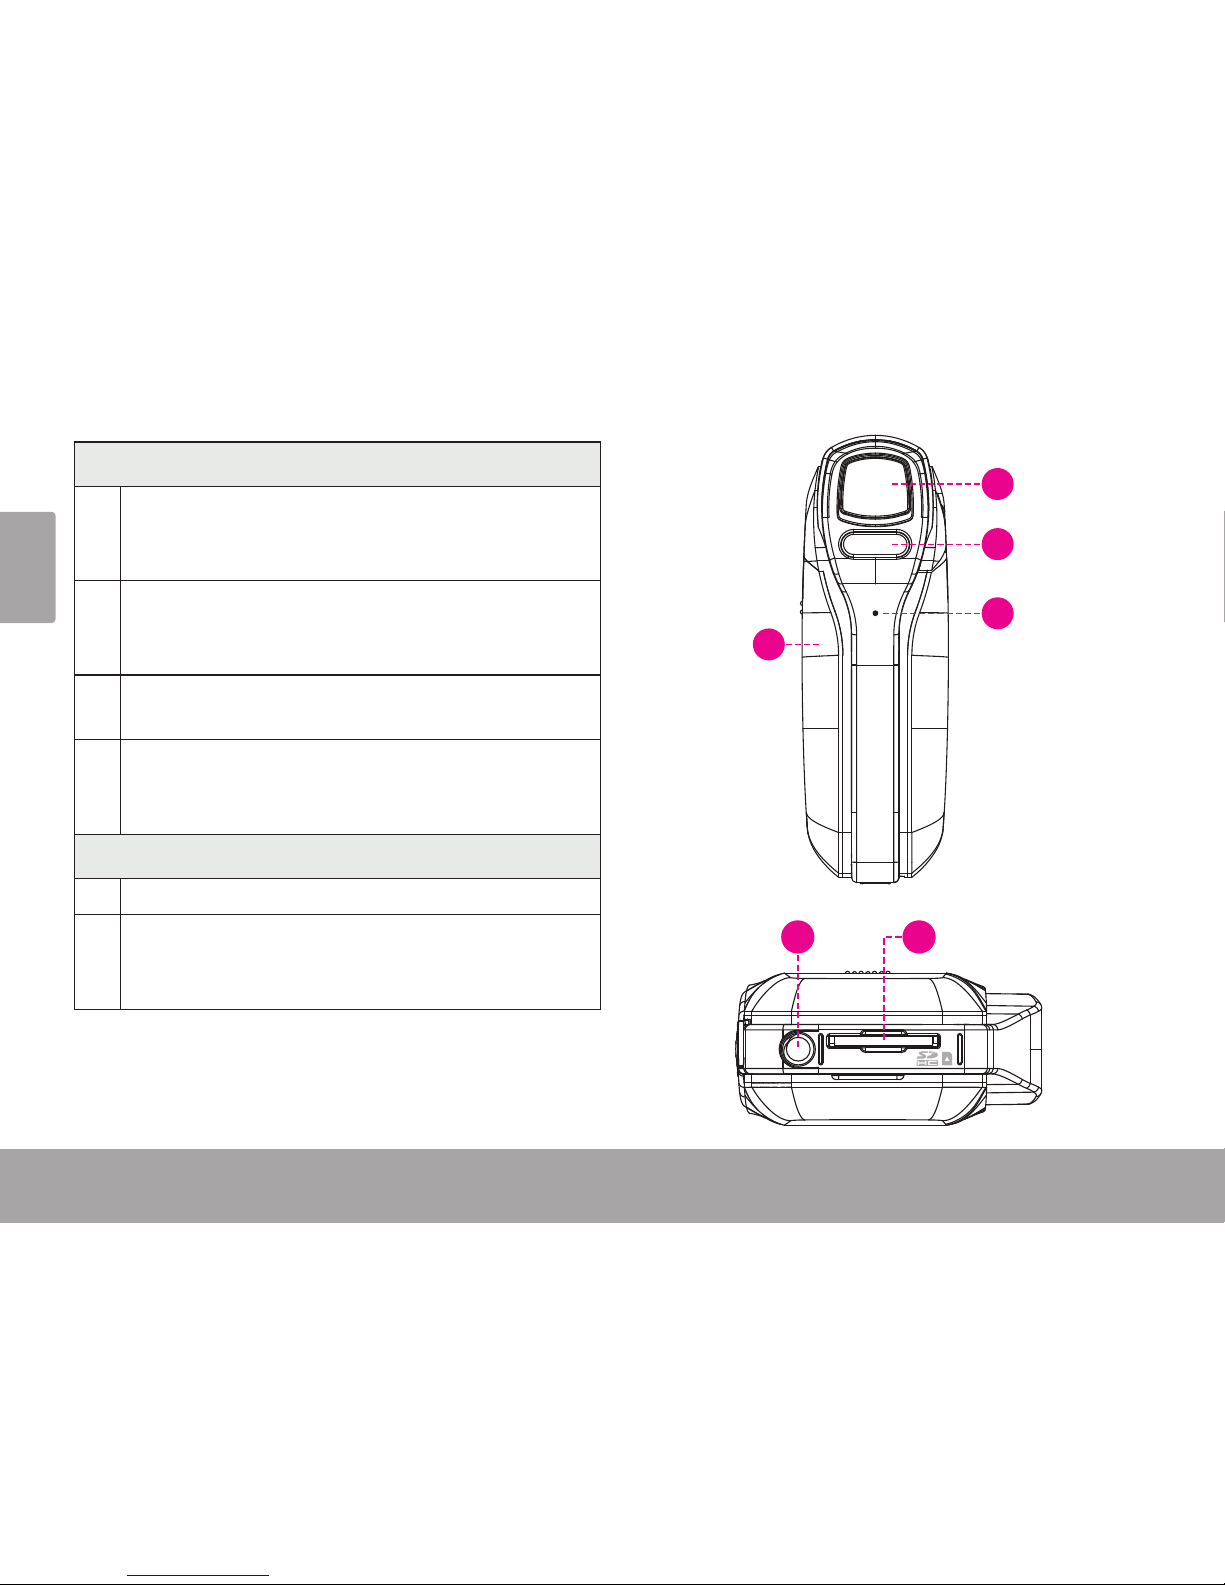
Rear View
Camera lens.
Point the lens towards the subject that you
want to capture
Low-light assist lamp.
Improves picture quality in low light situations.
Microphone.
Captures audio during movie recording
Battery cover.
Slide the cover down to install or replace the
batteries.
Bottom View
Tripod mount
SD/SDHC card slot. Load SD or SDHC memory
cards into the slot. The metal contacts of the
card should face down.
15
16
17
18
2019
Page 9
Getting Started Page 9
English
Getting Started Page 9
English
Please read and complete the following steps to
begin using your digital video camera.
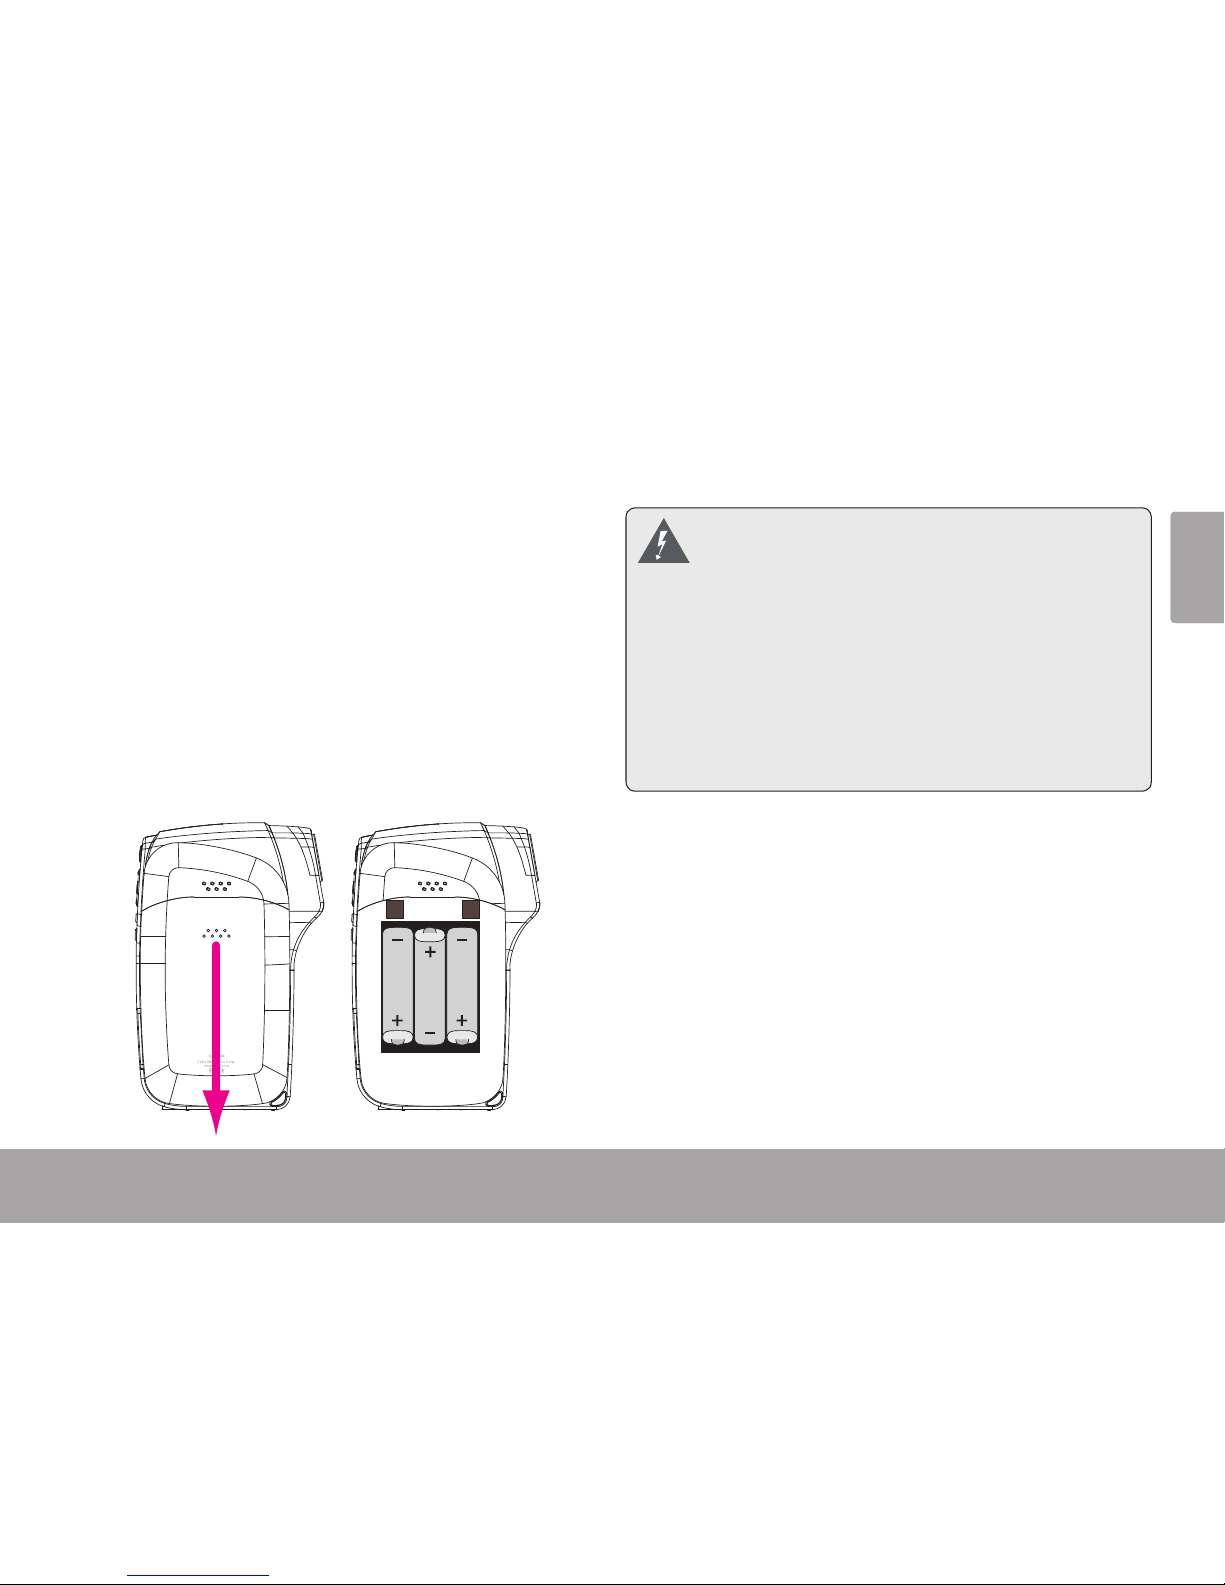
Install the Batteries
Remove the battery compartment door by slid-1.
ing it toward the base of the camera.
Load three “AAA” batteries into the compart-2.
ment as shown in the diagram.
Replace the battery compartment door.3.
The battery used in this device may present
a re or chemical hazard if mistreated. Do
not recharge, disassemble, incinerate, or
heat the batteries. Used batteries should be
disposed of safely.
Replace all batteries at the same time. Do
not mix old with new batteries. Do not mix
dierent types of batteries.
Keep batteries out of the reach of children.
Insert a Memory Card
This camera records to SD or SDHC memory cards.
The maximum supported card size is GB.
Make sure that the write protection switch on the
memory card is set to the “unlocked” position.
getting started
Â
Page 10
Page 10 Getting Started
English
Install the memory card by inserting it gently
into the card slot on the bottom of the video
camera. Push the card until it clicks into place.
Make sure the card is properly aligned as indicated by the marking next to the card slot.
To release and remove the card, press the card in;
it will spring out of the slot. Grasp the card by its
edge to remove it.
To avoid data corruption, turn o the digital
video camera before inserting or removing
a memory card.
Avoid touching the gold contacts of the
memory card.
Do not attempt to insert objects other than
an SD or SDHC memory card into the card
slot. A compatible memory card should t
easily into the card slot; if you encounter
resistance, check the alignment of the card.
Do not attempt to force the card in.
Turning the Camera On/O
Press and hold to turn the camera on. Press
to turn the camera o.
To save power, the camera will turn itself
o automatically after one minute when
not in use.
Changing Camera Modes
Your video camera has two modes: Record and
Playback. Press to toggle between them.
Icon
Camera
Mode
Function
Record
Take photos and record
movies.
Playback
Review movie and photo
les.
Page 11
Record Mode (photos & Movies) Page 11
English
Record Mode (photos & Movies) Page 11
English
Â
Place the camera in Record mode to take photos
and record movies. When the camera is in Record
mode, simply press to take a photo or press
to record a movie.
When you turn on your camera, it will enter
Record mode automatically.
To Record a Movie
Press to begin recording.
Press to stop recording.
When the camera is recording, the elapsed
recording time is displayed on the upper
right corner of the screen. When the camera
is not recording, the estimated available recording time is displayed instead.
Recording will stop automatically when the
memory card is full.
To Take a Photo
Press to take a photo.
The estimated number of available photos
on the memory card is displayed on the upper left corner of the screen.
Movie and Photo Adjustments
Additional adjustments are available through the
Options menu. Please refer to the Options Menu
section for more information.
Zoom
To use the camera’s digital zoom function:
Press
to zoom in.
Press to zoom out.
record mode (Photos & movies)
Â
Page 12
Page 12 Record Mode (photos & Movies)
English
The magnication level is displayed on the
lower right of the screen.
Using the Low-Light Assist Lamp
The low-light assist lamp may help to increase
photo or movie quality in dark environments where
proper lighting is not possible. For best results,
subjects should be well lit. The assist lamp cannot
substitute for proper lighting.
Press to turn the lamp on or o.
Using the low-light assist lamp will decrease
battery life.
Changing the Movie Size
The camera can record at a maximum movie size
of x pixels. To increase recording time, you
may wish to record movies at a lower resolution.
The movie size is displayed on the upper right of
the screen.
Movie Size Resolution
[] VGA ( x )
[] QVGA ( x )
To change the movie size:
Press 1.
to access the options menu.
Press 2. to select the Movie Size option and
then press .
Press 3. or to select a movie size. Press the
joystick to set the movie size.
Press 4. to exit the options menu.
Recording must be stopped to change the
movie size.
Page 13
Record Mode (photos & Movies) Page 13
English
Changing the Photo Size
The camera can record at a maximum photo size
of . MP ( x ). To increase the amount of
photos you can take, you may wish to take photos
at a lower resolution.
The photo size is displayed on the upper left of the
screen:
Photo Size Resolution
[M] . MP ( x )*
[M] . MP ( x )
* Based on interpolation.
To change the photo size:
Press
to change the photo size.
Changing the Photo Quality
You can change the quality that photos are recorded at in order to conserve memory. To increase
the amount of photos you can take, you may wish
to take photos with a lower quality setting.
The photo quality is displayed on the left side of the
screen:
Photo
Quality
Resolution
Super Fine (highest quality)
Fine (higher quailty)
Normal (normal quality)
To change the photo quality:
Press 1.
to access the options menu.
Press 2.
to select the Quality option and then
press .
Press 3. or to select a quality setting. Press
the joystick to set the movie size.
Press 4. to exit the options menu.
Page 14

Page 14 Playback Mode
English
Place the camera in Playback mode to review or
delete movies and photos on the camera.
Press to place the camera in playback mode.
Playback Controls
To Browse Files
Press or to browse the les on the
camera.
If a movie le is selected, the movie icon will
be displayed on the lower left of the screen.
If a photo le is selected, the [JPG] icon will
be displayed on the lower left of the screen.
Press the joystick to play a movie le. When
playing a movie le:
Press
to pause movie playback. Press
again to resume playback.
Press the joystick to quit playback and
return to browsing les.
When viewing a photo le:
Press
or to increase or decrease the
magnication level of the photo le.
When a photo is magnied, press the joy-
stick to enter Pan mode. Press / /
/ to move around the magnied
photo.
Press the joystick again to exit Pan mode
and return to a normal view.
To Browse Files as Thumbnails
When the camera is in Playback mode, press to
browse les as thumbnails. This allows you to see
up to nine les on one screen.
Press
/ / / to select a le. Movie
les are marked with a “V”.
Press the joystick to expand the le to ll the
screen.
Press again to return to the thumbnail view.
Playback mode
Â
Page 15

Playback Mode Page 15
English
Playback Mode Page 15
English
Deleting Files
To delete the current le (delete one):
Press 1. . A “Delete this File?” prompt will ap-
pear.
To delete the le, press or to select
“ Yes ”, then press the joystick to nish.
To cancel without deleting les, press or
to select “No”, then press the joystick.
To delete all les (delete all):
Press 1. to access the Options menu.
Press 2. or to select “Delete”, then press
the joystick to continue.
Press 3. or to select “All”, then press the
joystick to continue.
To delete all les, press
/ to select
“Yes”, then press the joystick to nish.
To cancel without deleting les, press or
to select “No”, then press the joystick.
(Press to exit the Options menu.)
Page 16
Page 16 Options Menu
English
Page 16 Options Menu
English
options menu
Â
Access the Options menu to adjust the camera’s
internal options.
Some setup options are related to Movie or
Photo mode only. To access to these specic options, place the camera in Movie or
Photo mode before entering the Options
menu, respectively.
To adjust the Record options:
Press . to place the camera in Record mode.
When the camera is in Record mode, you will
see the Photo [ ] and Movie [ ] icons at
the top of the screen.
Press 2. to access the Options menu. The
Record options tab will be selected.
Press
or to select an option.
Press the joystick to enter the selected op-
tion.
Press
or to adjust the option. Press
the joystick to set the option.
Press to return to the previous screen
and to exit the Options menu.
Menu Item Function
Resolution
Change the photo resolution.
2048 x 1944*: 3.1 MP resolution.•
1280 x 1024: 1.3 MP resolution.•
640 x 480: 0.3 MP resolution.•
Note: Higher resolutions will result in a larger
le size.
Movie Size
Change the movie resolution.
640 x 480: VGA resolution.•
320 x 240: QVGA resolution.•
Note: Shooting at VGA resolution will result in
a larger le size.
Page 17

Options Menu Page 17
English
Menu Item Function
Frame Rate
Change the movie frame rate.
High: 30 frames per second.•
Low: 15 frames per second.•
Note: Movies recorded with a higher frame
rate will be smoother but will result in a larger
le size.
Quality
Change the photo quality.
Super Fine•
Fine•
Normal•
Note: A higher photo quality will result in a
larger le size.
Menu Item Function
Metering
Adjust the exposure of the image by designating a reference area within the frame.
Center: The exposure will be calculated based
on light in the central area of the frame.
This option is suitable for general use.
Multi: The exposure will be calculated based
on the average light throughout the
frame.
Spot: The exposure will be calculated based
on the light in the very center of the
frame.
White Balance
Adjust the white balance to current light conditions.
Exposure
Set the exposure value manually to compensate for unusual lighting conditions such as
indirect indoor lighting, dark backgrounds, or
strong backlighting.
Note: Use a lower exposure value to compensate for bright lighting conditions; use a higher
exposure value for dark conditions.
Page 18
Page 18 Options Menu
English
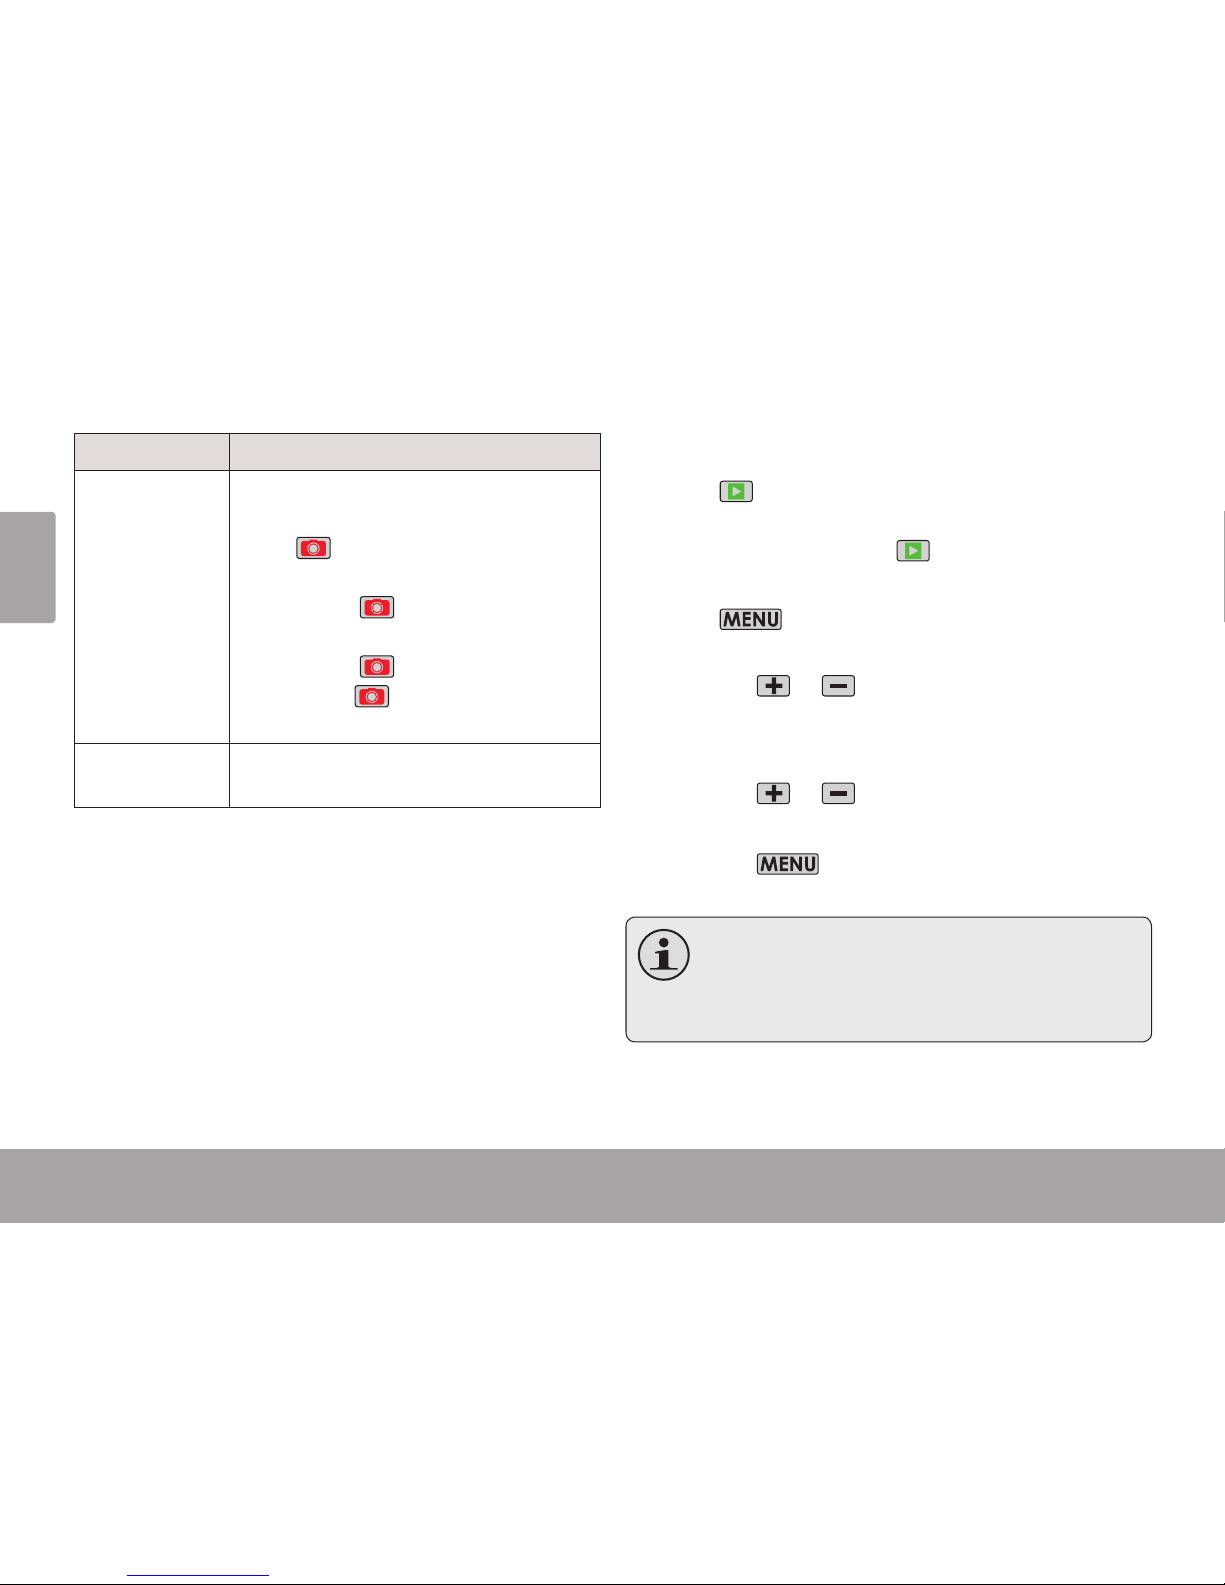
Menu Item Function
Driver Mode
Set the self-timer mode for photos.
O: The photo will be taken immediately •
after
is pressed.
Self-timer 2S: The photo will be taken 2 •
seconds after is pressed.
Self-timer 10S: The photo will be taken 10 •
seconds after is pressed.
Burst: Press • to take 3 photos in rapid
succession.
Eect
Select an eect to apply fun and creative lters
to your photos.
To adjust the Playback options:
Press . to place the camera in Playback mode.
When the camera is in Playback mode, you will
see the Playback icon [ ] at the top of the
screen.
Press 2. to access the Options menu. The
Record options tab will be selected.
Press or to select an option.
Press the joystick to enter the selected op-
tion.
Press or to adjust the option. Press
the joystick to set the option.
Press to return to the previous screen
and to exit the Options menu.
If a movie le is selected, the only options
available will be Lock and Delete. Select
a photo le before accessing the Options
menu to view photo-specic options.
Page 19
Options Menu Page 19
English
Menu Item Function
Lock
Lock les on the camera to protect them from
being deleted. You can also unlock les that
are locked.
Lock/Unlock One: Lock or unlock the current •
le.
Lock All: Lock all les.•
Unlock All: Unlock all les.•
Note: Locked les are marked with a “key” icon
when viewed in Playback mode.
Delete
Delete les from the camera.
One: Delete the current le.•
All: Delete all les.•
Note: Locked les will not be deleted until they
are unlocked.
Menu Item Function
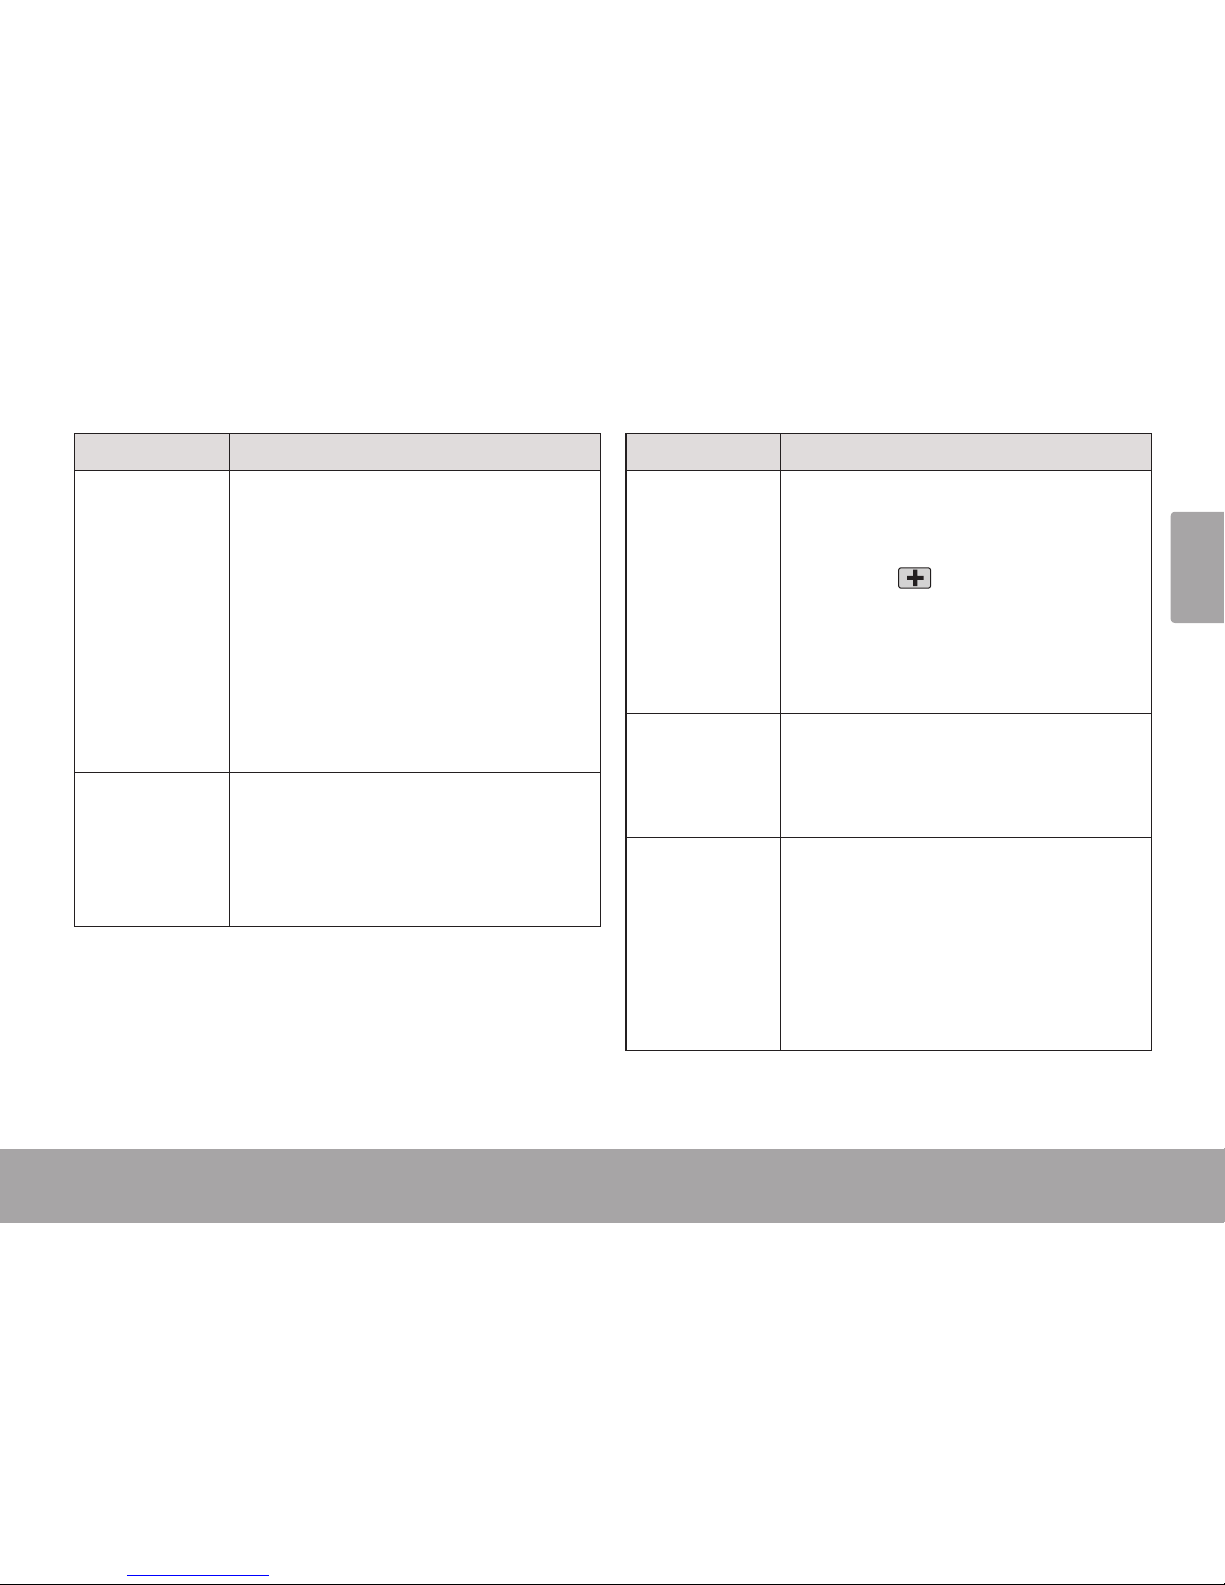
Slide Show (photo
only)
View a slide show of all photos on the camera.
You can also set the slide show options here.
Start: Start the slide show. During the slide •
show, press
to pause, or press any other
button to quit the slide show.
Interval: Set the display duration for each •
photo in the slide show.
Repeat: Have the slide show repeat in a loop.•
Eect (photo
only)
Apply a fun and creative lter to the current
photo. A copy of the photo le will be created;
the original photo will not be altered when an
eect is applied.
Rotate (photo
only)
Rotate the current photo.
Rotate: Rotate the photo clockwise 90 •
degrees.
Save: Save the rotated photo.•
Back: Cancel and return to the previous •
screen without saving the rotated photo.
Note: Locked les cannot be rotated.
Page 20
Page 20 Options Menu
English
Menu Item Function
Start-up Image
(photo only)
Use the current photo as the start-up image.
The start-up image will need to be changed in
the System options menu.
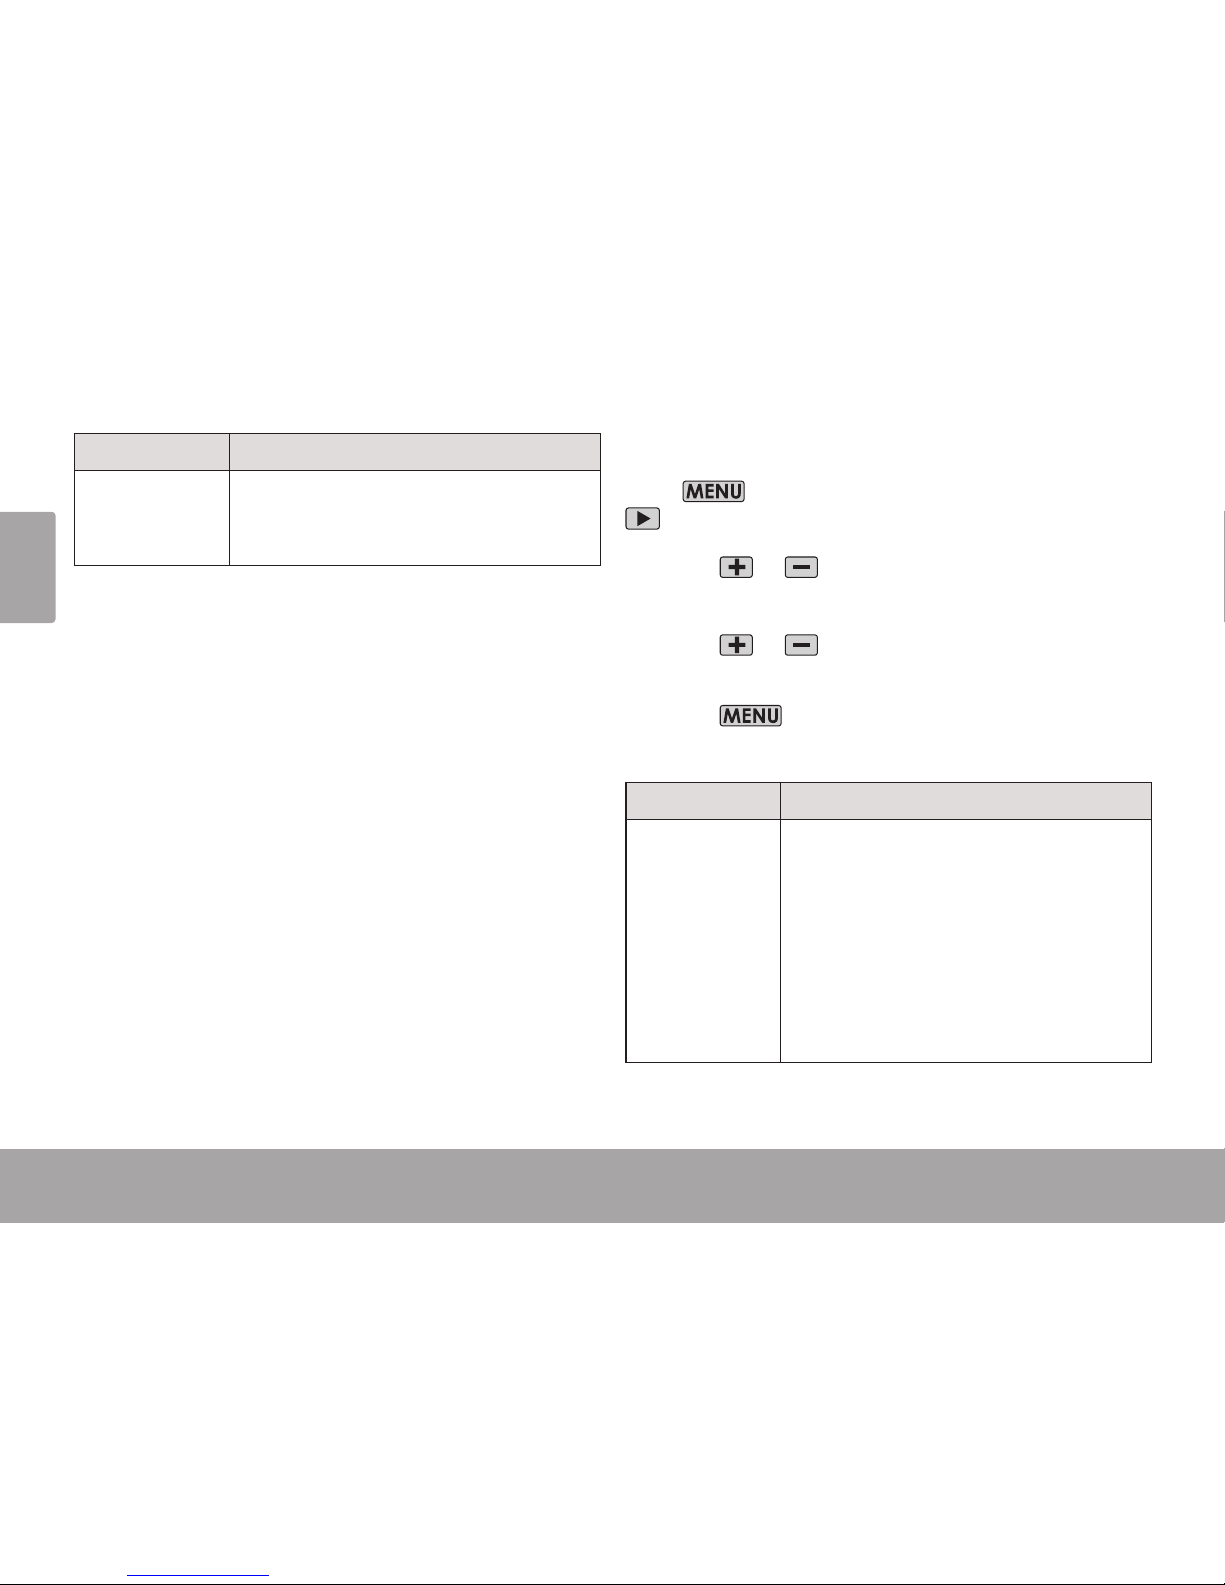
To adjust the System options:
Press to access the Options menu, then press
once to select the System options tab.
Press or to select an option.
Press the joystick to enter the selected option.
Press or to adjust the option. Press the
joystick to set the option.
Press to return to the previous screen and
to exit the Options menu.
Menu Item Function
Sounds
Change the alert tone options.
Shutter: Play a tone when you take a photo.•
Start-up: Change the melody you hear when •
the camera turns on.
Beep: Sound a tone when you press a but-•
ton.
Volume: Adjust the loudness of the alert •
tones.
Page 21

Options Menu Page 21
English
Menu Item Function
Auto Review
Review the last photo taken.
O: Do not review the last photo.
1 sec.: Review the last photo for one second.
3 sec.: Review the last photo for three seconds.
Power Frequency
Match the power frequency used in your area.
Adjust this option to correct for ickering
from uorescent lamps that do not use highfrequency ballasts.
50 Hz: Use with 100 Hz uorescent lighting
(50 Hz power; this is used in Argentina and China).
60 Hz: Use with 120 Hz uorescent lighting
(60 Hz power; this is used in North
America and Brazil).
Menu Item Function
Power Save
In order to save power, the camera will turn
itself o automatically when not in use.
1min: The camera will turn itself o after •
one minute.
3min: The camera turns itself o after three •
minutes.
5min: The camera turns itself o after ve •
minutes.
Date & Time
Set the camera’s internal clock (Date/Month/
Year, Hours, Minutes).
Language
Set the display language for menus and other
interface elements (English, French, Spanish).
TV Out
NTSC: Set the TV output to be compatible
with the NTSC TV standard. (NTSC is
used in most of North America.)
PAL: Set the TV output to be compatible
with the PAL TV standard. (PAL is
used in Brazil, Argentina, and China).
Page 22
Page 22 Options Menu
English
Page 23

Connecting To A Tv Page 23
English
Connecting To A Tv Page 23
English
Â
connecting to a tv
Â
To view your video and photo les on a bigger screen, use the included A/V cable to connect your camera
to a television.
if your tv has composite video input
(yellow/red/white connectors):
Locate the Composite Video input connectors 1.
on the TV.
Connect the cable’s yellow RCA plug to the
Composite Video In jack of the TV.
Connect the cable’s red RCA plug to the red
Audio In jack of the TV.
Connect the cable’s mini plug to the A/V output 2.
jack located on the camera.
Turn on the TV. Set the TV’s input source mode 3.
to display the Composite Video signal.
when the camera is connected to your tv:
Turn on the camera; the camera will automati-1.
cally switch to playback mode and the
camera screen will turn
o.
Use the playback 2.
mode controls to play
videos or view photos
on the TV.
If the TV source mode has been set properly,
you will see the camera’s display on the TV
screen. If you need help setting the TV source
mode, please refer to the documentation
provided with your TV.
W R Y
TV
Page 24

Page 24 Transferring Files To A Computer
English
Page 24 Transferring Files To A Computer
English
Â
transferring files to a computer
Â
Connect your camera to a computer to transfer les
from the camera onto your hard drive.
If you are planning to install the software
on the included CD, please install these programs BEFORE connecting the camera to
your computer.
Use the included USB cable to connect the 1.
camera to a computer.
Plug the small end of the cable into the
camera.
Plug the large end of the cable into a USB
port on the computer.
If the camera is o, turn it on. Your computer 2.
should automatically recognize the video
camera as a removable disk. Follow the prompt
on your computer screen to view les on the
camera.
If no prompt appears, you may access the
camera via “My Computer” on a Windows computer, or via a Finder window on Mac OS X.
Transfer les from the camera to your computer 3.
as you would with any external disk (i.e., dragand-drop or copy/paste).
The camera must be turned on to connect to
a computer.
Page 25

Transferring Files To A Computer Page 25
English
The rst time you connect the camera to a computer, it may take a moment for the computer to rec-
ognize and install the appropriate drivers for the camera.
A USB extension cable has been provided for your convenience. Use this cable to connect if the only
available USB ports are located on the back of your computer, or if the camera is blocked by other USB
devices.
If your computer has an SD card reader, you can simply remove the SD card from the camera and load
it into the card reader to transfer les.
Page 26

Page 26 Using The Included Software
English
Page 26 Using The Included Software
English
For your convenience, the following software is
included:
muvee™ autoProducer . Basic.
muvee autoProducer is the latest release in the
range of award-winning autoProducer software.
With over styles, there are many ways to personalize your home production. Whether you are
trying to create a slideshow or a quick home movie –
muvee autoProducer brings a level of simplicity to
the task. Add your photos and video, select a style,
and let it automatically create and sync a movie to
the beat of your music.
The minimum system requirements for this software are:
A computer running Windows , Windows Vista,
or Windows XP.
A computer with an optical DVD/CD-ROM drive.
Processor: Intel Pentium III GHz, AMD Athlon,
or equivalent with MMX support
Memory: MB RAM
Other Requirements: Microsoft DirectX . or
higher, Apple QuickTime (for MOV les)
For more information about DirectX,
please visit the Microsoft support website:
http://support.microsoft.com/kb/179113/.
For more information about Apple Quick-
Time, please visit the Apple website:
http://www.apple.com/quicktime/download/.
using the included software
Â
Page 27

Using The Included Software Page 27
English
Installing muvee™ autoProducer
To install muvee autoProducer . Basic:
Load the included software CD
into your computer’s optical DVD/
CD-ROM drive. When the AutoPlay
window appears, click “Open folder
to view les”.
Note: If an AutoPlay window does not
appear, open Windows Explorer and
double-click the DVD/CD-ROM drive
icon to view its contents.
Page 28
Page 28 Using The Included Software
English
Double-click the folder “muvee” to
view its contents, then double-click
the folder “Installer” to view its contents.
CAM4002 IB
CAM4002
CAM4002
Page 29

Using The Included Software Page 29
English
Double-click the le “setup” to start
the installer.
CAM4002
Page 30

Page 30 Using The Included Software
English
Follow the on-screen instructions to
install muvee autoProducer.
Restart your computer to complete
the installation.
Page 31

Using The Included Software Page 31
English
Using muvee™ autoProducer
muvee autoProducer allows you to get creative with your videos and photos. Whether you are trying to
create a slideshow or a quick home movie – muvee autoProducer brings a level of simplicity to the task.
To learn more about muvee autoProducer, press the “F” key on your keyboard to view the Help les (or
select “Help” from the menu bar).
The help documentation refers to the full version of autoProducer 6, not the Basic version that is included.
The basic version of muvee autoProducer 6.1 has the following limitations:
Video les per muvee: Add voiceovers: No
Pictures per muvee: MPEG- and MPEG- output: No
Music tracks per muvee: DVD burning: No
Add captions: No
Page 32

Page 32 Using The Included Software
English
Making a muvee™
Start the program.1.
From your computer’s Start menu, click:
All Programs → muvee → muvee
autoProducer 6.1 → Home movies
made easy!
Turn on the CAM4002 and connect it to your 2.
computer.
Add videos and photos from the CAM4002:3.
Click on the “Import from Device” icon.a.
Page 33

Using The Included Software Page 33
English
Click “From My Camera Device”b.
Use the drop-down menu to choose the c.
CAM4002. The SD card will appear as a
removable drive.
Click “OK”.d.
Page 34

Page 34 Using The Included Software
English
To add a soundtrack to the project, click the 4.
music icon.
Click on a style to choose a visual style for this 5.
project.
Click the “make muvee” icon to nish creating 6.
your muvee.
Page 35

Using The Included Software Page 35
English
To save and share your nished muvee, click 7.
the muveeShare icon.
To upload videos to YouTube, you must have a valid YouTube account. To sign up for a free account,
please visit http://www.youtube.com/create_account/.
Page 36

Page 36 Specications
English
Specications
Â
Display Type 2.4” TFT LCD
Image Sensor CMOS (1.3 MP)
Video Resolution VGA (640 x 480), 30 fps
QVGA (320 x 240), 30 fps
Photo Resolution 3.1 MP (2048 x 1944)*
1.3 MP (1280 x 1024)
Low-Light Assist LED
Zoom 4x digital
Lens 8.7 mm, f/2.8
Focus Range Fixed
White Balance Auto
Exposure Auto
Removable Memory
Support
SD/SDHC (up to 16GB)
Video Format AVI (Motion JPEG)
Photo Format JPEG
A/V Output 2.5mm Composite Video/Mono
PC Connection USB 2.0 Hi-speed
Power 3 x “AAA” batteries
* Based on interpolation.
Specications and manual are subject to change without notice.
Page 37

Troubleshooting & Support Page 37
English
troubleshooting & support Â
If you experience a problem with this device, please read the troubleshooting guide below and check
our website at www.cobyusa.com for Frequently Asked Questions (FAQ) and rmware updates. If these
resources do not resolve the problem, please contact Technical Support.
Address COBY Electronics Technical Support
Knowlton Way
Savannah, GA
Email techsupport@cobyusa.com
Web www.cobyusa.com
Phone --: Monday–Friday, :AM–:PM EST
Saturday, :AM-:PM EST
--: Monday–Friday, :AM–:PM EST
Page 38

Page 38 Troubleshooting & Support
English
camera does not power on.
Check that the rechargeable battery has been
installed correctly. The text on the battery
should face up and be legible, and the gold
contacts should face left.
The battery level may be low. Connect the
camera to a computer to charge.
the camera does not take pictures/video.
The camera’s memory or memory card may be
full. Delete several les and try again.
The memory card type may not be supported.
Make sure that you are using an SD or SDHC
memory card GB or less in size.
The memory card format may not be sup-
ported. Make sure that you are using a FATformatted card.
image is blurry or out of focus.
Blurry images or video may result when the
camera is not held steady during recording.
Hold the camera steady and try again.
Blurry images or video may result when there is
not enough light on the subject. Try recording
in a brightly lit location.
recorded images are not saved in memory.
Images will not save if the camera is turned o
before data has nished processing. Be sure
to allow adequate time for the image to save
completely before turning o the video camera.
Page 39

Important Information Page 39
English
important information Â
The lightning ash with arrowhead symbol within
an equilateral triangle is intended to alert the user
to the presence of uninsulated “dangerous voltage”
within the product’s enclosure that may be of sucient magnitude to constitute a risk of electric shock.
The exclamation point within an equilateral triangle
is intended to alert the user to the presence of
important operation and servicing instructions in the
literature accompanying the appliance.
For Customer Use:
Enter below the serial number that is located on the rear of the
unit. Retain this information for future reference.
Model No. CAM4002
Serial No.
For recycling or disposal information about
this product, please contact your local authorities or the Electronics Industries Alliance: www.eiae.org.
WARNING: To prevent re or shock hazard, do not
expose this device to rain or moisture. Dangerous high
voltage is present inside the enclosure. Do not open the
cabinet.
Page 40

Page 40 Important Information
English
FCC Statement
This device complies with Part 15 of the FCC Rules. Operation is subject to the following two conditions:
(1) This device may not cause harmful interference.
(2) This device must accept any interference received, including interference that may cause undesired operation.
Note: This equipment has been tested and found to comply with the limits for Class B digital devices, pursuant to Part 15
of the FCC rules. These limits are designed to provide reasonable protection against harmful interference in a residential
installation. This equipment generates, uses and can radiate radio frequency energy and, if not installed and used in accordance with the instructions, may cause harmful interference to radio communications. However, there is no guarantee
that interference will not occur in a particular installation. If this equipment does cause harmful interference to radio or
television reception, which can be determined by turning the equipment o and on, the user is encouraged to try to correct
the interference by one or more of the following measures:
Reorient or relocate the receiving antenna.•
Increase the separation between the equipment and receiver.•
Connect the equipment into an outlet on a circuit dierent from that to which the receiver is connected.•
Consult the dealer or an experienced radio/TV technician for help•
Use of shielded cable is required to comply with Class B limits in Subpart B of Part 15 of the FCC rules.
Do not make any changes or modications to the equipment unless otherwise specied in the manual. If such changes or
modications should be made, you could be required to stop operation of the equipment.
Page 41

Important Information Page 41
English
Important Safety Instructions
Read Instructions: All the safety and operating instruc-1.
tions should be read before the product is operated.
Retain Instructions: The safety and operating instruc-2.
tions should be retained for future reference.
Heed Warnings: All warnings on the product and in the 3.
operating instructions should be adhered to.
Follow Instructions: All operating and usage instruc-4.
tions should be followed.
Cleaning: Unplug this product from the wall outlet 5.
before cleaning. Do not use liquid cleaners or aerosol
cleaners. Use a damp cloth for cleaning.
Attachments: Use only attachments recommended by 6.
the manufacturer. Use of other attachments may be
hazardous.
Water and Moisture: Do not use this product near water 7.
(e.g., near a bath tub, washbowl, kitchen sink, laundry
tub, in wet basements, or near a swimming pool and
the like).
Ventilation: Slots and openings in the cabinet are pro-8.
vided for ventilation to ensure reliable operation of the
product and to protect it from overheating. These openings should never be blocked by placing the product on
a bed, sofa, rug, or other similar surface. This product
should not be placed in a built-in installation such as a
bookcase or rack unless proper ventilation is provided or
the manufacturer instructions have been adhered to.
Power Sources: This product should be operated only 9.
from the type of power source indicated on the rating
label. If you are not sure of the type of power supply
to your home, consult your product dealer or local
power company. For products intended to operate from
battery power or other sources, refer to the operating
instructions.
Overloading: Do not overload wall outlets, extension 10.
cords, or integral convenience receptacles as this can
result in a risk of re or electric shock.
Page 42

Page 42 Important Information
English
Object and Liquid Entry: Never push objects of any kind 11.
into this product through openings as they may tap
dangerous voltage points or shout-out parts that could
result in a re or electric shock. Never spill liquid of any
kind on the product.
Servicing: Do not attempt to service this product your-12.
self as opening or removing covers may expose you to
dangerous voltage or other hazards. Refer all servicing
to qualied service personnel.
Damage Requiring Service: Unplug this product from 13.
the wall outlet and refer servicing to qualied service
personnel under the following conditions: a) when the
power-supply or plug is damaged; b) if liquid has been
spilled or if objects have fallen into the product; c) if
the product has been exposed to rain or water; d) if the
product does not operate normally by following the
operating instructions. Adjust only those controls that
are covered by the operating instructions as improper
adjustment of other controls may result in damage and
will often require extensive work by a qualied techni-
cian to restore the product to its normal operation; e)
if the product has been dropped or damaged in any
way; f) when the product exhibits a distinct change in
performance—this indicates a need for service.
Replacement Parts: When replacement parts are 14.
required, be sure that your service technician has used
replacement parts specied by the manufacturer or
have the same characteristics as the original part.
Unauthorized substitutions may result in re, electric
shock, or other hazards.
Safety Check: Upon completion of any service or repairs 15.
to this product, ask the service technician to perform
safety checks to ensure that the product is in proper
operating condition.
Heat: The product should be situated away from heat 16.
sources such as radiators, heat registers, stoves, or other
products (including ampliers) that produce heat.
Page 43

Important Information Page 43
English
Maintenance and Care
Always secure the camera with the wrist band 1.
when in use to prevent accidental damage to
the camera.
Always store the camera in the pouch provided 2.
to prevent scratches to the camera lens and
screen.
Never touch the lens.3.
To clean the lens:4.
Blow away the dust from the surface of the a.
lens.
Gently wipe the lens clean with a microber b.
cloth designed for cleaning lenses/optical
devices. If necessary, use lens cleaner ONLY.
Never use organic solvents to clean the
camera.
When storing the camera for a long period of 5.
time, remove the battery and keep the camera
in a dry and dark place.
This digital video camera is suitable for environ-6.
ments between 0°C- 40°C (32°F-104°F). Do not
expose the camera to extremely high temperatures, such as in a car parked in direct sunlight,
or to excessive humidity.
To prevent condensation, keep the camera in 7.
a sealed plastic bag when moving from a cold
place to a warm place. The camera can be removed from the bag when it reaches the indoor
temperature.
Page 44

Page 44 Índice De Contenidos
Español
Índice de contenidos Â
contenidos del Paquete ......................... 48
Panorama de la cámara .......................49
Vista frontal ................................................... 49
Vista frontal ...................................................50
Vista desde la izquierda .............................. 51
Vista posterior ............................................... 52
Vista inferior .................................................. 52
Para emPezar ............................................. 53
Instalación de las baterías ..........................53
Cómo insertar una tarjeta de memoria ....54
Encendido/apagado de la cámara .........55
Cambio de modos de la cámara .............55
modo de grabación (fotografÍas y
PelÍculas) .................................................... 56
Para grabar una película ...........................56
Para tomar una fotografía .......................... 56
Ajustes de películas y fotografías ...............57
Zoom (Acercar/Alejar) ...................... 57
Cómo utilizar la luz de asistencia
para situaciones con poca luz ........ 57
Cómo cambiar la dimensión de
las películas ........................................ 57
Cómo cambiar la dimensión de
las fotografías ....................................58
Cómo cambiar la calidad de las
fotografías .......................................... 59
modo de reProducción ........................ 60
Controles de reproducción ........................ 60
Para buscar archivos ........................60
Para buscar archivos en miniatura ..61
Cómo eliminar archivos ...............................61
Para eliminar el archivo actual
(eliminar uno): .....................................61
Para eliminar todos los archivos
(eliminar todo): ..................................62
Page 45

Índice De Contenidos Page 45
Español
menú oPciones ......................................... 63
Para ajustar las opciones de grabación ...63
Para ajustar las opciones de
reproducción: ...............................................66
Para ajustar las opciones del sistema:.......68
conexión a una tv ...................................71
transferencia de archivos a una
comPutadora ............................................72
uso del software incluido .....................74
Instalación de muvee™ autoProducer .... 75
Uso de muvee™ autoProducer .................. 79
Realización de un muvee™ .............80
esPecificaciones ...................................... 84
solución de Problemas y soPorte ...... 85
información imPortante .......................87
Declaración de la FCC ...............................88
Instrucciones de Seguridad Importantes ..89
Mantenimiento y Cuidado ..........................91
Page 46

Page 46 Contenidos Del Paquete
Español
Gracias por su compra de esta Snapp™ Cámara
Digital de Video Coby CAM. Lea estas instrucciones detenidamente antes de utilizar la videocámara, y consérvelas para referencia futura. Este
paquete incluye:
Una cámara CAM
Un cable A/V
Un cable de USB
Tres baterías tamaño “AAA”
Un CD de instalación
Una bolsa
Si faltara cualquiera de los elementos mencionados
anteriormente, comuníquese con el distribuidor a
quien le compró este producto.
Es posible que este paquete contenga bol-
sas de plástico u otros materiales peligrosos
para los niños. Asegúrese de desechar todos
los materiales de embalaje en forma segura
una vez abierto el paquete.
contenidos del Paquete Â
Page 47

Panorama De La Cámara Page 47
Español
Vista frontal
1
Presione este botón para tomar una fotografía cuando
la cámara está en el modo Grabar.
2
Presione este botón para grabar un video cuando la
cámara está en el modo Grabar.
3
Presione la palanca para aceptar una opción seleccionada (OK).
Empuje la palanca hacia arriba, hacia la izquierda, hacia abajo
o hacia la derecha para activar los botones (4) a (8) que están
debajo.
4
Empuje la palanca hacia arriba para aumentar el nivel
de zoom.
5
Empuje la palanca hacia la izquierda para cambiar la
resolución de las fotografías. Las fotografías de mayor
resolución ocuparán más espacio en la memoria.
6
Empuje la palanca hacia abajo para disminuir el nivel
de zoom.
7
Empuje la palanca hacia la derecha para activar/desactivar la luz de asistencia en situaciones con poca luz.
Vista frontal
8
Presione este botón para alternar entre el modo
Reproducir y Grabar.
9 Presione este botón para borrar un archivo.
1
3
2
7
9
4
6
5
8
Panorama de la cámara Â
Page 48

Page 48 Panorama De La Cámara
Español
Vista frontal
10
Pantalla de información. Voltee la pantalla hacia arriba para
abrirla y luego rótela para que quede mirando hacia usted.
(Los botones POWER y MENU quedan protegidos detrás de la
pantalla de información cuando la cierra).
11
Enchufe de salida A/V. Utilícelo con el cable A/V incluido para
conectar la cámara a un televisor o a otra pantalla.
(El enchufe de salida A/V está protegido con una tapa de
goma. Levante la tapa para que el enchufe de salida A/V
quede expuesto).
12
Puerto USB. Utilícelo con el cable USB incluido para conectar la
cámara a la computadora.
(El puerto USB está protegido con una tapa de goma. Levante
la tapa para que el puerto USB quede expuesto).
11
12
10
Page 49

Panorama De La Cámara Page 49
Español
Vista desde la izquierda
13
Presione y mantenga presionado para encender o
apagar la cámara.
(El botón POWER está protegido detrás de la pantalla de información. Voltee la pantalla para abrirla
para acceder a este botón).
14
Presione este botón para acceder al menú de
opciones.
(El botón MENU está protegido detrás de la pantalla
de información. Voltee la pantalla para abrirla para
acceder a este botón).
13
14
Page 50

Page 50 Panorama De La Cámara
Español
Vista posterior
Lente de la cámara.
Apunte la lente hacia el sujeto que desea
captar.
Luz de asistencia para situaciones con poca luz.
Mejora la calidad de la imagen en situaciones
con poca luz
Micrófono.
Capta audio durante la grabación de películas.
Tapa de la batería.
Deslice la cubierta hacia abajo para colocar o
reemplazar las baterías.
Vista inferior
Montaje de trípode.
Ranura para tarjetas SD/SDHC.
Coloque tarjetas de memoria SD o SDHC
en la ranura. Los contactos metálicos de la
tarjeta deben quedar hacia abajo.
15
16
17
18
2019
Page 51

Para Empezar Page 51
Español
Lea y complete los siguientes pasos para comenzar
a utilizar su cámara de video digital.
Instalación de las baterías
Retire la cubierta del compartimiento de las 1.
baterías deslizándola hacia la base de la cámara.
Coloque las tres baterías “AAA” en el com-2.
partimiento tal como se muestra en el diagrama.
Vuelva a colocar la cubierta del compartimiento 3.
para baterías.
La batería utilizada en este dispositivo
puede producir incendios o presentar riesgos químicos si se la trata de manera incorrecta. No recargue, desarme, incinere ni caliente la batería. Las baterías usadas deben
descartarse de forma segura.
Cambie todas las baterías al mismo tiempo.
No combine baterías viejas con baterías nuevas. No combine diferentes tipos de baterías.
Mantenga las baterías lejos del alcance de los
niños.
Para empezar Â
Page 52

Page 52 Para Empezar
Español
Cómo insertar una tarjeta de
memoria
Esta cámara graba en tarjetas de memoria SD o SDHC.
El tamaño máximo de tarjeta admitido es GB.
Asegúrese de que el interruptor de protección de
escritura de la tarjeta de memoria esté colocado
en la posición “desbloqueado”.
Instale la tarjeta de memoria insertándola
suavemente en la ranura para tarjetas que se
encuentra en la parte inferior de la cámara de
video. Empuje la tarjeta hacia adentro hasta que
esté en su lugar. Asegúrese de que la tarjeta esté
alineada correctamente según lo indica la marca
ubicada al lado de la ranura para tarjetas.
Para liberar y quitar la tarjeta, presiónela hacia
adentro y saldrá eyectada de la ranura. Tome la
tarjeta por el borde para retirarla.
Para evitar la corrupción de datos, apague
la cámara de video digital antes de insertar
o quitar una tarjeta de memoria.
Evite tocar los contactos de oro de la tarjeta
de memoria.
No intente insertar objetos que no sean una
tarjeta de memoria SD o SDHC en la ranura
de la tarjeta. Una tarjeta de memoria compatible debe encajar fácilmente en la ranura
de la tarjeta; si encuentra resistencia, verique la alineación de la tarjeta. No intente
forzar la tarjeta al introducirla.
Page 53

Para Empezar Page 53
Español
Encendido/apagado de la cámara
Press and hold to turn the camera on. Press
to turn the camera o.
Presione y mantenga para encender la cámara.
Presione para apagar la cámara
Para ahorrar energía, la cámara se apagará
automáticamente después de un minuto
de que no se la haya utilizado.
Cambio de modos de la cámara
La cámara de video tiene dos modos: Grabación y
Reproducción. Presione para alternar entre los
dos modos.
Ícono
Modo de
cámara
Función
Grabación
Toma fotografías y
graba películas.
Reproducción
Permite ver los
archivos de películas y fotografías.
Page 54

Page 54 Modo De Grabación (fotografías Y Películas)
Español
Coloque la cámara en el modo Grabación para
tomar fotografías y grabar películas. Cuando la
cámara esté en el modo Grabación, simplemente
presione para tomar una fotografía o presione
para grabar una película.
Cuando encienda su cámara, entrará au-
tomáticamente al modo Grabación.
Para grabar una película
Presione para comenzar a grabar.
Presione para detener la grabación.
Cuando la cámara está grabando, se mues-
tra el tiempo de grabación transcurrido en
la esquina superior derecha de la pantalla.
En cambio, cuando la cámara no está grabando, se muestra el tiempo estimado de
grabación disponible.
La grabación se detendrá automáticamente
cuando la tarjeta de memoria esté llena.
Para tomar una fotografía
Presione para tomar una fotografía
En la esquina superior izquierda de la pan-
talla se muestra la cantidad estimada de
fotografías disponible en la tarjeta de memoria.
modo de grabación (fotografías y Â
Películas)
Page 55

Modo De Grabación (fotografías Y Películas) Page 55
Español
Ajustes de películas y fotografías
Se pueden realizar ajustes adicionales desde
el menú Opciones. Consulte la sección Menú
Opciones para mayor información.
Zoom (Acercar/Alejar)
Para utilizar la función de zoom digital de la cámara:
Presione para acercar.
Presione para alejar.
En la esquina inferior derecha de la pantalla
se muestra el nivel de ampliación.
Cómo utilizar la luz de asistencia para
situaciones con poca luz
La luz de asistencia para situaciones con poca luz
puede ayudar a mejorar la calidad de una fotografía
o de una película en entornos oscuros donde
no hay una iluminación adecuada. Para obtener
mejores resultados, los sujetos deben estar bien
iluminados. La luz de asistencia no puede reemplazar una iluminación adecuada.
Presione
para encender o apagar la luz de
asistencia.
El uso de la luz de asistencia reducirá la du-
ración de la batería.
Cómo cambiar la dimensión de las
películas
La cámara puede grabar películas a una dimensión
máxima de x píxeles. Para aumentar el
tiempo de grabación, debe grabar películas a una
menor resolución.
La dimensión de la película se muestra en la esquina superior derecha de la pantalla.
Page 56

Page 56 Modo De Grabación (fotografías Y Películas)
Español
Dimensión de la
película
Resolución
[] VGA ( x )
[] QVGA ( x )
Para cambiar la dimensión de la película:
Presione 1.
para acceder al menú de op-
ciones.
Presione 2. para seleccionar la opción Dimen-
sión de película y luego presione .
Presione 3. o para seleccionar la dimen-
sión de la película. Presione la palanca para
establecer la dimensión de la película.
Presione 4. para salir del menú de opciones.
Se debe detener la grabación para cambiar
la dimensión de la película.
Cómo cambiar la dimensión de las
fotografías
La cámara puede grabar fotografías a una dimensión máxima de , MP ( x ). Para aumentar
la cantidad de fotografías que puede tomar, debe
tomar fotografías a una menor resolución.
La dimensión de la fotografía se muestra en la
esquina superior izquierda de la pantalla:
Dimensión de la
fotografía
Resolución
[M] , MP ( x )*
[M] , MP ( x )
[] , MP ( x )
* Según la interpolación.
Para cambiar la dimensión de la fotografía:
Presione
para cambiar la dimensión de la
fotografía.
Page 57

Modo De Grabación (fotografías Y Películas) Page 57
Español
Cómo cambiar la calidad de las fotografías
Se puede cambiar la calidad de las fotografías grabadas para conservar la memoria. Para aumentar
la cantidad de fotografías que puede tomar, debe
tomar fotografías de menor calidad.
La calidad de la fotografía se muestra en la parte
izquierda de la pantalla:
Calidad de la
fotografía
Resolución
Súper na (la mejor calidad)
Fina (calidad buena)
Normal (calidad normal)
Para cambiar la calidad de la fotografía:
Presione .
para acceder al menú de op-
ciones.
Presione . para seleccionar la opción Calidad
y luego presione .
Presione .
o para seleccionar la conguración de calidad. Presione la palanca para
establecer la dimensión de la película.
Presione . para salir del menú de opciones.
Page 58

Page 58 Modo De Reproducción
Español
Coloque la cámara en el modo Reproducción para
volver a ver o eliminar películas y fotografías de la
cámara.
Presione para colocar la cámara en el modo
Reproducción.
Controles de reproducción
Para buscar archivos
Presione o para buscar los archivos en la
cámara.
Si selecciona un archivo de película, se
muestra el icono de película en la esquina
inferior izquierda de la pantalla.
Si selecciona un archivo de fotografía, se
muestra el icono [JPG] en la esquina inferior
izquierda de la pantalla.
Presione la palanca para reproducir un archivo
de película. Cuando esté reproduciendo un
archivo de película:
Presione para pausar la reproducción
de la película. Presiónelo nuevamente para
reanudar la reproducción.
Presione la palanca para detener la repro-
ducción y regresar a la búsqueda de archivos.
Cuando esté viendo un archivo de fotografía:
Presione o para aumentar o dis-
minuir el nivel de ampliación del archivo de
fotografía.
Cuando una fotografía esté ampliada,
presione la palanca para ingresar al modo
Desplazamiento. Presione
/ / /
para desplazarse por la foto ampliada.
Presione la palanca nuevamente para salir
del modo Desplazamiento y regresar a la
vista normal.
modo de reproducción Â
Page 59

Modo De Reproducción Page 59
Español
Para buscar archivos en miniatura
Cuando la cámara esté en el modo Reproducción,
presione para buscar archivos en tamaño
miniatura. Esto le permite ver hasta nueve archivos
en una sola pantalla.
Presione / / / para seleccionar un
archivo. Los archivos de película están marcados
con una “V”.
Presione la palanca para expandir el archivo a
toda la pantalla.
Presione nuevamente para regresar a la
vista de miniaturas.
Cómo eliminar archivos
Para eliminar el archivo actual (eliminar
uno):
Presione 1. . Aparecerá el mensaje “Delete tihs
File?” (¿Desea eliminar este archivo?).
Para eliminar este archivo, presione
o para seleccionar “Yes ” (Si) y luego
presione la palanca para nalizar.
Para cancelar sin eliminar archivos, presione
o para seleccionar “No” y luego
presione la palanca.
Page 60

Page 60 Modo De Reproducción
Español
Para eliminar todos los archivos (eliminar
todo):
Presione 1. para acceder al menú Opciones.
Presione 2. o para seleccionar “Delete”
(Eliminar) y luego presione la palanca para
continuar.
Presione 3. o para seleccionar “All” (Todo)
y luego presione la palanca para continuar,
Para eliminar todos los archivos, presione
/ para seleccionar “Yes ” (Sí) y luego
presione la palanca para nalizar.
Para cancelar sin eliminar archivos, presione
/ para seleccionar “No” y luego
presione la palanca. (Presione para
salir del menú Opciones).
Page 61

Menú Opciones Page 61
Español
menú opciones Â
Acceda al menú Opciones para ajustar las opciones
internas de la cámara.
Algunas opciones de conguración están
relacionadas con el modo Película o Fotografía únicamente. Para acceder a estas
opciones especícas, coloque la cámara en
el modo Película o Fotografía antes de ingresar al menú Opciones, respectivamente.
Para ajustar las opciones de
grabación
Presione . para colocar la cámara en el modo
Grabación. Cuando la cámara esté en el modo
Grabación, verá los iconos Fotografía [ ] y
Película [ ] en la parte superior de la pantalla.
Presione .
para acceder al menú Opciones.
Se seleccionará la pestaña de opciones Grabación.
Presione o para seleccionar una
opción.
Presione la palanca para aceptar la opción
seleccionada.
Presione la tecla o para ajustar la
opción. Presione la palanca para establecer
la opción.
Presione para regresar a la pantalla
anterior y salir del menú Opciones.
Page 62

Page 62 Menú Opciones
Español
Elemento del
menú
Función
Resolution
(Resolución)
Cambia la resolución de una fotografía.
2048 x 1944*: Resolución de 3,1 MP•
1280 x 1024: Resolución de 1,3 MP•
640 x 480: Resolución de 0,3 MP•
Nota: Las resoluciones más altas generarán un
archivo de tamaño más grande.
Movie Size
(Dimensión de la
película)
Cambia la resolución de una película.
640 x 480: Resolución VGA.•
320 x 240: Resolución QVGA.•
Nota: Grabar a una resolución VGA generará un
archivo de mayor tamaño.
Frame Rate
(Velocidad de
cu adro)
Cambia la velocidad del cuadro de película.
Alto: 30 cuadros por segundo.•
Bajo: 15 cuadros por segundo.•
Nota: Las películas grabadas a una velocidad de
cuadro más alta tendrán mejor calidad, pero se
generará un archivo de mayor tamaño.
Elemento del
menú
Función
Quality
(Calidad)
Cambia la calidad de una fotografía.
Súper no•
Fino•
Normal•
Nota: Una mayor calidad de fotografía generará
un archivo de mayor tamaño.
Metering
(Medición)
Ajusta la exposición de la imagen designando
un área de referencia dentro del cuadro.
Central: La exposición se calculará según la •
luz que haya en el área central del cuadro.
Esta opción es adecuada para uso general.
Multi: La exposición se calculará según la luz •
promedio en todo el cuadro.
Spot: La exposición se calculará según la luz •
que haya en el centro propiamente dicho del
cuadro.
White Balance
(Balance de
blanc o)
Ajusta el balance de blanco según las condiciones actuales de luz.
Page 63

Menú Opciones Page 63
Español
Elemento del
menú
Función
Exposure
(E xposic ión)
Congura el valor de exposición de forma
manual para compensar condiciones de iluminación poco comunes tales como luz interior
indirecta, fondos oscuros o iluminación trasera
intensa.
Nota: Utilice un valor de exposición menor para
compensar las condiciones de luz brillosa; utilice
un valor de exposición mayor para condiciones
oscuras.
Elemento del
menú
Función
Driver Mode
(Modo Controlador)
Congura el modo de temporización automática para fotografías.
Apagado: La fotografía se tomará inmedi-•
atamente después de presionar
.
Temporizador automático 2S: La fotografía •
se tomará dos segundos después de presionar .
Temporizador automático 10S: La fotografía •
se tomará diez segundos después de presionar .
Ráfaga: Presione • para tomar tres fotos
en una sucesión rápida.
Eect
(Ef ec to)
Seleccione un efecto para aplicar ltros divertidos y creativos a las fotografías.
Page 64

Page 64 Menú Opciones
Español
Para ajustar las opciones de
reproducción:
Presione . para colocar la cámara en el modo
Reproducción. Cuando la cámara esté en el
modo Reproducción, verá el icono Reproducción [ ] en la parte superior de la pantalla.
Presione . para acceder al menú Opciones.
Se seleccionará la pestaña de opciones Grabación.
Presione o para seleccionar una
opción.
Presione la palanca para aceptar la opción
seleccionada.
Presione la tecla o para ajustar la
opción. Presione la palanca para establecer
la opción.
Presione para regresar a la pantalla
anterior y salir del menú Opciones.
Si se selecciona una película, las únicas
opciones disponibles son Lock (Bloquear)
y Delete (Eliminar). Seleccione un archivo
de fotografía antes de acceder al menú
Opciones para ver las opciones especícas
de la fotografía.
Elemento del
menú
Función
Lock
(Bloq ueo)
Bloquea archivos de la cámara para impedir
que se los elimine. También puede desbloquear
archivos que están bloqueados.
Bloquear/desbloquear uno: Bloquee o •
desbloquee el archivo actual.
Bloquear todos: Bloquea todos los archivos.•
Desbloquear todos: Desbloquea todos los •
archivos.
Nota: Los archivos bloqueados están marcados
con el icono de una llave cuando se los visualiza
en el modo Reproducción.
Page 65

Menú Opciones Page 65
Español
Elemento del
menú
Función
Delete
(Borrar)
Borra archivos de la cámara.
Uno: Borre el archivo actual.•
Todos: Borra todos los archivos.•
Nota: Los archivos bloqueados no se eliminarán
hasta que se los desbloquee.
Slide Show
(Muestra de
imágenes)
(sólo fotografías)
Realiza una muestra de imágenes de todas
las fotografías de la cámara. Aquí también se
pueden congurar las opciones de la muestra
de imágenes.
Inicio: Inicia la muestra de imágenes. Du-•
rante la muestra de imágenes, presione
para pausar o presione cualquier otro botón
para salir de la muestra de imágenes.
Intervalo: Congure la duración de la visual-•
ización de cada fotografía en la muestra de
imágenes.
Repetición: Haga que la muestra de imá-•
genes se repita de forma cíclica
Elemento del
menú
Función
Eect (Efecto)
(sólo fotografías)
Aplica un ltro divertido y creativo a la
fotografía actual. Se creará una copia de la
fotografía; no se cambiará la fotografía original
cuando se aplique un efecto.
Rotate (Rotar)
(sólo fotografías)
Rota la fotografía actual.
Rotar: Rote la fotografía a 90 grados en •
sentido horario.
Guardar: Guarde la foto rotada.•
Atrás: Cancele y regrese a la pantalla ante-•
rior sin guardar la foto rotada.
Nota: Los archivos bloqueados no se pueden
ro tar.
Start-up Image
(Imagen de inicio)
(sólo fotografías)
Usa la imagen actual como imagen de inicio. Se
deberá cambiar la imagen de inicio en el menú
de opciones del sistema.
Page 66

Page 66 Menú Opciones
Español
Para ajustar las opciones del
sistema:
Presione para acceder al menú Opciones
y luego presione una vez para seleccionar la
pestaña de opciones del sistema.
Presione o para seleccionar una opción.
Presione la palanca para aceptar la opción
seleccionada.
Presione la tecla o para ajustar la opción.
Presione la palanca para establecer la opción.
Presione para regresar a la pantalla ante-
rior y salir del menú Opciones.
Elemento del
menú
Función
Sounds
(Sonidos)
Cambia las opciones de tonos de alerta.
Obturador: Reproduce un tono cuando se •
toma una fotografía.
Inicio: Cambia la melodía que se escucha •
cuando se enciende la cámara.
Bip: Suena un tono cuando se presiona un •
botón.
Volumen: Ajusta el volumen de los tonos de •
alerta.
Auto Review
(Vista automática)
Vuelve a mostrar la última fotografía tomada.
Apagado: No vuelve a mostrar la última •
fotografía.
1 seg.: Vuelve a mostrar la última fotografía •
durante un segundo.
3 seg.: Vuelve a mostrar la última fotografía •
durante tres segundos.
Page 67

Menú Opciones Page 67
Español
Elemento del
menú
Función
Power Frequency
(Frecuencia de
alimentación)
Realiza la coincidencia con la frecuencia de
alimentación utilizada en su área. Ajuste esta
opción para corregir el parpadeo de las lámparas uorescentes que no utilizan balastros de
alta frecuencia.
50 Hz: Úsela con luz uorescente de 100 •
Hz (alimentación de 50 Hz; se utiliza en
Argentina y China).
60 Hz: Úsela con luz uorescente de 120 Hz •
(alimentación de 60 Hz; se utiliza en Norteamérica y Brasil).
Power Save
(Ahorro de
energía)
Para ahorrar energía, la cámara se apagará automáticamente cuando no se la esté utilizando.
1 min.: La cámara se apagará automática-•
mente después de un minuto.
3min.: La cámara se apagará automática-•
mente después de tres minutos.
5min.: La cámara se apagará automática-•
mente después de cinco minutos.
Elemento del
menú
Función
Date & Time
(Fecha y hora)
Congura el reloj interno de la cámara (Fecha/
Mes/Año, Horas, Minutos).
Language
(Idioma)
Congura el idioma de la pantalla para menús
y otros elementos de la interfaz (inglés, francés, español).
TV Out
(Salida de TV)
NTSC: Congura la salida de TV para que
sea compatible con el estándar de
TV NTSC. (NTSC es el sistema que se
utiliza en la mayor parte de Norteaméric a).
PAL: Congura la salida de TV para que
sea compatible con el estándar de TV
PAL. (PAL es el sistema que se utiliza
en Brasil, Argentina y China).
Page 68

Page 68 Menú Opciones
Español
Elemento del
menú
Función
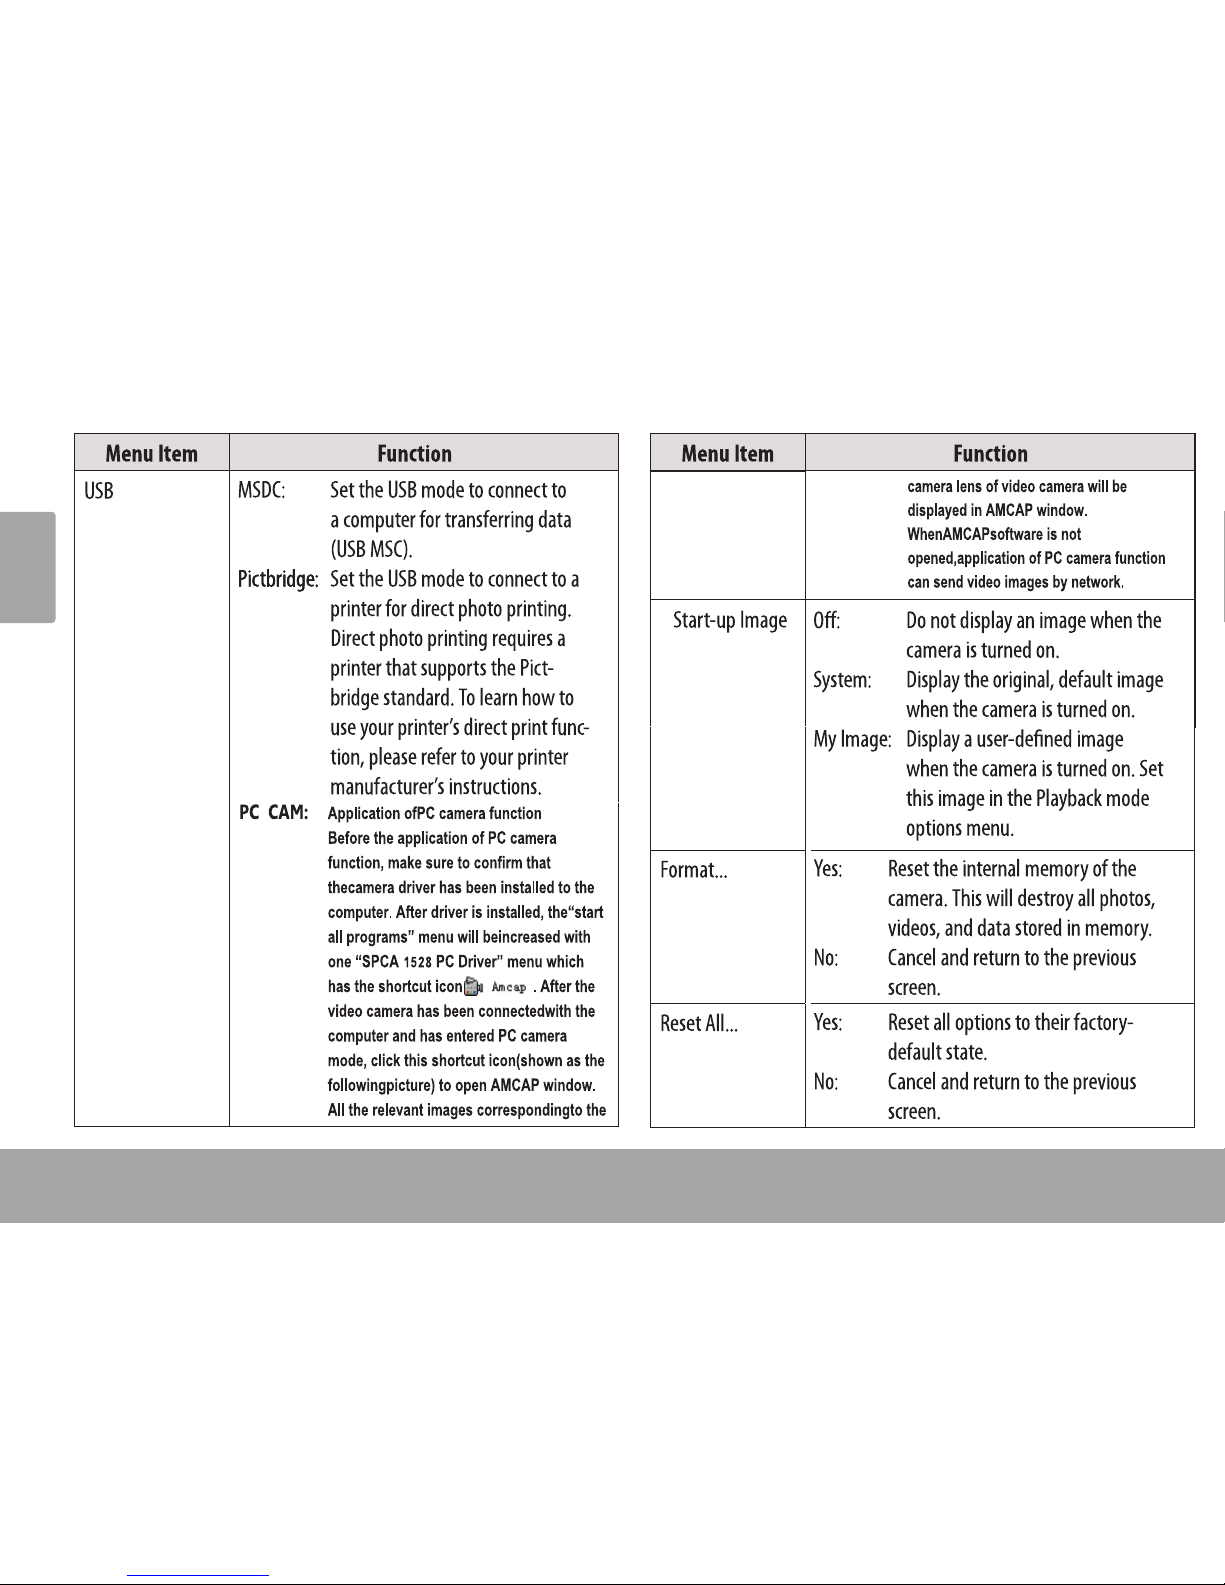
USB
MSDC: Congura el modo USB para
conectarse a una computadora y
transferir datos (USB MSC).
Pictbridge: Congura el modo USB para
conectarse a una impresora e
imprimir fotos directamente. Para
imprimir fotografías directamente,
la impresora debe ser compatible
con el estándar de Pteimagen.
Para saber cómo usar la función de
impresión directa de la impresora,
consulte las instrucciones del
fabricante de la impresora.
Start-up Image
(Imagen de inicio)
Desactivado: No muestra una imagen •
cuando se enciende la cámara.
Sistema: Muestra la imagen original prede-•
terminada cuando se enciende la cámara.
Mi imagen: Muestra una imagen denida •
por el usuario cuando se enciende la cámara.
Congure esta imagen en el menú de
opciones del modo Reproducción.
Elemento del
menú
Función
Format...
(Formato)
Sí: Reinicia la memoria interna de la cá-
mara. Esto destruirá todas las fotos,
los videos y los datos guardados en la
memoria.
No: Cancela y regresa a la pantalla ante-
ri or.
Reset All...
(Reiniciar todo)
Sí: Restaura todas las opciones al estado
predeterminado de fábrica.
No: Cancela y regresa a la pantalla ante-
ri or.
Page 69

Conexión A Una Tv Page 69
Español
conexión a una tv Â
Para ver los archivos de video y fotografía en una pantalla más grande, use el cable A/V incluido para
conectar la cámara a un televisor.
si el televisor tiene entrada de video
compuesta (conectores amarillo/rojo/
blanco):
Ubique los conectores de entrada de video 1.
compuesto en el televisor.
Conecte el enchufe RCA amarillo del cable
en el enchufe de video compuesto del
televisor.
Conecte el enchufe RCA rojo del cable en
el enchufe hembra de entrada de audio del
televisor.
Conecte el mini enchufe del cable al enchufe de 2.
salida A/V ubicado en la cámara.
Encienda el televisor. Congure el modo de 3.
fuente de entrada del televisor para que se
muestre la señal de video compuesto.
cuando la cámara está conectada al tv:
Encienda la cámara; la 1.
cámara se cambiará
automáticamente al
modo de reproducción y la pantalla de la
cámara se apagará.
Use los controles del 2.
modo de reproducción
para reproducir videos o ver fotografías en el
televisor.
Si el modo de fuente del televisor se ha con-
gurado correctamente, verá la pantalla
de la cámara en la pantalla del televisor. Si
necesita ayuda para congurar el modo de
fuente del televisor, consulte la documentación provista con su televisor.
W R Y
TV
Page 70

Page 70 Transferencia De Archivos A Una Computadora
Español
transferencia de archivos a una Â
computadora
Conecte la cámara a una computadora para transferir los archivos de la cámara al disco duro.
Si planea instalar el software del CD incluido,
instale estos programas ANTES de conectar
la cámara a la computadora.
Utilice el cable USB incluido para conectar la 1.
cámara a la computadora.
Enchufe el extremo pequeño del cable a la
cámara.
Conecte el extremo grande del cable en un
puerto USB de la computadora.
Si la cámara está apagada, enciéndala. Su 2.
computadora debe reconocer automáticamente
la cámara de video como disco portátil. Siga las
indicaciones en la pantalla de la computadora
para ver los archivos de la cámara.
Si no hay indicaciones en pantalla, puede ac-
ceder a la cámara a través de “Mi PC” en una
computadora con Windows o en la ventana
Finder en Mac OS X.
Transera archivos desde la cámara a su com-3.
putadora como lo haría con un disco externo (es
decir, arrastre y suelte o copie y pegue).
La cámara debe estar encendida para
conectarla a una computadora.
Page 71

Transferencia De Archivos A Una Computadora Page 71
Español
La primera vez que conecte la cámara a una
computadora, a esta le llevará un momento
reconocer e instalar los controladores adecuados para la cámara.
Se ha proporcionado un cable de extensión
USB para su comodidad. Utilice este cable
para conectar la cámara si los únicos puertos USB disponibles están ubicados en la
parte posterior de la computadora o si la
cámara está bloqueada con otros dispositivos USB.
Si la computadora tiene una lectora de tar-
jetas SD, puede simplemente quitar la tarjeta SD de la cámara e insertarla en el lector
de tarjetas para transferir archivos.
Page 72

Page 72 Uso Del Software Incluido
Español
Para su conveniencia, se incluye el siguiente software:
muvee™ autoProducer . Basic
muvee autoProducer es el último lanzamiento en
la gama del galardonado software de autoProducer.
Con más de estilos, tiene muchas formas de
personalizar su producción hogareña. Ya sea que
intenta crear una muestra de imágenes o una
película rápida casera, muvee autoProducer
aporta un nivel de simplicidad a la tarea. Agregue
sus fotografías y videos, seleccione un estilo y deje
que automáticamente cree y sintonice una película
al ritmo de la música.
Los requisitos mínimos del sistema para este software son:
Una computadora con Windows , Windows
Vista o Windows XP.
Una computadora con unidad óptica de DVD/
CD-ROM.
Procesador: Intel Pentium III GHz, AMD Athlon,
o equivalente con soporte para MMX.
Memoria: MB de RAM
Otros requisitos: Microsoft DirectX . o supe-
rior, Apple QuickTime (para archivos MOV)
Para obtener más información sobre DirectX,
visite el sitio Web de ayuda de Microsoft:
http://support.microsoft.com/kb/179113/.
Para obtener más información sobre Ap-
ple QuickTime, viste el sitio Web de Apple:
http://www.apple.com/quicktime/download/.
uso del software incluido Â
Page 73

Uso Del Software Incluido Page 73
Español
Instalación de muvee™ autoProducer
Para instalar muvee autoProducer . Basic:
Inserte el CD de software incluido en
la unidad óptica de DVD/CD-ROM en
la computadora. Cuando la ventana
de reproducción automática aparezca
en pantalla, haga clic en “Abrir carpeta para ver los archivos”.
Nota: Si no aparece ninguna ventana
de reproducción automática, abra el
explorador de Windows y haga doble
clic en el icono de la unidad de DVD/
CD-ROM para ver el contenido.
Page 74

Page 74 Uso Del Software Incluido
Español
Haga doble clic en la carpeta “muvee”
para ver su contenido, luego doble
clic en la carpeta “Installer” para ver
su contenido.
CAM4002 IB
CAM4002
CAM4002
Page 75

Uso Del Software Incluido Page 75
Español
Haga doble clic en el archivo “setup”
para comenzar el proceso de instalación.
CAM4002
Page 76

Page 76 Uso Del Software Incluido
Español
Siga las instrucciones en pantalla para
instalar el controlador.
Reinicie la computadora para completar la instalación.
Page 77

Uso Del Software Incluido Page 77
Español
Uso de muvee™ autoProducer
muvee autoProducer le permite volverse creativo con sus videos y fotografías. Ya sea que intenta crear una
muestra de imágenes o una película rápida casera, muvee autoProducer aporta un nivel de simplicidad a
la tarea.
Para conocer más sobre muvee autoProducer, presione la tecla “F” en el teclado para ver los archivos de
ayuda (o seleccione “Ayuda” en la barra de menú).
La documentación de ayuda se reere a la versión completa de autoProducer 6, no a la versión básica
incluida. La versión básica de muvee autoProducer 6.1 tiene las siguientes limitaciones:
Archivos de video por muvee: Agregar narraciones de voz: No
Fotografías por muvee: Salida MPEG- y MPEG-: No
Pistas de música por muvee: Grabación de DVD: No
Agregar encabezados: No
Page 78

Page 78 Uso Del Software Incluido
Español
Realización de un muvee™
Inicie el programa.1.
Desde el menú de inicio de la computadora, haga
clic en:
All Programs (todos los programas) →
muvee → muvee autoProducer 6.1 →
Home movies made easy!
Encienda la CAM3002 y conéctela a la com-2.
putadora usando el cable USB provisto.
Para agregar videos y fotografías de la 3.
CAM3002:
Haga clic en el ícono “Import from Device” a.
(Importar del dispositivo).
Page 79

Uso Del Software Incluido Page 79
Español
Haga clic en “From My Camera Device” b.
(Desde el dispositivo de la cámara).
Use el menú desplegable para seleccionar c.
la CAM3002. La tarjeta SD (en caso de
estar cargada) aparecerá como un disco
extraíble..
Haga clic en “OK” (Aceptar).d.
Page 80

Page 80 Uso Del Software Incluido
Español
Para agregar pistas de sonido al proyecto, haga 4.
clic en el icono de música.
Haga clic en un estilo para elegir un estilo visual 5.
para este proyecto.
Haga clic en el icono "make muvee” (Hacer 6.
muvee) para nalizar la creación de su muvee.
Page 81

Uso Del Software Incluido Page 81
Español
Para guardar y compartir el muvee nalizado, 7.
haga clic en el icono “muveeShare”.
Para subir videos a YouTube, usted debe contar con una cuenta de YouTube válida. Para
inscribirse y obtener una cuenta gratuita, visite: http://www.youtube.com/create_account/.
Page 82

Page 82 Especicaciones
Español
Especicaciones Â
Tipo de Pantalla LCD TFT 2.4”
Sensor de Imágenes CMOS (1.3 MP)
Resolución de Video VGA (640 x 480), 30 fps
QVGA (320 x 240), 30 fps
Resolución de Foto 3.1 MP (2048 x 1944)*
1.3 MP (1280 x 1024)
0.3 MP (640 x 480)
Asistencia de Poca Luz LED
Zoom (Acercar/Alejar) 4x digital
Lente 8.7 mm, f/2.8
Rango del Foco Foco jo
Balance de Blancos Auto (automático)
Exposición Auto (automático)
Soporte de Memoria
Extraíble
SD/SDHC (hasta 16 GB)
Formato de Video AVI (MJPEG)
Formato de Foto JPEG
Salida A/V Video compuesto/mono de
2.5 mm
Conexión a la
Computadora
USB 2.0 Hi-speed (alta velocidad)
Alimentación 3 baterías tamaño “AAA”
* Sobre la base de interpolación.
Las especicaciones y el manual están sujetos a cambios
sin noticación.
Page 83

Solución De Problemas Y Soporte Page 83
Español
solución de Problemas y soporte Â
Si experimenta un problema con este dispositivo, lea la guía de solución de problemas que se encuentra a
continuación y visite nuestro sitio Web www.cobyusa.com para obtener respuestas a preguntas frecuentes
(FAQs) y las actualizaciones de rmware. Si estos recursos no resuelven el problema, comuníquese con el
Soporte técnico.
Address COBY Electronics Corporation Soporte técnico
Knowlton Way
Savannah, GA
Correo Electrónico techsupport@cobyusa.com
Sitio Web www.cobyusa.com
Teléfonos y Horarios -- De Lunes a Viernes:
:AM–:PM Hora estándar del este
Sábados:
:AM–:PM Hora estándar del este
-- De Lunes a Viernes:
:AM–:PM Hora estándar del este
Page 84

Page 84 Solución De Problemas Y Soporte
Español
la cámara no enciende.
Verique que la batería recargable esté cor-
rectamente instalada. El texto de la batería debe
quedar hacia arriba y poder leerse; los contactos
dorados deben estar orientados hacia la izquierda.
Es posible que el nivel de batería esté bajo.
Conecte la cámara a una computadora para
cargarla.
la cámara no toma fotografías o video.
Es posible que la memoria de la cámara o la
tarjeta de memoria estén llenas. Borre varios
archivos e intente nuevamente.
El tipo de tarjeta de memoria puede no ser
compatible con la cámara. Asegúrese de que se
encuentra utilizando una tarjeta de memoria SD
o SDHC de tamaño igual o menor a GB.
El formato de la tarjeta de memoria puede no
ser compatible con la cámara. Asegúrese de que
se encuentre utilizando una tarjeta con formato
de tipo FAT.
la imagen es borrosa o fuera de foco.
Las imágenes o videos borrosos pueden deber-
se a que la cámara no es sostenida de manera
estable durante la grabación. Sostenga rmemente la cámara e intente nuevamente.
Las imágenes o videos borrosos pueden de-
berse a que no hay suciente luz en el sujeto.
Pruebe grabar en un sitio mejor iluminado.
las imágenes grabadas no son guardadas
en la memoria.
Las imágenes no se guardarán si la cámara es
apagada antes de que el proceso de guardado
de la información concluya. Asegúrese de conceder un tiempo adecuado para que la imagen
sea guardada por completo antes de apagar la
cámara.
Page 85

Información Importante Page 85
Español
La gura de relámpago que termina en punta de
echa dentro de un triángulo equilátero tiene por
nalidad alertar al usuario de la presencia de “voltaje
peligroso” sin aislamiento dentro de la caja del
producto que podría tener potencia suciente para
constituir un riesgo de choque eléctrico.
El signo de exclamación dentro de un triángulo
equilátero tiene el propósito de advertir al usuario
de la presencia de instrucciones de funcionamiento
y reparación importantes en el material impreso que
acompaña al artefacto.
Para uso de los clientes:
Ingrese a continuación el número de serie que se encuentra en la parte
trasera de la unidad. Conserve esta información para referencias futuras
Nº de modelo CAM4002
Nº de serie
Para obtener información de reciclaje o eliminación sobre
este producto, comuníquese con sus autoridades locales o
con la Alianza de Industrias Electrónicas: www.eiae.org.
ADVERTENCIA: Para prevenir el riesgo de descarga eléctrica,
no exponga este dispositivo a la lluvia ni a la humedad. Adentro del
gabinete se encuentra alto voltaje peligroso. No lo abra.
información importante Â
Page 86

Page 86 Información Importante
Español
Declaración de la FCC
Este dispositivo cumple con la Parte 15 de las Normas de la FCC. El funcionamiento está sujeto a las siguientes dos
condiciones:
(1) Este dispositivo puede no causar interferencias perjudiciales, y
(2) Este dispositivo debe aceptar cualquier interferencia recibida, inclusive aquella que podría causar funcionamiento no
deseado.
Nota: Este equipo fue probado y cumple con todos los límites para dispositivos digitales clase B, conforme a la Parte 15 de
las normas de la FCC. Estos límites fueron diseñados para brindar protección razonable contra la interferencia perjudicial en
una instalación residencial. Este equipo genera, emplea y puede irradiar energía de frecuencia de radio y, si no se instala y
emplea según las instrucciones, puede ocasionar interferencia perjudicial para las comunicaciones de radio. Sin embargo, no
hay ninguna garantía de que no ocurrirá en una instalación en particular. Si este equipo causa interferencia perjudicial para la
recepción de radio o televisión, lo cual puede determinarse al apagar o encender el equipo, el usuario puede tratar de corregir
la interferencia con una o más de las siguientes medidas:
Reorientar o reubicar la antena receptora. •
Aumentar la distancia entre el equipo y el receptor. •
Conectar el equipo en un tomacorriente en un circuito diferente del que está conectado el receptor. •
Consultar al distribuidor o a un técnico con experiencia en radio y TV para obtener ayuda.•
Se requiere el uso de cable blindado, para cumplir con los límites de la clase B, en la sub parte B de la Parte 15 de las
normas de la FCC.
No efectúe cambios ni modicaciones al equipo, excepto en caso de que así lo especique el manual. Si se deben
efectuar tales cambios o modicaciones, se le solicitará que detenga el funcionamiento del equipo.
Page 87

Información Importante Page 87
Español
Instrucciones de Seguridad
Importantes
Lea las instrucciones: Deberá leer todas las instruc-1.
ciones de seguridad y funcionamiento, antes de poner
en funcionamiento este producto.
Conserve las instrucciones: Deberá conservar las 2.
instrucciones de seguridad y funcionamiento para
referencia futura.
Preste atención a las advertencias: Deberá respetar 3.
todas las advertencias contenidas en el producto y en
las instrucciones de funcionamiento.
Siga las instrucciones: Deberá seguir todas las in-4.
strucciones de uso y funcionamiento.
Limpieza: Desconecte este producto del tomacorri-5.
ente de pared antes de la limpieza. No utilice produc-
tos de limpieza líquidos o en aerosol. Utilice un paño
húmedo para limpiar.
Complementos: Utilice sólo complementos recomen-6.
dados por el fabricante. El uso de otros complementos
puede ser peligroso.
Agua y humedad: No utilice este producto cerca del 7.
agua (por ejemplo: cerca de una bañera, lavatorio,
lavaplatos o tina para lavar ropa, en un sótano mojado
ni cerca de una piscina o similar).
Ventilación: El gabinete posee ranuras y aberturas 8.
para asegurar la correcta ventilación del producto y
para protegerlo del recalentamiento. Nunca se debe
bloquear estos oricios al colocar el producto sobre
una cama, sofá, alfombra u otras supercies simi-
lares. No se debe colocar este producto en un mueble
empotrado, tal como biblioteca o estante, salvo que
se proporcione una ventilación correcta o se cumplan
las instrucciones del fabricante del producto.
Fuentes de alimentación: Este producto debe utilizarse 9.
sólo con el tipo de fuente de alimentación indicada
en la etiqueta de clasicación. Si no está seguro del
tipo de fuente de alimentación de su hogar, consulte
con el distribuidor del producto o con la compañía
eléctrica local. Para los productos que funcionan a
batería o con otras fuentes de alimentación, consulte
las instrucciones de funcionamiento.
Sobrecarga: No sobrecargue los tomacorrientes, al-10.
argues o enchufes de pared, ya que esto puede tener
como resultado un riesgo de incendio o descarga
eléctrica.
Entrada de objetos y líquido: Nunca introduzca objetos 11.
de ningún tipo dentro de este producto a través de las
aberturas, ya que pueden ponerse en contacto con pun-
tos de voltaje peligrosos o provocar cortocircuitos que
ocasionarían incendios o descargas eléctricas. No der-
rame nunca líquido de ningún tipo sobre el producto.
Page 88

Page 88 Información Importante
Español
Reparaciones: No intente reparar este producto usted 12.
mismo, ya que al abrir o quitar las cubiertas se expon-
dría a voltaje peligroso u otros peligros. Para cualquier
reparación, póngase en contacto con el personal téc-
nico calicado.
Daños que requieran servicio técnico: Desconecte 13.
este producto del enchufe de pared y contáctese
con personal técnico calicado en las siguientes
situaciones: a) cuando la fuente de alimentación o el
enchufe estén dañados; b) si se ha derramado líquido,
han caído objetos dentro del producto; c) si el producto
ha sido expuesto a lluvia o al agua; d) si el producto no
funciona normalmente al seguir las instrucciones de
funcionamiento. Ajuste sólo aquellos controles inclui-
dos en las instrucciones de funcionamiento, ya que el
ajuste inadecuado de otros controles puede ocasionar
daños y requerir con frecuencia un trabajo extenso por
parte de un técnico calicado para restaurar el funcio-
namiento normal del producto; e) si el producto se ha
caído o ha sufrido algún daño; f) cuando el producto
presenta un cambio marcado en su rendimiento; esto
indica que necesita mantenimiento.
Piezas de reemplazo: Cuando se requieren piezas de 14.
reemplazo, asegúrese de que el servicio técnico haya
utilizado las piezas de reemplazo especicadas por el
fabricante o que posean las mismas características que
la pieza original. Las sustituciones no autorizadas pueden
provocar incendio, descarga eléctrica u otros riesgos.
Controles de seguridad: Una vez completado el ser-15.
vicio o las reparaciones de este producto, solicite al
servicio técnico que realice controles de seguridad
para asegurar que se encuentra en condición de fun-
cionamiento correcto.
Calor: El producto debe ubicarse lejos de fuentes de 16.
calor tales como radiadores, rejillas de aire caliente,
estufas u otros productos (incluidos amplicadores)
que produzcan calor.
Page 89

Información Importante Page 89
Español
Mantenimiento y Cuidado
Mientras la utiliza, sujete la cámara con la correa 1.
para la muñeca en todo momento para evitar
daños accidentales.
Siempre guarde la cámara en el estuche provis-2.
to para evitar la aparición de rayas en la pantalla
y el lente de la cámara.
Para limpiar el lente:3.
Sople para quitar el polvo de la supercie a.
del lente.
Frote el lente delicadamente con un paño b.
de microbra especial para la limpieza de
lentes/dispositivos ópticos. Si fuera necesario, utilice ÚNICAMENTE limpiador de lentes.
Nunca use solventes orgánicos para
limpiar la cámara.
Nunca toque el lente.4.
Si piensa guardar la cámara durante un período 5.
prolongado, quítele la batería y conserve la
cámara en un lugar seco y oscuro.
Esta cámara de video digital es adecuada para 6.
entornos con temperaturas de entre 0°- 40°
(32°-104°). No exponga la cámara a temperaturas extremadamente altas, por ejemplo, la de un
automóvil estacionado bajo luz solar directa, ni
a la humedad excesiva.
Para evitar la condensación, guarde la cámara 7.
en una bolsa de plástico sellada cuando se
desplace de un ambiente frío a uno cálido.
Puede extraer la cámara de la bolsa una vez que
alcance la temperatura de interiores.
Page 90

Page 90 Table Des Matières
Français
table des matières Â
contenu de la boîte ................................... 4
la caméra en un couP d’oeil ................. 5
Vue de face ....................................................5
Vue de face ....................................................6
Vue de gauche .............................................. 7
Vue arrière ...................................................... 8
Bottom View ................................................... 8
Pour démarrer ............................................ 9
Installer les Piles...............................................9
Insertion d’une Carte Mémoire .................... 9
Mise en marche/arrêt de la Caméra ........ 10
Changement des Modes de Caméra ...... 10
mode enregistrement (Photos &
films) .............................................................11
Pour Enregistrer un Film .................................11
Pour Prendre une Photo ...............................11
Ajustements Film et Photo ............................12
Zoom ....................................................12
Utilisation de la Lampe
d’Assistance à Eclairage Faible........12
Changement de la Taille du Film .....12
Changement de la Taille de
Photo ....................................................13
Changement de la Qualité Photo ...14
mode de lecture ........................................15
Commandes de Lecture ..............................15
Pour Naviguer à Travers des
Fichiers .................................................15
Pour Naviguer à Travers des
Fichiers en tant qu’Imagettes ...........16
Suppression de Fichiers ................................16
Pour supprimer le chier actuel
(supprimer un chier seulement) : ....16
Pour supprimer tous les chiers
(supprimer tous) : ................................17
Page 91

Table Des Matières Page 91
Français
menu des oPtions ......................................18
Pour ajuster les options
d’Enregistrement : ........................................ 18
Pour ajuster les options de Lecture : .......... 20
Pour ajuster les options de Système : .........22
branchement sur un téléviseur ............ 26
transfert de fichiers à un
ordinateur ..................................................27
utilisation du logiciel inclus ................29
Installing muvee™ autoProducer ...............30
Utilisation de muvee™ autoProducer ........34
Créer un muvee™ (lm) ...................35
carac téristiques ......................................39
déPannage et assistance ....................... 40
renseignements imPortants .................. 42
Déclaration FCC: ......................................... 43
Consignes de Sécurité Importantes ...........44
Entretien et Soins ..........................................46
Page 92

Page 92 Contenu De La Boîte
Français
Merci d’avoir acheté cette Caméra Vidéo
Numérique CAM de Coby. Veuillez lire ces
instructions avant d’utiliser votre caméscope, et
conservez-les pour référence future. Cette boîte
comprend :
Caméra CAM
Câble A/V
Câble USB
CD d’installation
Trois piles de type “AAA”
Pouch
Si l’un des éléments ci-dessus est manquant, veuillez
contacter le revendeur auprès duquel vous avez
acheté ce produit.
Ce paquet peut contenir des sacs en plastique
ou d’autres matériaux qui posent un danger
pour les enfants. Assurez-vous d’éliminer, en
toute sécurité, tous les matériaux d’emballage
après l’ouverture.
contenu de la boîte Â
Page 93

La Caméra En Un Coup D’oeil Page 93
Français
Vue de face
1
Appuyer pour prendre une photo quand la caméra est
en mode Record (Enregistrement).
2
Appuyer pour capturer une vidéo quand la caméra est
en mode Record (Enregistrement).
3
Appuyez sur le levier de commande pour entrer une option
sélectionnée (OK).
Poussez le levier de commande vers le haut, la gauche, le bas,
ou la droite pour déclencher les boutons (4) à (8) ci-dessous.
4
Poussez le levier de commande vers le haut pour
augmenter le zoom.
5
Poussez le levier de commande vers la gauche pour
changer la résolution photo. Des photos à plus haute
résolution utiliseront plus de mémoire.
6
Poussez le levier de commande vers le bas pour
diminuer le zoom.
7
Poussez le levier de commande vers la droite pour
commuter la lampe d'assistance à éclairage faible.
Vue de face
8
Appuyez pour changer entre les modes Playback
(Lecture) et Record (Enregistrement).
9 Appuyez pour supprimer un chier.
1
3
2
7
9
4
6
5
8
la caméra en un coup d’oeil Â
Page 94

Page 94 La Caméra En Un Coup D’oeil
Français
Vue de face
10
Ecran d’achage. Rabattez l’écran pour l’ouvrir, puis faites
pivoter l’écran face à vous.
(Les boutons MARCHE/ARRET et MENU sont protégés derrière l’écran d’achage quand il est fermé.)
11
Prise de sortie A/V. Utilisez avec le câble A/V inclus pour connecter la caméra à un téléviseur ou à un autre achage.
(La prise de sortie A/V est protégée par un rabat en caoutchouc. Soulevez le rabat vers le haut pour révéler la prise de
sortie A/V.)
12
Port USB. Utilisez avec le câble USB fourni pour connecter la
caméra à un ordinateur.
(Le port USB est protégé par un rabat en caoutchouc. Soulevez
le rabat vers le haut pour révéler le port USB.)
11
12
10
Page 95

La Caméra En Un Coup D’oeil Page 95
Français
Vue de gauche
13
Appuyer et maintenir appuyé pour mettre la caméra
sous tension/hors tension.
(Le bouton MARCHE/ARRET est protégé derrière
l’écran d’achage. Ouvrez l’écran pour accéder à ce
bouton.)
14
Appuyez pour accéder au menu d’options.
(Le bouton MENU est protégé derrière l’écran
d’achage. Ouvrez l’écran pour accéder à ce
bouton.)
13
14
Page 96

Page 96 La Caméra En Un Coup D’oeil
Français
Vue arrière
15
Objectif de la caméra.
Pointez l’objectif vers le sujet que vous voulez capturer.
16
Lampe d’assistance à éclairage faible.Améliore la qualité de
l’image dans des situations de faible luminosité.
17
Microphone.
Capture l’audio pendant un enregistrement de lm.
18
Cache du compartiment piles.
Faites glisser le cache pour installer ou remplacer les piles.
Bottom View
19 Fixation trépied
20
Logement de carte SD/SDHC.
Chargez des cartes mémoire SD ou SDHC dans le logement.
Les contacts métalliques de la carte doivent être orientés vers
le bas.
15
16
17
18
2019
Page 97

Pour Démarrer Page 97
Français
Veuillez lire et accomplir les étapes suivantes
pour commencer à utiliser votre caméra vidéo
numérique.
Installer les Piles
Retirez le couvercle du compartiment à piles en 1.
le faisant glisser vers la base de l’appareil.
Chargez trois batteries “AAA” dans le comparti-2.
ment comme montré dans le diagramme.
Remettez en place le cache du compartiment 3.
batteries.
La pile utilisée dans cet appareil peut
présenter un danger d’incendie ou de
brûlure chimique si elle est malmenée. Vous
ne devez ni recharger, ni démonter, incinérer ou chauer les piles. Les piles utilisées
devraient être jetées en toute sécurité.
Remplacez toutes les piles en même temps. Ne
pas mélanger des piles neuves avec les vieilles.
Ne pas mélanger plusieurs types de piles.
Conservez les piles hors de portée des enfants.
Insertion d’une Carte Mémoire
Cette caméra enregistre sur des cartes mémoire
SD ou SDHC. La taille de carte maximum prise en
charge est Go
Assurez-vous que le commutateur de protection
contre l’écriture est réglé sur la position « déverrouillé » sur la carte mémoire.
Pour démarrer Â
Page 98

Page 98 Pour Démarrer
Français
Installez la carte mémoire en l’insérant douce-
ment dans la fente de carte sur le bas de la
caméra vidéo. Poussez la carte jusqu’à ce qu’elle
s’enclenche en place. Assurez-vous que la carte
est proprement alignée comme indiqué par la
marquage à côté de la fente de carte.
Pour relâcher et enlever la carte, poussez sur la
carte ; elle s’éjectera de la fente. Prenez la carte
par ses bords pour l’enlever.
Pour éviter la corruption de données,
éteignez la caméra vidéo numérique avant
d’insérer ou de retirer une carte mémoire.
Evitez de toucher les contacts en or de la
carte mémoire.
N’essayez pas d’insérer des objets autres
qu’une carte mémoire SD ou SDHC dans la
fente de carte. Une carte mémoire compatible devrait rentrer facilement dans la fente
de carte ; si vous rencontrez de la résistance,
vériez l’alignement de la carte. N’essayez
pas de forcer la carte pour qu’elle rentre.
Mise en marche/arrêt de la
Caméra
Appuyez sur et maintenez enfoncé pour allumer
la caméra. Appuyez sur pour éteindre la caméra
Pour économiser la puissance, la caméra
s’éteindra automatiquement après une
minute quand elle n’est pas utilisée.
Changement des Modes de Caméra
Votre caméra vidéo a deux modes : Enregistrement
et Lecture. Appuyez sur pour basculer entre ces
deux modes.
Icône
Mode
Caméra
Fonction
Enregistrement
Prendre des photos et enregistrer des lms.
Lecture
Revoir des chiers lm et
photo.
Page 99

Mode Enregistrement (photos & Films) Page 99
Français
Placez la caméra en mode Enregistrement (Record)
pour prendre des photos et enregistrer des lms.
Lorsque la caméra est en mode Enregistrement
(Record), il sut d’appuyer sur pour prendre une
photo ou d’appuyer sur pour enregistrer un lm.
Lorsque vous allumez votre caméra, elle
passera automatiquement en Mode Enregistrement (Record).
Pour Enregistrer un Film
Appuyez sur pour commencer
l’enregistrement.
Appuyez sur pour arrêter l’enregistrement.
Quand la caméra enregistre, le montant to-
tal de temps d’enregistrement écoulé est afché dans le coin supérieur droit de l’écran.
Quand la caméra n’enregistre pas, le montant de temps d’enregistrement estimé disponible est aché.
L’enregistrement s’arrêtera automatique-
ment lorsque la carte mémoire est pleine.
Pour Prendre une Photo
Appuyez sur pour prendre une photo.
Le nombre estimé de photos disponibles sur
la carte mémoire est aché sur le coin supérieur gauche de l’écran.
mode enregistrement (Photos & films) Â
Page 100

Page 100 Mode Enregistrement (photos & Films)
Français
Ajustements Film et Photo
Des ajustements supplémentaires sont disponibles
à travers le menu des Options. Veuillez consulter
la section Menu des Options pour de plus amples
renseignements.
Zoom
Pour utiliser la fonction de zoom numérique de la
caméra :
Appuyez sur pour faire un zoom avant.
Appuyez sur pour faire un zoom arrière.
Le niveau d’agrandissement est aché sur
le coin droit inférieur de l’écran.
Utilisation de la Lampe d’Assistance à
Eclairage Faible
La lampe d’assistance à éclairage faible peut vous
aider à augmenter la qualité de la photo ou du lm
dans des environnements sombres où un éclairage
approprié n’est pas possible. Pour de meilleurs
résultats, les sujets devraient être bien éclairés. La
lampe d’assistance ne peut pas servir de substitut
pour un éclairage approprié.
Appuyez sur
pour allumer ou éteindre la
lampe.
L’utilisation d’une lampe d’assistance à éclai-
rage faible réduira l’autonomie de la pile.
Changement de la Taille du Film
La caméra peut enregistrer à une taille de lm maximum de x pixels. Pour augmenter le temps
d’enregistrement, vous pouvez vouloir enregistrer
des lms à une résolution plus basse.
La taille du lm est achée sur le coin droit supérieur de l’écran.
Taille de Film Résolution
[] VGA ( x )
[] QVGA ( x )
 Loading...