

Page 1
Coby Electronics Corp.
56-65 Rust Street
Maspeth, NY 11378
www.cobyusa.com
www.ecoby.com
USER'S MANUAL
Please read manual before operation
Customer Service Hours
Monday- Friday 8:00AM ~ 11:00PM (EST) 1-800-681-2629 or 718-416-3197
Monday- Friday 6:30PM ~ 11:00PM (EST) 1-800-727-3592
Saturday- Sunday 9:00AM ~ 11:00PM (EST) 1-800-727-3592
Or Send E-Mail to: Customerservice@cobyusa.com / techsupport@cobyusa.com
MPC941
Back cover Front cover
Page 2
Contents
Contents
Getting Started
Features .....................................................................................
Accessories................................................................................
Safty Instructions .......................................................................
Power Supply........ ....................................................................
Location of Control ..................................................................
LCD Display ...............................................................................
MENU Table ..............................................................................
Connection to Computer
USB Driver Installation ..............................................................
Connecting the player to PC ................................................
Downloading/ Uploading files ...............................................
Disconnection the USB ...........................................................
Basic Operations
Power On/ Off .........................................................................
Entering the Main Menu .........................................................
Playing Music ...........................................................................
Mic Recording..........................................................................
Line-in Recording.....................................................................
FM Recording.............................. ............................................
2
10
11
12
13
13
14
15
16
17
18
19
Advance Setup
4
5
6
7
8
9
Playback Function.............................................................
Settings.....................................................................................
FM-Tuner.............................................................................
Reading Textfiles.....................................................................
F/W Upgrade ..........................................................................
Customer Support
Troubleshooting .....................................................................
Specifications ........................................................................
2
3
20-23
24
25-26
27
28
29
30
Page 3
Features
20GB Built-in Hard Disk
MP3, WMA, OGG, WAV Playback
MP3 Files which is recorded from Line-In/FM(ENC
001-999,FM001-999)
MP3 Files which is recorded from MIC(VOC001-999)
Favorite: Bookmark Files (100-File)
Playlist: M3U Files(*.m3u(100-File) which has contained up to 100
files in one file)
Music File Search
Text Files Reading
FM-Receiver (20-Preset Channel)
Plug and Play (No installation software require for
Window 2000 / Window ME / Window XP)
Voice Recording
Displays Song Title, Album and Artist
Upgradable Firmware (You can upgrade the programs
when available. Please check the home page
www.cobyusa.com for upgrades.
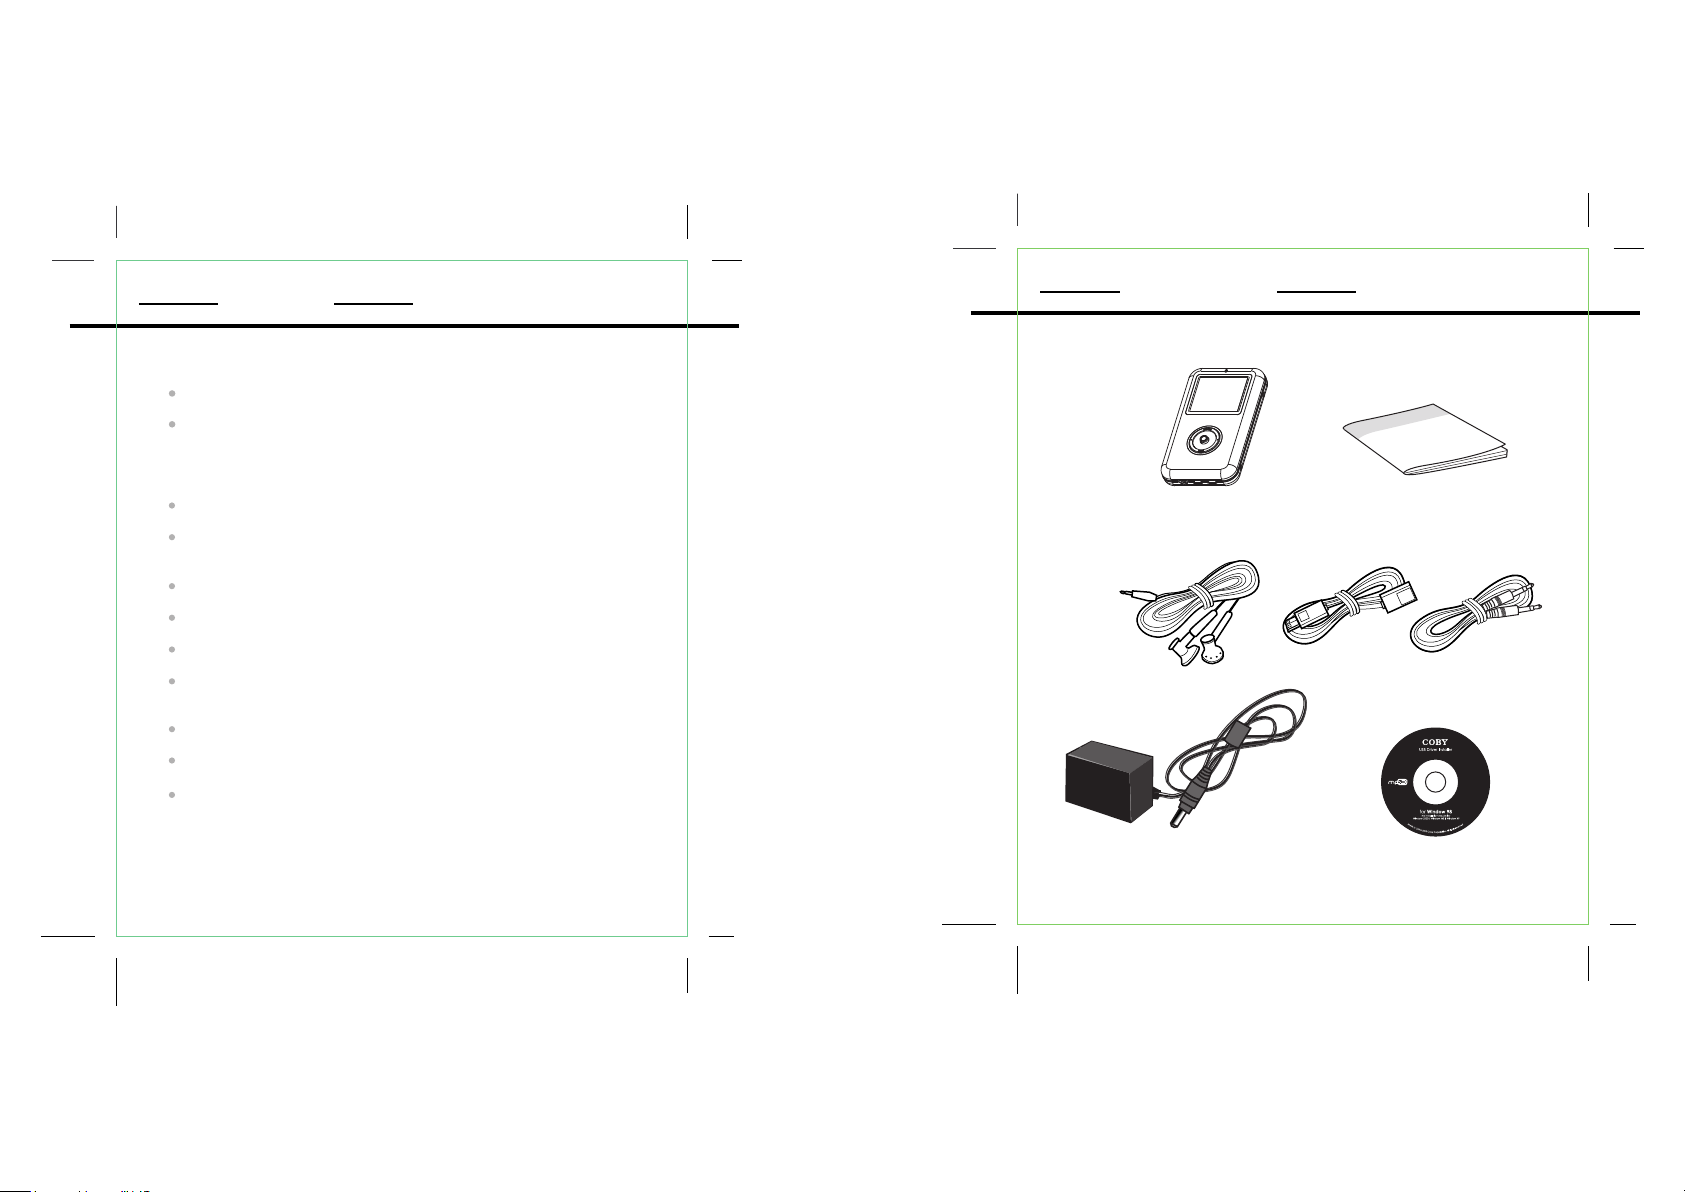
Accessories
MP3 Player User's Manual
Earphone USB Cable Line-in Cable
AC Adaptor
Installation CD
4
5
Page 4
Safety Instructions
Power Supply
1. Do not expose the unit to high temperature or humidity.
2. Do not subject the unit to severe impact, or place heavy
objects on it.
3. Do not use strong detergent or solvent to clean the unit.
4. Remove battery when the device is left unused for a
long period of time.
5. Do not try to disassemble and repair the device yourself.
6. Do not expose to direct sunlight or heat sources.
7. Do not store in dusty areas.
Protect your ears:
Hearing experts advise against the constant use of
personal stereo played at high volume. Constant high
volume use can lead to hearing loss. If you experience
ringing in the ears or hearing loss, discontinue use
and seek medical advice.
Battery (included):
This unit operates on one 3.7V Li-ion Battery.
6
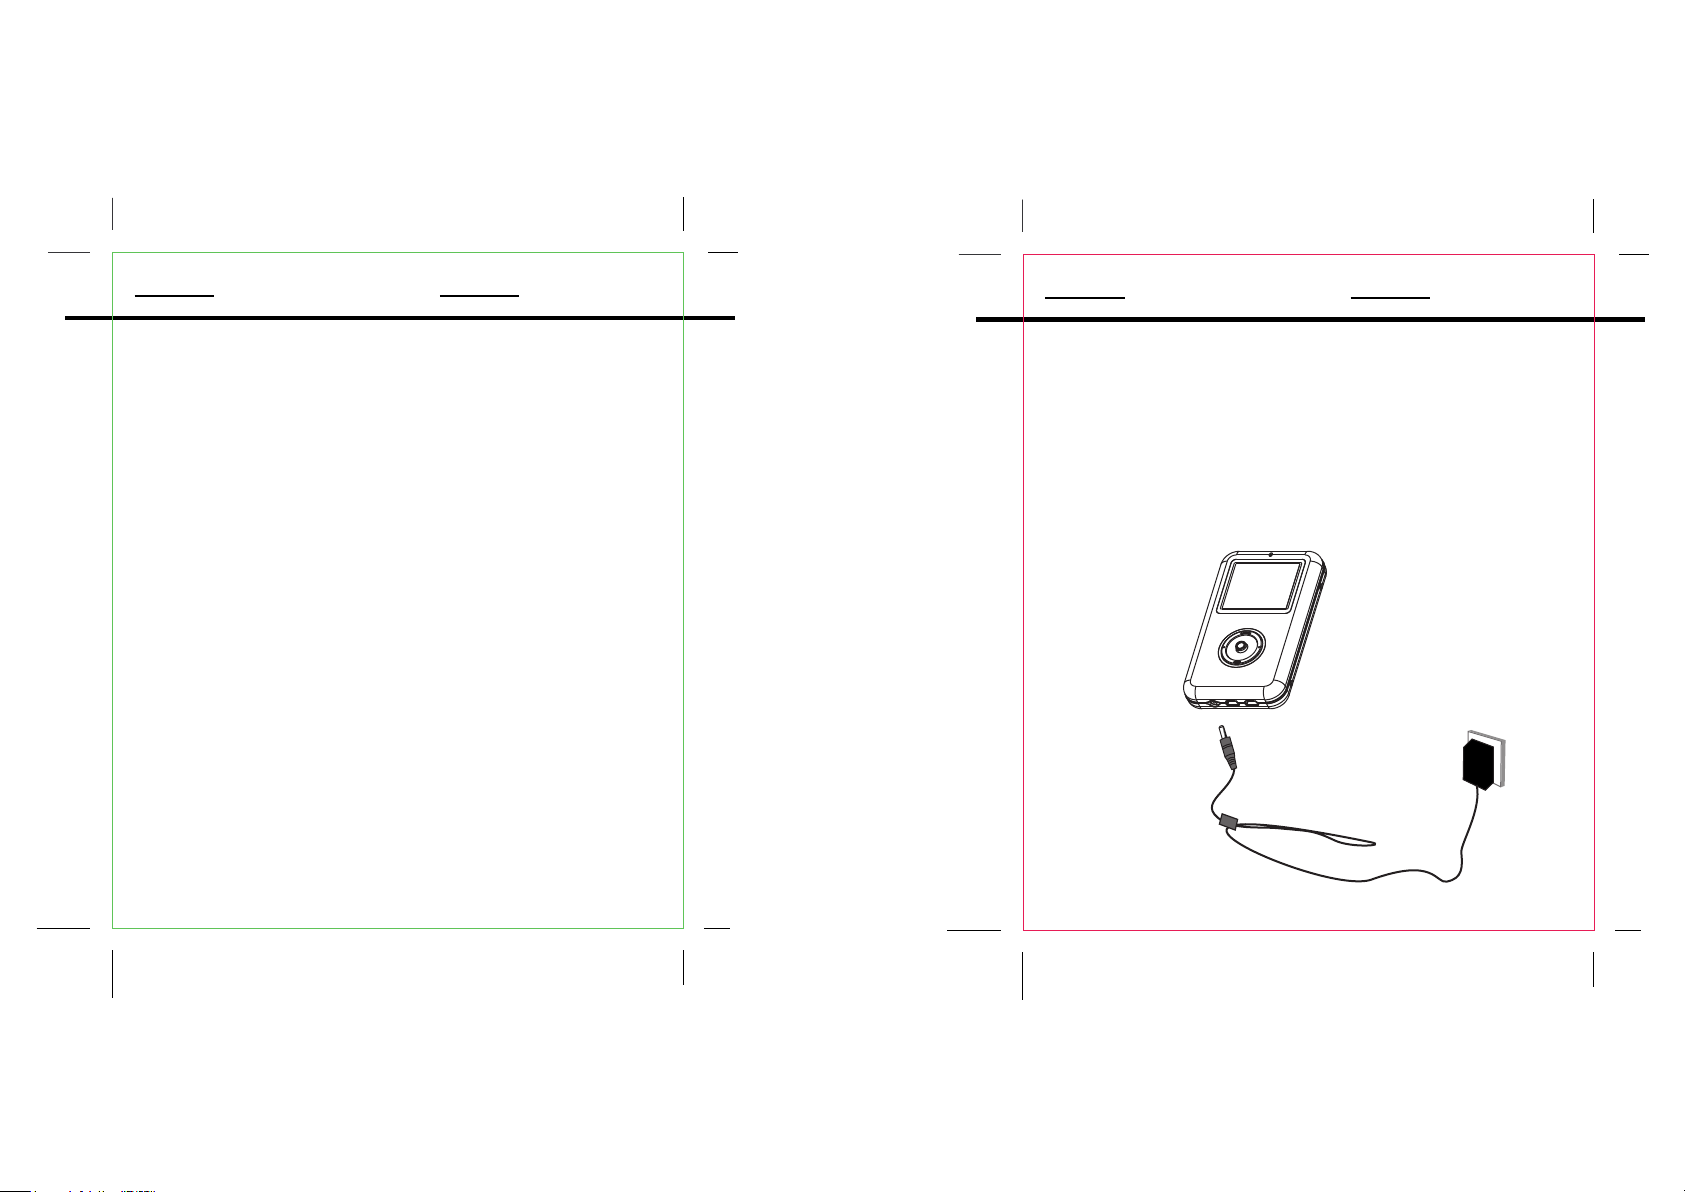
Power Supply
Power is supplied through the provided appropriative
power adapter.
one end of which is connected to the DC IN jack
on the unit, another to wall outlet with AC100-240V.
Charging the Battery
The player is being under charging the same time as it is
powered by supplied adaptor.
7
Page 5
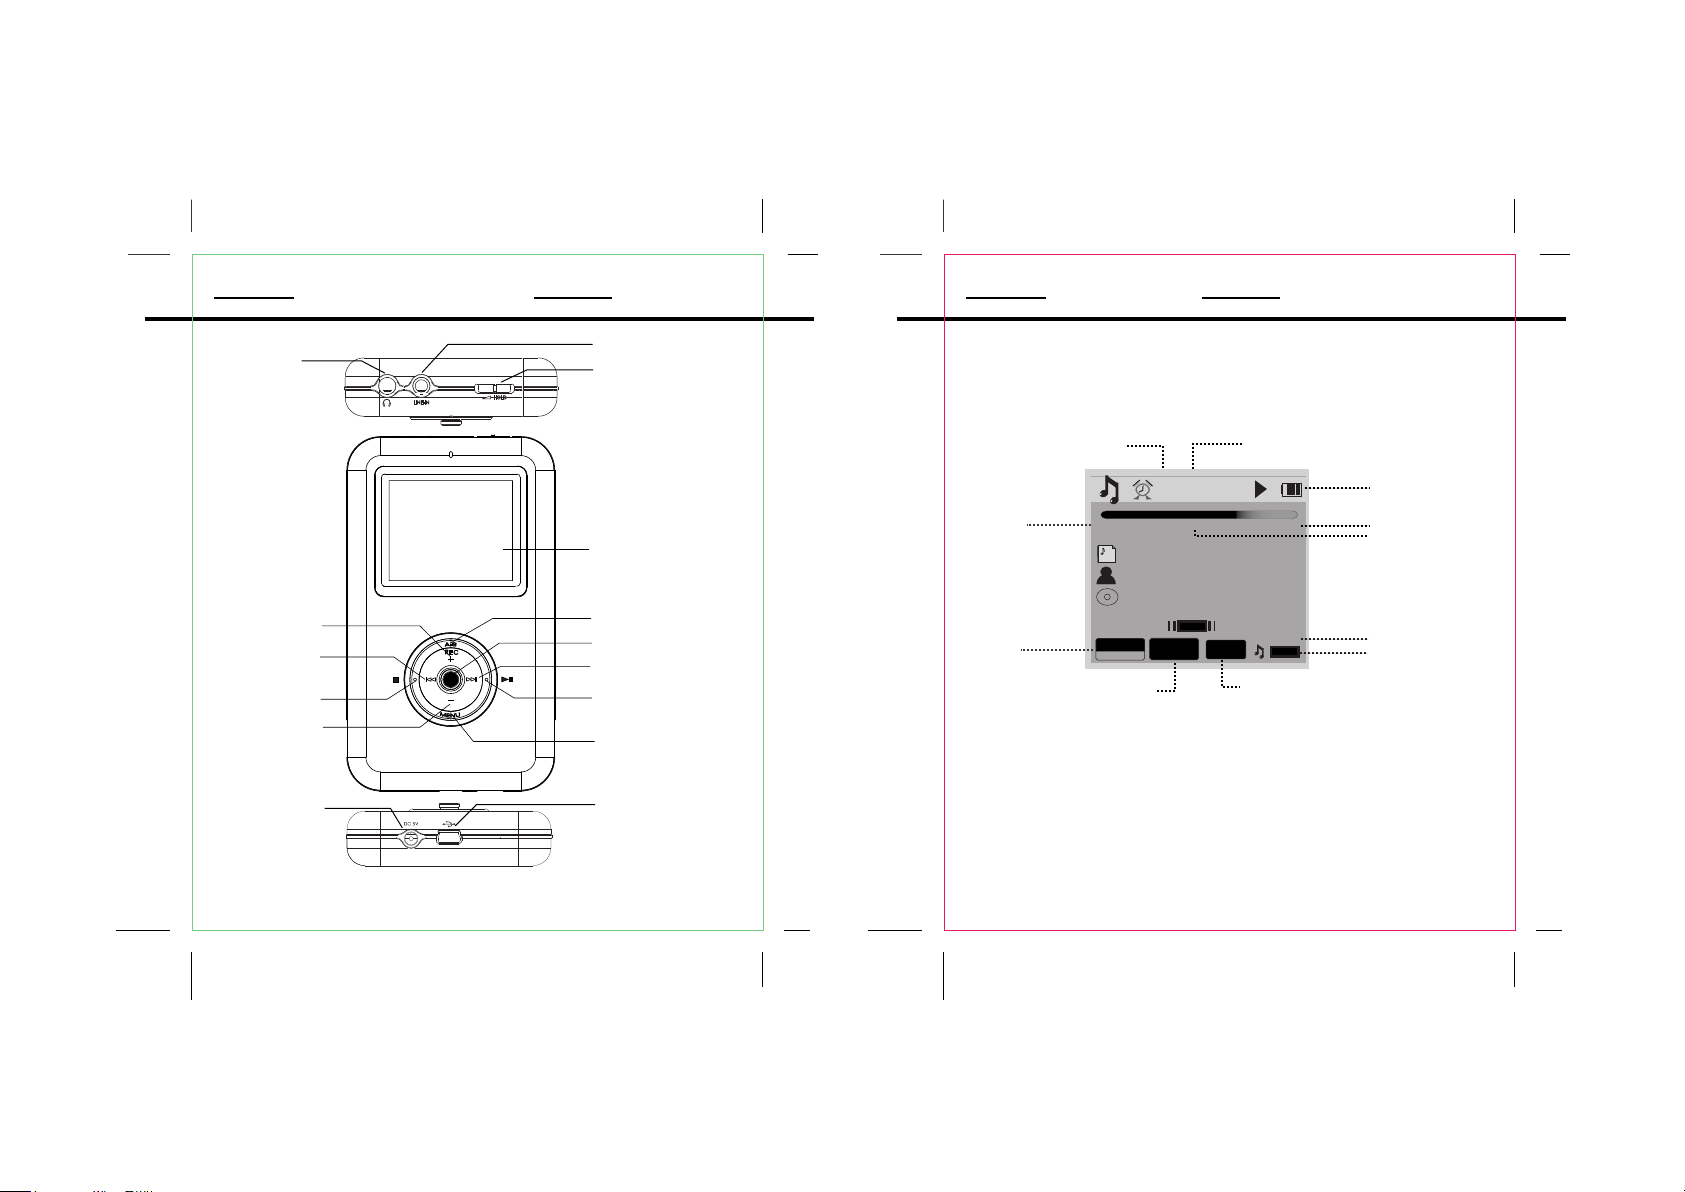
Location of Control
LCD Display
PHONE JACK
VOL+
REW
STOP
VOL -
DC IN JACK
LINE-IN JACK
HOLD
Alarm
Indicator
P
11:07
M
SFL 1
The Light
The Light of the world
ROOT
COBY
128Kbps
Bit Rate Sample
DISPLAY
REC/A-B
JOYSTICK
F.FWD
POWER ON/OFF
PLAY/PAUSE
MENU
USB PORT
Elapsed
Time
EQ
Indicator
00:02:35
MP3
NORMAL
8
44KHz
9
Clock
00:02:35
0012
0011
Frequency
Battery Indicator
Total Time
Playback
Mode
Total Tracks
Current Track
Page 6
MENU Table
USB Driver Installation
MENU
Music,Encode,Voice,Playlist,Search.
Audio
Text TEXT FILE
FM-Tuner Tuner
Setting
Sound-EQ Preset/User EQ/Balance
Display-Backlight Time/Contrast/Language
/Lyric /Auto Scroll
General-Auto Play/USB Charge/Load Default
Timer-Sleep/Date/Time Alarm
Record-MIC Quality/Line-in Quality/Radio Quality/
Sync On/Off /Voice Detect/
Information- HDD Info/Total File/Version
10
USB Driver software Installation:
If you are using Windows Me/2K/XP or Mac X
(version10.2.6 or above), there is no installation require,
just connect the player to the computer. OS will setup for
one moment and then removable disk icon will show in
"My Computer" (For Mac OS user, it'll show on the "Desktop").
If you are using Windows 98 SE, you must install the driver
which will setup the update utility and driver to computer.
1. Insert the Installation CD into the CD-ROM driver.
2. Click to open the disc D: (Where D:\is your CD-ROM
drive) and find out "Win98Driver.exe", click to run the
program.
3. Setup dialogue Window will be displayed on the screen.
4. Operate following the instructions on the screen until get
the suggestion that restart your computer now or restart
it later.
5. Select one option and then click FINISH .
11
Page 7

Connecting to PC
Down/uploading Files
Connecting the player to PC:
1. Make sure the player is turned off.
2. Connect the player with your computer by supplied
USB cable.
3. PC will automatically detect the player as removable
disk under MY COMPUTER.
4. Go to MY COMPUTER and confirm the connection.
12
Downloading/ Uploading files:
1. Connect the player to PC.
2. Open Window Explorer on PC.
3. Select the file to save and drag-and drop it into the
removable disc icon. You can also transfer file from the
player to your PC.
Note: Do not remove the player while it's transfering files.
It might currupt or damage the firmware and or files
on the player. If the player is accidentley removed
while transfering and does not work properly, remove
battery for 3 seconds and replace it.
Disconnecting the Player:
After completing the file transfer, you must disconnect the
player as following direction:
1. Double-click on the green arrow in the taskbar on the
bottom right of the window.
2. When the [Stop a Hardware device] message appears,
press the [OK] button and disconnect the USB port.
3. Now you can remove the player safely.
13
Page 8

Power On/ Off
Entering the Main Menu
Hold Function:
Hold Off: Set the HOLD switch to opposite direction of
arrow symbol to operate the player.
Hold On: Slide HOLD switch to the arrow direction to
disable all the functions.
The screen displays
hold symbol:
Turning Power On / Off:
Power On: Press button to turn on the power.
It shows "coby"
COBY
Power Off: Press/hold the button to turn off the power.
14
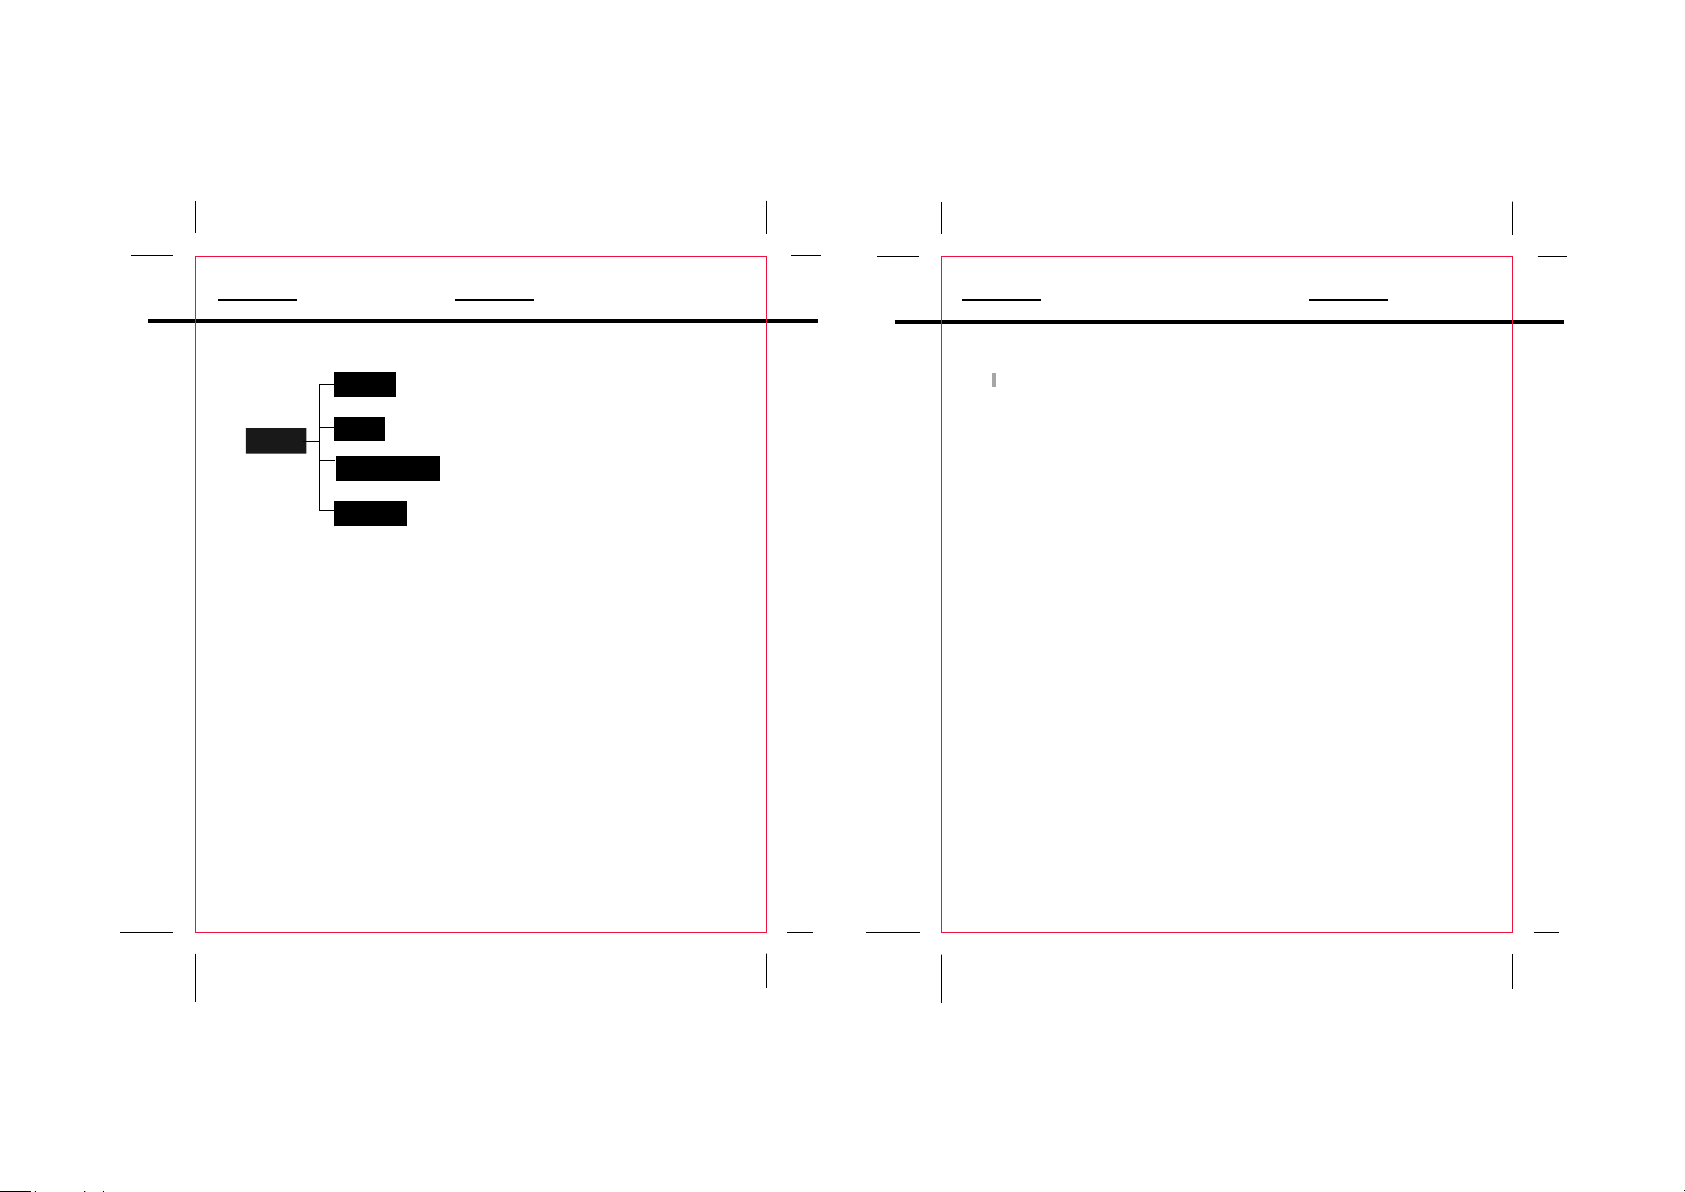
Enter the Main Menu
Press/ hold MENU button to enter the main menu.
In the main menu, it will diplay Audio,Text,FM-Tuner,Settings.
05:40
Audio
Text
FM-Tuner
Settings
Audio - music/record voice playback
Music : Music files (ex. MP3, WMA)
Encode: Line-In/FM tuner recording files (ex. FM-001.mp3)
Voice : MIC recording files (ex. VOC001.mp3)
Playlists : M3U Files, My favorite music(ex.MP3.WMA)
Search: Search music files.
TEXT- (TEXT FILE)
FM-Tuner (FM Tuner)
Settings- (System Setup)
Note: Refer to the MENU Table for detal list.
Exit the Menu
Press the MENU button to exit the menu.
Note: While working with MENU:
1. Slide joystick to make selection.
2. Press joystick to confirm.
3. Press MENU button to exit menu.
15
Page 9

Playing Music
Recording
Playing Music
1. All music files are saved under the "ROOT".
Follow below steps to get to the "ROOT".
Main Menu - Audio - Music - Root
2. Press joystick up/down to select a desired file.
3. Press joystick or PLAY button for music playback.
If the file is saved as favorite music under the PLAYLIST folder,
there is an indicator during playback.
Adjust Tracks
Press joystick to the right to play next track and left to
move to and play previous track.
Press and hold joystick to the right to move fast forward .
Press and hold joystick to the left to move fast backward.
Adjust Volume
Press joystick up or down to adjust the volume.
Pause Playback
1. Press the button to pause playback.
Note: If no buttons are pressed within custom settings,
the player automatically powers off.
2. Press the again to resume playback.
16
MIC Recording:
1. Press REC button to start recording.
The player will start recording immediately.
REC symbol will appear on the screen:
Mic
Stop Record:
2. Press STOP button to end and to save recording.
The recorded voice will be saved automatically into the
voice folder. It will get to the Voice foler after saving.
If recording from the FM- Tuner or Line-in, the recorded voice will
be saved under the ENCODE folder.
Pause Recording
Press PLAY/PAUSE button to pause recording.
Press it again to continue.
Note: The RECORDING function is unavailable in
playing mode.
17
Page 10

Recording
Recording
Line-in Recording
1. Connect the player with external audio souce by line-in cable.
To Line-In
Jack
External Audio Souce
To PHONE jack
2. Press REC button,the screen displays
3.Press PLAY/PAUSE button to start recording.
4. Press STOP button to end and to save.
5. The recorded will be be saved
automatically under the ENCODE folder.
18
Stand By...
Line-In
ENC005.MP3
Recording...
Line-In
ENC005.MP3
Recording from FM-Tuner.
1. Select a desired station,
2. Press REC button to start recording
3. Press STOP button to end and to save .
4. The recorded will be be saved automatically under
the ENCODE folder.
It will get back to the tuner mode after recording
Get to know record setup menu
During recording, press /hold joystick to enter
record setup menu.
Sync Ctrl
Voice Detect
Exit
Sync Ctrl- Setup sync control as Low/middle/high.
Voice Detect- Setup voice detect capability.
Play Recorded Voice:
1. MIC recorded files are saved under "Voice" folder.
2. FM-Tuner/Line in recorded files are saved under "Encode" folder.
3. Locate the file first and then press the joystick or PLAY button
to start playing.
Please refer to other playback mode for detail.
19
Page 11

Searching for Files
Search desired file
1. Enter Audio menu
2. Select a desired folder, press joystick to enter.
Music : Music files (ex. MP3, WMA)
Encode: Line-In/FM recordign files (ex. FM-001.mp3)
Voice : MIC recording files (ex. VOC001.mp3)
Playlists : M3U files, My favorite music(ex.MP3.WMA)
Search: Search music files.
3. Press the joystick up/down to search a desired file.
4. Press the joystick or PLAY/PAUSE button to play.
Locate file via three-digit initials
1. Select "Search" from audio menu
2. Press joystick to enter.
3. Slide joystick up/down to search through files
20
Page 12

Playback Function
Playback Function
Get to know Playback Setup Menu
During music or vioce playback, press/hold joystic to enter
playback setup menu.
Favorite(+)/(-)
EQ
Playback Speed
Info
Exit
Press joystick to enter and to exit desired item.
Press joystick up/down to make adjustment.
To exit, select EXIT and press joystick. Or simply press MENU.
Favorite(+)/(-)- add to or remove from the collection as a
favorite music.
(only for currently played music file).
EQ- Change equalizer settings (Normal,Rock,Classic, Jazz,,U-Bass, User)
Playback Speed- 70%, 100%, 120%.
Info- show memory info.
21
Playback Mode
Repeat/Shuffle/Random
During music/voice playback, press MENU button briefly,
following symbols will appear on the screen in sequence.
A - Repeat All
1 - Repeat one
D- Repeat current directory excluding sub-directory.
S- Repeat current directory including sub-directory.
1- playback current file only
D- Playback current directory only
S- Playback current sub-directory only
A- Playback all files.
SFL1- Repeatedly playback one file in random
SFLD- Playback files in current directory randomly
excluding sub-directory
SFL S - Playback files in current directory randomly
including sub-directory
SFL A- Playback all files in an random order.
INTRO- Playback each file for a few seconds as an introductory.
22
Page 13

Playback Function
Settings
Repeat A-B Function
A specified section will be repeated for a number of times.
1. During playback, press A-B button briefly to
set starting point "A".
2. Press A-B button for the second time to set
ending point "B" .
3. The player start repeating point A to B.
4. To exit, press A-B button for the third time.
23
Enter Settings menu from the main menu.
Settings menu contains the following sub-menus.
Please note each function of sub-menus.
Sound- Setup EQ,User EQ, Balance.
Display- Setup Backlight Time, Contrast, Language,
Lyric, Auto Scroll.
Backlight- Adjust backlight illumination time.
Contrast- screen color contrast
Language- setup screen language
Lyric- Displays lyric when playing.
Auto Scroll- Setup automatic scroll.
General- Setup auto play, USB Charge Load Default.
Timer- Setup sleep time , Date/Time, Alarm
Sleep Time: Select to shut off the player automatically
when it runs out of the preset time.
Record- Setup MIC Quality, Line-in Quality, Radio Quality,
Sync On/Off, Voice Detect.
Information- Select to view HDD Info, Total File, Version.
NOTE: Working with menu setup,
Press joystick to all directions to make selection and
adjustment. Press joystick to confirm.
Press MENU button to back-up and to exit.
24
Page 14

FM-Tuner
FM-Tuner
Listening to the FM Tuner
1. Select FM-Tuner from the main menu.
2. Press the joystick to enter.
Tune to a desired station
1. Press the joystick to the left/right to decrease or
increase the frequency.
2.Press and hold the joystick to the left/right for one
second to seek the next station.
Toggle between FREQ and PRESET mode
3. Press the joystick briefly to toggle between freqency
mode and preset modes.
A CHxx will appear near the middle right corner
in preset mode, where xx is the preset number.
Storing Stations Automatically
1. Press PLAY/PAUSE button to start auto search.
2. The player will scan the entire band and save located
stations into the twenty preset memory channels, overwriting
the previously stored channels.
25
Storing Stations Manually
1. Press joystick to get to the FRED mode.
2. Tune to the station you wish to store.
3. Press /hold joystick to enter FM setup menu.
4. Select "presetting" and press joystick to enter.
5. Press joystick to left/right to select preset number.
6. Press joystick to store the station to the chosen channel.
Get to know FM-Tuner setup menu
Under the tuner mode, press/hold joystick to
enter tuner setup menu.
Presetting
Scan-Level
Area
Exit
Presetting : Preset station manually.
Scan-level: Select scan level from low middle high.
Area-Select broadcasting system from US,JAPAN, EUROPE.
NOTE: Working with menu setup,
Press joystick to all directions to make selection and
adjustment. Press joystick to confirm.
Press MENU button to back-up and to exit.
26
Page 15

Reading Textfile
Reading Textfile
64 KB memory for at most 100 text files and 50 folders.
1. Enter " Text " menu from the main menu.
2. Select a desire textfile from the textfile folder.
3. Press joystick to open
4. Press joystick to all direction to move between pages
Get to know Text setup menu
Under the text mode, press joystick to enter text setup menu.
GO TO
Language
Info
Exit
GO TO: Input the desired page number by slide joystick up/down.
The player will go to the specified page.
Language: Setup text language.
Info: Press to show text file info.
Note : the screen display language will be changed also as you
change text language.
27
Page 16

F/W Upgrade
Downloading F/W Upgrade
When you upgrade firmware, make sure to fully charge the
battery because it take large amount of power when
upgrading. If battery runs out of power during upgrading,
flash memory will get damaged.
1. Make sure the player is turned off.
2. Connect USB port to the PC computer.
3. PC will automatically detect the player as "Removable
disk" under MY COMPUTER.
4. Download available F/W Upgrade from our web site.
5 Select new F/W upgrade and drag and drop it into the
"Firmware" folder of removable disc icon.
Note: After completing the file transfer, disconnect the
player using [Stop a Hardware device]. Refer to
page 13 for detail note "Disconnecting the player".
6. After remove the player, turn on the power.
Note: Player will automatically update it when the player
is turned on.
28
Page 17

Trouble Shooting
Specification
The player does not work
1. Check the battery capacity.
Download failure
1. Check to see if the driver is installed correctly in the PC.
2. Check the connection.
3. Check if the memory is full.
4. Check the battery.
The buttons do not work
1. Check setting of Hold switch.
2. Charge the battery
3. Press "RESET" button on ths back of the unit
Poor sound quality
1. Check if the quality of music file is poor, and
reformat or download it again.
Something's wrong with LCD display
1. Check if the battery power is too lower.
The LCD displays nothing
1. Check if the battery power is too lower.
2. Call customer service for Hot-key reboot.
Tel, 1-718-416-3197, 1-800-681-2629
29
Power -------------------------------------------------------3.7V Li Battery
Memory-----------------------------------------------------------------20GB
Size(WXHXD)-------------------------------------------------29x91x17mm
Interface---------------------------------------------------------USB Rev.2.0
Display------------------------------------------------------------2"LCD
Processor---------------------------------------------------------65MIPS DSP
Audio Playback---------------------------------------------MP3 decode
Voice Recording-----------------------------IMA-ADPCM encoding
18 hours recording
Signal to Noise Ratio------------------------------------------------90dB
Frequency Response---------------------------------------20Hz~20KHz
Output (16 OHM)------------------------------->10mW(each output)
Distortin Output-----------------------------------------------0.01%~0.1%
Ports--------------------------------------------------------------------------USB
WMA Format---------------------------------------32-192Kbps,8-48KHz
MP3 Format-----------------------------------------8-320Kbps, 8-48KHz
WAV Format----------------------------16bit, mono/stereo,44.1KHz
OGG Format----------------------45-500 kbps(Q-1-Q-10), 8-48KHz
30
 Loading...