

Page 1
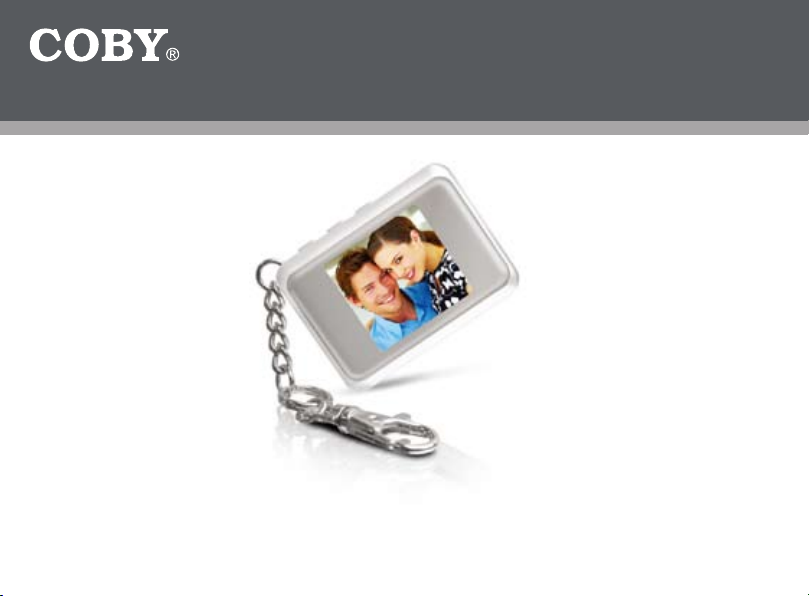
1.5″ Color LCD Digital Photo Key Chain
Instruction Manual
Please read this manual carefully before operation
DP-151
151MPB
Page 2
Precautions
For Customer Use:
Enter below the serial number that is located on
the bottom of the unit. Retain this information for
future reference.
Model No. DP-151
Serial No.
The lightning ash with arrowhead symbol within an equilateral triangle is intended to
alert the user to the presence of uninsulated “dangerous voltage” within the product’s
enclosure that may be of sufcient magnitude to constitute a risk of electric shock.
The exclamation point within an equilateral triangle is intended to alert the user to the
presenc e of impor tant operation and servicing instructions in the literature accompanying
the appliance.
WARNING:
To prevent re or shock hazard, do not expose this device to rain or moisture. Dangerous high voltage is
present inside the enclosure. Do not open the cabinet.
For recycling or disposal information about this product, please contact your local authorities or
the Electronics Industries Alliance: ww w.eiae.org.
Coby Ele ctron ics Corp. [2] www.cobyusa.c om
Page 3

Power Sources: This product should be operated only from the
Important Safety Instructions
Read Instructions: All the safety and operating instructions should
1.
be read before the product is operated.
Retain Instructions: The safety and operating instructions should
2.
be retained for future reference.
Heed Warnings: All warnings on the product and in the operating
3.
instructions should be adhered to.
Follow Instructions: All operating and usage instructions should
4.
be followed.
Cleaning: Unplug this product from the wall outlet before cleaning.
5.
Do not use liquid cleaners or aerosol cleaners. Use a damp cloth
for cleaning.
Attachments: Use only at tachments recommended by the manu-
6.
facturer. Use of other attachments may be hazardous.
Water and Moisture: Do not use this product near water (e.g., near
7.
a bath tub, washbowl, kitchen sink, laundry tub, in wet basements,
or near a swimming pool and the like).
Object and Liquid Entry: Never push objects of any kind into this
8.
product, through openings or other wise; this may result in objects
touching dangerous voltage points or short-out parts that c ould
result in a personal or property damage or injur y, including re or
electric shock. Never spill liquid of any kind on the product.
Heat: The product should be situated away from heat sources
9.
such as radiators, heat registers, stoves, or other products (includ-
ing ampliers) that produce heat.
Coby Ele ctron ics Corp. [3] www.cobyusa.c om
10.
type of power source indicated on the rating label. If you are
not sure of the type of power supply to your home, consult your
product dealer or local power company. For products intended to
operate from battery power or other sources, refer to the operating
instructions.
Servicing: Do not attempt to service this product yourself as open-
11.
ing or removing c overs may expose you to dangerous voltage or
other hazards. Refer all servicing to qualied servic e personnel.
Damage Requiring Service: a) if liquid has been spilled or if
12.
objects have fallen into the product; c) if the product has been exposed to rain or water; d) if the product does not operate normally
by following the operating instructions. Adjust only those controls
that are c overed by the operating instructions as improper adjustment of other controls may result in damage and will often require
extensive work by a qualied technician to restore the product to
its normal operation; e) if the product has been dropped or dam aged in any way; f) when the product exhibits a distinct change in
performance—this indicates a need for service.
Replacement Parts: When replacement parts are required, be
13.
sure that your ser vice technician has used replacement parts
specied by the manufacturer or have the same characteristics
as the original part. Unauthor ized substitutions may result in re,
electric shock, or other hazards.
Safety Check: Upon completion of any service or repairs to this
14.
product, ask the service technician to per form safety checks to
ensure that the product is in proper operating condition.
Page 4

Table of Contents Package Contents
Precau tions ...................................................................... 2
Important Safet y Instructions ....................................... 3
Table of Contents ............................................................ 4
Package Contents ........................................................... 4
Features & Specications ..............................................4
Getting Started ................................................................5
Charging the Key Chain ..................................................5
Controls at a Glance........................................................ 6
Key Chain Control Functions ......................................... 6
Photo Viewer Sof tware (for Microsof t Wind ows) ........ 7
Photo Viewer Sof tware (for Macintosh OS X) .............. 9
Technical Suppor t ......................................................... 12
Coby Ele ctron ics Corp. [4] www.cob yusa.c om
Please make sure the following items are included in the
product packaging. If any items are missing, contact your
local dealer.
DP-151 Photo Key Chain
●
USB Cable
●
Installation CD
●
Features & Specications
1.5 ″ CSTN LCD Color Screen
●
Displays Digital Photo Files (JPEG, GIF, BMP)
●
32 MB Flash Memory Stores up to 120 Photos
●
Photo Slideshow Function
●
USB Port for File Transfer s and Charging
●
Integrated Rechargeable Lithium-Polymer Battery
●
Key Chain Design
●
Page 5

Getting Started
To get started using your digital photo keychain:
Install the Photo Viewer Soft ware onto your c omputer
1.
from the Installation CD.
Connect the Key Chain to your computer using the sup-
2.
plied USB cable.
Use the Photo Viewer Sof tware to transfer photos to the
3.
Key Chain.
Disconnect the Key Chain from your computer.
4.
Please observe the following when using
this item:
Do not disassemble, modify, crush, or puncture
the unit in any way. Any excessive impact may
cause the unit to malfunction.
Do not expose to high temperatures above 140°F
(60°C).
Do not incinerate; dispose of properly.
Store between -4°F and 122°F (-20°C and 50°C).
Keep away from children.
Charging the Key Chain
The Key Chain comes with an integrated lithium-ion battery. The battery can be charged by connecting it to the
USB por t of a powered-on c omputer.
When connected to a USB hub, the hub must be self-
●
powered to charge the Key Chain’s batter y.
The Key Chain should be charged a minimum of
four hours before initial use.
A new or exhausted battery should be charged
fully before its initial use to ensure optimum
lifetime performance.
Coby Ele ctron ics Corp. [5] www.cob yusa.c om
Page 6

Controls at a Glance
Top View
1.
Previous, Delete Photo (one)
Power, Slideshow
2.
3.
Next, Delete Photo (all)
Front View
Key Chain Ring
4.
LCD Display
5.
Right View
USB Port
6.
Coby Ele ctron ics Corp. [6] www.cob yusa.c om
Key Chain Control Functions
Function Key Action
Power the Key Chain on or off.
Turn Slideshow Mode (Auto Play) on or off.
When Slideshow Mode is on, the Key
Chain will automatically display photos
one at a time.
While Slideshow Mode i s OFF:
View the nex t photo.
View the previous photo.
Delete the current photo.
The Key Chain will ash “Delete?”.
To conrm deletion, press .
●
To cancel deletion, press any other key.
●
Delete all photos.
The photo screen will ash “Delete All? ”.
To conrm deletion, press .
●
To cancel deletion, press any other key.
●
1.
Hold
Press
Press
Press
Hold
Hold
Page 7

Photo Viewer Soft ware (for Microsoft Windows)
Photos on
Key Chain
Disks/ Folders on
Compute r
Collec tion Panel
Install the Photo Viewer sof tware onto your computer to
transfer photos to the Key Chain. The software will also
allow you to view, delete, and crop photos.
The following instr uctions are for the Microsoft Windows
version of the Photo Viewer Soft ware. For instructions for
the Macintosh OS X version of this software, please refer
to the corresponding section of this instruction manual.
Function
Installing the Photo Viewer Software
The Photo Viewer software requires a computer running
Microsoft Windows 98SE, 200 0, XP, or Vista.
Make sure the Key Chain is disconnected from the
1.
computer.
Place the Installation CD into the computer’s CD/DVD
2.
drive. Follow the on-screen instructions to complete the
installation.
Using the Photo Viewer Software
Connect the Key Chain to the computer with the USB
1.
cable.
Double -click the Photo Viewer icon on the computer
2.
desktop to start the Photo Viewer software.
Photo Viewer
Key Chain Photo Functions
To view photos on the Key Chain,
●
click on the “View Photos” button.
To delete photos on the Key
●
Chain: a) Select the photos on the
Key Chain that you want to delete;
b) Click the “Delete” button.
To delete all photos on the Key
●
Chain, click the “Delete All” button.
NOTE: To select multiple photos, hold “Shift” or “Ctrl” on the
Buttons
keyboard while clicking with the mouse.
Coby Ele ctron ics Corp. [7] www.cob yusa.c om
Page 8

Prepar ing Photos for Key Chain Display
The Photo Viewer sof tware will automatically crop and
convert the photos on your computer for display on the Key
Chain. You may, however, manually adjust the size, brightness, contrast, and rotation of the photos.
Use the “Browse for Images” panel to nd photos on the
1.
Disks/Folders of your computer.
Select a photo to adjust and then click the “Crop Photo”
2.
button.
A “Crop Photo” window will appear. Click the buttons
3.
and slider s to make the desired adjustments.
Click “Done” to save the changes and close the window.
4.
Select the desired photos in the Collection Panel and
3.
then click the “Transfer Collection to Device” button to
start the transfer process. The computer will display
“Updating photos, please wait...” during the transfer
process.
When the transfer is complete, the Key Chain will dis-
4.
play “Downloaded”.
Close the Photo Viewer soft ware and then disconnect
5.
the Key Chain from the computer.
NOTE: To avoid damage to the Key Chain or your photos, do not disconnect the Key Chain from the computer until Steps 4 and 5 are complete.
Additional Collection Pan el Functions
Transferring Files to the Key Chain
Add photos to the Collection Panel to transfer them
Displa yed Files
to the Key Chain.
Use the “Browse for Im-
1.
ages” panel to nd photos on the Disks/Folders
of your computer.
Select a photo to add
2.
to the Collection Panel
and then click the “Add
to Collection Panel”
button.
Coby Ele ctron ics Corp. [8] www.cob yusa.c om
Arrange Sequence: To change the position of a photo,
select the desired photo and click the “<<” or “>>” buttons.
Remove from Collection: To remove a photo from the
Collection Panel, select the desired photo and click the
“Remove from Collection” button.
Remove All from Coll ection: To remove all photos from
the Collection Panel, click the “Remove All from Collec tion” button.
Save Collection: To save the collection for future use: a)
Click the “Save Collection” button; b) Choose a location on
the computer to save the c ollection le to and click “Save”.
The Collection File will have a le extension of “ITC”.
Page 9

Load Coll ection: To load a previously saved collection: a)
Remove all photos from the c ollection; b) Click the “ Load
Collection” button; c) Locate the desired Collection File
and click “Open”.
Photo Viewer Software (for Macintosh OS X)
The included Photo Viewer soft ware is required to transfer
your digital photos to the DP-151 Digital Photo Keychain.
The following instr uctions are for the M acintosh OS X
version of the Photo Viewer Soft ware. For instructions for
the Windows version of this software, please refer to the
corresponding section of this instruction manual.
Installing the Photo Viewer Software
The Macintosh Photo Viewer software requires a
computer running Macintosh OS X.
Make sure the Key Chain is disconnected from the
1.
computer.
Place the Installation CD into the computer’s CD/DVD
2.
drive.
Locate the “Photo Viewer 4.6 Mac OS.dmg” le on the
3.
installation CD. Double-click the le to mount the disk
image.
Double -click the “Photo Viewer Install” le to launch
4.
the installation program.
Follow the on-screen instructions to complete the
5.
installation.
Coby Ele ctron ics Corp. [9] www.cob yusa.c om
Page 10
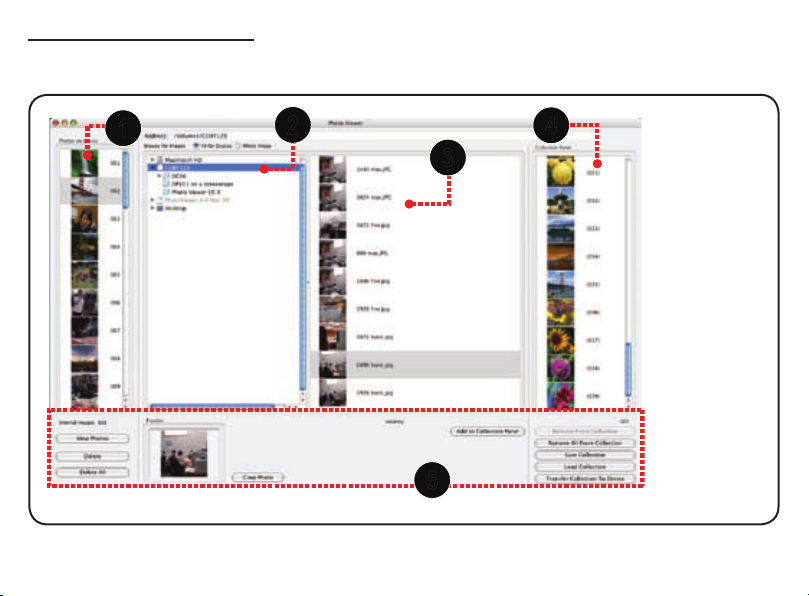
Using the Photo Viewer Software
2
3
1
4
5
Connect the Key Chain to the computer with the USB
1.
cable.
Double-click the Photo Viewer icon in the “Applications”
2.
folder to st art the Photo Viewer software.
Photos on the
1.
Keychain
Disks / Fold-
2.
ers on the
Computer
Photos on the
3.
Computer
Collection
4.
Panel
Function But-
5.
tons
Coby Ele ctron ics Corp. [10] www.cobyusa.c om
Page 11

Key Chain Photo Functions
●
To view photos on the Key
Chain, click on the “View
4.
Click “Done” to save the changes and close the window.
The adjusted photo will be added to the Collection
Panel automatically.
Photos” button.
To delete photos on the Key
●
Chain: a) Select the photos
on the Key Chain that you
want to delete; b) Click the
“Delete” button.
To delete all photos on the Key Chain, click the “Delete
●
All” button.
NOTE: To select multiple photos, hold “Shift” or “APPLE” on
the keyboard while clicking with the mouse.
Prepar ing Photos for Key Chain Display
The Photo Viewer software will automatically crop and
convert the photos on your computer for display on the
Crop Photo Window
Key Chain. You may, however, manually adjust the size,
brightness, contrast, and rotation of the photos.
Use the “Browse for Images” panel to nd photos on
1.
the Disks/Folders of your computer.
Select a photo on the computer to adjust and then
2.
click the “Crop Photo” button.
A “Crop Photo” window will appear. Click the buttons
3.
and slider s to make the desired adjustments.
Coby Ele ctron ics Corp. [11] www.cobyusa.c om
Transferring Files to the Key Chain
Add photos to the Collection Panel to transfer them to the
Key Chain.
Use the “Browse for Images” panel to nd photos on
1.
the Disks/Folders of your computer.
Select a photo to add to the Collection Panel and then
2.
click the “Add to Collection Panel” button.
Page 12

Select the desired photos in the Collection Panel and
3.
then click the “Transfer Collection to Device” button to
start the transfer process. The computer will display
“Updating photos, please wait...” during the transfer
process.
When the transfer is c omplete, the Key Chain will
4.
display “Downloaded”.
Close the Photo Viewer software and then disconnect
5.
the Key Chain from the computer.
NOTE: To avoid damage to the Key Chain or your
photos, do not disconnect the Key Chain from the
computer unt il Steps 4 and 5 are complete.
Additional Collection Pan el Functions
Remove from Collection: To remove a photo from the
Collection Panel, select the desired photo and click the
“Remove from Collection” button.
Remove All from Collection: To remove all photos
from the Collection Panel, click the “Remove All from
Collection” but ton.
Save Collection: To save the collection for future use: a)
Click the “Save Collection” button; b) Choose a location on
the computer to save the c ollection le to and click “Save”.
The Collection File will have a le extension of “ITC”.
Load Collection: To load a previously saved collection: a)
Remove all photos from the collec tion; b) Click the “Load
Coby Ele ctron ics Corp. [12] www.cobyusa.c om
Collection” but ton; c) Locate the desired Collection File
and click “Open”.
Technical Support
If you have a problem with this device, please check our
website at w ww.cobyusa.com for Frequently Asked Questions (FAQs) and rmware updates. If these resources do
not resolve the problem, please contact Coby Technical
Suppor t.
COBY Elec tronics Technical Support
56- 65 Rust Street
Maspeth, NY 11378
Hours: 8:00 AM –11:00 PM EST, seven days a week.
Email: techsupport@cobyusa.com
Phone: 718-416-3197, 800-681-2629, or 800-727-3592
Web: www.cobyusa.com
 Loading...