

Page 1

VERTICAL HI-FI 3 CD DIGITAL
STEREO RADIO SYSTEM
CX-3CD610
INSTRUCTION MANUAL
Page 2

Caution
To prevent fire or shock hazard, do not use this plug with an extension cord, receptacle or
other outlet unless the blades can be fully inserted to prevent blade exposure. To prevent fire
or shock hazard, do not expose this appliance to rain or moisture.
The lightning flash with
arrowhead symbol, within an
equilateral triangle is intended
to alert the user to the
presence of uninsulated “dangerous voltage” within the
product’s enclosure that may
be of sufficient magni-tude to
constitute a risk of electric
shock to persons.
WARNING: To reduce the risk
of electric shock do not
remove cover (or back), no
user service-able parts inside
refer servicing to qualified service personnel.
The exclamation point
within an equilateral
triangle is intended to
alert the user to the
presence of important
operating and maintenance (servicing) instructions in the literature
ccompanying the appliance.
IMPORTANT SAFETY INSTRUCTIONS
1. Read these instructions.
2. Keep these instructions.
3. Heed all warnings.
4. Follow all instructions.
5. Do not use this apparatus near water.
6. Clean only with dry cloth.
7. Do not block any ventilation openings. Install in accordance with the manufacturer’s
instructions.
8. Do not install near any heat sources such as radiators, heat registers, stoves, or other
apparatus (including amplifiers) that produce heat.
9. Do not defeat the safety purpose of the polarized or grounding-type plug. A polarized plug
has two blades with one wider than the other. A grounding type plug has two blades and a
third grounding prong. The wide blade or the third prong is provided for your safety. If the
provided plug does not fit into your outlet, consult an electrician for replacement of the
obsolete outlet.
10. Protect the power cord from being walked on or pinched particularly at plugs, convenience
receptacles, and the point where they exit from the apparatus.
11. Only use attachments / accessories specified by the manufacturer.
12. Unplug this apparatus during lightning storms or when unused for long periods of time.
13. Refer all servicing to qualified service personnel. Servicing is required when the apparatus
has been damaged in any way, such as power-supply cord or plug is damaged, liquid has
been spilled or objects have fallen into the apparatus, the apparatus has been exposed to
rain or moisture, does not operate normally, or has been dropped.
14. This appliance shall not be exposed to dripping or splashing water and no object filled
with liquids such as vases shall be placed on the apparatus.
15. Do not overload wall outlet. Use only power source as indicated.
16. Use replacement parts as specified by the manufacturer.
17. The product may be mounted to a wall only if recommended by the manufacturer.
18. Upon completion of any service or repairs to this product, ask the service technician to
perform safety checks.
Page 3
Important Notes
Important notes
• Avoid installing this unit in places
exposed to direct sunlight or close to
heat radiating appliances such as
electric heaters, on top of other stereo
equipment that radiates too much heat,
places lacking ventila-tion or dusty
areas, places subject to constant
vibration and/or humid or moist areas.
• Do not attempt to clean this unit with
chemical solvents as this might
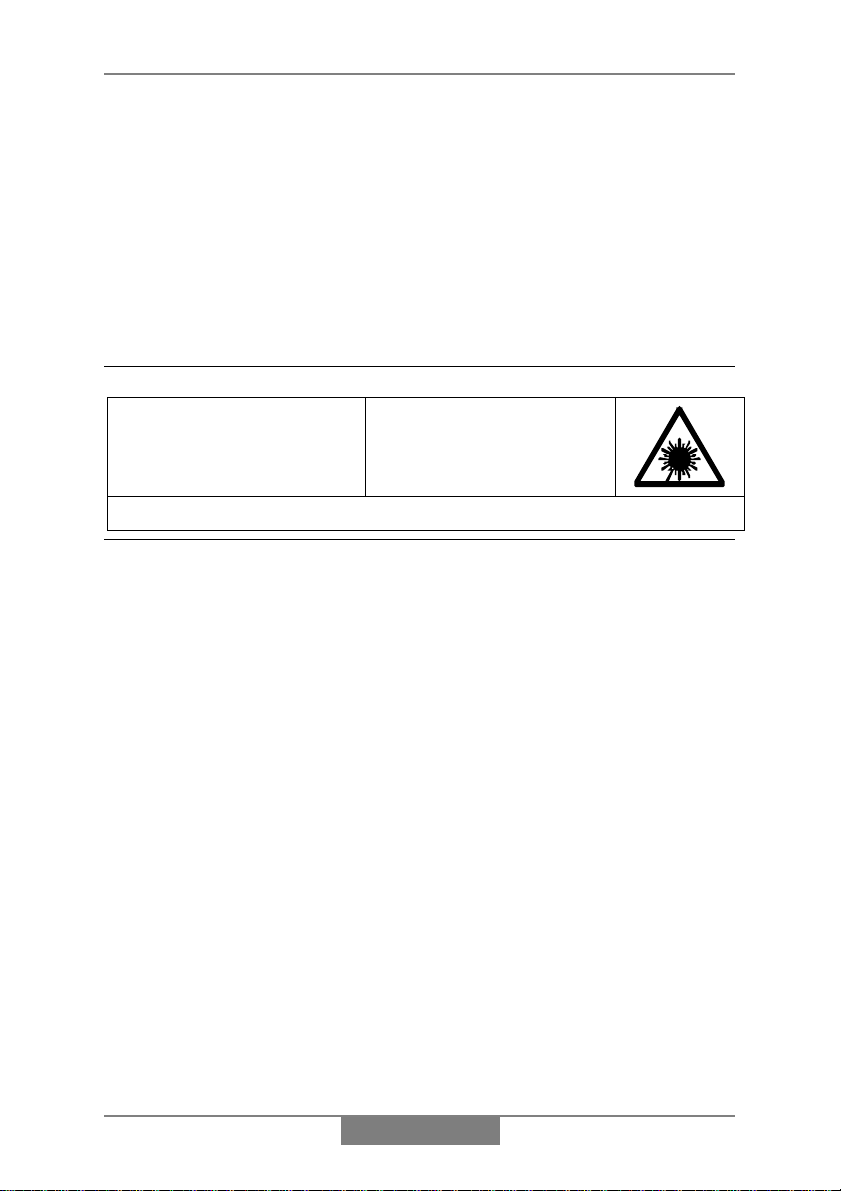
CLASS 1 LASER PRODUCT
CLASS 1 LASER PRODUCT
APPAREIL Á LASER DE CLASSE 1
PRODUCTO LASER DE CLASE 1
This product contains a low power Laser Device.
INVISIBLE LASER RADIATION
WHEN OPEN AND INTERLOCKS
AVOID EXPOSURE TO BEAM
damage the finish. Use a clean dry
cloth.
• Operate controls and switches as
described in the manual.
• Before turning ‘On’ the power, make
certain that power cord is properly
installed.
• Store your CDs, in a cool area to
avoid damage from heat.
• When moving the set, be sure to first
disconnect the power cord.
CAUTION
DEFEATED.
FCC INFORMATION
This equipment has been tested and found to comply with the limits for a Class B digital
device, pursuant to Part 15 of the FCC Rules. These limits are designed to provide
reasonable protection against harmful interference in a residential installation. This
equipment generates, uses, and can radiate radio frequency energy and, if not installed
and used in accordance with the instructions, may cause harmful interferen ce to radio
communications. However, there is no guarantee that interference will not occur in a
particular installation. If this equipment does cause harmful interference to radio or
television reception, which can be determined by turning the equipment off and on, the
user is encouraged to try to correct the interference by one or more of the following
measures:
• Reorient or relocate the receiving antenna.
• Increase the separation between the equipment and receiver.
• Connect the equipment into an outlet on a circuit different from that to which the
receiver is connected.
• Consult the dealer or an experienced radio/TV technician for help.
This device complies with Part 15 of the FCC Rules. Operation is subject to the
following two conditions:
• This device may not cause harmful interference, and
• This device must accept any interference received, including interferenc e that may
cause undesired operation.
PROP. 65 WARNING:
Handling the coated electrical wires of this product exposes you to lead, a chemical
known to the State of California to cause cancer, birth defects and other reproductive
harm.
Wash hands after use.
1
Page 4

Installation
Installation
Place the unit on leveled surface such as a cabinet or shelf. Make sure the
unit is positioned close to a main power supply socket.
To ensure adequate ventilation f or the unit, do not operat e it while it is placed
on a soft surface (such as a carpet ). Make sure t hat the ventilation s lots in the
cabinet are not obstructed. Keep items such as newspapers, tablecloths,
curtains, etc clear of the unit.
Do not subject the unit t o excessively hot, cold, damp or dusty conditions. Do
not operate the unit near a radiator or heater.
The unit must not be exposed to dripping o r splashing. Never place objects
filled with liquids (such as vases) on the unit. If liquid i s accidentally spilt or
splashed on the unit, disconnect the mains plug from the supply socket
immediately and consult your dealer.
No naked flame sources (such as lighted candles) should be placed on or
near the unit.
Note - Leave at least 3 inches (7cm) to the left and right of th e unit for
the doors to open without being obstructed.
Finally, position the speakers to the left and right of the unit.
2
Page 5

Installation
R
Connections
Connect the speakers to th e red and b lack t e rminals on the back of the unit as
shown below. (Hold down red or black terminal flap, insert wire, release flap.)
TO RI G HT
SPEAKER
Optional: Connect any additional equipment to the back panel sockets as
follows:
♦ Plug your playback* equipment (eg. MP3 or cassette player) into the
AUX sockets.
♦ Plug your recording equipment (eg. MP3 or cassette recorder) into the
LINE OUT sockets.
*Other examples of playback equipment include your TV, video recorder, DVD
player or satellite receiver, or your computer or games console.
Always refer to the equipment manufacturer's instructions.
TO LEFT
SPEAKE
Aerial antenna wire
The single trailing wire from the unit is the FM aer ial antenna. This should be
positioned for best FM reception (do this when you're tuning-in to radio
stations - see page 17).
3
Page 6
Installation
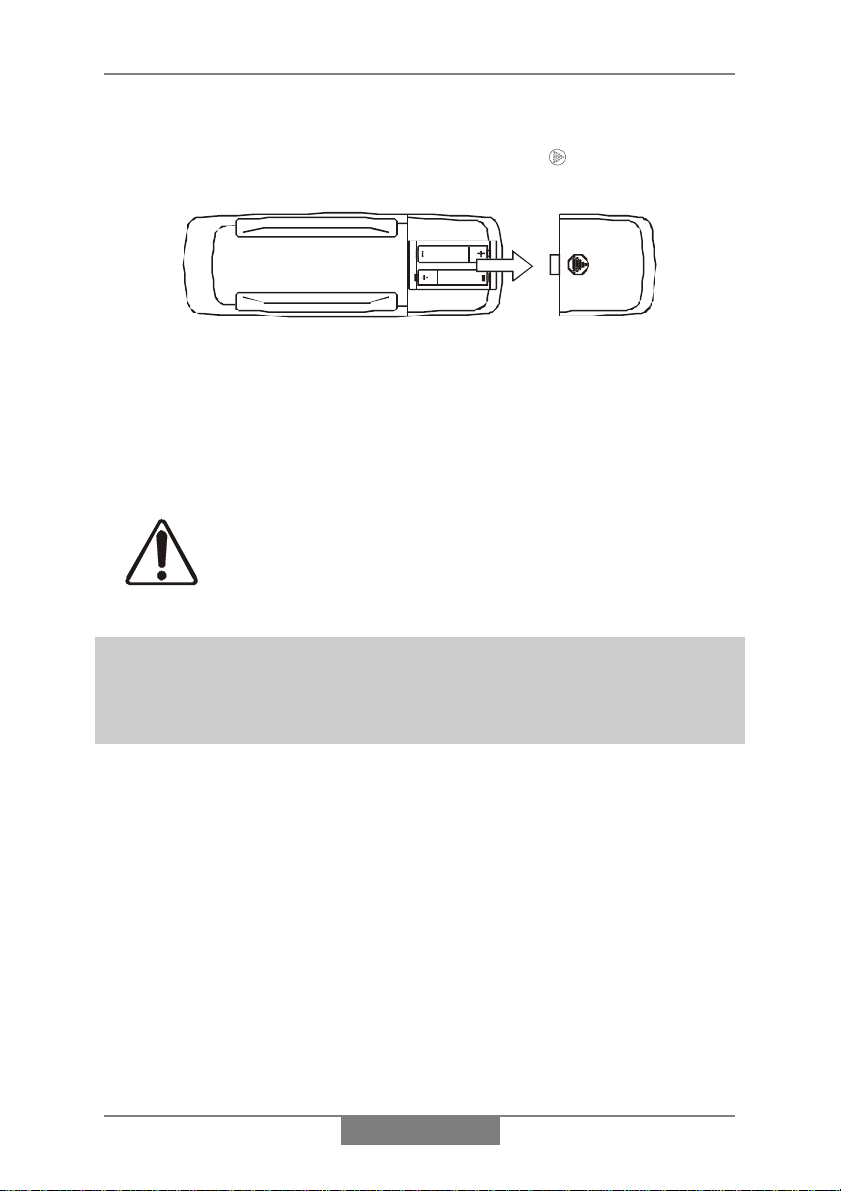
Installing the remote control batteries
At the back of the remote, press the indented area and slide open the
battery compartment.
Fit 2 batteries type AA, R6, S, UM-3 or equivalent (not supplied). Make sure
the direction of the batteries is as shown above.
Once the batteries are inserted, slide the battery compartment closed.
If the remote stops working, it's most likely that t he batteries need replacing.
Always use leak-proof batteries.
If you're not using the remote for a few weeks or more, remove the batteries.
Note - Most functions can be operated by the remote. However, so me
of the controls are also present on the front panel (below the bottom
flap). In general you shouldn't need to lower the flap unless you lose
the remote.
Dispose of old batteries safely. Do not throw them
into a fire.
4
Page 7

Installation
Safety Precautions
The mains lead is fitt ed with a standard 13 amp mains plug (BS.1363) which
is fitted with a 3 amp fuse . When changing or examining the fuse, m ake sure
the correct 3 amp type - ASTA or BSI approved (BS.1362) is fitted.
The 13 amp plug is the most widely used in the US and should be suitable for
most users. However, some locations (mainly older buildings) may not be
equipped with normal 13 amp sockets. In such cases it is recommended that
a suitable plug adaptor be purchased from your dealer (rather than remove
the plug). Should you need to change the plug, refe r to the section below:
IMPORTANT - The wires in the mains lead are colored in accordance with the
following code:
As the color of the wires in the mains lead of this apparatus may not
correspond with the colored markings identifying the terminals in your plug,
proceed as follows:
The wire which is colored blue must be connected to the terminal which is
marked with the letter N or colored black.
The wire which is colored brown must be connected t o the terminal which is
marked with the letter L or colored red.
Do not make any connection to the larger pin marked with the letter E or
by the symbol
A 3 amp fuse must be f itted either in the plu g or adaptor, or at t he distribution
board.
The unit is to be used on the following mains supply:
The mains supply rating is printed on the back panel.
mAC 110V/220V ¶ 60/50Hzm
Blue : Neutral
Brown : Live
or colored green or green-and-yellow.
E
5
Page 8

Installation
Do not attempt to remove any screws or gain access
inside the unit. For your safety, always obey the
warning on the back panel rating label:
Dangerous high voltages inside. To prevent the
risk of electric shock do not remove the back
cover. No user serviceable parts inside. Refer
servicing to qualified service personnel.
Ready to switch on
Plug the unit into the mains supply.
On top of the unit, t he light within the power button O will be red to indicate
that the unit is in standby (standby means plugged-in but not switched on).
Switch the unit on by pressing the power button O - the red light will change
to green.
(To switch the unit back to standby, simply press O again.)
The unit is now ready to use.
Cleaning & Maintenance
This unit is maintenance free - do not use oil or other lubricants on any of
the moving parts.
You may clean the main unit and speakers' cabinets periodically using a
barely damp cloth.
6
Page 9

Setting the clock
Setting the clock
Use the buttons on the remote to carry out this procedure.
1. Press O to switch the unit on.
2. Press the AUX button. (Note the time s etting appears at t he centre of the
display.)
3. Press lMEMORYl so that the hour setting flashes, then immediately
press
B or F to set the correct hour.
Note - Check the AM / PM indicator (to the left of the hour) to ensure you
make the correct setting.
4. Press lMEMORYl repeatedly so that the minute setting flashes, then
immediately press
After the setting has stopped flashing, the clock is set.
Note - If ever you find the whole time display is flashing, this means that the
clock needs to be re-set (possib ly due to the unit having been disconnected
from the mains supply, or a power cut).
B or F to set the correct minute.
7
Page 10

General use
General use
All general functions can be operated by the remote – y ou don't need
to open the front panel flap.
Switch the unit on by pressing O.
Selecting the sound source
To select the sound source you wish to listen to, press:
♦ CD / SELECT to listen to compact disc, or
FM / AM
♦
to listen to radio, or
♦ AUX to listen to auxiliary equipment connected to t he AUX sockets (see
page 2).
Volume
To adjust the volume, use VOLUME U or D.
To mute the sound instantly, press MUTE (press again t o restore sound).
Note - At minimum volume (or when MUTE is pressed), you may find that the
sound is not completely silenced. This is perfectly normal.
8
Page 11

General use
Headphones
For private listening, plug a pair of ster eo headphones into the socket mar ked
on the left-hand side panel.
When headphones are plugged-in, the speakers are switched off
automatically.
Graphic equalizer
The graphic equalizer (EQ) adjusts the character of t he sound. It provides a
range of 4 tonal shapes: flat, rock, classic and pop.
Press EQ repeatedly to set the graphic equalizer according to your taste or
the style of music being played. The s elected setting:
or
POP appears at the bottom right of t he display.
Switching off
To switch off to standby, press O.
Note* - This unit is intended to be switched off to standby. If you switch off at
the mains or unplug the unit, you will lose all clock and timer s ettings together
with any radio stations you have stored in the unit's memory.
FLAT, R OCK, CLASSIC
When the unit is in standby, a small amount of curr ent cont inues to flow. If you
intend not to use the unit for a lo ng period of time, it is recomm ended that you
disconnect it from the mains supply socket (see note* above, however).
9
Page 12

CD operation
CD operation
All CD functions can be operated by the remote - you s houldn't need
to lower the front panel flap.
IMPORTANT - The CD doors operate el ectrically - don't try to sl ide them
open or closed by hand.
Note - Before CD operation, make sure you've removed the colored cardboard
discs inside the doors.
♦ Switch the unit on and press CD / SELECT.
Note the unit must be in CD / SELECT mode before you can open the CD
doors. (The doors cannot be opened while any of the discs are spinning.)
Loading and ejecting discs
1. To open the CD doors, press e button.
2. Take your disc out of its case, handling it by the edges.
3. Load the disc onto one of the three players (see note* below).
Note* - To load a disc, place it onto the center spindle of the player (in the
same way that you'd put a disc back in its case).
Always load discs with the printed side facing towards you.
4. Press e button to close the CD doors.
Whenever you close the doors, the unit checks if any CDs are load ed. (You
will see the disc(s) spin for a second or two.)
10
Page 13

CD operation
Ejecting
To eject, open the CD doors and remove th e disc(s).
Note there's a cut-out at the bot tom of each player so
that you can place your finger under the edge of a
disc to remove it.
Playing one disc
1. Load the disc (as previously shown) and close the CD doors.
2. Press button 1 or 2 or 3 on
top of the unit.
(Alternatively, press one of the
CD buttons on the remote.)
The number of the disc playing (
or or
) is indicated on the front panel display (see
right for example):
DISC
Selecting tracks
To change track while a disc is playing, press and release B or F.
Alternatively, you can pick a track number directly using buttons 1 to 9 on the
remote.
If the required track number is higher than 9, use the +10 button as follows:
Examples - To select track 10 press +10 then 0.
To select track 23 press
+10
twice then 3.
11
Page 14

CD operation
Searching tracks
To search within tracks while a disc is playing, hold in the B or F button.
Pause and stop
To pause during play, press RP (press again to resume play).
To stop play, press
C.
Repeat play
You can repeat all discs, one disc, or just one track. To select the mode you
require, press REPEAT until the top-left o f the display indicates one of the
following:
REPEAT 1 DISC
REPEAT 1 TRACK dummy
REPEAT ALL DISC
dummy
To cancel repeat play, press REPEAT until the word
REPEAT disappears
from the display.
Random play
You can play tracks in random order (from one disc or all discs).
To select the mode you require, press RANDOM until the top-left of the
display indicates one of the following:
RANDOM 1 DISC
RANDOM ALL DISC
m
To cancel random play, press RANDOM until the word
RANDOM disappears
from the display.
Note - You can not apply random play to a programmed selection of tracks
(explained on the next page).
12
Page 15

CD operation
Playing all discs
1. Load the discs (as previously shown) and close the CD doors.
Note that discs will be played in order. If you don't
want to start with disc
select
or on the front panel display (see
, press CD / SELECT to
DISC
right for example):
2. Press
RP to start play.
♦ To select tracks, search tracks, pause, stop, etc, use the buttons
F, RP and C as shown on pages 11 and 12.
B,
♦ For repeat and random play, see previous page.
Playing a programmed selection of tracks
You can program the unit to play a selection of tracks from the discs loaded.
(Up to 40 tracks can be programmed.)
Note you can abandon programming at any time by pressing
1. Load the disc(s) and close the CD doors.
Note - When you press PROG to start programming, the front panel will
display P-01 - this means programmed track 1. Note that TRACK 00
flashing next to P-01 is telling you to enter the CD and track number for
programmed track 1 .
C .
2. Press PROG.
3. Press CD / SELECT to select
panel display).
DISC or or (on the front
13
Page 16

CD operation
4. Press
B or F to select the TRACK number on that disc. (To select all
tracks on the disc, press
B or F so that TRACK AL is displayed.)
5. Repeat steps 2, 3 and 4 for each programmed track. (Note that
P– 01 advances to P– 02, P– 03 etc as you program each track.)
♦ You can check your program by pressing PROG repeatedly. As P– 01,
P– 02 advances, check the displayed disc and track numbers. (Note
after the final track, the display flashes
TRACK 00, and pressing PROG
again will return to the first track.)
6. Finally, press
RP to play the program.
After the program has stopped, you may press
RP to play the whole program
again.
♦ To set the program to repeat continuously, press REPEAT so that
REPEAT is displayed. (To cancel repeat, press REPEAT so that REP EAT
disappears.)
Note - You cannot set the program to random play.
14
Page 17

CD operation
Editing the program
Before editing, make sure no disc is playing.
♦ To change a track, press PROG repeatedly (until the required P–
number is displayed) then press
TRACK number. (If you want to change the disc as well as the track, press
CD / SELECT before pressing
B or F.)
B or F to change the
♦ To delete a track, press PROG repeatedly (until the required P–
number is displayed) then press
TRACK number to
– –
.
B or F to change the
♦ To add a t rack, press PROG repeatedly (until
use CD / SELECT and
B or F to select required disc and TRACK
TRACK 00 flashes) then
number.
Clearing the program
To clear the program, stop any disc playing first, then press C once play has
stopped.
Note - The program will be cleared if the CD doors are opened.
If you don't want to clear the
program but wish to play one of the
loaded discs normally, simply press
button 1 or 2 or 3 on top of the unit.
(Alternatively, press one of the
CD buttons on the remote.)
15
Page 18

CD operation
Track introductions
If you press INTRO (instead of RP ) to start play, only the firs t 10 seconds of
each track will be played. This enables you to scan through a disc (or a
programmed selection of tracks) automatically.
The introduction feature can also be used to help you search for a track when you hear the track you require, press INTRO again and that track will
continue playing.
Track/time displays
♦ When all discs are stopped, the display shows the total playing time of
the currently selected disc.
♦ When a disc is playing, the display shows the elapsed time of the current
track.
♦ When a disc is playing, pressing lMODEl (REMAIN) once displays the
remaining time of the current track; pressing again displays the
remaining time of the whole disc.
♦ To display the current time (when all discs are stopped), pres s lMODEl
once. To display current time during play, press lMODEl 4 times.
Note - Pressing lMODEl repeatedly also displays any
TIMER OFF
settings. These are explained on page 19.
TIMER ON
and
Instant play
If you are listening to radio or auxiliary
input, you can instantly play a disc
simply by pressing button 1 or 2 or 3
on top of the unit.
(Alternatively, press one of the
CD buttons on the remote.)
16
Page 19

Radio operation
Radio operation
All radio functions can be operated by th e remote - you shouldn't need
to lower the front panel flap.
Tuning-in a new radio station
Pressing FM/AM selects radio operation. The display indicates the tuning
frequency, and just to the right of it, t he band:
FM/AM changes the band.
Having selected the required band, you can tune-i n to a radio station in either
of the following ways:
♦ To search up or down the band for a station, hold in
for 2 seconds then release.
♦ To change frequ ency one step at a time, repeatedly press and release
B or F .
You can keep any new station you've tuned-in by storing it in the memory
(see below).
Note - For best FM reception, position the t railing FM aerial antenna wire for
least interference. (Note if AM recepti on is poor, you may need to rotate the
unit.)
. Repeatedly pressing
FM, MW
B or F
Storing radio stations in memory
You can store up to 20 radio stations on each band.
1. Tune-in to the station you wish to store (as described above).
2. Decide on the memory number you will use for this station, for example 2.
17
Page 20

Radio operation
3. Press lMEMORYl followed by lMEMUl or lMEMDl so that the memory
number flashes to the left of the f requency, for example:
MHz FM. After a few seconds the flashing stops and the memory
89.1
number is set.
Note - Instead of using lMEMUl and lMEMDl you can use the number keys on
the remote. In the above example, you would press lMEMORYl followed by 2.
Note after pressing lMEMORYl you must enter a memory number within 5
seconds, otherwise the operation will time-out.
MEMORY CH 02
Selecting stored radio stations
1. Press FM/AM to select required band.
2. Press lMEMUl or lMEMDl to select required memory number.
Alternatively, you can use the number keys on the remote as follows:
Examples - For memory 7 simply press 7.
For memory 14 press +10 then 4.
For memory 20 press
+10
twice then 0.
FM mono/stereo
You can set FM radio stations to mono (for example if FM ster eo reception is
noisy). To switch between FM mono and stereo, lower the front panel flap and
FM STEREO
press
.
Time display
To display the current time, press lMODEl once.
Note - Pressing lMODEl repeatedly also displays any TIMER ON and TIMER OFF
settings. These are explained on the n ext page.
18
Page 21

Timer operation
The timer facility allows you to set the unit to switch itself on and off
automatically, for example, to wake you up each morning.
While setting up th e timer, make sure you carry out each step within 5
seconds, otherwise the operation will time-out and you will have to start
again.
Note - During timer setup, always check the AM / PM indicator (to the left of the
time) to ensure you make the correct settings.
1. Select the radio station or CD you wish to play when the unit switches on.
(For CD this can be a programmed selection of tracks if desired.)
2. Press lMODEl repeatedly until TIMER ON flashes at the right of the
display, then press lMEMORYl straight away.
The switch-on time (hour setting) will flash.
3. Immediately press B or F to set the hour, then press lMEMORYl.
The minute setting will flash.
4. Immediately press B or F to set the minute, then press lMEMORYl.
5. Press lMODEl repeatedly until TIMER OFF flashes at the right of the
display, then press lMEMORYl straight away.
The switch-off time (hour setting) will flash.
6. Immediately press B or F to set the hour, then press lMEMORYl.
The minute setting will flash.
7. Immediately press B or F to set the minute, then press lMEMORYl.
The switch-on and switch-off times have now been set. T o check them at any
time, press lMODEl repeatedly to step through the TIMER ON and TIMER
settings on the display.
OFF
19
Page 22

Timer operation
8. To activate the timer, lower the front panel flap and press TIMER so that
TIMER appears at the right of the display.
9. Press O to switch off the unit to standby.
Timer operation is now set. The unit will switch itse lf on and off at the
set times, every day.
Note - If ever you find the whole time display flashing, the clock needs to be
re-set (see page 7). T his could be due to the unit having been disconnec ted
from the mains supply, or a power cut.
Canceling timer operation
If you don't want the unit to switch itself on, for example at weekends, press
TIMER (inside front panel flap) so tha t the word
timer settings are still retained for the n ext time you wish to activate the timer.)
To activate the timer again, carry out step 8 above.
TIMER is not displayed. (The
Sleep timer
The unit has a sleep timer. Activ ating it will make the unit switch itself off after
a set time (10 - 90 minutes).
To activate the sleep timer, lower the front panel fl ap and hold in the SLEEP
button until SLEEP is displayed together with the required sleep time (90, 80,
70 … 20, 10 minutes).
To cancel the sleep timer, press
not displayed.
SLEEP
so that so that the word
SLEEP is
Specification
Power Source : AC 110/220V ~ 60/50Hz
Power Consumption : 32 Watts
Radio Section
Frequency Range : Am 530 -1710 KHz
FM 87.5 - 108 MHz
20
Page 23

Index
Aerial antenna wire.....3, 17
AM reception ..................17
AM/PM indicator ...............7
Automatic on/off .............20
$8; sockets....................3
Back panel........................3
Band ...............................17
Batteries ...........................4
Cassette ...........................3
CD...................................10
CD play...............11, 13, 16
&'_6(/(&7 button ......13
Classic (EQ) .....................9
Cleaning ...........................6
Clear CD programme .....15
Clock.....................7, 16, 18
Computer..........................3
Connections......................3
',*,7$/ 287 socket....3
DVD player .......................3
Edit CD programme........15
Ejecting discs..................11
(4 button.........................9
Flat (EQ) ...........................9
FM aerial antenna ......3, 17
)0_0:_/: button........17
Frequency.......................17
Fuse..................................5
Games console.................3
Graphic equaliser .............9
Guarantee.......................21
Headphones .....................9
Helpline.............................1
Installation.........................2
,1752 button................16
/,1( 287 sockets .........3
Loading discs..................10
LW reception...................17
Mains plug.........................5
Mains supply.....................5
Maintenance .....................6
Memory...................... 9, 17
Minidisc.............................3
Mono/stereo (FM) ...........18
087( button ...................8
MW reception..................17
Open/close button...........10
Optical connection ............3
Pause..............................12
Phones socket ..................9
Playing all discs ..............13
Playing one disc..............11
Pop (EQ)...........................9
Power button.....................6
Problems...........................1
352* button .................13
Programme clear ............15
Programme edit ..............15
Programmed play ...........13
Radio...............................17
Random play...................12
Rating label.......................6
5(0$,1 button............ 16
Remote control................. 4
Repeat play.............. 12, 14
Rock (EQ) ........................ 9
Safety ............................... 5
Satellite receiver .............. 3
Searching tracks ............ 12
Shuffle............................ 12
6/((3 button ............... 20
Sleep timer ..................... 20
Source selection .............. 8
Speakers .......................... 2
63($.(56 terminals.... 3
Standby........................ 6, 9
Stereo/mono (FM).......... 18
Stop................................ 12
Storing radio stations ..... 17
Switching on/off............ 6, 9
Time ..................... 7, 16, 18
Timer .............................. 19
7,0(5 button ............... 20
Timer cancel................... 20
Track introductions......... 16
Track numbers ......... 11, 14
Track search .................. 12
Track selection... 11, 13, 15
Tuner.............................. 17
Tuning-in ........................ 17
TV3
Ventilation ........................ 2
Video recorder ................. 3
Volume............................. 8
Warranty......................... 21
 Loading...