

Page 1
CSMP160
EN
Digital Speaker System for iPod
Instruction Manual ..........................................Page 2
ES
Sistema de Altavoz Digital para iPod
Manual de Instrucciones ............................. Página 28
FR
Systeme de Haut-Parleurs pour iPod
Mode d’emploi ...............................................Page 58
Please read carefully before use • Léa el manual antes de usar •
Veuillez lire ce livret avant utilisation
Page 2

Page 2 Coby Electronics Corporation
English
www.cobyusa.com Page 3
Table of Contents
FOREWORD ........................................................................4
Thank You ...............................................................................................4
Getting Started .....................................................................................4
Features ...................................................................................................4
Package Contents ................................................................................5
UNIT OVERVIEW ................................................................6
Front panel .............................................................................................6
Back panel ..............................................................................................6
Top panel ................................................................................................7
Remote control .....................................................................................8
SETTING THE CLOCK .......................................................12
Setting Mode ...................................................................................... 12
To set the CLOCK TIME .................................................................... 12
To set the ALARM .............................................................................. 12
Wake to iPod Alarm ............................................................... 13
Wake to Radio Alarm............................................................. 13
Wake to Buzzer Alarm .......................................................... 13
Wake to AUX Alarm ............................................................... 13
To stop the ALARM ........................................................................... 14
To use the SNOOZE function ........................................................ 14
To set AUTO OFF time...................................................................... 14
RADIO MODE ...................................................................15
Using the Radio ................................................................................. 15
IPOD MODE ......................................................................17
iPod Adapters ......................................................................................17
Playback Operation .......................................................................... 18
Page 3

www.cobyusa.com Page 3
English
Table of Contents
AUX IN MODE ...................................................................19
External Equipment Connections .............................................. 19
TROUBLESHOOTING ...................................................... 20
SPECIFICATIONS ............................................................. 23
SAFETY NOTICES ............................................................ 24
Page 4

Page 4 Coby Electronics Corporation
English
www.cobyusa.com Page 5
Foreword
Thank You
Congratulations on your purchase of the Coby CSMP
Digital Speaker System for iPod® with Dual Alarm Clock/
FM Radio. This system is designed for use with iPod and
is compatible with most iPod models including the rdgeneration iPod Nano, the iPod Touch, and others.
Please read all operational and safety instructions thoroughly before using this system, and follow all instructions
carefully.
Getting Started
To get started, connect the power cord to the power
socket on the rear panel and a wall outlet(AC V/
Hz Hz), then press [STANDBY] to switch on the unit.
Features
LCD display screen
Universal dock for iPod
Full function remote control
Two-channel audio input
Digital PLL FM Radio Tuner
Clock with dual alarm timers
Page 5

www.cobyusa.com Page 5
English
Package Contents
Please make sure that the items shown below are included
in the package. Should an item be missing, please contact
the local retailer from which you purchased this product.
CSMP (main unit)
Instruction manual
Remote control with x CR battery
Dock adapters for iPod*
* Dock adapter cartridges are included for your convenience and are subject to change. Apple includes dock adapters with their recent iPod models.
Foreword
Page 6
Page 6 Coby Electronics Corporation
English
www.cobyusa.com Page 7
Unit Overview
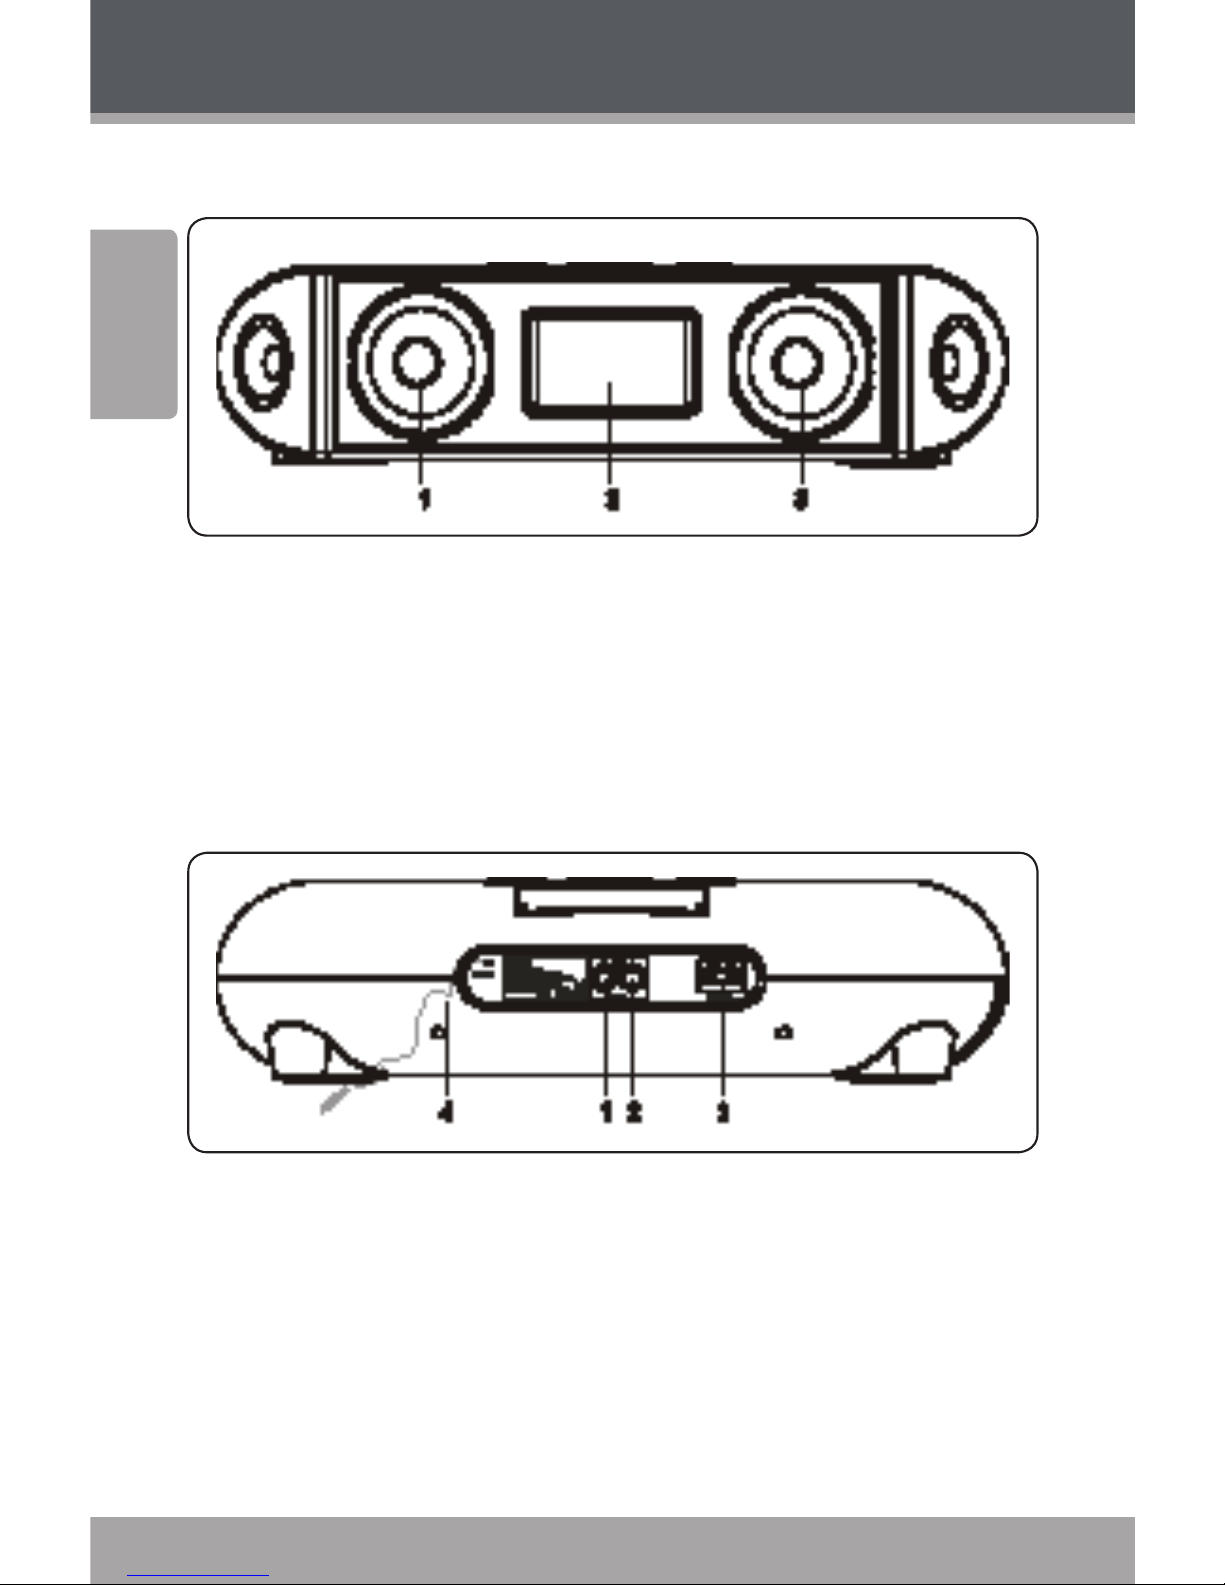
Front panel
Left Speaker1.
LCD Screen2.
Right Speaker3.
Back panel
Left Channel Audio Input1.
Right Channel Audio Input2.
Power Socket3.
FM Antenna 4.
Page 7

www.cobyusa.com Page 7
English
Unit Overview
Top panel
Previous/Alarm Clock 1/Channel-1.
Next/Alarm Clock 2/Channel+2.
Standby3.
Sleep4.
Mode5.
Snooze6.
Play/Pause7.
Volume-8.
Volume+9.
Standby Indicator10.
iPod Docking Station Cover11.
iPod Docking Connector12.
For information on button functions, please refer
to Remote Control section.
Page 8
Page 8 Coby Electronics Corporation
English
www.cobyusa.com Page 9
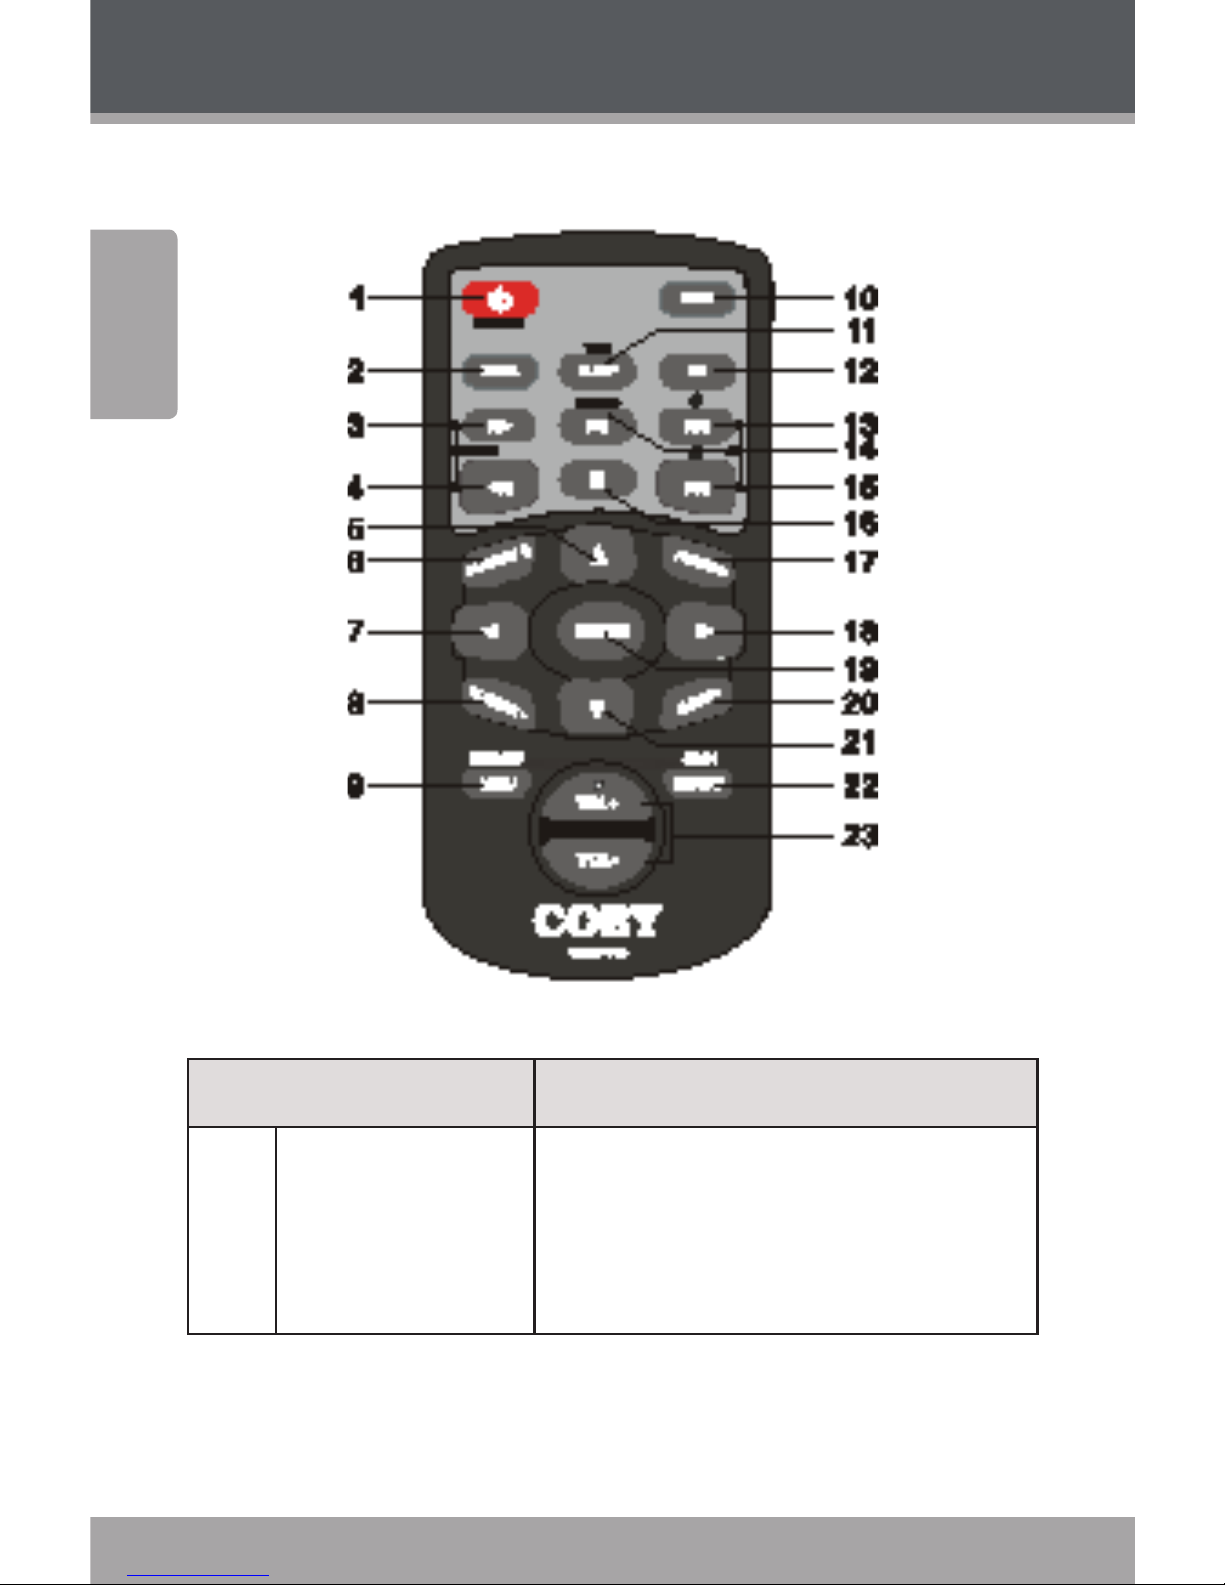
Remote control
Key Description
1 STANDBY/SNOOZE Press to switch on unit. When unit is
turned on, press to put in STANDBY mode.
For more information on Clock Functions, see Clock Settings section.
Unit Overview
Page 9
www.cobyusa.com Page 9
English
Unit Overview
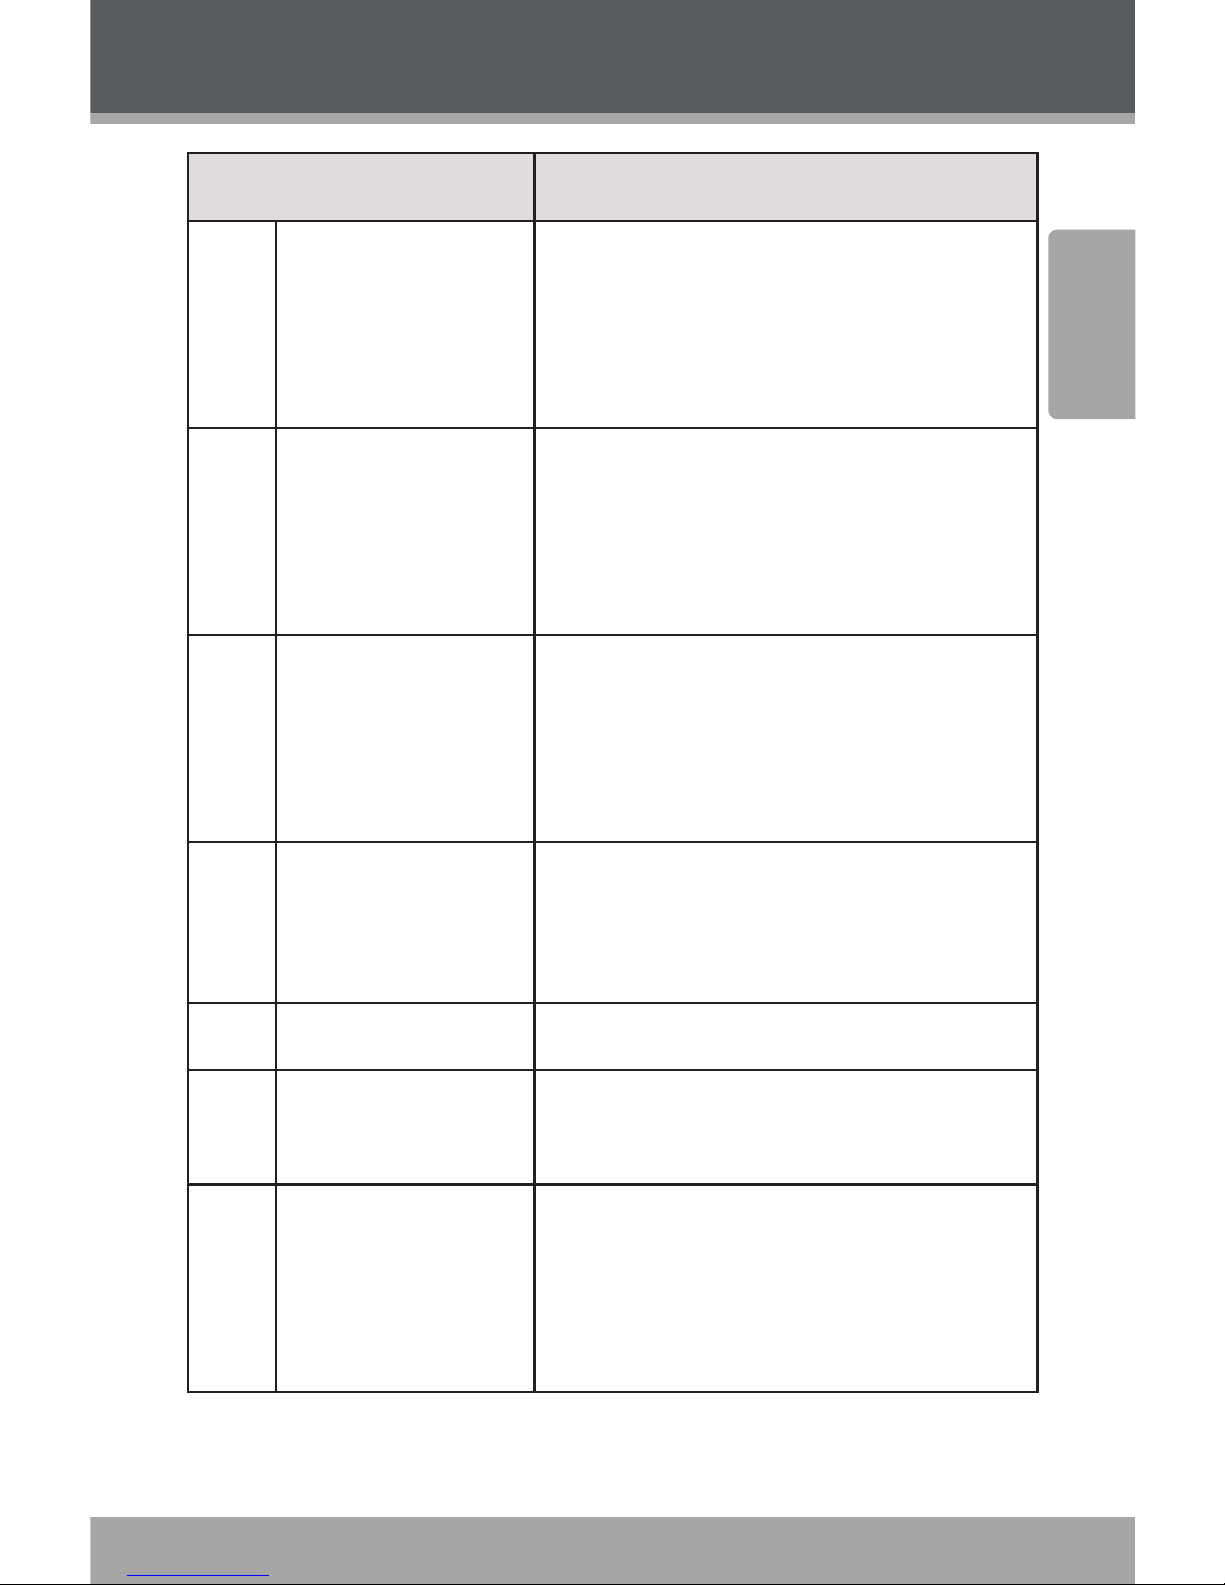
Key Description
2 MODE Switch between IPOD, TUNER (radio)
and AUX-IN modes.
Note: IPOD mode is not available
when no iPod is docked in device.
3 FAST FORWARD/
SEARCH
In IPOD mode, press and hold for fast
forward playback.
In TUNER mode, press to tune radio to
next available frequency.
4 FAST REWIND/
SEARCH
In IPOD mode, press and hold for fast
rewind playback.
In TUNER mode, press to tune radio to
previous available frequency.
5, 7,
18,
21
Direction Keypad In IPOD mode, navigate iPod menu.
6 PLAYLIST + In IPOD mode, skip to next playlist.
8 PLAYLIST – In IPOD mode, skip to previous
playlist.
9 MENU/MEMORY In IPOD mode, press to display iPod
menu.
In TUNER mode, press to store preset
radio stations.
Page 10

Page 10 Coby Electronics Corporation
English
www.cobyusa.com Page 11
Key Description
10 MUTE Press to mute sound in IPOD, TUNER or
AUX mode.
In STANDBY mode, press and hold to
restore default settings and reset all
clock functions.
11 SLEEP/TIME In STANDBY mode, press to display
CLOCK TIME.
When unit is turned on, press
repeatedly to display CLOCK TIME,
ALARM TIME 1 – 2, ALARM TYPE 1 – 2,
SNOOZE TIME.
For more information on Clock Functions, see Clock Settings section.
12 EQ Press to select equalizer mode (FLAT,
JAZZ, CLASSICAL, POP, ROCK) for audio
play.
13 NEXT/ALARM 2/
CH+
In STANDBY mode, press to view
ALARM 2 TIME.
In IPOD mode, press to skip to the
next track.
In TUNER mode, press to skip to the
next preset radio frequency.
Unit Overview
Page 11
www.cobyusa.com Page 11
English
Unit Overview
Key Description
14 PLAY/PAUSE/
STEREO
In IPOD mode, press to play or pause
audio.
In TUNER mode, press to switch between
Stereo and Mono FM radio reception.
15 PREVIOIUS/
ALARM 1/CH --
In STANDBY mode, press to view
ALARM 1 TIME.
In IPOD mode, press to skip to the
previous track.
In TUNER mode, press to skip to the
previous preset radio frequency.
16 STOP Stops playback in IPOD mode.
17 ALBUM+ In IPOD mode, skips playback to next
track.
19 ENTER Press to conrm IPOD menu selection
or device settings.
20 ALBUM – In IPOD mode, skips playback to
previous track.
22 REPEAT/SCAN In IPOD mode, press to switch play-
back repeat settings.
In TUNER mode, press to auto scan all radio frequencies. Press again to stop scan.
23 VOLUME+/-- Increase/decrease volume in IPOD,
TUNER and AUX modes.
Page 12

Page 12 Coby Electronics Corporation
English
www.cobyusa.com Page 13
Setting the Clock
Setting Mode
To access the clock’s SETTING Mode, place the device in
STANDBY mode and then hold down [SLEEP/TIME].
Press [SLEEP/TIME] to toggle between menu items
(CLOCK, ALARM, ALARM, SNOOZE, etc) and sections
(HOUR/MINUTE, ALARM TYPE, etc).
Press [PREVIOUS/ALARM /CH] or [NEXT/ ALARM /
CH+] to adjust value or switch options. Press [SLEEP/
TIME] to conrm.
Press [SLEEP/TIME] again to proceed to the next item
in the SETTING menu.
To set the CLOCK TIME
Press [SLEEP/TIME] to access CLOCK TIME Setting Mode.
Select CLOCK TIME using instructions provided below.
To set the ALARM
This device includes a dual alarm clock which allows up to
preset alarm times. Press [SLEEP/TIME] to access Alarm
Setting Mode. Select ALARM TIME and ALARM TYPE using
instructions provided above. For more information on
ALARM TYPE, see below.
Page 13

www.cobyusa.com Page 13
English
Setting the Clock
Wake to iPod Alarm
Select ALARM TYPE: IPOD. Insert iPod in docking station
and set device to STANDBY mode. iPod playback will begin
at ALARM TIME. If no iPod is inserted in the device docking
station, the unit will buzz at ALARM TIME. If the unit is
switched on and iPod is playing at ALARM TIME, playback
will stop and the alarm will buzz. The unit will return to its
previous mode after the alarm is stopped.
Wake to Radio Alarm
Select ALARM TYPE: RADIO. Set device to STANDBY mode.
Radio playback will begin on most recent frequency at
ALARM TIME. If the unit is switched on and radio is playing
at ALARM TIME, radio play will stop and the alarm will
buzz. The unit will return to its previous mode after the
alarm is stopped.
Wake to Buzzer Alarm
Select ALARM TYPE: BUZZER. Make sure that the device
is switched on; buzzer will not sound if unit is in STANDBY
mode. Buzzer will sound at ALARM TIME. The alarm lasts
for one minute and becomes gradually louder if it is not
turned o.
Wake to AUX Alarm
Select ALARM TYPE: AUX. Set device to STANDBY mode.
Unit will wake up to AUX mode at ALARM TIME. If the unit
is switched on at ALARM TIME, the alarm will buzz. The
unit will return to its previous mode after the alarm is
stopped.
Page 14

Page 14 Coby Electronics Corporation
English
www.cobyusa.com Page 15
To stop the ALARM
Press ALARM or ALARM to shut o and reset the alarm.
To use the SNOOZE function
To delay the alarm for a short period of time ( –
minutes), press SNOOZE. The snooze function is available
up to times per alarm, after which the alarm will shut o.
For additional information on setting the SNOOZE time,
please see Setting Mode instructions above.
To set AUTO OFF time
The AUTO OFF function will turn o the device automatically after a set period of time ( – minutes). To set
AUTO OFF time, switch the device on. Press and hold
[SLEEP/TIME] to enter the AUTO OFF setting mode. Press
[SLEEP/TIME] repeatedly to select AUTO OFF time. To
disable the AUTO OFF function, select ‘’.
To display clock and alarm clock settings:
In STANDBY mode, press [SLEEP/TIME] to display the
CLOCK TIME. Press [ALARM] and [ALARM] to display
corresponding ALARM TIME.
In ON mode, Press [SLEEP/TIME] repeatedly to
display the CLOCK TIME, ALARM TIMES ( & ), ALARM
TYPES ( & ) and SNOOZE TIME.
Setting the Clock
Page 15

www.cobyusa.com Page 15
English
Radio Mode
Using the Radio
To listen to the radio, press [MODE] and select TUNER
mode.
Autoscan
Press [REPEAT/SCAN] to perform a full scan of all available
frequencies from . to MHz. Press [STOP] to halt the
scan.
Seek
Press and hold [SEARCH+] to search for next available
radio frequency. Press and hold [SEARCH --] to scan for
previous available frequency.
Tuning
Press [SEARCH+]/[SEARCH –] to increase/decrease frequency by . MHz.
Programming Station Memory
Your device will store up to preset radio frequencies.
To set a frequency, press [MENU/MEMORY] to enter
programming mode. (Screen will display ‘MEM’.) Select the
desired frequency by pressing CH+/CH –. To conrm your
selection, press [MENU/MEMORY].
Listening to the radio
Press [CH+]/[CH-] to skip to the next preset channel
or return to the previous preset channel.
Page 16
Page 16 Coby Electronics Corporation
English
www.cobyusa.com Page 17
Radio Mode
Press [STEREO] to change the FM mode reception
settings.
For information on using [EQ], [MUTE] and [VOL+/-]
in TUNER mode, please refer to the Remote Control
chapter.
If the system is in programming mode, you must
conrm your selection and exit by pressing
[MENU/MEMORY] before using scan functions.
Page 17
www.cobyusa.com Page 17
English
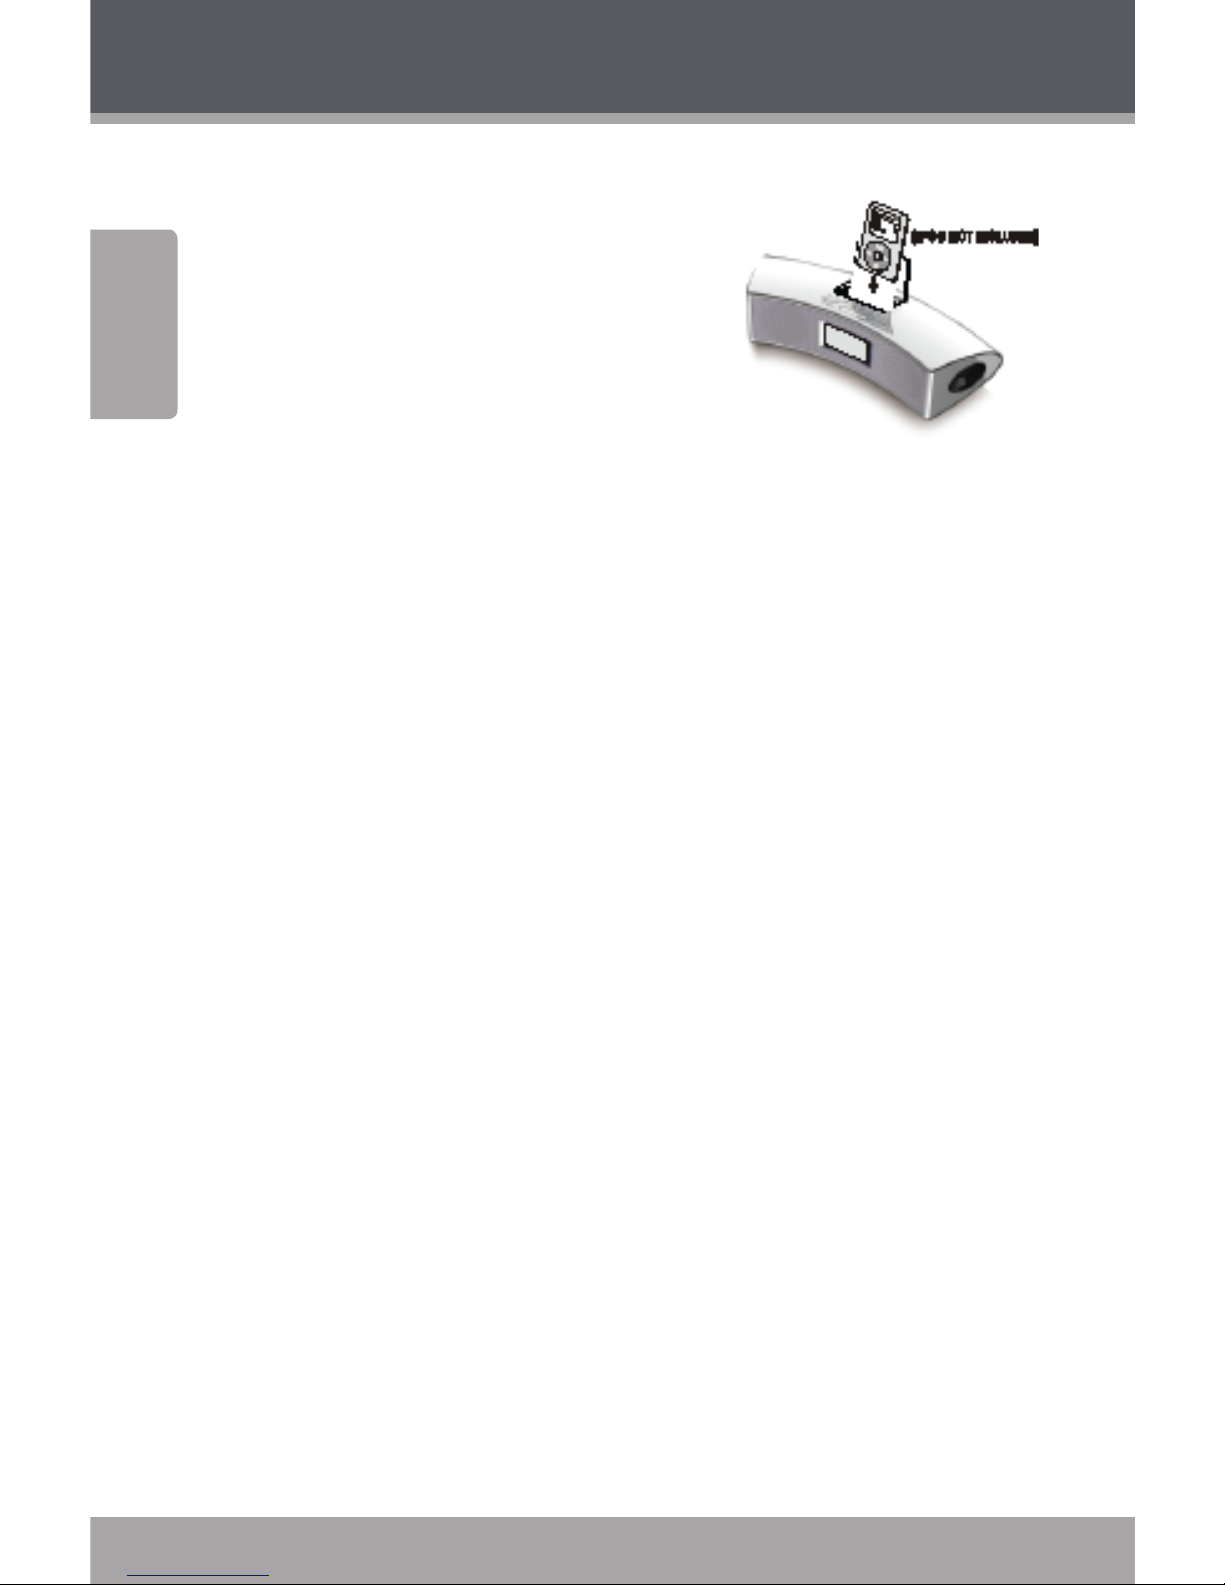
iPod Mode
Connect your iPod to the dock on the device’s top panel
for high-quality audio playback.
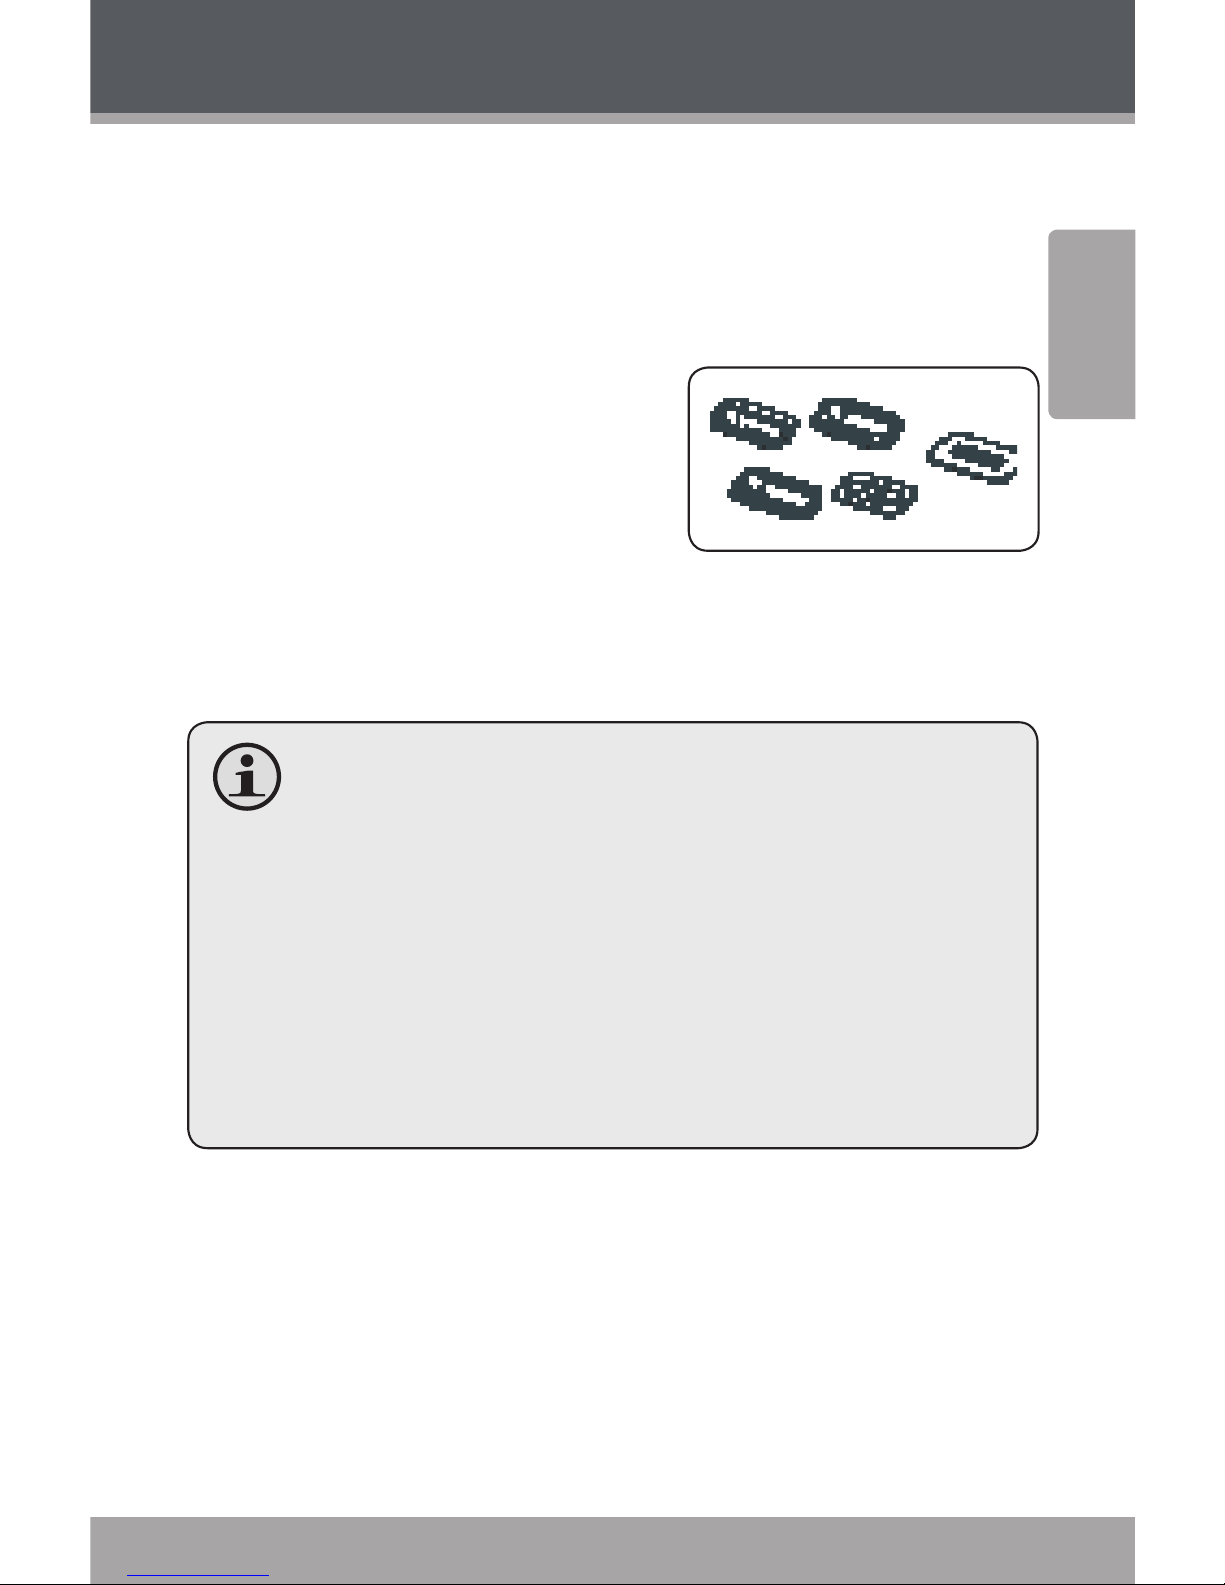
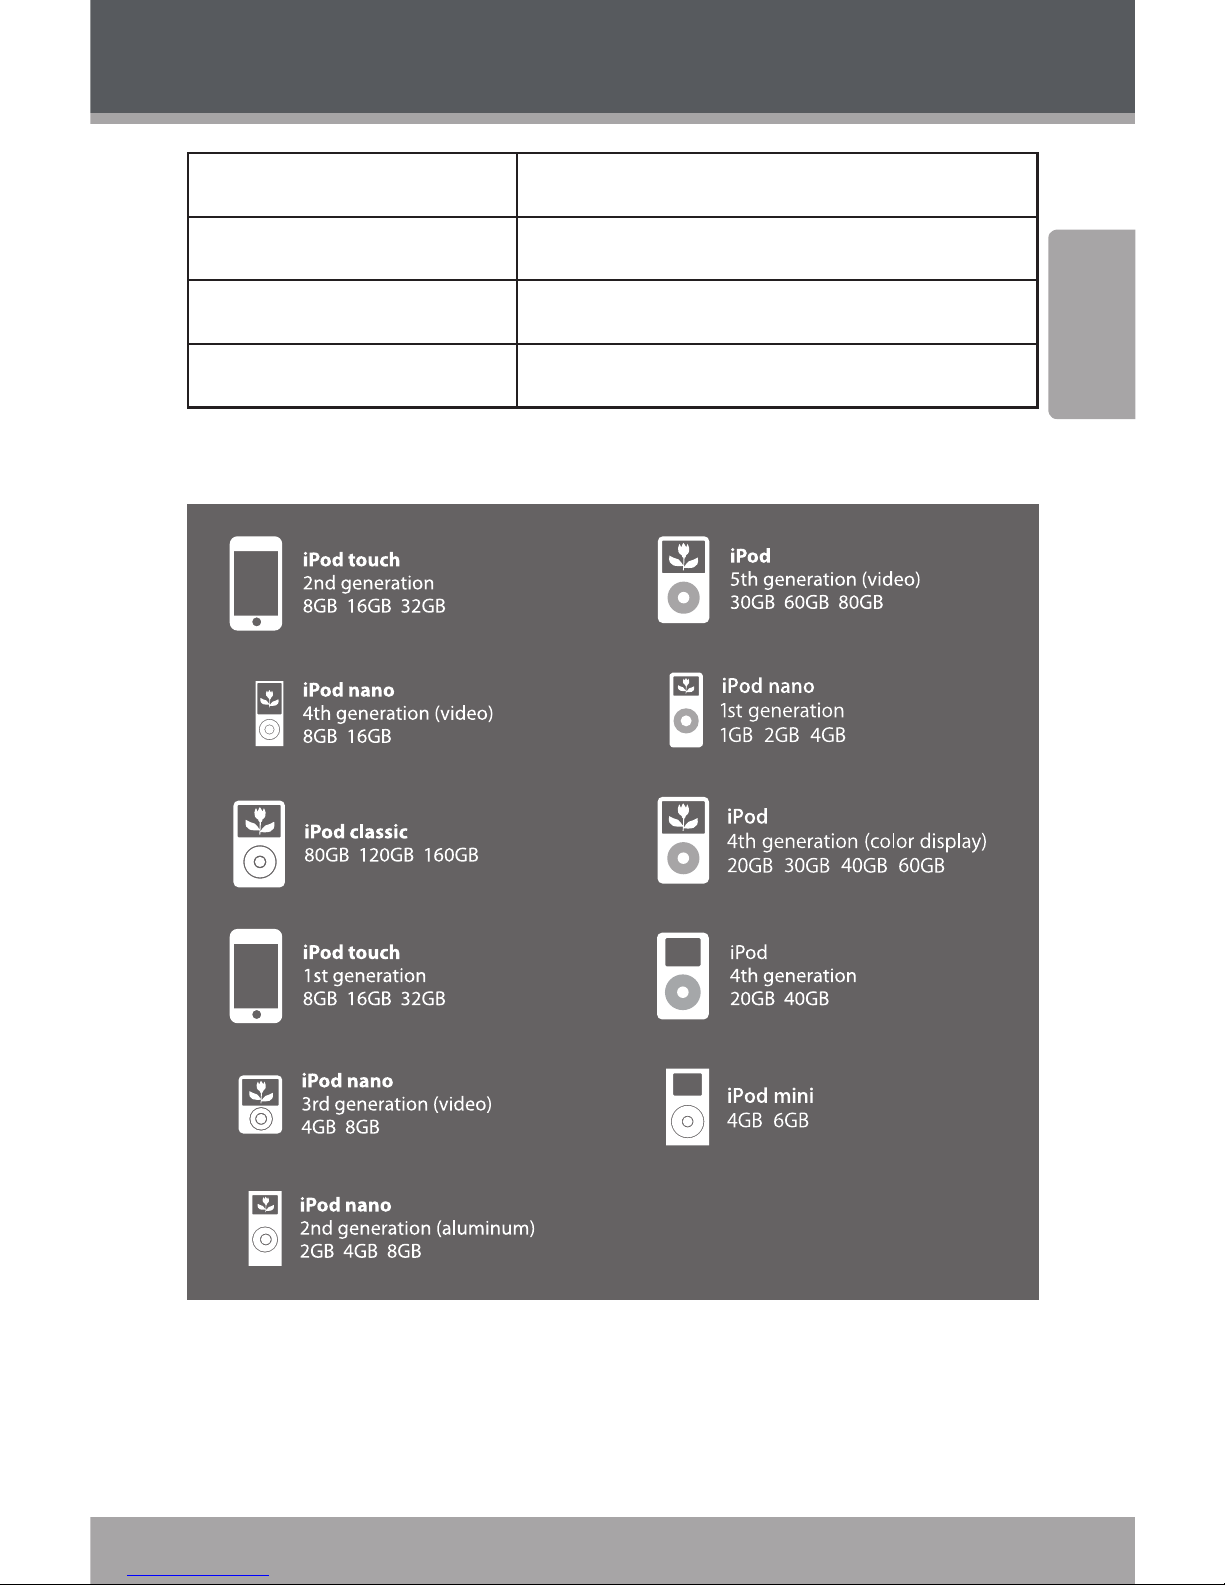
iPod Adapters
To ensure proper connection,
an array of iPod adapters is included with this device. Before
connecting, please select the
correct iPod adapter for your
iPod model.
To install a new adapter, press it into the docking station
until it is rmly in place.
Check that the iPod adapter is the correct size and
type for your iPod model before connecting.
To avoid damaging hardware, turn o the unit be-
fore connecting or disconnecting iPod.
When switched on, the unit will recharge the bat-
tery of any iPod in the dock.
This device does not include a video decoder; if
you select a video le from your iPod menu, the
playback will be sound only.
Page 18
Page 18 Coby Electronics Corporation
English
www.cobyusa.com Page 19
iPod Mode
Playback Operation
After connecting your iPod to
the dock, turn on the device.
Press [MODE] to select IPOD
mode.
The [MENU] and Direction Keys cor-
respond to the functions of your iPod:
Press [MENU] to display the iPod menu; use the
direction key [UP] or [DOWN] to select an item.
Press [RIGHT] to enter an item submenu.
Press [LEFT] or [MENU] to return to the previous
menu.
During playback, press [PLAY/PASUE] to pause; press
again to resume playback.
Press [STOP] to stop playback.
Press [PLAYLIST-]/[PLAYLIST+] to skip to the previous/
next playlist.
Press [ALBUM-]/[ALBUM+] or [NEXT]/[NEXT to skip to
the previous/next track in the playlist.
Press and hold [FAST FORWARD] for fast forward play-
back; for fast rewind, press and hold [FAST REWIND].
Press [REPEAT] repeatedly to change playback repeat
mode.
For more information on using [EQ], [MUTE] and
[VOL+/-] in IPOD mode, please refer to the Unit
Overview section.
Page 19
www.cobyusa.com Page 19
English
AUX IN Mode
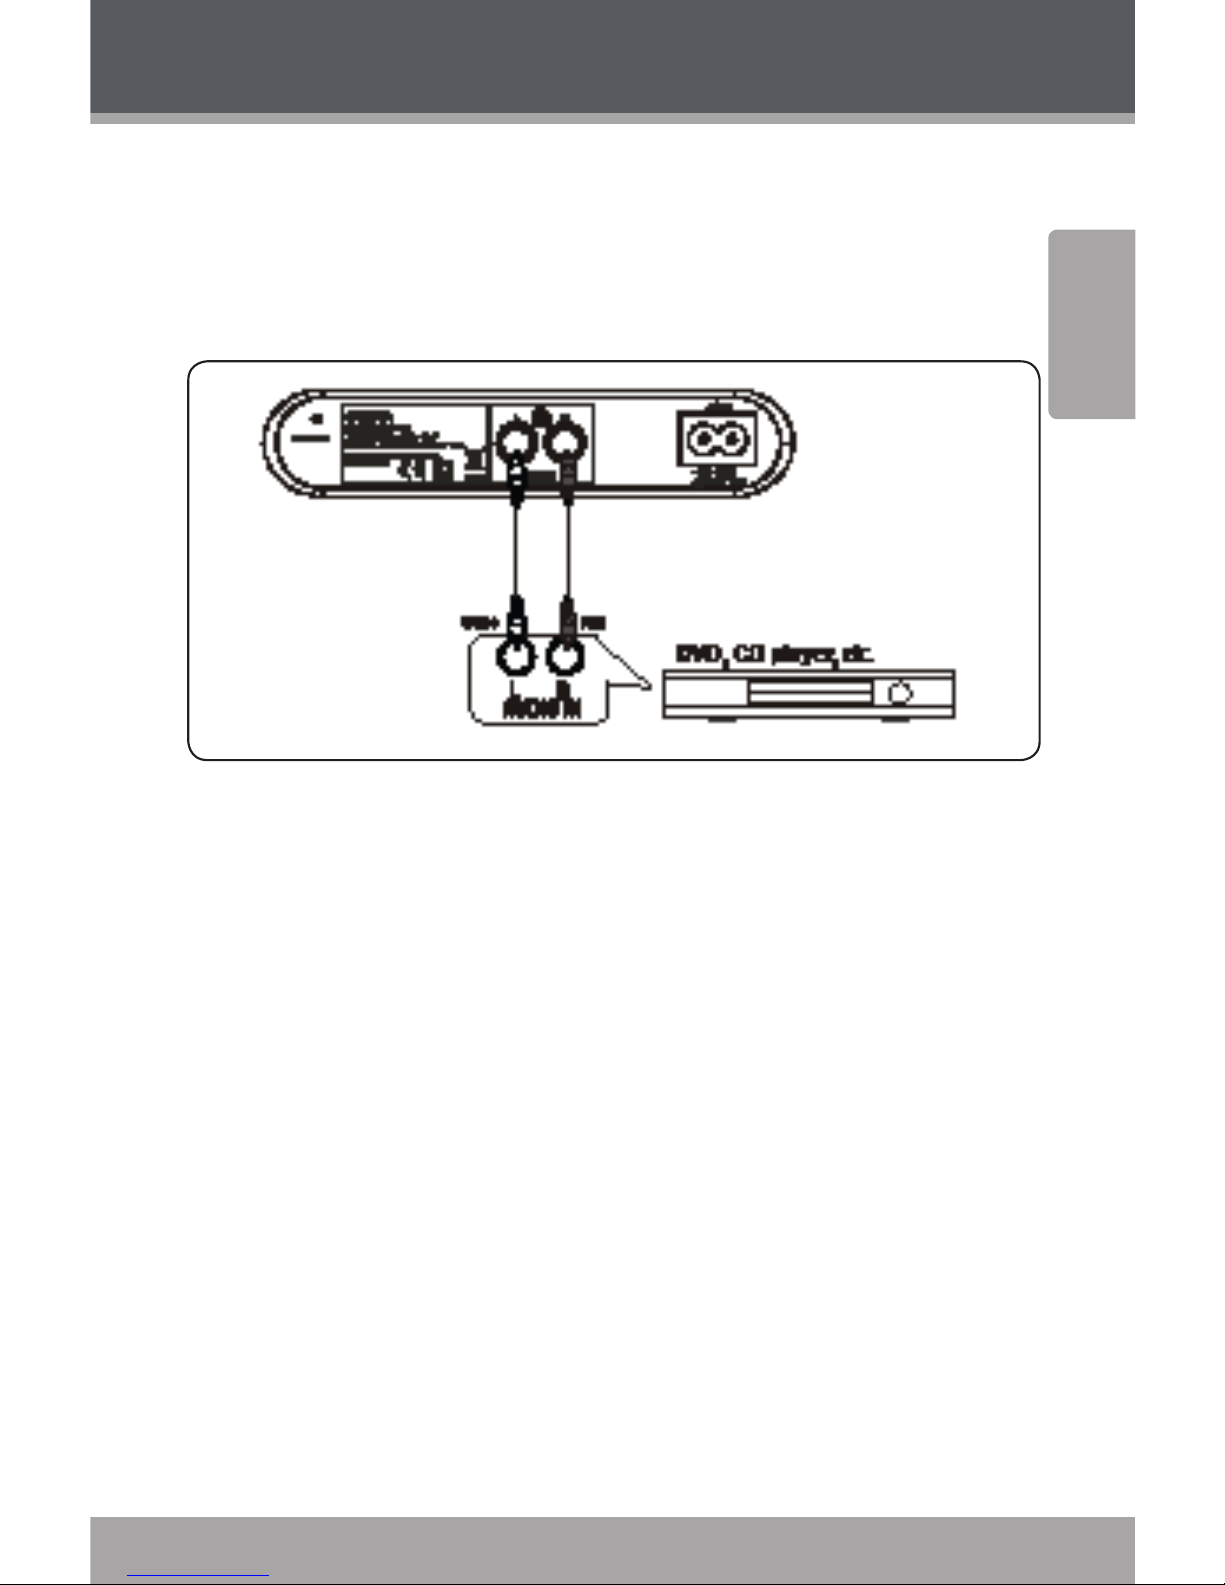
External Equipment Connections
You can enjoy high-quality audio playback from a CD
player, DVD player or other external apparatus through
this unit’s speakers.
To connect an external device:
For your safety, disconnect the power cord before
connecting external equipment.
Use a pair of audio cables to connect the audio
output on your external equipment to the auxiliary
audio input on the unit’s back panel. Connect the
white cable/plug to the left channel auxiliary audio
input, and the red cable/plug to the right.
After the connections have been made, power
on the unit. Press [MODE] to select AUX-IN mode.
Select playback on the external device to play audio
through this unit’s speaker system.
For information on using [EQ], [MUTE] and [VOL+/-]
in AUX-IN mode, please refer to the Remote Control
chapter.
Page 20

Page 20 Coby Electronics Corporation
English
www.cobyusa.com Page 21
Troubleshooting
If you have a problem with this device, please read the
troubleshooting guide below and check our website at
www.cobyusa.com for Frequently Asked Questions (FAQs)
and rmware updates. If these resources do not resolve
the problem, please contact Technical Support.
Address
Coby Electronics Technical Support
56-65 Rust Street
Maspeth, NY 11378
Email
techsupport@cobyusa.com
Web
www.cobyusa.com
Phone
800-727-3592: Mon–Fri, 8:00AM–11:00PM EST
Saturdays, 9:00AM–5:30PM EST
718-416-3197: Mon–Fri, 8:00AM–5:30PM EST
If you experience problems with the speaker
system, please take the following steps:
Check that the power cord connections to the system
and wall outlet are secure.
Check that the system has been turned on.
Check that the volume has been turned up.
Check that the correct audio mode is selected.
Check that a compatible iPod and correct connection
adapter have been inserted in the dock.
Check that the correct radio frequency is selected.
Page 21

www.cobyusa.com Page 21
English
Troubleshooting
If you experience problems while attempting to
use the remote control, check that the batteries are
inserted and fully charged.
Please refer to the table below for common troubleshooting techniques.
Problem Cause Solution
No audio/ no
display
Power is not connected
Connect power and
recheck system
Unit is not turned on Turn unit on and
recheck system
Faulty plug pack
power supply
Contact manufacturer
for a replacement plug
Display
functioning,
but no audio
Incorrect audio mode
selected
Select correct audio
mode
Volume turned down
on unit
Adjust volume using
+/– controls on unit
iPod not connected
properly
Remove iPod from dock
and reconnect
Faulty equipment
(speaker, iPod, dock
connection)
Contact manufacturer
Page 22

Page 22 Coby Electronics Corporation
English
www.cobyusa.com Page 23
Problem Cause Solution
Poor FM re-
ception, static
or crackling
Interference from
other devices; poor
reception quality
Reposition FM antenna,
or relocate system to
another position
iPhone not operating
in airplane mode
Select airplane mode
before connecting
iPhone to the dock
iPhone shows
error message when
connected to
dock
iPhone may cause
interference when
operated outside of
airplane mode
Select airplane mode
before connecting
iPhone to the dock
Troubleshooting
Page 23
www.cobyusa.com Page 23
English
Specications
Power Supply AC 100-240V ~ 50/60Hz
Output Power 3W x 2 (RMS)
Auxiliary Input RCA stereo
Tuner System FM
Compatible with
Specications and manual are subject to change without notice.
Page 24
Page 24 Coby Electronics Corporation
English
www.cobyusa.com Page 25
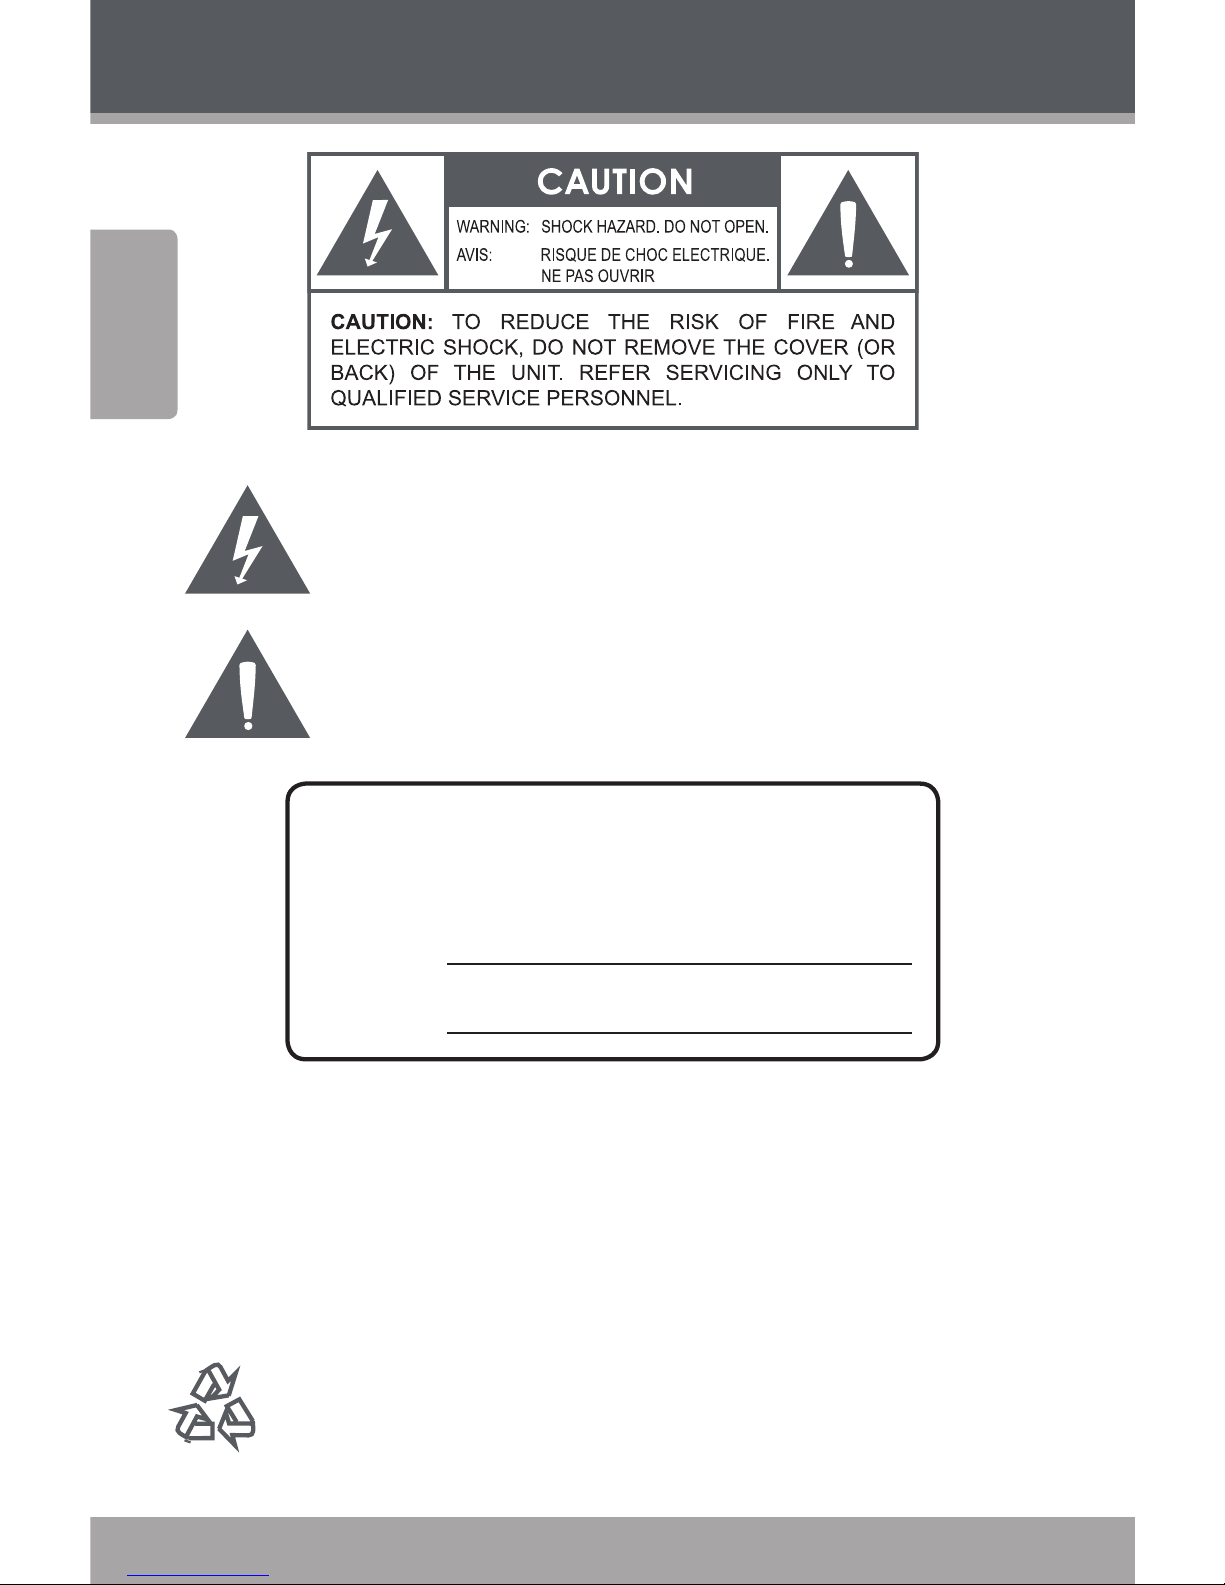
The lightning ash with arrowhead symbol within an equilateral
triangle is intended to alert the user to the presence of uninsulated “dangerous voltage” within the product’s enclosure that may
be of sufcient magnitude to constitute a risk of electric shock.
The exclamation point within an equilateral triangle is intended to
alert the user to the presence of important operation and servicing instructions in the literature accompanying the appliance.
For Customer Use:
Enter below the serial number that is located on the rear
of the unit. Retain this information for future reference.
Model No. CSMP160
Serial No.
WARNING: To prevent re or shock hazard, do not expose this device to rain or moisture.
Dangerous high voltage is present inside the enclosure. Do not open the cabinet.
CAUTION: To prevent electric shock, match wide blade of plug to wide slot of outlet and
fully insert.
Protect your hearing: Hearing experts advise against the constant use of personal stereos
played at high volume. Constant exposure to high volumes can lead to hearing loss. If you
should experience ringing in the ears or hearing loss, discontinue use and seek medical advice.
For recycling or disposal information about this product, please contact
your local authorities or the Electronics Industries Alliance: www.eiae.org.
Safety Notices
Page 25

www.cobyusa.com Page 25
English
Safety Notices
FCC Statement:
This device complies with Part 15 of the FCC Rules. Operation is subject to the following two conditions:
(1) This device may not cause harmful interference, and
(2) This device must accept any interference received, including interference that
may cause undesired operation.
Note: This equipment has been tested and found to comply with the limits for Class
B digital devices, pursuant to Part 15 of the FCC rules. These limits are designed to
provide reasonable protection against harmful interference in a residential installation.
This equipment generates, uses and can radiate radio frequency energy and, if not
installed and used in accordance with the instructions, may cause harmful interference
to radio communications. However, there is no guarantee that interference will not
occur in a particular installation. If this equipment does cause harmful interference to
radio or television reception, which can be determined by turning the equipment off
and on, the user is encouraged to try to correct the interference by one or more of the
following measures:
Reorient or relocate the receiving antenna.•
Increase the separation between the equipment and receiver.•
Connect the equipment into an outlet on a circuit dierent from that to which the receiver is •
connected.
Consult the dealer or an experienced radio/TV technician for help•
Use of shielded cable is required to comply with Class B limits in Subpart B of Part 15
of the FCC rules.
Do not make any changes or modications to the equipment unless otherwise specied
in the manual. If such changes or modications should be made, you could be required
to stop operation of the equipment.
Page 26

Page 26 Coby Electronics Corporation
English
www.cobyusa.com Page 27
Safety Notices
Important Safety Instructions
Read Instructions: All the safety and operating instructions should be 1.
read before the product is operated.
Retain Instructions: The safety and operating instructions should be 2.
retained for future reference.
Heed Warnings: All warnings on the product and in the operating 3.
instructions should be adhered to.
Follow Instructions: All operating and usage instructions should be 4.
followed.
Cleaning: Unplug this product from the wall outlet before cleaning. 5.
Do not use liquid cleaners or aerosol cleaners. Use a damp cloth
for cleaning.
Attachments: Use only attachments recommended by the manufac-6.
turer. Use of other attachments may be hazardous.
Water and Moisture: Do not use this product near water (e.g., near a 7.
bath tub, washbowl, kitchen sink, laundry tub, in wet basements, or
near a swimming pool and the like).
Ventilation: Slots and openings in the cabinet are provided for venti-8.
lation to ensure reliable operation of the product and to protect it from
overheating. These openings should never be blocked by placing the
product on a bed, sofa, rug, or other similar surface. This product
should not be placed in a built-in installation such as a bookcase
or rack unless proper ventilation is provided or the manufacturer
instructions have been adhered to.
Power Sources: This product should be operated only from the type 9.
of power source indicated on the rating label. If you are not sure of
the type of power supply to your home, consult your product dealer or
local power company. For products intended to operate from battery
power or other sources, refer to the operating instructions.
Power-Cord Protection: Power supply cords should be routed so 10.
that they are not likely to be walked on or pinched by items placed
upon or against them, paying particular attention to cords at plugs,
convenience receptacles, and at the point which they exit from the
product.
Lightning: For added protection for this product, unplug it from the 11.
wall outlet and disconnect the antenna or cable system during a lightning storm or when it is left unattended and unused for long periods
of time. This will prevent damage to the product due to lightning or
power-line surges.
Page 27

www.cobyusa.com Page 27
English
Overloading: Do not overload wall outlets, extension cords, or in-12.
tegral convenience receptacles as this can result in a risk of re or
electric shock.
Object and Liquid Entry: Never push objects of any kind into this 13.
product through openings as they may touch dangerous voltage
points or shout-out parts that could result in a re or electric shock.
Never spill liquid of any kind on the product.
Servicing: Do not attempt to service this product yourself as opening 14.
or removing covers may expose you to dangerous voltage or other
hazards. Refer all servicing to qualied service personnel.
Damage Requiring Service: Unplug this product from the wall outlet 15.
and refer servicing to qualied service personnel under the following
conditions: a) when the power-supply or plug is damaged; b) if liquid
has been spilled or if objects have fallen into the product; c) if the
product has been exposed to rain or water; d) if the product does
not operate normally by following the operating instructions. Adjust
only those controls that are covered by the operating instructions as
improper adjustment of other controls may result in damage and will
often require extensive work by a qualied technician to restore the
product to its normal operation; e) if the product has been dropped or
damaged in any way; f) when the product exhibits a distinct change
in performance—this indicates a need for service.
Replacement Parts: When replacement parts are required, be sure 16.
that your service technician has used replacement parts specied
by the manufacturer or have the same characteristics as the original
part. Unauthorized substitutions may result in re, electric shock, or
other hazards.
Safety Check: Upon completion of any service or repairs to this prod-17.
uct, ask the service technician to perform safety checks to ensure
that the product is in proper operating condition.
Heat: The product should be situated away from heat sources such 18.
as radiators, heat registers, stoves, or other products (including am-
pliers) that produce heat.
Safety Notices
Page 28

Page 28 Coby Electronics Corporation
Español
www.cobyusa.com Page 29
Índice
INTRODUCCIÓN .............................................................. 30
Gracias ...................................................................................................30
Para empezar ...................................................................................... 30
Características ....................................................................................30
Contenidos del paquete ............................................................... 31
GENERALIDADES DE LA UNIDAD...................................32
Panel frontal ........................................................................................ 32
Panel reverso ...................................................................................... 32
Panel superior .................................................................................... 33
Control Remoto .................................................................................34
CONFIGURACIONES DEL RELOJ .................................... 39
En el modo Setting ........................................................................... 39
Para ajustar CLOCK TIME (HORA DEL RELOJ) .......................... 39
Para ajustar ALARM (ALARMA): ...................................................40
Para ajustar iPod Alarm (Alarma del iPod) ....................40
Para ajustar Radio Alarm (Alarma de la radio).............40
Para ajustar AUX Alarm (Alarma AUX) ............................ 41
Para ajustar Buzzer Alarm (Alarma con zumbador) .. 41
Para detener ALARM (ALARMA): ................................................. 41
Para utilizar la función SNOOZE (REPETICIÓN
DE ALARMA) ........................................................................................ 41
Para ajustar la hora AUTO OFF (APAGADO
AUTOMÁTICO) .................................................................................... 42
MODO RADIO.................................................................. 43
Uso de la radio ................................................................................... 43
Autoescaneo ............................................................................ 43
Búsqueda ..................................................................................43
Sintonización ........................................................................... 43
Programación de memoria para estaciones ............... 43
Page 29

www.cobyusa.com Page 29
Español
Índice
MODO IPOD .................................................................... 45
Adaptadores de iPod ....................................................................... 45
Funcionamiento de la reproducción .........................................45
MODO AUX IN ................................................................. 48
Conexiones del equipo externo .................................................48
SOLUCIÓN DE PROBLEMAS ........................................... 50
ESPECIFICACIONES .........................................................53
AVISOS DE LA SEGURIDAD ............................................ 54
Page 30

Page 30 Coby Electronics Corporation
Español
www.cobyusa.com Page 31
Introducción
Gracias
Felicitaciones por su compra del Coby CS-MP iPod®
Dock con radio/reloj alarma dual. Por favor lea este manual
antes de encender y hacer funcionar el sistema. Conserve
este manual para referencias futuras.
Para empezar
Para comenzar a utilizar este dispositivo, conecte el cable de
alimentación al enchufe correspondiente en el panel trasero.
Conecte el enchufe al tomacorriente de pared (CA V/
Hz Hz). Presione [STANDBY] para encender la unidad.
Características
Pantalla de visualización LCD
Estación de conexión del iPod
Control remoto de función total
Entradas de audio de dos canales
Sintonizador de radio digital FM PLL
Reloj alarma con conguración dual
Page 31

www.cobyusa.com Page 31
Español
Introducción
Contenidos del paquete
CSMP
Manual de instrucciones
Control remoto (incluye batería de litio CR)
Adaptadores del iPod
* Se incluyen adaptadores de iPod para su comodidad y están sujetos a
cambios. Apple incluye adaptadores con sus últimos modelos de iPod.
Page 32

Page 32 Coby Electronics Corporation
Español
www.cobyusa.com Page 33
Generalidades de la Unidad
Panel frontal
Left Speaker (Altavoz izquierdo)1.
LCD Screen (Pantalla LCD)2.
Right Speaker (Altavoz derecho)3.
Panel reverso
Entrada de audio del canal izquierdo1.
Entrada de audio del canal derecho2.
Power Socket (Tomacorriente)3.
FM Antenna (Antena de FM)4.
Page 33

www.cobyusa.com Page 33
Español
Generalidades de la Unidad
Panel superior
Previous (Anterior)/Alarm Clock 1 1.
(Reloj despertador 1)/Channel- (Canal -)
Next (Próximo)/Alarm Clock 2 (Reloj despertador 2)/2.
Channel+ (Canal +)
Standby (Espera)3.
Sleep (Hibernación)4.
Source (Fuente)5.
Snooze (Repetición de alarma)6.
Play (Reproducción)/Pause (Pausa) 7.
Volume- (Volumen-)8.
Volume+ (Volumen+)9.
Indicador de modo de espera)10.
Cubierta de la estación de conexión para iPod)11.
Conector para puerto de iPod)12.
Para obtener información sobre las funciones de los
botones, consulte la sección del control remoto.
Page 34

Page 34 Coby Electronics Corporation
Español
www.cobyusa.com Page 35
Control Remoto
Tecla Descripción
1 STANDBY (ESPERA)/
SNOOZE
(REPETICIÓN DE
ALARMA)
Presione para encender la unidad.
Cuando la unidad esté encendida,
presione para colocar la unidad en
modo STANDBY .
Para más información sobre las
Funciones del Reloj, ver la sección
Conguraciones del Reloj.
Generalidades de la Unidad
Page 35

www.cobyusa.com Page 35
Español
Generalidades de la Unidad
Tecla Descripción
2 SOURCE (FUENTE) Intercambie entre los modos IPOD,
TUNER (SINTONIZADOR) (radio) y
AUX-IN (AUXILIAR).
Nota: El modo IPOD no está disponible
cuando no está conectado el iPOD en
el dispositivo.
3 FAST FORWARD
(AVANCE
RÁPIDO)/SEARCH
(BÚSQUEDA)
En modo IPOD, presione y mantenga
presionado para avanzar rápido la
reproducción.
En el modo TUNER, presione para
sintonizar la próxima frecuencia
disponible.
4 FAST REWIND
(RETORCESO
RÁPIDO)/SEARCH
(BÚSQUEDA)
En modo IPOD, presione y mantenga
presionado para retroceder rápido la
reproducción.
En modo TUNER, presione para
sintonizar la frecuencia anterior
disponible.
5, 7,
18,
21
Teclado de direc-
ción
En modo IPOD, navegue por el menú
iPod.
6 PLAYLIST (LISTA DE
REPRODUCCIÓN) +
En modo IPOD, pase a la próxima
lista de reproducción.
Page 36

Page 36 Coby Electronics Corporation
Español
www.cobyusa.com Page 37
Tecla Descripción
8 PLAYLIST (LISTA DE
REPRODUCCIÓN) –
En modo IPOD, pase a la lista de
reproducción anterior.
9 MENÚ (MENU)/
MEMORY (MEMORIA)
En modo IPOD, presione para mostrar
el menú iPod.
En modo TUNER, presione para
almacenar las estaciones de radio
preconguradas.
10 MUTE (SILENCIO) Presione para silenciar el sonido en el
modo IPOD, TUNER o AUX.
En modo STANDBY, presione y mantenga presionado para restaurar las
conguraciones predeterminadas y
reajustar todas las funciones del reloj.
11 SLEEP (IBER-
NACIÓN)/TIME
(HORA)
En modo STANDBY, presione para visualizar CLOCK TIME (HORA DEL RELOJ).
Cuando la unidad está activada, presione repetidamente para visualizar
la CLOCK TIME (HORA DEL RELOJ),
ALARM TIME (HORA DE ALARMA) 1
– 2, ALARM TYPE (TIPO DE ALARMA)
1 – 2, SNOOZE TIME (HORA DE
REPETICIÓN DE ALARMA).
Para obtener más información sobre
las Funciones del Reloj, ver la sección
Conguraciones del Reloj.
Generalidades de la Unidad
Page 37

www.cobyusa.com Page 37
Español
Generalidades de la Unidad
Tecla Descripción
12 EQ (EC) Presione para seleccionar el modo
ecualizador (FLAT, JAZZ, CLASICA,
POP, ROCK) para reproducir el audio.
13 NEXT/ALARM 2/
CH+ (PROX./ALARMA 2/Canal+)
En modo ESPERA, presione para
visualizar ALARM 2 TIME. (HORA DE
ALARMA 2).
En modo IPOD, presione para saltar a
la próxima pista.
En el modo TUNER, presione para
saltar a la próxima frecuencia de
radio precongurada.
14 PLAY/PAUSE/
STEREO
(REPRODUCCIÓN/
PAUSA/ESTÉREO)
En modo IPOD, presione para reproducir o pausar el audio.
En modo TUNER, presione para intercambiar entre recepción de radio FM
Estéreo/Mono
15 (PREVIOIUS/ALARM
1/CH --)ANT/
ALARMA 1/Canal --
En modo ESPERA, presione para
visualizar ALARM 1 TIME (HORA DE
ALARMA 1).
En modo IPOD, presione para saltar a
la pista anterior.
En el modo TUNER, presione para saltar a la frecuencia de radio anterior
precongurada.
Page 38

Page 38 Coby Electronics Corporation
Español
www.cobyusa.com Page 39
Tecla Descripción
16 STOP (DETENER) Detiene la reproducción en modo
IPOD.
17 ALBUM+ (ÁL-
BUM+)
En modo IPOD, saltee la reproducción
a la próxima lista.
19 ENTER (ENTRAR) Presione para conrmar la selección
del menú IPOD o las conguraciones
del dispositivo.
20 ALBUM – (ÁLBUM-) En modo IPOD, saltee la reproducción
a la lista anterior.
22 REPEAT/SCAN
(REPETICIÓN/
ESCNEO)
En modo IPOD, presione para cambiar las conguraciones de repetición
de la reproducción.
En modo TUNER, presione para escanear automáticamente las frecuencias de radio. Presione nuevamente
para detener el escaneo.
23 VOLUME+/--
(VOLUMEN +/--)
Suba/baje el volumen en los modos
IPOD, TUNER y AUX.
Generalidades de la Unidad
Page 39

www.cobyusa.com Page 39
Español
Conguraciones del Reloj
En el modo Setting
Para acceder al modo SETTING (CONFIGURACIÓN) del reloj,
coloque el dispositivo en modo STANDBY (ESPERA) y luego
mantenga presionado [SLEEP /TIME] (HIBERNACIÓN/HORA).
Presione [SLEEP/TIME] para intercambiar los elemen-
tos del menú (CLOCK (RELOJ), ALARM (ALARMA),
ALARM (ALARMA), SNOOZE (REPETICIÓN DE
ALARMA), etc) y las secciones (HOUR (HORA)/MINUTE
(MINUTO), ALARM TYPE (TIPO DE ALARMA), etc).
Presione [PREVIOUS / ALARM /CH] (ANTERIOR/
ALARMA /CANAL) o [NEXT / ALARM /CH+]
(PRÓXIMO/ALARMA /CANAL +) para ajustar los va-
lores o las opciones del interruptor. Presione [SLEEP/
TIME] para conrmar.
Presione [SLEEP/TIME] una vez más para seguir con el
siguiente elemento en el menú SETTING.
Para ajustar CLOCK TIME (HORA DEL
RELOJ)
Presione [SLEEP/TIME] para acceder al modo CLOCK TIME
Setting (Conguración de la HORA DEL RELOJ). Seleccione
CLOCK TIME utilizando las instrucciones que se proporcionaron anteriormente.
Page 40

Page 40 Coby Electronics Corporation
Español
www.cobyusa.com Page 41
Conguraciones del Reloj
Para ajustar ALARM (ALARMA):
Este dispositivo incluye un reloj despertador dual que
permite hasta horarios de alarma precongurados.
Presione [SLEEP/TIME] para acceder al modo Alarm Setting
(Conguración de la alarma). Seleccione ALARM TIME
(HORA DE LA ALARMA) y ALARM TYPE (TIPO DE ALARMA)
utilizando las instrucciones que se proporcionaron anteriormente. Para obtener más información sobre ALARM
TYPE, vea la información que aparece a continuación.
Para ajustar iPod Alarm (Alarma del iPod)
Seleccione ALARM TYPE: IPOD. Inserte el iPod en la
estación de conexión y ajuste el dispositivo en modo
STANDBY. La reproducción del iPod se iniciará en ALARM
TIME. Si no se inserta ningún iPod en la estación de conexión del dispositivo, la unidad va a zumbar en ALARM TIME.
Si la unidad se enciende y el iPod está reproduciendo en
ALARM TIME, la reproducción va a detenerse y la alarma
va a zumbar. La reproducción se va a reanudar cuando se
detenga la alarma.
Para ajustar Radio Alarm (Alarma de la radio)
Seleccione ALARM TYPE: RADIO. Congure el dispositivo
en modo STANDBY. La reproducción de la radio va a
comenzar en la frecuencia más reciente en ALARM TIME.
Si la unidad se enciende y la radio está reproduciendo en
ALARM TIME, la radio va a detenerse y la alarma va a zumbar. La reproducción de la radio se va a reanudar cuando
se detenga la alarma.
Page 41

www.cobyusa.com Page 41
Español
Conguraciones del Reloj
Para ajustar AUX Alarm (Alarma AUX)
Seleccione ALARM TYPE: AUX. Congure el dispositivo
en modo STANDBY. La unidad va a despertar en modo
AUX en ALARM TIME. Si la unidad se enciende en ALARM
TIME, la alarma va a zumbar. El audio AUX se va a reanudar
cuando se detenga la alarma.
Para ajustar Buzzer Alarm (Alarma con zumbador)
Seleccione ALARM TYPE: BUZZER. Asegúrese de que el
dispositivo esté encendido; el zumbador no sonará si la
unidad está en modo STANDBY. El zumbador sonará en
ALARM TIME. La alarma dura un minuto y se hace gradualmente más fuerte si no se apaga.
Para detener ALARM (ALARMA):
Presione ALARM o ALARM para apagar y reiniciar la
alarma.
Para utilizar la función SNOOZE
(REPETICIÓN DE ALARMA)
Para retrasar la alarma por un corto período de tiempo
( – minutos), presione SNOOZE. La función snooze
está disponible hasta veces por alarma, después de
las cuales la alarma se apaga. Para obtener información
adicional sobre cómo ajustar la hora de SNOOZE, consulte
las instrucciones del modo Setting anteriores.
Page 42

Page 42 Coby Electronics Corporation
Español
www.cobyusa.com Page 43
Para ajustar la hora AUTO OFF
(APAGADO AUTOMÁTICO)
La función AUTO OFF apagará el dispositivo automáticamente después de un período determinado de tiempo
(- minutos). Para ajustar la hora AUTO OFF, encienda
el dispositivo. Presione y mantenga presionado [SLEEP/
TIME] para acceder al modo de conguración AUTO OFF.
Presione [SLEEP/TIME] repetidamente para seleccionar
la hora AUTO OFF. Para desactivar la función AUTO OFF,
seleccione ‘’.
Para visualizar las conguraciones del reloj y del
reloj despertador:
En modo STANDBY, presione [SLEEP/TIME] para
visualizar CLOCK TIME (HORA DEL RELOJ). Presione
[ALARM] y [ALARM] para visualizar la correspondi-
ente ALARM TIME.
En modo ON (ENCENDIDO), presione [SLEEP/TIME]
repetidamente para visualizar CLOCK TIME (HORA
DEL RELOJ), ALARM TIMER (& ) [TEMPORIZADOR
DE ALARMA (&)], ALARM TYPES (& ) [TIPOS
DE ALARMA (&)] y SNOOZE TIME (HORA DE
REPETICIÓN DE ALARMA).
Conguraciones del Reloj
Page 43

www.cobyusa.com Page 43
Español
Modo Radio
Uso de la radio
Para escuchar la radio, presione [SOURCE] (FUENTE) y
seleccione el modo TUNER (SINTONIZADOR).
Autoescaneo
Presione [REPEAT/SCAN] (REPETICIÓN/ESCANEO) para
realizar una búsqueda completa de todas las frecuencias
disponibles desde , hasta MHz. Presione [STOP]
(DETENER) para detener el escaneo.
Búsqueda
Presione y mantenga presionado [SEARCH+]
(BÚSQUEDA+) para buscar la próxima frecuencia de radio
disponible. Presione y mantenga presionado [SEARCH
--] (BÚSQUEDA--) para buscar las frecuencias previas
disponibles.
Sintonización
Presione [SEARCH+]/[SEARCH –] (BÚSQUEDA+) /
(BÚSQUEDA--) para subir/bajar la frecuencia en , MHz.
Programación de memoria para estaciones
Su dispositivo almacenará hasta frecuencias de radio
preconguradas. Para congurar una frecuencia, presiones
[MENU/MEMORY] (MENÚ/MEMORIA) para ingresar a un
modo de programación. (La pantalla visualizará ‘MEM’.)
Seleccione la frecuencia deseada presionando CH+/CH
– (Canal +/Canal -). Para conrmar su selección, presione
[MENU/MEMORY] (MENÚ/MEMORIA).
Page 44

Page 44 Coby Electronics Corporation
Español
www.cobyusa.com Page 45
Modo Radio
Cómo escuchar la radio
Presione [CH+]/[CH-] para cambiar al próximo canal
precongurado o para volver al canal precongurado
previamente.
Presione [ST/MO] para cambiar las conguraciones
de recepción del modo FM.
Para obtener información sobre el uso de [EQ] (EC),
[MUTE] (SILENCIO) y [VOL+/-] en el modo TUNER, por
favor remítase al capítulo sobre Control Remoto.
Si el sistema está en el modo programación,
debe conrmar su selección y salir presionando
[MENU/MEMORY] antes de utilizar las funciones
de escaneo.
Page 45

www.cobyusa.com Page 45
Español
Conecte su iPod al puerto de conexión en el panel superior
del dispositivo para obtener una reproducción de audio de
alta calidad.
Adaptadores de iPod
Para asegurar una conexión
correcta, se incluye una
disposición de adaptadores
de iPod con este dispositivo.
Antes de conectarlo, seleccione
el adaptador de iPod correcto
para su modelo de iPod.
Para instalar un nuevo adaptador, presiónelo dentro de la
estación de conexión hasta que esté ajustado en su lugar.
Verique que el adaptador del iPod sea del tipo y
tamaño correctos para su modelo de iPod antes
de conectarlo.
Para evitar dañar el hardware, apague la unidad
antes de conectar o desconectar el iPod.
Cuando esté encendida, la unidad recargará la bat-
ería de cualquier iPod en el puerto de conexión.
Este dispositivo no incluye un decodicador de
video; si selecciona un archivo de video del menú
de su iPod, la reproducción será solo de sonido.
Funcionamiento de la reproducción
Después de conectar su iPod en el puerto de
conexión, encienda el dispositivo. Presione [SOURCE]
(FUENTE) para seleccionar el modo IPOD.
Modo iPod
Page 46

Page 46 Coby Electronics Corporation
Español
www.cobyusa.com Page 47
Modo iPod
La tecla [MENU] (MENÚ) y las teclas de
dirección corresponden a las
funciones de su iPod.
Presione [MENU] para
visualizar el menú del
iPod; utilice la tecla de
dirección [UP] (ARRIBA) o
[DOWN] (ABAJO) para seleccionar
un elemento.
Presione [RIGHT] (DERECHA) para acceder a un
submenú del elemento.
Presione [LEFT] (IZQUIERDA) o [MENU] para
regresar al menú previo.
Durante la reproducción, presione [PLAY /PAUSE]
(REPRODUCCIÓN/PAUSA) para pausar; presione
nuevamente para reanudar la reproducción.
Presione [STOP] (DETENER) para detener la reproducción.
Presione [PLAYLIST-]/[PLAYLIST+] (LISTA DE
REPRODUCCIÓN -)/ (LISTA DE REPRODUCCIÓN +) para
pasar a la lista de reproducción anterior/próxima.
Presione [ALBUM-]/[ALBUM+] (ÁLBUM -)/ (ÁLBUM +) o
[NEXT]/[NEXT] (PRÓXIMO)/(PRÓXIMO) para pasar a la
pista anterior/próxima en la lista.
Presione y mantenga presionado [FAST FORWARD]
(AVANCE RÁPIDO) para una reproducción que avance
rápidamente; para retroceder rápidamente, presione
y mantenga presionado [FAST REWIND] (RETROCESO
RÁPIDO).
Page 47

www.cobyusa.com Page 47
Español
Modo iPod
Presione [REPEAT] (REPETICIÓN) repetidamente para
cambiar el modo repetición de la reproducción.
Para obtener más información sobre cómo utilizar
[EQ] (EC), [MUTE] (SILENCIO) y [VOL +/-} en el modo
IPOD, consulte el capítulo del control remoto.
Page 48

Page 48 Coby Electronics Corporation
Español
www.cobyusa.com Page 49
Modo AUX IN
Conexiones del equipo externo
Puede disfrutar de un reproductor de audio de alta calidad
en un reproductor de CD, reproductor de DVD u otro
aparato externo a través de los altavoces de esta unidad.
Para conectar un dispositivo externo:
Por su seguridad, desconecte la tarjeta de energía
antes de conectar el equipo externo.
Utilice un par de cables de audio para conectar la salida
de audio en su equipo externo a la entrada de audio
auxiliar en el panel trasero de la unidad. Conecte el
cable/enchufe blanco a la entrada de audio auxiliar del
canal izquierdo, y el cable/enchufe rojo al derecho.
Después de que se han realizado las conexiones,
encienda la unidad. Presione [SOURCE] (FUENTE) para
seleccionar el modo AUX (AUXILIAR). Seleccione que la
reproducción en el dispositivo externo reproduzca el
audio a través del sistema de altavoces de esta unidad.
Page 49

www.cobyusa.com Page 49
Español
Para obtener información sobre el uso de [EQ] (EC.),
[MUTE] (SILENCIO) y [VOL+/-] en el modo de entrada
AUX, por favor remítase al capítulo sobre Control
Remoto.
Modo AUX IN
Page 50

Page 50 Coby Electronics Corporation
Español
www.cobyusa.com Page 51
Si tiene un problema con este dispositivo, lea la guía
de solución de problemas a continuación y revise las
Preguntas Frecuentes (FAQ) en nuestro sitio Internet
www.cobyusa.com y las actualizaciones de rmware.
Si estos recursos no le solucionan el problema, comuníquese con Soporte Técnico.
Domicilio
Coby Electronics Technical Support
56-65 Rust Street
Maspeth, NY 11378
Email
techsupport@cobyusa.com
La Red
www.cobyusa.com
Horario de teléfonos
800-727-3592: De lunes a viernes, 8AM a 11PM EST
Sabados de 9AM–5:30PM EST
718-416-3197: De lunes a viernes, 8AM a 5:30PM EST
Solución de Problemas
Si tiene problemas con el sistema de altavoces, siga los
siguientes pasos:
Verique que las conexiones del cable de aliment-
ación al sistema y tomacorriente de pared sean
seguras.
Verique que el sistema se haya encendido.
Verique que el volumen se haya activado.
Verique que el modo de audio correcto esté selec-
cionado.
Page 51

www.cobyusa.com Page 51
Español
Solución de Problemas
Verique que el iPod compatible y el adaptador de
conexión correcto se hayan insertado en la base dock.
Verique que la frecuencia de radio correcta esté
seleccionada.
Si tiene problemas al intentar utilizar el control
remoto, verique que las baterías estén insertadas y
completamente cargadas.
Consulte la tabla que aparece a continuación para obtener
técnicas de solución de problemas comunes.
Problema Causa Solución
No funciona el
audio/la pantalla
La alimentación no
está conectada
Conecte a la alimentación y vuelva a
vericar el sistema
La unidad no está
encendida
Encienda la unidad y
vuelva a vericar el
sistema
Fallas en el suministro
de alimentación al
paquete de enchufes
Comuníquese con
el fabricante para
solicitar un enchufe
de repuesto
Page 52

Page 52 Coby Electronics Corporation
Español
www.cobyusa.com Page 53
Solución de Problemas
Problema Causa Solución
El iPhone muestra un mensaje
de error cuando
se conecta a la
base dock
El modo de audio seleccionado es incorrecto
Seleccione el modo
de audio correcto
Se redujo el volumen
en la unidad
Ajuste el volumen con
los controles +/– ubicados en la unidad
El iPod no está
conectado adecuadamente
Retire el iPod de la
base dock y vuelva a
conectarlo
Fallas en el quipo
(altavoces, iPod, conexión de base dock)
Comuníquese con el
fabricante
Recepción
deciente de
FM, estática o
interferencias
Interferencia de
otros dispositivos;
calidad de recepción
deciente
Vuelva a posicionar la
antena FM o coloque
el sistema en otra
posición
El iPhone muestra
un mensaje de error
cuando se conecta a
la base dock
Seleccione el modo
Airplane antes de
conectar el iPhone a
la base dock
El iPhone muestra un mensaje
de error cuando
se conecta a la
base dock
El iPhone puede
producir interferencias cuando
funciona fuera del
modo Airplane
Seleccione el modo
Airplane antes de
conectar el iPhone a
la base dock
Page 53

www.cobyusa.com Page 53
Español
Fuente de Alimentación AC 100-240V ~ 50/60Hz
Potencia de Salida 3W x 2 (RMS)
Entrada Auxiliar RCA estéreo
Sistema de Sintonización FM
Compatible con
Las especicaciones y el manual están sujetos a cambios sin noticación.
Especicaciones
Page 54

Page 54 Coby Electronics Corporation
Español
www.cobyusa.com Page 55
El relámpago con el símbolo de echa dentro de un triángulo equilátero
tiene el propósito de advertir al usuario de la presencia de voltaje peligroso no aislado dentro del gabinete del producto que puede ser de suciente magnitud como para constituir un riesgo de descarga eléctrica.
El signo de exclamación dentro de un triángulo equilátero tiene el
propósito de advertir al usuario de la presencia de instrucciones de
funcionamiento y reparación importantes en el material impreso que
acompaña al artefacto.
Para uso de los clientes:
Ingrese a continuación el número de serie que se encuentra en la parte
trasera de la unidad. Conserve esta información para referencias futuras
Nº de modelo CSMP160
Nº de serie
ADVERTENCIA: Para prevenir el riesgo de descarga eléctrica, no exponga este
dispositivo a la lluvia ni a la humedad. Adentro del gabinete se encuentra alto voltaje
peligroso. No lo abra.
ADVERTENCIA: Para prevenir descargas eléctricas, haga coincidir la paleta ancha del
enchufe con la ranura ancha e insértela completamente.
Proteja su audición: Los expertos en audición advierten contra el uso constante de
estéreos personales a volumen alto. La exposición constante al volumen alto puede
llevar a la pérdida de la audición. Si le zumban los oídos o sufre una pérdida de
audición, suspenda el uso y busque asesoramiento médico.
Para obtener información de reciclaje o eliminación sobre este producto,
comuníquese con sus autoridades locales o con la Alianza de Industrias
Electrónicas: www.eiae.org.
Avisos de la Seguridad
Page 55

www.cobyusa.com Page 55
Español
Declaración de la FCC
Este dispositivo cumple con la Parte 15 de las Normas de la FCC. El funcionamiento
está sujeto a las siguientes dos condiciones:
(1) Este dispositivo puede no causar interferencias perjudiciales, y
(2) Este dispositivo debe aceptar cualquier interferencia recibida, inclusive aquella
que podría causar funcionamiento no deseado.
Nota: Este equipo fue probado y cumple con todos los límites para dispositivos
digitales clase B, conforme a la Parte 15 de las normas de la FCC. Estos límites
fueron diseñados para brindar protección razonable contra la interferencia perjudicial
en una instalación residencial. Este equipo genera, emplea y puede irradiar energía
de frecuencia de radio y, si no se instala y emplea según las instrucciones, puede
ocasionar interferencia perjudicial para las comunicaciones de radio. Sin embargo, no
hay ninguna garantía de que no ocurrirá en una instalación en particular. Si este equipo
causa interferencia perjudicial para la recepción de radio o televisión, lo cual puede
determinarse al apagar o encender el equipo, el usuario puede tratar de corregir la
interferencia con una o más de las siguientes medidas:
Reorientar o reubicar la antena receptora. •
Aumentar la distancia entre el equipo y el receptor. •
Conectar el equipo en un tomacorriente en un circuito diferente del que está •
conectado el receptor.
Consultar al distribuidor o a un técnico con experiencia en radio y TV para obtener •
ayuda.
Se requiere el uso de cable blindado, para cumplir con los límites de la clase B, en la
sub parte B de la Parte 15 de las normas de la FCC.
No efectúe cambios ni modicaciones al equipo, excepto en caso de que así lo especique el manual. Si se deben efectuar tales cambios o modicaciones, se le solicitará
que detenga el funcionamiento del equipo.
Avisos de la Seguridad
Page 56

Page 56 Coby Electronics Corporation
Español
www.cobyusa.com Page 57
Avisos de la Seguridad
Consignes de Sécurité Importantes
Lea las instrucciones: Deberá leer todas las instrucciones de seguridad 1.
y funcionamiento, antes de poner en funcionamiento este producto.
Conserve las instrucciones: Deberá conservar las instrucciones de 2.
seguridad y funcionamiento para referencia futura.
Preste atención a las advertencias: Deberá respetar todas las 3.
advertencias contenidas en el producto y en las instrucciones de
funcionamiento.
Siga las instrucciones: Deberá seguir todas las instrucciones de uso 4.
y funcionamiento.
Limpieza: Desconecte este producto del tomacorriente de pared 5.
antes de la limpieza. No utilice productos de limpieza líquidos o en
aerosol. Utilice un paño húmedo para limpiar.
Complementos: Utilice sólo complementos recomendados por el 6.
fabricante. El uso de otros complementos puede ser peligroso.
Agua y humedad: No utilice este producto cerca del agua (por ejem-7.
plo: cerca de una bañera, lavatorio, lavaplatos o tina para lavar ropa,
en un sótano mojado ni cerca de una piscina o similar).
Ventilación: El gabinete posee ranuras y aberturas para asegurar la 8.
correcta ventilación del producto y para protegerlo del recalentam-
iento. Nunca se debe bloquear estos oricios al colocar el producto
sobre una cama, sofá, alfombra u otras supercies similares. No se
debe colocar este producto en un mueble empotrado, tal como biblioteca o estante, salvo que se proporcione una ventilación correcta
o se cumplan las instrucciones del fabricante del producto.
Fuentes de alimentación: Este producto debe utilizarse sólo con el 9.
tipo de fuente de alimentación indicada en la etiqueta de clasicación.
Si no está seguro del tipo de fuente de alimentación de su hogar,
consulte con el distribuidor del producto o con la compañía eléctrica
local. Para los productos que funcionan a batería o con otras fuentes
de alimentación, consulte las instrucciones de funcionamiento.
Protección del cable de alimentación: Los cables de alimentación 10.
deben colocarse de modo tal de evitar que se pisen o que queden
apretados por elementos colocados sobre o contra ellos, prestando
especial atención a los cables en los enchufes, tomacorrientes y el
punto en el que salen del producto.
Rayos: Para una mayor protección de este producto, desenchúfelo 11.
del tomacorriente de la pared y desconecte la antena o el sistema
de cable durante una tormenta eléctrica o cuando el producto quede
Page 57

www.cobyusa.com Page 57
Español
sin atención o no se utilice durante períodos de tiempo prolongados. Esto evitará que se dañe el producto a causa de relámpagos o
subidas de tensión.
Sobrecarga: No sobrecargue los tomacorrientes, alargues o 12.
enchufes de pared, ya que esto puede tener como resultado un
riesgo de incendio o descarga eléctrica.
Entrada de objetos y líquido: Nunca introduzca objetos de ningún tipo 13.
dentro de este producto a través de las aberturas, ya que pueden
presionar puntos de voltaje peligrosos o provocar cortocircuitos que
ocasionarían incendios o descargas eléctricas. No derrame nunca
líquido de ningún tipo sobre el producto.
Reparaciones: No intente reparar este producto usted mismo, ya 14.
que al abrir o quitar las cubiertas se expondría a voltaje peligroso u
otros peligros. Para cualquier reparación, póngase en contacto con
el personal técnico calicado.
Daños que requieran servicio técnico: Desconecte este producto del 15.
enchufe de pared y contáctese con personal técnico calicado en las
siguientes situaciones: a) cuando la fuente de alimentación o el enchufe
estén dañados; b) si se ha derramado líquido o han caído objetos dentro del producto; c) si el producto ha sido expuesto a lluvia o al agua;
d) si el producto no funciona normalmente al seguir las instrucciones
de funcionamiento. Ajuste sólo aquellos controles incluidos en las instrucciones de funcionamiento, ya que el ajuste inadecuado de otros
controles puede ocasionar daños y requerir con frecuencia un trabajo
extenso por parte de un técnico calicado para restaurar el funcionamiento normal del producto; e) si el producto se ha caído o ha sufrido
algún daño; f) cuando el producto presenta un cambio marcado en su
rendimiento; esto indica que necesita mantenimiento.
Piezas de reemplazo: Cuando se requieren piezas de reemplazo, 16.
asegúrese de que el servicio técnico haya utilizado las piezas de
reemplazo especicadas por el fabricante o que posean las mismas
características que la pieza original. Las sustituciones no autorizadas pueden provocar incendio, descarga eléctrica u otros riesgos.
Controles de seguridad: Una vez completado el servicio o las 17.
reparaciones de este producto, solicite al servicio técnico que realice controles de seguridad para asegurar que se encuentra en
condición de funcionamiento correcto.
Calor: El producto debe ubicarse lejos de fuentes de calor tales 18.
como radiadores, rejillas de aire caliente, estufas u otros productos
(incluidos amplicadores) que produzcan calor.
Avisos de la Seguridad
Page 58

Page 58 Coby Electronics Corporation
Français
www.cobyusa.com Page 59
AVANTPROPOS .............................................................. 60
Merci ...................................................................................................... 60
Pour démarrer ................................................................................... 60
Caractéristiques ................................................................................60
Contenu de l’emballage ................................................................60
VUE GÉNÉRALE DU PRODUIT ........................................61
Panneau avant ................................................................................... 61
Panneau arrière ................................................................................. 61
Panneau supérieur ........................................................................... 62
Télécommande .................................................................................. 63
REGLAGES DU REVEIL .....................................................67
Mode réglage ..................................................................................... 67
Pour régler l’HEURE: ......................................................................... 67
Pour régler L’ALARME .....................................................................68
Pour régler l’alarme iPod .....................................................68
Pour régler l’alarme radio ...................................................68
Pour régler l’alarme AUX .....................................................68
Pour régler le buzzer.............................................................69
Pour arrêter L’ALARME .................................................................... 69
Pour utiliser la fonction SNOOZE ................................................ 69
Pour régler l’heure d’arrêt automatique .................................. 69
RADIO MODE ...................................................................71
Utilisation de la radio ...................................................................... 71
Autoscan.................................................................................... 71
Recherche ................................................................................. 71
Tuning......................................................................................... 71
Programmer la mémoire station ..................................... 71
Écouter la radio ...................................................................... 71
IPOD MODE ..................................................................... 73
Adaptateurs iPods ............................................................................ 73
Opération de lecture ......................................................................73
Table des Matières
Page 59

www.cobyusa.com Page 59
Français
Table des Matières
AUX IN MODE ...................................................................75
Connexions à des équipements externes .............................. 75
DÉPANNAGE ....................................................................76
SPÉCIFICATIONS ............................................................. 79
NOTICES DE SÛRETÉ ...................................................... 80
Page 60

Page 60 Coby Electronics Corporation
Français
www.cobyusa.com Page 61
Avant-propos
Merci
Félicitations pour votre achat de l’iPod Dock Coby CSMP
avec radio réveil. Veuillez lire ce manuel avant d’installer et
d’utiliser ce produit. Gardez ce manuel pour référence future.
Pour démarrer
Pour utiliser cet appareil, brancher le cordon électrique
au branchement correspondant sur le panneau arrière.
Brancher ensuite à une prise murale (AC -V/Hz
Hz). Appuyer sur [STANDBY] pour brancher l’unité.
Caractéristiques
Achage écran LCD
Station ipod doclking
Télécommande comprenant toutes les fonctions
Périphériques entrée audio double-canal
Tuner radio numérique FM PLL
Réveil double réglage
Contenu de l’emballage
CSMP*
Manuel utilisateur
Télécommande (pile lithium CR incluse)
Adaptateurs iPod*
* iPod adaptateurs sont inclus pour votre commodité et sont sujets à changement. Apple inclut des adaptateurs avec les dernières modèles d’iPod.
Page 61

www.cobyusa.com Page 61
Français
Vue Générale du Produit
Panneau avant
Haut-parleur gauche 1.
Écran LCD2.
Haut-parleur droite3.
Panneau arrière
Périphérique d’entrée audio canal gauche1.
Périphérique d’entrée audio canal droit2.
Prise de courant3.
Antenne FM4.
Page 62

Page 62 Coby Electronics Corporation
Français
www.cobyusa.com Page 63
Vue Générale du Produit
Panneau supérieur
Précédent/ Réveil 1/ Canal-1.
Suivant/ Réveil 2/ Canal +2.
Pause3.
Sommeil4.
Source5.
Snooze6.
Lecture/Pause7.
Volume -8.
Volume +9.
Indicateur pause10.
Couvercle Station Ipod docking11.
Connecteur iPod Docking12.
Pour plus d’informations sur les touches, voir la
section sur la télécommande.
Page 63

www.cobyusa.com Page 63
Français
Télécommande
Clé Description
1 PAUSE/SNOOZE Appuyer pour allumer l’unité. Lorsqu’elle
est allumée, appuyer pour mettre en
STANDBY.
Pour plus de renseignements sur les
fonctions du réveil, voir la section
réglages horloge.
Vue Générale du Produit
Page 64

Page 64 Coby Electronics Corporation
Français
www.cobyusa.com Page 65
Vue Générale du Produit
Clé Description
2 SOURCE Naviguer entre les modes IPOD, TUNER
(radio) et AUX-IN.
Note : Le mode IPOD n’est pas disponible
lorsqu’aucun iPod n’est branché sur
l’appareil.
3 AVANCE
RAPIDE/
RECHERCHE
En mode IPOD, appuyer et maintenir pour
l’avance rapide.
En mode TUNER, appuyer pour rechercher
la fréquence suivante.
4 RETOUR
RAPIDE/
RECHERCHE
En mode IPOD, appuyer et maintenir pour
le retour rapide.
En mode TUNER, appuyer pour rechercher
la fréquence précédente.
5, 7,
18,
21
Clavier de
navigation
En mode IPOD, naviguer dans le menu
iPod.
6 PLAYLIST + En mode IPOD, passe à la playlist
suivante.
8 PLAYLIST - En mode IPOD, passe à la playlist
précédente.
9 MENU/
MEMOIRE
En Mode IPOD, appuyer pour acher le
menu iPod.
En mode TUNER, appuyer pour prérégler
des stations radio.
Page 65

www.cobyusa.com Page 65
Français
Clé Description
10 SILENCE
(MUTE)
Appuyer pour couper le son en modes
IPOD, TUNER et AUX.
En mode STANDBY, appuyer et maintenir
pour restaurer les réglages d’origine et
réinitialiser les fonctions du réveil.
11 SOMMEIL/
HEURE
En mode STANDBY, appuyer pour acher
l’HEURE.
Lorsque l’unité est en marche, appuyer
plusieurs fois pour acher L’HEURE,
L’ALARME 1-2, LE TYPE D’ALARME 1-2 ET
L’HEURE SNOOZE.
Pour plus de renseignements sur les
fonctions du réveil, voir la section
réglages horloge.
12 EQ Appuyer pour choisir le mode equalizer
(FLAT, JAZZ, CLASSIQUE, POP, ROCK) pour
lecture audio.
13 SUIVANT/
ALARME 2/
CH+
En mode STANDBY, appuyer pour voir
l’HEURE ALARME 2
En mode IPOD, appuyer pour passer à la
piste suivante.
En mode TUNER, appuyer pour rechercher
la fréquence suivante préréglée.
Vue Générale du Produit
Page 66

Page 66 Coby Electronics Corporation
Français
www.cobyusa.com Page 67
Vue Générale du Produit
Clé Description
14 LECTURE/
PAUSE/
STEREO
En mode IPOD, appuyer pour écouter ou
mettre en pause.
En mode TUNER, appuyer pour naviguer
entre la réception radio FM Stéréo/Mono.
15 PRECEDENT/
ALARME 1/ CH-
En mode STANDBY, appuyer pour voir
l’HEURE ALARME 1
En mode IPOD, appuyer pour passer à la
piste précédente.
En mode TUNER, appuyer pour rechercher
la fréquence précédente préréglée.
16 STOP Arrête la lecture en mode IPOD.
17 ALBUM + En mode IPOD, passe à la piste suivante.
19 ENTER Appuyer pour conrmer la sélection menu
IPOD ou les réglages de l’appareil.
20 ALBUM - En mode IPOD, passe à la piste précédente.
22 REPETE/SCAN En mode IPOD, appuyer pour régler la
fonction répétition.
En mode TUNER, appuyer pour scanner
toutes les fréquences radio. Appuyer de
nouveau pour arrêter le scan.
23 Volume +/- Augmente ou diminue le volume en
modes IPOD, TUNER et AUX.
Page 67

www.cobyusa.com Page 67
Français
Reglages du Reveil
Mode réglage
Pour accéder au mode REGLAGE de l’horloge, mettre
l’appareil en mode VEILLE, puis appuyer et maintenir sur
[SOMMEIL/HEURE].
Appuyer [SOMMEIL/HEURE] pour naviguer parmi
les éléments du menu (REVEIL, ALARM, ALARM,
SNOOZE, etc.) et les sections (HEURE/MINUTE, TYPE
D’ALARME, etc.).
Appuyer sur [PRECEDENT/ALARME CH] ou [SUIVANT/
ALARME /CH+] pour régler les valeurs ou changer
d’options. Appuyer sur [SOMMEIL/HEURE] pour
conrmer.
Appuyer de nouveau sur [SOMMEIL/HEURE] pour
passer à l’élément de réglage suivant.
Pour régler l’HEURE:
Appuyer sur [SOMMEIL/HEURE] pour accéder au mode
HEURE DU REVEIL. Choisir HEURE DU REVEIL en suivant
les instructions ci-dessus.
Page 68

Page 68 Coby Electronics Corporation
Français
www.cobyusa.com Page 69
Pour régler L’ALARME
Cet appareil inclut une alarme qui permet de prérégler
heures de réveil. Appuyer sur [SOMMEIL/HEURE] pour
accéder au mode de réglage de l’alarme. Choisir HEURE
DU REVEIL et le TYPE D’ALARME en suivant les instructions
ci-dessus. Pour plus d’informations sur le TYPE D’ALARME,
voir ci-dessous.
Pour régler l’alarme iPod
Choisir le type d’ALARME: IPOD. Brancher l’iPod sur la
station et le mettre en mode VEILLE. L’iPod s’allumera
selon l’HEURE DE REVEIL. Si aucun iPod n’est branché sur
la station, l’unité sonnera à l’HEURE DU REVEIL. Si l’unité
est allumée, et que l’iPod est utilisé à l’HEURE DU REVEIL,
il s’arrêtera et l’alarme sonnera. L’iPod reprendra lorsque
l’alarme sera arrêtée.
Pour régler l’alarme radio
Choisir le type d’ALARME: RADIO. RADIO. Mettre l’appareil
en mode VEILLE. La radio s’allumera sur la fréquence la
plus récente à l’HEURE DU REVEIL. Si l’unité est allumée, et
que la radio est utilise à l’HEURE DU REVEIL, elle s’arrêtera
et l’alarme sonnera. La radio reprendra lorsque l’alarme
sera arrêtée.
Pour régler l’alarme AUX
Choisir le type d’ALARME: AUX. Mettre l’appareil en mode
VEILLE. L’unité s’allumera en mode AUX à l’HEURE DU
REVEIL. Si l’unité est allumée à l’HEURE DU REVEIL, elle
s’arrêtera et l’alarme sonnera. Le mode AUX reprendra
lorsque l’alarme sera arrêtée.
Reglages du Reveil
Page 69

www.cobyusa.com Page 69
Français
Pour régler le buzzer
Choisir le type d’ALARME: BUZZER. Assurez-vous que
l’appareil soit allumé; le buzzer ne sonnera pas si l’unité est
en mode VEILLE. Le buzzer sonnera à l’HEURE DU REVEIL.
La sonnerie dure une minute et devient graduellement
plus forte si elle n’est pas arrêtée.
Pour arrêter L’ALARME
Appuyer sur ALARME ou ALARME pour éteindre et
réinitialiser l’alarme.
Pour utiliser la fonction SNOOZE
Pour retarder l’alarme sur une courte période (- minutes),
appuyer sur SNOOZE. La fonction snooze est disponible
jusqu’à fois par alarme, ensuite l’alarme s’éteindra. Pour
plus d’informations sur le réglage de la fonction SNOOZE,
veuillez voir les instructions ci-dessus.
Pour régler l’heure d’arrêt automatique
L’heure d’arrêt automatique éteindra l’appareil automatiquement après une période de temps préréglée (-
minutes). Pour programmer l’heure d’arrêt automatique,
allumer l’appareil. Appuyer et maintenir sur [SOMMEIL/
HEURE] pour accéder au mode AUTO OFF. Appuyer a
plusieurs reprises pour régler l’heure d’arrêt automatique.
Pour bloquer cette fonction, sélectionner ‘’.
Reglages du Reveil
Page 70

Page 70 Coby Electronics Corporation
Français
www.cobyusa.com Page 71
Reglages du Reveil
Pour acher les réglages de l’heure et de l’alarme :
En mode STANDBY, appuyer sur [SOMMEIL/HEURE]
pour acher l’HEURE. Appuyer sur [ALARME ] et
[ALARME ] pour acher l’HEURE DE REVEIL.
Sur le mode ON, appuyer à plusieurs reprises sur
[SOMMEIL/HEURE] pour acher L’HEURE, L’HEURE
DE REVEIL (&), le TYPE D’ALARME (&) et l’HEURE
SNOOZE.
Page 71

www.cobyusa.com Page 71
Français
Radio Mode
Utilisation de la radio
Pour écouter la radio, appuyer sur [SOURCE], puis sélectionner le mode TUNER.
Autoscan
Appuyer sur [REPETE/SCAN] pour scanner toutes les
fréquences radio disponibles de . à MHz. Appuyer
sur [STOP] pour arrêter le scan.
Recherche
Appuyer et maintenir sur [RECHERCHE+] pour avoir
la fréquence radio suivante. Appuyer et maintenir sur
[RECHERCHE -] pour avoir la fréquence précédente.
Tuning
Appuyer sur [RECHERCHE+] ou [RECHERCHE -] pour augmenter ou diminuer la fréquence de , MHz.
Programmer la mémoire station
Cet appareil peut mémoriser jusqu’à fréquences radio
préréglées. Pour régler une fréquence, appuyer sur
[MENU/MÉMOIRE] pour entrer dans le mode de programmation. (l’écran achera « MEM »). Choisir la fréquence
désirée en appuyant sur CH+/CH-. Pour conrmer votre
choix, appuyer sur [MENU/MÉMOIRE].
Écouter la radio
Appuyer sur [CH+] ou [CH-] pour passer à la station
préréglée suivante ou revenir à la précédente.
Page 72

Page 72 Coby Electronics Corporation
Français
www.cobyusa.com Page 73
Radio Mode
Appuyer sur [ST/MO] pour changer les réglages de
réception du mode FM.
Pour plus d’informations sur les fonctions [EQ],
[MUTE] et [VOL+/-] en mode TUNER, référez-vous au
chapitre sur la télécommande.
Si le système est un mode de programma-
tion, vous devez conrmer votre sélection et
quitter la programmation en appuyant sur
[MENU/MÉMOIRE] avant d’utiliser le scan.
Page 73

www.cobyusa.com Page 73
Français
iPod Mode
Branchez votre iPod à la connexion sur le panneau haut de
l’appareil pour une lecture audio de grande qualité.
Adaptateurs iPods
Pour assurer une connexion
correcte, plusieurs adaptateurs iPod sont inclus avec
cet appareil. Avant de vous
connecter, veuillez choisir le
correct adaptateur en fonction
de votre modèle iPod.
Pour installer un nouvel adaptateur, l’insérer dans la station jusqu’à ce qu’il soit fermement en place.
Vérier que la taille de l’adaptateur est la bonne
pour votre iPod avant de faire le branchement.
Pour éviter d’endommager le système, éteignez
l’unité avant de brancher ou de débrancher votre
iPod.
Lorsqu’elle est allumée, l’unité rechargera la pile
de l’iPod.
Cet appareil ne comprend pas de décodeur vidéo;
si vous choisissez une vidéo dans votre menu iPod,
vous n’aurez que le son.
Opération de lecture
Après avoir branché votre iPod sur la station,
allumez-le. Appuyer sur [SOURCE] pour sélectionner
le mode IPOD.
Page 74

Page 74 Coby Electronics Corporation
English
www.cobyusa.com Page 75
iPod Mode
Les touches [MENU] et de direction
correspondent aux fonctions de
votre iPod :
Appuyer sur [MENU]
pour acher le menu
iPod; utilisez les touches
du haut [UP] ou du bas
[DOWN] pour faire un choix.
Appuyez sur [RIGHT] pour entrer dans le sous-
menu de la sélection.
Appuyez sur [LEFT] ou [MENU] pour revenir au
menu précédent.
Pendant la lecture, appuyez sur [LECTURE/PAUSE]
pour mettre en pause; appuyez pour reprendre la
lecture.
Appuyez sur [STOP] pour arrêter la lecture.
Appuyez sur [PLAYLIST-]/[PLAYLIST+] pour passer au
morceau suivant/revenir au précédent.
Appuyez sur [ALBUM-]/[ALBUM+] ou [NEXT]/[NEXT]
pour passer à la chanson suivante/ précédente.
Appuyez et maintenez sur [AVANCE RAPIDE] pour
une avance rapide; pour un retour rapide, appuyez et
maintenez sur [FAST REWIND].
Appuyez sur [REPEAT] à plusieurs reprises pour
changer le mode répétition.
Pour plus d’informations sur les fonctions [EQ],
[MUTE] et [VOL+/-] en mode IPOD, référez-vous au
chapitre sur la télécommande.
Page 75

www.cobyusa.com Page 75
English
AUX IN Mode
Connexions à des équipements externes
Vous pouvez proter d’une lecture haute-qualité depuis
un lecteur CD, DVD ou autres appareils au travers des hautparleurs de l’unité.
Pour brancher un appareil extérieur :
Pour votre sécurité, débrancher le cordon électrique
avant de brancher un appareil externe.
Utiliser une paire de câbles audio pour brancher le
périphérique de sortie audio de votre équipement
externe sur le périphérique d’entrée au dos de l’unité.
Brancher le câble blanc sur le périphérique d’entrée
audio à gauche, et le câble rouge à droite.
Une fois les branchements eectués, allumer l’unité.
Appuyer sur [SOURCE] pour sélectionner le mode
AUX. Choisir le playback sur l’appareil externe pour
écouter au travers des haut-parleurs de l’unité.
Pour plus d’informations sur les fonctions [EQ],
[MUTE] et [VOL+/-] en mode AUX-IN, référez-vous au
chapitre sur la télécommande.
Page 76

Page 76 Coby Electronics Corporation
Français
www.cobyusa.com Page 77
Si vous avez un problème avec votre appareil, reportezvous au guide de dépannage ci-dessous et consultez notre
site Web www.cobyusa.com pour consulter la FAQ (Foire
aux questions) et vérier la disponibilité des mises à jour
des micrologiciels. Si ces ressources ne vous aident pas
à résoudre le problème, veuillez communiquer avec le
service d’assistance technique.
Adresse
Coby Electronics Technical Support
56-65 Rust Street
Maspeth, NY 11378
Email
techsupport@cobyusa.com
Site Web
www.cobyusa.com
Téléphone
800-727-3592: de 8h00 à 23h00 EST, en semaine
de 9h00 à 17h30 EST, le samedi
718-416-3197: de 8h00 à 17h30 EST, du lundi au vendredi
Dépannage
En cas de problèmes de fonctionnement de vos hautparleurs, veuillez procéder comme suit :
Vériez que les branchements du cordon
d’alimentation à l’appareil et à la prise de courant
sont sûrs.
Vériez que l’appareil a été mis en marche.
Vériez le niveau du volume.
Vériez que le mode audio correct est sélectionné.
Page 77

www.cobyusa.com Page 77
Français
Dépannage
Vériez qu’un iPod compatible et qu’un adaptateur
correct ont été insérés dans la station d’accueil.
Vériez que la fréquence radio correcte est sélection-
née.
En cas de problèmes lors de l’utilisation de la télé-
commande, vériez que les piles ont été insérées et
qu’elles sont entièrement chargées.
Veuillez vous reporter au tableau ci-dessous pour le
dépannage courant.
Problème Cause Solution
Pas d'audio / pas
d'achage
L’appareil n’est pas
branché
Branchez l'appareil
et refaites la vérication
L’appareil n’est pas
allumé
Allumez l’appareil
et refaites la vérication
Fiche de branchement défectueuse
Adressez-vous
au fabricant pour
changer la che
Page 78

Page 78 Coby Electronics Corporation
Français
www.cobyusa.com Page 79
Dépannage
Problème Cause Solution
L’iPhone indique
un message
d’erreur lors de
la connexion à la
station d’accueil
Mauvais mode audio
sélectionné
Sélectionnez le
mode audio correct
Niveau de volume
trop faible
Réglez le volume au
moyen des contrôles
+/– sur l'appareil
iPod mal connecté Enlevez l’iPod de la
station d’accueil et
reconnectez-le
Équipement défectueux (haut-parleur,
iPod, branchement de
la station d’accueil)
Adressez-vous au
fabricant
Mauvaise réception FM, électricité statique ou
friture
Interférence d’autres
appareils ; qualité de
réception faible
Changez la position
de l’antenne FM ou
déplacez l’appareil
L’iPhone ne fonctionne
pas en mode avion
Sélectionnez le
mode avion avant de
connecter l’iPhone à
la station d’accueil
L’iPhone indique
un message
d’erreur lors de
la connexion à la
station d’accueil
L’iPhone peut causer
une interférence
lorsqu’il est utilisé à
l’extérieur en mode
avion
Sélectionnez le
mode avion avant de
connecter l’iPhone à
la station d’accueil
Page 79

www.cobyusa.com Page 79
Français
Alimentation CA 100-240V ~ 50/60Hz
Alimentation de Sortie 3W x 2 (RMS)
Entrée auxiliaire RCA 3,5 mm
Système de Tuner Radio FM
Compatible avec
Les caractéristiques et le manuel utilisateur sont sujet à modications sans préavis.
Spécications
Page 80

Page 80 Coby Electronics Corporation
Français
www.cobyusa.com Page 81
Le symbole en forme d’éclair éché placé dans un triangle équilatéral informe l’utilisateur de la présence de “tensions dangereuses” non isolées au sein du boîtier du produit dont l’amplitude
peut constituer un risque de décharge électrique.
Le point d’exclamation placé dans un triangle équilatéral informe
l’utilisateur que des instructions d’utilisation et de maintenance
importantes sont fournies dans la documentation qui accompagne
le produit.
Information client :
Notez ci-après le numéro de série situé sur l’appareil. Conservez
ces informations pour pouvoir vous y référer ultérieurement.
Numéro du modèle CSMP160
Numéro de série
AVERTISSEMENT : An d’éviter tout risque d’incendie ou de décharge électrique,
n’exposez pas cet appareil à la pluie ou à l’humidité. Le boîtier renferme des tensions
élevées dangereuses. N’ouvrez pas le boîtier de l’appareil.
ATTENTION : An d’éviter toute décharge électrique, alignez la broche large de la che
en face de l’orice large de la prise électrique et insérez-la complètement.
Protégez votre audition : Les spécialistes de l’audition déconseillent l’utilisation
prolongée d’écouteurs stéréo à un niveau de volume élevé. L’écoute à un niveau
de volume élevé constant peut provoquer des pertes auditives. Si vous souffrez de
bourdonnements dans les oreilles ou de perte d’audition, arrêtez d’utiliser les écouteurs
et consultez votre médecin.
Pour de plus amples informations sur le recyclage ou la mise au rebut de ce
produit, veuillez contacter les autorités locales ou les représentants de l’EIA
(Alliance des industries du secteur de l’électronique) : www.eiae.org.
Notices de Sûreté
Page 81

www.cobyusa.com Page 81
Français
Déclaration FCC
Cet appareil est conforme avec la section 15 des Règles FCC. Le fonctionnement est
sujet aux deux conditions suivantes :
(1) Cet appareil ne peut causer d’interférences dangereuses, et
(2) Cet appareil doit accepter toute interférence, y compris une interférence
pouvant causer une action non souhaitée.
Note: Cet équipement a été testé et déclaré conforme aux limites de la classe B des
équipements digitaux, conformément à la section 15 des Règles FCC. Ces limites
ont été créées pour fournir une protection raisonnable contre des interférences
néfastes au sein d’une installation résidentielle. Cet équipement génère, utilise et peut
émettre de l’énergie de fréquence radio, qui, si non installée et utilisée correctement
pourrait causer des interférences néfastes aux communications radio. Cependant,
il n’y a aucune garantie qu’il n’y aura pas d’interférences. Si cet appareil cause des
interférences sur la réception radio ou télé, ce qui peut être déterminé en allumant et
en éteignant cet appareil, nous vous encourageons à essayer de corriger la situation
de la manière suivante :
Réorientez ou changez la position de l’antenne. •
Augmentez la séparation entre l’appareil et le récepteur. •
Branchez l’appareil à une prise différente de celle du récepteur. •
Consultez votre représentant en ventes ou un technicien qualié. •
L’utilisation de câbles électriques protégés est requise pour être conforme aux limites
de la classe B et la sous-partie B de la section 15 des règles FCC.
Ne pas effectuer de changements ou de modications a cet appareil, à moins que cela
ne soit indiqué dans ce manuel. Si de telles modications devaient être faites, il faudra
peut-être que vous arrêtiez d’utiliser cet appareil.
Notices de Sûreté
Page 82

Page 82 Coby Electronics Corporation
Français
www.cobyusa.com Page 83
Consignes de Sécurité Importantes
Lisez les instructions : Toutes les instructions de sécurité et de fonc-1.
tionnement devraient être lues avant utilisation.
Gardez ces instructions : Vous devriez conserver ce manuel pour 2.
référence future.
Mises en garde : Vous devriez respecter tous les avertissements et 3.
toutes les instructions pour ce produit.
Suivez les instructions : Vous devriez suivre toutes les instructions 4.
d’usage.
Nettoyage : Débrancher ce produit avant de le nettoyer. Ne pas uti-5.
liser de nettoyants liquide ou en aérosol. Utiliser un chiffon humide
pour nettoyer.
Attaches : N’utilisez que les attaches recommandées par le fabri-6.
cant. L’utilisation d’autres attaches pourrait être dangereuse.
Eau et humidité : Ne pas utiliser ce produit près d’une source d’eau 7.
(par ex, près d’une baignoire, d’un évier, de la machine à laver, dans
une cave humide ou près d’une piscine et équivalent).
Ventilation : Les fentes et ouvertures du couvercle sont faites pour 8.
la ventilation et pour empêcher une surchauffe. Ces ouvertures ne
devraient jamais être bloquées par un lit, un canapé, un tapis ou
similaire. Ce produit ne devrait jamais être mis sur une installation
murale, comme une étagère, à moins que la ventilation soit adéquate
et que les instructions du fabricant aient été suivies.
Sources de courant : Ce produit ne devrait fonctionner qu’avec le 9.
type de courant indiqué sur l’étiquette. Si vous n’êtes pas certain du
type de courant, demandez à votre représentant en vente ou à votre
compagnie d’électricité. Pour les produits fonctionnant avec une pile
ou autres sources, veuillez consulter les instructions.
Protection des câbles électriques : Les câbles électriques devraient 10.
être disposés de façon à ce qu’ils ne soient pas piétinés et à ce
qu’aucun objet ne soit mis sur eux; faire attention au niveau des
prises murales et aux périphériques de sortie du produit.
Orage : Pour une meilleure protection de cet appareil en cas 11.
d’orage, ou lorsqu’il n’est pas utilisé pendant de longues périodes,
débranchez-le et déconnectez l’antenne ou le câble. Cela évitera
des dommages dus aux orages ou à une surcharge de courant.
Notices de Sûreté
Page 83

www.cobyusa.com Page 83
Français
Surcharge : Ne pas faire de multiples branchements dans les prises, 12.
avec les rallonges électriques ou des multiprises car cela pourrait
entrainer un incendie ou une électrocution.
Insertion d’objet ou de liquide: Ne jamais insérer d’objets dans 13.
les fentes de ce produit; ils pourraient entrer en contact avec des
composants électriques et cela pourrait causer un incendie ou une
électrocution. Ne jamais renverser de liquide sur cet appareil.
Maintenance : Ne tentez pas de réparer ce produit vous-même; 14.
ouvrir ou enlever l’enveloppe du produit pourrait vous exposer à un
voltage dangereux ou à d’autres risques. Ne faire appel qu’à des
professionnels qualiés.
Dégâts requérant des réparations : Débranchez cet appareil et 15.
conez-le à un professionnel qualié dans les cas de gure suivants
: A) Si la prise est endommagée. B) si du liquide a été renversé sur
le produit ou si des objets sont tombés dessus. C) si le produit a
été exposé a de la pluie ou de l’eau. D) si ce produit ne fonctionne
pas normalement, même en suivant les instructions suivantes. Ne
régler que les contrôles inclus dans les instructions. Un mauvais réglage des contrôles pourrait résulter en des dégâts et devra requérir
beaucoup de travail de la part d’un technicien qualié pour restaurer
le produit en mode opératoire normal. E) si ce produit est tombé ou
a été endommagé de quelque manière. F) Si le produit montre un
changement signicatif dans sa performance—Cela indique une
nécessité de maintenance.
Pièces détachées : Si des pièces détachées sont requises, assurez-16.
vous que le technicien utilise les mêmes pièces que le fabricant ou
des pièces ayant les mêmes caractéristiques que les originales.
Des substitutions non autorisées pourraient causer un incendie, une
électrocution ou autres dangers.
Contrôle de sécurité : Si des réparations ont été effectuées sur ce 17.
produit, demandez au technicien de faire les contrôles de sécurité
recommandés par le fabricant an de déterminer que l’appareil est
en bonne condition de fonctionnement.
Chaleur : Ce produit devrait être placé loin de sources de chaleur 18.
comme des radiateurs, des indicateurs de chaleur, de cuisinières
ou autres produits (y compris des amplicateurs) étant source de
chaleur.
Notices de Sûreté
Page 84

Print v1.0
Coby is a registered trademark of Coby Electronics
Corporation. Printed in China.
COBY es la marca registrada de COBY Electronics
Corporation. Imprimido en China.
Coby est une marque de fabrique de Coby Electronics Corporation. Imprimé en Chine.
Coby Electronics Corporation
1991 Marcus Ave, Suite 301
Lake Success, NY 11042
www.cobyusa.com
www.ecoby.com
 Loading...