

Page 1
2
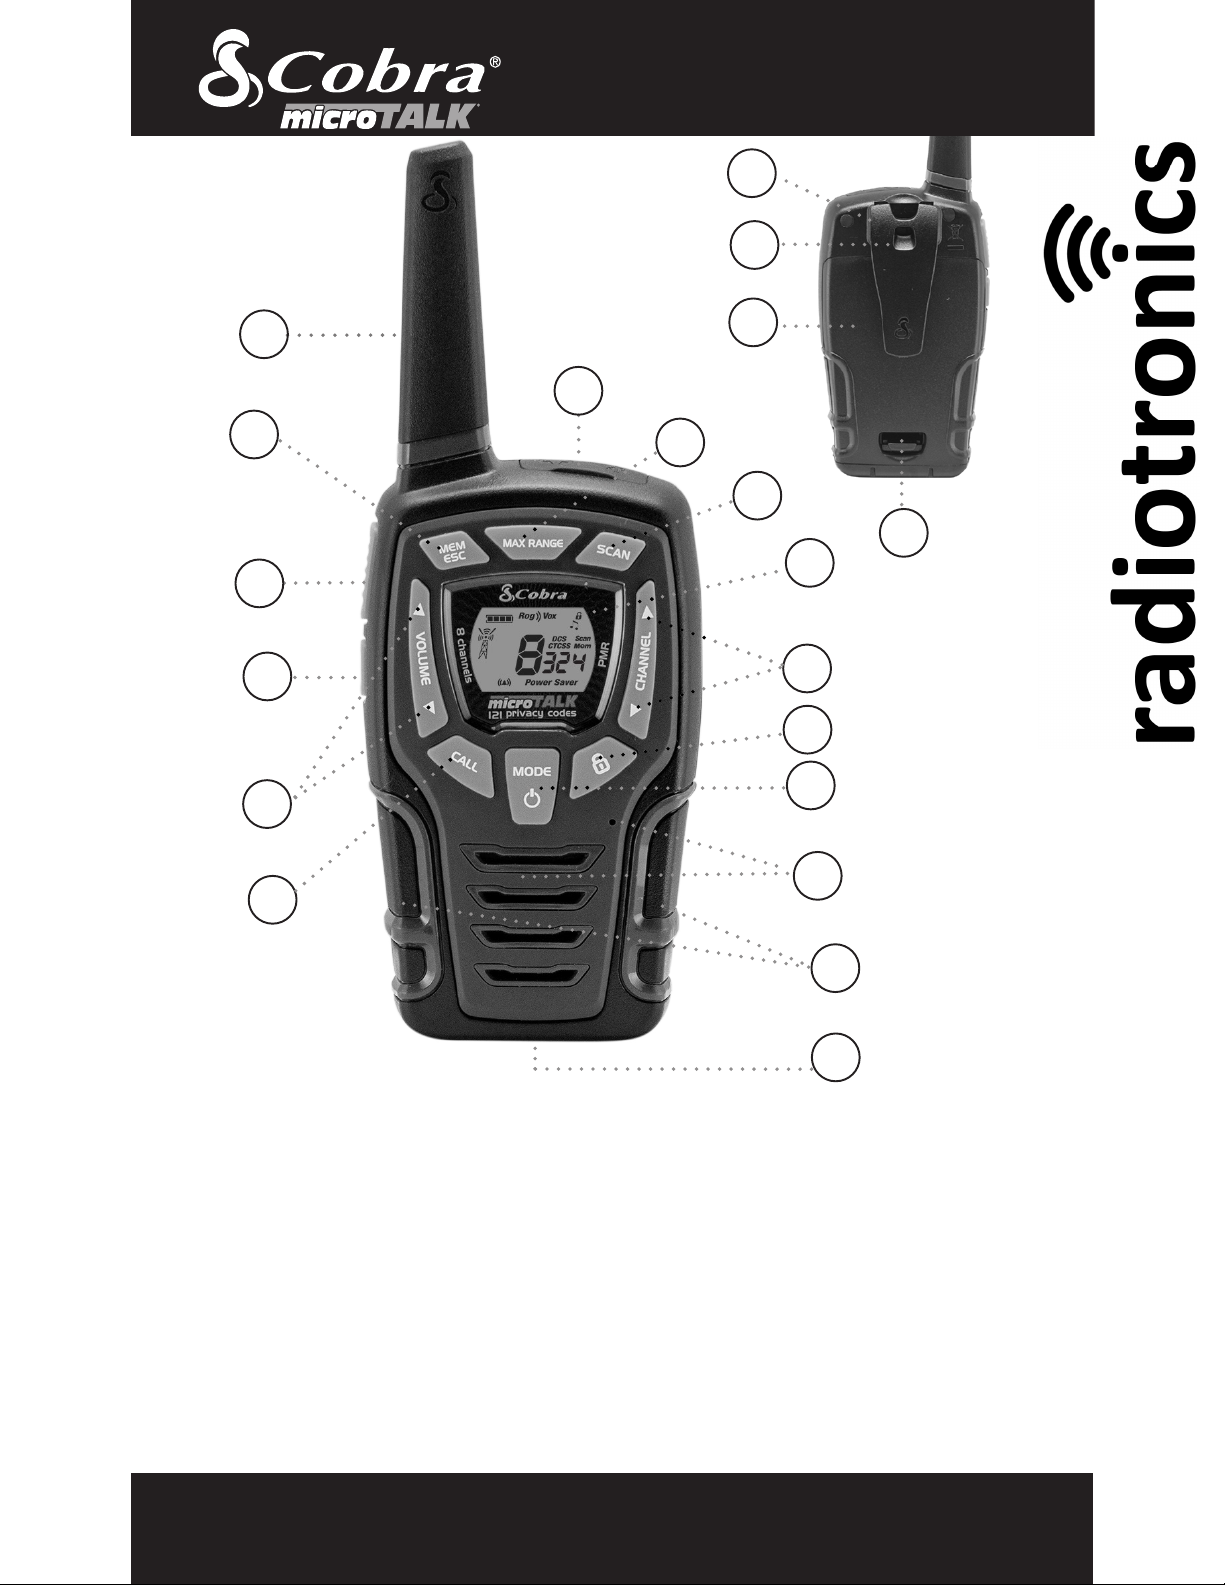
Product Features
1
3
7
4
8
11
5
15
14
16
17
10
6
9
1. Antenna
2. External Speaker/
Microphone/ USB Charge Jack
3. Mode/Power Button
4. Call Button
5. Channel Up/Down
Buttons
6. Backlit LCD Display
7. Speaker/Microphone
8. Volume Up/Down Buttons
9. LED Light Button
10. Talk Button
11. Memory/Escape Button
12. Max Range Button
13. Scan Button
14. Wrist Strap Connection
15. Belt Clip
16. Battery Compartment
17. Battery Door Latch
18. Rubberized Grips
19. LED Flashlight
20. Lock Button
Radio Controls
and Indicators
12
13
19
18
20
English
TWO-WAY RADIO MODEL
AM845
Nothing Comes Close to a Cobra
®
KEM-ML38403
Page 2

Product Features
Product Features
English
2
Features
• 8 Channels
•
121 Privacy Codes
(38 CTCSS codes/
83 DCS codes)
•
Hands-Free Operation
(VOX)
•
VibrAlert®
• Scan
Channels,
privacy codes
• Backlit LCD Display
• LED Flashlight
• Call Alert
Ten selectable
tones
•
Button Lock
• Speaker/
Microphone/
Charge Jack
• Roger Beep
Selectable On/Off
• Battery/Power Saver
• Keystroke Tones
• Battery Level
Indicator
• Low Battery
Audible Alert
• Auto Squelch
• Maximum
Range Extender
•
Belt Clip
Maximum range may vary and is based on
unobstructed line-of-sight communication
under ideal conditions.
Backlit LCD Display
1. Battery Level Indicator
2. Roger Beep Icon
3. VOX Icon
4. VibrAlert® / Call Alert Icon
5. Lock Icon
6. Key Tone Icon
7. DCS/CTCSS Icons
8. Scan/Memory Icon
9. Memory Channel Number
10. DCS/CTCSS Privacy Code Numbers
11. Power Saver Icon
12. Channel Numbers
13. Receive/Transmit Icon
1
2
3
5
11
12
13
10
8
7
9
4
6
Product Information Caring for Your Radio
This MicroTALK radio has been manufactured to
meet all required standards for radio equipment
using PMR 446 frequencies as authorized. The use
of this two-way radio product involves the public
airways and its use may be subject to local laws or
requlations. Contact your radio licensing authority
for more information.
Your MicroTALK radio will give you years of
trouble-free service if cared for properly. Here are
a few suggestions:
• Handle the radio gently.
• Keep it away from dust.
• Never put the radio in water or in a damp place.
• Avoid exposure to extreme temperatures.
*You are not allowed to use channels 1 and 2 in France.
This situation can change; please contact the French
radio licensing authority for more information.
®
®
Page 3
Operation
English
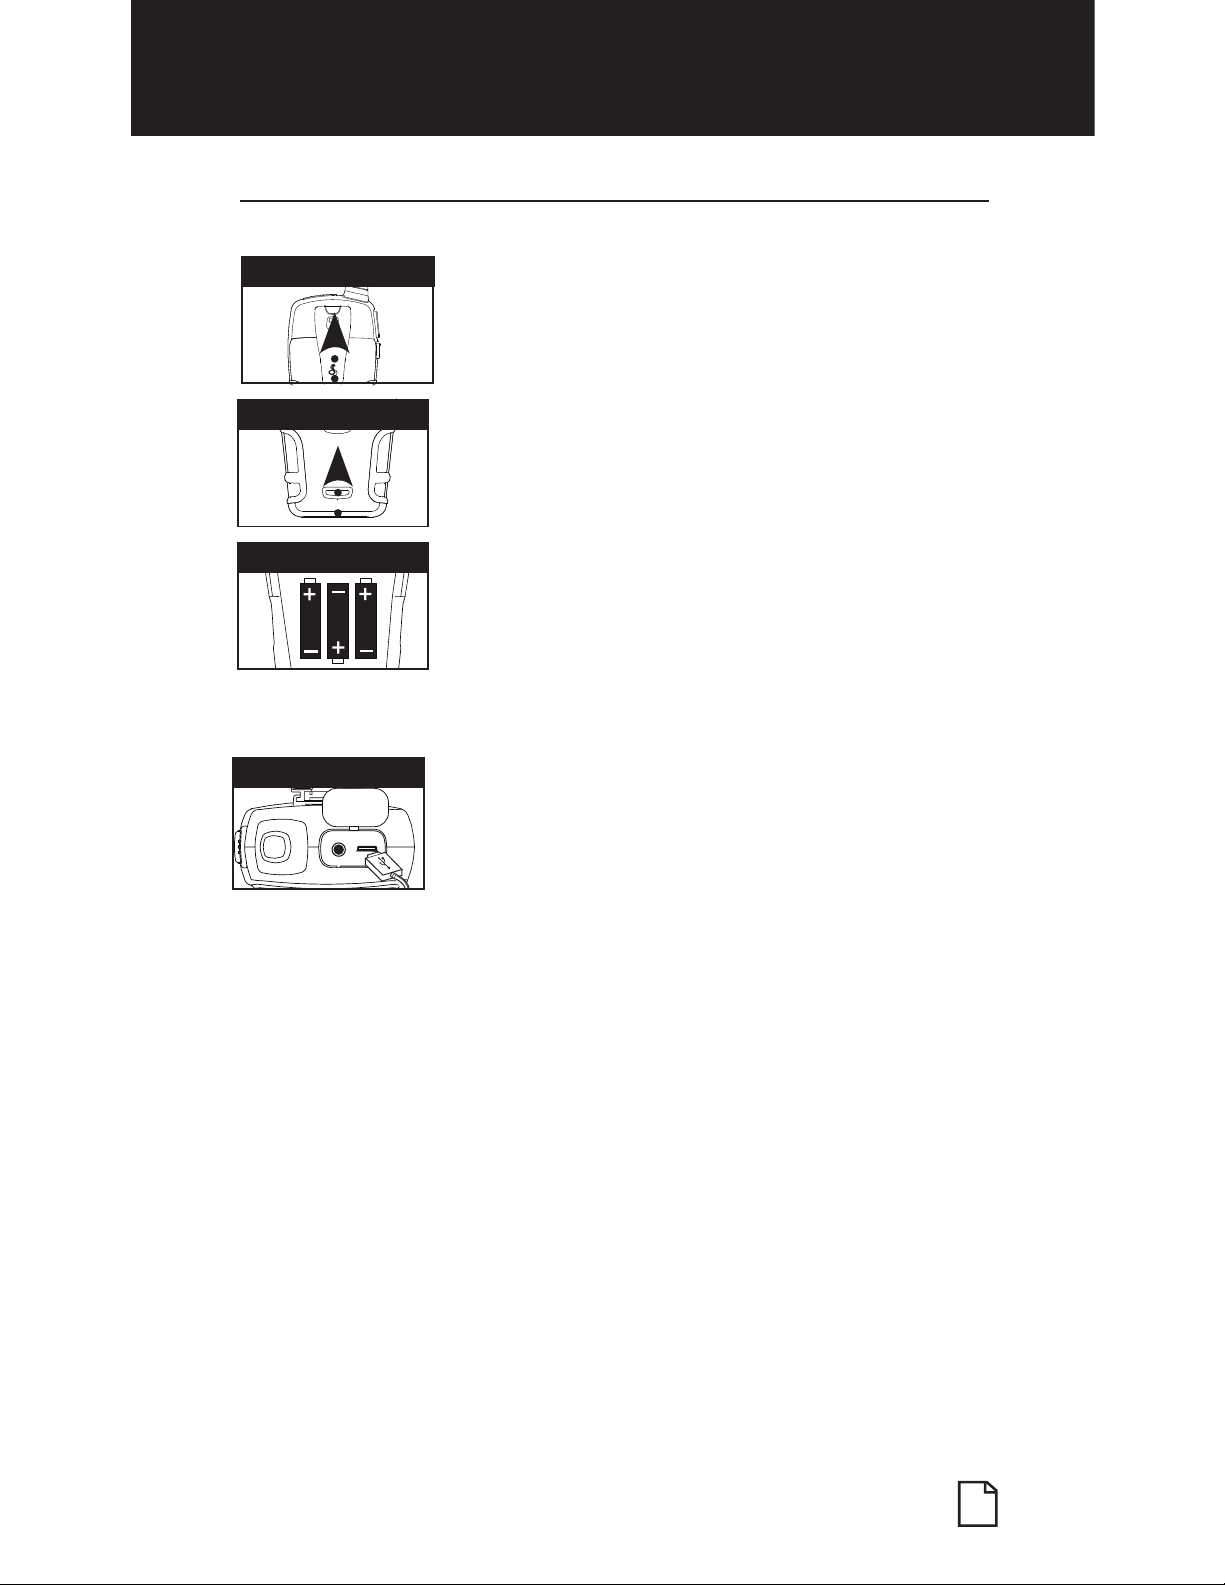
Installing Batteries
•
To install or replace batteries:
1. Remove belt clip by releasing belt clip
latch and sliding clip up.
2.
Pull up on the battery door latch to remove the battery
compartment cover.
3.
Insert the supplied three AA rechargeable batteries or non-
rechargeable alkaline batteries. Position batteries according
to polarity markings.
4. Replace battery compartment cover and
belt clip.
• Do not attempt to charge alkaline batteries.
• Do not mix old and new batteries.
• Do not mix alkaline, standard (carbon-zinc), or
rechargeable (Ni-Cd, Ni-MH, etc.) batteries.
Caution - Risk of fire or explosion if battery is replaced by an
incorrrect type. Dispose of used batteries
according to the instructions.
To charge batteries in radio:
1. Check to see that the batteries have been inserted properly.
2. Insert the cable into the charge jack located at the top of
the radio.
3. Plug the cable into USB-compatible power source.
Use only the supplied rechargeable batteries and charger for recharging
your Cobra microTALK radio.
Cobra recommends your radio is turned off while being charged.
Non-rechargeable alkaline batteries can also be used in your radio.
Maximum/Minimum Operating Range: -20°C to +45°C.
Maximum SAR values: 0.934W/kg for FM 25KHz (boby-Worn).
Remove Belt Clip
Pull Up Lock Latch
Insert Batteries
3
Nothing Comes Close to a Cobra
®
Radio Charger Jack
Page 4
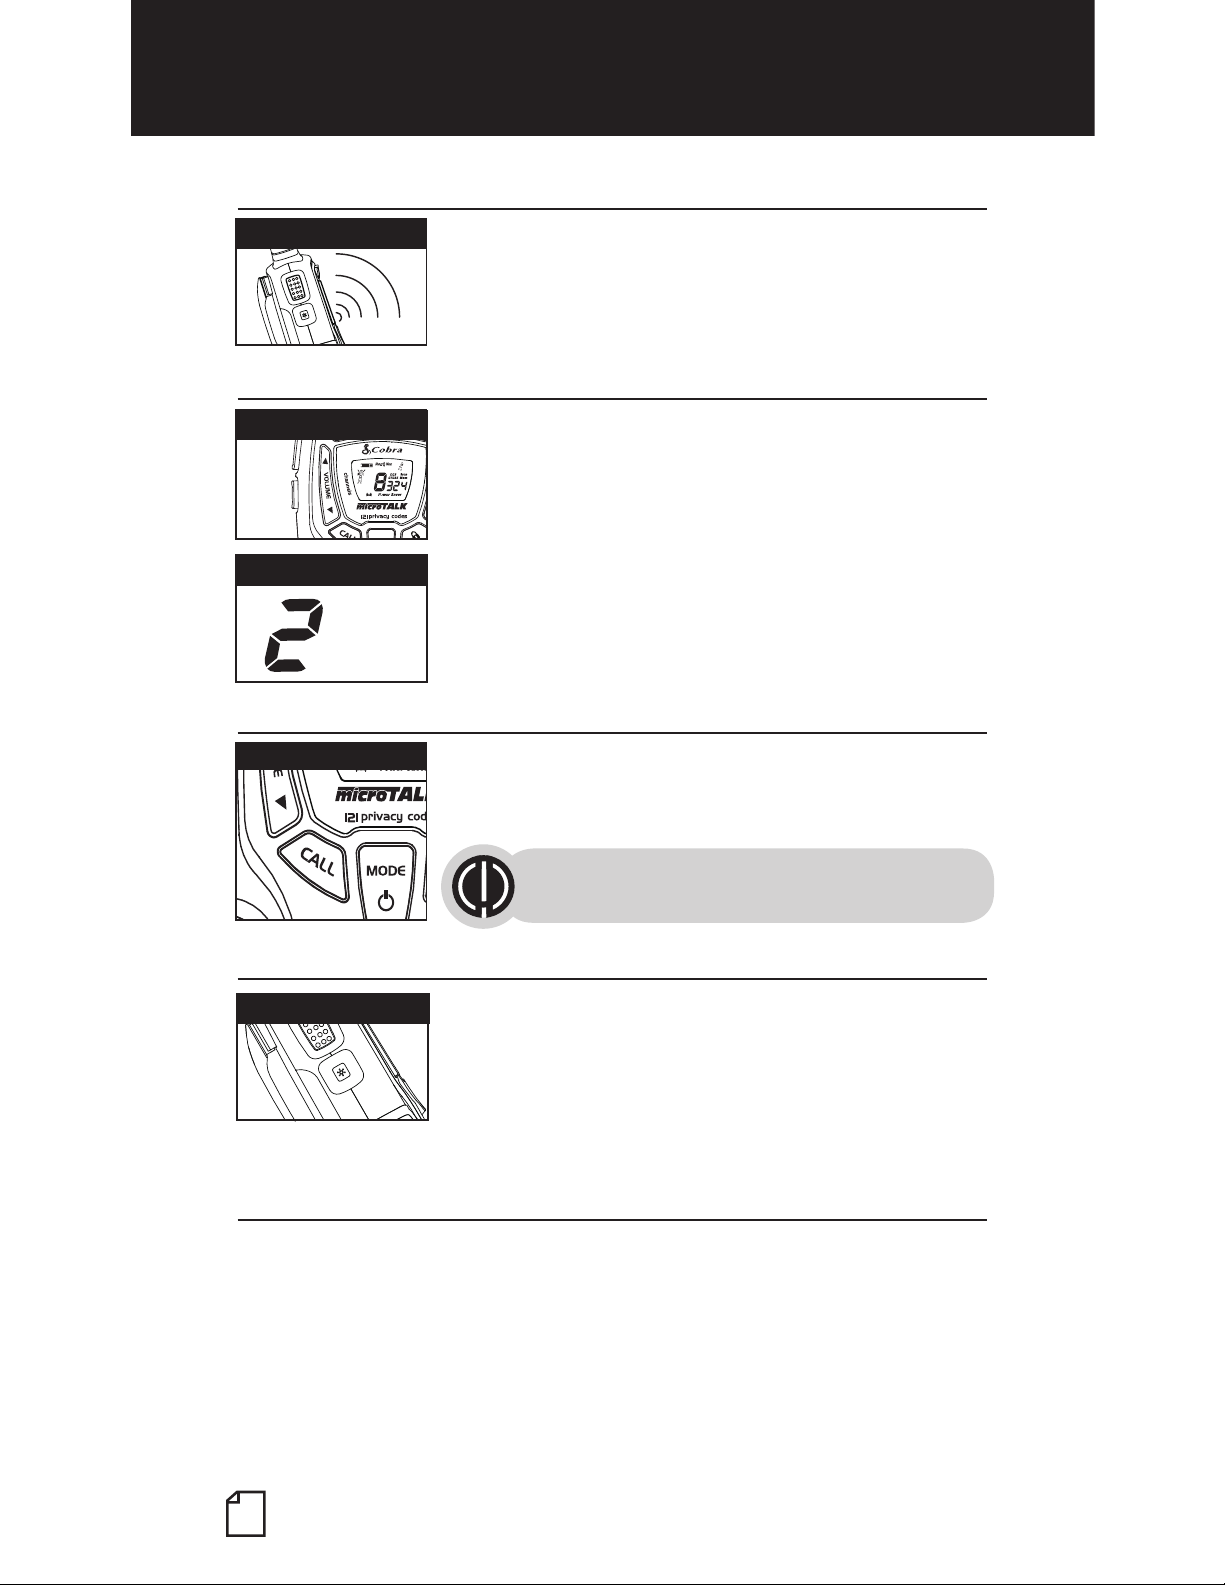
Turning on Your microTALK® Radio
•
Press and hold the Mode/Power button until you hear
a series of audible tones indicating the radio is on.
Your microTALK
®
radio is now in Standby mode,
ready to receive transmissions. The radio is always
in Standby mode except when the Talk, Call or
Mode/Power buttons are pressed.
Quick Start
1. Press and hold the Mode/Power button
to turn on your radio.
2.
Press the Channel Up or Channel Down
button to select a channel.
Both radios must be tuned to the same
channel/privacy code to communicate.
3.
Press and hold the Talk button while
speaking into the microphone.
4.
When finished talking, release the Talk
button and listen for a response.
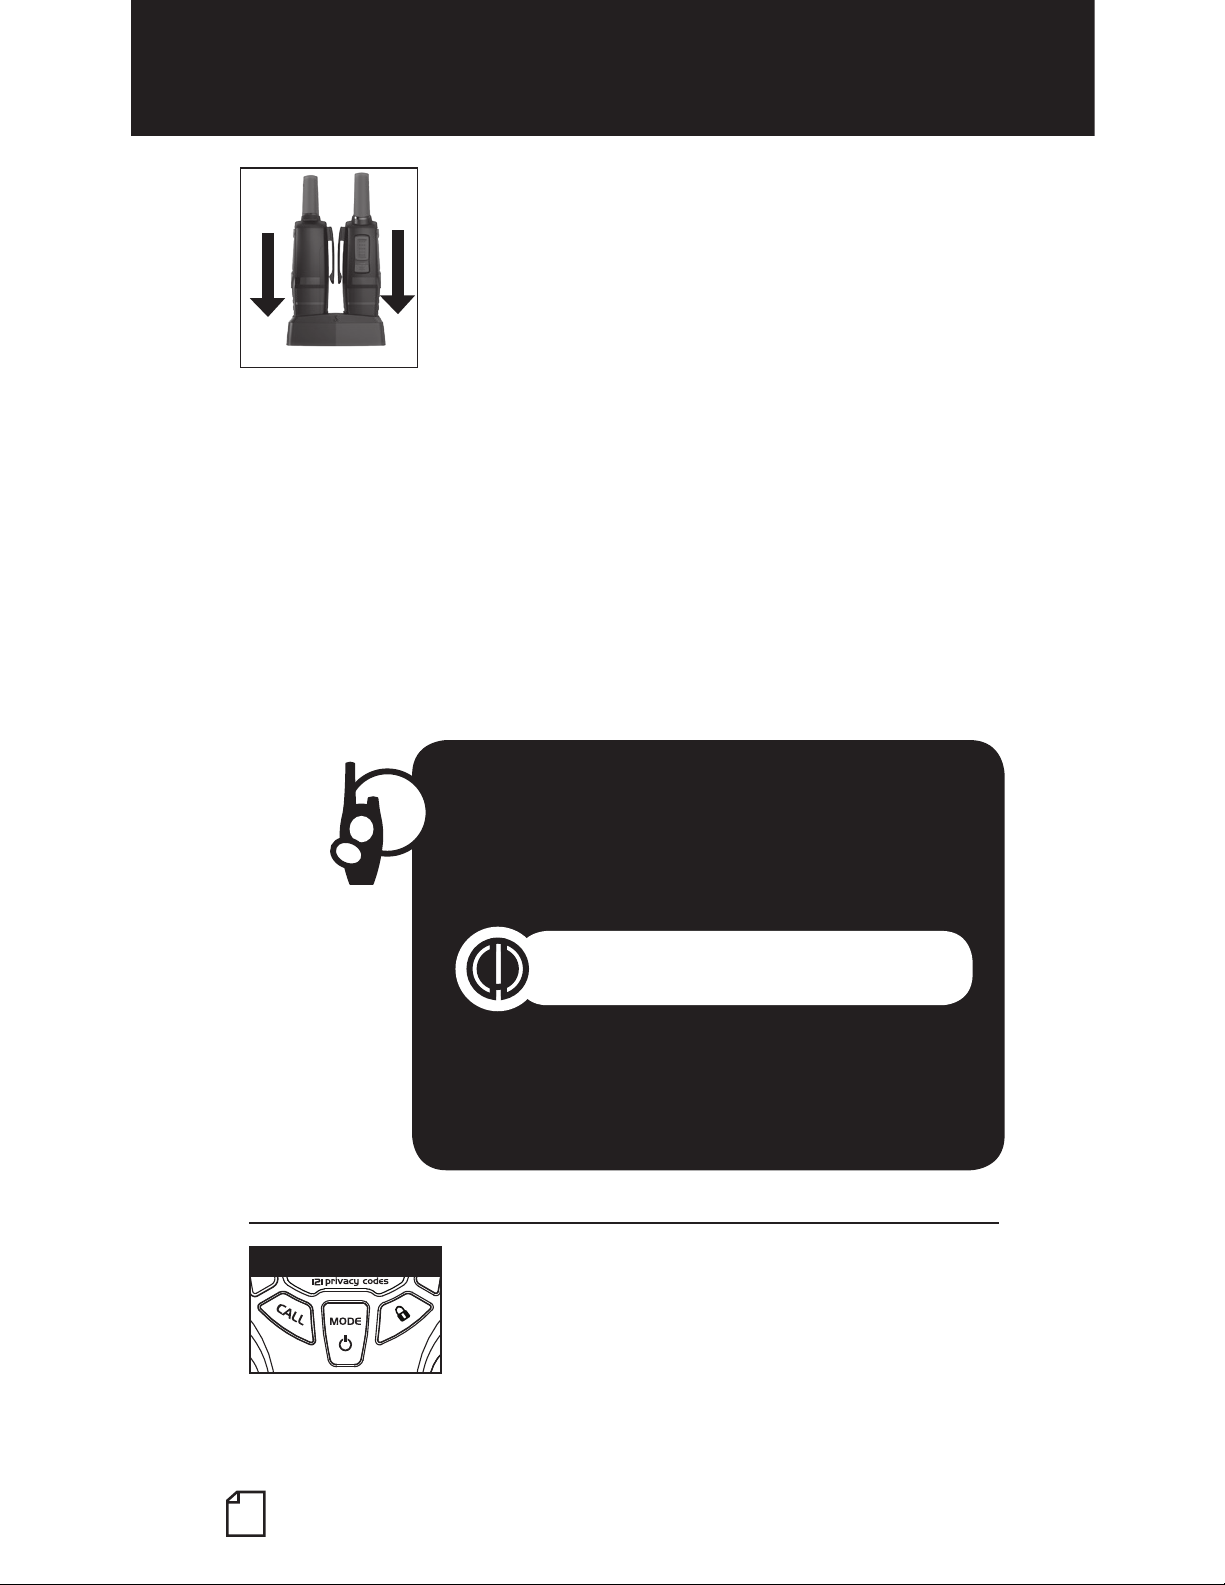
For charging microTALK radio(s) in desktop charger:
1. Insert radio(s) into desktop charger as shown.
2.
Insert the micro-USB cable into jack on back
of charger.
3.
Plug the cable into USB-compatible power port.
For pluggable equipment, the socket-outlet shall
be installed near the equipment and shall be easily
accessible.
If charging light is not on, check position of radio. Radio should be
upright. The charge indicator light will stay on as long as the radio is in
the charging well, and the light will go off when the charging is complete.
Note: To charge a single radio, you can bypass the desktop charger and
simply insert the micro-USB’s connector directly into the charge jack
located on the top of the radio.
The radio will display flashing battery icon while charging.
Cobra recommends your radio be turned off while being charged.
Product Features
Using Your Radio
English
4
08
PMR
SCAN
Mode/Power
Page 5
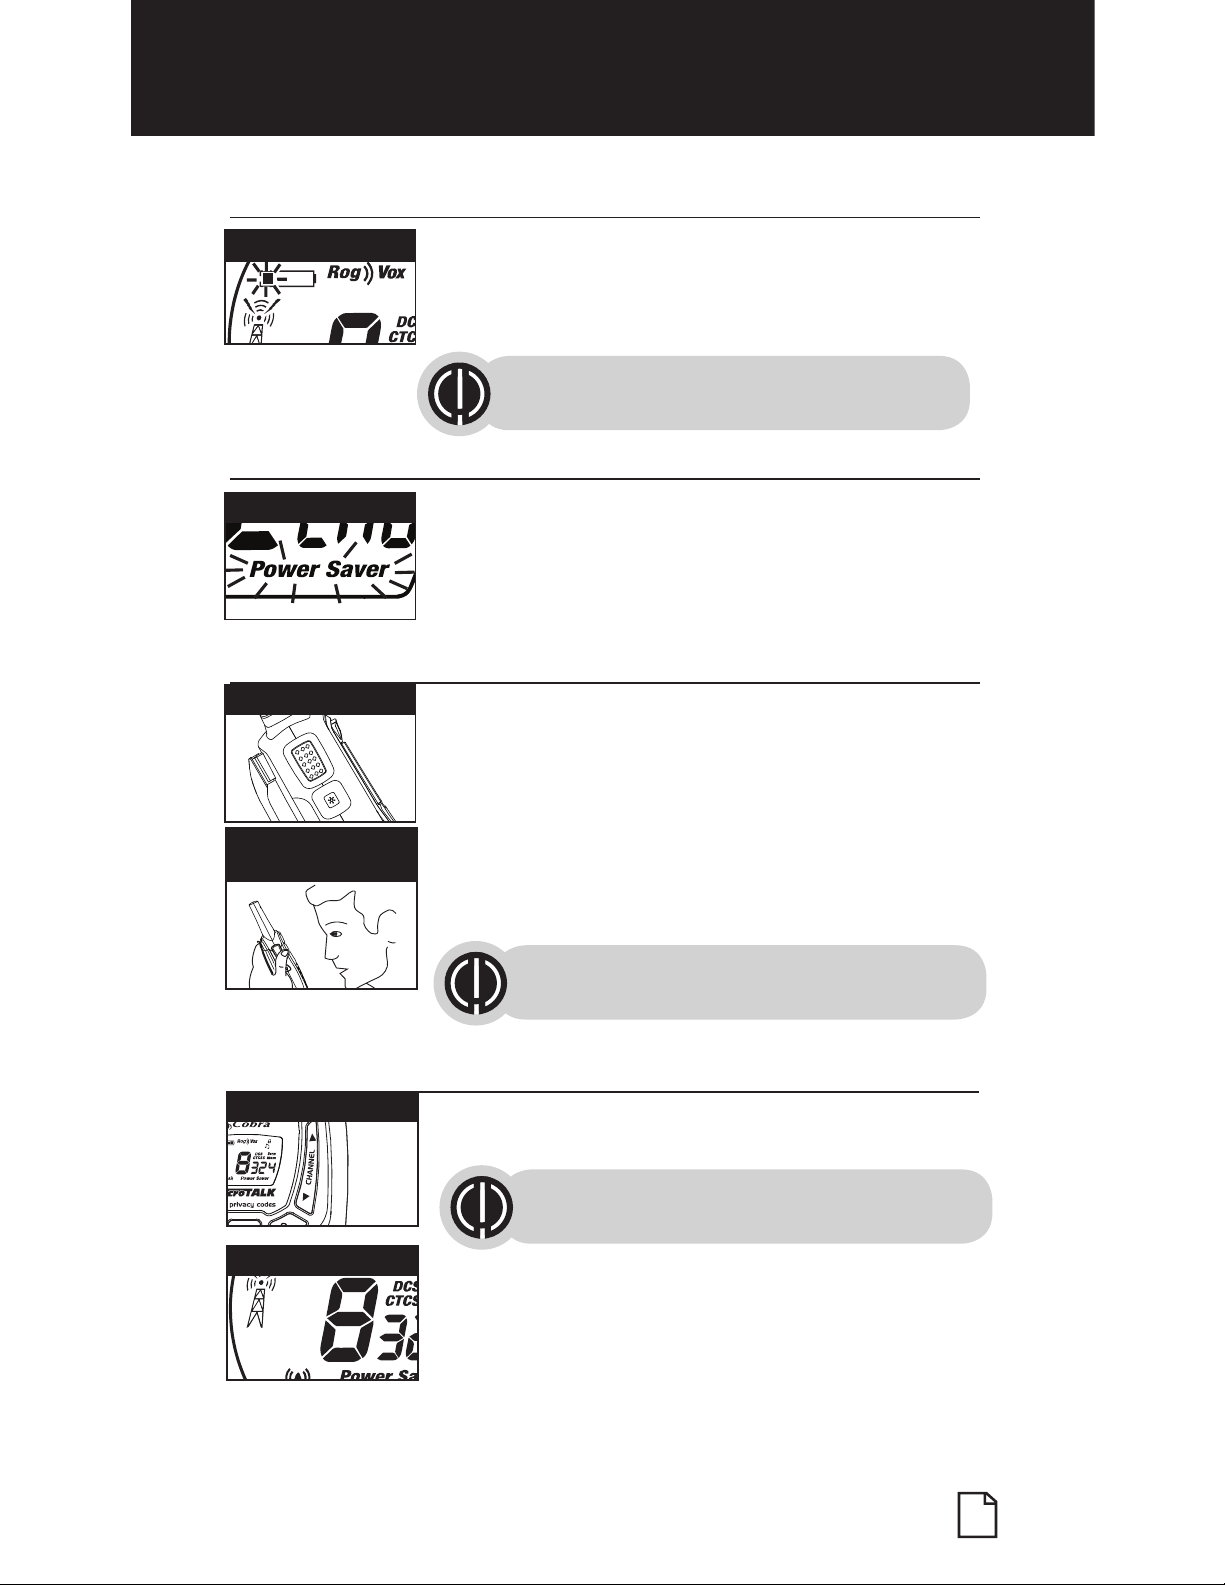
Battery Low
•
When battery power is low, the final bar in the Battery
Low icon will blink and an audible tone will sound twice
before the radio shuts off. Your batteries should be
replaced or recharged, if using rechargeable batteries.
Auto Battery Save
•
If there are no transmissions within 10 seconds,
the radio will automatically switch to Battery Save
mode and the Power Saver icon will flash in the
display. This will not affect the radio’s ability to
receive incoming transmissions.
Communicating with Another Person
•
1. Press and hold the Talk button.
2.
With the microphone about two inches (5 cm) from
your mouth, speak in a normal voice.
3.
Release the Talk button when you are
finished talking and listen for a response.
You cannot receive incoming calls while
pressing the Talk button.
Both radios must be tuned to the same
channel/privacy code to communicate.
Battery Low
Battery Save Mode
08
PMR
SCAN
Talk Button
Two Inches (5 cm)
from Mouth
PMR
SCAN
Channel Button
Channel Number
The radio will display flashing battery icon
while charging.
English
5
Nothing Comes Close to a Cobra
®
To Select a Channel
•
With the radio on, select any of the 8 channels by
pressing the Channel Up or Channel Down button.
Both radios must be tuned to the
same channel to communicate.
Both radios must be tuned to the same
channel/privacy code to communicate.
Page 6
Product Features
Using Your Radio
Listening for a Response
•
Release the Talk button to receive incoming
transmissions. Your microTALK
®
radio is always in
Standby mode while the Talk or Call buttons are
not pressed.
To Adjust Volume
•
Press the Volume Up or Volume
Down button.
A double beep sound is used to indicate
the minimum and maximum volume levels
(1 through 8).
Call Button
•
Press and release the Call button.
The other person will hear a three second call tone. This
tone is used only to establish voice communications.
See page 14 on how to select between ten
call tone settings.
08
PMR
SCAN
Volume Button
08
PMR
SCAN
Call Button
Listening
Volume Level
LED/S.O.S. Flashlight
•
Press and release the LED flashlight button below
the TALK button to use the LED flashlight located at
the bottom of the radio.
To activate S.O.S. function, press and hold the LED
flashlight button to turn on. Press and release to
turn off the flashlight or S.O.S. function.
Auto Squelch/Maximum Range
•
Your microTALK
®
radio will automatically shut off weak transmissions
and unwanted noise due to terrain, conditions or if you’ve reached your
Maximum Range limit.
Can temporaily turn off auto squelch for having maximum range
extension allowing all signals to be received and extending the
maximum range of your radio
08
PMR
SCAN
LED/S.O.S. Flashlight
English
6
Page 7

To temporarily turn off auto squelch:
Press the Max Range button for
at least three seconds.
To turn maximum range extender off:
–
Press and hold the Max Range
button or change channels.
Lock Function
•
The Lock function locks the Channel Up, Channel
Down, Volume Up, Volume Down and Mode/
Power buttons to prevent accidental operation.
To turn the lock on or off:
–
Press and hold the Lock button for
three seconds.
A double beep sound is used to confirm your lock
on or off request. When in Lock mode,
the Lock icon will be displayed.
Lock Icon
08
SCAN
Light/Max Range
08
PMR
SCAN
Lock Button
microTALK® Range
•
Your range will vary depending on terrain and conditions.
In flat, open country your radio will
operate at maximum range.
Buildings and foliage in the path of the
signal can reduce the range of the radio.
Dense foliage and hilly terrain will further
reduce the range of the radio.
Remember, you can achieve maximum
range by using maximum range extender.
See page 6 for details.
HI / LO
SC
AN
HI / LO
SC
AN
HI / LO
SC
AN
Maximum Range
Reduced Range
Reduced Range
English
7
Nothing Comes Close to a Cobra
®
Page 8
Product Features
Using Your Radio
English
8
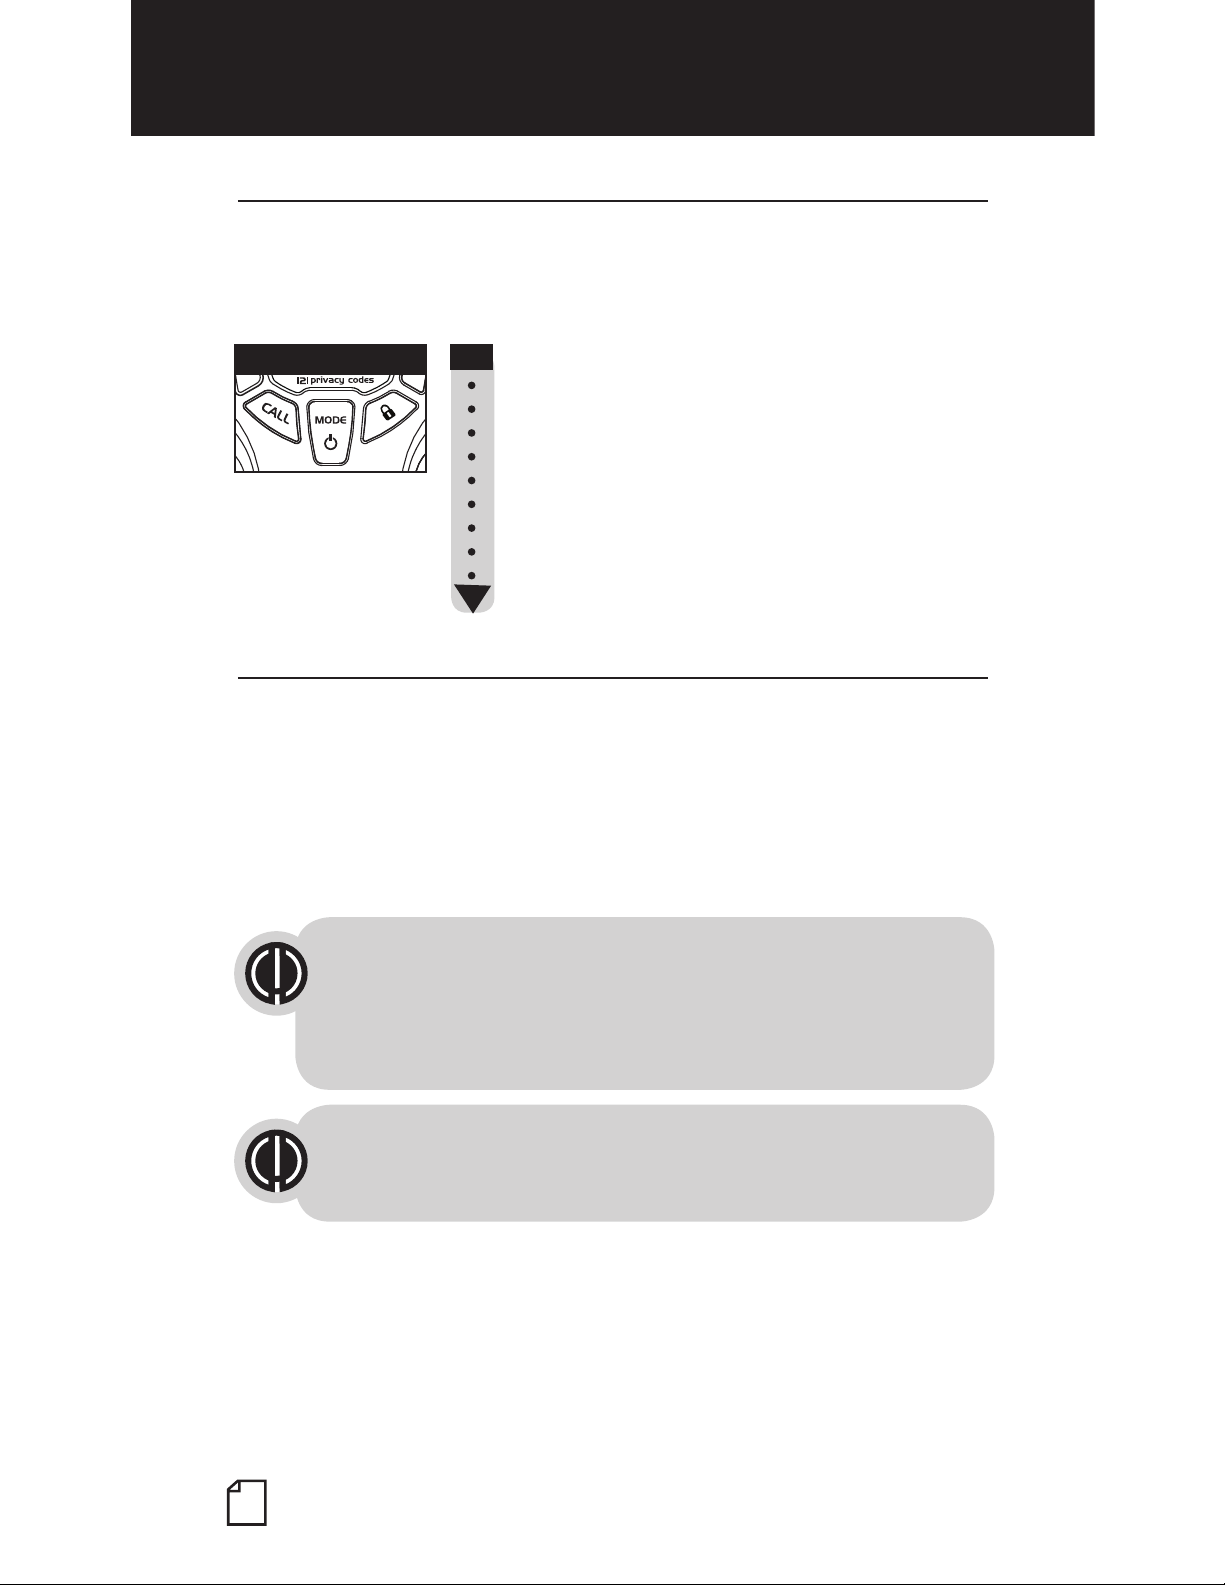
Scrolling Through the Mode Function
•
By scrolling through the Mode function, you will be able to
select or turn on preferred features of your microTALK
®
radio. When
scrolling through the Mode function, your radio features
will be displayed in the same predetermined order:
Set CTCSS Privacy Codes
Set DCS Privacy Codes
Set Vox On/Off
Set Vox Sensitivity
Set Call Tones 1-10
Set VibrAlert On/Off
Set Roger Beep On/Off
Set Key Tones On/Off
Privacy Codes
•
Your microTALK radio incorporates two advanced coded squelch
systems that can help to reduce interference from other users
on any given channel. CTCSS (Continuous Tone Coded Squelch
System) provides 38 privacy codes and DCS (Digitally Coded Squelch)
provides 83 privacy codes. This provides a total of 121 Privacy
Codes. Either system can be used on all channels, but both systems
cannot be used on the same channel at the same time.
To successfully communicate using a privacy code, both
the sending and receiving radios must be tuned to the same
channel and to the same privacy code system (CTCSS or DCS)
and privacy code number. Each channel will remember the last
privacy code system and number you select.
The privacy code 00 is not a privacy code, but allows all signals
to be heard on a channel that is set to 00 on both
the CTCSS and DCS systems.
08
PMR
SCAN
Mode/Power
Page 9
English
9
Nothing Comes Close to a Cobra
®
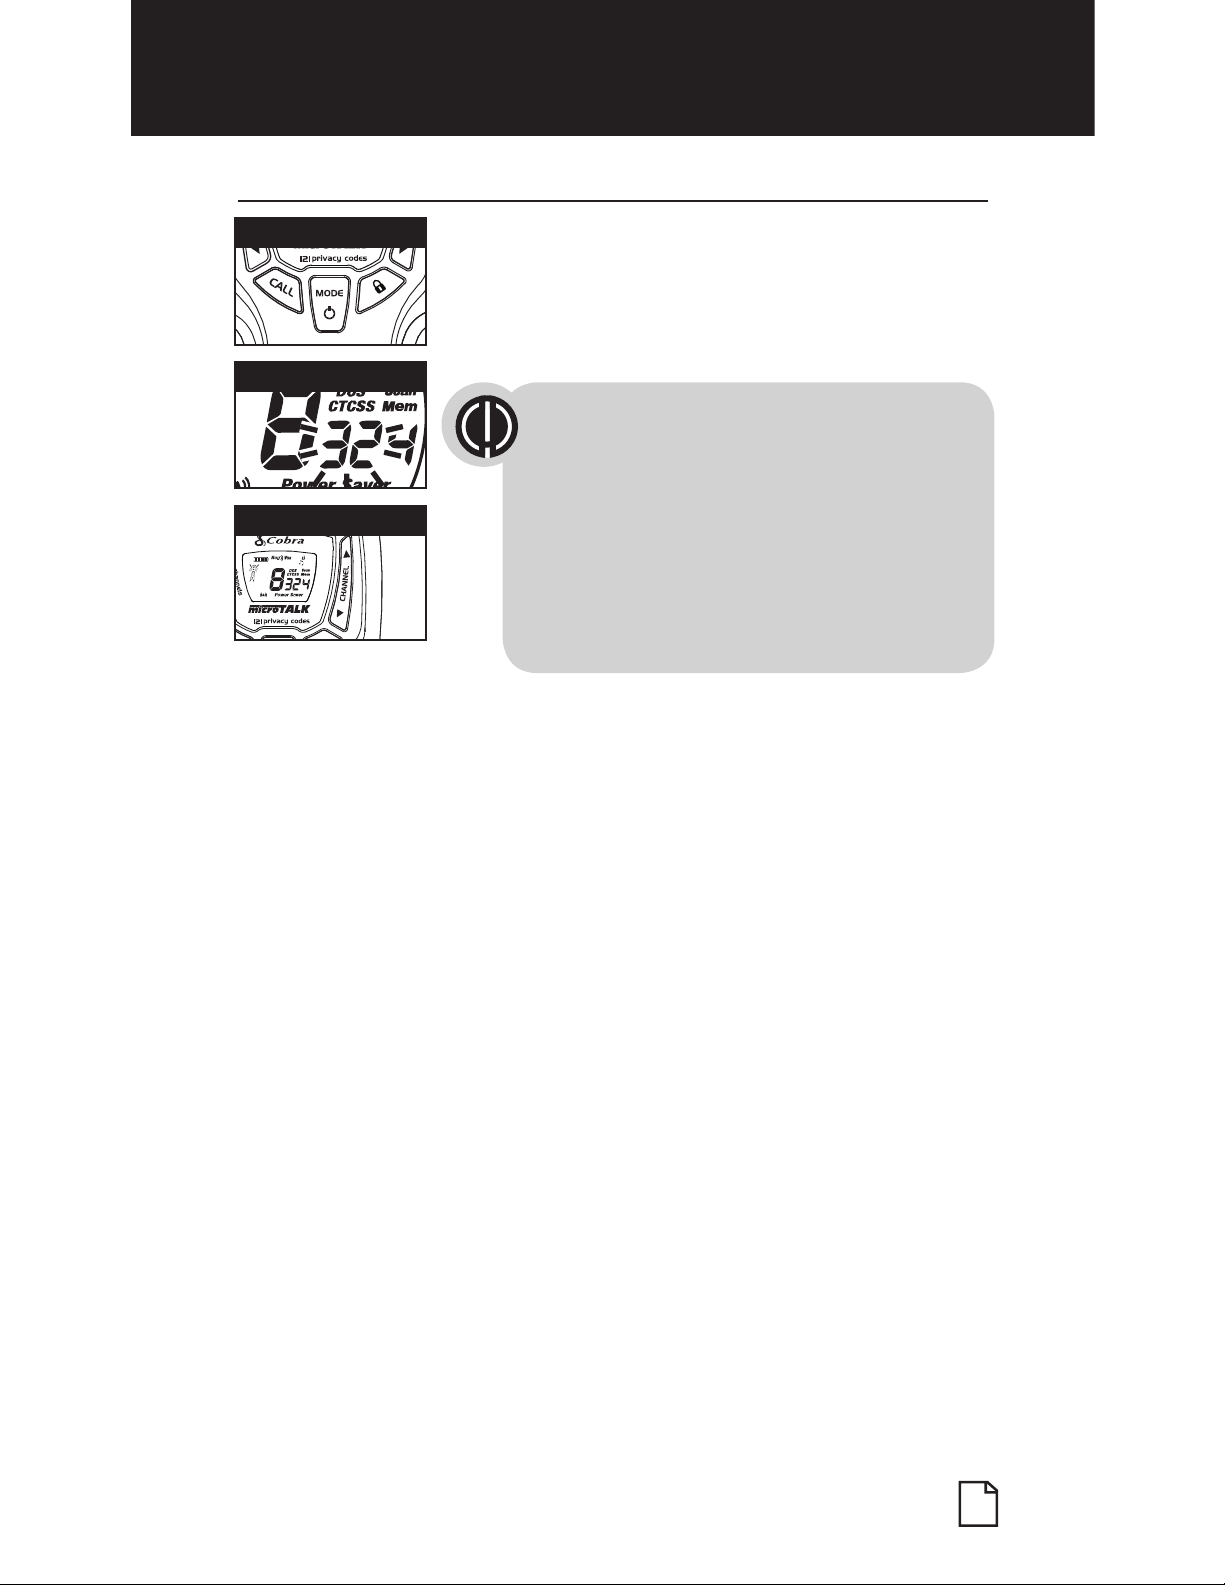
Set CTCSS Privacy Codes
•
To select a CTCSS privacy code:
1.
After selecting a channel, press
the Mode/Power button until the CTCSS icon
appears and the small numbers next to the
channel number flash on the display.
If DCS is turned on at the channel selected,
the display will flash the
CTCSS icon and “OFF.” To switch from
DCS to CTCSS, press the Channel Up
or Channel Down button while the display
is flashing “OFF.” The display
will then show the small numbers flashing
and you will then be able
to proceed to step 2.
2.
Press the Channel Up or Channel Down button
to select a privacy code. You can hold the Up or
Down button for fast advance.
3.
When your desired CTCSS privacy code is
displayed, choose one of the following:
a.
Press the Mode/Power button to enter the
new setting and proceed to other functions.
b.
Press Talk or Call button to return to Standby
mode.
c. Do not press any buttons for 6 seconds
to return to Standby mode.
Privacy Code
08
PMR
SCAN
Mode/Power
PMR
SCAN
Channel Button
Page 10

Set DCS Privacy Codes
•
To select a DCS privacy code:
1.
After selecting a channel, press the Mode/Power
button until the DCS icon appears and the small
numbers flash on the display (01 through 83).
2.
Press the Channel Up or Channel Down button to select a DCS privacy
code. You can hold the Up or Down button for fast advance.
3.
When DCS privacy code is displayed, choose one of the following:
a. Press the Mode/Power button to enter the new setting and
proceed to other functions.
b.
Press Talk/Call button to return to Standby mode.
c.
Do not press any buttons for 6 seconds to return to Standby mode.
External Speaker/Microphone/Charge Jack
•
Your microTALK radio can be fitted with an optional
external speaker/microphone (not included), freeing
your hands for other tasks.
To attach an external speaker/microphone or
charger
1.
Open the charge tab at the top of the radio.
2. Insert the plug into the jack.
DCS Privacy Code
If CTCSS is turned on at the channel
selected, the display will flash the DCS
icon and “OFF.” To switch from CTCSS to
DCS, press the Channel Up or Channel
Down button while the display is flashing
“OFF.” The display will then show the
small numbers flashing and you will then
be able to proceed to step 2.
08
PMR
SCAN
Mode/Power
Radio Charger Jack
PMR
SCAN
Channel Button
Product Features
Using Your Radio
English
10
NOTE: Excessive sound pressure from earphones and headphones can
cause hearing loss.
Page 11

Voice Activated Transmit (VOX)
•
In VOX mode, your microTALK® radio can be used “hands-free,” automatically
transmitting when you speak. You can set the VOX sensitivity level to fit the
volume of your voice and avoid transmissions triggered by background noise.
To turn VOX mode on or off:
1.
Press the Mode/Power button until the VOX icon
flashes on the display. The current On or Off
setting is displayed.
2.
Press the Channel Up or Channel Down
button to turn VOX On or Off.
3. Choose one of the following:
a.
Press the Mode/Power button to enter the
new setting and proceed to other functions.
b. Press Talk or Call button to return to Standby
mode.
c. Do not press any buttons for 6 seconds to return
to Standby mode.
To set VOX sensitivity:
1.
Press the Mode/Power button until the VOX icon
flashes and the current sensitivity level is displayed.
The current VOX sensitivity level is displayed
with letters “L” and a Number 1 through 5,
with Number 5 being the most sensitive level
and Number 1 being the least sensitive level.
2.
Press the Channel Up or Channel Down
button to change the setting.
3. Choose one of the following:
a.
Press the Mode/Power button to enter the
new setting and proceed to other functions.
b. Press Talk or Call button to return to Standby
mode.
c. Do not press any buttons for 6 seconds to return
to Standby mode.
VOX Icon
VOX Sensitivity Level
08
PMR
SCAN
Mode/Power
PMR
SCAN
Channel Button
08
PMR
SCAN
Mode/Power
PMR
SCAN
Channel Button
English
11
Nothing Comes Close to a Cobra
®
Page 12

Product Features
Using Your Radio
English
12
10 Memory Locations
•
Your microTALK radio has 10 Memory Locations for storing
your most frequently used channels and channel/privacy code
combinations. These Memory Locations can be selected individually or
can be scanned. (See page 18 for memory location scan.)
To program a memory location:
1.
Press the MEM/ESC button. Memory icon and
the Memory Location show on the display.
2.
Press the Channel Up or Channel Down button
to select the memory location (0 through 9).
If a location has been programmed before,
its associated channel/privacy code will be
shown on the display.
3.
Press the MEM/ESC button to enter a
new memory location or edit an already
programmed memory location.
4.
Press the Channel Up or Channel Down button
to select the memory location.
5.
Press the MEM/ESC button. The channel
numbers will flash on the display.
6.
Press the Channel Up or Channel Down button
to select a channel (1 through 8).
7.
Press the MEM/ESC button. The CTCSS icon
and privacy code numbers will flash on the
display.
8. Choose one of the following:
a.
Press the Channel Up or Channel Down
button to select a CTCSS privacy code (00
through 38) for the channel.
b.
Press the MEM/ESC button to switch from
CTCSS to DCS. The DCS icon and privacy code
numbers will flash on the display. The Channel
Up or Channel Down button can then be used
to select a DCS privacy code (00 through 83)
for the channel.
SCAN
MEM/ESC Button
PMR
SCAN
Channel Button
SCAN
MEM/ESC Button
Memory Channel
PMR
SCAN
Channel Button
PMR
SCAN
Channel Button
Page 13

English
13
Nothing Comes Close to a Cobra
®
If “oF” flashes in place of the privacy code numbers,
a privacy code is already set in the opposite (CTCSS
or DCS) system. Press the Channel Up or Channel Down
button to cancel the opposite code and select a privacy
code from the active system for the selected channel.
9. Choose one of the following:
a.
Press the MEM/ESC button to enter the channel/privacy code
in the selected memory location. Radio then proceeds to next
memory location, which will blink.
b.
Press and hold the MEM/ESC button to save the current state of
the Set Memory Function and press the MEM/ESC button again
return to Standby mode.
To recall a stored memory channel location:
1.
Press the MEM/ESC button until the Memory
icon and the memory location number flash on
the display.
2.
Press the Channel Up or Channel Down button
to select a memory location (0 through 9).
If a location has been programmed before,
its associated channel/privacy code will be
shown on the display.
Press and hold the Talk
button to communicate
with another person as usual
3.
Press and hold the MEM/ESC button to return
to Standby mode on the selected memory
location.
A memory location can be reprogrammed
at any time it is displayed. Press the
MEM/ESC button to begin.
SCAN
MEM/ESC Button
Memory Channel
PMR
SCAN
Channel Button
Page 14

Product Features
Using Your Radio
English
14
VibrAlert® and Call Alert
•
Your MicroTALK
®
radio can alert you to incoming
signals by sounding an audible call tone or an
audible tone with VibrAlert
®
.
To change call settings:
1.
Press the Mode button until the Call Setting
icon flashes on the display. The current setting
(“01” vibrate + ring, “02” ring only) is displayed.
2.
Press the Channel Up or Channel Down button to
change the call setting.
3.
Choose one of the following:
a.
Press the Mode button to enter the new
setting and proceed to other functions.
b.
Press Talk or Call button to return to Standby
mode.
c. Do not press any buttons for 6 seconds to return
to Standby mode.
Ten Call Tone Settings
•
You can choose between ten different Call Tone Settings to transmit
a call alert.
To change a call tone setting:
1.
Press the Mode/Power button until the
letter “C” and the current call tone number
(01 through 10) is displayed. The current
call tone will sound for three seconds.
2.
Press the Channel Up or Channel Down button
to hear the other call tone settings.
3. Choose one of the following:
a.
Press the Mode/Power button to enter the
new setting and proceed to other functions.
b. Press Talk or Call button to return to Standby
mode.
c. Do not press any buttons for 6 seconds to return
to Standby mode.
Call Tone Setting
08
PMR
SCAN
Mode/Power
PMR
SCAN
Channel Button
Call Tone On/
Vibrate On
Call Tone On/
Vibrate Off
Page 15

English
15
Nothing Comes Close to a Cobra
®
Roger Beep Confirmation Tone
•
Your listener will hear an audible tone when you release the Talk button.
This alerts the other party that you are finished talking and it is OK for
them to speak.
To turn roger beep on or off:
1.
Press the Mode/Power button until the
Roger Beep icon flashes. The current
on or off setting is displayed.
2.
Press the Channel Up or Channel Down button
to select roger beep on or off.
3. Choose one of the following:
a.
Press the Mode/Power button to enter the
new setting and proceed to other functions.
b. Press Talk or Call button to return to Standby
mode.
c. Do not press any buttons for 6 seconds to return
to Standby mode.
Channel Button
Roger Beep Off
08
PMR
SCAN
Mode/Power
PMR
SCAN
Channel Button
Key Tone On/Off
•
When Key Tone is On, an audible tone will sound each time a button
is pressed.
To turn key tone on or off:
1.
Press the Mode/Power button until the keytone
icon Flashes. Current key tone status On/Off will
flash.
2.
Press the Channel Up or Channel Down button
to select key tone on or off.
3. Choose one of the following:
a.
Press the Mode/Power button to enter the
Standby mode.
b. Press Talk or Call button to return to Standby
mode.
c. Do not press any buttons for 6 seconds to return
to Standby mode.
08
PMR
SCAN
Mode/Power
PMR
SCAN
Channel Button
Page 16

Product Features
Using Your Radio
English
16
Channel Scan
•
Your microTALK
®
radio can automatically scan channels.
To scan channels:
1.
Press and release the Scan button until the Scan
icon and the channel numbers appear
on the display.
2.
Press and hold the Scan button to begin scanning
channels.
The radio ignores specific privacy
codes while scanning channels.
The Scan icon will continue to be displayed when
scan is on. Your radio will continue to scan all
channels and stop if an incoming transmission is
detected. Your radio will remain on that channel for
2 seconds.
During scanning (while receiving an incoming transmission),
you can choose from the following:
a.
Press and hold the Talk button to communicate on that channel.
Your radio will remain on that channel and return to Standby mode.
b.
Press the Channel Up or Channel Down button to resume
scanning channels.
c.
Press and hold the Scan button to return to Standby.
Scan Channels
PMR
SCAN
Channel Button
SCAN
Scan Button
Page 17

English
17
Nothing Comes Close to a Cobra
®
Privacy Code Scan
•
Your microTALK radio can automatically scan the Privacy Codes (either
CTCSS 01 through 38 or DCS 01 through 83) within one channel. Only
one set of privacy codes (CTCSS or DCS) can be scanned at a time.
To scan privacy codes:
1.
While in Standby mode, press and release the
Scan button twice (CTCSS) or three times (DCS)
until the CTCSS or DCS icon and numbers are
flashing.
2.
Press and hold the Scan button to begin scanning
privacy codes within the selected channel.
The Scan icon will continue to be displayed when privacy code scan
is on. Your radio will continue to scan privacy codes and stop as an
incoming transmission is detected. Your radio will remain on that
channel/privacy code for 6 seconds.
During scanning (while receiving an incoming transmission), you can choose
from the following:
a. Press and hold the Talk button to communicate on that channel/privacy code. Your
radio will remain on that channel/privacy code and return to Standby mode.
b. Press the Channel Up or Channel Down
button to resume scanning privacy codes.
If you do not press any button within 10 seconds, your radio will automatically
resume scanning privacy codes.
c. Press the Scan button to return to Standby.
Select Channel
Scan Privacy Codes
SCAN
Scan Button
PMR
SCAN
Channel Button
Page 18

Product Features
Using Your Radio
English
18
Memory Scan
•
Your microTALK radio can automatically scan the stored memory
locations.(See page 12 for setting memory locations)
To scan memory locations:
1.
Make sure 2 or more memory locatios
programmed already.
2.
Press and release the MEM/ESC button to enter
Memory mode from Standby mode.
Memory icon and the Memory Location
show
on the display.
3.
Press and release the Scan button, then the
Scan icon will flash on the display.
Then press Scan button again, Scan
icon
and Memory icon will flash on the display
simultaneously.
4.
Press the Channel Up or Channel Down button
to begin scanning stored channel locations.
The Scan icon will continue to be displayed when
Memory Scan is On.
Your radio will continue to scan memory locations
and stop as an incoming transimmision is detected.
Your radio will remain on that stored channel/
privacy code for 6 seconds.
SCAN
MEM/ESC Button
SCAN
Scan Button
PMR
SCAN
Channel Button
Page 19

English
19
Nothing Comes Close to a Cobra
®
Declaration of Conformity(DoC)
We, Altis Global Limited of Berkeley Lake, GA 30071 USA
declare under our side responsibility that the product:
Private Mobile Radio (PMR 446) - Walkie Talkie
Two-way Radio
Model: AM845
to which this declaration relates is in confirmity with
all the essential requirements and other relevant
requirements of the R&TTE Directive (1995/5/CE). The
product is in conformity with the following standards
and/or other normative documents:
Health (Article 3.1(a)): EN50566:2013
Safety (Article 3.1(a)): EN60950-1:2006/A2:2013
EMC (Article 3.1(b)):
EN301 489-1 V1.9.2 (2011-09)
EN301 489-5 V1.3.1 (2002-08)
Spectrum (Article 3.2): EN300 296-2 V1.4.1 (2013-08)
This product complies with Commission Regulation (EC)
No 278/2009 of 6 April 2009 implementing Directive
2009/125/EC of the European Parliament and of the
Council with regard to ecodesign requirements for
no-load condition electric power consumption and
average active efficiency of external power supplies
and is in conformity with Directive 2011/65/EU of the
European Parliament and of the Council of 8 June
2011 on the restriction of the use of certain hazardous
substances in electrial and electronic equipment.
The radio will not comply with the standard at voltage
below 3.4V.
Warranty & Customer Service
For warranty and customer service
information, please go to:
www.cobrapmr.com
For use in EU countries, subject to local laws and
regulations.
CEEL is a registered trademark of Cobra
Electronics Europe, Ltd.
Snake design and microTALK are registered
trademarks of Cobra Electronics Corporation, USA.
©2016 Altis Global Limited,
Berkeley Lake, GA, 30071 USA
Berkeley Lake, GA, USA 1 OCT 2016
Bernard Auyang
CEO
KEM-ML38403
®
 Loading...