

Page 1
206105
CHEST
ASSEMBLY INSTRUCTIONS
COASTER FINE FURNITURE
www.coastercompany.com
PAGE 1 OF 5
REVISION 0: 06/05/2018
Page 2
ITEM:
ASSEMBLY TIPS:
1.Remove hardware from box and sort by size.
2.Please check to see that all hardware and parts are present prior to start of assembly.
3.Please follow attached instructions in the same sequence as numbered to assure fast & easy assembly.
206105
Warning!
1.Don't attempt to repair or modify parts that are broken or defective. Please contact the store
immediately.
2.This product is for home use only and not intended for commercial establishments.
ASSEMBLY TIME 10 MINUTES
ASSEMBLY INSTRUCTIONS
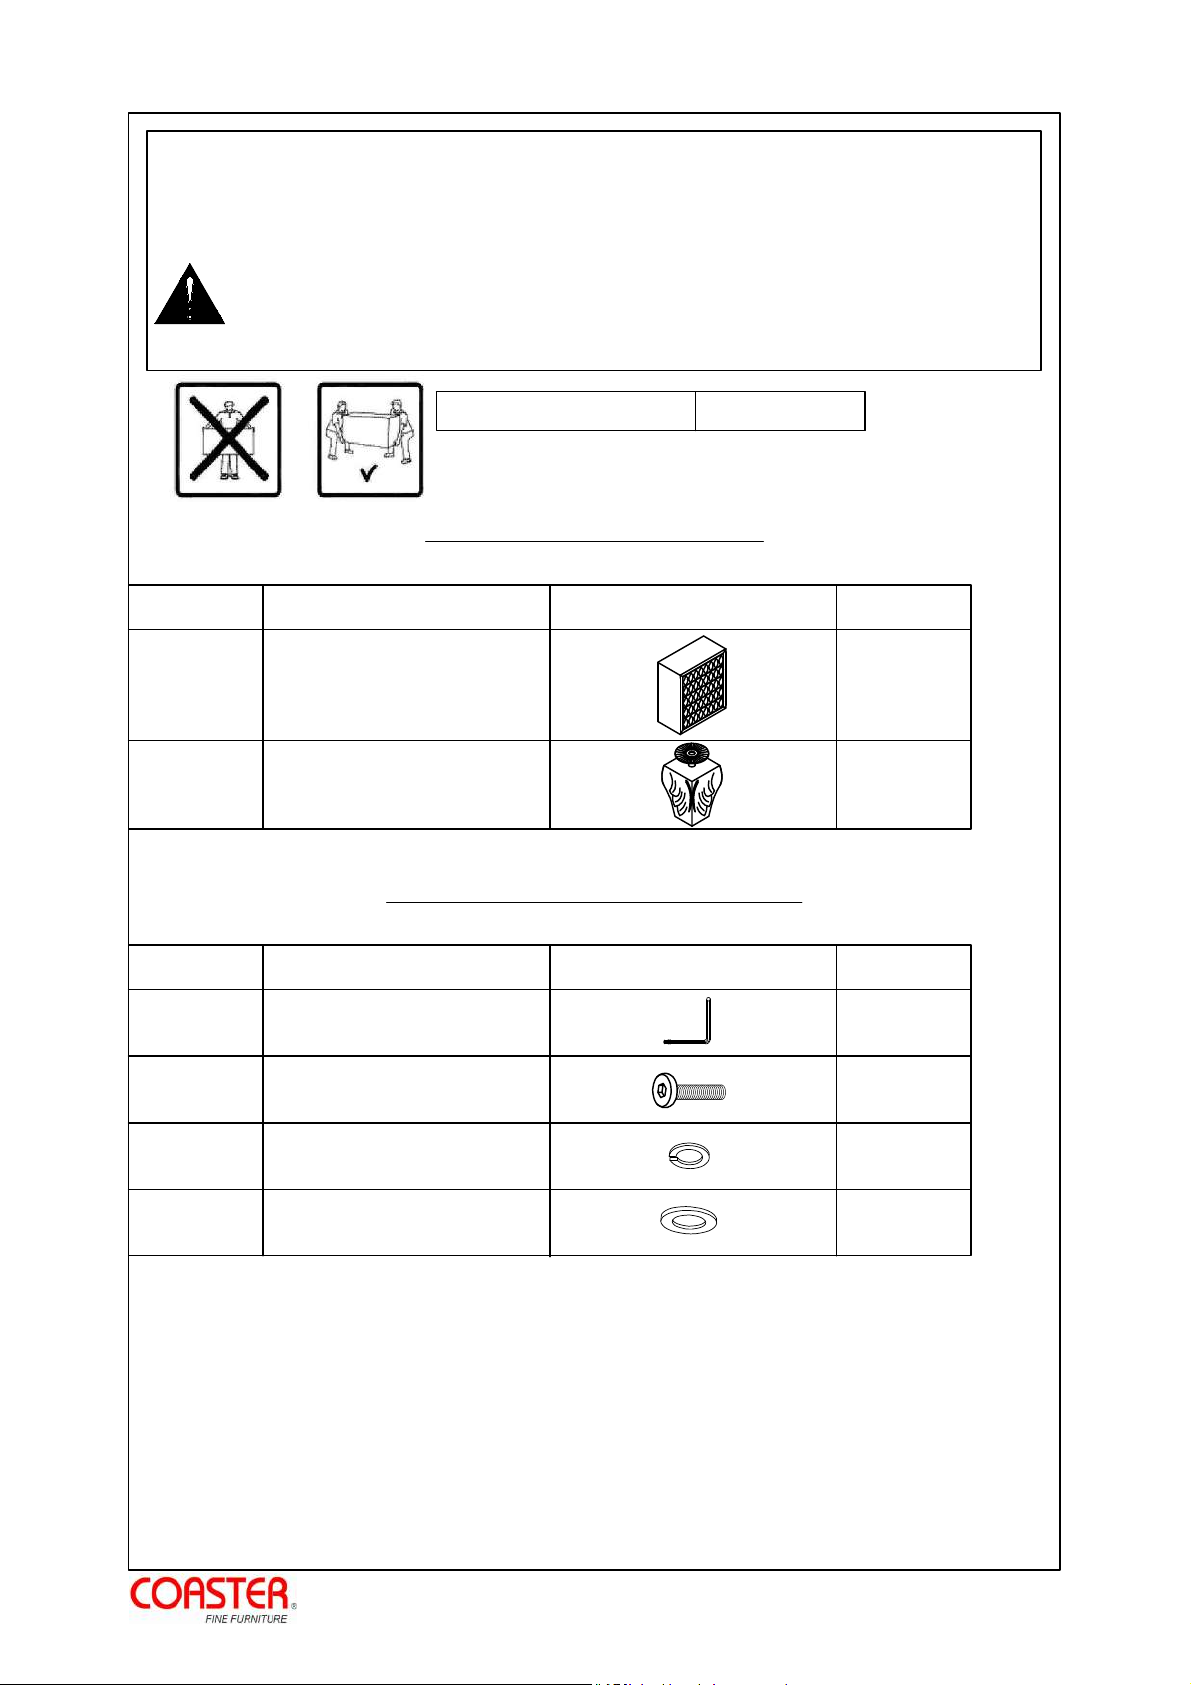
PARTS IDENTIFICATION
FIGUREPART NAME QTY
A CHEST
B
1
2
3
4
LEG
ALLEN WRECH
(4mm - RBW)
BOLT
(Ø5/16" x 90mm - RBW)
LOCK WASHER
(Ø5/16" - RBW)
FLAT WASHER
(Ø5/16" x 19 x 1.5mm - RBW)
1 PC
4 PCS
HARDWARE IDENTIFICATION
FIGUREHARDWARE NAME QTY
1 PC
4 PCS
4 PCS
4 PCS
NOTE: PHILLIPS HEAD SCREW DRIVER IS REQUIRED IN THE ASSEMBLY
PROCESS; HOWEVER, MANUFACTURER DOES NOT PROVIDE THIS ITEM.
www.coastercompany.com
PAGE 2 OF 5
Page 3

ITEM:
STEP 1
206105
ASSEMBLY INSTRUCTIONS
A
Please take out the legs from
the last drawer
STEP 2
STEP 3
A
B
4
3
2
1
PAGE 3 OF 5
www.coastercompany.com
Page 4

ITEM:
STEP 4
Complete
206105
ASSEMBLY INSTRUCTIONS
PAGE 4 OF 5
www.coastercompany.com
Page 5
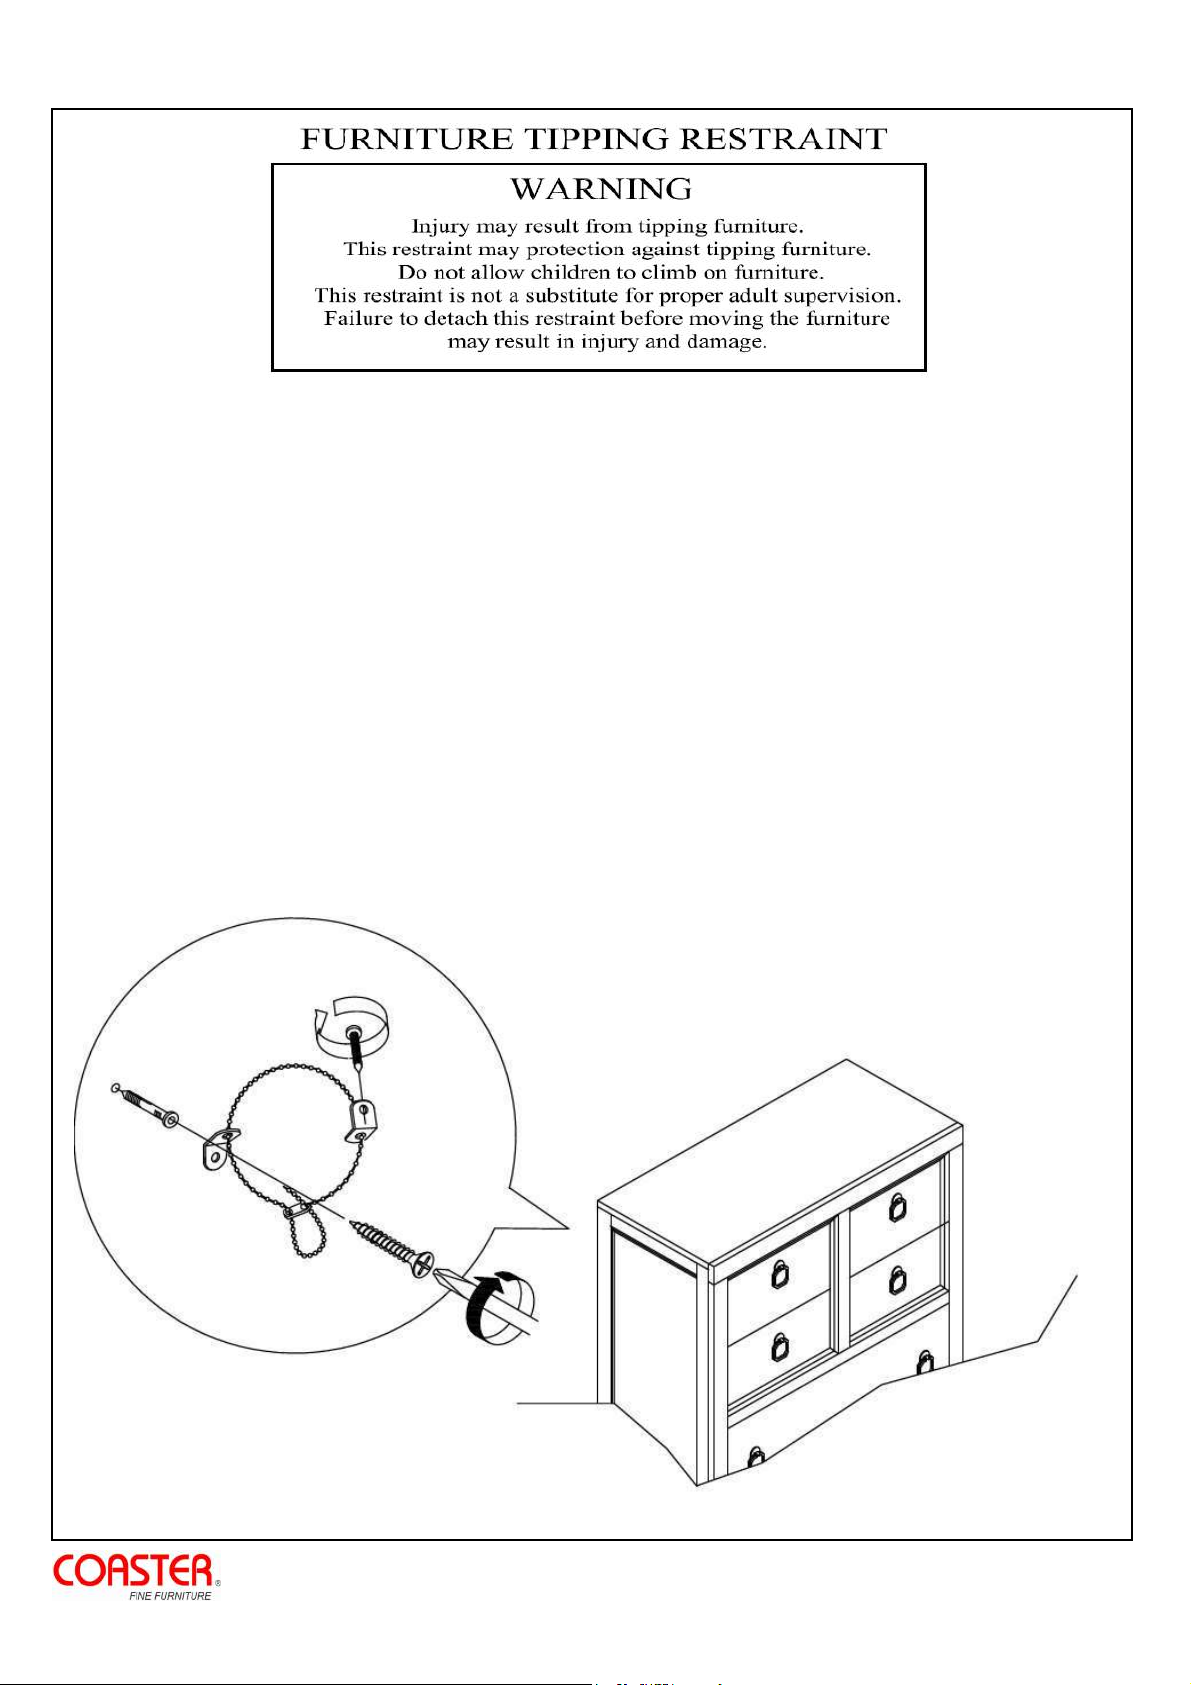
ANTI-TIPPING INSTALLMENT INSTRUCTIONS
1. Attach one of the mounting brackets securely to the back edge of the furniture. Use the short screw.
2. Determine where the furniture is to be placed and mark location on the wall for the mounting bracket screw
hole approximately 2" below the bracket mounted to the edge of the furniture.
3. Drill a 3/16" hole in the wall. Press the plastic wall plug into the hole and gently tap until the flange on the
wall plug is against the wall surface.
4. Position the bracket over the wall plug and use the long screw to securely attach the bracket to the wall.
5. Place the furniture so the bracket on the back edge is in line with the bracket on the wall.
6. Lace an end of the cable tie down through each bracket. Bring both ends together and slide the beaded end
of the cable tie through the keyhole shaped slot on the other end until snug. Pull down on the beaded end
until it snap locks into the keyhole slot.
7. To double lock return the beaded end back through the keyhole as shown.
8. Check to make sure the cable tie is securely laced and locked to the brackets.
PAGE 5 OF 5
www.coastercompany.com
 Loading...