

CNH FM-1000 How-to Manual
The 'FM-1000' “How To Guide”

The "FM-1000 "How To Guide
Contents
Title Section/Page
FM-1000 "How To Guide" Table of contents
1. Administration Password.................................................................................... 1/3
2. Firmware
2.1 Check the Firmware Version................................................................... 2/3
2.2 Check USB stick compatibility................................................................. 2/3
2.3 Downloading firmware........................................................................... 2/4
2.4 Unzipping firmware and placing firmware onto USB Stick..................... 2/5
2.5 Updating the Screen............................................................................... 2/5
3. Upgrading features & Unlock codes
3.1 FM1000 Receiver/Screen Unlocks.......................................................... 3/6
3.2 Upgrading to OmniSTAR......................................................................... 3/6
3.3 Upgrading to RTK.................................................................................... 3/7
3.4 Installing Rover Radio............................................................................. 3/8
3.5 Unlocking Features ................................................................................ 3/9
4. Configuring the Receiver
4.1 EGNOS..................................................................................................... 4/10
4.2 OmniSTAR............................................................................................... 4/10
i. OmniSTAR ID.............................................................................. 4/10
ii. Convergence Time..................................................................... 4/11
4.3 RTK.......................................................................................................... 4/11
4.4 VRS.......................................................................................................... 4/11
5. Installation of Equipment
5.1 Correctly Mounting the Antenna............................................................ 5/12
5.2 Upgrading the Antenna.......................................................................... 5/12
5.3 Mounting the Screen.............................................................................. 5/13
6. Screen Add On's
6.1 Connecting EZ Steer................................................................................ 6/14
6.2 Coverage Switch..................................................................................... 6/14
6.3 Radar Out................................................................................................ 6/15
6.4 NMEA Out............................................................................................... 6/17
7. Data Management
7.1 Field Management.................................................................................. 7/18
7.3 Summary Reports................................................................................... 7/20
2
The "FM-1000 "How To Guide
1. Administration Password
The FM-1000 Administration password is
2009, this password will have to be
entered when trying to change any of the
'Configuration' menu settings.
2 - Firmware
Note: Firmware is the software that runs the
EZ Guide screen. Firmware/Software must be
up to date to ensure satellite configurations
and the latest features are installed on the
Figure 1.1
screen.
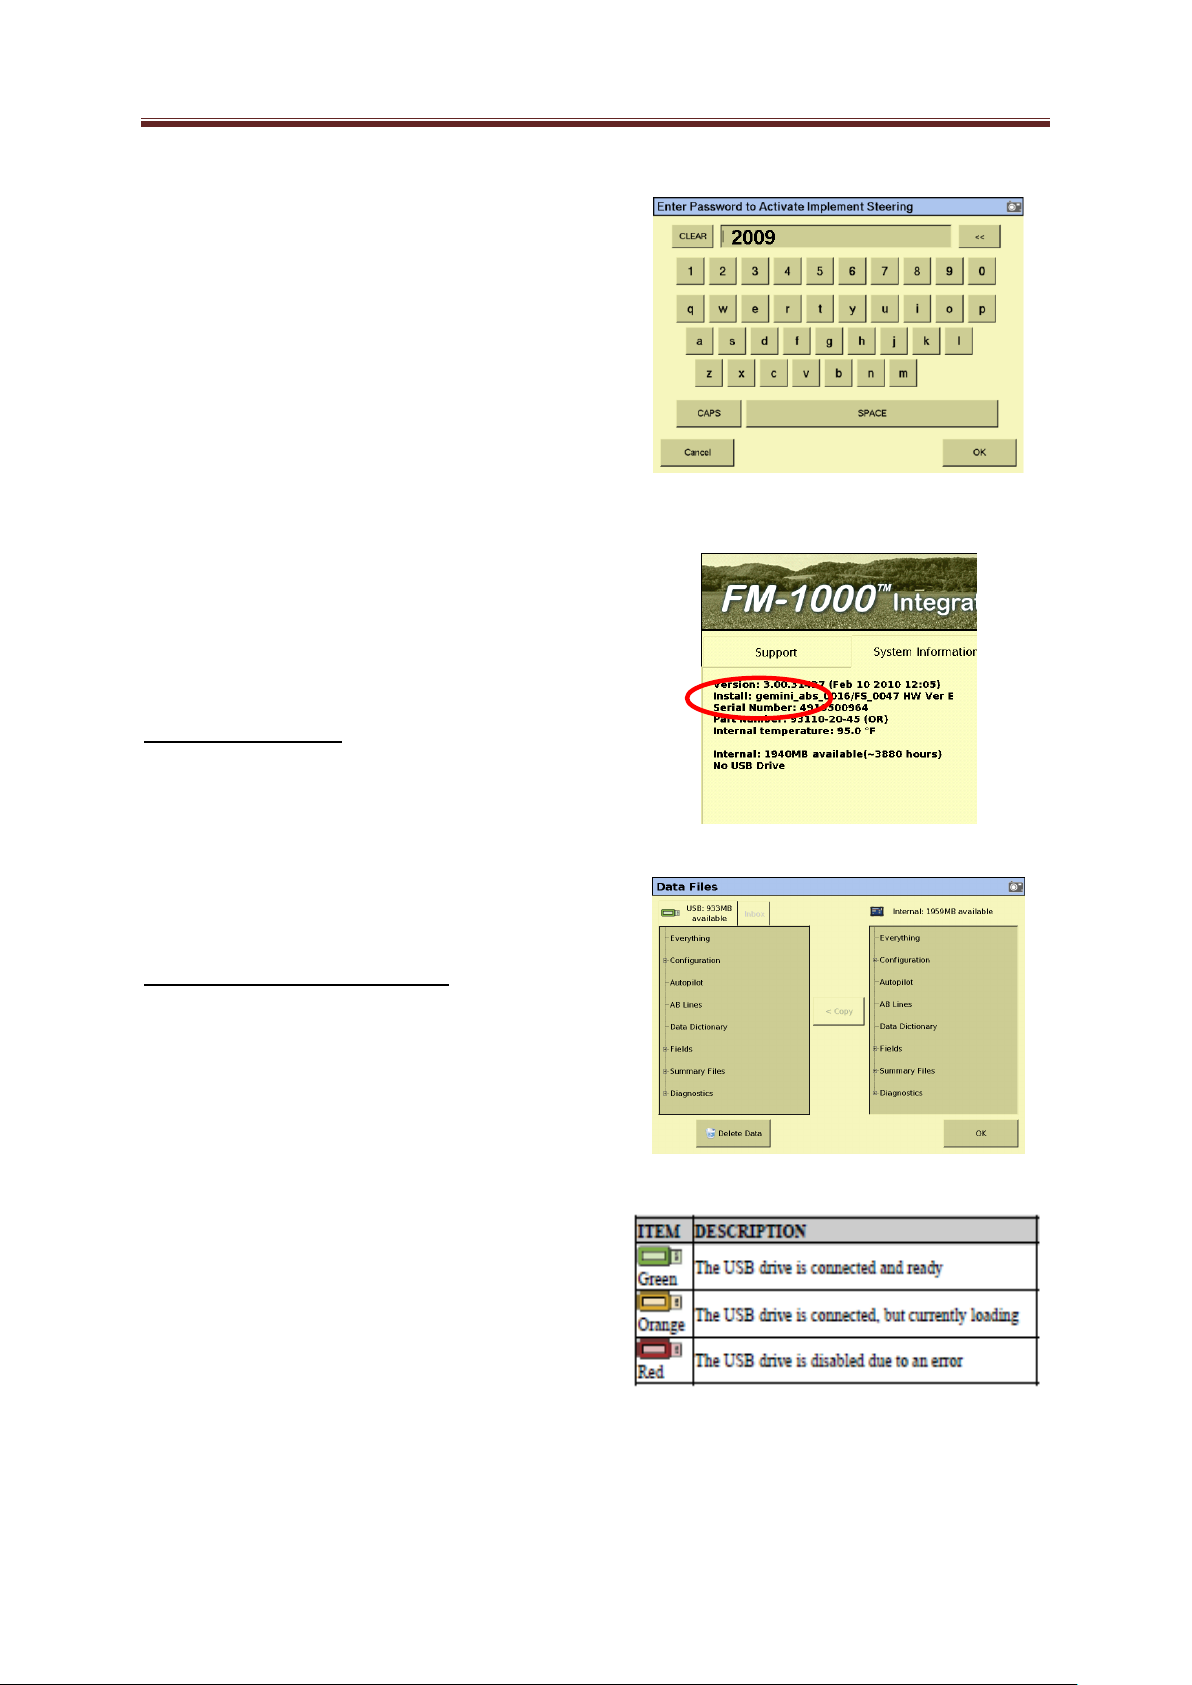
2.1 Firmware Version
On the home screen choose the 'system
information' tab. The software version is
displayed on the left hand side of the
screen as shown in figure 2.1.
2.2 Check USB stick compatibility
Please note that not all USB sticks are
compatible with the FM-1000 screen.
Some (Not all) FAT/FAT32 USB sticks are
compatible with the screen.
The colour of the USB stick icon will show
the status of the USB stick as shown in
Figure 2.3.
Figure 2.1
Figure 2.2
Compatible USB sticks can be ordered
through CNH Parts. Part No 73321221
Figure 2.3
3
The "FM-1000 "How To Guide
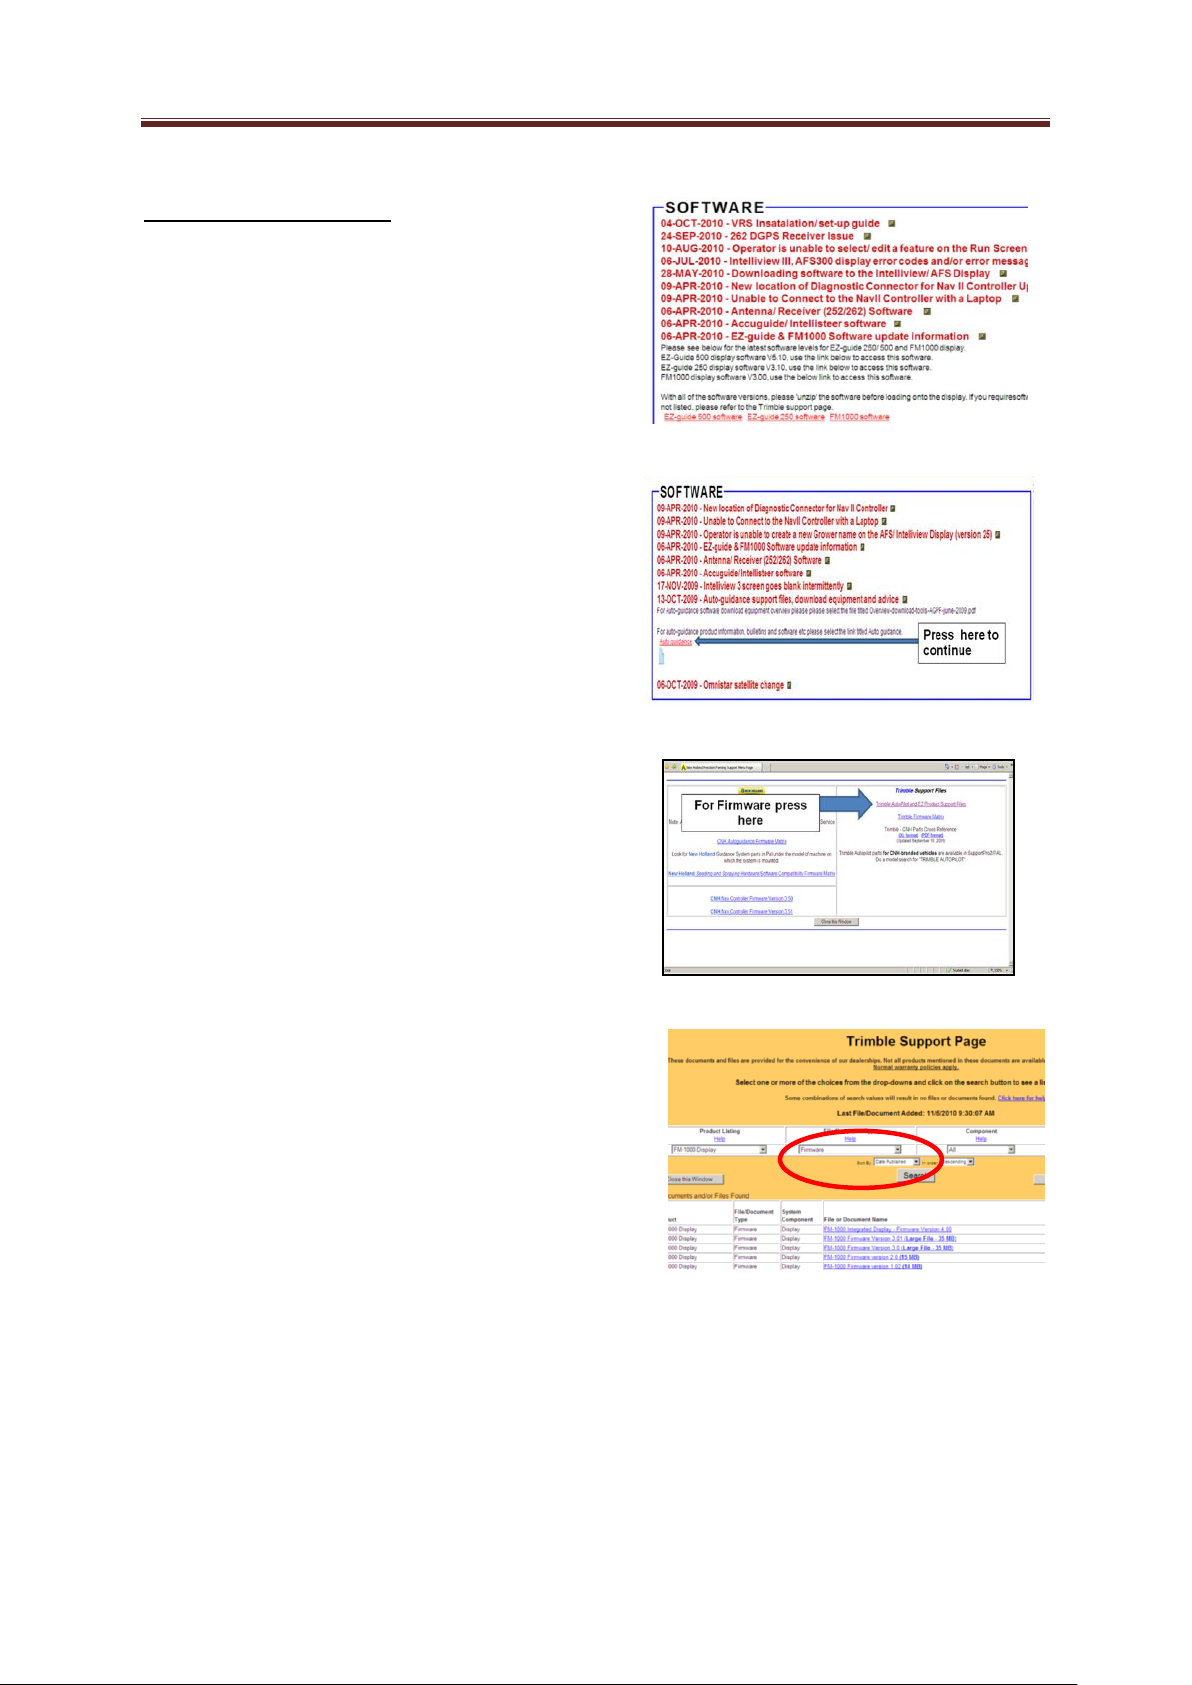
2.3 Downloading firmware
FM-1000 firmware can be got from
the CNH Trimble Support Page, this
can be accessed through the assist
home page.
When logged into assist home page,
choose 'Auto-guidance support files,
download equipment and advice'
shown in [Figure 2.6]. Click on the
'Auto-guidance' link.
From the link that opens chose the
'Trimble AutoPilot and EZ Support
files'.
This opens the 'Trimble Support Page'.
Under the product listing drop down
box choose FM-1000. From the
'File/Document Type' choose the
'Firmware' option and click the
[Figure 2.4]
[Figure 2.5]
[Figure 2.6]
search icon
Figure 2.7
4
The "FM-1000 "How To Guide
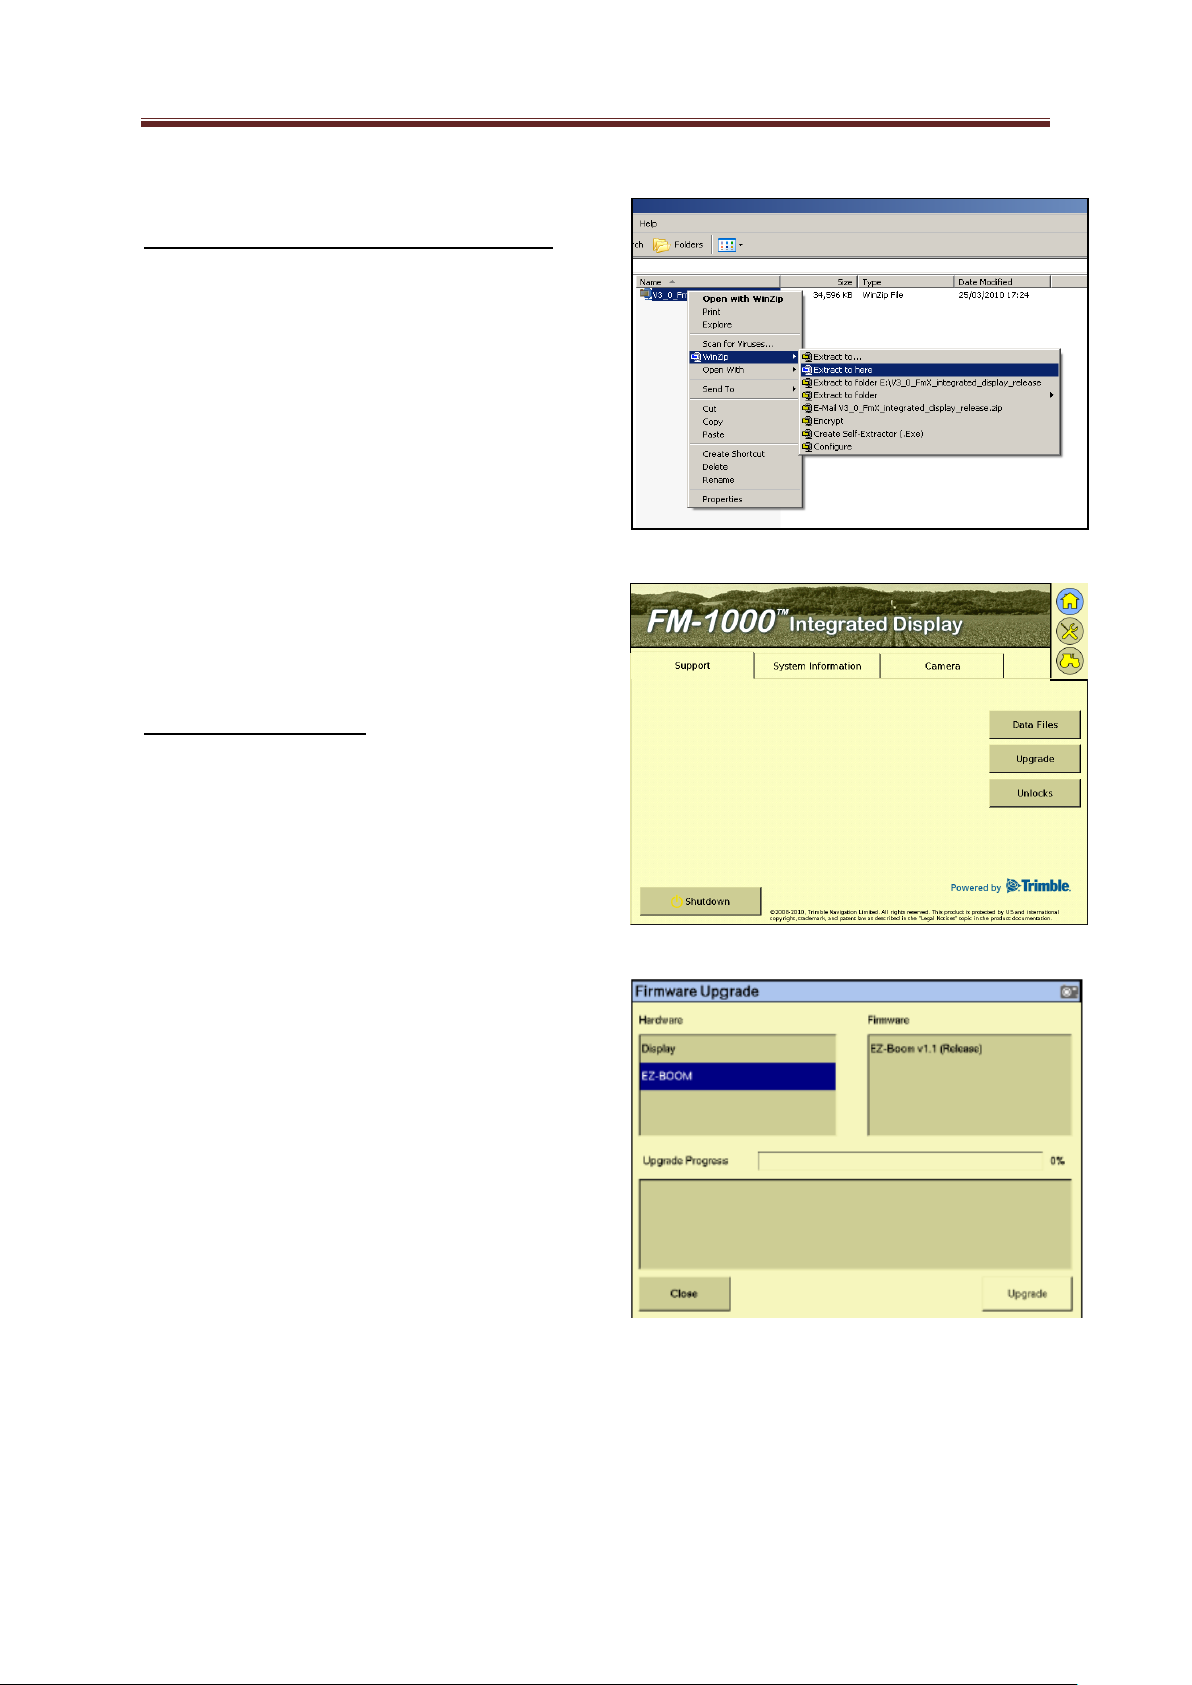
2.4 Unzipping firmware/Preparing USB stick
Once downloaded the ZIP file should then
be copied to the root (first) folder of a
compatible USB stick.
The file must then be Unzipped before it
can be used. This can be done by right
clicking on the file and selecting 'extract
here' as shown in [Figure 2.8].
Note: The computer programme WinZip is
needed to Unzip the file before the USB stick
can be inserted into the FM-1000.
2.5 Updating the Screen
To upgrade the fm FM-1000, on the
support tab on the home screen press the
'Upgrade' button.
In the new window, the newer level of
firmware will appear in the 'Firmware'
box, the upgrade icon will become active
and pressing this will allow the firmware
to be updated.
Note: For an AutoPilot steering system
Figure 2.8
Figure 2.9
please ensure the Trimble NAVII controller
has been updated with the latest level of
software also.
Figure 2.10
5
The "FM-1000 "How To Guide
3 Upgrading features & Unlock codes
3.1 FM-1000 Receiver/Screen Unlocks
I. EGNOS to OmniSTAR
II. OmniSTAR to RTK
III. Glonass
IV. Second Antenna
V. TrueTracker
VI. TrueGuide
VII. Variable Rate & Section Control
3.2 Upgrading to OmniSTAR
Figure 3.1
The EGNOS to OmniSTAR Part Number is
73313916. The dealer must place an order
with SAP. Then he must send an e-mail to
eugpsreceiverupgrade@cnh.com with
following information :
I. Serial number of the screen
II. CNH part number
III. SAP order number
The Customer must then purchase a
subscription for a HP or XP correction
signal from OmniSTAR (for info please
visit www.omnistar.nl)
Once the upgrade code has been ordered,
A minimum of 2 full days is necessary to
send back the Upgrade code. Also
Figure 3.2
Figure 3.4
included in the Upgrade is a new level
antenna which is needed to replace the
Ag15 antenna that comes with the EGNOS
level FM-1000. The Ag15 can receive an
EGNOS signal.
Figure 3.3
6

The "FM-1000 "How To Guide
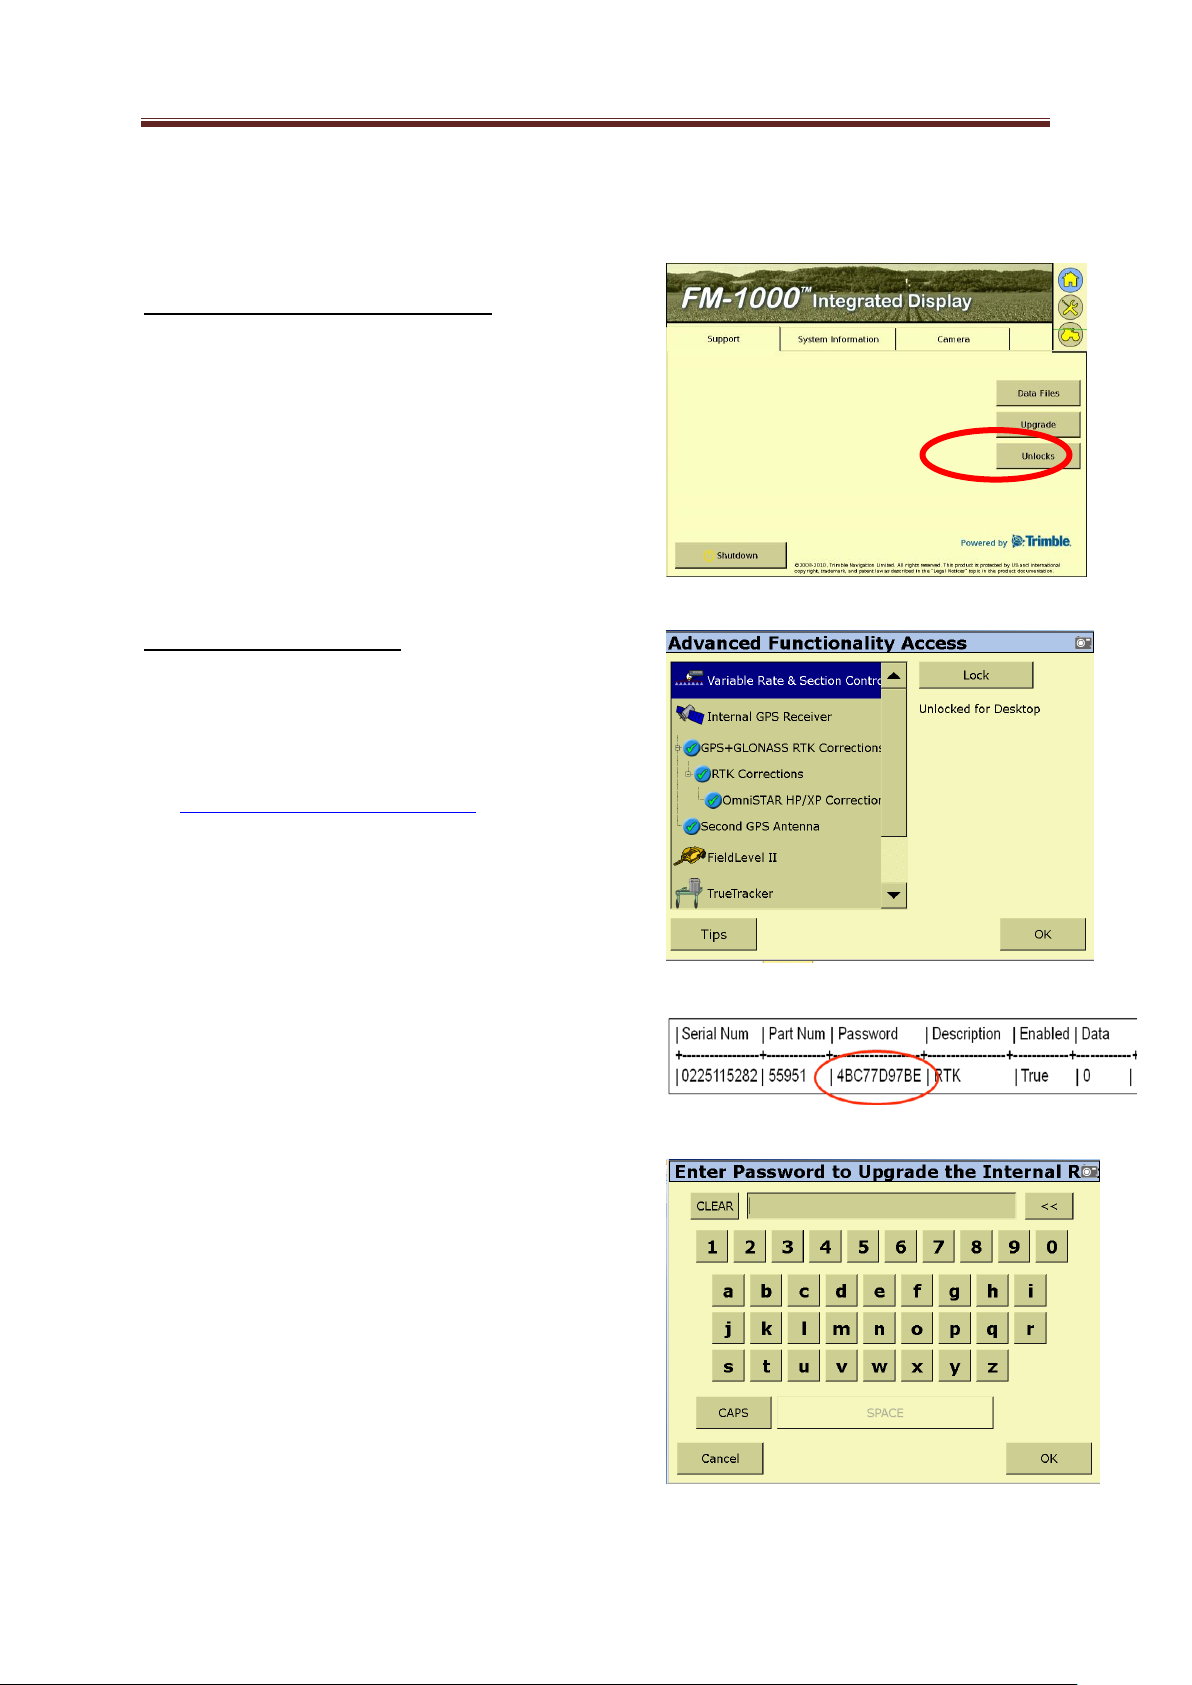
The Upgrade code must then be entered
in to the screen. Choosing the 'Support'
tab on the 'Home' screen and pressing the
'Unlocks' button and choosing the correct
unlock feature
Note: The serial number asked for on the
OmniSTAR order form is the OmniSTAR User
ID number and not the screen serial number,
both are on the 'Support' Tab on the home
screen, shown in [Figure 3.2] & [Figure 3.3].
3.3 Upgrading to RTK
The RTK upgrade code can be received
using the same method as that of EGNOS
to OmniSTAR. The same antenna used for
OmniSTAR can be used for RTK. The FM-
1000 needs an ‘Internal radio module
Figure 3.4
Figure 3.5
450-470’ to pick up the RTK signal. If the
FM-1000 has got the 450-470 radio
module it will have a sticker. If the FM-
1000 screen doesn't have the 450-470
radio, see the installing Radio module
section below.
Note: If the VRS Ag3000 modem is being
used then the FM-1000 will not need the
radio module. It will only need to be
unlocked to a RTK level.
7
 Loading...